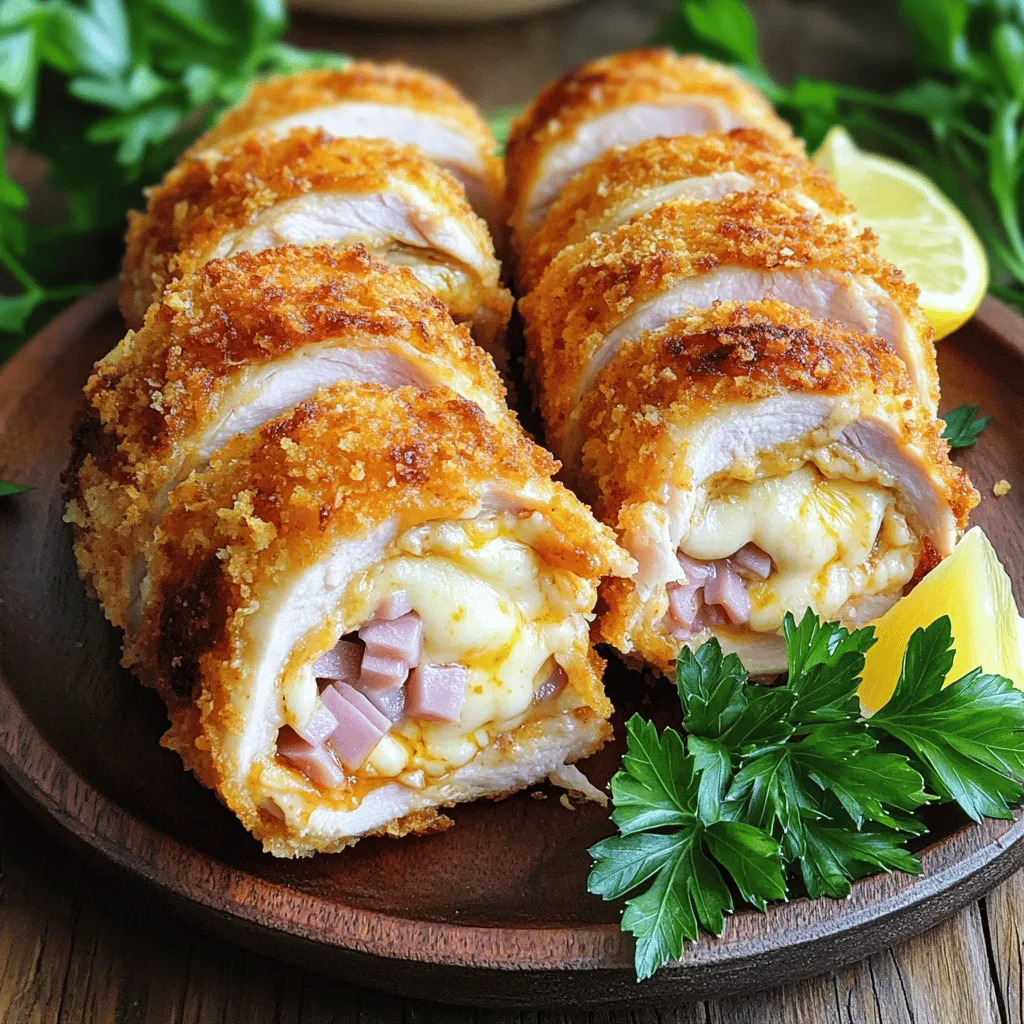
Are you ready to impress your family with a restaurant-quality meal right at home? This Easy Chicken Cordon Bleu recipe is simple and fun, perfect for busy weeknights or special occasions. I’ll guide you through each step to ensure a crispy, cheesy delight that everyone will love. Get ready to learn about the best ingredients, cooking methods, and even some creative twists! Let’s dive in!
Ingredients
Complete Ingredient List
To make easy chicken cordon bleu, gather these simple ingredients:
– 4 boneless, skinless chicken breasts
– 4 slices of Swiss cheese
– 4 slices of ham (smoked or honey)
– 1 cup all-purpose flour
– 2 large eggs, beaten
– 1 cup breadcrumbs (panko for extra crunch)
– 1 teaspoon garlic powder
– 1 teaspoon paprika
– Salt and pepper to taste
– Olive oil or cooking spray for frying
Ingredient Substitutions
You can swap out some ingredients if you need to. Here are a few ideas:
– Use cheddar cheese instead of Swiss for a sharper taste.
– Substitute turkey or chicken ham for a lighter option.
– Use whole wheat flour for a healthier breading option.
– Try almond flour for a gluten-free version.
Tips for Freshness and Quality
To ensure your chicken cordon bleu tastes great, keep these tips in mind:
– Choose fresh chicken breasts. They should feel firm and not slimy.
– Buy high-quality cheese and ham for the best flavor.
– Store your meat in the fridge until you’re ready to cook.
– Use fresh breadcrumbs for better texture. You can make them at home by toasting bread.
Cooking with fresh ingredients will improve your dish’s taste and quality. Enjoy your culinary adventure with this easy chicken cordon bleu recipe!
Step-by-Step Instructions
Preparing the Chicken
To start, gather your ingredients. You need four chicken breasts, ham, and Swiss cheese. Place each chicken breast between two sheets of plastic wrap. This keeps the mess down. Use a meat mallet or rolling pin to pound the chicken gently. Aim for an even thickness of about 1/2 inch. This step helps the chicken cook evenly. Next, season both sides with salt, pepper, garlic powder, and paprika. This adds great flavor.
Breading Process
Now, let’s get to the breading. Set up a breading station. Use three bowls: one for flour, one for beaten eggs, and one for breadcrumbs. Dip each chicken roll first in flour. Then, coat it in the egg mixture. Finally, cover it with breadcrumbs. Press gently to make sure they stick. This creates a nice, crispy outer layer when cooked.
Cooking Methods: Frying and Baking
You have two cooking options: frying or baking. For frying, heat a skillet over medium heat. Add enough olive oil to cover the bottom. Once the oil is hot, add the chicken rolls seam side down. Fry for about 3-4 minutes on each side. Look for a golden brown color. After frying, transfer the chicken to a baking dish. Preheat your oven to 350°F (175°C) for baking. Bake for 15-20 minutes. Make sure the chicken reaches an internal temperature of 165°F (75°C). This ensures it’s fully cooked. Remember to remove the toothpicks before serving. Let the chicken rest for a few minutes to keep it juicy.
Tips & Tricks
How to Achieve the Perfect Crisp
To get that perfect crisp on your chicken cordon bleu, use panko breadcrumbs. They give a great crunch. After breading, let the chicken sit for a few minutes. This helps the coating stick better during cooking. When frying, make sure your oil is hot. This way, the chicken will brown nicely without soaking up too much oil.
Common Mistakes to Avoid
One common mistake is not pounding the chicken evenly. If it’s too thick, it won’t cook all the way. Be careful with the amount of filling. If you overstuff, the rolls may burst while cooking. Lastly, don’t skip the baking step. Frying alone won’t fully cook the chicken or melt the cheese inside.
Enhancing Flavor Profiles
You can add more flavor to your chicken cordon bleu. Try mixing herbs like thyme or basil into the breadcrumbs. A splash of lemon juice can brighten the dish. For a twist, use different cheeses like pepper jack or gouda. Experiment with smoked ham or prosciutto for a unique taste.
Variations
Vegetarian Alternatives
If you want a meat-free dish, try eggplant or zucchini. Slice these veggies thin and pound them flat. Use the same spices as before. For filling, use spinach and ricotta cheese. This gives a creamy taste that pairs well with the crispy coating. You can also use tofu for a protein boost. Just make sure to press it first to remove excess water.
Different Cheese and Meat Options
Swiss cheese is classic, but you can mix it up! Try mozzarella for a gooey texture. Cheddar adds a sharp flavor that many love. For the meat, turkey or chicken ham works great. You can even use prosciutto for a fancy twist. Each choice changes the dish’s taste, making it fun to experiment.
Creative Twists on the Classic Recipe
Want to change things a bit? Add herbs to the breadcrumbs like parsley or thyme. This gives a fresh taste. You can also stuff your chicken with sun-dried tomatoes or jalapeños for a spicy kick. For a sweet twist, try adding a thin layer of fruit preserves like apricot or fig between the cheese and ham. These creative ideas make your Easy Chicken Cordon Bleu unique and exciting.
Storage Info
How to Store Leftovers
After you enjoy your chicken cordon bleu, let it cool. Place the leftovers in an airtight container. Store it in the fridge for up to three days. This keeps the chicken fresh and tasty for later meals.
Reheating Instructions
To reheat, you can use the oven or a microwave. If using the oven, set it to 350°F (175°C). Place the chicken in a baking dish and cover it with foil. Heat for about 15-20 minutes until warm. For the microwave, place the chicken on a microwave-safe plate. Heat for 1-2 minutes, checking often. This helps to keep the cheese melty and the chicken juicy.
Freezing Tips for Long-term Storage
If you want to store chicken cordon bleu for longer, freezing is great. Wrap each piece tightly in plastic wrap, then place it in a freezer bag. Remove as much air as possible to prevent freezer burn. It can last up to three months in the freezer. When ready to eat, thaw it in the fridge overnight before reheating. This keeps flavors intact and ensures a delicious meal later.
FAQs
What sides pair well with Easy Chicken Cordon Bleu?
Easy Chicken Cordon Bleu goes well with many sides. Here are some great options:
– Steamed vegetables: Broccoli or green beans add color and nutrients.
– Mashed potatoes: Creamy potatoes balance the crispy chicken.
– Rice pilaf: A light, fluffy rice dish complements the meal well.
– Side salad: Fresh greens with a light dressing offer a refreshing crunch.
Can I make Easy Chicken Cordon Bleu ahead of time?
Yes, you can prepare Easy Chicken Cordon Bleu in advance. Here’s how:
– Prepare the chicken rolls: Follow the recipe but stop before frying or baking.
– Store in the fridge: Wrap the rolls tightly in plastic wrap or foil. They can last for up to 24 hours.
– Cook when ready: Just fry and bake them when you’re ready to serve. This saves time and keeps them fresh.
How can I tell when the chicken is fully cooked?
To know if your chicken is done, check these points:
– Use a meat thermometer: Insert it into the thickest part of the chicken. It should read 165°F (75°C).
– Check the juices: When you cut into the chicken, the juices should run clear, not pink.
– Touch the chicken: Fully cooked chicken feels firm and not soft.
These tips help ensure you serve delicious and safe chicken every time.
This guide covered everything you need for Easy Chicken Cordon Bleu. We explored key ingredients and their best substitutes. I shared steps for preparing, breading, and cooking, plus tips for great texture. We also looked at variations for different diets and preferences. Finally, I provided storage methods and answered common questions.
Enjoy making this dish your own. With these tips, you’re set for a tasty meal. Happy cooking!