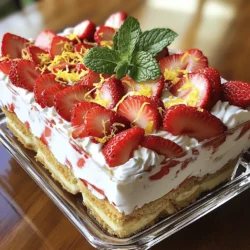
Strawberry Shortcake Icebox Cake
Delight in the refreshing taste of Strawberry Shortcake Icebox Cake with this easy recipe that's perfect for summer! Layered with whipped cream, fresh strawberries, and light ladyfinger cookies, this no-bake dessert is a crowd-pleaser. With just 30 minutes of prep time, you'll be ready to impress your guests.