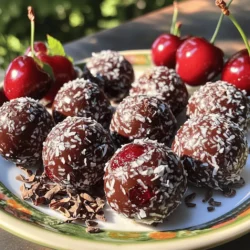
Cherry Chocolate Bliss Balls
Indulge in these delicious Cherry Chocolate Bliss Balls that are the perfect healthy treat! Made with fresh cherries, medjool dates, and rich cocoa powder, these no-bake bites are easy to make and full of flavor. Discover how to whip them up in just an hour with our simple recipe. Perfect for snacks or dessert, these bliss balls will satisfy your sweet tooth without any guilt.