Skip to content
DisclaimerTerms Of UseGDPR PolicyCookie Policy

juliesdish

  • Home
  • Drinks
  • Appetizers
  • Dinner
  • Dessert
  • About
  • Contact
  • Privacy Policy
DisclaimerTerms Of UseGDPR PolicyCookie Policy

NO-ING-IMG

To make this creamy soup, you need simple and fresh ingredients. Here’s what you will need: - 4 cups fresh broccoli florets - 1 medium onion, diced - 2 cloves garlic, minced - 1 medium potato, peeled and diced - 4 cups vegetable broth - 1 cup unsweetened almond milk (or any plant-based milk) - 1 cup nutritional yeast - 2 tablespoons lemon juice - 1 tablespoon olive oil - 1 teaspoon smoked paprika - Salt and pepper to taste These ingredients combine to create a rich and satisfying flavor. The broccoli gives it a bright color and nutrition. The nutritional yeast adds a cheesy taste, making it feel like a classic cheddar soup. You can add a few extras to make this soup your own. Here are some optional ingredients: - Croutons for crunch - Fresh parsley for garnish - A dash of hot sauce for heat - A sprinkle of vegan cheese for extra creaminess Feel free to mix and match these to suit your taste. Adding croutons gives a nice crunch, while hot sauce can spice things up. This soup is not just tasty; it's also good for you. Here’s the breakdown per serving: - Calories: Approximately 230 - Protein: 8g - Carbohydrates: 36g - Fiber: 7g - Fat: 7g This soup provides a good amount of vitamins and minerals. It’s a hearty option for a light meal or a side dish. Enjoy this creamy vegan broccoli cheddar soup for a healthy, filling option any day. You can find the Full Recipe to guide you through the cooking process step by step. First, we need to build a strong base for our soup. In a large pot, heat 1 tablespoon of olive oil over medium heat. Add the diced onion and sauté it for 3-4 minutes. Wait until it turns soft and translucent. Then, toss in 2 minced garlic cloves and cook for one more minute. You want to smell that garlic! This step adds depth to the soup and brings out the flavors. Next, add the diced potato and 4 cups of fresh broccoli florets to the pot. Pour in 4 cups of vegetable broth. Bring the mixture to a boil. Once it’s bubbling, lower the heat and let it simmer. Cook for about 15-20 minutes. Check if the broccoli and potatoes are tender. This is key for a smooth soup. Now comes the fun part! Use an immersion blender to blend the soup until it’s smooth. If you don’t have an immersion blender, carefully pour the soup into a regular blender in batches. Make sure to let it cool a bit first. Once blended, return the soup to the pot if needed. Stir in 1 cup of unsweetened almond milk, 1 cup of nutritional yeast, 2 tablespoons of lemon juice, and 1 teaspoon of smoked paprika. Season with salt and pepper to taste. Let it simmer for another 5 minutes. If you find the soup too thick, add more vegetable broth or almond milk until it reaches your preferred consistency. For a warm, comforting meal, ladle the soup into bowls. You can add croutons and chopped parsley on top for color and crunch. Enjoy this creamy goodness! For the full recipe, check out the earlier section. To make the soup really shine, use fresh broccoli. Fresh veggies bring great taste. I love adding a squeeze of lemon juice. It brightens the flavor a lot. Smoked paprika gives a nice depth too. You can add more or less based on your taste. The key to a creamy soup is blending well. I use an immersion blender for ease. It makes the soup smooth without fuss. If you want a chunkier soup, blend only half. You can also add some diced potatoes for even more creaminess. Make sure to adjust the liquid based on your desired thickness. Serving this soup in a nice bowl makes it special. Garnish with croutons for crunch. Fresh parsley adds a pop of color and flavor. You can pair it with crusty bread or a fresh salad. It makes a satisfying meal. For more ideas, check the Full Recipe for great serving tips! {{image_2}} You can make this soup even tastier with a few add-ins. Try adding a cup of chopped carrots for sweetness. You can also stir in some cooked quinoa or lentils for added protein. If you love spice, a pinch of cayenne pepper will give it a nice kick. For a smoky touch, consider adding diced smoked tofu. Each of these options boosts flavor and adds unique textures. This vegan broccoli cheddar soup is already gluten-free if you use the right ingredients. Just make sure your vegetable broth and any plant-based cheese are gluten-free. You can also use cornstarch or arrowroot powder to thicken the soup if needed. This way, you can enjoy a creamy soup without any worries about gluten. The choice of plant-based cheese can change the soup's taste. Nutritional yeast gives a cheesy flavor, but you can also try cashew cheese or almond cheese. These options add creaminess and flavor. If you prefer a sharper taste, go for a vegan cheddar that shreds well. You can mix and match these cheeses to find your perfect blend. For the full recipe, check out the details to make this delicious dish! To keep your soup fresh, store it in an airtight container. Let the soup cool down before sealing it. Place the container in the fridge. It will stay good for up to four days. When ready to eat, pour the soup into a pot. Heat it over medium heat. Stir often to prevent sticking. You can also use the microwave. Place it in a microwave-safe bowl and heat in short bursts, stirring in between. You can freeze this soup if you want to save some for later. Use a freezer-safe container or bag. Leave some space at the top, as the soup will expand when frozen. When you're ready to eat, move it to the fridge to thaw overnight. Heat it on the stove or in the microwave, stirring well before serving. For the best taste, eat it within three months. For the full recipe, check the complete guide above. Yes, you can make this soup ahead of time. I often prepare it a day before serving. Store it in an airtight container in the fridge. When you are ready to eat, just heat it up on the stove. The flavors will blend even more, making it taste great. If you don't have nutritional yeast, you can use a few options. You might try ground cashews or sunflower seeds for a similar flavor. You can also use a cheese alternative that fits your diet. Just be aware that the taste may change a bit. To change the thickness, add more liquid. If it feels too thick, pour in extra vegetable broth or almond milk. Start with small amounts and stir well. Keep adding until you reach the texture you enjoy. This way, you can customize it to your liking. Vegan cheddar cheese is not a must. It adds a nice cheese flavor, but the soup is still tasty without it. Nutritional yeast gives a cheesy taste as well. If you want a richer flavor, feel free to add it, but it's not needed for a good soup. You can still enjoy the creamy goodness with just the base ingredients. Vegan broccoli cheddar soup is easy to make with a variety of ingredients. We covered key components, cooking steps, and tips for great taste and texture. Remember, you can customize the soup with add-ins and plant-based cheese options. Store leftovers properly to enjoy later. This soup is great for meal prep, and you can adjust the thickness to your liking. With these insights, you can make a delicious, healthy dish that fits your needs. Dive in and enjoy your cooking journey!

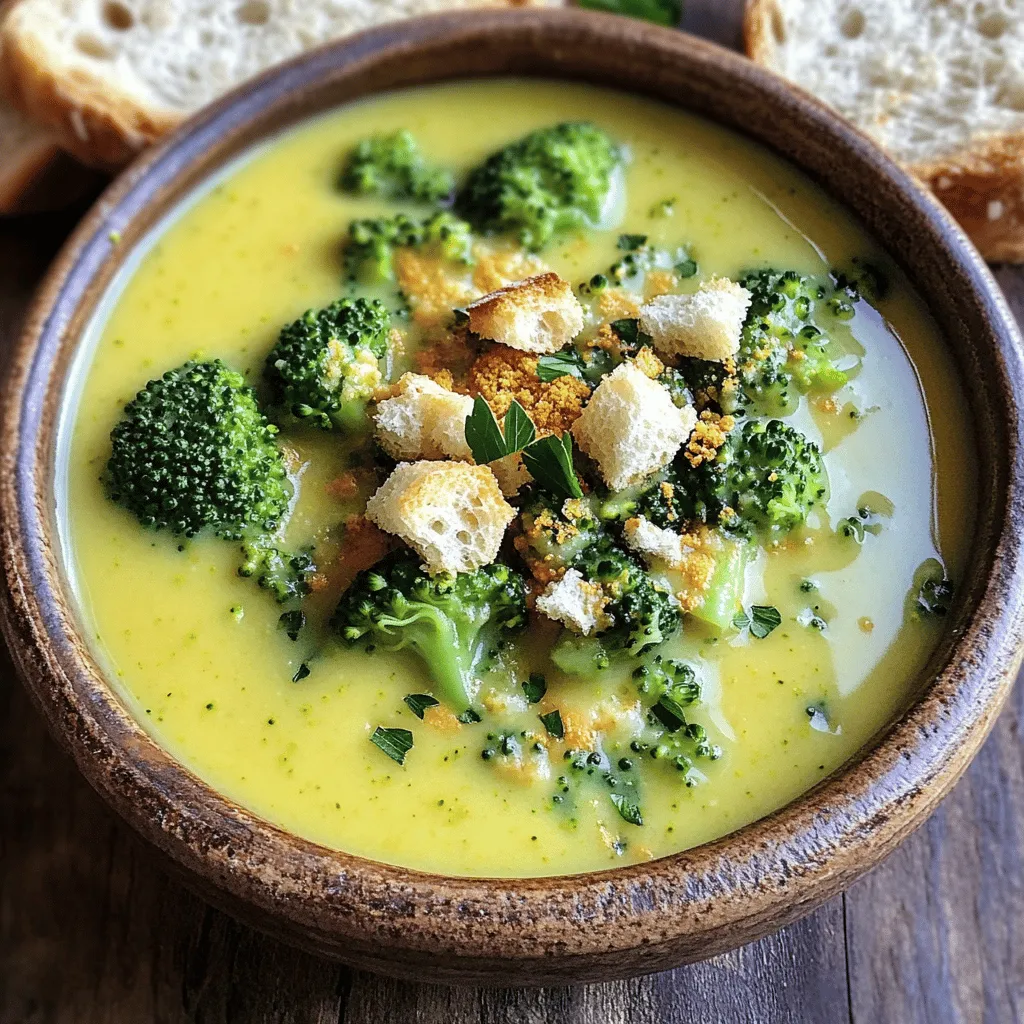
Vegan Broccoli Cheddar Soup Creamy and Nourishing Dish

Are you craving a warm, creamy bowl of soup that’s both delicious and healthy? Look no further! My Vegan Broccoli

To make the Blueberry Almond Breakfast Cake, gather these items: - 1 cup all-purpose flour - 1/2 cup almond flour - 1/2 teaspoon baking powder - 1/2 teaspoon baking soda - 1/4 teaspoon salt - 1/2 cup unsalted butter, softened - 3/4 cup granulated sugar - 2 large eggs - 1 teaspoon vanilla extract - 1/2 cup Greek yogurt - 1 cup fresh blueberries - 1/4 cup sliced almonds (for topping) - Powdered sugar (for dusting, optional) You might want to change things up with these swaps: - Use whole wheat flour instead of all-purpose flour for more fiber. - Swap almond flour for oat flour if you need a gluten-free option. - Replace Greek yogurt with sour cream for a tangy twist. - If you have no fresh blueberries, frozen ones work just as well. Just toss them in frozen to avoid mush. - For a nut-free version, omit the almond flour and sliced almonds. Each ingredient plays a role in both taste and health: - Almond flour adds healthy fats and protein. It also gives a nice nutty flavor. - Greek yogurt provides moisture and protein. It keeps the cake light and fluffy. - Blueberries are packed with vitamins and antioxidants. They add sweetness and a burst of flavor. - Unsalted butter gives richness. It helps the cake rise beautifully. - Eggs are key for binding. They help the cake hold its shape. Using good ingredients makes this cake not just tasty but also a little healthier. For the full recipe, check the recipe section above. First, gather all your ingredients. You will need flour, almond flour, baking powder, baking soda, salt, butter, sugar, eggs, vanilla, Greek yogurt, blueberries, and sliced almonds. Preheat your oven to 350°F (175°C). Grease and flour an 8-inch round cake pan. You can also line it with parchment paper for easy removal. In a medium bowl, whisk together the all-purpose flour, almond flour, baking powder, baking soda, and salt. Set this mixture aside for now. In a large mixing bowl, beat the softened butter and sugar together. Mix them until they become light and fluffy. This might take about 3 to 4 minutes. Add the eggs one at a time. Be sure to mix well after each one. Then, stir in the vanilla extract and Greek yogurt until it all comes together. Gradually fold in the dry mixture you set aside earlier. Remember not to overmix. Next, gently fold in the fresh blueberries, spreading them evenly throughout the batter. Pour this mixture into your prepared cake pan. Spread it out evenly and sprinkle the sliced almonds on top for some nice crunch. Bake the cake in your preheated oven for 30 to 35 minutes. Check if it is done by inserting a toothpick into the center. If it comes out clean, it’s ready! Once baked, take it out and let it cool in the pan for 10 minutes. Then, transfer the cake to a wire rack to cool completely. If you like, dust it with powdered sugar before serving. This adds a nice touch! Serve slices on a pretty plate, perhaps with a sprig of mint or a dollop of Greek yogurt. Enjoy this cake at breakfast or as a tasty treat! Using fresh and high-quality ingredients is key. For the best results, use room temperature eggs and butter. This helps the batter mix well and rise nicely. Fresh blueberries add flavor and moisture. If possible, choose organic blueberries for a richer taste. One common mistake is overmixing the batter. Mix gently until just combined. Overmixing can lead to a dense cake. Also, ensure your oven is preheated. Baking in a cold oven can ruin the texture. Lastly, remember to check the cake with a toothpick. If it comes out clean, the cake is ready. You can boost flavor by adding a pinch of lemon zest or almond extract. These small additions make a big difference! For better texture, consider using both almond and all-purpose flour. This mix gives a nice crumb. Top the cake with sliced almonds for extra crunch. You could also sprinkle some powdered sugar for a sweet finish. {{image_2}} You can easily make this cake gluten-free. Just swap the all-purpose flour for a gluten-free blend. This blend will work great in most recipes. For a vegan option, replace eggs with flax eggs. Mix one tablespoon of ground flaxseed with three tablespoons of water for each egg. This will help bind the cake. Also, use non-dairy yogurt and butter for a vegan twist. Feel free to get creative with flavors. Add a teaspoon of cinnamon or nutmeg for warmth. You can also mix in some lemon zest for a fresh kick. If you love chocolate, try adding mini chocolate chips for a sweet surprise. You can even fold in some chopped nuts for extra crunch. These add-ins can make your cake unique and fun. Presentation makes food more enjoyable. Serve slices on a colorful plate. Add a sprig of mint for a pop of color. You can also dust the top with powdered sugar for a pretty finish. For an extra touch, place a dollop of Greek yogurt next to each slice. Top it with a few blueberries to make it look fancy. These simple ideas will impress your guests and make every bite delightful. Store your blueberry almond breakfast cake in an airtight container. This keeps it fresh. You can keep it at room temperature for up to three days. If you want it to last longer, place it in the fridge. It can stay fresh for up to a week when refrigerated. You can freeze the cake for later. First, let it cool completely. Then, wrap it tightly in plastic wrap. Place it in a freezer-safe bag or container. This helps prevent freezer burn. The cake will keep well for up to three months. When you are ready to eat, thaw it in the fridge overnight. To reheat the cake, preheat your oven to 350°F (175°C). Place slices on a baking sheet. Warm them for about 10 minutes. You can also use the microwave. Heat on medium power for about 20-30 seconds. This will make the cake warm and soft again. If you want, dust with powdered sugar before serving. If you don't have almond flour, you can use regular flour. You can also try ground oats or cashew flour. Each will change the texture, but they will work in the recipe. Yes, you can use frozen blueberries. Just make sure to thaw and drain them first. This helps avoid extra moisture in the cake. The cake is done when a toothpick comes out clean. Insert it into the center of the cake. If it is wet, bake it a bit longer. You can prepare the batter a few hours ahead. Just cover it tightly and keep it in the fridge. It’s best to bake it fresh for best results. Serve the cake either warm or at room temperature. You can dust it with powdered sugar. A dollop of Greek yogurt and some fresh berries on the side adds a nice touch. For the complete recipe, check the Full Recipe section. This post covered important ingredients and their benefits. We explored clear steps to prepare and bake your cake. I shared tips to improve flavor and avoid common errors. You can also try fun variations to fit your diet. Lastly, I provided storage tips for freshness and taste. Baking can be fun and easy with the right knowledge. Enjoy creating your delicious cake!

Blueberry Almond Breakfast Cake Easy and Tasty Recipe

Craving a tasty start to your day? This Blueberry Almond Breakfast Cake is just the answer! It combines juicy blueberries

To make Honey Sriracha Glazed Salmon, gather these simple ingredients: - Salmon fillets - Honey - Sriracha sauce - Soy sauce - Fresh ginger - Garlic - Lime juice - Sesame oil - Seasoning (salt and black pepper) - Garnishes (green onions and sesame seeds) These ingredients blend to create a sweet and spicy glaze that brings out the rich flavor of the salmon. Each part plays a role in building taste. The honey gives a nice sweetness, while Sriracha adds heat. The soy sauce adds depth, and ginger and garlic bring freshness. When selecting your salmon, aim for fillets that are bright and firm. Fresh ingredients, like ginger and garlic, will really enhance the flavor. The lime juice brightens the dish and balances the sweetness. You can find the full recipe [here](#). Enjoy cooking! Start by making the marinade. In a bowl, whisk together honey, Sriracha sauce, soy sauce, grated ginger, minced garlic, lime juice, sesame oil, salt, and black pepper. Mix well until everything is blended. The marinade gives the salmon a rich flavor. Marinating the salmon is key. I recommend letting it sit for at least 30 minutes. This allows the flavors to soak into the fish. For a stronger taste, marinate for up to 2 hours. Next, preheat your oven to 400°F (200°C). While it's heating, prepare a baking sheet by lining it with parchment paper. This makes for easy cleanup later on. Once the oven is hot, take the salmon out of the marinade. Place the salmon fillets skin-side down on the baking sheet. Keep any leftover marinade for later. Bake the salmon for 12-15 minutes. To check if it’s done, look for an internal temperature of 145°F (63°C). The fish should be opaque and flake easily with a fork. While the salmon is baking, it's time to thicken the glaze. Pour the reserved marinade into a small saucepan. Bring it to a boil, then reduce the heat. Let it simmer for about 3-5 minutes until it thickens slightly. After baking, brush the thickened glaze over your salmon fillets. This adds a shiny finish. For a final touch, garnish with chopped green onions and sesame seeds. These add a pop of color and flavor to your dish. For the full recipe and more tips, check out the [Full Recipe]. To get the best flavor from your honey Sriracha glaze, you can adjust the spice level. If you want more heat, add extra Sriracha. For a milder version, use less Sriracha and mix in some extra honey. This balance makes the glaze perfect for your taste. For the ideal consistency, whisk the glaze until smooth. It should not be too runny or too thick. If it seems too thin after cooking, simmer it longer to thicken. Aim for a syrupy texture. This glaze clings nicely to the salmon and adds a great shine. Cooking salmon right is key to a tasty dish. Baking is one of the best methods. Preheat your oven to 400°F (200°C) for even cooking. Place the salmon skin-side down on parchment paper. This helps prevent sticking and makes cleanup easy. Keep an eye on the temperature. Salmon is best when it reaches 145°F (63°C). Use a meat thermometer for accuracy. If you prefer a crispy skin, broil the salmon for the last few minutes. This gives it a great texture that contrasts with the glaze. For a full recipe, check out the instructions above. {{image_2}} If you want a milder heat, try using a sweet chili sauce instead of Sriracha. This sauce gives a nice sweetness and a little spice. You can also mix in some chili flakes for extra heat if you prefer. If you want to switch up the fish, try using trout or halibut. Both fish work well with the honey Sriracha glaze. You can even use shrimp or scallops for a fun twist. Just remember to adjust the cooking time based on what you choose. To make your meal complete, serve the salmon with rice or quinoa. Steamed veggies like broccoli or green beans also pair well. They add a nice crunch to the dish. If you have leftovers, don’t worry! You can use the salmon in a salad or a sandwich. Just flake the salmon and mix it with some greens, cherry tomatoes, and a light dressing. It’s a quick and tasty lunch option. For the full recipe, check out the detailed steps provided earlier. To store leftover honey Sriracha glazed salmon, let it cool first. Place it in an airtight container. This helps keep the flavor and texture fresh. You can store it in the fridge for up to three days. If you have extra glaze, save it too! It adds great flavor when you reheat the salmon. When it's time to enjoy your leftovers, use a gentle method to reheat. The best way is in the oven. Preheat it to 300°F (150°C). Place the salmon on a baking sheet and cover it with foil to keep it moist. Heat for about 10-15 minutes or until it’s warm. You can also use the microwave. But be careful! Heat it in short bursts of 30 seconds. Check often to avoid drying out the fish. If you have leftover glaze, brush it on before serving for extra flavor. Can I use frozen salmon for this recipe? Yes, you can use frozen salmon. Just make sure to thaw it first. Thaw it overnight in the fridge or in cold water for quick results. Frozen salmon works well, but fresh salmon tastes better. How spicy is the Honey Sriracha Glaze? The glaze has a nice kick. Sriracha adds heat, but the honey balances it out. If you want less spice, you can use less Sriracha or add more honey. What are the health benefits of salmon? Salmon is packed with omega-3 fatty acids. These fats are good for your heart and brain. Salmon also has high-quality protein and vitamins like B12 and D. Eating salmon can help improve your mood and boost your immune system. How many calories are in Honey Sriracha Glazed Salmon? Each serving of Honey Sriracha Glazed Salmon has about 350 calories. This can vary based on the size of the salmon fillet and the amount of glaze used. It's a healthy meal option that fits into many diets. How long to marinate salmon for best flavor? Marinate the salmon for at least 30 minutes. For more flavor, you can let it sit for up to 2 hours. This helps the salmon absorb the sweet and spicy glaze. Can I grill instead of bake the salmon? Yes, grilling is a great option! Just make sure to preheat your grill. Cook the salmon on medium heat for about 5-7 minutes per side. This will give it a nice smoky flavor and crispy edges. For the best results, keep an eye on the salmon so it doesn't overcook. For the full recipe, check out the detailed instructions above! In this post, we explored a delicious Honey Sriracha Glazed Salmon recipe. We covered essential ingredients, easy steps, and helpful tips, making it simple to prepare. Remember to marinate for great flavor and use the right cooking methods for perfect doneness. You can also tweak ingredients to match your taste. Whether you’re enjoying it fresh or storing leftovers, this salmon dish offers lots of versatility. I hope you feel inspired to try it and enjoy every bite. Happy cooking!

Honey Sriracha Glazed Salmon Flavorful and Easy Recipe

Are you ready to elevate your dinner game? This Honey Sriracha Glazed Salmon recipe is simple yet bursting with flavor.

You will need the following ingredients for a perfect batch of creamy garlic mashed potatoes: - 2 pounds Yukon Gold potatoes, peeled and cubed - 4 cloves garlic, minced - ½ cup unsalted butter - 1 cup heavy cream - Salt and pepper to taste - ¼ cup cream cheese (for extra creaminess) - 2 tablespoons chives, finely chopped (for garnish) Yukon Gold potatoes are my go-to for mashed potatoes. They have a naturally buttery flavor. Their creamy texture makes them perfect for mashing. Yukon Golds hold their shape well during cooking. This helps create a smooth and rich dish. Their yellow color also adds a warm hue to your plate. You can use other potatoes, but Yukon Golds truly shine here. If you need a substitute for heavy cream, there are a few good options. You can use whole milk mixed with butter. For a lighter choice, try using half-and-half. If you want a dairy-free option, use coconut cream or almond milk. These alternatives may change the flavor slightly, but they still work well. Just make sure to adjust the amount to get the right creaminess. For the full recipe, check out the [Full Recipe]. Start with two pounds of Yukon Gold potatoes. Peel and cube them into even pieces. This helps them cook evenly. Place the potatoes in a large pot and cover them with salted water. Bring the water to a boil. Cook the potatoes for about 15 to 20 minutes. They should be tender when pierced with a fork. Drain the potatoes and return them to the pot for mashing. While the potatoes cook, melt half a cup of unsalted butter in a small saucepan. Keep the heat low to avoid burning. Add four cloves of minced garlic to the butter. Sauté the garlic for about two to three minutes. You want it fragrant but not browned. This garlic butter will add rich flavor to your mashed potatoes. Now, let's mash those potatoes! Add the garlic butter mixture, one cup of heavy cream, and a quarter cup of cream cheese to the drained potatoes. Use a potato masher or a hand mixer to mash everything together. Aim for a creamy texture but avoid over-mashing. This can make them gluey. Taste and adjust the seasoning with salt and pepper. For a pop of flavor, fold in two tablespoons of finely chopped chives. Serve your creamy garlic mashed potatoes warm. - Tips for achieving the right texture: - Use warm ingredients for better mixing. - Avoid overworking the potatoes to keep them fluffy. - Experiment with adding milk or broth for different flavors. For the complete recipe, you can refer to the [Full Recipe]. To keep mashed potatoes light and fluffy, start with the right potatoes. I recommend using Yukon Gold potatoes. They have a creamy texture that works well. Boil them until they are just tender. If you overcook them, they can become gluey. Drain them well after boiling. Too much water can lead to a sticky mess. Adding herbs and spices can elevate your dish. I love using fresh chives in my creamy garlic mashed potatoes. They provide a nice crunch and a hint of onion flavor. You can also try adding thyme or rosemary for a fragrant touch. A pinch of nutmeg adds warmth without overpowering. Taste as you go to find the right balance. The right tools can make your cooking easier. A potato masher works well, but a hand mixer gives a smooth finish. For the garlic butter, a small saucepan is best. It allows you to control the heat. If you have a ricer, use it for extra fluffy potatoes. This tool removes lumps and keeps your mash light. For more details on the recipe, check the Full Recipe for creamy garlic mashed potatoes. {{image_2}} You can make your garlic mashed potatoes even better by adding cream cheese. This ingredient gives a rich, creamy taste. Just mix in ¼ cup of cream cheese when you mash the potatoes. The cream cheese melts and blends well, making every bite delicious. If you want a deeper flavor, try adding roasted garlic. Roasting garlic changes its taste, making it sweet and soft. To do this, wrap whole garlic heads in foil and bake them until soft. Then, squeeze the garlic out and mix it into your mashed potatoes. This gives your dish a warm, mellow garlic flavor. For a vegan version, swap out butter and cream. Use olive oil instead of butter. For cream, try coconut milk or almond milk. These options keep the dish creamy while making it plant-based. You won’t lose any flavor, and your guests will enjoy the change. Explore these variations to find your favorite twist on creamy garlic mashed potatoes. For the full recipe, check the earlier sections. To keep your creamy garlic mashed potatoes fresh, store them in an airtight container. Let them cool down first. This helps avoid extra moisture. Place the lid on tight and keep them in the fridge. They will last for about three to five days. Always label your container with the date. This way, you’ll know when to use them. When you're ready to enjoy your leftovers, reheating is key. You can use the microwave for quick warming. Place the mashed potatoes in a bowl and cover with a damp paper towel. Heat in short bursts, stirring in between. This helps them heat evenly. You can also reheat on the stove. Add a splash of milk or cream to keep them creamy. Stir over low heat until they are warm. Freezing creamy garlic mashed potatoes is easy and smart. Use a freezer-safe container. Scoop your mashed potatoes into it, leaving some space at the top. They expand when frozen. Label your container with the date and type. These can last up to three months in the freezer. When ready to use, thaw them in the fridge overnight. Reheat as needed, adding a little cream for smoothness. For the full recipe, check out the instructions above! Yukon Gold potatoes are the best choice for creamy garlic mashed potatoes. They have a rich texture and buttery flavor. Their natural creaminess makes them ideal for mashing. You can also use Russet potatoes, but they may yield a fluffier result. Yukon Golds hold up well when mixed with butter and cream. Yes, you can make creamy garlic mashed potatoes ahead of time. Prepare them completely and store them in the fridge. Just keep them in an airtight container. When you are ready to serve, reheat them slowly on the stove. Add a splash of cream or milk to restore creaminess. To make mashed potatoes creamier without adding many calories, use less butter and cream. Instead, try adding low-fat yogurt or buttermilk. These ingredients add creaminess and flavor without the extra calories. You can also mash in some cooked cauliflower for added texture. This keeps your dish light but delicious. Creamy garlic mashed potatoes are a delight when made right. We covered the best ingredients, like Yukon Gold potatoes, and key substitutes. You learned step-by-step methods to cook and mash effectively. I shared tips to avoid gluey texture and ways to enhance flavor. You can even try variations like cheesy or vegan options. Lastly, we discussed how to store and reheat leftovers. Remember these techniques, and you’ll impress everyone with your creamy garlic mashed potatoes! Enjoy your cooking adventure!

Creamy Garlic Mashed Potatoes Rich and Comforting Dish

If you crave a warm, comforting dish, creamy garlic mashed potatoes might be your answer. This rich, buttery treat combines

To make maple glazed carrots, you'll need a few simple ingredients. Here’s what you need: - 1 pound baby carrots (or regular carrots cut into sticks) - 3 tablespoons pure maple syrup - 2 tablespoons unsalted butter - 1 teaspoon ground cinnamon - 1/4 teaspoon nutmeg - Salt and pepper to taste - 1 tablespoon fresh parsley, chopped (for garnish) These ingredients blend together to create a sweet and savory side dish. The maple syrup brings a natural sweetness, while the butter adds richness. The spices, cinnamon and nutmeg, give a warm flavor that pairs perfectly with the carrots. This dish is not just tasty, but it also looks bright and appealing on your plate. When you finish, the fresh parsley adds a pop of color and freshness. For the complete recipe, check the Full Recipe section. 1. First, wash the carrots under cold water. 2. If you use regular-sized carrots, peel them. 3. Next, fill a medium pot with water and add salt. 4. Bring the salted water to a boil. 5. Add the carrots and cook for about 4-5 minutes. 6. They should be slightly tender but still crisp. 7. Drain the carrots and set them aside for later. 1. In a large skillet, melt the butter over medium heat. 2. Once melted, add your cooked carrots to the skillet. 3. Stir well to coat the carrots in the melted butter. 4. Now, drizzle the maple syrup over the carrots. 5. Sprinkle in the ground cinnamon and nutmeg. 6. Stir again to make sure all carrots are coated. 1. Cook the carrots for another 5-7 minutes. 2. This allows the maple syrup to thicken and glaze the carrots. 3. Stir occasionally to avoid sticking. 4. Season with salt and pepper to taste. 5. Once glazed and tender, remove from heat. 6. Transfer the carrots to a serving platter. 7. Garnish with fresh parsley for a pop of color. Check out the Full Recipe for specific measurements and cooking times! To make the best maple glaze, focus on the syrup's thickness. Start with pure maple syrup. Heat it gently to help it combine well with the butter. Stir the carrots often while cooking. This helps the glaze coat every piece evenly. Use a spatula to gently turn the carrots. You want to cover them without breaking them. Baby carrots are sweet and tender. Regular carrots have a stronger flavor. If you use regular ones, cut them into sticks for even cooking. Look for bright orange color in carrots. They should feel firm and smooth. Avoid any that are soft or have dark spots. Do not overcook the carrots. They should be tender but still crisp. If they get too soft, they won’t hold their shape. Let the glaze thicken. If you take the carrots off too soon, the syrup will be runny. Cook them long enough to get that nice, sticky coat. {{image_2}} You can boost the taste of maple glazed carrots by adding garlic or ginger. Both ingredients add a nice kick. Just sauté them in the butter before adding the carrots. If you want to change the sweet flavor, try using honey or agave syrup instead of maple syrup. Each option gives a unique twist to the dish. To make the dish more diverse, you can mix in seasonal vegetables. Parsnips or butternut squash work well alongside the carrots. They add color and flavor. You can also switch up the spices. For a holiday feel, try adding nutmeg or cloves. This small change can make your dish festive. If you want a vegan option, use plant-based butter instead of regular butter. This way, you keep the same great taste while making it vegan-friendly. For those watching sugar intake, consider a low-sugar option. You can use less maple syrup or pick a sugar substitute. These easy changes make the dish fit many diets. You can find the full recipe for maple glazed carrots to try these variations at home. To store leftover maple glazed carrots, let them cool first. Place them in an airtight container. This keeps them fresh for about 3 to 5 days. Glass containers work great because they don’t stain. You can also use plastic containers. Just make sure they seal well to keep the flavor in. To reheat your carrots without losing their flavor, use the stove. Simply add a splash of water to a pan. Heat them over low to medium heat. Stir frequently until they are warmed through. This method helps keep the glaze nice and sticky. You can also use the microwave if you're in a hurry. Just cover them with a damp paper towel. Yes, you can freeze maple glazed carrots! To do this, let them cool completely. Then place them in a freezer-safe bag. Remove as much air as possible before sealing. Maple glazed carrots can last up to 3 months in the freezer. When you’re ready to eat them, thaw them in the fridge overnight. Heat them in a pan with a little water to bring back their glaze. Maple glazed carrots last about 3 to 5 days in the fridge. Store them in an airtight container. This keeps them fresh and tasty for your next meal. If you want to enjoy them longer, consider freezing them. Yes, you can use other vegetables. Try parsnips, sweet potatoes, or even Brussels sprouts. Each vegetable will bring its own unique flavor and texture to the dish. Just remember to adjust cooking times as needed for different vegetables. Homemade maple glazed carrots have about 100 calories per serving. This includes the carrots, maple syrup, and butter. If you want a lower-calorie option, you can use less butter or maple syrup. Maple glazed carrots pair well with many dishes. They go great with roasted chicken or pork. You can also serve them with grilled fish or a hearty grain salad. Their sweet and savory flavor adds a nice touch to any meal. Here’s your quick guide to making maple glazed carrots. This side dish is simple and tasty. Ingredients: - 1 pound baby carrots (or regular carrots cut into sticks) - 3 tablespoons pure maple syrup - 2 tablespoons unsalted butter - 1 teaspoon ground cinnamon - 1/4 teaspoon nutmeg - Salt and pepper to taste - 1 tablespoon fresh parsley, chopped (for garnish) Instructions: 1. Start by washing and peeling regular carrots. If using baby carrots, leave them whole. 2. Boil a pot of salted water. Add carrots and cook for 4-5 minutes until slightly tender. Drain and set aside. 3. In a large skillet, melt butter over medium heat. 4. Add carrots to the skillet and coat them with butter. 5. Drizzle maple syrup over carrots. Sprinkle with cinnamon and nutmeg. Stir well. 6. Cook for 5-7 minutes, stirring occasionally. The syrup will thicken and glaze the carrots. 7. Season with salt and pepper to taste. Remove from heat when glazed and tender. 8. Serve on a platter and garnish with parsley for a fresh look. This recipe takes about 25 minutes from start to finish and serves four people. Enjoy crafting this sweet and savory side that pairs well with many main dishes! For the complete details, check out the Full Recipe. Maple glazed carrots are simple and tasty, perfect for any meal. We covered the ingredients, cooking steps, and helpful tips to make them shine. Remember to avoid overcooking and give the glaze time to thicken. You can also tweak the recipe with flavor additions or different vegetables. With the right storage, these carrots stay fresh and delicious. Try them out and enjoy their sweetness on your plate. Happy cooking!

Maple Glazed Carrots Simple and Tasty Side Dish

Looking for a simple and tasty side dish that wows? Maple glazed carrots are just that! They’re sweet, buttery, and

- 4 cups all-purpose flour - 1 packet (2 ¼ tsp) active dry yeast - 1 ½ cups warm water (about 110°F) - 4 tablespoons granulated sugar - 2 teaspoons salt - ¼ cup baking soda - 1 large egg, beaten (for egg wash) - Coarse sea salt for topping - Optional: 2 tablespoons melted butter (for brushing) What is the importance of active dry yeast? Active dry yeast helps the dough rise. It ferments sugars in the dough. This process creates bubbles and makes the pretzels soft and fluffy. Without it, your pretzels would be dense. What role does warm water play in activation? Warm water wakes up the yeast. It should be around 110°F. If the water is too hot, it can kill the yeast. This causes failure in your dough. Always check the temperature before mixing. What are the benefits of coarse sea salt vs. regular salt? Coarse sea salt adds texture and flavor. It stays on top of the pretzel, giving a salty crunch. Regular salt can dissolve too quickly and might not give the same taste. Using coarse sea salt enhances your pretzel experience. For the complete recipe, check out the Full Recipe. To start, mix warm water, sugar, and yeast in a bowl. Use about 110°F water, which feels warm to the touch. Stir gently, then let it sit for 5-10 minutes. You want to see bubbles or foam on top. This shows that the yeast is alive and ready to work. If it doesn’t foam, your yeast may be old. Next, combine the flour and salt in a large bowl. Once your yeast mixture is frothy, pour it into the bowl of flour. Stir until you see a rough dough forming. Then, transfer it to a floured surface. Knead the dough for about 5-7 minutes. Use the palms of your hands to push and fold the dough. You want it smooth and elastic. If it’s too sticky, sprinkle more flour as you knead. After kneading, let the dough rise in a warm spot for about one hour. Once it doubles in size, punch it down gently. Divide the dough into 8 equal pieces. Roll each piece into a long rope, about 24 inches long. Form a "U" shape, twist the ends twice, and fold them down to make a pretzel shape. Aim for uniform sizes for even baking. Prepare a baking soda bath by boiling 10 cups of water and adding ¼ cup of baking soda. Carefully drop each pretzel into the water for about 30 seconds. This step gives them that classic pretzel taste and color. Use a slotted spoon to remove them and place them on lined baking sheets. Brush each pretzel with a beaten egg, then sprinkle with coarse sea salt. Bake in a preheated oven at 450°F for 12-15 minutes until golden brown. The full recipe will guide you through every step. To get the best rise, keep your dough warm. Place the bowl in a sunny spot or near a warm oven. A warm area helps the yeast grow. This makes the dough fluffy and light. For the perfect pretzel texture, use a baking soda bath. This step gives pretzels their signature crust and chewy inside. Is your dough too sticky? Add a little more flour, one spoon at a time. This helps it come together. If your pretzels are not browning, check your oven temperature. Make sure it is at 450°F (232°C) before baking. You can also brush the pretzels with more egg wash for a deeper color. When serving pretzels, arrange them on a wooden board. This looks nice and rustic. Add small bowls of dipping sauces for a fun touch. Mustard, cheese dip, or even honey mustard work great. These options will make your pretzels even more enjoyable. For the full recipe, check out the details above. {{image_2}} You can change the taste of your pretzels. Try cheese-stuffed pretzels. Just fill the dough with your favorite cheese before shaping. Bake them until gooey. They are a real treat! Another fun option is cinnamon sugar pretzels. After baking, brush them with melted butter. Then coat them in a blend of sugar and cinnamon. This sweet twist is perfect for dessert! You can add more flavor with different toppings. A garlic butter topping is delicious. Melt butter and mix in minced garlic. Brush this mix onto your pretzels right after baking. It offers a savory touch that everyone will love. Everything bagel seasoning is another great choice. Sprinkle it on top before baking for a crunchy, flavorful bite. This mix often has sesame seeds, poppy seeds, and garlic. It gives your pretzels a unique taste! If you need gluten-free options, use gluten-free flour. Look for a blend that works well for bread. It will give you soft pretzels without the gluten. For a vegan choice, skip the egg wash. Instead, use a mix of water and plant-based milk. Brush this on before baking. Your pretzels will still be golden and tasty! Explore more ideas and find the full recipe to create your own soft pretzels. To keep your pretzels fresh, follow these simple steps. - Refrigerating: Place cooled pretzels in an airtight container. You can also wrap them in plastic wrap. This keeps them soft for about 2-3 days. - Freezing: For longer storage, freeze the pretzels. Wrap each pretzel in plastic wrap, then place in a freezer bag. They can last up to 3 months in the freezer. When you want to enjoy your pretzels again, reheating is key. - Oven: Preheat your oven to 350°F (175°C). Place pretzels on a baking sheet and heat for 10 minutes. This makes them crispy on the outside and soft inside. - Microwave: For a quick fix, use the microwave. Heat each pretzel for about 20-30 seconds on a microwave-safe plate. They may not be as crispy but will still taste great. This process helps you enjoy your pretzels even after storing them. For the full recipe, check out the section above. Yes, you can make pretzel dough ahead of time. After kneading, let it rise once. Then, cover it and chill in the fridge. This slows down the yeast action and keeps the dough fresh. When you’re ready, take it out, let it warm up, and shape the pretzels. If you need an alternative to baking soda, try using baking powder. Baking powder won't give the same dark color, but it still helps create a chewy texture. You can also skip the bath and bake them directly, but the texture will change. Your pretzels are done when they turn a rich golden brown. This usually takes 12 to 15 minutes at 450°F (232°C). You can also tap the bottom. If it sounds hollow, they are ready! You can serve pretzels with many fun dips! Here are some ideas: - Cheese sauce for a classic bite. - Honey mustard for a sweet and tangy treat. - Garlic butter for a savory twist. - Creamy ranch for a cool flavor. Yes, you can customize the flour! While all-purpose flour works great, you can try bread flour. It gives a chewier texture. For gluten-free, use a gluten-free blend. Just make sure it has xanthan gum for the best rise. For more details, check the Full Recipe. In this blog post, we explored the essential ingredients and steps for making soft pretzels. We discussed activating yeast and shaping the dough for the perfect pretzel. Tips covered include dough rising and troubleshooting common issues. I shared tasty variations and storage methods to keep your pretzels fresh. Soft pretzels are fun to make and delicious to eat. With practice, you can create perfect pretzels for any occasion. Enjoy your baking journey and savor each bite!

Homemade Soft Pretzels Easy and Delicious Recipe

Imagine biting into a warm, soft pretzel, fresh from your kitchen. In this post, I’ll share my easy and delicious

To make Cajun shrimp pasta, gather these ingredients: - 8 oz linguine or fettuccine pasta - 1 lb shrimp, peeled and deveined - 2 tablespoons Cajun seasoning - 2 tablespoons olive oil - 4 cloves garlic, minced - 1 bell pepper, sliced (any color) - 1 cup cherry tomatoes, halved - 1 cup heavy cream - 1/2 cup grated Parmesan cheese - Salt and pepper to taste - Fresh parsley, chopped (for garnish) These ingredients blend to create a dish full of flavor. The shrimp and pasta pair perfectly with the creamy sauce. Choosing a good Cajun seasoning makes a big difference. I often use brands like Tony Chachere's or Zatarain's. They deliver great flavor without being too spicy. You can also mix your own seasoning with paprika, garlic powder, onion powder, and cayenne pepper. Experiment and find what works best for you! Want to elevate your dish? Here are some optional add-ins: - Spinach or kale for greens - Mushrooms for an earthy taste - Fresh lemon juice for brightness - Crumbled feta or goat cheese for tang These add-ins can enhance the dish's depth. Feel free to get creative and adjust based on your taste! Start by boiling water in a large pot. Add salt to the water for flavor. Once the water bubbles, toss in the linguine or fettuccine. Cook it until it is al dente. This means it should be firm but not hard. Drain the pasta and set it aside. A good tip is to save a bit of the pasta water. It helps if the sauce gets too thick later. In a medium bowl, put your peeled and deveined shrimp. Sprinkle the Cajun seasoning over the shrimp. Make sure to coat each piece well. This will give the shrimp a nice kick of flavor. You can use your hands or a spoon to mix them. Let it sit for a few minutes so the flavors soak in. This step is key to making your dish pop. Heat olive oil in a large skillet over medium heat. Add minced garlic and sliced bell pepper to the pan. Sauté them for about 2-3 minutes. You want the bell peppers to be soft. Next, add the seasoned shrimp to the skillet. Cook for 3-4 minutes, flipping halfway. They should turn pink and opaque. After that, stir in halved cherry tomatoes. Let them soften for about 2 minutes. Now, lower the heat and pour in the heavy cream. Stir well and let it simmer for 1-2 minutes. Mix in grated Parmesan cheese until it melts. Season with salt and pepper to taste. Finally, add your cooked pasta to the skillet. Toss everything together until the pasta is coated. If the sauce is thick, add a splash of pasta water. Now, your dish is ready to serve! For the full recipe, check out the details above. To keep shrimp tender, watch your cooking time closely. Cook shrimp for just 3-4 minutes. They should turn pink and opaque. Remove them from heat as soon as they change color. Overcooked shrimp can become rubbery. It's better to undercook slightly and let them rest. They will continue to cook in the hot sauce. For a creamy sauce, use heavy cream. It gives a rich texture that coats the pasta well. Stir the cream gently into the skillet. Heat it over low to prevent boiling. If the sauce gets too thick, add a splash of pasta water. This will help loosen it up. Parmesan cheese adds flavor and creaminess. Mix it in until it melts completely. Adjust salt and pepper to taste for perfect seasoning. For this dish, you need a few basic tools. Use a large pot for boiling pasta. A skillet is best for sautéing shrimp and veggies. A wooden spoon or spatula helps mix everything. Use a measuring cup for heavy cream and cheese. A good colander makes draining pasta easy. Having these tools ready will make cooking smooth and fun. Check out the Full Recipe for more details on each step. {{image_2}} You can make Cajun shrimp pasta even better with veggies. Try adding spinach, zucchini, or mushrooms. These veggies bring a fresh taste and extra color. If you want, swap out the bell pepper for asparagus or broccoli. These choices add crunch and nutrients. You can also toss in some peas for sweetness. This way, you can make a dish that fits your taste. If you love heat, boost your Cajun shrimp pasta! Add more Cajun seasoning for extra spice. You can also toss in red pepper flakes or sliced jalapeños. Mix them in with the shrimp while cooking. Another idea is to use spicy sausage with the shrimp. This gives a rich flavor and packs a punch. Just remember to taste as you go. You want to enjoy the heat, not burn your tongue! For a gluten-free version, choose gluten-free pasta. Many brands offer these options now. They cook just like regular pasta, so no need to worry. If you want a low-carb meal, use zucchini noodles or spaghetti squash. These options keep the flavor but cut down on carbs. Just remember to sauté them lightly before adding to the sauce. This keeps them from becoming too watery. Enjoy a tasty meal that fits your diet! After enjoying your Cajun shrimp pasta, let it cool. Place leftovers in an airtight container. This helps keep the flavors fresh. Store it in the fridge for up to three days. Don't forget to label it. This way, you know when to eat it. To reheat your pasta, use a skillet for even heating. Add a splash of water or cream to keep it creamy. Heat it over medium-low heat, stirring gently. This helps prevent sticking and drying out. You can also use the microwave. Just cover the bowl with a plate and heat in short bursts. If you want to keep it longer, freezing is a great option. First, let the pasta cool completely. Then, portion it into freezer-safe bags or containers. Remove as much air as you can. Label each bag with the date. For best taste, eat within two months. To thaw, move it to the fridge overnight. Reheat it as mentioned before for a tasty meal. Cajun shrimp pasta comes from Louisiana's Cajun culture. Cajun food blends French, African, and Spanish flavors. The dish shows a mix of spices and fresh seafood. The pasta adds a nice touch to this rich flavor. It is a great way to enjoy Cajun cooking at home. Yes, you can use frozen shrimp for this recipe. Just make sure to thaw them first. Place the shrimp in cold water for about 15 minutes. This helps them cook evenly. Frozen shrimp can save time and are often just as tasty as fresh. To make this dish dairy-free, swap heavy cream for coconut milk or almond milk. You can also use dairy-free cheese instead of Parmesan. This keeps the creamy texture without the dairy. The Cajun spices will still give it a great flavor. For the complete recipe, including detailed steps, check out the Full Recipe. It has everything you need to make this tasty dish. This blog post covered everything you need for Cajun shrimp pasta. We looked at key ingredients, brands, and optional add-ins to amp up flavor. You learned to cook the pasta and season shrimp right. I shared tips to avoid overcooking and keep your sauce creamy. I also gave you storage methods and variations to suit your taste. Enjoy cooking your Cajun shrimp pasta and remember to have fun with it!

Cajun Shrimp Pasta Delightful and Flavorful Dinner

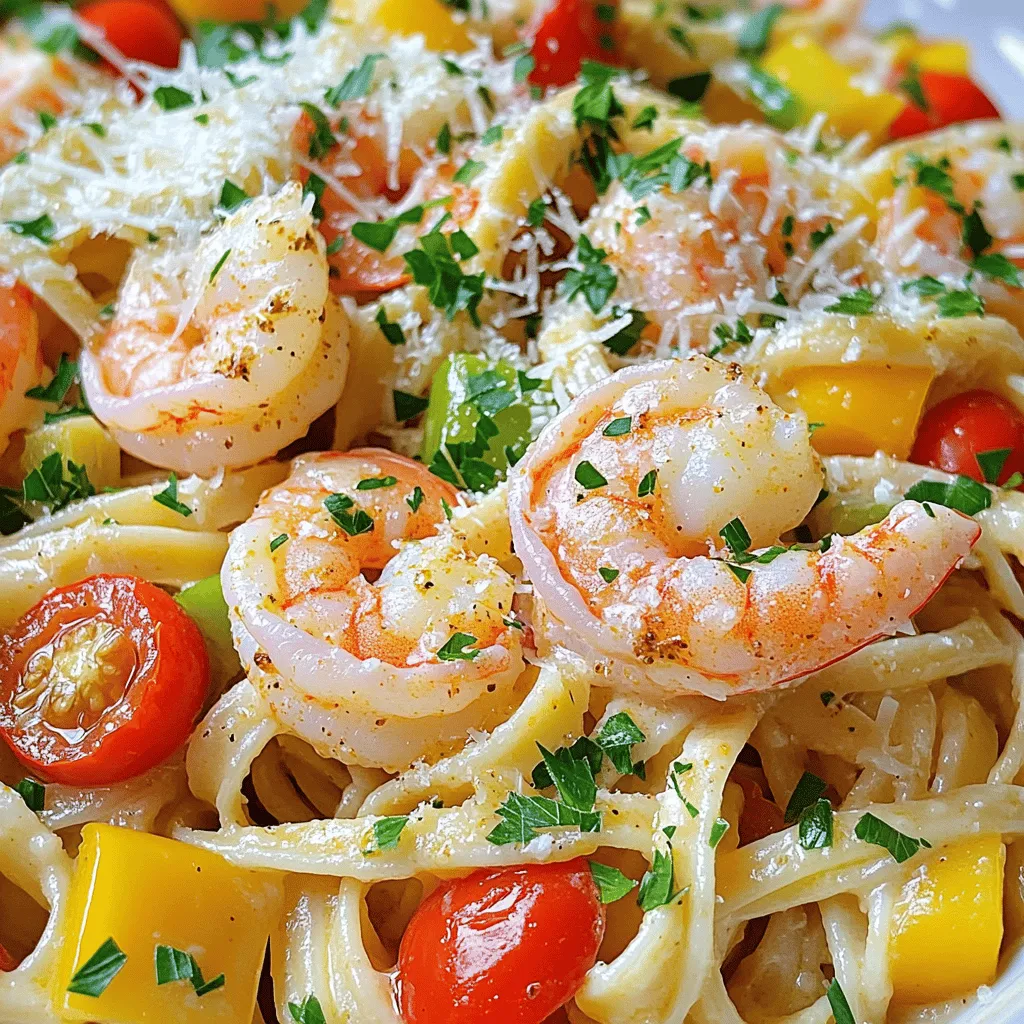
Craving a dinner that’s packed with flavor? Cajun Shrimp Pasta is your answer! This dish combines tender shrimp, zesty seasonings,

- 1 cup orzo pasta - 2 cups vegetable broth (or water) - 1 cup cherry tomatoes, halved - 1 small cucumber, diced - 1/4 red onion, finely chopped - 1 bell pepper (any color), diced - 1/4 cup parsley, chopped The heart of this salad is the orzo pasta. It gives a nice base and a fun texture. I love using vegetable broth for cooking the orzo. It adds extra flavor. Fresh vegetables like cherry tomatoes, cucumbers, red onions, and bell peppers bring color and crunch. They make the dish lively and fresh. Don't forget the parsley; it adds a burst of green. - 1/4 cup feta cheese, crumbled (optional) - Additional toppings like olives or nuts Feta cheese is a great choice for adding creaminess and saltiness. You can skip it if you want a lighter taste. You could also add olives for a briny twist or nuts for a crunchy bite. These optional add-ins let you customize the salad to your liking. - 3 tablespoons olive oil - Juice of 2 lemons - 2 cloves garlic, minced - Salt and black pepper to taste - 1/4 teaspoon red pepper flakes (optional) The dressing is simple yet packs a punch. A mix of olive oil and lemon juice creates a bright, zesty flavor. Minced garlic adds warmth and depth. Season with salt and black pepper for balance. If you like heat, sprinkle some red pepper flakes in. This dressing ties all the ingredients together and makes every bite delicious. For the full recipe, you can check the [Full Recipe]. To start, cook the orzo pasta. In a medium pot, bring 2 cups of vegetable broth to a boil. Add 1 cup of orzo pasta. Cook it according to the package instructions until it is al dente. This usually takes about 8 to 10 minutes. After cooking, drain the orzo and set it aside to cool. You want it to be at room temperature before mixing it with the veggies. Next, let's make the dressing. In a small bowl, whisk together 3 tablespoons of olive oil, the juice of 2 lemons, and 2 minced garlic cloves. Add salt and black pepper to taste, and if you like a bit of heat, include 1/4 teaspoon of red pepper flakes. Whisk until everything blends well. Taste it and adjust the flavors if needed. You might want a little more salt or lemon juice. Now it's time to mix everything. In a large bowl, combine 1 cup of halved cherry tomatoes, 1 diced cucumber, 1/4 finely chopped red onion, and 1 diced bell pepper. Add the cooled orzo into this veggie mix. Pour the dressing over the top and toss gently. Make sure everything is coated well. Finally, add 1/4 cup of chopped parsley and 1/4 cup of crumbled feta cheese if you like. Toss again to mix. It’s best to chill the salad in the fridge for at least 30 minutes before serving. This helps all the flavors come together beautifully. For the full recipe, check the details above. To boost the taste of your Lemon Garlic Orzo Salad, adjust the seasonings. Add salt and pepper to your liking. If you like heat, mix in red pepper flakes. Fresh ingredients shine here. Use fresh garlic and herbs for the best flavor. Dried herbs can work, but fresh ones bring more zest. For a beautiful presentation, serve the salad in a large bowl. You can also use individual plates to impress your guests. Garnish with extra feta cheese and a lemon wedge. This adds brightness and color. Consider adding sliced olives for more flavor and a pop of color. This salad pairs well with grilled chicken or fish for a light meal. You can make this salad ahead of time. It tastes great after chilling for a while. To chill, cover the bowl with plastic wrap or a lid. Best practice is to let it sit in the fridge for at least 30 minutes. This helps the flavors blend nicely. Remember, the longer it chills, the better it tastes! For the full recipe, refer to the instructions above. {{image_2}} You can swap orzo for other grains. Quinoa or farro can add a nutty taste. Rice works well, too. These grains offer different textures and flavors. You can mix and match to find what you like best. Seasonal veggies make your salad shine. In spring, add fresh peas or asparagus. Summer brings ripe zucchini and bell peppers. In fall, try roasted butternut squash or Brussels sprouts. Each season offers new delights for your dish. Want a vegan option? Just skip the feta, or use a plant-based cheese. Use vegetable broth for cooking. This keeps the dish light and fresh. Need a gluten-free choice? Swap orzo for gluten-free pasta like brown rice or corn pasta. These options still give you that great taste without the gluten. If you are watching carbs, try using spiralized zucchini instead of orzo. This keeps the crunch and flavor without the carbs. It’s a fun twist that still satisfies your cravings. Add protein to your salad for a heartier meal. Grilled chicken or shrimp works great. For a plant-based option, toss in chickpeas or black beans. They add protein and fiber, making your salad filling. Nuts and seeds bring a nice crunch. Try sliced almonds or walnuts for a rich flavor. Sunflower seeds add a nice texture, too. Just sprinkle them on top to keep their crunch. These twists make your orzo salad unique and enjoyable. For the Full Recipe, check the earlier section. To store leftovers of your Lemon Garlic Orzo Salad, place it in a container. I suggest using an airtight container. This keeps the salad fresh and prevents odors from other foods. Always let the salad cool down before sealing it. This helps avoid excess moisture inside the container. Can you freeze orzo salad? Yes, you can, but it may change texture. If you freeze it, use a freezer-safe bag or container. Remove as much air as you can to prevent freezer burn. For reheating, let it thaw in the fridge overnight. Then, warm it gently in a pan, adding a splash of olive oil or water to bring back some moisture. How long does it last in the fridge? Your Lemon Garlic Orzo Salad can last about 3 to 5 days. Always check for freshness. Signs that the salad is no longer good include a sour smell or slimy texture. If you see any mold, it’s best to toss it out. Keeping track of freshness helps you enjoy your salad safely! You can make this salad a day in advance. Cook the orzo and chop the veggies. Mix the salad, but add the dressing just before serving. This keeps everything fresh. Store it in an airtight container in the fridge. It will taste great the next day. Yes, you can swap orzo for other pasta. Try small shapes like ditalini or fusilli. You can also use whole wheat or gluten-free pasta. Just cook according to the package. The salad will still be delicious and fun. If you don’t have lemon juice, use vinegar. Apple cider vinegar or white wine vinegar work well. You can also use lime juice for a twist. These options give a nice acidity to the salad. Chill the salad for at least 30 minutes. This helps all the flavors mix well. If you have more time, chill it for an hour or two. The longer it sits, the better the taste. For the full recipe, check out the complete details! In this post, we explored how to make a fresh Lemon Garlic Orzo Salad. We discussed the main ingredients, like orzo and fresh veggies. I shared tips for enhancing flavors and options for meal prep. We looked at variations, like using different grains and proteins. For a delightful salad, stick to fresh ingredients and adjust seasonings to your taste. This dish is versatile and easy to customize, making it a perfect choice for any meal. Enjoy your cooking!

Lemon Garlic Orzo Salad Fresh and Flavorful Dish

Looking to spice up your mealtime? Let me introduce you to the vibrant and zesty Lemon Garlic Orzo Salad! This

This Sizzling Sausage & Veggie Delight is simple and quick. You can have a tasty meal ready in 40 minutes. This dish serves four people and is perfect for busy nights. - 1 lb chicken or turkey sausage, sliced - 2 bell peppers (one red, one yellow), sliced - 1 medium zucchini, sliced - 1 medium red onion, sliced - 1 cup cherry tomatoes, halved - 3 cloves garlic, minced - 2 tablespoons olive oil - 1 teaspoon dried oregano - 1 teaspoon smoked paprika - Salt and pepper, to taste - Fresh parsley, chopped (for garnish) These ingredients make a colorful and filling dish. The sausage adds protein, while the veggies bring vitamins and minerals. You can easily change the veggies based on what you like or have on hand. You can add other ingredients for more flavor and texture. Here are some ideas: - Sweet potatoes for extra heartiness - Broccoli for additional crunch - Spinach for a boost of greens - Feta cheese for a creamy touch - Lemon zest for brightness Feel free to mix and match to suit your taste. It makes the dish fun and unique every time! For the full recipe, check out the cooking instructions. Start by gathering all your ingredients. You will need: - 1 lb chicken or turkey sausage, sliced - 2 bell peppers (one red, one yellow), sliced - 1 medium zucchini, sliced - 1 medium red onion, sliced - 1 cup cherry tomatoes, halved - 3 cloves garlic, minced - 2 tablespoons olive oil - 1 teaspoon dried oregano - 1 teaspoon smoked paprika - Salt and pepper, to taste - Fresh parsley, chopped (for garnish) Make sure to wash and slice your veggies. Slicing them evenly helps them cook at the same time. Preheat your oven to 425°F (220°C). This step is key for a nice roast. Take a large sheet pan and combine the sliced sausage, bell peppers, zucchini, red onion, and cherry tomatoes. In a small bowl, mix together the olive oil, minced garlic, oregano, smoked paprika, salt, and pepper. This blend adds great flavor. Drizzle this mix over the sausage and veggies. Toss everything well to coat them evenly. Spread the mixture out in a single layer on the sheet pan. This ensures even cooking. Roast in the preheated oven for 25-30 minutes. Halfway through, give everything a stir. This helps with browning and cooking. Once cooked, take the sheet pan out of the oven. Let it cool for a few minutes. This makes it easier to serve. Garnish with freshly chopped parsley for a pop of color. This dish is great on its own or served with rice or bread. Try it tonight for a satisfying meal! For the full recipe, check the earlier section. To get perfectly roasted veggies, cut them into similar sizes. This helps them cook evenly. Use fresh vegetables for the best taste. I always toss them with olive oil and seasonings before roasting. This gives them a great flavor and helps them brown nicely. Don’t overcrowd the pan; give each piece space to roast well. Stir them halfway through cooking for even browning. For seasoning, I love to start with salt and pepper. You can also add herbs like thyme or rosemary for more flavor. Try adding a pinch of red pepper flakes for some heat. A squeeze of lemon juice after roasting brightens the taste. You can change the spices based on what you love. Experiment to find your favorite mix. Cooking times may vary based on your oven. If you use larger pieces of veggies, they need more time. Check for doneness at 25 minutes, but they might need up to 30 minutes. The sausage should be browned, and the veggies should be tender. If you want them crispier, leave them in a few extra minutes. Always keep an eye on them to avoid burning. For full instructions, check the Full Recipe. {{image_2}} You can switch the sausage for other proteins. Turkey and chicken sausage work well. If you prefer, you can use plant-based sausage for a veggie-friendly meal. Chorizo adds a kick, while Italian sausage gives a rich flavor. Each option brings its own unique taste. Feel free to try different meats to find your favorite! The beauty of this dish lies in its versatility. You can swap the veggies based on what you have. Broccoli, carrots, or asparagus work great. Sweet potatoes add earthiness, while mushrooms give a nice umami flavor. Mix and match to create your perfect blend. Seasonal vegetables can add freshness and color to your meal. To boost the flavor, consider adding fresh herbs like thyme or rosemary. A squeeze of lemon juice brightens the dish nicely. You can also sprinkle some crushed red pepper for heat. If you love cheese, feta or Parmesan can add creaminess. Experiment with your favorite spices for a unique twist. Each enhancement can change the dish and make it your own! After your meal, let any leftovers cool first. Place them in an airtight container. This keeps the flavors fresh. Store in the fridge for up to three days. If you want to enjoy them later, freezing is a great option. To reheat, you can use the oven or a microwave. If using the oven, preheat it to 350°F (175°C). Place the leftovers in an oven-safe dish and cover with foil. Heat for about 15-20 minutes. If you’re in a hurry, the microwave works too! Just heat in short bursts, stirring in between, until warm. Want to freeze your dish? It’s simple! Place cooled leftovers in a freezer-safe container. Make sure to leave some space at the top, as food expands when frozen. Label the container with the date. You can freeze it for up to three months. To use, thaw overnight in the fridge before reheating. Enjoy your Sizzling Sausage & Veggie Delight whenever you like! Yes, you can use frozen vegetables. They save time and make cooking easy. Just remember to thaw them first. This helps them cook evenly. The texture may change a bit, but they will still taste great. If you like, you can also roast them straight from frozen. Just add a few extra minutes to the cooking time. You can try many types of sausage. Chicken or turkey sausage works well. You could also use pork sausage or even veggie sausage. Each type will bring a unique flavor to the dish. Just pick your favorite and slice it. Adjust the cooking time if your sausage is thicker or thinner. Yes, this recipe is healthy. It has lean protein and lots of veggies. Each serving gives you vitamins and nutrients. The olive oil adds healthy fats, which are good for your heart. You can also adjust the salt to keep it low. Overall, this meal is balanced and tasty. For the full recipe, check out the Full Recipe section. This blog post shared a complete guide to making a delicious dish. We started with the essential ingredients and optional add-ins. I provided step-by-step instructions for preparing, roasting, and serving. I offered tips for perfect veggies and seasoning options. We discussed variations for proteins and vegetables, plus how to store and reheat leftovers. This recipe is flexible and fun. You can make it your own. Enjoy cooking and experimenting with flavors!

Satisfying Sausage and Veggie Sheet Pan Dinner

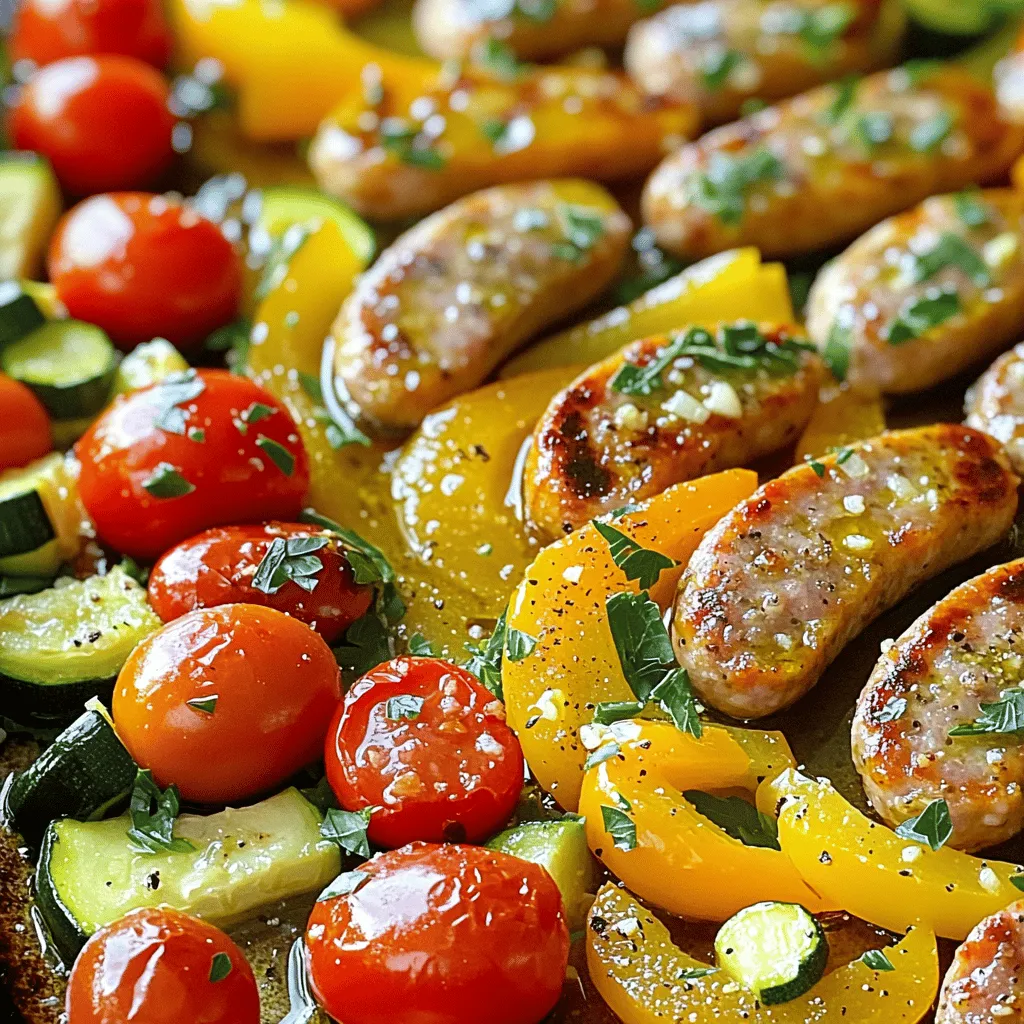
Get ready for an easy and flavorful meal with my Satisfying Sausage and Veggie Sheet Pan Dinner! This dish is

To make a tasty egg salad, gather these ingredients: - 6 large eggs - 1/4 cup mayonnaise - 1 tablespoon Dijon mustard - 1 tablespoon lemon juice - 1/4 cup celery, finely chopped - 1/4 cup green onions, finely chopped - 2 tablespoons fresh dill, chopped - 1 tablespoon fresh parsley, chopped - Salt and pepper to taste - 2 teaspoons capers, rinsed and roughly chopped (optional) - Fresh lettuce leaves, for serving You can switch some ingredients if you like. Here are a few ideas: - Use Greek yogurt instead of mayonnaise for a lighter option. - Swap Dijon mustard for yellow mustard if you prefer a milder taste. - Try adding avocado for a creamy texture and healthy fats. - Replace fresh herbs with dried herbs in smaller amounts. To make this egg salad, you will need: - A saucepan for boiling eggs - A mixing bowl for combining ingredients - A knife and cutting board for chopping - A spoon for mixing - An ice bath bowl for cooling eggs - Serving plates or lettuce leaves for presentation You can find the full recipe [here](#). To start, you need to boil the eggs. Place six large eggs in a saucepan. Cover the eggs with water. Turn on the heat to medium-high. Wait for the water to boil. Once it boils, cover the pot and turn off the heat. Let the eggs sit for 12 minutes. This method cooks them just right. After 12 minutes, move the eggs to an ice bath. The ice bath cools the eggs quickly. Leave them in the cold water for about five minutes. After cooling, gently tap each egg on the counter to crack the shell. Peel the eggs under running water. This makes peeling easier and less messy. Now it's time to mix! Take the peeled eggs and chop them into bite-sized pieces. In a large mixing bowl, add the chopped eggs. Then, include 1/4 cup of mayonnaise, 1 tablespoon of Dijon mustard, and 1 tablespoon of lemon juice. Next, add 1/4 cup of finely chopped celery and 1/4 cup of finely chopped green onions. For a fresh taste, add 2 tablespoons of chopped dill and 1 tablespoon of chopped parsley. If you like, toss in 2 teaspoons of rinsed and chopped capers. Gently fold everything together. Be careful not to mash the eggs too much. Finally, season the mixture with salt and pepper to taste. Adjust the flavors as needed. For a lovely presentation, spoon the egg salad onto fresh lettuce leaves. This makes a light and tasty option. You can also serve it on your favorite bread as a sandwich. Try different bread types for variety. You can add sliced tomatoes or pickles for extra flavor. For a fun twist, consider using wraps instead of bread. Enjoy your creamy herb-infused egg salad! For the complete recipe, refer to the Full Recipe section. To make great egg salad, cook your eggs just right. Start by placing the eggs in a pot. Cover them with cold water. Heat the pot on medium-high until it boils. Once boiling, cover the pot and turn off the heat. Let the eggs sit for 12 minutes. This method makes them perfect every time. After 12 minutes, cool the eggs in an ice bath. This stops the cooking and makes peeling easy. If you have leftover egg salad, store it in an airtight container. It should last up to three days in the fridge. When you’re ready to eat it, check for freshness. If it smells bad or looks off, don’t eat it. Always use clean utensils to scoop out the salad. This helps keep it fresh longer. To make your egg salad pop, try adding extra herbs or spices. Fresh dill and parsley add a nice touch. You might also add a splash of hot sauce for some heat. Don't forget about salt and pepper; they bring out the flavors. Mix well but gently to keep the eggs from mashing. For more ideas, check out the Full Recipe for variations! {{image_2}} You can make your egg salad even better by adding veggies. Try adding chopped bell peppers for crunch. Grated carrots add sweetness and color. You can also mix in diced pickles or olives for a tangy kick. These additions not only enhance flavor but also boost nutrition. Feel free to get creative! You can serve egg salad in many tasty ways. One popular method is as a sandwich. Use whole grain bread for a healthier choice. You can also wrap the salad in a tortilla for a quick lunch. For a lighter option, serve it on crisp lettuce leaves. Each style gives a unique twist to your meal. The classic recipe is great on its own, but seasonings can elevate it. Try adding a pinch of paprika for warmth. A dash of hot sauce can bring heat if you like spice. Fresh herbs like chives or cilantro can also add brightness. These simple changes keep the dish exciting and flavorful. Explore these variations to find what you love! For the full recipe, check out the Creamy Herb-Infused Egg Salad section. To keep your egg salad fresh, store it in an airtight container. This helps prevent air from spoiling the taste. Use glass or plastic containers with tight lids. If you plan to serve it later, don’t mix in any extras, like lettuce, until you're ready. This keeps everything crisp and tasty. Egg salad can stay fresh in the fridge for up to three days. Make sure to check it each day. If you have extra egg salad, freezing is not recommended. The texture will change and become watery. It’s best to make only what you need. Always check for signs that your egg salad may have gone bad. Look for changes in color or an odd smell. If it feels slimy, it’s time to toss it. When in doubt, throw it out to stay safe. To hard-boil eggs, place them in a pot. Cover the eggs with water. Heat the pot on medium-high until the water boils. Once boiling, cover the pot and remove it from heat. Let the eggs sit for 12 minutes. This method ensures even cooking, and the eggs are easy to peel. Egg salad stays fresh in the fridge for about three to five days. Store it in an airtight container to keep it safe. Always check for any off smells or changes in texture before eating. I do not recommend freezing egg salad. Freezing changes the texture of the eggs and mayonnaise. When thawed, it may become watery and unappetizing. It's best to enjoy egg salad fresh. Egg salad pairs well with many foods. You can serve it on bread, crackers, or lettuce. It also goes great with pickles, chips, or fresh veggies. For a heartier meal, add it to a salad. To make egg salad healthier, use Greek yogurt instead of mayonnaise. You can add more veggies, like spinach or diced peppers. Reducing the amount of mayo or mustard also helps. For the full recipe, check out the creamy herb-infused egg salad! In this blog post, we explored how to make delicious egg salad. We covered the ingredients, tools, and step-by-step instructions. You learned tips for perfect cooking and flavor enhancement. We also shared storage info and how to adapt the recipe. With these insights, you can easily create your own tasty egg salad. Experiment with variations and enjoy the process! Your egg salad will impress everyone.

Classic Egg Salad Healthy and Simple Recipe Guide

Are you ready to enjoy a classic dish that’s both healthy and simple? This egg salad recipe is perfect for

Older posts
Newer posts
← Previous Page1 … Page82 Page83 Page84 Next →

dsad

© 2026 juliesdish • Built with GeneratePress

Our Policies

  • Copyright Policy
  • Cookie Policy
  • GDPR Policy
  • Privacy Policy
  • Disclaimer
  • Terms Of Use

More Information

  • Home
  • About
  • Contact
  • Appetizers
  • Dessert
  • Dinner
  • Drinks
©2026, juliesdish About Back To Top