Skip to content
DisclaimerTerms Of UseGDPR PolicyCookie Policy

juliesdish

  • Home
  • Drinks
  • Appetizers
  • Dinner
  • Dessert
  • About
  • Contact
  • Privacy Policy
DisclaimerTerms Of UseGDPR PolicyCookie Policy

NO-ING-IMG

To make your stuffed peppers, gather these key ingredients: - 4 large bell peppers (red, yellow, or green) - 1 cup cooked quinoa - 1 can (15 oz) black beans, rinsed and drained - 1 cup corn (frozen or canned) - 1 cup diced tomatoes (fresh or canned) - 1 teaspoon cumin - 1 teaspoon chili powder - 1 teaspoon garlic powder - Salt and pepper to taste - 1 cup shredded cheese (cheddar or mozzarella) - Fresh cilantro, chopped (for garnish) These ingredients create a tasty filling that you will enjoy. You can change your stuffed peppers with these optional ingredients: - Ground beef or turkey for added protein - Chopped onions or bell pepper tops for extra flavor - Avocado or sour cream for creamy toppings - Jalapeños for a spicy kick - Other grains like rice or farro Feel free to mix and match based on what you have at home. When choosing bell peppers, you want fresh and firm ones. Here are some tips: - Look for bright colors. Red, yellow, and orange are ripe. - Check for smooth skin without wrinkles or spots. - Choose peppers that feel heavy for their size. - Avoid any with soft spots or blemishes. These tips will help you pick the best bell peppers for your dish. Enjoy crafting your easy stuffed peppers with these fresh ingredients! To start, preheat your oven to 375°F (190°C). Next, take your bell peppers and slice off the tops. Carefully remove the seeds and membranes inside. Set the cleaned peppers aside for now. In a large bowl, mix together the cooked quinoa, black beans, corn, diced tomatoes, cumin, chili powder, garlic powder, salt, and pepper. Stir this mixture well until all ingredients blend nicely. You want each bite to be packed with flavor! Now, generously stuff each bell pepper with your quinoa mixture. Press it in tightly to make sure they are full. Place the stuffed peppers upright in a baking dish. If they wobble, trim the bottom slightly to help them stand straight. Once your peppers are ready, sprinkle shredded cheese on top of each one. Cover the baking dish with aluminum foil to keep the moisture in. Bake in the oven for 30 minutes. After 30 minutes, take off the foil and bake for another 10 to 15 minutes. You want the cheese to become bubbly and slightly golden. When they are done, carefully remove the baking dish from the oven. Let the peppers cool for a few minutes before you serve them. To finish, garnish your stuffed peppers with fresh cilantro for a pop of color. These colorful peppers look great on any table! You can serve them with a side salad or some crusty bread. They also pair well with a nice dip or salsa. Enjoy your meal! For the complete recipe, check out the Full Recipe section. To make your stuffed peppers really shine, pick the best peppers. Look for peppers that are bright and firm. They should feel heavy for their size. When you cut off the tops, be careful not to cut too deep. You want enough space inside to hold your filling. Pack the filling tightly. This ensures the peppers hold their shape and flavor. Want to save time? Use pre-cooked quinoa or canned beans. This cuts your prep time in half. You can also chop your veggies ahead of time. Keep them in the fridge until you’re ready to cook. If you have leftover filling, you can use it in salads or wraps. You can cook stuffed peppers in different ways. The oven method works great, but you can also use a stovetop. Just simmer them in a pot with some water and cover it. This helps steam the peppers until they're tender. For a slow cooker, place the stuffed peppers upright in the pot. Add a bit of water at the bottom and cook on low for several hours. Each method gives you a tasty meal, so pick the one that fits your day. For the Full Recipe, check the earlier section. Enjoy your cooking! {{image_2}} You can create tasty vegetarian stuffed peppers that are filling and fun. Start with the basic recipe. Use quinoa, black beans, and corn as your base. You can add more veggies like diced zucchini, mushrooms, or spinach. For extra flavor, mix in some chopped olives or artichokes. This makes a colorful and healthy meal. If you love meat, try adding ground beef or turkey. Cook the meat in a pan before mixing it with your filling. You can also use sausage for a spicy kick. Combine the meat with the same beans, corn, and rice. This is a hearty dish that satisfies. To spice things up, add jalapeños or hot sauce to your filling. You can also use spicy sausage or add crushed red pepper flakes. If you like heat, try using poblano peppers instead of bell peppers. They have a nice kick. Serve with a dollop of sour cream to cool it down. Each bite will be full of flavor! Feel free to explore these variations for your stuffed peppers. Check out the Full Recipe for more ideas. After you make your stuffed peppers, let them cool. Place them in an airtight container. They can last in the fridge for about 3-4 days. If you want to keep them longer, consider freezing. Just remember to label the container with the date. To freeze stuffed peppers, let them cool completely. Wrap each pepper in plastic wrap or foil. Place them in a freezer-safe bag or container. They can stay fresh in the freezer for about 3 months. When you're ready to eat, thaw them in the fridge overnight. To reheat your stuffed peppers, you can use the oven or microwave. For the oven, preheat to 350°F (175°C). Place peppers in a baking dish and cover with foil. Heat for about 20-25 minutes. If using a microwave, heat on high for 2-3 minutes. Make sure they are hot all the way through. Enjoy your delicious meal again! Stuffed peppers can stay fresh in the fridge for about 3 to 4 days. Store them in an airtight container. If you want them to last longer, freezing is a great option. Frozen stuffed peppers can last up to 3 months without losing taste. Yes, you can prepare stuffed peppers in advance. Just assemble the peppers but don’t bake them yet. Cover them with plastic wrap or foil. Store them in the fridge for up to 24 hours. When ready, bake them as directed in the full recipe. You can serve stuffed peppers with a side salad for freshness. Rice or quinoa also pairs well. For a fun touch, try adding some crusty bread or garlic bread. If you want a dip, salsa or guacamole adds great flavor too. Easy stuffed peppers are a fun and colorful dish. They fill your kitchen with great smells. You can make them in less than an hour. They are perfect for lunch or dinner. The mix of quinoa, beans, and veggies makes them healthy and tasty. You can use different bell peppers to change the look. Red, yellow, and green peppers all work well. Each pepper holds a treasure of flavors. The best part is the creamy cheese on top. It melts and makes everything taste better. With just a few steps, you will have a meal that looks great and tastes even better. This recipe is easy enough for kids to help with. Easy stuffed peppers are packed with good stuff. Each serving has protein from quinoa and beans. They have fiber, which is great for your tummy. Here is a quick look at what you get: - Calories: About 350 - Protein: 15g - Carbohydrates: 50g - Fat: 10g - Fiber: 10g These numbers can change based on what you add to the mix. If you want to make them lower in calories, use less cheese or add more veggies. If you love easy stuffed peppers, you might like these dishes too: - Zucchini Boats: Hollow out zucchini and fill them with meat or veggies. - Stuffed Tomatoes: Use tomatoes instead of peppers for a twist. - Casserole Dishes: Mix all your ingredients in a dish and bake. Each of these recipes has the same fun flavors and is easy to make. Stuffed peppers can be a fun and tasty meal. We covered the key ingredients and steps for making them. You learned about tips for perfect results and variations for different tastes. Don’t forget to explore storage tips to keep them fresh. Finally, these peppers are easy to adapt for any meal. Enjoy creating your own delicious stuffed peppers. Happy cooking!

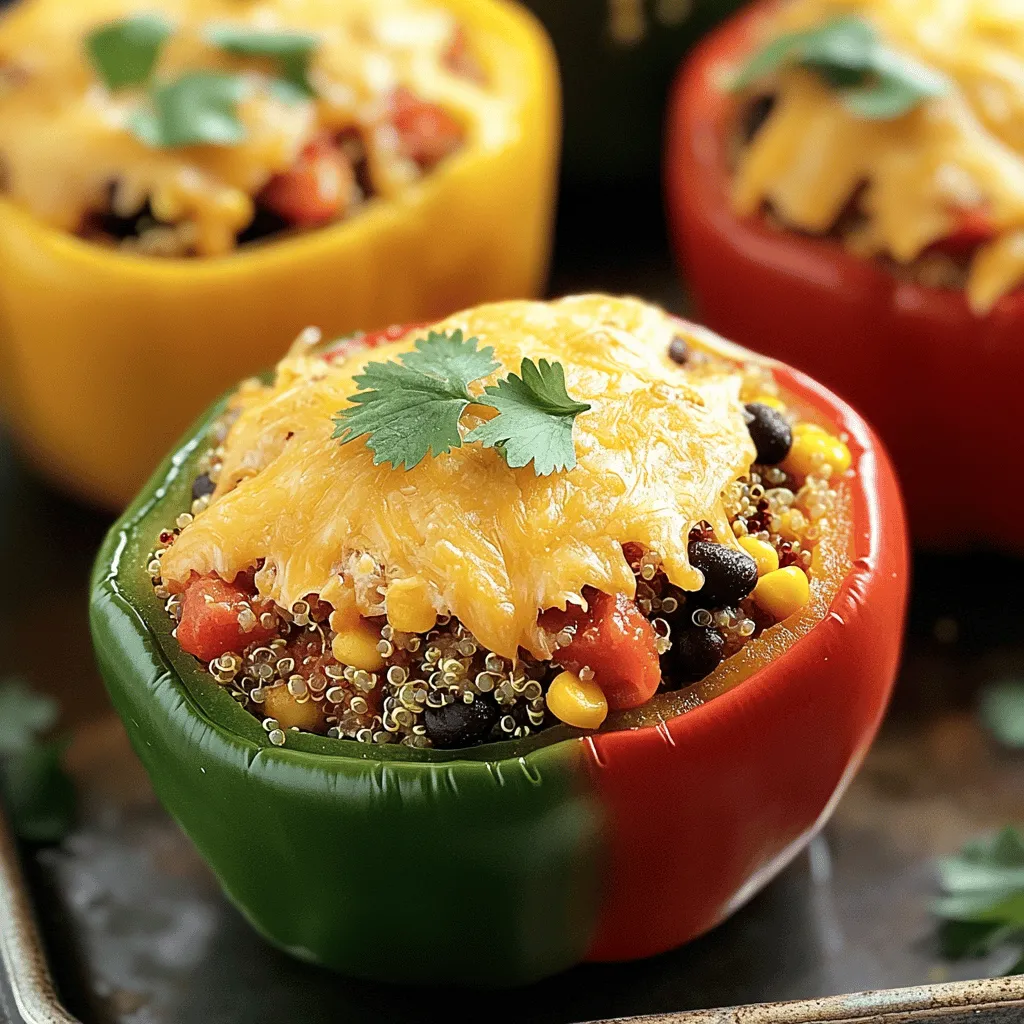
Easy Stuffed Peppers Flavorful and Simple Recipe

Are you ready to spice up your dinner routine? This Easy Stuffed Peppers recipe is not only flavorful but also

To make delicious avocado tuna salad, you need these key items: - 1 can (5 oz) tuna, drained - 1 ripe avocado, mashed - 1/4 cup Greek yogurt (or mayo for a richer taste) - 1 tablespoon Dijon mustard - 1 tablespoon lemon juice - 1 celery stalk, finely chopped - 1/4 red onion, finely chopped - 1 tablespoon fresh dill, chopped (or 1 teaspoon dried dill) - Salt and pepper to taste - 8 large lettuce leaves (like Romaine or Butter lettuce) - Cherry tomatoes, halved (for garnish) These ingredients work together to create a creamy and fresh dish. The tuna provides protein, while the avocado adds healthy fats and creaminess. If you want to boost the flavor of your avocado tuna salad, consider these add-ins: - Chopped pickles or relish - Sliced olives - Chopped bell peppers - A dash of hot sauce - Chopped nuts for crunch These options can add a new layer of taste and texture. Try mixing them in to find your favorite combo. You can easily swap some ingredients for others. Here are a few ideas: - Use canned salmon instead of tuna for a different flavor. - Swap Greek yogurt for sour cream for a tangy taste. - If you don't have dill, try parsley or cilantro. - For a lower-carb option, use cucumber slices instead of lettuce leaves. These substitutions let you customize the dish to your liking while keeping it tasty and fresh. {{ingredient_image_1}} To make avocado tuna salad lettuce wraps, start by gathering your ingredients. In a mixing bowl, add one can of drained tuna and one ripe, mashed avocado. Mix these two until they blend well. Next, add 1/4 cup of Greek yogurt or mayo, 1 tablespoon of Dijon mustard, and 1 tablespoon of lemon juice. Stir everything together until the mixture is smooth. Now, fold in the finely chopped celery and red onion. Add 1 tablespoon of fresh dill or 1 teaspoon of dried dill. Season with salt and pepper to taste. Adjust flavors as needed by adding more salt or lemon juice. When mashing the avocado, ensure it is ripe. A ripe avocado is soft and easy to mash. Use a fork to mash the avocado until it is creamy. This helps blend better with the tuna. When mixing, be gentle to keep some texture. Over-mixing can make the salad mushy, which is not what you want. For serving, take one large lettuce leaf, like Romaine or Butter lettuce. Spoon a generous amount of the tuna salad mixture into the center of the leaf. Top it off with halved cherry tomatoes for a pop of color and taste. Fold the lettuce leaf around the filling to form a wrap. You can serve them right away, or chill them for later. Enjoy your fresh and tasty lettuce wraps! Choosing ripe avocados is key. Look for avocados that feel slightly soft when you press them. If they are too hard, they need more time to ripen. For tuna, select a can labeled as “light” or “solid white” for best taste. Check the expiration date on the can. Freshness matters! To get great flavor, mash the avocado well. You want it creamy but not too smooth. Mix it with the tuna until just combined. Stir in Greek yogurt or mayo slowly. This keeps the texture nice and adds creaminess. Don't skip the lemon juice; it brightens the dish. Adjust salt and pepper to your taste. Remember, taste as you go! For fresh and crisp lettuce wraps, wash the leaves gently. Pat them dry with a towel. Thick leaves like Romaine hold the filling well. Lay the leaves flat before adding the tuna salad. This helps to keep your wrap from tearing. Serve the wraps right away for the best crunch! Pro Tips Use Fresh Ingredients: Fresh herbs and vegetables enhance the flavor of your tuna salad. Opt for freshly chopped dill and crisp celery for the best taste. Adjust Consistency: If you prefer a creamier texture, feel free to add more Greek yogurt or mayo to the mixture until it reaches your desired consistency. Experiment with Flavors: Don’t hesitate to add other ingredients like diced bell peppers, capers, or a dash of hot sauce for a unique twist on your salad. Chill Before Serving: For the best flavor, chill the tuna salad in the refrigerator for 30 minutes before serving. This allows the flavors to meld beautifully. {{image_2}} You can switch out tuna for chicken or chickpeas. If you use chicken, I recommend cooked and shredded chicken. This gives a nice texture. For a vegetarian twist, use chickpeas. Smash them slightly and mix as you would with tuna. Both options keep the dish fresh and tasty. If you like heat, try adding some hot sauce or diced jalapeños. A sprinkle of cayenne pepper adds a kick without overpowering. You can also mix in a bit of smoked paprika for a warm flavor. Adjust the spice to suit your taste and enjoy the new twist! To make this dish vegan, replace the tuna with mashed chickpeas or tofu. Use plant-based yogurt instead of Greek yogurt. You can also skip the yogurt altogether and add more avocado. This keeps it creamy and rich while being completely dairy-free. Enjoy your healthy, vegan version! To keep your leftover tuna salad fresh, place it in an airtight container. This will help keep moisture in and air out. You should eat it within 2-3 days for the best taste. If you notice any changes in color or smell, it’s best to throw it away. Store your lettuce in the fridge to keep it crisp. Wrap the leaves in a damp paper towel and place them in a plastic bag. This helps keep them fresh for about a week. Avoid washing the leaves until you are ready to use them. Excess moisture can cause them to spoil faster. Use glass or plastic containers with tight lids for the best storage. They help prevent air and moisture from getting in. For tuna salad, a medium-sized container works best. For lettuce, a larger container will keep the leaves flat and unbroken. Make sure to label your containers with the date for easy tracking. Yes, you can make Avocado Tuna Salad ahead of time. I often prepare it a few hours before serving. It tastes great when chilled. Just store it in an airtight container in the fridge. This keeps it fresh and flavorful. Avoid adding the lettuce until you’re ready to eat. This way, the lettuce stays crisp and doesn't get soggy. Avocado Tuna Salad is packed with health benefits. It combines protein from tuna and healthy fats from avocado. Here are some key benefits: - Heart Health: Tuna is rich in omega-3 fatty acids. These fats can help lower bad cholesterol. - Nutrient-Dense: Avocados are high in vitamins E, C, and K. They also provide fiber. - Low-Carb Option: Using lettuce wraps instead of bread cuts carbs. It is a great choice for those watching their carbs. - Hydrating: This salad includes fresh vegetables, which add hydration. The Avocado Tuna Salad lasts about 2 days in the fridge. Be sure to store it in an airtight container. After 2 days, the avocado may brown and lose its taste. If you notice any changes in smell or texture, it’s best to discard it. Always check for freshness before eating leftovers. In this blog post, we explored how to make a tasty avocado tuna salad. We covered key ingredients, cooking steps, and tips for fresh lettuce. You can also swap or add ingredients to suit your taste. Choose your protein, spice it up, or go vegan. Remember to store leftovers correctly to keep them fresh. This dish offers great flavor and health benefits. Enjoy making and serving it your way. You’ll love this quick meal for any day!

Avocado Tuna Salad Lettuce Wraps Flavorful and Fresh

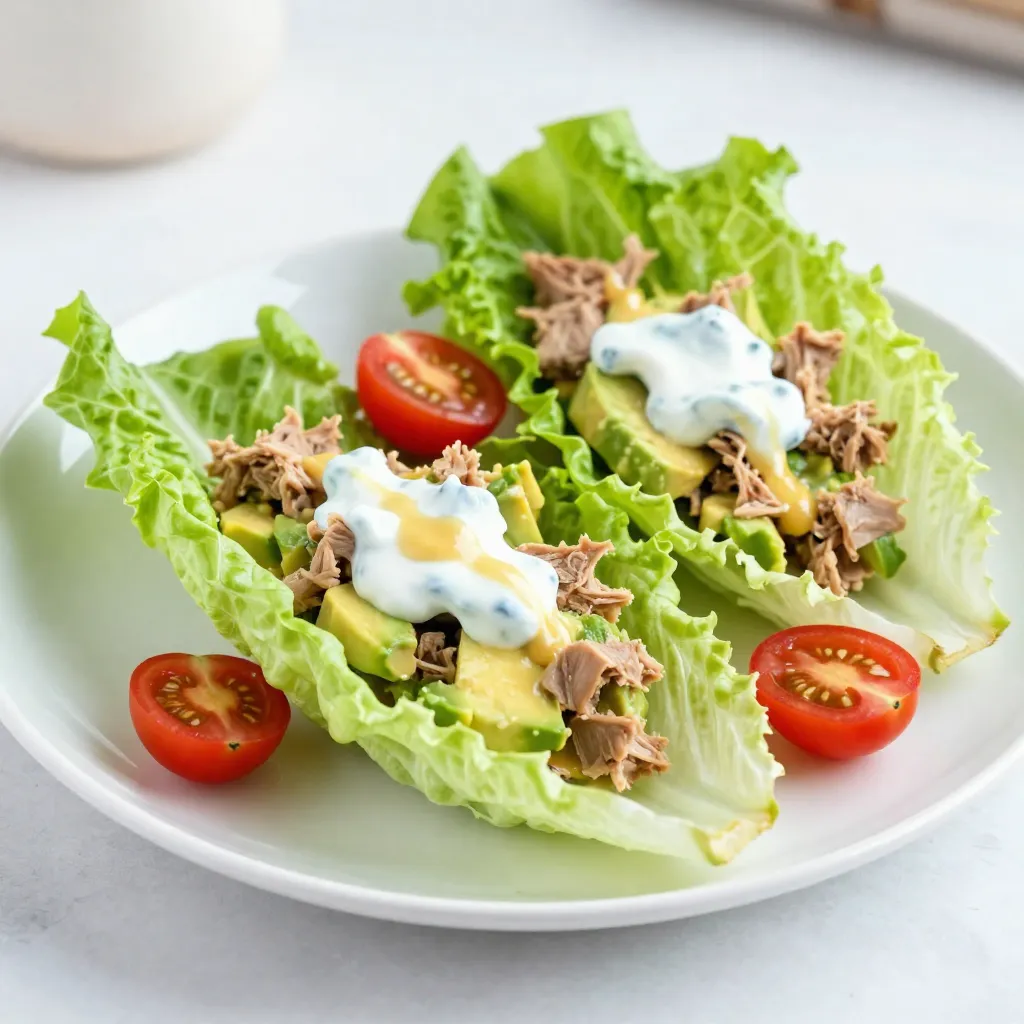
Looking for a delicious meal that’s healthy and easy to make? Avocado Tuna Salad Lettuce Wraps are your answer! This

For my Garlic Herb Grilled Veggie Skewers, I love to use a mix of colorful vegetables. Here are the must-have veggies: - 1 bell pepper (red, yellow, or green), cut into chunks - 1 zucchini, sliced into thick rounds - 1 yellow squash, sliced into thick rounds - 1 red onion, cut into wedges - 8 ounces cherry tomatoes - 2 cups mushrooms (cremini or button), cleaned and stems removed Using different colors makes the dish look great. Each vegetable adds its own unique flavor and texture. You can also change them up based on what you like. The marinade is key to making these skewers tasty. Here are the simple ingredients you’ll need: - 4 tablespoons olive oil - 3 cloves garlic, minced - 2 teaspoons dried oregano - 1 teaspoon dried thyme - Salt and pepper to taste I mix these ingredients in a bowl. The olive oil helps the veggies soak up the flavors. Garlic adds a punch of taste, and the herbs give a lovely aroma. The salt and pepper enhance everything, making each bite pop. After grilling, I like to add some fresh parsley. It brightens up the dish with color and freshness. You can also try other garnishes like: - Feta cheese for a creamy touch - Lemon juice for a tangy kick - Balsamic glaze for sweetness These garnishes are optional but can take your skewers to the next level. Feel free to get creative and use what you have! {{ingredient_image_1}} First, gather your ingredients. You need olive oil, garlic, oregano, thyme, salt, and pepper. In a small bowl, mix 4 tablespoons of olive oil with 3 minced garlic cloves. Then add 2 teaspoons of dried oregano, 1 teaspoon of dried thyme, and a pinch of salt and pepper. Stir well until the mix is smooth. This marinade adds great flavor to the veggies. Next, take a large mixing bowl and add all your chopped vegetables. Use bell pepper, zucchini, yellow squash, red onion, cherry tomatoes, and mushrooms. Pour the marinade over the vegetables. Gently toss them until they are well coated. Cover the bowl and let it sit for at least 30 minutes. This helps the veggies soak up all the tasty flavors. Now, it’s time to grill! First, preheat your grill to medium-high heat. If you use wooden skewers, soak them in water for about 20 minutes to stop them from burning. Then, take your marinated vegetables and thread them onto the skewers. Alternate the colors and types for a beautiful look. Place the skewers on the grill and cook for 10-12 minutes. Turn them occasionally until they become tender and have nice grill marks. Once done, remove the skewers and let them cool slightly. Before serving, add fresh parsley as a garnish for extra color and taste. Enjoy your tasty garlic herb grilled veggie skewers! Grilling veggies can be fun and easy. First, always preheat your grill. A hot grill gives veggies nice grill marks. Keep your grill at medium-high heat. This helps cook them fast while keeping them tender. Use oil to coat the veggies. It keeps them from sticking and adds flavor. Pick fresh and colorful veggies. Bell peppers, zucchini, yellow squash, red onion, cherry tomatoes, and mushrooms work great. Choose firm veggies. They hold up better on the grill. For a sweet touch, add red or yellow bell peppers. For a nice bite, red onions are perfect. Cut veggies into similar sizes. This helps them cook evenly. For thicker pieces, like zucchini and squash, slice them into rounds. This way, they cook at the same rate as smaller pieces. When grilling, turn the skewers often. This helps all sides get heat. Keep an eye on them to avoid burning. Cook until they are tender but still vibrant. Enjoy the colorful, tasty results! Pro Tips Choose Fresh Vegetables: Opt for seasonal and fresh vegetables to enhance the flavor and texture of your skewers. Marination Time: Allow the veggies to marinate for at least 30 minutes to absorb the garlic and herbs for a more robust flavor. Grill Temperature: Make sure your grill is preheated to medium-high heat for perfect char marks and to prevent sticking. Experiment with Veggies: Feel free to mix in your favorite vegetables like eggplant, asparagus, or bell peppers for variety and color. {{image_2}} You can add protein for a heartier meal. Chicken, shrimp, or tofu work well. Cut your protein into bite-sized pieces. Marinate it the same way as the veggies. Then, thread the protein onto the skewers with the veggies. This adds flavor and makes the skewers more filling. Feel free to mix up the herbs and spices! Instead of oregano and thyme, try rosemary or basil. You can even use a spicy blend like chili flakes for some heat. Experiment with fresh herbs for a bright taste. The more you play with flavors, the more fun your skewers will be! If you want to switch up the veggies, go for it! Asparagus, eggplant, or bell peppers are great choices. You can also use sweet potatoes or cauliflower for a unique twist. Just make sure to cut them into similar sizes for even cooking. The goal is to enjoy your time in the kitchen while making tasty food! After you enjoy your Garlic Herb Grilled Veggie Skewers, save any leftovers. Let the skewers cool down first. Place them in an airtight container. Store them in the fridge. They will stay fresh for about 3 to 5 days. When you want to eat the leftovers, you can reheat them easily. The best way is to use the grill. Preheat your grill to medium heat. Place the skewers on the grill for about 5 minutes. Turn them halfway through. You can also use a microwave. Heat them in short bursts of 30 seconds. Check often to avoid overcooking. If you want to save skewers for a long time, freezing is a great option. First, let the skewers cool completely. Wrap them tightly in plastic wrap or aluminum foil. Place them in a freezer bag. Be sure to remove as much air as possible. They can last for up to 3 months in the freezer. When you are ready to use them, thaw in the fridge overnight. Then, reheat as mentioned before. Yes, you can use many vegetables. Try carrots, bell peppers, or asparagus. You can mix and match your favorites. Just cut them to similar sizes for even cooking. This way, they all get the same grill time and heat. Soak wooden skewers for about 20 minutes. This helps stop them from burning on the grill. If you forget to soak them, use metal skewers instead. They won’t burn and work just as well. These skewers pair well with rice or quinoa. You can also serve them with a light salad. For a fun twist, add some grilled chicken or shrimp. This adds protein and makes a complete meal. In this post, we explored the best veggies for skewers, how to make a tasty marinade, and the art of grilling. You learned about choosing the right vegetables and ensuring they cook evenly. We also touched on ways to add protein and create unique flavors. Don't forget to store any leftovers properly. Grilled veggie skewers are fun, healthy, and easy. With these tips, you can enjoy delicious skewers any time! Now, it’s time to fire up the grill and get cooking!

Garlic Herb Grilled Veggie Skewers Flavorful and Easy

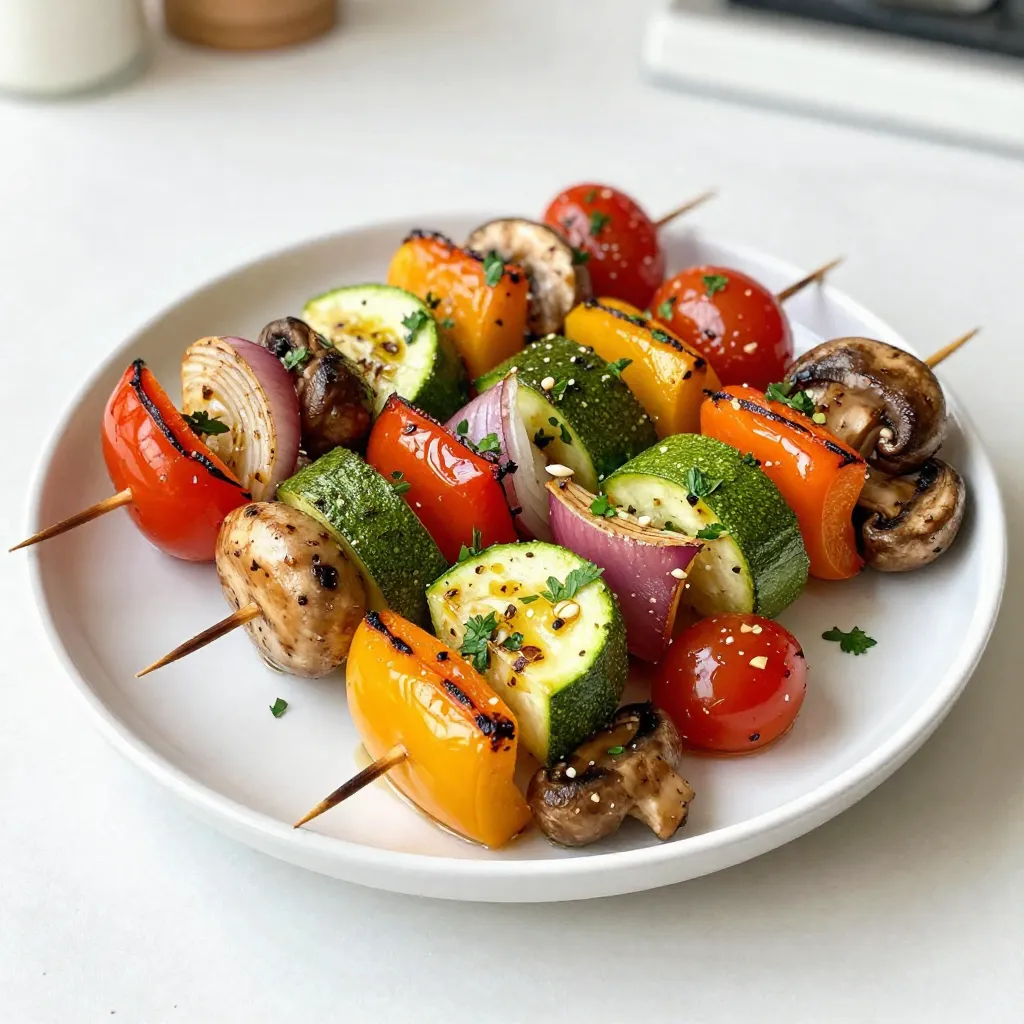
Looking to spice up your next cookout? Garlic Herb Grilled Veggie Skewers are here to elevate your grilling game! With

- 1 ripe mango, diced - 1 can (15 oz) black beans, rinsed and drained - 1 red bell pepper, finely chopped - 1 small red onion, finely chopped - 1 jalapeño, seeded and minced - 1/4 cup fresh cilantro, chopped - Juice of 2 limes - 2 tablespoons olive oil - Salt and pepper to taste To make this Mango Black Bean Salsa, you need fresh and flavorful ingredients. Start with a ripe mango. It should feel soft when you squeeze it gently. This ensures you get the best sweetness. Next, grab a can of black beans. Rinsing and draining them helps remove excess sodium. This makes your salsa healthier. You will also need a red bell pepper. Its color adds vibrancy, and its crunch gives texture. A small red onion brings a mild onion flavor. It complements the sweetness of the mango. The jalapeño adds a spicy kick. Be sure to remove the seeds if you prefer less heat. Fresh cilantro gives a fresh, herbal note. If you dislike cilantro, you can skip it or use parsley. Lime juice brightens the dish. It adds tartness that balances the sweetness of the mango. Olive oil brings a rich flavor and helps meld all the ingredients. Finally, season with salt and pepper to bring out all the flavors. Now, you're ready to create this tasty dish! Use the Full Recipe for detailed steps. To make Mango Black Bean Salsa, follow these easy steps. This dish is simple and fun to prepare. - First, take a large mixing bowl. Combine the diced mango, black beans, finely chopped red bell pepper, and red onion in the bowl. The mango adds a sweet touch, while the beans give you a hearty base. - Next, add the minced jalapeño and chopped cilantro. The jalapeño brings a nice kick, and cilantro gives a fresh flavor. - In a separate small bowl, mix the lime juice, olive oil, salt, and pepper to create the dressing. This mixture ties all the flavors together. - Pour the dressing over the salsa mixture. Toss everything gently to combine. Make sure all the ingredients are well-coated. - Finally, taste the salsa and adjust the seasoning if needed. You may want to add more lime juice, salt, or pepper based on your preference. - Let the salsa sit for about 10-15 minutes. This time allows the flavors to meld together, making each bite more delicious. For the full recipe, check the ingredients and instructions in the previous sections. Enjoy your vibrant and refreshing salsa! Choosing the right mango is key. A ripe mango feels firm yet gives a little when pressed. Look for skin that turns from green to a yellow or red hue. This means it is sweet and ready to eat. For fresh cilantro, check the leaves. They should be bright green and not wilting. Fresh cilantro adds flavor. If it's brown or slimy, skip it. Always pick the best herbs for your dish. When using jalapeño, taste it first. Some are mild, while others are hot. Remove the seeds for less heat. You can also add more if you like a spicy kick. Balance is important! Mango Black Bean Salsa pairs well with grilled chicken or fish. It also makes a great topping for tacos. You can serve it with tortilla chips for a fun snack. For presentation, use a colorful bowl. This adds flair to your table. You can also spoon the salsa into small cups for guests. Garnish with cilantro leaves or lime wedges. This makes it look even more inviting. Want the full recipe? Check out the [Full Recipe] for all the steps! {{image_2}} You can make Mango Black Bean Salsa even better with a few additions. - Incorporating corn for extra sweetness: Sweet corn brings a lovely crunch. It adds a pop of sweetness that pairs well with the mango. Just toss in a cup of fresh or canned corn. - Adding avocado for creaminess: Avocado adds a rich and creamy texture. Dice one ripe avocado and fold it in gently to keep it intact. It makes the salsa smooth and delicious. - Experimenting with different chili peppers for varying heat levels: If you like heat, try different peppers. Swap the jalapeño for a serrano for more spice. For milder salsa, use a bell pepper instead. You can easily adjust this salsa to fit your diet. - Making it vegan-friendly: This recipe is naturally vegan. All the ingredients are plant-based, so you can enjoy it without worry. - Gluten-free considerations: This salsa is also gluten-free. Just ensure your tortilla chips or any sides are labeled gluten-free. Enjoy these variations to make your Mango Black Bean Salsa unique and tailored to your taste! Find the full recipe above to get started. To keep your Mango Black Bean Salsa fresh, store it in an airtight container. This helps keep out air and moisture. Place it in the fridge right after serving. The salsa will taste best within 3 days. After that, the flavors may fade, and the texture can change. If you notice any odd smells or changes in color, it's best to toss it out. You can freeze Mango Black Bean Salsa if you have extra. First, scoop it into a freezer-safe bag. Remove as much air as possible before sealing. This helps prevent freezer burn. Label the bag with the date. The salsa can stay in the freezer for up to 3 months. To thaw frozen salsa, move it to the fridge overnight. You can also run the bag under cold water for a quicker thaw. After thawing, give it a good stir. You may want to add a splash of lime juice to brighten the flavors. Serve it with chips or as a topping on grilled chicken or fish. Can I make Mango Black Bean Salsa ahead of time? Yes, you can make this salsa ahead of time. The flavors get better as they sit. I recommend making it a few hours ahead. Just store it in the fridge in a sealed container. What are some good pairings for this salsa? Mango Black Bean Salsa pairs great with tacos, grilled chicken, or fish. You can also enjoy it with tortilla chips. It shines as a fresh topping for salads, too. How can I adjust the spice level in the recipe? To adjust spice, you can change the amount of jalapeño. For milder salsa, use less or remove the seeds. If you like it spicy, add more jalapeño or even a hotter pepper. Mango Black Bean Salsa is not only tasty but also healthy. It offers many nutrients. The mango adds vitamins A and C, while black beans provide protein and fiber. Each serving has about 100 calories. It also contains essential minerals and healthy fats from olive oil. Enjoy this dish for a nutritious snack or side! This blog post detailed a simple, tasty Mango Black Bean Salsa. We covered the fresh ingredients, easy steps, and helpful tips. You can add your touch with variations for flavor and dietary needs. Store leftovers safely and enjoy them later. In summary, this salsa is not just delicious; it’s versatile and healthy. By following these steps, you can impress your friends and family at any gathering. Enjoy making it and exploring the many ways to customize your salsa!

Mango Black Bean Salsa Flavorful and Refreshing Dish

Are you ready for a burst of flavor? Mango Black Bean Salsa is a tasty treat that brings bright colors

- Eggs and dairy components: Start with 3 large eggs. They give the omelette its structure. Add 2 tablespoons of milk for creaminess. You can use any milk you like. - Recommended vegetables: Choose a mix of colorful veggies. I like using: - 1/4 cup diced bell peppers (red, yellow, and green) - 1/4 cup finely chopped red onion - 1/4 cup halved cherry tomatoes - 1/4 cup chopped spinach These add flavor and a nice crunch. - Optional herbs and seasonings: For extra taste, add salt and pepper to your eggs. You can garnish with fresh herbs like parsley or chives. These add a fresh touch and visual appeal. Using these ingredients, you can create a tasty and healthy meal. Make sure to check the [Full Recipe] for all the details! Whisking the egg mixture Start by cracking three large eggs into a mixing bowl. Add 2 tablespoons of milk for creaminess. Use a whisk to blend until the mix is frothy. Add a pinch of salt and pepper for flavor. This step is key for a fluffy omelette. Sautéing the vegetables Next, heat 1 tablespoon of olive oil or butter in a non-stick skillet over medium heat. Once hot, add 1/4 cup of diced bell peppers and 1/4 cup of red onion. Sauté for about 2-3 minutes until they soften. Then, add 1/4 cup of halved cherry tomatoes and 1/4 cup of chopped spinach. Cook for another 2 minutes until the spinach wilts. The colors and smells will make your kitchen come alive. Cooking the omelette Now, pour the egg mixture into the skillet. Swirl it around so the veggies spread evenly. Cook for about 3-4 minutes. Watch for the edges to lift from the pan. When the eggs are nearly set but still a bit runny on top, sprinkle 1/4 cup of shredded cheddar cheese on one half. Use a spatula to fold the omelette in half, covering the cheese. Cook for another minute to melt the cheese. Finally, slide the omelette onto a plate and garnish with fresh herbs. Importance of using a non-stick skillet Using a non-stick skillet is crucial. It helps the omelette slide out easily without burning. This means less mess and more time to enjoy your meal. Tips for folding the omelette When folding, do it gently. This keeps the filling inside and ensures a nice presentation. Use a spatula to lift the edge and fold it over without breaking it. Practice makes perfect! To make the best veggie omelette, you need to know the right cooking temperatures. I recommend using medium heat. This heat cooks the eggs without burning them. If the heat is too high, the eggs can become tough. If it's too low, they can turn out runny. Common mistakes can ruin your omelette. One mistake is overcooking. Keep an eye on the eggs. They should be set but still a bit soft on top. Another mistake is not using the right pan. A non-stick skillet helps the omelette slide out easily. Make sure to add oil or butter to avoid sticking. Spices can bring your omelette to life. I suggest using black pepper, paprika, or even a pinch of cayenne for some heat. Fresh herbs like parsley or chives add a nice touch, too. Seasoning is key to a great omelette. Don't skip the salt. A little salt enhances the flavors of the eggs and veggies. Taste as you go. You can always add more, but you can't take it out once it's in. For a detailed recipe to get started, check the Full Recipe. {{image_2}} You can easily switch out the cheese in your veggie omelette. Here are some tasty choices: - Feta cheese adds a nice tang. - Goat cheese brings a creamy texture. - Mozzarella melts beautifully and is mild. You can also try different veggies. Here are a few options: - Mushrooms give a savory depth. - Zucchini adds a fresh crunch. - Broccoli is packed with nutrients and flavor. If you want a vegan omelette, try using plant-based egg alternatives. Here are some popular choices: - Chickpea flour makes a fluffy base. - Silken tofu blends well for a creamy texture. For cheese, use non-dairy substitutes like: - Nutritional yeast adds a cheesy flavor. - Cashew cheese gives creaminess without dairy. These swaps keep your omelette delicious and cater to different diets. For the full recipe, check out the Colorful Veggie Delight Omelette. To keep your veggie omelette fresh, you need to store it right. First, let the omelette cool down. This helps prevent moisture build-up. Next, wrap it in plastic wrap or place it in an airtight container. This keeps out air and moisture. You can keep it in the fridge for up to three days. When you're ready to eat, just reheat it in a skillet or microwave until hot. This method helps keep the flavors intact. If you want to save your omelette for later, freezing works well. Start by letting the omelette cool completely. Then, wrap it tightly in plastic wrap. After that, place it in a freezer bag or container. Make sure to remove as much air as possible. You can freeze the omelette for up to one month. When you're ready to eat, thaw it overnight in the fridge. Reheat it gently in a skillet or microwave. This keeps the texture nice and fluffy. For more details, check out the Full Recipe. To stop your omelette from sticking, always use a non-stick skillet. This type of pan helps the omelette slide out easily. Before you pour in the eggs, heat the skillet on medium heat. Add some olive oil or butter and let it warm up. Swirl the fat around to coat the pan. Once it’s hot, add your veggies. Then, pour in the egg mix. This method really helps! Yes, you can prep your omelette in advance! You can chop the veggies and mix the eggs a few hours ahead. Store the veggies and egg mix in separate containers in the fridge. When you are ready to eat, just heat the skillet and cook it fresh. This keeps the flavors bright and tasty. You can tell your omelette is done by checking the edges. They should lift slightly from the pan. The center should still be a bit soft, but not runny. When you fold it over, the cheese should melt inside. If it looks golden brown and puffs up a little, it’s ready to eat. Enjoy your colorful veggie delight! For the full recipe, check out the details above. You can now make a tasty veggie omelette with ease. Start with fresh ingredients and follow the steps provided. Don’t forget the tips for flavor and cooking techniques. Try different veggies and cheese to find your favorite mix. If you plan to save leftovers, remember to store them properly. With practice, you’ll perfect your omelette every time. Enjoy the process and have fun experimenting!

Easy Veggie Omelette Flavorful and Simple Recipe

Looking for a quick and delicious meal? This Easy Veggie Omelette is packed with flavor and simple to make! With

- 1 lb boneless, skinless chicken thighs - 2 medium carrots, sliced - 2 celery sticks, diced - 1 medium onion, chopped - 3 cloves garlic, minced For this recipe, I love using chicken thighs. They stay juicy and flavorful. You can also use chicken breasts if you prefer. Fresh veggies add color and taste. Carrots, celery, and onion form a classic base. Garlic adds a nice kick and aroma. - 1 teaspoon dried thyme - 1 teaspoon dried rosemary - 1 bay leaf - Fresh parsley, chopped (for garnish) Herbs elevate the soup's flavor. Thyme and rosemary bring warmth and depth. The bay leaf adds a lovely subtlety. Don’t forget fresh parsley at the end. It adds freshness and makes your soup look pretty. - 8 cups low-sodium chicken broth - 2 cups egg noodles - 2 tablespoons olive oil - Salt and pepper to taste Low-sodium chicken broth is key. It allows you to control the saltiness. Olive oil helps sauté the veggies and adds richness. Egg noodles soak up the flavors well. Always taste and adjust the salt and pepper as needed. - Fresh parsley - Additional spices Garnishes make a dish special. Fresh parsley adds a pop of color. You can also sprinkle in some extra spices if you like. A pinch of red pepper flakes can add heat for those who enjoy a kick. You can find the Full Recipe at the end for all the steps! Preparing the vegetables Start by washing and chopping your vegetables. Slice your carrots into thin rounds. Dice the celery sticks into small pieces. Chop the onion into small bits. Mince the garlic cloves finely. This prep makes your soup more tasty and colorful. Searing the chicken Next, heat two tablespoons of olive oil in a large pot over medium heat. Once hot, add the chopped onion. Sauté for about 3-4 minutes until it is soft and clear. Then, add the minced garlic, sliced carrots, and diced celery. Stir these for another 5 minutes until they soften a bit. Push the veggies to the sides of the pot. Place 1 pound of boneless, skinless chicken thighs in the center. Sear the chicken for 2-3 minutes on each side until it turns golden brown. This step locks in the flavors. Sautéing and adding ingredients After searing the chicken, pour in 8 cups of low-sodium chicken broth. Add 1 teaspoon of dried thyme, 1 teaspoon of dried rosemary, and 1 bay leaf. Sprinkle in salt and pepper to taste. Bring this mixture to a boil. The aroma will start to fill your kitchen! Simmering the soup Once it boils, lower the heat to a gentle simmer. Cover the pot and let it cook for 20-25 minutes. This allows the chicken to cook and the flavors to meld. Shredding chicken When the chicken is fully cooked, take it out of the pot. Let it cool for a few minutes. Use two forks to shred the chicken into bite-sized pieces. Adding noodles Return the shredded chicken to the pot. Add 2 cups of egg noodles and stir. Simmer for another 8-10 minutes until the noodles are soft. Taste your soup and adjust the salt and pepper if needed. Don’t forget to remove the bay leaf before serving! Garnish each bowl with fresh chopped parsley for a bright touch. Enjoy your Homemade Chicken Noodle Soup! For a complete guide, check out the Full Recipe. - Choosing the right chicken: I recommend using boneless, skinless chicken thighs. They stay moist and tender. Thighs bring rich flavor to the soup. If you prefer, you can also use chicken breasts, but they may dry out. - Importance of low-sodium broth: Using low-sodium chicken broth helps control salt levels. You can always add salt later, but you can't take it out once added. This broth also lets the flavors of the chicken and veggies shine through. - Alternative vegetables: You can mix in other veggies. Try adding peas, corn, or spinach. These add color and nutrients. Experiment with what you have in your fridge. - Gluten-free noodles: If you need a gluten-free option, use rice noodles or gluten-free pasta. They work well in the soup and still taste great. - Pairing with bread: Serve your soup with bread. A warm, crusty baguette or soft rolls makes a perfect match. Dipping bread in the soup adds a cozy touch. - Recommended side dishes: Consider a simple side salad or steamed vegetables. These pair well and add balance to your meal. You can also enjoy it with a light fruit salad for a refreshing finish. {{image_2}} You can make low-calorie changes to your soup. Use skinless chicken breasts instead of thighs. This cuts fat but keeps it tasty. You can also switch to whole wheat noodles for extra fiber. For a lighter version, use vegetable broth instead of chicken broth. If you are looking for vegetarian adaptations, try using chickpeas or lentils. These add protein and texture. You can replace chicken with tofu or seitan as well. Add your favorite veggies to make it heartier. To give your soup some spice, add red pepper flakes or cayenne pepper. This will make the soup warm and exciting. You can also try adding a splash of hot sauce for a kick. Using different herbs can change the taste too. Fresh basil or cilantro can give a fresh twist. You might also like to add a bit of lemon zest to brighten the flavors. I love making memory meals. This soup is a great way to bond with kids. You can let them help with simple tasks, like adding noodles or herbs. For simplified flavors, keep it mild. Skip strong spices and stick to salt and pepper. Use fun shapes of pasta to make it more appealing. Kids love a little playfulness in food. To store leftovers, let the soup cool down first. Pour it into an airtight container. This keeps the soup fresh and tasty. You can store it in the fridge for up to four days. Make sure it's sealed well to avoid any fridge odors. For freezing, use a freezer-safe container. Leave some space at the top for expansion. This soup can last in the freezer for up to three months. When you're ready to eat it, thaw it in the fridge overnight. This keeps it safe and helps the flavor stay strong. To reheat your soup, you can use the stove or microwave. On the stove, heat it gently over medium heat. Stir often to avoid burning. If using the microwave, heat in short bursts, stirring in between. This helps keep the noodles from getting too soft. Always check the temperature before serving. You want it hot but not boiling. Enjoy your comforting bowl of chicken noodle soup! Homemade chicken noodle soup lasts about 3 to 4 days in the fridge. Store it in an airtight container. Make sure to cool it down before putting it away. If you want to keep it longer, freeze it. It can last up to 3 months in the freezer. Yes, you can use rotisserie chicken. It saves time and adds flavor. Just shred the chicken and add it to the soup. This is a great way to make the soup faster when you are busy. Many side dishes pair well with chicken noodle soup. Here are some popular choices: - Crusty bread - Grilled cheese sandwich - Simple green salad - Crackers or breadsticks These sides add more texture and flavor to your meal. You can make chicken noodle soup in a slow cooker. Just follow these steps: 1. Add all the ingredients except the noodles to the slow cooker. 2. Cook on low for 6 to 8 hours or on high for 3 to 4 hours. 3. After cooking, shred the chicken and return it to the pot. 4. Add the egg noodles and cook for an additional 30 minutes on high. This method makes it easy and hands-off, perfect for busy days. For the full recipe, check the cooking instructions above. In summary, you learned about key ingredients for great chicken noodle soup, from fresh chicken and veggies to pantry staples and garnishes. I shared step-by-step instructions for preparation, cooking, and the final touches. You got tips on cooking, substitutions, and serving ideas. Variations included health-conscious and kid-friendly options. Finally, we covered storage and FAQs to make your soup last. Now it's time for you to create your own delicious version. Enjoy the warmth and flavor of homemade soup!

Homemade Chicken Noodle Soup Comforting and Easy Recipe

Warm, hearty, and packed with flavor, homemade chicken noodle soup is the ultimate comfort food. In this easy recipe, I’ll

- 1 large bag of tortilla chips - 1 can (15 oz) black beans, drained and rinsed - 1 cup corn kernels (fresh or frozen) - 2 cups shredded cheddar cheese - 1 cup shredded Monterey Jack cheese - 1 jalapeño, sliced - 1 ripe avocado, diced - 1 cup salsa (your choice of mild or spicy) - ½ cup sour cream - 2 green onions, chopped - Fresh cilantro leaves, for garnish - Olive oil for drizzling - Salt and pepper, to taste When making Loaded Nacho Supreme, quality ingredients matter. I always choose a big bag of crunchy tortilla chips for the base. They hold up well under all that tasty goodness. Next, I add a can of black beans. They add fiber and protein to the dish. Corn kernels bring a sweet crunch that balances all the flavors. Cheese is a must, so I use both cheddar and Monterey Jack. They melt beautifully and create a rich, creamy texture. For spice, sliced jalapeños add a nice kick without overwhelming the dish. Don't forget the avocado! It adds creaminess and freshness. Salsa is key for flavor. You can pick mild or spicy based on your taste. Sour cream gives a cool finish, while green onions add a pop of color and taste. Fresh cilantro ties everything together. A drizzle of olive oil enhances the look and flavor. Finish with salt and pepper to taste for a perfect blend. For the full recipe, check out the detailed instructions. Enjoy each bite of this loaded delight! - Preheat your oven to 350°F (175°C). - Spread tortilla chips evenly on a baking sheet. - Mix black beans and corn with salt and pepper. To start, you need to preheat your oven. This step is key for getting your nachos nice and hot. Next, take a large baking sheet and spread your tortilla chips in a single layer. This helps them get crunchy. In a bowl, mix the black beans and corn. Add a bit of salt and pepper for taste. This adds flavor to your nachos. - Distribute the black bean and corn mixture over chips. - Sprinkle shredded cheeses over the top. - Add sliced jalapeños for extra heat. Now, it’s time to layer your nachos. Take that black bean and corn mix and spread it over the chips. Then, sprinkle the shredded cheeses generously on top. The more cheese, the better! If you like some heat, add sliced jalapeños. They give a nice kick. - Bake in preheated oven for 10-15 minutes until cheese is melted. - Let cool for a minute before adding toppings. Place your loaded nachos in the preheated oven. Bake them for about 10-15 minutes. You want the cheese to melt and bubble. Once they are done, take them out and let them cool for a minute. This stops the cheese from burning your tongue! - Top with diced avocado, salsa, and sour cream. - Garnish with green onions and cilantro. - Drizzle with olive oil before serving. Now comes the fun part! Top your nachos with diced avocado, salsa, and sour cream. These toppings add great flavor and creaminess. Next, sprinkle green onions and cilantro on top for some freshness. Finally, drizzle a bit of olive oil for a shiny finish. Your Loaded Nacho Supreme is ready to enjoy! Check the Full Recipe for more details. To make your nachos pop, I recommend using a mix of cheese types. Cheddar and Monterey Jack blend well and give a rich taste. Adding spices, like cumin or chili powder, brings out more flavor. Just a pinch can make a big difference. Nachos are great on their own, but serve them with sides for fun! Guacamole and pico de gallo add fresh flavors. Pair your nachos with drinks like soda, beer, or cocktails to elevate the meal. Make your nachos look as good as they taste. Use colorful platters to catch the eye. Layer the nachos high for a fun twist. This adds height and makes each bite exciting. For the full recipe, check out the complete instructions above! {{image_2}} You can switch up the beans in your Loaded Nacho Supreme. Substitute black beans with pinto or refried beans for a different taste. This small change can add creaminess or a new flavor. If you want more protein, consider adding cooked ground beef or chicken. These options can make the dish heartier and more filling. If you like things hot, try adding diced green chilies or a splash of hot sauce. These spicy additions will kick your nachos up a notch. For cheese lovers, swap out Monterey Jack for pepper jack cheese. This adds a nice kick and depth to the flavor profile. If you're following a vegetarian or vegan diet, there are easy swaps to make. Replace sour cream with non-dairy alternatives like cashew cream or coconut yogurt. For cheese, use cashew cheese or a vegan cheese blend. This way, everyone can enjoy a delicious plate of nachos. For the full recipe, check out the detailed instructions above. Store leftovers in an airtight container in the fridge. This keeps them fresh and tasty. The best time to eat them is within 1-2 days. After that, they may lose their crunch and flavor. Reheat in the oven for crispiness. This method ensures you get that delightful crunch back. Avoid using the microwave, as it can make the nachos soggy. To keep them moist, add a splash of water while reheating. This trick helps maintain the flavor and texture. For more cooking ideas, check out the Full Recipe. You can use vegetable chips or baked pita chips. These options provide a crunchy base for your nachos. They also add a unique flavor twist. Consider trying different brands to find your favorite. Yes, you can prepare layers separately. Store them in the fridge until you are ready to bake. This method keeps the chips fresh and crisp. Assemble the nachos right before baking for the best results. To avoid soggy nachos, bake them on a wire rack. This allows hot air to circulate around the chips. You can also broil them for a crispy finish. Broiling adds a nice texture without making them wet. A mix of cheddar and Monterey Jack works best. Cheddar gives great flavor, while Monterey Jack melts beautifully. This combination creates that gooey, cheesy goodness we all love. Try adding a bit of pepper jack for extra heat! You can create delicious loaded nachos using simple ingredients and easy steps. Start with tortilla chips and add your favorite toppings. Bake until cheesy and hot. Don’t forget to add your personal touch with extra spices or different vegetables. These nachos are perfect for gatherings or a fun snack. Enjoy them fresh or make them unique with different flavors. Happy nacho making!

Loaded Nacho Supreme Tasty and Flavorful Delight

Are you ready to dive into a cheesy, crunchy world of flavor? My Loaded Nacho Supreme is the ultimate crowd-pleaser

To make this dip, you need some simple ingredients. Here’s what you will need: - 1 cup fresh spinach, chopped - 1 cup canned artichoke hearts, drained and chopped - 1 cup cream cheese, softened - 1 cup sour cream - 1 cup shredded mozzarella cheese - 1/2 cup grated Parmesan cheese - 2 cloves garlic, minced - 1 teaspoon lemon juice - 1/2 teaspoon red pepper flakes (optional) - Salt and pepper to taste - 1/2 teaspoon dried oregano Each ingredient plays a key role. The spinach gives a fresh taste, while the artichokes add a unique flavor. Cream cheese and sour cream make it rich and creamy. Mozzarella and Parmesan add cheesy goodness. Garlic gives it depth, and lemon juice adds brightness. This dip is not only tasty but also has some nutritional value. One serving contains: - Calories: About 250 - Protein: 10g - Carbohydrates: 8g - Fat: 20g The combination of spinach and artichokes gives you some vitamins and minerals. Spinach has iron and calcium. Artichokes offer fiber and antioxidants. Enjoying this dip in moderation is a tasty treat. You can swap out some ingredients if you need to. For a lighter dip, use Greek yogurt instead of sour cream. You can also use low-fat cream cheese. If you like a bit of spice, add more red pepper flakes. If you don’t have fresh spinach, you can use frozen spinach. Just make sure to thaw and drain it well. You can also mix in other veggies like bell peppers or mushrooms for a twist. For the full recipe, check out the details in the main article. To make this dip, gather your ingredients first. You need fresh spinach, artichoke hearts, cream cheese, sour cream, mozzarella cheese, and Parmesan cheese. Don’t forget the garlic and spices! This recipe takes about 10 minutes to prep and 25 minutes to bake. 1. Preheat your oven to 375°F (190°C). 2. In a big bowl, mix the softened cream cheese and sour cream. Use a spatula to blend them well. 3. Add in the chopped spinach and artichoke hearts. Toss in the minced garlic, lemon juice, and mozzarella cheese. 4. Sprinkle in the Parmesan cheese, red pepper flakes, oregano, salt, and pepper. Stir until it’s all combined. 5. Pour the mixture into a baking dish. Spread it evenly with your spatula. 6. Bake for 20-25 minutes. Look for a bubbly, golden brown top. 7. Let it cool for a few minutes before you dig in! - Keep an eye on the time. If you overbake, the dip can dry out. - For a crispier top, broil for 1-2 minutes after baking. - Always serve warm for the best taste! Remember to check the [Full Recipe] for more details! One big mistake is overcooking the dip. Keep an eye on it while baking. You want it bubbly and golden brown, not burnt. Another mistake is not draining the artichokes well. Excess liquid can make your dip watery. Always drain them thoroughly before mixing. Lastly, don’t forget to taste as you go. Adjust the salt and pepper for the best flavor. To boost flavor, add more garlic. I love using three cloves instead of two. You can also sprinkle in some fresh herbs, like basil or parsley, right before serving. These add brightness. A splash of hot sauce can give your dip a nice kick. If you want a zesty twist, try adding a bit of lemon zest. It brightens up the whole dish. For a creamy texture, use softened cream cheese. Let it sit out before you start cooking. Mixing it well with the sour cream is key. Another tip is to fold in the cheese gently. This keeps the dip fluffy. If you want extra creaminess, try adding a splash of heavy cream. It makes the dip rich and smooth. {{image_2}} You can easily make this spinach artichoke dip healthier. Use Greek yogurt instead of sour cream. This swap adds protein and cuts fat. You can also use low-fat cream cheese for fewer calories. If you want a dairy-free option, try cashew cream or a vegan cream cheese. Both can taste great and still keep the dip creamy. Cheese can change the flavor of your dip. Instead of mozzarella, try cheddar or gouda for a richer taste. You could also use a blend of cheeses for more depth. Cream cheese is a must for that smooth texture. Parmesan adds a nice salty kick. Mixing cheeses can make your dip unique. Feel free to get creative with seasonal ingredients. In spring, add fresh herbs like basil or dill. In the fall, mix in roasted pumpkin for a sweet twist. You can also try adding sun-dried tomatoes for a burst of flavor. These small changes can make your spinach artichoke dip new and exciting. Check out the Full Recipe for more ideas! To keep your spinach artichoke dip fresh, store it in an airtight container. Make sure it cools down to room temperature first. This helps to avoid steam buildup, which can make the dip soggy. You can keep it in the fridge for up to 3 days. If you want to save it longer, consider freezing it. When it’s time to enjoy leftovers, preheat your oven to 350°F (175°C). Place the dip in an oven-safe dish. Cover it with foil to prevent burning. Heat for about 15 to 20 minutes, or until it’s warm and bubbly. You can also reheat it in the microwave. Just cover the dish and heat in short bursts, stirring in between. If you want to freeze your dip, use a freezer-safe container. It can last for up to 2 months in the freezer. When ready to eat, transfer it to the fridge to thaw overnight. Once thawed, follow the reheating instructions. This keeps the dip creamy and tasty. Enjoy your creamy spinach artichoke bliss dip whenever you want! You can make spinach artichoke dip ahead of time. Just mix all the ingredients and place them in a baking dish. Cover the dish tightly with plastic wrap and store it in the fridge. You can keep it there for up to two days. When you're ready to bake, remove the wrap and pop it in the oven. Bake it as directed in the Full Recipe. This way, you save time and still enjoy a hot dip. Yes, you can use fresh artichokes instead of canned. Fresh artichokes need some prep work. First, you must clean them and remove the tough outer leaves. Then, cook them in boiling water for about 30 minutes until they are tender. After cooling, chop the hearts and mix them into your dip. This gives a fresh taste to your dish. Just remember, canned artichokes save time! You can serve spinach artichoke dip with many tasty options. Pita chips are a classic choice. They add a nice crunch. Fresh veggies like carrots, celery, and bell peppers also work well. These add color and flavor. For something different, try tortilla chips or toasted baguette slices. You can even use crackers for dipping. This dip is versatile and pairs well with many snacks. Enjoy making your spread! Spinach Artichoke Dip is a delicious and easy dish. This blog showed key ingredients, cooking steps, and tasty tips. Remember to avoid common mistakes for the best flavor. You can experiment with healthy swaps or different cheeses to customize your dip. Store properly to keep it fresh. I hope you feel ready to make your delicious dip and impress your friends. Enjoy every creamy bite!

Savory Spinach Artichoke Dip Easy and Delicious Recipe

If you’re craving a dip that’s rich, creamy, and packed with flavor, you’re in the right place! My easy and

- 2 lbs baby potatoes, halved - 1/2 cup mayonnaise - 1/4 cup plain Greek yogurt - 2 tablespoons Dijon mustard - 1 tablespoon apple cider vinegar - 1/4 cup celery, finely chopped - 1/4 cup red onion, finely chopped - 1/2 cup fresh parsley, chopped - 1/2 teaspoon garlic powder - Salt and pepper to taste - Optional: 1/4 cup sweet pickles, diced - Large pot - Mixing bowl - Whisk - Colander - Plastic wrap The ingredients for classic potato salad are simple yet flavorful. The baby potatoes form the base of this dish. I use halved baby potatoes for their tender texture and great flavor. If you want a creamy dressing, I mix mayonnaise and Greek yogurt. This combo gives the salad a nice tang and richness. To add flavor, I include Dijon mustard and apple cider vinegar. The mustard adds depth, while the vinegar brings a bright note. Chopped celery and red onion add crunch and a little zest. Fresh parsley brightens the salad with color and flavor. Garlic powder adds a nice hint of warmth. Season to taste with salt and pepper to tie everything together. If you like a sweeter touch, add diced sweet pickles. These optional ingredients make the salad even more special. Gather these ingredients, and you're ready to make a delicious classic potato salad! For the complete instructions, check out the Full Recipe. - Step 1: Start by boiling the potatoes. Place 2 lbs of halved baby potatoes in a large pot. Cover them with cold water and add a pinch of salt. Bring the pot to a boil over high heat. Once boiling, reduce to a simmer. Cook until the potatoes are fork-tender, about 10-15 minutes. - Step 2: After cooking, drain the potatoes. Let them cool for a bit. Once cool enough to handle, chop any larger pieces into bite-sized chunks. This helps everyone enjoy each bite. - Step 3: Now, let’s mix the dressing. In a mixing bowl, combine 1/2 cup mayonnaise, 1/4 cup plain Greek yogurt, 2 tablespoons Dijon mustard, 1 tablespoon apple cider vinegar, and 1/2 teaspoon garlic powder. Add salt and pepper to taste. - Step 4: Whisk the mixture until it is fully combined. This creates a creamy and tangy dressing that makes the potato salad shine. - Step 5: It’s time to bring everything together. Gently fold the cooled potatoes into the dressing. Add the chopped celery, red onion, and parsley. If you like, toss in 1/4 cup of sweet pickles for extra flavor. - Step 6: Taste your salad and adjust the seasoning if needed. Once you’re happy with the flavor, cover the bowl with plastic wrap. Refrigerate for at least 1 hour. This allows the flavors to meld beautifully. You can find the full recipe in the earlier section, which details everything you need for this creamy potato salad. Enjoy! To get tender potatoes, cook them for 10-15 minutes. Start with cold water and a good pinch of salt. This helps the potatoes cook evenly. Test them with a fork. If it goes in easily, they are ready. For a creamy dressing, mix mayonnaise and Greek yogurt. Use equal parts for richness. Whisk until smooth. Add the Dijon mustard and apple cider vinegar to enhance flavor. This will give you a thick and creamy dressing. Use fresh herbs like parsley or dill for a pop of flavor. Chopped celery adds crunch, while red onion gives a nice bite. If you like a hint of sweetness, add diced sweet pickles. These make the potato salad taste fresh and bright. Refrigerating the salad is key. Let it chill for at least one hour. This helps the flavors blend well. You’ll notice a big difference in taste after it sits. For a fun presentation, serve the potato salad in a big, colorful bowl. Garnish with extra parsley on top. Another cute idea is to use small mason jars for serving. This makes for a great picnic dish! Pair the potato salad with grilled meats or fresh veggies. It goes well with burgers, hot dogs, or even a nice piece of fish. This makes your meal complete and satisfying. For the full recipe, check out the detailed instructions above. {{image_2}} Southern-style potato salad stands out for its creamy texture and sweet flavor. The key ingredients include sweet pickles, boiled eggs, and sometimes even mustard for a tangy twist. The dressing often mixes mayonnaise with a touch of pickle juice, adding a unique zing. You can also find celery and bell peppers for crunch. This style is creamy but not overly heavy, making it perfect for picnics and barbecues. German potato salad offers a different flavor profile. It is warm and tangy, often featuring bacon and a vinegar-based dressing. This dish uses waxy potatoes that hold their shape well. The dressing usually combines vinegar, mustard, and bacon fat, giving it a rich taste. You can top it with fresh herbs like chives or parsley for added flavor. This salad is great served warm and pairs well with grilled meats. For a vegan potato salad, you can easily swap out mayonnaise and yogurt. Use silken tofu blended with lemon juice for creaminess. You can also use avocado for a richer texture. Fresh herbs and spices can enhance the flavor without dairy. To make it even more exciting, add roasted garlic or smoked paprika. This version is perfect for those who want a plant-based option without missing out on taste. For the full recipe, check out the Creamy Herb Potato Delight 🥔 section. To keep your potato salad fresh, place it in an airtight container. This helps prevent air from drying it out. Make sure to seal the lid tight. You can also cover the bowl with plastic wrap. This keeps moisture in and flavors intact. You can store potato salad in the fridge for up to four days. Check for any changes in smell or color. If it smells sour or looks off, it’s best to throw it away. Always trust your senses when it comes to food safety. You can freeze potato salad, but it may change texture. The creamy dressing might separate when thawed. If you still want to freeze it, use a freezer-safe container. When ready to eat, thaw it in the fridge overnight. Stir well before serving to help restore some creaminess. To keep potatoes firm, choose waxy varieties like baby potatoes. Boil them for just 10-15 minutes until fork-tender. Drain and cool them quickly. This method helps retain their shape. Avoid overcooking, as that makes them mushy. Yes, you can use regular yogurt. However, Greek yogurt gives a thicker, creamier texture. If you prefer a lighter taste, go with regular yogurt. Just remember, it may alter the salad's creaminess a bit. If you want to skip mayonnaise, use avocado or hummus. Both provide creaminess and flavor. You can also mix yogurt with a little mustard for extra zest. This keeps the salad creamy and adds a unique twist. Potato salad is best served cold. Chilling lets the flavors blend and enhances the taste. After mixing, refrigerate for at least an hour. This cooling time makes a significant difference in flavor and texture. Let your potato salad sit for at least one hour. This waiting time allows flavors to meld beautifully. If you have more time, chill it longer for even better taste. Just cover it well in the fridge. For the full recipe, check out the Creamy Herb Potato Delight. This creamy herb potato salad is a classic dish that is both tasty and easy to make. It takes about 20 minutes to prep and 10-15 minutes to cook the potatoes. After mixing everything, you should let it chill for at least an hour. This recipe serves 6 to 8 people. Ingredients: - 2 lbs baby potatoes, halved - 1/2 cup mayonnaise - 1/4 cup plain Greek yogurt - 2 tablespoons Dijon mustard - 1 tablespoon apple cider vinegar - 1/4 cup celery, finely chopped - 1/4 cup red onion, finely chopped - 1/2 cup fresh parsley, chopped - 1/2 teaspoon garlic powder - Salt and pepper to taste - Optional: 1/4 cup sweet pickles, diced To make this salad, start by boiling the halved baby potatoes in a large pot with cold water and salt. Once they are fork-tender, drain them and let them cool. You can cut any larger pieces into smaller chunks. Next, whisk the mayonnaise, Greek yogurt, Dijon mustard, apple cider vinegar, garlic powder, salt, and pepper in a mixing bowl. When the potatoes are cool, add them to the dressing. Toss in the chopped celery, red onion, parsley, and sweet pickles if you want that extra crunch. Gently mix everything until the potatoes are coated well. Taste and adjust the seasoning if needed. Cover the bowl with plastic wrap and chill in the fridge. This allows all the flavors to blend nicely. Before serving, give the salad a gentle stir. For a nice touch, you can sprinkle some fresh parsley on top. Enjoy this creamy and flavorful delight! In this blog post, we explored how to make a tasty potato salad. We covered all the ingredients, from baby potatoes and mayonnaise to tasty seasonings. I shared step-by-step instructions and helpful tips to get the best texture and flavor. Whether you're aiming for Southern, German, or vegan styles, you can customize this dish. Remember to store leftovers properly for the best taste. Enjoy creating your perfect potato salad! It's a great dish for any meal.

Classic Potato Salad Creamy and Flavorful Delight

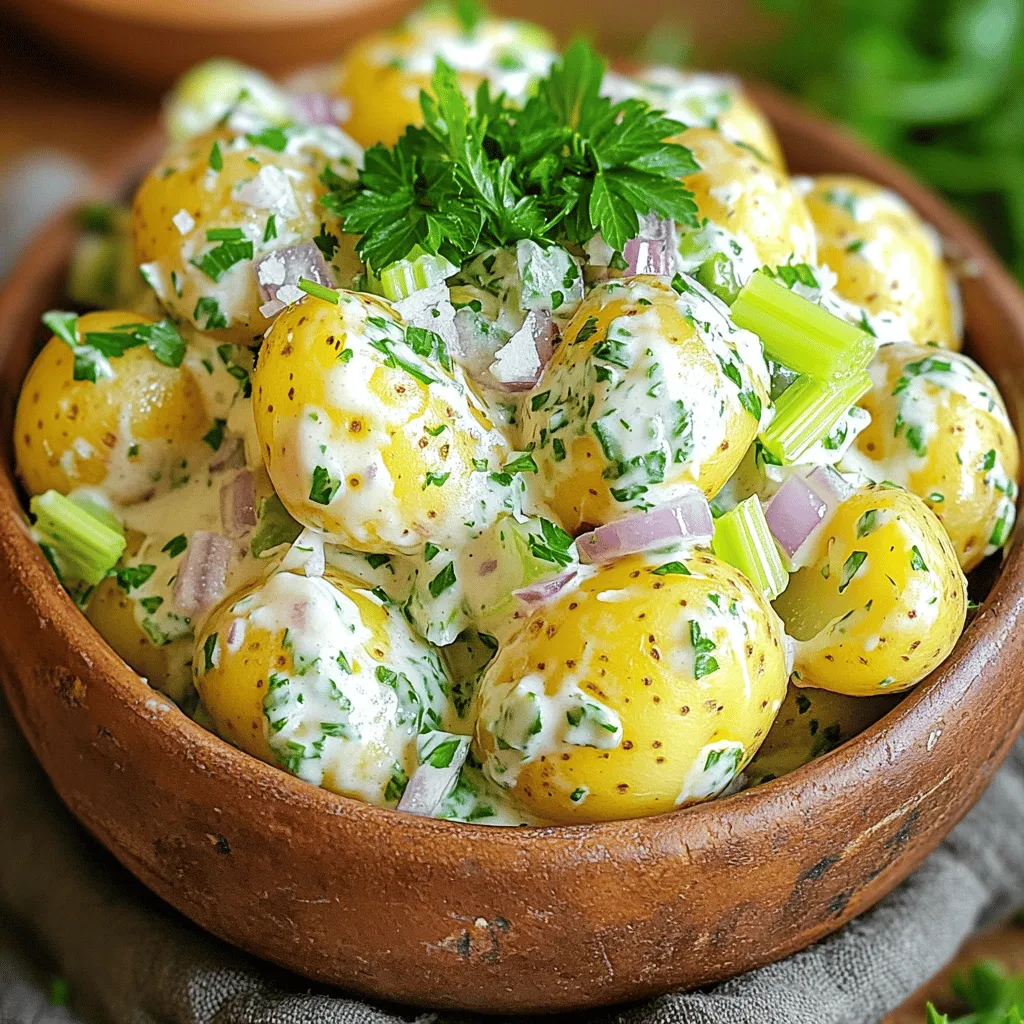
Are you ready to whip up the perfect potato salad? My Classic Potato Salad: Creamy and Flavorful Delight will become

- Bring a large pot of salted water to a boil. - Prepare an ice water bath for shocking the green beans. Start by boiling the water. Salt helps enhance the flavor. While waiting, get an ice bath ready. This fast cooling method keeps the beans bright green. - Sauté garlic in melted butter until fragrant. - Toss in blanched green beans and coat in garlic butter. Next, melt the unsalted butter in a large skillet over medium heat. Once the butter bubbles, add the minced garlic. Sauté it for about one to two minutes. You want it fragrant but not brown. After that, toss in the blanched green beans. Stir them well to coat in the garlic butter. Cook for another three to four minutes until heated through. - Add lemon zest, salt, and pepper to taste. - Transfer to serving dish and garnish with parsley. Finally, stir in the lemon zest, salt, and pepper. The zest gives a nice burst of flavor. Once mixed, remove from heat and transfer the green beans to a serving dish. Finish by garnishing with chopped parsley. This adds a fresh touch and color. To keep your green beans bright and crisp, blanch them first. Here’s how: - Bring a large pot of salted water to a boil. - Add the fresh green beans and cook for about 3-5 minutes. - Look for a vivid green color and tender-crisp texture. - Quickly transfer the beans to a bowl of ice water. This stops the cooking and locks in color. For the best results, don’t overcook them. Tender-crisp beans are the goal. You can easily boost the flavor of garlic butter green beans. Here are a few ideas: - Toss in some toasted nuts like almonds or walnuts for crunch. - Add cheese, such as grated Parmesan, for a savory touch. Balancing flavors makes a big difference. Think about adding a splash of lemon juice or vinegar for brightness. A pinch of red pepper flakes can also add a nice kick without overwhelming the dish. Garlic butter green beans pair well with many meals. They are great alongside roasted chicken or grilled steak. For a holiday table, serve them in a beautiful dish with a sprinkle of parsley on top. This adds color and makes the dish pop. For a casual dinner, you can serve them in a simple bowl. They are easy to make and look lovely on any table. {{image_2}} You can make garlic butter green beans even better with seasonal veggies. Think about adding bright asparagus or sweet baby carrots. These vegetables bring their own flavors and textures. You can also consider using fresh peas or even zucchini. Citrus adds a nice touch too. Try using orange zest instead of lemon. It gives a sweet and tangy twist. You can also mix in lime zest for a zesty kick. These small changes can brighten your dish and make it feel fresh. If you want a vegan option, swap the butter for olive oil. This keeps the dish tasty while making it plant-based. You can also use vegan butter if you prefer that. For those who need gluten-free meals, this recipe is already great. Just stick to the fresh ingredients and you’re good. Want a low-carb side? You can skip the butter and use a little broth instead. This keeps it light and healthy while still being flavorful. To add an international flair, think about spices. You could add soy sauce for an Asian vibe. A sprinkle of sesame seeds can give it a nutty crunch. For Mediterranean flavors, try adding oregano or thyme. These herbs work well with garlic and butter. If you want to go fusion, mix in some curry powder. It adds warmth and a unique taste. This simple change can turn your green beans into a dish full of surprises. With these variations, you can keep your garlic butter green beans fresh and exciting. For the full recipe, check out the detailed steps above. To keep your garlic butter green beans fresh, place them in an airtight container. This will help preserve their flavor and texture. Store them in the fridge for up to three days. If you want to enjoy them later, consider freezing them. When reheating, avoid the microwave if you can. Instead, use a skillet on low heat. This method keeps the beans crunchy. Add a splash of water or a bit of butter to help with moisture. If you freeze them, thaw in the fridge overnight. Then, reheat as you normally would. This will keep your garlic butter green beans tasty and vibrant. For the full recipe, check back to earlier sections. Yes, you can prep garlic butter green beans ahead of time. Start by trimming the green beans and mincing the garlic. You can also zest the lemon and chop the parsley. Store these items in separate containers in the fridge. When you're ready to cook, just blanch the green beans and sauté them with garlic and butter. This saves time and keeps your meal fresh. If you're sensitive to garlic, there are great substitutes. Try using shallots for a mild flavor. You can also use garlic-infused olive oil for a similar taste. Another option is to add leeks or chives for a fresh twist. These alternatives will keep your dish tasty without the garlic. To add heat without red pepper flakes, consider using jalapeños. Chop them finely and sauté with garlic. You can also add a dash of hot sauce for a kick. Another option is to sprinkle in some cayenne pepper. Adjust the amount to match your spice level. Enjoy the extra warmth in your garlic butter green beans! In this post, we explored how to make garlic butter green beans. You learned about key ingredients and preparation steps. I shared tips for perfect texture and flavor enhancements. We also discussed variations to fit dietary needs. Finally, I covered storage and reheating advice. Enjoy cooking these tasty green beans for any meal. With a few simple changes, you can make this dish your own!

Garlic Butter Green Beans Flavorful Side Dish Recipe

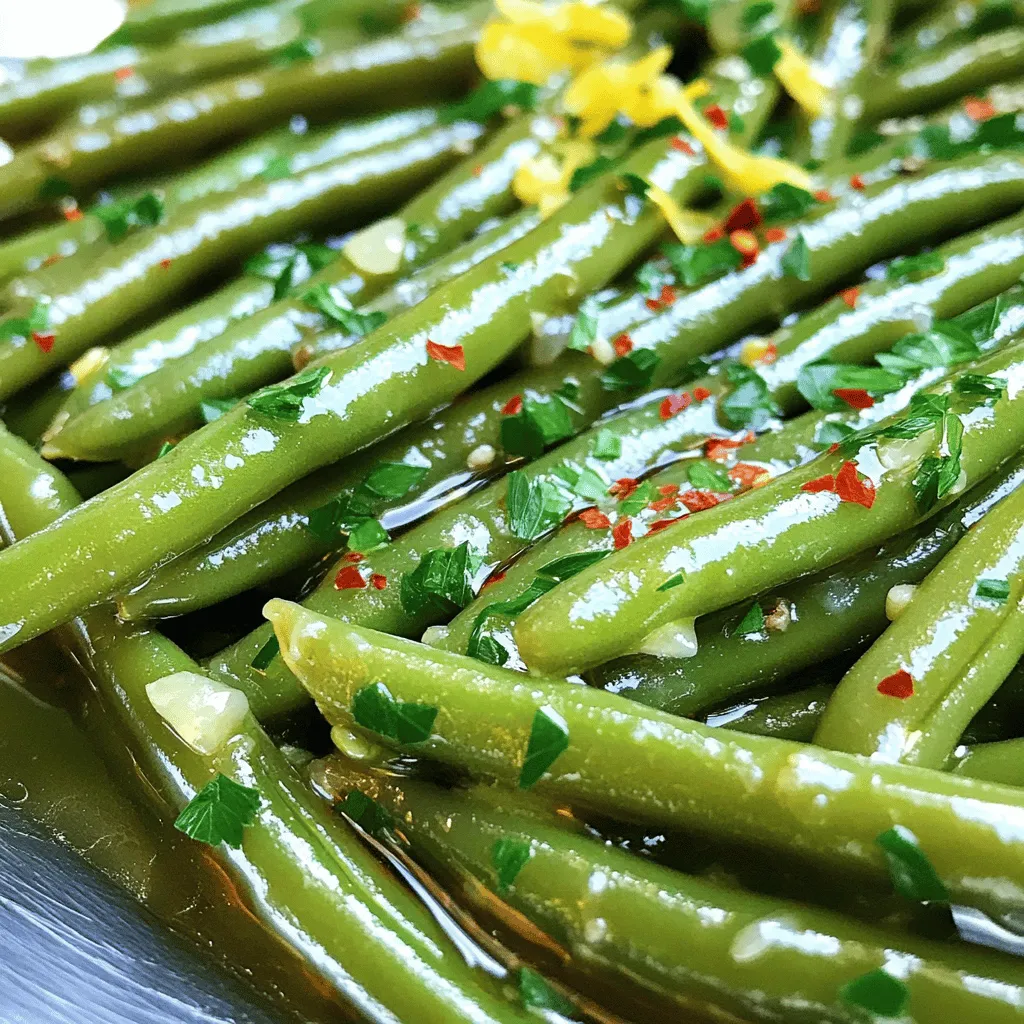
Looking for a simple yet delicious side dish? Garlic butter green beans are the perfect answer! With just a few

Older posts
Newer posts
← Previous Page1 … Page75 Page76 Page77 … Page84 Next →

dsad

© 2026 juliesdish • Built with GeneratePress

Our Policies

  • Copyright Policy
  • Cookie Policy
  • GDPR Policy
  • Privacy Policy
  • Disclaimer
  • Terms Of Use

More Information

  • Home
  • About
  • Contact
  • Appetizers
  • Dessert
  • Dinner
  • Drinks
©2026, juliesdish About Back To Top