Skip to content
DisclaimerTerms Of UseGDPR PolicyCookie Policy

juliesdish

  • Home
  • Drinks
  • Appetizers
  • Dinner
  • Dessert
  • About
  • Contact
  • Privacy Policy
DisclaimerTerms Of UseGDPR PolicyCookie Policy

NO-ING-IMG

To make a tasty Eggplant Parmesan Bake, gather these ingredients: - 2 medium eggplants, sliced into 1/4-inch rounds - 3 cups marinara sauce (homemade or store-bought) - 2 cups shredded mozzarella cheese - 1 cup grated Parmesan cheese - 2 cups all-purpose flour - 1 cup breadcrumbs (preferably Italian style) - 3 large eggs, beaten - 1 tablespoon dried oregano - 1 tablespoon fresh basil, chopped (or 1 teaspoon dried) - Salt and pepper to taste - Olive oil for brushing You’ll need a few tools to make this dish: - A sharp knife for slicing eggplants - A cutting board for prep work - Three bowls for the breading station - A large skillet for frying - A 9x13 inch baking dish for layering - Aluminum foil to cover the dish while baking - Measuring cups and spoons to ensure accuracy Quality matters when it comes to flavor. Here are some tips: - Choose firm, shiny eggplants with no blemishes. - Use fresh herbs for a bright taste. Dried herbs work too but may lack depth. - Select high-quality marinara sauce for the best flavor. Homemade sauce can really shine. - Opt for fresh mozzarella for a gooey texture. Pre-shredded cheese is convenient but may not melt as well. - Use fresh Parmesan cheese, grated right before use, for maximum flavor. When you gather the right ingredients, your Eggplant Parmesan Bake will shine. For the complete recipe, check out the Full Recipe section above. Start by prepping your eggplants. Slice two medium eggplants into 1/4-inch rounds. This size helps them cook evenly. Sprinkle salt over the slices and let them sit for 30 minutes. This step draws out excess moisture and bitterness. Rinse the slices and pat them dry with a clean towel. Next, set up your breading station. You need three bowls: one with 2 cups of all-purpose flour, one with 3 beaten eggs, and the last with 1 cup of breadcrumbs mixed with 1 tablespoon of dried oregano, 1 tablespoon of fresh basil (or 1 teaspoon of dried), salt, and pepper to taste. Now, it's time to coat the eggplant slices. Dip each slice into the flour and shake off the extra. Next, dip it into the beaten eggs, coating it well. Finally, coat it in the breadcrumb mixture. Make sure each piece is fully covered. Heat a large skillet over medium heat and add a drizzle of olive oil. Once the oil is hot, add the breaded eggplant slices in batches. Cook them until golden brown, about 3-4 minutes on each side. Transfer the cooked slices to a plate lined with paper towels to absorb excess oil. For the baking part, grab a 9x13 inch baking dish. Spread a thin layer of marinara sauce on the bottom. Layer half of the eggplant slices over the sauce. Then, add half of the marinara sauce, followed by half of the mozzarella cheese, and half of the Parmesan cheese. Repeat these layers with the remaining eggplant, marinara sauce, mozzarella, and Parmesan. Cover the baking dish with aluminum foil, making sure it doesn't touch the cheese. Bake in the preheated oven at 375°F (190°C) for 30 minutes. After 30 minutes, remove the foil and bake for another 15-20 minutes. You want the cheese to be bubbly and golden. Let the dish cool for 10 minutes before slicing. Enjoy this rich and flavorful Eggplant Parmesan Bake with family and friends! For the full recipe, check out the main section. When picking eggplant, look for smooth, shiny skin. Choose firm eggplants without soft spots. The color should be deep purple, almost black. Smaller eggplants often taste better than larger ones. If you can, smell the stem; it should smell fresh. This helps ensure you get the best flavor. To get the best texture, slice the eggplant thin. A quarter-inch thickness works great. Salt the slices, letting them sit for 30 minutes. This step pulls out excess moisture and bitterness. Rinse and dry them well. Fry them until golden brown in olive oil. This gives you a crisp outer layer. Layering the eggplant with marinara and cheese keeps it moist. Bake until the cheese bubbles for a perfect finish. When serving, cut the bake into neat squares. Place each square on a plate and add fresh basil for color. A sprinkle of extra Parmesan cheese makes it look fancy. You can serve it with garlic bread or a fresh salad. This balance of flavors makes each bite special. For a twist, pair it with a light red wine. Enjoy every flavorful layer! {{image_2}} You can make this dish even more veggie-packed. Try adding layers of spinach or zucchini for extra nutrition. You can also replace the eggplant with mushrooms. They soak up flavors well and add a nice texture. To make this bake gluten-free, swap the breadcrumbs and flour. Use gluten-free breadcrumbs and almond flour instead. They work great and still give a nice crunch. You can also use crushed nuts for a unique twist. Want to kick up the flavor? Add roasted garlic to the marinara sauce. It brings a rich taste that pairs well with the eggplant. You can also mix in some red pepper flakes for heat. Fresh herbs like thyme or rosemary can add depth, too. Don't forget to check the Full Recipe for more ideas. After you enjoy your eggplant Parmesan bake, let it cool completely. Place any leftovers in an airtight container. Store in the fridge for up to four days. If you want to keep it longer, freezing is a great option. Reheat the leftovers in the oven for best results. Preheat your oven to 350°F (175°C). Place the bake in an oven-safe dish. Cover it with foil to keep it moist. Heat for about 20-25 minutes. You can also use a microwave, but it may not heat evenly. If you go this route, heat in 1-minute intervals until warm. To freeze eggplant Parmesan bake, first cool it completely. Cut it into smaller portions for easy reheating later. Wrap each portion tightly in plastic wrap, then in aluminum foil. Store these in a freezer-safe bag or container. This dish can last in the freezer for up to three months. When you’re ready to eat, thaw it in the fridge overnight and reheat as mentioned above. Enjoy your delicious eggplant Parmesan bake from the Full Recipe! Yes, you can use other cheeses in this recipe. I often mix mozzarella with provolone for a sharper taste. If you enjoy a stronger flavor, try adding fontina or gouda. You can also use ricotta for a creamy layer. Just remember to keep the texture in mind. The cheese should melt well and blend with the eggplant. To add some heat, sprinkle crushed red pepper flakes into the marinara sauce. You can also use spicy sausage in the layers. Another option is to mix diced jalapeños into the eggplant layers. Adjust the spice to your taste and keep it balanced with the cheese. Eggplant Parmesan Bake pairs well with simple sides. A fresh green salad adds brightness. Garlic bread is a great choice for soaking up sauce. You can also serve it with steamed vegetables for a healthy touch. Try a light pasta dish as well, like spaghetti aglio e olio, to keep it Italian. For the full recipe, check out the recipe section. This blog post covered how to make a great eggplant dish. I shared the best ingredients, tools, and tips for perfect results. Choosing quality ingredients helps with taste and texture. I also provided step-by-step instructions, variations, and storage tips. Remember, cooking is fun and creative. Don’t be afraid to try new flavors or methods. Enjoy your time in the kitchen! Every dish is a chance to learn. You can impress friends and family with your skills.

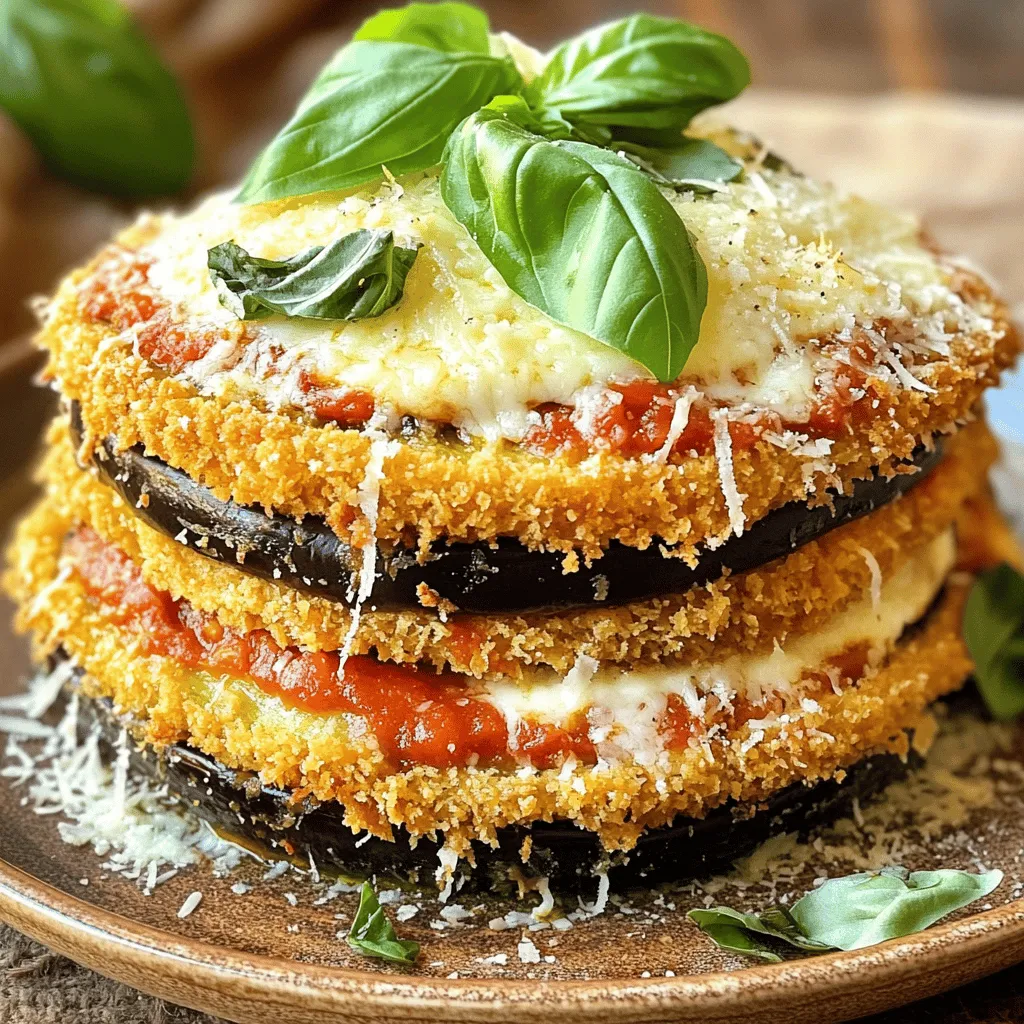
Eggplant Parmesan Bake Rich and Flavorful Dish

Looking for a rich and flavorful dish that impresses? This Eggplant Parmesan Bake is the answer! With layers of crispy

To make these tasty cookies, gather these simple items: - 2 cups all-purpose flour - 1 teaspoon baking soda - 1/2 teaspoon salt - 3/4 cup unsalted butter, softened - 3/4 cup brown sugar, packed - 1/2 cup granulated sugar - 1 teaspoon vanilla extract - 1 large egg - 1 cup white chocolate chips - 1 cup macadamia nuts, roughly chopped These ingredients create a sweet and crunchy treat. The butter adds richness, while the sugars give a lovely sweetness. The white chocolate and nuts provide a delightful crunch and flavor. You can add a twist to your cookies with these optional ingredients: - Dried cranberries for a tart touch - Coconut flakes for a tropical vibe - Different types of chocolate chips, like dark or milk These additions can enhance the flavor and make your cookies unique. If you need to swap some items, try these: - Use coconut oil instead of butter for a dairy-free option. - Replace all-purpose flour with almond flour for a gluten-free treat. - If you lack macadamia nuts, try walnuts or pecans instead. These substitutions can help you customize the recipe to fit your needs or what you have at home. Always remember, cooking is about creativity! {{ingredient_image_1}} Start by preheating your oven to 350°F (175°C). This step is key for even baking. While it heats, grab a baking sheet and line it with parchment paper. This paper will help keep the cookies from sticking. Make sure to spread it out flat for best results. In a medium bowl, whisk together 2 cups of all-purpose flour, 1 teaspoon of baking soda, and 1/2 teaspoon of salt. This mix gives your cookies structure. Set it aside for now. Then, in a large bowl, beat 3/4 cup of softened unsalted butter with 3/4 cup of packed brown sugar and 1/2 cup of granulated sugar. Mix until it turns creamy, about 2-3 minutes. Next, add 1 teaspoon of vanilla extract and 1 large egg. Blend until it is all well combined. Now, gradually add the flour mix to the wet ingredients. Stir until just mixed. Finally, fold in 1 cup of white chocolate chips and 1 cup of roughly chopped macadamia nuts. You want these tasty bits spread throughout the dough. Using a cookie scoop or tablespoon, drop rounded balls of dough onto the prepared baking sheet. Make sure to space them about 2 inches apart. This space allows them to spread. Bake in the preheated oven for 10-12 minutes. Look for golden brown edges and soft centers. Once done, take them out and let the cookies cool on the baking sheet for 5 minutes. This helps them set before moving them. After that, transfer the cookies to a wire rack. Let them cool completely, and then enjoy your homemade treat! To get the best texture in your cookies, focus on the butter. Use softened butter, not melted. It should feel like a cold stick but easy to press. Cream the butter with both sugars for about 2-3 minutes. This step adds air, making the cookies light. Don’t overmix once you add the flour. Mix just until combined. This keeps cookies soft in the middle. If you have extra cookie dough, you can store it easily. Wrap the dough tightly in plastic wrap. Then, place it in an airtight container. It will last in the fridge for up to one week. For longer storage, freeze the dough. Shape it into balls, then freeze them on a tray. Once firm, put them in a bag. They will last for up to three months. When it’s time to serve, make it special! Place your cookies on a pretty plate. You can add a bowl of melted white chocolate next to them. Guests can dip their cookies for extra sweetness. For a nice touch, garnish with whole macadamia nuts. This makes the cookies look fancy and inviting. Enjoy them warm with a glass of milk or tea! Pro Tips Use Room Temperature Butter: Make sure your butter is softened to room temperature for easier mixing and a smoother cookie dough. Chill the Dough: For thicker cookies, chill the dough for about 30 minutes before baking. This helps prevent spreading. Store in an Airtight Container: Keep the cookies in an airtight container at room temperature to maintain freshness for several days. Experiment with Mix-Ins: Feel free to add dried fruits or other nuts to customize your cookies and enhance their flavor. {{image_2}} You can make gluten-free white chocolate macadamia nut cookies with just a few tweaks. Use a gluten-free flour blend instead of all-purpose flour. Look for one that has xanthan gum, as it helps with texture. This swap keeps the cookies soft and chewy. The rest of the ingredients remain the same, so you’ll still enjoy that rich flavor. To create vegan white chocolate macadamia nut cookies, replace the egg and butter. Use a flax egg made with one tablespoon of ground flaxseed and three tablespoons of water. Allow it to sit for five minutes to thicken. Replace the unsalted butter with coconut oil or a vegan butter substitute. Choose dairy-free white chocolate chips to keep it vegan. These simple changes let everyone enjoy the treat. You can add other ingredients to enhance the cookies. Try adding dried fruit, like cranberries or cherries, for a tart twist. Chopped dark chocolate can add depth to the flavor. If you want a crunchy texture, mix in some toasted coconut flakes or even crushed pretzels. These fun additions make the cookies unique and exciting. Enjoy experimenting to find your perfect combination! To keep your white chocolate macadamia nut cookies fresh, store them in an airtight container. This helps prevent them from becoming hard or stale. You can layer the cookies with parchment paper to avoid sticking. If you add a slice of bread to the container, it keeps the cookies soft. You can freeze both the dough and baked cookies. For the dough, scoop it into balls and place them on a baking sheet. Freeze until solid, then transfer to a freezer bag. This way, you can bake fresh cookies anytime! Baked cookies can also be frozen. Wrap them tightly in plastic wrap or foil, then place in a freezer bag. Stored in an airtight container at room temperature, these cookies last about one week. If you freeze them, they can last up to three months. Just remember to let frozen cookies thaw at room temperature before enjoying them. This helps bring back their fresh flavor and texture. The best way to soften butter is to cut it into small pieces. Place the pieces in a bowl. Let them sit at room temperature for about 10 minutes. If you're in a hurry, you can microwave it. Use a low power setting and heat in short bursts, checking often. Soft butter should be slightly firm but easy to press. Yes, you can use different nuts in this recipe. If you do not have macadamia nuts, try using walnuts or pecans. These nuts also add great flavor and texture. Just chop them up roughly, like you would with macadamias. The cookies will still taste amazing with these substitutions. You will know the cookies are done when the edges are golden brown. The centers should still look soft and slightly underbaked. They will firm up as they cool. You can also do a light touch test. If the cookie springs back, they are ready to come out of the oven. In this post, we covered key ingredients, step-by-step baking, and useful tips. You learned about variations, storage methods, and answered common questions. Remember, the right ingredients and techniques lead to amazing cookies. Baking is fun, so try new flavors and share with friends. Follow these steps, and enjoy your tasty treats!

White Chocolate Macadamia Nut Cookies Delightful Treat

If you love cookies, you’ll adore these White Chocolate Macadamia Nut Cookies! They’re soft, chewy, and packed with sweet flavor.

- 4 large apples (Granny Smith or Honeycrisp), peeled and sliced - 1 tablespoon lemon juice - 1 teaspoon ground cinnamon - 1 cup rolled oats - 1 cup brown sugar, packed - 1/2 cup all-purpose flour - 1/2 cup unsalted butter, melted - 1/4 teaspoon salt - 1/2 teaspoon vanilla extract - Optional: Ice cream or whipped cream for serving The apples are the star of this dish. I love using Granny Smith or Honeycrisp apples. They add a nice tartness and hold their shape well during baking. The lemon juice brightens the flavor and keeps the apples from browning. Ground cinnamon gives warmth and spice, making the dish feel cozy. The rolled oats create a crunchy topping. Brown sugar adds sweetness and depth. Unsalted butter enriches the crisp, while salt enhances all the flavors. Vanilla extract adds a lovely aroma that ties everything together. If you need to convert measurements, here are some helpful tips: - 1 cup = 8 fluid ounces - 1 tablespoon = 3 teaspoons - 1/2 cup = 4 fluid ounces - 1 cup of brown sugar weighs about 7 ounces - 1 large apple yields about 1 to 1.5 cups when sliced You can always scale the recipe up or down based on how many people you are serving. This easy apple crisp recipe will delight everyone! For the full recipe, check here. First, gather your ingredients. You need 4 large apples, lemon juice, and ground cinnamon. Next, peel and slice the apples. In a large bowl, toss the apple slices with 1 tablespoon of lemon juice and 1 teaspoon of ground cinnamon. This step adds flavor and keeps the apples fresh. Spread the apple mixture evenly in a greased 9x13 inch baking dish. Now, it’s time to make the crisp topping. In a separate bowl, mix 1 cup of rolled oats, 1 cup of packed brown sugar, and 1/2 cup of all-purpose flour. Pour in 1/2 cup of melted unsalted butter, add 1/4 teaspoon of salt, and 1/2 teaspoon of vanilla extract. Stir until the mixture looks like coarse crumbs. Sprinkle this topping evenly over the apples. Bake in a preheated oven at 350°F (175°C) for 35-40 minutes. Watch for a golden brown top and bubbling apples. When it’s done, take the dish out of the oven. Let it cool for a few minutes. This helps the crisp set up better. Serve warm, and if you like, add a scoop of vanilla ice cream or a dollop of whipped cream on top. This makes each bite even more special. For the full recipe, check the earlier section. Enjoy! To get the best crisp topping, use cold butter. Cut it into small cubes before mixing. This helps create a nice, crumbly texture. Combine oats, brown sugar, flour, and salt in a bowl. Then add the cold butter. Use your fingers to mix until it resembles coarse crumbs. Don’t overmix; you want some lumps for crunch. For the best flavor, I suggest using Granny Smith or Honeycrisp apples. Granny Smith gives a nice tartness that balances the sweet topping. Honeycrisp adds a juicy crunch, making each bite delightful. You can mix these apples for added depth in flavor. Always choose firm apples without bruises for the best results. Serve your apple crisp warm, and add a scoop of vanilla ice cream on top. The cold ice cream melts into the warm crisp, creating a lovely contrast. If you prefer, whipped cream is a great option too. For a bit of spice, sprinkle some cinnamon on top. This makes the dessert feel even more special. Check out the Full Recipe for more details on this delicious treat! {{image_2}} You can make this apple crisp gluten-free. Just swap the all-purpose flour for almond flour or a gluten-free blend. Both options work well. You get the same great taste without the gluten. Mix-ins can add fun flavors and textures to your crisp. Try adding chopped nuts, like walnuts or pecans. They give a nice crunch. You can also mix in dried fruits, such as raisins or cranberries. This adds a sweet twist to each bite. Want to boost the flavor? Add spices like nutmeg or ginger. These spices pair well with apples. You might also try a splash of almond or maple extract. These small changes can make a big difference in taste. Each variation lets you personalize your dessert. To keep your apple crisp fresh, let it cool first. Once cooled, cover it tightly with plastic wrap or foil. You can also use an airtight container. Store it in the fridge for up to 3 days. This helps maintain its flavor and texture. When you want to enjoy your leftovers, preheat your oven to 350°F (175°C). Place the apple crisp in an oven-safe dish. Cover it with foil to prevent it from browning too much. Heat for about 15-20 minutes or until it's warm throughout. This keeps the topping nice and crispy. If you want to save some for later, you can freeze it! First, let the apple crisp cool completely. Cut it into portions and wrap each piece in plastic wrap. Place them in a freezer-safe bag. This way, you can enjoy it for up to 3 months. When ready to eat, thaw in the fridge overnight and reheat as mentioned above. Enjoy this easy apple crisp anytime! For the full recipe, check out the details above. Yes, you can use other fruits! Berries, peaches, or pears work well. Each fruit brings its own flavor. Just slice them and follow the same steps. You can mix fruits for a fun twist too. Try combining apples with blueberries or raspberries! You’ll know it’s done when the top is golden brown. Also, the apples should be bubbly and soft. Check it around 35 minutes into baking. If the top is not golden yet, let it bake a bit longer. Keep an eye on it to avoid burning. If you want to skip butter, use coconut oil or margarine. They both work well in this recipe. You can also use applesauce for a healthier option. This will make it moist and tasty without the butter. Just remember, the flavor may change a bit. For the complete guide, check out the Full Recipe. This blog post covered key ingredients, step-by-step instructions, and helpful tips for making a delicious apple crisp. You learned how to perfect the crisp topping and choose the best apples. I also shared storage advice and answered common questions. Now, you can confidently bake your apple crisp at home. Enjoy sharing this warm treat with friends or family. With practice, you will master this classic dessert and experiment with your own twists. Happy baking!

Easy Apple Crisp Simple and Delicious Dessert Recipe

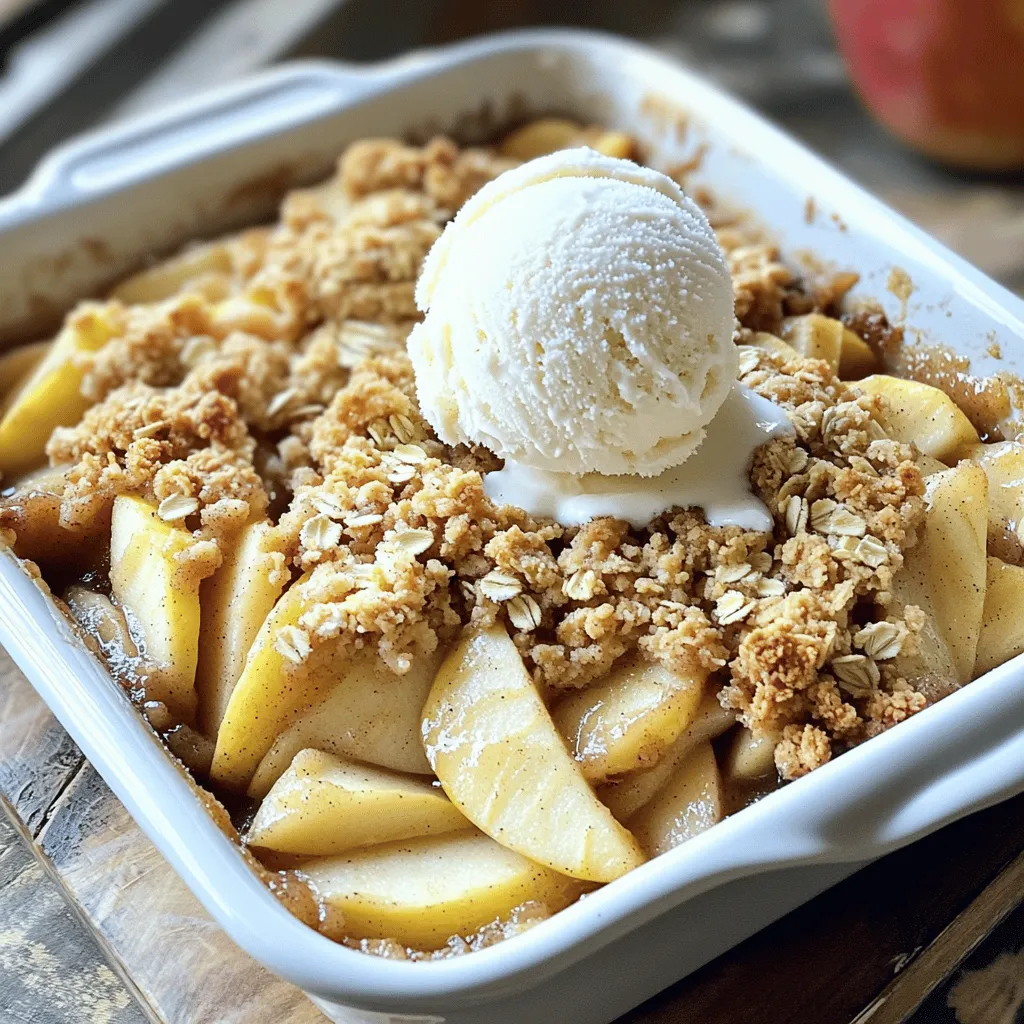
Craving a warm, sweet treat that’s super easy to make? Look no further! This Easy Apple Crisp recipe is perfect

To make this dish, start with fresh green beans. Look for bright green, crisp beans. They should feel firm when you press them. One pound is perfect for four servings. Trim the ends by snapping them off. This simple step makes them easy to eat. Next, you will need garlic and olive oil. Use four cloves of garlic, minced finely. Garlic adds a strong, tasty kick to the beans. For the oil, three tablespoons of olive oil work well. The oil helps the garlic cook and keeps the beans from sticking. You can add some optional ingredients for extra flavor. Lemon zest from one lemon brightens the dish. The juice from the same lemon adds a nice tang. If you like spice, add one teaspoon of red pepper flakes. A sprinkle of salt and pepper enhances the taste. For a crunchy finish, use ¼ cup of toasted slivered almonds as a garnish. This combination makes the dish special. For the full recipe, check out the section below. Start by washing your green beans well. This helps remove dirt and any pesticides. After washing, trim the ends. Use kitchen scissors or a knife for this. Once trimmed, set them aside. Grab a large skillet and put it on medium-high heat. Pour in the olive oil and let it warm up. When the oil is hot, add the minced garlic. Sauté it for about 30 seconds. You want it fragrant, but don't let it brown. Next, add the green beans to the skillet. Toss them gently in the garlic oil. Cook for about 5 to 7 minutes. Stir them occasionally. The beans should look bright green and feel tender-crisp. If you enjoy a little spice, sprinkle in the red pepper flakes during the last minute. Once the beans are cooked, remove the skillet from heat. Stir in the lemon zest and juice, mixing well to coat the beans. Season with salt and pepper to your liking. Transfer the sautéed green beans to a serving dish. Top with toasted slivered almonds for a nice crunch. This adds flavor and a pretty look. For the full recipe, check the earlier part of the article. Enjoy your fresh, vibrant dish! When picking green beans, look for ones that are bright green and firm. They should snap easily when bent. Avoid beans that look dull or have brown spots. Fresh beans taste best. If possible, buy organic beans to enjoy better flavor and health benefits. Garlic adds great taste to green beans. Use fresh garlic for the best flavor. When you heat the oil, add garlic and sauté for only 30 seconds. This keeps it from burning. Burnt garlic tastes bitter, which you want to avoid. Stir it often to keep it from sticking and burning. To take your dish up a notch, try adding lemon zest and juice. The bright taste of lemon pairs well with green beans. If you enjoy spice, add red pepper flakes for a kick. You can also toss in toasted nuts like almonds for crunch. Each of these tips makes your sautéed green beans more exciting. For the complete recipe, check out the Full Recipe section. {{image_2}} You can easily add nuts for extra flavor and crunch. Almonds are a great choice. Toasted slivered almonds work well with the dish. You can also try walnuts or pecans. Simply sprinkle them on top before serving. This adds a nice texture and taste. To change the flavor, consider adding spices. Try some crushed red pepper for heat. You can also use black pepper or paprika for a smoky touch. For a fresh twist, add a pinch of cumin or coriander. These spices will give your green beans a new life. For a vegetarian twist, use vegetable broth instead of oil. This adds depth without meat. You can also toss in some fresh herbs like basil or thyme. They enhance the dish's aroma and taste. If you want a richer flavor, add a bit of soy sauce. Each variation can make your green beans unique and exciting. For more ideas, check out the Full Recipe. You can store leftover sautéed green beans in an airtight container. Keep them in the fridge. They stay fresh for about three days. Make sure to cool them down before sealing. This way, they won’t get soggy. You can enjoy them as a quick snack or side dish later. If you want to save more, freezing is a great option. Place the green beans in a freezer bag. Remove as much air as possible to avoid freezer burn. They can last up to three months in the freezer. When you’re ready to eat them, thaw in the fridge overnight. To reheat the green beans, use a skillet over medium heat. Add a splash of olive oil to keep them moist. Stir them for about three to five minutes until warm. If you want, you can also pop them in the microwave. Heat in short intervals, stirring in between. This keeps them from getting overcooked. Enjoy them just like when they were fresh! For the full recipe, check out the earlier section. Sautéed green beans last about 3 to 5 days in the fridge. Store them in an airtight container. They may lose some crunch but keep their flavor. To enjoy them fresh, eat them sooner rather than later. Yes, you can use frozen green beans. They cook faster than fresh ones. Just add a few extra minutes to the sauté time. Make sure to thaw and drain them first for best results. This helps avoid excess water in the pan. Sautéed green beans pair well with many dishes. Try them with grilled chicken or fish. They also go great with rice or quinoa. For a vegetarian meal, serve them with roasted vegetables. You can find the full recipe for sautéed green beans with garlic and lemon zest in this article. Sautéed green beans are simple and tasty. We explored fresh ingredients and step-by-step cooking. I shared tips to pick the best beans and many ways to change up the flavor. Storing leftovers or freezing them keeps your meal easy. Experiment with different nuts and spices to find your favorite mix. Enjoy your delicious green beans!

Sautéed Green Beans with Garlic Flavorful Dish

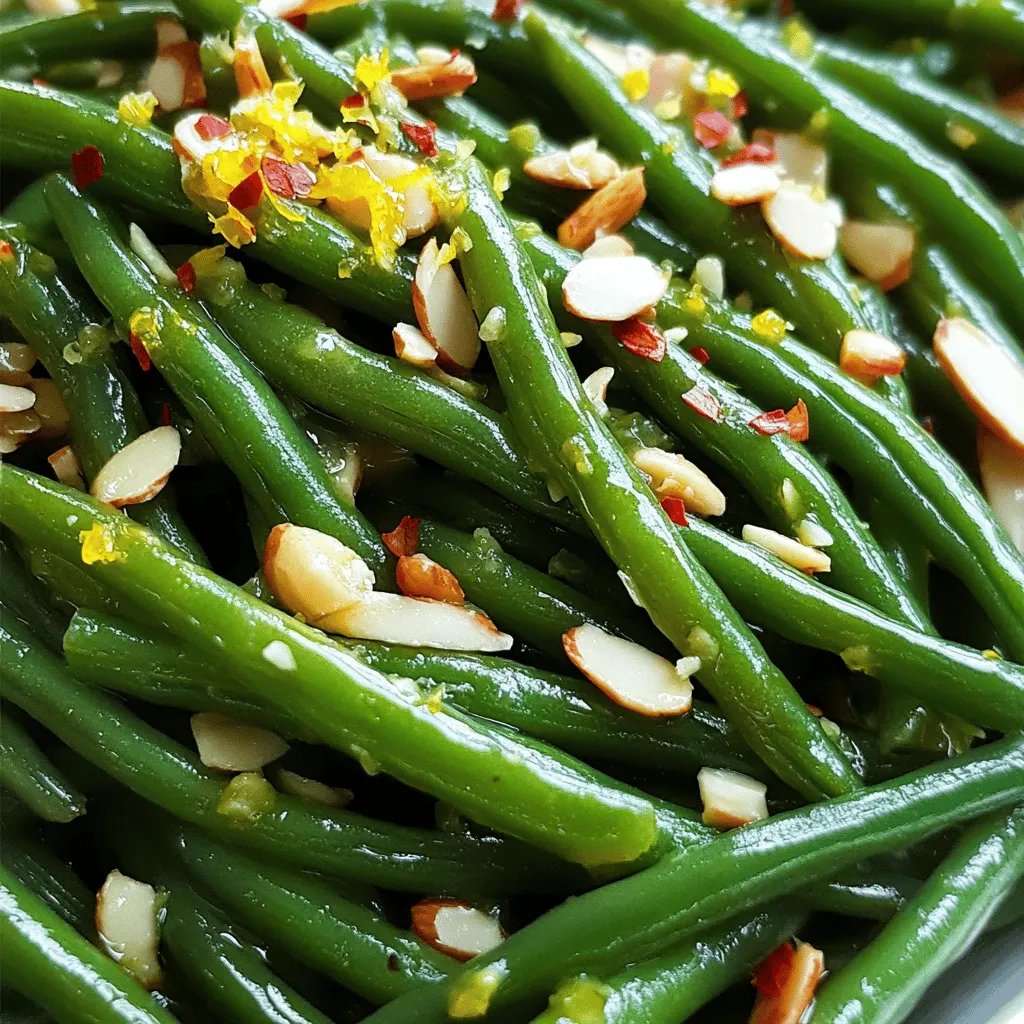
If you’re looking for a quick and tasty side dish, sautéed green beans with garlic will impress everyone. This dish

- 1 cup canned chickpeas, drained and rinsed - 1 large roasted red pepper (jarred or homemade) - 2 tablespoons tahini - 2 tablespoons olive oil In this recipe, chickpeas serve as the base. They bring protein and fiber. Roasted red pepper adds a sweet and smoky flavor. It gives the hummus a vibrant color. Tahini provides creaminess and a nutty taste. Olive oil enhances the texture and richness. - 1 garlic clove, minced - 1 tablespoon lemon juice - 1/2 teaspoon cumin - Salt to taste Garlic adds a zesty kick. Lemon juice brightens the flavor. Cumin brings warmth, while salt enhances all the tastes. You can adjust these to suit your taste. Feel free to skip or add more as you wish. - Fresh parsley - Paprika or extra olive oil Garnish your hummus for a fresh look. Chopped parsley adds color and a hint of earthiness. Sprinkling paprika gives a pop of flavor and visual appeal. A drizzle of olive oil on top makes it shine. To make roasted red pepper hummus, start by gathering your ingredients. You need canned chickpeas, a roasted red pepper, tahini, olive oil, garlic, lemon juice, cumin, and salt. Place all these ingredients into a food processor. Next, blend the mixture until it is smooth. You may have to scrape down the sides to ensure everything blends well. This step helps mix all the flavors together. If your hummus is too thick, you can add water. Do this one tablespoon at a time. Blend after each addition until you reach the right consistency. It should be creamy but not runny. Tasting is key! After blending, take a moment to taste your hummus. If it needs more flavor, add more salt or lemon juice. Adjusting the seasoning is crucial for a tasty dip. Now it's time to serve your delicious hummus. It pairs wonderfully with pita chips or fresh vegetables. For a nice touch, drizzle some olive oil on top of the hummus. You can also sprinkle chopped fresh parsley for extra color. When plating, consider using a shallow dish. This way, it looks appealing and is easy to scoop. Enjoy your roasted red pepper hummus with friends or family! For the full recipe, check [Full Recipe]. Roasting your own red peppers makes a big difference. Homemade roasted peppers have a smoky, deep flavor. You can easily roast them by placing them over a flame or in the oven until the skin is charred. After that, peel off the skin and slice them up. If you’re short on time, store-bought roasted peppers work well too. Using quality olive oil and tahini is key. Good olive oil adds richness and depth to your hummus. The same goes for tahini; fresh tahini has a nice, nutty flavor. Look for brands that use high-quality sesame seeds. To get smooth hummus, start with well-processed chickpeas. Blend them first before adding other ingredients. This lets them break down and mix well. Adding a bit of water slowly also helps. Start with one tablespoon at a time. Blend until you reach your desired creaminess. Be sure to add ingredients in the right order. Start with chickpeas, and then add roasted peppers, tahini, and olive oil. This method helps to blend everything more evenly. For storage, use an airtight container. This keeps your hummus fresh for about a week in the fridge. If you see it thickening, don’t worry! Just add a little water and mix it well again. This will bring back its smooth texture. If you want to use hummus later, you can freeze it too. Just put it in a freezer-safe container. It can last up to three months. When ready to use, thaw it in the fridge overnight. Mix it well before serving. For the full recipe, check out the detailed instructions above. {{image_2}} You can spice up your roasted red pepper hummus in fun ways. For a kick, try adding jalapeños. This spicy roasted red pepper hummus will wake up your taste buds. If you want a fresh twist, mix in herbs like basil or cilantro. These greens add a nice flavor and bright color. If you're out of chickpeas, don't worry! You can swap them for white beans. This change gives a smooth texture and a different taste. You can also use different nuts instead of tahini. Almonds or cashews work well. Just blend them until smooth, and enjoy the new flavor. Hummus is not just for dipping! Spread it in sandwiches or wraps for a tasty lunch. It adds creaminess and flavor. You can also serve it as a dip on charcuterie boards. Pair it with crackers, cheese, and fruits for a fun snack. For the full recipe, check out [Full Recipe]. To keep your roasted red pepper hummus fresh, use airtight containers. Glass jars work well, but plastic containers are also fine. Make sure the lid seals tightly to keep air out. Store the hummus in the fridge for up to five days. This way, you can enjoy it for snacks or meals throughout the week. You can freeze hummus if you want to keep it longer. Place it in a freezer-safe container, leaving some space at the top. This space allows the hummus to expand. It lasts in the freezer for about three months. When you're ready to eat it, take it out and let it thaw in the fridge overnight. After thawing, blend it for a smoother texture if needed. Add a little olive oil or water to revive it. Check your hummus for signs of spoilage before eating. If you see mold, throw it out. A sour smell or off taste is another sign it has gone bad. To help maintain freshness, always use clean utensils when scooping out hummus. This helps prevent bacteria from getting in. Enjoy your roasted red pepper hummus knowing it’s safe and tasty! For the full recipe, check out the instructions above. Homemade roasted red pepper hummus lasts about a week in the fridge. Store it in an airtight container to keep it fresh. If you want to keep it longer, you can freeze it. It can stay good for up to three months in the freezer. Just make sure to thaw it in the fridge before serving. Yes, you can use dried chickpeas. Start by soaking them overnight in water. After soaking, cook them until they are soft. This process can take about 1 to 2 hours. Once cooked, drain and rinse them before adding to your hummus. Dried chickpeas can add a richer flavor and texture. You can serve roasted red pepper hummus with many tasty options. Great dippers include: - Pita chips - Fresh vegetables like carrots, cucumbers, or bell peppers - Pretzels - Crackers - Toasted bread or baguette slices This dip is also lovely spread on sandwiches or wraps. Yes, roasted red pepper hummus is healthy. It is high in protein and fiber from chickpeas. Tahini adds healthy fats, while olive oil provides more heart-healthy benefits. The red pepper adds vitamins A and C. Just keep an eye on how much you eat, as it can be calorie-dense. Enjoy it as part of a balanced diet. Roasted red pepper hummus is simple to make. You need key ingredients like chickpeas and roasted peppers. Optional flavors, like garlic and lemon, can boost taste. Remember to adjust for creamy texture. Consider trying different variations for fun. Store leftovers correctly to keep them fresh. This dip is not only tasty but also healthy. Enjoy it with pita or veggies. Now, you can impress anyone with your homemade hummus!

Roasted Red Pepper Hummus Flavorful Dip Recipe

Get ready to elevate your snack game with my Roasted Red Pepper Hummus recipe! This easy and flavorful dip is

- 6 large eggs - 1/4 cup mayonnaise - 1 tablespoon Dijon mustard - 1 tablespoon lemon juice - 1/4 cup celery, finely chopped - 1/4 cup red onion, finely chopped - 1 tablespoon fresh dill (or 1 teaspoon dried dill) - Salt and pepper to taste - Lettuce leaves (for serving) - Whole grain bread or wraps (optional) When making classic egg salad, I focus on fresh, high-quality ingredients. The base starts with eggs, which are rich in protein and flavor. I always choose large eggs for a nice, creamy texture. Mayonnaise adds creaminess, while Dijon mustard gives a tangy kick. Lemon juice brightens the dish and adds a fresh taste. Next, I add crunch and flavor with finely chopped celery and red onion. The celery adds a nice bite, while the onion gives a mild sweetness. Dill is a must for that classic flavor. I recommend using fresh dill when possible, but dried dill works too. For serving, you can keep it simple with lettuce leaves. They make a great base for the egg salad. If you prefer a sandwich, whole grain bread or wraps are perfect. They add a hearty touch and are great for lunch! Check the Full Recipe for more details on how to prepare this delicious egg salad. How to hard boil eggs properly To hard boil eggs, place them in a saucepan. Cover them with cold water. Heat on medium-high until it boils. Once boiling, cover the pan and turn off the heat. Let the eggs sit for 12-15 minutes. Cooling and peeling the eggs After 12-15 minutes, transfer the eggs to a bowl of ice water. Let them cool for about 5 minutes. Once they cool, tap each egg on the counter to crack the shell. Peel the eggs under running water for easier removal. Making the dressing with mayonnaise, mustard, and lemon juice In a mixing bowl, combine 1/4 cup of mayonnaise, 1 tablespoon of Dijon mustard, and 1 tablespoon of lemon juice. Stir well until it looks creamy and smooth. Gently combining all ingredients Chop the cooled eggs into small pieces. Add them to the bowl with the dressing. Then, add 1/4 cup of finely chopped celery, 1/4 cup of finely chopped red onion, and 1 tablespoon of fresh dill. Fold everything together gently. Best ways to serve egg salad: in lettuce wraps or on bread For serving, you can use lettuce leaves as wraps. This keeps it light and fresh. You can also spread the egg salad between slices of whole grain bread or in wraps. Presentation tips to enhance visual appeal To make it look nice, serve the egg salad on a colorful plate. Add extra fresh dill on top. A few slices of tomato will add a pop of color. Enjoy your Classic Egg Salad Delightful and Easy Recipe! For the full recipe, check out the details above. - To boil eggs, place them in a pan and cover with water. - Bring the water to a boil over medium-high heat. - Once boiling, cover the pan and turn off the heat. - Let the eggs sit for 12-15 minutes. - Transfer eggs to ice water to cool for 5 minutes. - For peeling, tap the shell gently and start from the large end. - For flavor, add more mustard for tang or lemon juice for zest. - Overmixing can make your egg salad mushy. - Skip no seasoning; salt and pepper are key for taste. - You can prepare egg salad a day in advance. - Store it in an airtight container in the fridge. - For freshness, consume within three days. {{image_2}} You can change the flavor of your egg salad with fresh herbs. Adding chopped basil or chives gives a bright taste. For a spicy kick, try diced jalapeño or a splash of hot sauce. These herbs and spices can make a simple dish feel special. Experiment with different herbs to find your favorite mix! Feel free to swap out some ingredients in your egg salad. If you want a lighter option, use Greek yogurt or mashed avocado instead of mayonnaise. You can also add fun ingredients like crispy bacon, sweet peas, or tangy pickles. These swaps add texture and flavor, making your salad unique. For those following a vegan or vegetarian diet, you can still enjoy egg salad. Use tofu or chickpeas to replace the eggs. For a low-carb option, skip the bread and serve it in lettuce wraps. These adjustments cater to different diets while keeping your egg salad tasty and satisfying. For the full recipe, check out the Egg-cellent Classic Egg Salad. To keep your egg salad fresh, store it in the refrigerator right away. Place it in an airtight container to prevent air exposure. This helps maintain its creamy texture. I recommend using glass or BPA-free plastic containers. They seal well and do not retain odors. For the best taste, eat your egg salad within three to five days. Any longer, and the flavors start to fade. Look for signs of spoilage, like an off smell or changes in texture. If it looks watery or has an unusual color, it's better to toss it. You can freeze egg salad, but I don’t recommend it. Freezing changes the texture and makes it watery. If you decide to freeze it, use a freezer-safe container and leave some space for expansion. When ready to eat, thaw it in the fridge overnight. Use it within a day or two after thawing for the best flavor. Homemade egg salad lasts about 3 to 5 days in the fridge. Store it in an airtight container for best results. Always check for any off-smells or changes in texture before eating. If you see any signs of spoilage, it’s best to discard it right away. Keeping it cold is key to maintaining its freshness. Yes, you can use different types of mustard in egg salad. Each mustard adds its own unique flavor. For a milder taste, yellow mustard works well. If you want a sharper kick, try spicy brown mustard. Honey mustard adds sweetness, while Dijon gives a tangy twist. Experiment with what you like best! Egg salad pairs well with several side dishes. Fresh veggies like carrot sticks or cucumber slices offer a nice crunch. You can also serve it with chips for some extra texture. A light salad with greens makes a refreshing side. For a heartier meal, try pairing it with soup. These sides complete your meal nicely! In this blog post, we explored how to make the perfect egg salad. We covered essential ingredients, preparation tips, and common mistakes to avoid. You learned ways to mix flavors and serve the salad beautifully. Remember, you can customize it with various herbs and substitute ingredients. With proper storage, your egg salad stays fresh for days. Now, you can enjoy this tasty dish anytime. Simple steps lead to great meals! Happy cooking!

Classic Egg Salad Delightful and Easy Recipe

Egg salad is a classic dish that never goes out of style. With just a few ingredients, you can create

- 1.5 pounds baby Yukon Gold potatoes - 4 tablespoons butter, melted - 4 cloves garlic, minced - 1/2 cup heavy cream - 1/4 cup fresh chives, finely chopped - Salt and pepper to taste For my smashed potatoes, I love using baby Yukon Gold potatoes. Their smooth texture makes them perfect for smashing. You want to boil them until tender, which usually takes about 15 to 20 minutes. The key is to not overcook them, or they’ll get mushy. Next, I melt the butter and mix in minced garlic. This adds a rich flavor that makes the dish special. Heavy cream is a must for that creamy finish. Finally, fresh chives bring a nice touch of brightness. - Crumbled feta cheese - Crispy fried onions - Salt and pepper If you want to elevate your smashed potatoes, consider adding feta cheese or crispy fried onions. Feta gives a tangy kick that contrasts nicely with the creaminess. Fried onions add a crunch that makes each bite exciting. Don't forget to adjust the salt and pepper to suit your taste. You can find the full recipe for these delicious smashed potatoes [here](#). 1. Boiling and salting the potatoes: Start by placing the baby Yukon Gold potatoes in a large pot. Cover them with cold water and add a good pinch of salt. This step helps season the potatoes while cooking. Bring the pot to a boil over medium-high heat. Cook the potatoes for about 15-20 minutes. You want them fork-tender, which means a fork should easily pierce them. 2. Cooling and draining the potatoes: Once the potatoes are tender, drain the water. Return the potatoes to the pot, allowing them to cool slightly. This step is key, as it helps the potatoes hold their shape when smashed. 1. Techniques for smashing the potatoes: Grab the bottom of a glass or a potato masher. Gently smash each potato until it flattens but stays in one piece. This method gives you a nice texture. Aim for a rustic look, as it adds charm to the dish. 2. Mixing garlic butter and cream: In a small bowl, combine melted butter, minced garlic, and heavy cream. Stir until mixed well. Pour this garlic butter mixture over the smashed potatoes. Make sure every potato gets a good coating. This adds a rich flavor that makes the dish shine. 1. Preparing the baking sheet: Preheat your oven to 400°F (200°C). Line a baking sheet with parchment paper. This helps with easy cleanup and prevents sticking. 2. Bake time and temperature settings: Place the smashed potatoes on the baking sheet. Bake them in the preheated oven for about 20-25 minutes. You're looking for crispy, golden edges. This is when the magic happens, turning creamy potatoes into a delightful dish. For the full recipe, check the section above. Enjoy your cooking! To avoid overcooking the potatoes, watch the clock. Boil them for 15-20 minutes. Check for fork-tenderness. If they are too soft, they become mushy when smashed. For extra crispiness, bake them a bit longer. Add five more minutes to the cook time for a golden edge. You can add herbs and spices for fun twists. Try rosemary, thyme, or paprika for a new taste. You can also change the toppings. Crumbled bacon, cheese, or sour cream work great. Experiment with what you love! For plating, arrange the smashed potatoes nicely on a bright platter. A colorful dish makes the food pop. Garnish with fresh chives for a lovely look. You can also sprinkle extra toppings for a stunning finish. Serve right away for the best taste and texture. For more details, check the Full Recipe. {{image_2}} You can swap baby Yukon Gold potatoes for red potatoes or sweet potatoes. Red potatoes add a creamy texture, while sweet potatoes provide a natural sweetness. Mixing different potato types can add fun flavors and colors to your dish. Try a blend of Yukon and red potatoes for a tasty twist! Adding cheese can elevate your smashed potatoes. Consider using sharp cheddar or creamy goat cheese for a richer taste. You can even mix in some crumbled feta for a tangy kick. Spices also work wonders. Sprinkle in garlic powder, paprika, or fresh herbs like rosemary for an extra burst of flavor. If you want to make your smashed potatoes vegan, use olive oil instead of butter and coconut cream instead of heavy cream. For a dairy-free option, almond milk can also work well. Plus, smashed potatoes are naturally gluten-free, so they fit into many diets without any changes. Enjoy experimenting with these variations to find your perfect flavor! To keep your smashed potatoes fresh, store them in a safe way. First, let the potatoes cool to room temperature. Then, place them in an airtight container. This helps keep moisture out. You can store them in the fridge for up to three days. The best containers for storage are glass or plastic with tight lids. Make sure they are clean and dry before adding the potatoes. If you don't have a container, you can wrap the potatoes tightly in plastic wrap. When it’s time to eat your leftovers, reheating is key. You want to keep that creamy texture. The best way is to use the oven. Preheat it to 350°F (175°C). Place the potatoes on a baking sheet. Cover them with foil to keep moisture in. Bake for about 15-20 minutes until they are warm. If you want to use leftovers in other dishes, try adding them to soups or casseroles. You can mash them up for a creamy soup base. Another fun idea is to mix them into a breakfast hash with eggs and veggies. There are many ways to enjoy your smashed potatoes again! What is the best potato for smashing? The best potato for smashing is the baby Yukon Gold. They have a creamy texture and a buttery flavor. Other good options include red potatoes or russet potatoes. These potatoes hold their shape well when cooked. They also become fluffy and tender, making them perfect for smashing. Can I make smashed potatoes ahead of time? Yes, you can make smashed potatoes ahead of time. Cook and smash them as directed. Then, store them in the fridge for up to two days. When ready to serve, reheat them in the oven. This keeps them crispy on the outside and soft inside. What to do if potatoes are too mushy? If your potatoes are too mushy, they may have been overcooked. To fix this, drain them well and let them dry for a few minutes. You can also add a bit more cream and butter to help improve the texture. This will make them creamier and reduce the mushiness. How can I make them crispier? To make your smashed potatoes crispier, increase the oven temperature to 425°F (220°C). Bake them longer for a nice golden color. You can also brush them with more melted butter before baking. Using a hot baking sheet can also help them crisp up nicely. Best side dishes to serve with smashed potatoes Smashed potatoes pair well with various dishes. Meat lovers can enjoy them with roasted chicken or grilled steak. They also go well with a fresh salad or steamed veggies. For a lighter meal, serve them with fish or a veggie stir-fry. Wine pairings for a complete meal experience For wine, a crisp white wine like Sauvignon Blanc works well. It complements the creamy potatoes nicely. If you prefer red, try a light Pinot Noir. This wine balances the flavors without overpowering them. Enjoy your meal with the right drink for a complete experience! Easy smashed potatoes are simple yet delicious. We explored key ingredients like Yukon Gold potatoes, butter, and garlic. I shared step-by-step instructions on how to boil, smash, and bake them. You learned tips for perfecting texture and ways to elevate flavors with garnishes and spices. Experiment with variations or make dietary adjustments. Proper storage techniques and reheating tips keep leftovers tasty. By following these guidelines, you can enjoy flavorful smashed potatoes anytime. Your friends and family will love them!

Easy Smashed Potatoes Simple and Creamy Delight

Are you ready for a creamy potato treat? My Easy Smashed Potatoes are simple to make and bursting with flavor.

To make a delicious baked chicken Parmesan, you will need these essential ingredients: - 4 boneless, skinless chicken breasts - 1 cup breadcrumbs (preferably Italian seasoned) - 1/2 cup grated Parmesan cheese - 2 large eggs - 1 cup marinara sauce The right seasonings make all the difference. Here’s what you need: - 1 teaspoon garlic powder - 1 teaspoon dried oregano - 1/2 teaspoon salt - 1/4 teaspoon black pepper - 1½ cups shredded mozzarella cheese - Fresh basil leaves for garnish (optional) Having the right tools makes cooking easier. Here are the tools you should gather: - Baking sheet - Parchment paper - Mixing bowls - Whisk These ingredients and tools are key for crafting the perfect baked chicken Parmesan. Each item plays a role in building flavor and texture. For the complete recipe, check out the Full Recipe. - Preheat your oven to 400°F (200°C). - Line the baking sheet with parchment paper for easier cleanup. - Combine breadcrumbs, Parmesan cheese, garlic powder, oregano, salt, and pepper in a large mixing bowl. - Whisk the eggs in a separate bowl. - Dip chicken breasts in the beaten eggs, allowing excess to drip off. - Coat with breadcrumb mixture, pressing gently to adhere. - Place breaded chicken on the prepared baking sheet and spray tops with cooking spray. - Bake for 25-30 minutes until golden brown and cooked through. - Add marinara sauce and mozzarella cheese, then return to oven for 5-7 minutes. - Let chicken rest, garnish with basil leaves, and serve. Cooking Baked Chicken Parmesan is simple and fun. You can follow these steps from the Full Recipe to create a tasty meal that everyone will love. Enjoy the crunchy, cheesy goodness! To get that perfect crunch, use Italian seasoned breadcrumbs. They add great flavor. Before baking, spray the tops of the chicken with cooking spray. This helps create a golden, crispy layer. You can switch out chicken breasts for chicken thighs if you prefer darker meat. For a fun twist, try using Alfredo sauce instead of marinara. It gives a creamy touch to your dish. Always check the chicken with a meat thermometer. You want it to reach an internal temperature of 165°F (75°C). This ensures your chicken is safe to eat and perfectly cooked. {{image_2}} You can try different cheese options to change the flavor. Provolone adds a nice melt. Cheddar gives a sharp taste. Mix mozzarella with these cheeses for a fun twist. Each cheese brings its own vibe to the dish. Experiment and see what you like best. Adding vegetables makes the dish even better. Spinach works well in the marinara sauce. It adds color and health benefits. Mushrooms also bring a nice texture and flavor. Try sautéing them first for extra taste. You can mix and match to suit your taste. Want a gluten-free version? Use gluten-free breadcrumbs for the coating. Check your marinara sauce labels to ensure they are gluten-free. This way, those with gluten sensitivities can enjoy this dish too. Cooking can be tasty and inclusive for everyone! Store leftovers in an airtight container in the fridge for up to 3 days. This keeps the chicken moist and tasty. I recommend using glass containers. They help keep flavors fresh and are easy to clean. To reheat, place the chicken in the oven at 350°F (175°C) for best results. This method keeps the coating crispy. It usually takes about 15 minutes to warm through. You can cover it lightly with foil to stop it from getting too brown. You can freeze the chicken before baking for a quick meal later. Wrap each piece tightly in plastic wrap, then place them in a freezer bag. When ready to cook, bake from frozen. Just add 10-15 extra minutes to the cooking time. You should bake Baked Chicken Parmesan at 400°F (200°C) for 25-30 minutes. This time ensures the chicken cooks through and stays juicy. To check for doneness, the internal temperature should reach 165°F (75°C). The outside will turn golden brown, making it look and taste delicious. Yes, you can use frozen chicken for this recipe. Just remember to adjust the cooking times. Frozen chicken may need 5-10 extra minutes in the oven. Make sure to check the internal temperature to ensure it's safe to eat. Baked Chicken Parmesan can be healthy with a few tweaks. Use lean chicken breasts to cut down on fat. You can also use less cheese to lower calories. Serving it with a salad adds freshness and nutrients. Enjoy your meal guilt-free while still savoring every bite! This blog post covered how to make Baked Chicken Parmesan. We talked about the key ingredients, cooking tools, and step-by-step instructions. I shared tips for achieving a crispy coating and suggested tasty variations. Storing and reheating leftovers was also important if you want to enjoy this dish later. Baked Chicken Parmesan is simple and fun to make. You can easily change ingredients to suit your taste. Enjoy cooking and have a delicious meal!

Baked Chicken Parmesan Irresistible Dinner Delight

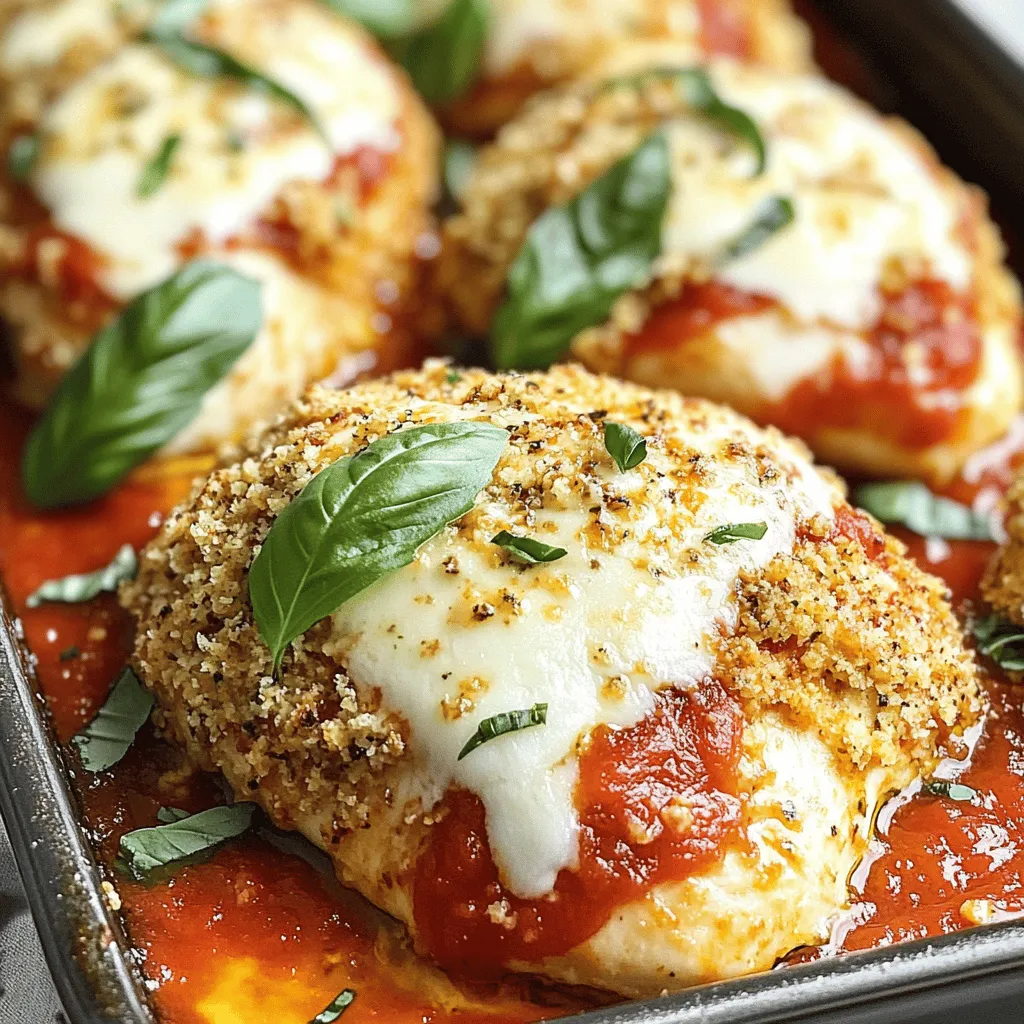
Looking for a simple yet delicious dinner idea? Baked Chicken Parmesan is the answer! With juicy chicken, crispy breading, and

- Ripe Avocados - Tomato - Red Onion - Jalapeño - Garlic - Lime - Fresh Cilantro - Seasoning (Salt, Pepper, Smoked Paprika) To make the best guacamole, start with ripe avocados. Look for ones that yield slightly when you press them. This means they’re ready to mash. Next, grab a fresh tomato. A vine-ripened tomato adds great flavor. Red onion offers a sweet bite. Chop it finely to mix well. For heat, use jalapeño. Remove the seeds for less spice. Garlic adds depth. Fresh minced garlic is best. You need a lime for its juice. It brightens the taste and keeps the avocado green. Fresh cilantro gives a nice herbal note. Finally, season with salt, pepper, and smoked paprika for a smoky twist. The best avocados for guacamole are Hass avocados. Their dark, bumpy skin means they are creamy and flavorful. Choose avocados that are firm but yield to gentle pressure. This means they are ripe and ready to use. Fresh ingredients always taste better in guacamole. Fresh avocados, tomatoes, and herbs give vibrant flavors. However, if fresh isn’t available, frozen options can work in a pinch. Just make sure to thaw them properly and drain any excess water. This helps keep your guacamole thick and tasty. For the full recipe, check out the Avocado Fiesta Guacamole 🥑. Start with three ripe avocados. Look for avocados that feel soft but not mushy. Cut each avocado in half and remove the pit. Use a spoon to scoop the flesh into a bowl. This step is key for a creamy texture. You can mash them as smooth or chunky as you like. Keep in mind, the more you mash, the creamier it gets. Once the avocados are ready, it's time to mix in the other ingredients. Add one medium diced tomato, one-fourth cup of finely chopped red onion, and one minced jalapeño. Don't forget two cloves of minced garlic for that extra kick! Next, squeeze the juice from one lime into the bowl. Lime adds brightness to your guacamole. Finally, sprinkle in salt, black pepper, and smoked paprika if you want a hint of smokiness. Now, give everything a good stir to combine the flavors. It's smart to taste your guacamole at this point. If it needs more zing, add more lime juice or salt. Remember, fresh ingredients can change the taste. Let it rest for about 10-15 minutes. This waiting time lets the flavors mix well. When you serve it, garnish with whole cilantro leaves and lime wedges for a nice touch. For the full recipe, check out the Avocado Fiesta Guacamole section. Enjoy your creation! To get the right texture, start with ripe avocados. They should be soft but not mushy. Use a fork or potato masher to mash them. If you like it smooth, mash more. For a chunkier guacamole, mash less. Add diced tomatoes and onions to give it a nice bite. Mix gently to keep some pieces whole. Fresh ingredients make the best guacamole. Use ripe avocados, fresh lime juice, and crisp cilantro. Adding minced garlic boosts the taste. A little salt and pepper enhance flavors. If you want some heat, add jalapeño. Letting your guacamole sit for 10-15 minutes helps the flavors mix well. The time lets the lime juice soak into the avocados. One mistake is using overripe avocados. They can make your guacamole taste bad. Another common error is not tasting as you go. Always check the flavor. Too much lime juice can make it sour, so add it slowly. Lastly, avoid browning by covering it tightly. Use plastic wrap pressed directly on the surface. For more details, check the Full Recipe. {{image_2}} You can make your guacamole stand out with fun add-ins. Here are two tasty options: - Mango or Pineapple Guacamole: Dicing fresh mango or pineapple adds a sweet twist. The fruit pairs well with the creamy avocado. Just mix in about one cup of diced fruit for a fruity delight. - Bacon or Feta Cheese: Crumbled bacon gives a salty crunch. Feta cheese adds a tangy flavor. Use about 1/2 cup of either for a savory kick. If you love heat, add more spice to your guacamole. You can mix in chopped serrano or habanero peppers. Start with a small amount and taste as you go. You can also add hot sauce for an extra kick. This makes your guacamole fiery and exciting! To make your guacamole vegan, simply skip dairy add-ins like feta cheese. For nut allergies, this recipe is already safe. Always check your ingredients, especially with processed items. You can enjoy guacamole without worry. For more flavor ideas, check out the Full Recipe! To keep guacamole fresh, store it in an airtight container. Press plastic wrap directly onto the surface of the guacamole. This method limits air exposure. If you have leftovers, you can also add a layer of lime juice on top. The acid helps preserve the color and taste. Guacamole can brown quickly. To slow this down, use lime juice as mentioned. You can also sprinkle a little salt on top. Another trick is to add a thin layer of water over the guacamole before sealing it. When you’re ready to eat, pour off the water. You can freeze guacamole for later use. First, prepare the guacamole as usual. Then, place it in a freezer-safe bag. Squeeze out as much air as possible before sealing. It will keep for about three months in the freezer. When you’re ready to enjoy it, thaw it in the fridge overnight before serving. Just remember, the texture may change slightly after freezing, but the flavor will still be great! To make homemade guacamole, start with ripe avocados. Cut them in half, remove the pit, and scoop the flesh into a bowl. Mash the avocados to your liking, whether smooth or chunky. Then, mix in diced tomato, chopped red onion, minced jalapeño, and minced garlic. Squeeze fresh lime juice over the mix and add chopped cilantro. Season with salt, black pepper, and smoked paprika if you want a smoky taste. Stir gently until all ingredients are combined. Let it sit for about 10-15 minutes for the best flavor. For the full recipe, check the [Full Recipe]. Guacamole pairs well with many dishes. Serve it with tortilla chips for a classic snack. Fresh vegetables like carrot sticks and cucumber slices are great, too. You can also add it to tacos, burritos, or sandwiches. Guacamole adds a creamy touch to any meal. Homemade guacamole typically lasts 1 to 2 days in the fridge. Store it in an airtight container to keep it fresh. The color may change to brown due to oxidation but it is still safe to eat. If it looks too brown, just mix it again, and it should be fine. You can make guacamole ahead of time, but it’s best to prepare it fresh. If you need to make it early, store it in the fridge with plastic wrap pressed against the surface. This reduces air exposure and helps prevent browning. If you don’t have lime juice, lemon juice works well as a substitute. It adds a similar tangy flavor. You can also try vinegar, but use it sparingly. The taste will change slightly, so adjust to your liking. In this article, we covered how to make the best guacamole. You learned about key ingredients like ripe avocados, tomatoes, and spices. We discussed the preparation steps and tips for great texture and flavor. You also discovered fun variations and how to store guacamole to keep it fresh. Remember, making guacamole is simple. With the right ingredients and techniques, you can impress anyone. Enjoy your guacamole adventure!

Homemade Guacamole Fresh and Simple Recipe Guide

Are you ready to make the best homemade guacamole? This fresh and simple recipe guide will show you how. With

To make creamy tomato basil soup, gather these items: - 2 tablespoons olive oil - 1 medium onion, chopped - 2 cloves garlic, minced - 1 can (28 oz) crushed tomatoes - 2 cups vegetable broth - 1 teaspoon sugar - 1 teaspoon dried oregano - Salt and pepper to taste - 1 cup heavy cream (or coconut cream for a vegan option) - 1/2 cup fresh basil leaves, chiffonade - Crusty bread or croutons for serving Each ingredient plays a big role in taste. - Olive oil adds richness and flavor. - Onion and garlic bring sweetness and depth. - Crushed tomatoes form the soup’s base, offering a bright, tangy flavor. - Vegetable broth enhances the soup’s savory notes. - Heavy cream makes it rich and smooth, while coconut cream is a great vegan choice. - Fresh basil adds a fragrant touch that brightens the dish. You can swap some ingredients if needed. - Use butter instead of olive oil for a different flavor. - Fresh tomatoes can replace canned tomatoes if you have them. - For a lighter version, try using half-and-half instead of heavy cream. - If you want more heat, add a pinch of red pepper flakes. Check the full recipe for more details and enjoy making your soup! To start, gather all your ingredients. This helps you stay organized. You’ll need: - 2 tablespoons olive oil - 1 medium onion, chopped - 2 cloves garlic, minced - 1 can (28 oz) crushed tomatoes - 2 cups vegetable broth - 1 teaspoon sugar - 1 teaspoon dried oregano - Salt and pepper to taste - 1 cup heavy cream (or coconut cream) - 1/2 cup fresh basil leaves, chiffonade - Crusty bread or croutons for serving Next, chop the onion and mince the garlic. This step is key for great flavor. In a large pot, heat the olive oil over medium heat. Add the chopped onion and sauté until it turns translucent, about 5 minutes. Stir in the minced garlic and cook for one more minute. The aroma will fill your kitchen! Now, pour in the crushed tomatoes and vegetable broth. Add the sugar, oregano, salt, and pepper. Stir everything well. Bring the soup to a simmer and let it cook for 20 minutes. This allows the flavors to meld beautifully. After simmering, it’s time to blend. Use an immersion blender for a smooth texture. If you don’t have one, carefully transfer the soup to a stand blender in batches. Once blended, return it to the pot if needed. Stir in the heavy cream until it mixes well. Finally, add the fresh basil and cook for another 5 minutes on low heat. When blending hot soup, be careful! Hot liquid can splatter. If using a stand blender, fill it halfway. Leave space for the steam. Always start on a low speed and increase gradually. This keeps your kitchen mess-free. For the best taste, adjust the seasoning after blending. Now you’re ready to enjoy a warm bowl of creamy tomato basil bliss! Don’t forget to check the [Full Recipe] for complete details. After you make your creamy tomato basil soup, let it cool before storing. Use an airtight container for best results. The soup lasts in the fridge for up to five days. If you want to save it for longer, freeze it in portions. It can stay in the freezer for up to three months. To reheat, place the soup in a pot over low heat. Stir often to avoid sticking. If the soup thickens too much, add a splash of broth or water. You can also microwave it in a bowl. Heat it in 30-second intervals, stirring in between. You can boost the flavor of your soup in several ways. Try adding fresh herbs like thyme or parsley. You can also use smoked paprika for a nice depth. A squeeze of lemon juice adds brightness. If you enjoy spice, add a pinch of red pepper flakes. For a richer taste, mix in some Parmesan cheese while cooking. One common mistake is not balancing the flavors. Always taste and adjust. If the soup is too acidic, add more sugar. If it's bland, salt can help. Another mistake is overcooking the cream. Add it only after blending the soup for a silky texture. Lastly, using low-quality tomatoes can affect the taste. Choose high-quality canned tomatoes for the best results. You can find the full recipe [here](#). {{image_2}} To make a vegan creamy tomato basil soup, swap the heavy cream for coconut cream. It gives a rich and creamy texture while keeping it dairy-free. Use vegetable broth instead of chicken broth to keep it vegan. Fresh basil adds a lovely taste and aroma, so don't skip it! If you like heat, add red pepper flakes or diced jalapeños to the pot. Start with a small amount, then taste and add more if you want. This extra spice can make your creamy tomato basil soup exciting. You can also mix in a splash of hot sauce before serving for a spicy kick. For a cheesy twist, stir in grated Parmesan or mozzarella while blending. This adds a depth of flavor and a fun texture. You can also top the soup with shredded cheese before serving. Melted cheese on top makes the soup even more comforting and indulgent. You can discover more about these variations in the Full Recipe. Store your creamy tomato basil soup in an airtight container. This keeps the soup fresh. Let it cool to room temperature first. Refrigerate the soup for up to five days. When you want to eat it, reheat it gently on the stove. Stir often to avoid burning. Freezing is a great way to save extra soup. Use freezer-safe containers or bags. Leave some space for the soup to expand when frozen. The soup can last for about three months in the freezer. When you’re ready to eat, thaw it in the fridge overnight. Reheat it on the stove, stirring well. You can get creative with leftovers. Add them to pasta for a quick meal. Use them as a sauce for baked chicken. Mix with rice or quinoa for a tasty side. You can even pour it over roasted veggies. This way, you enjoy every last drop of your creamy tomato basil soup. For the full recipe, check out the original article. Yes, you can use fresh tomatoes. Choose ripe tomatoes for the best flavor. You will need about 2 pounds of fresh tomatoes. First, blanch them in boiling water for a minute. Then, put them in cold water. This step helps to peel the skins easily. After peeling, chop the tomatoes and add them to the pot. Fresh tomatoes may take longer to cook down. So be patient, and enjoy the process! To make this soup gluten-free, just use gluten-free broth. Most vegetable broths are gluten-free. Be sure to check the label. You can also replace any bread you want to add. Use gluten-free bread or croutons instead. This soup is naturally gluten-free, so it’s easy to keep it safe for everyone. You can add many herbs to enhance your soup. Fresh parsley adds a bright taste. Thyme offers a nice earthy flavor. If you want a kick, try a pinch of red pepper flakes. Basil is the star here, but feel free to mix! Just remember to add herbs sparingly. You can always add more, but it’s hard to take them out! This blog covered all you need for a great tomato basil soup. We looked at key ingredients, step-by-step cooking, and useful tips. You learned how to store and reheat soup properly and explored fun variations. Avoiding common mistakes ensures success. Remember, using fresh tomatoes or adding herbs can enhance flavor. With these insights, you can make a delicious soup that fits your diet and taste. Enjoy your cooking!

Creamy Tomato Basil Soup Delightful and Easy Recipe

Ready to savor the rich flavors of Creamy Tomato Basil Soup? This delightful and simple recipe is your ticket to

Older posts
Newer posts
← Previous Page1 … Page74 Page75 Page76 … Page84 Next →

dsad

© 2026 juliesdish • Built with GeneratePress

Our Policies

  • Copyright Policy
  • Cookie Policy
  • GDPR Policy
  • Privacy Policy
  • Disclaimer
  • Terms Of Use

More Information

  • Home
  • About
  • Contact
  • Appetizers
  • Dessert
  • Dinner
  • Drinks
©2026, juliesdish About Back To Top