Skip to content
DisclaimerTerms Of UseGDPR PolicyCookie Policy

juliesdish

  • Home
  • Drinks
  • Appetizers
  • Dinner
  • Dessert
  • About
  • Contact
  • Privacy Policy
DisclaimerTerms Of UseGDPR PolicyCookie Policy

NO-ING-IMG

- 1 ½ cups all-purpose flour - ½ cup unsalted butter, softened - 1 cup granulated sugar - 2 large eggs - 1 cup fresh raspberries (lightly tossed in flour) - 1 teaspoon baking powder - ½ teaspoon baking soda - ¼ teaspoon salt - Zest of 1 lemon - 2 tablespoons fresh lemon juice - ½ teaspoon vanilla extract - ¼ cup powdered sugar (for glaze) - 1 tablespoon lemon juice (for glaze) - Mixing bowls - Whisk and spatula - 9x5-inch loaf pan - Parchment paper for easy removal The main ingredients form the base of this Lemon Raspberry Loaf. All-purpose flour gives it structure, while butter adds richness. Granulated sugar sweetens the loaf, and eggs help it rise. The fresh raspberries give pops of flavor and color. In the additional ingredients, baking powder and baking soda help the loaf rise. Lemon zest and juice add bright flavor, while vanilla extract rounds it out. The glaze made from powdered sugar and lemon juice adds a sweet finish. For tools, mixing bowls are a must for combining ingredients. A whisk and spatula help you mix and fold gently. The 9x5-inch loaf pan is perfect for shaping the loaf. Parchment paper makes it easy to remove the loaf once baked. This list makes gathering everything simple. You will be ready to bake your delightful Lemon Raspberry Loaf in no time! 1. Preheat your oven to 350°F (175°C). Grease a 9x5-inch loaf pan. Line the bottom with parchment paper. This helps the loaf come out easily. 2. In a mixing bowl, whisk together 1 ½ cups of flour, 1 teaspoon of baking powder, ½ teaspoon of baking soda, and ¼ teaspoon of salt. Set this mixture aside. 3. In a large bowl, cream together ½ cup of softened butter and 1 cup of granulated sugar. Mix until it looks light and fluffy. This should take about 2-3 minutes. 1. Add 2 large eggs, the zest of 1 lemon, 2 tablespoons of fresh lemon juice, and ½ teaspoon of vanilla extract to the butter mixture. Beat well until everything is mixed. 2. Gradually add the dry mixture to the wet mixture. Mix until just combined. Be careful not to overmix. This keeps the loaf soft. 3. Fold in 1 cup of fresh raspberries that you have lightly tossed in flour. Do this gently to avoid crushing the berries. 1. Pour the batter into the prepared loaf pan. Smooth the top with a spatula for an even bake. 2. Bake for 45-50 minutes. Check doneness with a toothpick. If it comes out clean, your loaf is ready. 3. Let the loaf cool in the pan for 10 minutes. Then, transfer it to a wire rack to cool completely. Enjoy the lovely aroma! For the complete recipe, check out the Full Recipe section. To make a great Lemon Raspberry Loaf, texture is key. Do not overmix your batter. Overmixing makes the loaf dense and tough. Mix just until you see no dry flour. This keeps it light and fluffy. Using room temperature ingredients also helps. When butter and eggs are at room temperature, they blend better. This creates a smooth batter and a soft loaf. Fresh raspberries are best for this recipe. They burst with juice and flavor. If you use frozen raspberries, they may make your batter soggy. If you must use frozen ones, thaw and drain them first. You can also add almond extract for a twist. Just a half teaspoon can give your loaf a new depth of flavor. This subtle change can make a big difference. The glaze should be smooth and drizzle easily. To achieve the right thickness, mix powdered sugar and lemon juice. Start with a little lemon juice and add more until you reach your desired consistency. When drizzling, use a spoon or a small bowl. Hold the spoon just above the loaf. Move back and forth to create an even drizzle. This makes your loaf look pretty and inviting. For the full recipe, check out the Lemon Raspberry Loaf. {{image_2}} You can switch up the fruit in your loaf for a fun twist. Blueberries and strawberries work great! They add sweetness and color. Just fold them in gently, like you do with raspberries. You can also try different citrus zest. Using lime or orange zest gives the loaf a unique taste. Each zest adds its own zing, making each bite exciting. For those who need gluten-free options, use almond flour or coconut flour. These flours create a moist loaf with a nice texture. If you want a vegan version, swap the eggs for flax eggs or applesauce. This keeps the loaf moist and tasty without any animal products. Serving your Lemon Raspberry Loaf is a joy! Try it with a dollop of whipped cream or a scoop of ice cream. This adds a creamy touch to your loaf. Pair it with a cup of tea or coffee for a delightful afternoon snack. The flavors blend beautifully, making each moment special. For the complete recipe, check out the [Full Recipe]. To keep your Lemon Raspberry Loaf fresh, store it at room temperature. Place it in an airtight container. This keeps moisture in but allows for airflow. The loaf stays fresh for about 2-3 days. If you want, wrap it in plastic wrap first. This adds an extra layer of protection. For longer storage, freezing is the best option. Wrap the cooled loaf tightly in plastic wrap. Then, place it in a freezer bag. Make sure to squeeze out as much air as possible. It can last up to three months in the freezer. To reheat, thaw it overnight in the fridge. Then, unwrap and warm it in the oven at 350°F for about 10-15 minutes. Check for spoilage by looking for mold or an off smell. If the loaf feels hard or dry, it may not taste good. Always store your loaf in a clean container. Glass or plastic containers work well. Avoid using containers that held strong-smelling foods, as they can affect the loaf's taste. To check if your Lemon Raspberry Loaf is ready, use a toothpick or cake tester. Insert it into the center of the loaf. If it comes out clean, your loaf is done. If it has wet batter, bake for a few more minutes. This method is simple and effective. Yes, you can use frozen raspberries. Just toss them lightly in flour before adding them to the batter. This helps prevent them from sinking. They may not be as firm as fresh, but they still taste great. You might want to bake a few minutes longer since frozen fruit can cool the batter. If you need a substitute for butter, you can use coconut oil or vegetable oil. Applesauce is also a great option for a healthier choice. Each alternative will change the flavor slightly, but the loaf will still be delicious. Just use the same amount as the butter called for in the recipe. Once baked, your Lemon Raspberry Loaf can last for about 2 to 3 days at room temperature. Store it in an airtight container to keep it fresh. If you want it to last longer, you can freeze it. Just wrap it well in plastic wrap and then foil. Yes, you can add nuts or chocolate! Chopped walnuts or pecans add a nice crunch. If you prefer chocolate, mix in chocolate chips. Just be careful not to overmix when you fold them in. This keeps your loaf light and fluffy while adding great flavor. This guide covered everything you need to make a delicious Lemon Raspberry Loaf. We discussed the key ingredients, tools, and step-by-step instructions to get it right. I shared tips for texture and flavor, plus fun variations you can try. Remember, proper storage is key to keeping your loaf fresh. With these insights, you can enjoy a delightful treat that pairs well with any occasion. Happy baking!

Lemon Raspberry Loaf Delightful and Fresh Recipe

If you’re craving a sweet treat that sings with flavor, look no further! My Lemon Raspberry Loaf combines zesty lemon

- Cauliflower florets - Flour and water for batter - Spices and seasonings To start, you need fresh cauliflower. Choose medium-sized florets for the best bite. Next, gather flour and water to make a simple batter. The batter will help the spices stick to the cauliflower. You want the batter to be smooth. For flavor, use garlic powder, onion powder, smoked paprika, salt, and black pepper. Each spice adds depth to the dish. - Sriracha sauce - Maple syrup - Olive oil For the sauce, Sriracha sauce is the star. It gives the wings their spicy kick. Mix in maple syrup for a touch of sweetness. This balances the heat and adds flavor. A little olive oil helps blend the sauce and adds richness. - Fresh cilantro - Additional dipping sauces Garnish your wings with fresh cilantro. It adds color and freshness. You can also serve them with your favorite dipping sauce. Ranch or blue cheese dressing works well. These extras enhance the experience and make your dish look great. For the full recipe, check out the recipe section above. Start by preheating your oven to 450°F (230°C). This high heat helps make the cauliflower wings crispy. While the oven warms up, grab a baking sheet and line it with parchment paper. The parchment helps prevent sticking and makes cleanup easier. In a large mixing bowl, combine the following dry ingredients: - 1 cup all-purpose flour - 1 teaspoon garlic powder - 1 teaspoon onion powder - 1 teaspoon smoked paprika - 1/2 teaspoon salt - 1/2 teaspoon black pepper Next, add 1 cup of water. The mixture should be smooth and free of lumps. Use a whisk to mix everything well. Whisking creates air bubbles, which helps the batter coat the cauliflower better. Take each cauliflower floret and dip it into the batter. Make sure it's fully coated, then gently shake off any extra batter. Place the coated florets on the lined baking sheet. Bake in the preheated oven for 20 minutes. Flip the wings halfway through to help them cook evenly. They should turn golden and slightly crispy at this point. Now, for the fun part! Remove the wings and drizzle the Sriracha sauce mixture over them. Toss gently to coat. Return them to the oven and bake for an additional 10-15 minutes. This step makes them caramelized and even crispier. Enjoy the bold flavors of the Spicy Sriracha Cauliflower Wings! For the full recipe, check the earlier section. To get that crispy texture, the batter must be just right. Use equal parts flour and water. If it is too thick, add a bit more water. If it’s too thin, add more flour. Aim for a smooth, thick but pourable batter. Oven temperature plays a big role in crispiness. Preheat your oven to 450°F (230°C). This high heat helps create a nice crust. If your wings are not crispy enough, try baking them a little longer. You can also turn on the broiler for the last few minutes. Just watch them closely so they don’t burn. Want more flavor? Add spices to the batter. Try a pinch of cayenne for heat or some cumin for depth. You can even mix in a bit of nutritional yeast for a cheesy flavor. Balancing sweetness in the sauce is key. If the Sriracha is too hot, add a bit more maple syrup. This will help cut the heat and give a nice balance. Taste as you mix to find what works for you. Pair these wings with classic sides. Celery sticks and carrot sticks are great for crunch. You can also serve them with ranch or blue cheese dressing for dipping. For a pretty presentation, use a large platter. Arrange the wings in a circle. Add celery sticks around them for color. Sprinkle fresh cilantro on top for that final touch. This makes your dish look as good as it tastes! {{image_2}} You can switch up the sauce for your cauliflower wings to match your taste. - Buffalo Sauce Option: If you love heat, try buffalo sauce. Just coat your wings after baking, like with the Sriracha. It gives a tangy kick that many enjoy. - Honey-Garlic Glaze: For a sweeter flavor, mix honey with minced garlic. This sauce pairs well with the crispy wings. Just drizzle it over after baking for a sticky, tasty treat. You can make these wings using different cooking styles based on your kitchen tools. - Air Fryer Instructions: Preheat your air fryer to 400°F (200°C). Coat the wings and place them in a single layer. Cook for about 15-20 minutes, shaking halfway through. They turn out crispy and delicious! - Grilling Tips: For a smoky taste, grill the wings. Preheat your grill to medium heat. Brush the wings with oil to prevent sticking and grill for about 10 minutes, turning often. You can make these wings healthier with some easy swaps. - Gluten-Free Options: Use gluten-free flour in the batter. You can also use cornstarch for a crunchy coating. - Lower Calorie Ingredients: Swap out regular flour for almond flour. You can also cut back on the maple syrup or use a sugar-free version. This keeps the flavor while making it lighter. For the full recipe, check the detailed steps above to enjoy these spicy Sriracha cauliflower wings! To keep your spicy Sriracha cauliflower wings fresh, use an airtight container. Glass or plastic containers work well. Before sealing, let the wings cool to room temperature. This step prevents steam build-up, which can make them soggy. To reheat your wings while keeping them crispy, use an oven. Preheat the oven to 375°F (190°C). Place the wings on a baking sheet and heat for about 10-15 minutes. This method helps restore their crunch. You can also use an air fryer for about 5-7 minutes at the same temperature for extra crispiness. To freeze your wings properly, let them cool completely first. Arrange them in a single layer on a baking sheet and freeze for 1-2 hours. Once frozen, transfer the wings to a freezer-safe bag. Remove as much air as possible before sealing. When you’re ready to eat, thaw the wings in the fridge overnight. Reheat them in the oven or air fryer to regain their crispy texture. Enjoy your wings just like they were fresh! For the full recipe, check out the details above. To make these wings vegan, swap out the maple syrup for agave nectar. Use a plant-based milk instead of water for the batter. You can also use oat flour or chickpea flour if you want a gluten-free batter. These easy swaps keep the flavor while making the dish vegan-friendly. Yes, you can use frozen cauliflower. However, frozen cauliflower may be softer after cooking. This change can affect the crunchiness. To keep the texture, thaw the cauliflower first and pat it dry. This helps remove excess moisture before coating. These wings pair well with a variety of sides. Try serving them with celery sticks or carrot sticks for a fresh crunch. A creamy dip like ranch or blue cheese adds a nice balance to the spice. You can also serve them with a side of rice or a light salad for a complete meal. This blog post covered how to make tasty Spicy Sriracha Cauliflower Wings. We discussed key ingredients like cauliflower, batter, and spices, plus making a great sauce with Sriracha and maple. I shared step-by-step instructions for baking, tips for the perfect crunch, and options for sauces and cooking methods. Finally, take these ideas and make this dish your own. Enjoy experimenting with flavors and methods. Your tasty wings will surely impress!

Spicy Sriracha Cauliflower Wings Bold and Tasty Recipe

Are you ready to spice up your snack game? My Spicy Sriracha Cauliflower Wings are bold, tasty, and easy to

- Chicken thighs: I love using chicken thighs for this dish. They stay juicy and tender. Their rich flavor pairs well with the garlic and butter, making each bite delightful. - Garlic and butter: These ingredients are the stars of this recipe. Garlic gives a strong and tasty punch. Butter adds creaminess and depth to the sauce. Together, they create a beautiful base for the chicken. - Optional ingredients: You can add a few extras for more flavor. Try fresh herbs like thyme or rosemary. Cherry tomatoes bring sweetness, while spinach adds a nice green touch. A squeeze of lemon brightens the dish, making it even tastier. - Recommended cookware: A large skillet works best for this recipe. Choose one that heats evenly. This way, you get a nice sear on the chicken. - Measuring tools: Use measuring spoons for precise amounts. This helps ensure the flavors balance perfectly. A meat thermometer can also be handy to check if the chicken is cooked through. For the complete recipe, check out the Full Recipe. To make One Pan Garlic Butter Chicken, start by prepping your chicken and veggies. First, take 4 boneless, skinless chicken thighs. Pat them dry with paper towels. This helps the seasoning stick well. Now, season the chicken. Use salt, pepper, dried thyme, and smoked paprika. Rub this mixture over both sides of the chicken. The spices will add great flavor. For the veggies, wash 1 cup of cherry tomatoes and slice them in half. Rinse 1 cup of fresh spinach. Having everything ready makes cooking easier and faster. Now let's cook! First, heat a large skillet over medium-high heat. Add 2 tablespoons of unsalted butter. Once it melts, place the seasoned chicken in the skillet. Sear the chicken for 5-7 minutes on each side. You want it golden brown and cooked through. After cooking, remove the chicken and set it aside. In the same skillet, add the remaining 2 tablespoons of butter and 8 minced garlic cloves. Sauté for about 1 minute. The garlic should smell amazing. Next, add the halved cherry tomatoes and spinach to the skillet. Cook for 2-3 minutes. You want the tomatoes to soften and the spinach to wilt. Finally, return the chicken to the skillet. Squeeze juice from 1 lemon over everything. Simmer for another 2 minutes. This brings all the flavors together. To finish, taste the dish and adjust the seasoning if needed. Add more salt or pepper to your liking. Now it's time to serve. Use a large plate or a serving dish. Place the chicken in the center and pour the veggies around it. Garnish with chopped fresh parsley. This adds a nice pop of color. Your One Pan Garlic Butter Chicken is ready to enjoy! Check the Full Recipe for all the details. To get the best sear on chicken, start with a hot pan. Heat your skillet on medium-high before adding the butter. This helps the chicken brown nicely. Pat the chicken thighs dry with paper towels. This step removes extra moisture and helps with searing. Season both sides well with salt, pepper, thyme, and smoked paprika. Cook for 5-7 minutes per side. The skin should be golden brown when done. If you use different chicken cuts, adjust your cooking time. Chicken breasts cook faster than thighs. For breasts, aim for about 4-6 minutes per side. Use a meat thermometer to check for doneness. Chicken should reach 165°F (75°C). This ensures it's safe to eat but still juicy. To boost flavor, consider adding more spices or herbs. Try rosemary or oregano for a fresh twist. A pinch of red pepper flakes can add heat. Mix in fresh basil for a fragrant kick too. You can also add a splash of white wine to the skillet. This adds depth and richness to the sauce. Adjusting acidity and sweetness can elevate your dish. Squeeze more lemon juice for extra brightness. If you prefer sweetness, drizzle honey or maple syrup. This balance makes your dish more complex and enjoyable. Check your flavors as you go. Taste often and adjust to your liking. For more ideas, check out the Full Recipe for One Pan Garlic Butter Chicken. {{image_2}} You can easily adapt this dish for different diets. If you need gluten-free options, use gluten-free soy sauce or tamari in place of regular soy sauce. This will keep the flavor while meeting your needs. For dairy-free requirements, swap out the butter for olive oil or a dairy-free butter alternative. These changes still give you a rich taste without the dairy. If you prefer a plant-based diet, you can substitute the chicken with firm tofu or tempeh. Cut them into slices and follow the same cooking method. They will soak up the garlic and butter flavors well. You can also use chickpeas for a protein-packed option that adds great texture. To switch up the flavor, try different herbs and spices. Fresh herbs like basil or oregano can add a unique taste. You can also use dried herbs, such as rosemary or dill, to change the profile. If you want to add a bit of heat, consider red pepper flakes or diced jalapeños. For a twist, include some lemon zest along with the juice. This will brighten the dish and give it a fresh kick. You can also toss in some olives or capers for a briny burst of flavor. Each of these options creates a different experience while keeping the dish simple and delicious. For the full recipe, check out [Full Recipe]. To keep your One Pan Garlic Butter Chicken fresh, use airtight containers. This keeps moisture in and air out. You can store it in the refrigerator for up to three days. For longer storage, freeze it. Place it in freezer-safe bags or containers. Be sure to squeeze out excess air. This way, it can last for about three months. Label your bags so you know when to use them. When reheating, I recommend using the stove or the oven. These methods help keep the chicken juicy. For the stove, heat a skillet over low heat. Add a splash of chicken broth or water to prevent drying. Cover it with a lid to trap steam. For the oven, set it to 350°F (175°C). Place the chicken in an oven-safe dish and cover it with foil. Heat for about 15-20 minutes. This keeps the chicken tender and flavorful. Avoid the microwave if you can, as it can make the chicken rubbery. How can I make One Pan Garlic Butter Chicken ahead of time? You can prepare this dish ahead of time. Cook the chicken and veggies, then cool them. Store them in an airtight container in the fridge for up to three days. When you are ready to eat, reheat in a skillet over medium heat. Add a splash of chicken broth to keep it moist. Can I use chicken breasts instead of thighs for this recipe? Yes, you can use chicken breasts. They will cook faster than thighs. Make sure to check the internal temperature. It should reach 165°F for safe eating. Adjust the cooking time to avoid overcooking. What can I serve with One Pan Garlic Butter Chicken? This dish pairs well with rice or quinoa. You can also serve it with a fresh salad. Garlic bread is a great option too. These sides will soak up the tasty butter sauce. What to do if the chicken is overcooked? If your chicken is overcooked, try slicing it thinly. Serve it in a sauce or with a side of broth. This can help add moisture back to the meat. How to fix an overly salty dish? To fix an overly salty dish, add a few slices of raw potato and let them cook for a few minutes. They can absorb some of the salt. You can also add more veggies or a splash of cream to balance the flavors. In this blog post, we explored the key ingredients and tools for making One Pan Garlic Butter Chicken. I shared preparation steps and cooking techniques to ensure perfect results. You also learned helpful tips for flavor and variations to suit dietary needs. Finally, we discussed storing leftovers and reheating methods. This dish brings comfort and flavor to your table. With these tips, you can cook with confidence. Enjoy delicious meals and impress your family with your skills!

One Pan Garlic Butter Chicken Flavorful and Easy Meal

Looking for a quick and tasty meal? One Pan Garlic Butter Chicken is your answer! This easy recipe combines juicy

- 2 cups plain Greek yogurt - 2 tablespoons honey or maple syrup - 1 teaspoon vanilla extract - 1 cup mixed berries (strawberries, blueberries, raspberries, and blackberries) Frozen yogurt bark is simple to make. The main ingredients are Greek yogurt, sweeteners, and berries. Greek yogurt gives the bark creaminess and protein. Honey or maple syrup adds a touch of sweetness. Vanilla extract boosts the flavor. The mixed berries provide a burst of freshness. You can use any berries you like for this treat. - 1/4 cup chopped nuts (almonds or walnuts) - 2 tablespoons shredded coconut (unsweetened, optional) You can make your yogurt bark even better with add-ins. Chopped nuts add crunch and healthy fats. Almonds or walnuts work great. Shredded coconut lends a tropical flair. Use unsweetened coconut for a less sweet taste. You can also add a splash of vanilla extract for more flavor. - Serve on a decorative platter - Garnish with fresh berries For a beautiful presentation, serve the bark on a nice platter. You can add fresh berries on top for a pop of color. This treat pairs well with other desserts. Try serving it alongside chocolate or fruit sorbet. You can also enjoy it as a snack or a light dessert. For the complete recipe, check out the [Full Recipe]. Start by mixing the yogurt and sweetener. In a bowl, add 2 cups of plain Greek yogurt. Then, stir in 2 tablespoons of honey or maple syrup. Add 1 teaspoon of vanilla extract for flavor. Mix until it’s smooth and creamy. This yogurt base is the heart of your bark. Next, prepare the baking sheet. Line a baking sheet with parchment paper. This will help you remove the yogurt bark easily once it’s frozen. Make sure the paper covers the entire sheet to prevent sticking. Now it’s time to spread the yogurt mixture. Pour the creamy yogurt onto the lined baking sheet. Use a spatula to spread it evenly. Aim for about 1/2 inch thick. This thickness helps it freeze well. With the yogurt spread, add your toppings. Sprinkle 1 cup of mixed berries over the yogurt layer. Use strawberries, blueberries, raspberries, and blackberries for a colorful mix. Gently press the berries into the yogurt. This keeps them from falling off later. Now, add 1/4 cup of chopped nuts and 2 tablespoons of shredded coconut for extra flavor. Place the baking sheet in the freezer. Freeze the yogurt bark for at least 3-4 hours. You want it to be completely firm before serving. Once frozen, take it out and break it into pieces. You can use a sharp knife or just break it apart with your hands. This gives a rustic look to your bark. Store any leftover pieces in an airtight container in the freezer. Enjoy your frozen yogurt bark anytime! For the complete recipe, check out the [Full Recipe]. To get the best texture, start with thick Greek yogurt. This keeps the bark from becoming too watery. Mix in your sweetener well. If you want a creamier texture, try full-fat yogurt. After mixing, spread the yogurt evenly on the baking sheet. Aim for about half an inch thick. This thickness helps it freeze nicely. For freezing times, leave it in the freezer for at least 3-4 hours. The longer it freezes, the firmer it gets. You can use flavored yogurt to add more taste. Try vanilla, strawberry, or blueberry yogurt. These flavors mix well with the berries. You can also mix toppings for fun. Add different berries like strawberries, blueberries, or even kiwi. For a crunch, sprinkle on nuts like almonds or walnuts. Shredded coconut can add sweetness and texture too. This makes each bite more exciting. Serve the yogurt bark right from the freezer. It tastes best when it’s very cold. Cut it into pieces for easy eating. For a fun twist, use cookie cutters for fun shapes. Serve it on a nice platter, and add a few fresh berries on top. This makes the dish look great and adds color. You can also pair it with a scoop of ice cream for a treat. {{image_2}} Using seasonal berries is a great way to boost flavor. Fresh strawberries, blueberries, and raspberries shine in this treat. When berries are in season, their taste is brighter and sweeter. You can also substitute with other fruits. Try sliced bananas, diced peaches, or even mango. Just make sure to cut them small. This keeps the bark easy to eat and fun to enjoy. If you need dairy-free options, there are great substitutes. Use coconut yogurt or almond yogurt in place of Greek yogurt. These alternatives still offer a creamy texture. You can also switch out sweeteners. Instead of honey, use agave syrup or stevia. Both options work well and keep the bark sweet. For holiday themes, you can get creative! Add festive colors like red and green for Christmas. You could use blueberries and strawberries for a July 4th celebration. Customizing for parties is fun too. You could cut the bark into fun shapes using cookie cutters. This makes your dessert stand out on any table. To keep your frozen yogurt bark fresh, use airtight containers. This prevents ice crystals from forming, which can change the texture. Store your bark in the freezer, and it will last for about two to three weeks. If you want to enjoy it longer, wrap it tightly in plastic wrap before placing it in a container. You can refreeze frozen yogurt bark, but it may lose some texture and flavor. If you must, try to keep the bark in a single layer. This helps maintain its structure. When you refreeze, make sure to use an airtight container again to avoid freezer burn. To safely thaw your frozen yogurt bark, take it out of the freezer and let it sit at room temperature for about 10 to 15 minutes. If you want to enjoy it cold, just break off a piece and eat it right away! To keep the texture nice, avoid using a microwave, as it can make the bark too soft. Enjoy your treat fresh for the best flavor and crunch! Frozen yogurt bark is a fun and tasty treat. It combines yogurt, sweeteners, and toppings. You spread yogurt on a baking sheet, add fruits and nuts, then freeze it. After freezing, you break the yogurt into pieces. This dessert is loved for its cool, creamy texture and fruity flavor. You can find many variations, like using different fruits or adding chocolate chips. Each twist makes it unique and enjoyable. Yes, you can use other sweeteners. Maple syrup is a great choice. You can also try agave nectar or stevia. Each sweetener brings a different taste. Just keep the same amount as honey. If you want to keep it sweet, taste the yogurt mixture before freezing. Adjust the sweetness to your liking. Absolutely! You can make frozen yogurt bark a day or two before you plan to serve it. Just follow the steps, then freeze it. Once it’s solid, store it in an airtight container. This keeps it fresh and tasty. When you are ready to enjoy it, simply break it into pieces. It’s a great dessert to prepare in advance for parties or family gatherings. Frozen yogurt bark is a fun and easy treat to make. You learned about the main ingredients, like Greek yogurt, honey, and mixed berries. You discovered steps to prepare, assemble, and freeze this dessert. I shared tips to enhance flavors and achieve the right texture. Don’t forget the variations for dietary needs or special occasions. This dessert is versatile and can fit any plan. Enjoy your yogurt bark and get creative!

Frozen Yogurt Bark with Berries Simple and Sweet Treat

Looking for a cool and easy treat? Frozen yogurt bark with berries is your answer! With just a few ingredients,

- 8 oz. fusilli or rotini pasta - 1 cup cherry tomatoes, halved - 1 cup cucumber, diced - 1/2 cup red bell pepper, diced - 1/4 cup red onion, finely chopped - 1/2 cup fresh basil leaves, roughly torn - 1/4 cup feta cheese, crumbled - 1/4 cup olive oil - 2 tablespoons fresh lemon juice - Zest of 1 lemon - Salt and pepper to taste When making Lemon Basil Pasta Salad, fresh ingredients shine. Start with your pasta. I love using fusilli or rotini because they hold the dressing well. Cherry tomatoes add sweetness. Diced cucumber brings crunch. Red bell pepper adds color and flavor. Red onion gives a slight bite. Basil is crucial. Use fresh leaves for the best taste. Feta cheese adds creaminess and a touch of salt. The dressing is simple. Olive oil, fresh lemon juice, and lemon zest make it bright. Add salt and pepper to taste. This salad is not only tasty but also nutritious. Each serving is packed with vitamins from the veggies. You get healthy fats from olive oil and protein from feta. It's perfect for a light lunch or as a side dish. Check out the Full Recipe for more details. You'll love how easy it is to prepare this dish. Start by cooking the pasta. Use the package instructions for best results. Boil water in a large pot and add the pasta. Stir it well to prevent sticking. Cook until tender, usually about 8 to 10 minutes. When done, drain the pasta in a colander. Rinse the pasta under cold water. This helps to cool it down quickly. Make sure to shake off any excess water and set it aside. In a large mixing bowl, combine the halved cherry tomatoes, diced cucumber, diced red bell pepper, and finely chopped red onion. This mix adds fresh flavor and crunch. Now, add the cooled pasta to the vegetable mix. It's important to mix these ingredients well. This way, each bite will be full of flavor. Next, we prepare the dressing. In a separate small bowl, whisk together the olive oil, fresh lemon juice, lemon zest, and a pinch of salt and pepper. This dressing brings the dish to life. Pour the dressing over the pasta and vegetables. Use a spatula to gently toss everything together. Be careful not to damage the ingredients. Finally, fold in the torn basil leaves and crumbled feta cheese. Mix sparingly to keep the cheese intact. Now, refrigerate the salad for at least 30 minutes. This time allows the flavors to blend perfectly. Serve in a large bowl. Garnish with extra basil leaves and a sprinkle of feta on top for a beautiful look. Enjoy your refreshing Lemon Basil Pasta Salad! To enhance the taste, adjust the lemon juice. You can add more for extra zing. A hint of garlic powder can also elevate the salad’s flavor. When you mix the dressing, whisk it well. This helps keep a smooth and creamy consistency. A touch of honey can balance the tang from the lemon. For a stunning look, serve the pasta salad in a large bowl. Top it with extra basil leaves and a sprinkle of feta. You can also add a few lemon slices for a bright touch. This salad works great for parties. Serve it alongside grilled chicken or fish for a complete meal. To save time, prep the salad a few hours in advance. Store it in the fridge in an airtight container. This keeps the ingredients fresh and helps the flavors mix well. If you want to keep the pasta from getting soggy, add the dressing right before serving. This keeps everything crisp and tasty. {{image_2}} You can make Lemon Basil Pasta Salad even better by adding protein or more veggies. - Chicken: Grilled chicken adds heartiness. - Shrimp: Cooked shrimp gives a nice seafood twist. - Tofu: A great plant-based protein option. Adding veggies can also enhance the dish. Try these: - Spinach: Fresh spinach adds color and nutrients. - Zucchini: Diced zucchini brings a mild flavor. - Olives: Black or green olives add a salty bite. If you need to change the recipe for dietary needs, it’s easy. - Gluten-free pasta: Use gluten-free fusilli or rotini. They work just as well. - Vegan modifications: Replace feta with tofu or a vegan cheese. You can also skip the cheese completely. Want to change the taste? Here are some fun ideas. - Different herbs: Try parsley or dill for a fresh twist. - Dressings: Use balsamic vinegar or a pesto instead of olive oil and lemon. These variations keep the salad exciting while still being simple and tasty. Want to explore more? Check out the [Full Recipe]. Store any leftover Lemon Basil Pasta Salad in an airtight container. This keeps the salad fresh and tasty. Place it in the fridge right after serving. For best results, eat the leftovers within three days. If you want to enjoy it later, you can repurpose the salad. Mix in some grilled chicken or shrimp for a new twist. Toss the salad with more dressing before serving to brighten up the flavors. This salad will last about three to four days in the fridge. If you notice any changes in color or smell, it’s best to toss it. Check for slimy or mushy vegetables. These are clear signs that the salad has gone bad. Always trust your senses when it comes to food safety. For the freshest taste, enjoy the salad sooner rather than later. You can easily make this salad gluten-free by using gluten-free pasta. Some great options include: - Brown rice pasta - Quinoa pasta - Chickpea pasta These choices work well and keep the salad tasty. Just cook them as you would regular pasta. You can use dried basil, but the flavor will change. Fresh basil has a bright taste. If you use dried, use one-third of the amount. So, for 1/2 cup fresh, use about 2 tablespoons dried. Yes, this salad is great for meal prep! Store it in an airtight container in the fridge. It stays fresh for about three days. To keep it crunchy, add the basil and feta just before serving. Freezing this salad is not the best choice. The vegetables and dressing may not hold up well. If you must freeze it, leave out the fresh ingredients. You can add them back after thawing and mixing. This blog post gives you everything you need to make a great Lemon Basil Pasta Salad. We covered the key ingredients, easy steps to follow, and helpful tips. You learned how to adjust the recipe for different diets and flavors. For best results, think about your pasta salad's taste and freshness. Make it your own by adding proteins or veggies. Enjoy making this dish at home for any occasion. Your friends and family will love it!

Lemon Basil Pasta Salad Refreshing and Easy Recipe

Looking for a light and tasty meal? Try my Lemon Basil Pasta Salad! This easy recipe bursts with fresh flavors

To make Zesty Lemon Garlic Asparagus, gather these fresh ingredients: - 1 pound asparagus, trimmed - 4 cloves garlic, minced - 2 tablespoons olive oil - Zest of 1 lemon - 2 tablespoons fresh lemon juice - 1 teaspoon red pepper flakes (optional for heat) - Salt and pepper, to taste - ¼ cup grated Parmesan cheese (optional) - Fresh parsley, chopped (for garnish) If you don’t have asparagus, use green beans or broccoli. Both work well. For garlic, garlic powder can act as a quick substitute. Olive oil can change to avocado oil or melted butter. If you lack fresh lemon, lemon juice from a bottle will do. If you want a vegan dish, skip the Parmesan cheese or use a dairy-free version. Choose firm asparagus stalks with bright green color. Look for tips that are closed and compact. Store asparagus upright in a jar with water, like flowers. Cover the tops with a plastic bag to keep them fresh. Always wash your vegetables before cooking to remove dirt and pesticides. The fresher the asparagus, the better the taste! For more details on the recipe, check the Full Recipe. To start, gather your ingredients for zesty lemon garlic asparagus. You will need: - 1 pound asparagus, trimmed - 4 cloves garlic, minced - 2 tablespoons olive oil - Zest of 1 lemon - 2 tablespoons fresh lemon juice - 1 teaspoon red pepper flakes (optional for heat) - Salt and pepper, to taste - ¼ cup grated Parmesan cheese (optional) - Fresh parsley, chopped (for garnish) Next, preheat your oven to 400°F (200°C). While it heats, wash and trim the asparagus. This helps remove the tough ends. Mince the garlic and zest the lemon. In a large bowl, mix the asparagus, minced garlic, olive oil, lemon zest, lemon juice, red pepper flakes, salt, and pepper. Toss well to coat every piece. This step is key for flavor. Spread the asparagus on a baking sheet lined with parchment paper. Make sure they are in a single layer. This helps them cook evenly. Roast them in the oven for 15-20 minutes. Toss halfway through to get a nice, even cook. If you want cheese, sprinkle it on during the last 5 minutes. Once the asparagus is done roasting, take it out and let it cool for a minute. Garnish with fresh parsley for a pop of color. Serve warm as a side dish with any main course you love. You can find the full recipe above for more details. Enjoy! To get the best asparagus, choose firm, bright green stalks. Avoid any that are limp or yellow. Trim the ends to remove the tough parts. I recommend cutting about an inch off the bottom. This helps the asparagus cook evenly. When roasting, spread them in a single layer on the baking sheet. This allows for nice browning and prevents steaming. To boost flavor, you can add more ingredients. Try tossing in sliced cherry tomatoes or thinly sliced bell peppers. They add color and taste. Fresh herbs like thyme or basil also work well. For a kick, include more red pepper flakes. If you love cheese, sprinkle more Parmesan on top before serving. This adds a rich, salty flavor. Presentation makes a meal more appealing. Arrange the roasted asparagus on a large platter. Drizzle extra lemon juice on top for a fresh look. Garnish with chopped parsley for a pop of green. You can also serve it in small bowls for individual servings. This makes it easy for guests to take what they want. For the full recipe, check out the details above. {{image_2}} You can cook Zesty Lemon Garlic Asparagus in different ways. Grilling adds a nice smoky flavor. Start by preheating your grill. Toss the asparagus with olive oil and seasonings. Place the spears directly on the grill for about six to eight minutes. Turn them often to avoid burning. Steaming is another healthy option. It keeps the vibrant green color. To steam, fill a pot with water and bring it to a boil. Place the asparagus in a steamer basket above the water. Cover and steam for about four to six minutes. This method keeps the nutrients intact. You can change the flavors of your asparagus easily. Adding fresh herbs can make a big difference. Try using basil, thyme, or dill for a fresh twist. Mix chopped herbs in with the garlic and olive oil. Cheese is a great addition too. Parmesan adds a salty, nutty flavor. You can sprinkle it on during the last few minutes of roasting. For a creamier taste, try feta cheese. Crumble it over the asparagus before serving. In summer, you can add cherry tomatoes for a pop of color. They roast well and add sweetness. In the fall, consider adding roasted pumpkin cubes for a seasonal touch. In winter, toss in some sliced almonds for crunch. Each season brings new flavors to explore with this dish. Check out the Full Recipe for more ideas! After enjoying your zesty lemon garlic asparagus, you might have some leftovers. To store them, let the asparagus cool down. Place it in an airtight container. This keeps the flavors fresh and the texture nice. Store it in the fridge for up to three days. If you want to keep it longer, consider freezing it. Just remember, freezing can change its texture. When you're ready to enjoy the leftovers, reheating is simple. You can use the oven or a skillet. For the oven, preheat it to 350°F (175°C). Spread the asparagus on a baking sheet. Heat for about 10 minutes, or until warm. If using a skillet, add a little olive oil to the pan. Toss the asparagus in the skillet over medium heat for about 5 minutes. This method helps keep it crisp. Zesty lemon garlic asparagus is best eaten fresh. However, if stored properly, it lasts a few days. Keep an eye on the color and smell. If it looks dull or smells off, it’s best to toss it. You can also check for texture. If it feels mushy, it's time to say goodbye. For the best taste, enjoy it within three days. For longer storage, consider freezing it right after cooking. You can pair Zesty Lemon Garlic Asparagus with many dishes. It goes well with grilled chicken. Try it with fish for a light meal. I love serving it with a quinoa salad. You can also enjoy it alongside pasta. The bright flavors enhance any main dish. Yes, you can prepare this dish ahead. Just trim the asparagus and mix the ingredients. Store them in the fridge for up to 24 hours. When ready, roast them fresh for the best taste. This way, you save time during busy meals. Asparagus is done when it's tender but still crisp. It should have a vibrant green color. You can poke it with a fork to check. If it feels soft and gives easily, it's ready. Roasting usually takes about 15-20 minutes. Keep an eye on it to avoid overcooking. Enjoy the fresh flavor and bright color! For the full recipe, check the section above. Zesty lemon garlic asparagus is easy to make and delicious. You learned about the key ingredients, step-by-step cooking, and tasty variations. Each tip helps you serve it well. Remember to store leftovers properly for later use. This dish fits in any meal and can impress others. Try different flavors and cooking methods to find what you love. You now have the tools to enjoy perfect asparagus every time. Enjoy your cooking adventure!

Zesty Lemon Garlic Asparagus Flavorful Side Dish

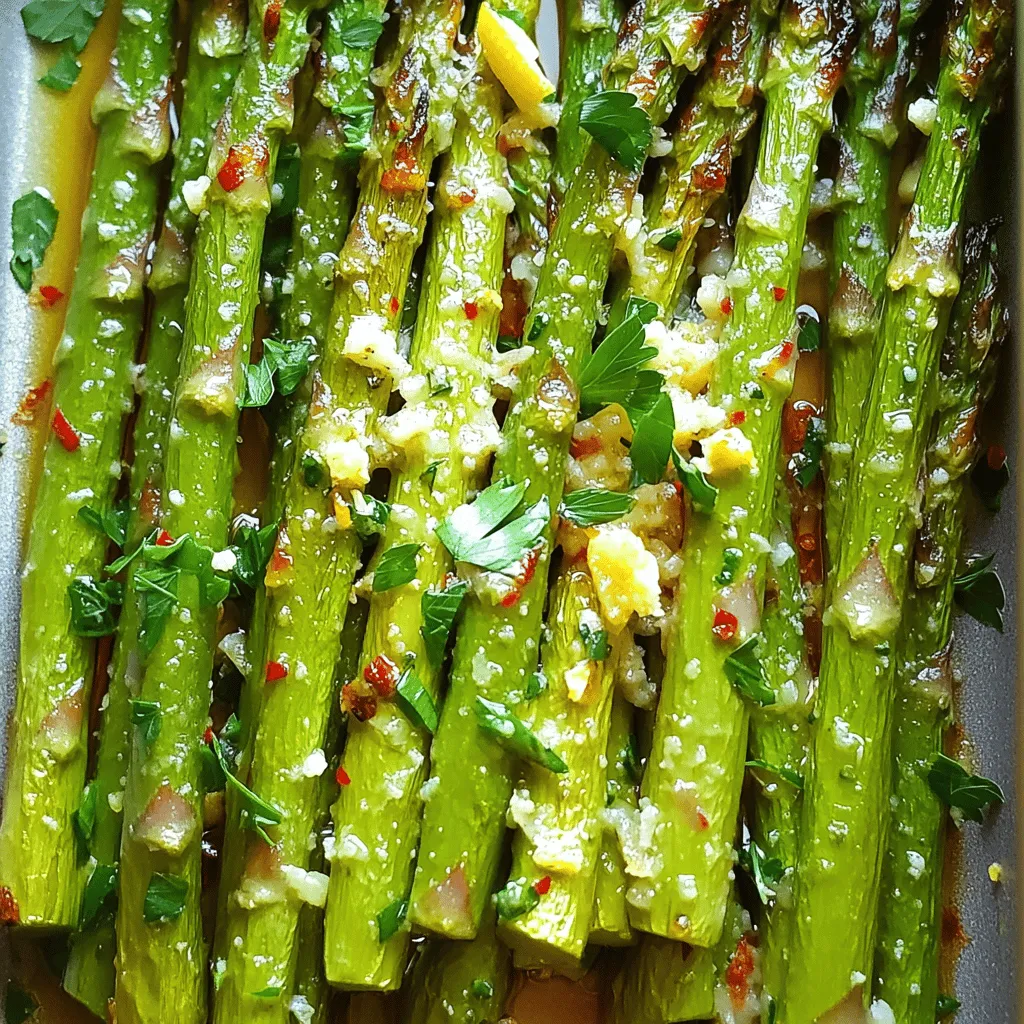
Looking for a vibrant side dish that brightens your meals? Try my Zesty Lemon Garlic Asparagus. This simple recipe packs

- 1 can (15 oz) chickpeas, drained and rinsed - 1 cup cherry tomatoes, halved - 1 cucumber, diced - ½ red onion, finely chopped - ½ cup Kalamata olives, pitted and sliced - 1 cup feta cheese, crumbled - 3 tablespoons olive oil - 2 tablespoons lemon juice - 1 teaspoon dried oregano - Salt and pepper to taste - 4 large whole wheat wraps or pita bread - Fresh parsley, chopped (for garnish) Gathering the right ingredients is key. Each one adds flavor and texture. You start with chickpeas. They are filling and rich in protein. Next, grab cherry tomatoes. Their sweetness balances the dish. Cucumbers add a refreshing crunch, while red onion gives a mild bite. Kalamata olives bring a salty flavor that enhances everything. Feta cheese adds creaminess and tang. For the dressing, use olive oil and lemon juice. They brighten the salad and tie it all together. Dried oregano gives a classic Greek taste. Don't forget salt and pepper for seasoning. For the wraps, use whole wheat wraps or pita bread. They are hearty and healthy. Finally, fresh parsley adds a touch of color and freshness. This complete ingredient list ensures a tasty and vibrant meal. You can find the full recipe at the end of this section. - First, combine chickpeas, cherry tomatoes, cucumber, red onion, olives, and feta in a bowl. I love the way these colors pop together. - Next, whisk olive oil, lemon juice, dried oregano, salt, and pepper in a separate bowl. This dressing adds a zesty kick. - Pour the dressing over the chickpea salad. Mix gently to coat all ingredients evenly. This makes every bite flavorful. - Now, lay out your whole wheat wraps or pita bread on a clean surface. Make sure they are flat and ready. - Spoon an even amount of the Greek chickpea salad into the center of each wrap. Don't overfill; you want to roll them easily. - Fold in the sides first, then roll tightly from the bottom to the top. This keeps everything securely inside. - Slice each wrap in half diagonally for easier handling. This also makes them look nice on a plate. - Garnish with fresh parsley for a bright finish. It adds a touch of color and freshness, making your meal more appealing. Enjoy this vibrant dish with the full recipe for Greek Chickpea Salad Wraps! If you want to change the feta cheese, try goat cheese or tofu. These options add creaminess without losing taste. For gluten-free wraps, look for rice or corn tortillas. They work well and keep the meal tasty. If you're on a low-sodium diet, use fresh herbs instead of olives. You can also skip added salt in the dressing. To add more taste, sprinkle some paprika or cumin on the chickpeas. This will give your salad a warm, earthy flavor. Fresh herbs like dill or mint can brighten the dish. Just chop them finely and mix them in. If you have time, marinate the chickpeas in lemon juice and spices for an hour. This will make them even more flavorful. When filling the wraps, use a spoon to evenly spread the salad. This ensures every bite is packed with flavor. To keep the wraps from falling apart, fold in the sides before rolling. This helps secure all the goodness inside. For a pretty presentation, slice each wrap in half and lay them on a colorful plate. You can also add a sprig of parsley on top for a fresh look. For the full recipe, check out the details above. {{image_2}} To make a vegan version of Greek chickpea salad wraps, simply omit the feta cheese. You can replace it with avocado or a nut-based cheese. Both options add creaminess and flavor. For a boost of protein, add hemp seeds or roasted chickpeas. You can also include fresh herbs like dill or basil for extra taste. To give your wraps a Mediterranean twist, add other veggies like bell peppers or artichokes. You can toss in sliced radishes for crunch and color. If you want some protein, consider adding grilled chicken or shrimp. Both will complement the chickpeas well and make your meal heartier. For a kick of heat, try adding a spicy dressing. Mix some sriracha or chili sauce into your olive oil and lemon juice. You can also sprinkle jalapeños on top for added spice. This will give your wraps a bold flavor that is sure to please spicy food lovers. Try these variations to make your Greek chickpea salad wraps even more exciting! For the full recipe, check out the complete guide. To keep your Greek chickpea salad wraps fresh, put them in an airtight container. This helps to lock in the flavors. Store them in the fridge for up to three days. If you need to save them longer, consider wrapping each one in plastic wrap before placing them in the container. This extra layer helps maintain freshness. Avoid stacking the wraps on top of each other to prevent squishing. You can freeze these wraps if you want to save them for later. Just wrap each one tightly in plastic wrap. Then, place them in a freezer-safe bag. They can last up to three months in the freezer. When you are ready to eat, let them thaw in the fridge overnight. To reheat, unwrap the wrap and place it in a microwave for about 30 seconds. This keeps the wrap soft and tasty. The ingredients in your Greek chickpea salad have a good shelf life. Chickpeas last for up to three years when canned. Fresh veggies, like tomatoes and cucumbers, stay good for about five days in the fridge. Feta cheese can be stored for up to a week after opening. Always check for signs of spoilage. If you see any mold or if it smells off, throw it away. Keeping an eye on your ingredients ensures you enjoy your wraps at their best. To make Greek Chickpea Salad Wraps, you start by mixing the salad. In a large bowl, combine the chickpeas, cherry tomatoes, cucumber, red onion, olives, and feta cheese. In another bowl, whisk olive oil, lemon juice, dried oregano, salt, and pepper. Pour this dressing over the salad mix and toss gently. For the wraps, lay out whole wheat wraps or pita bread. Spoon the salad into the center of each wrap, fold the sides, and roll tightly. Finally, slice the wraps in half and garnish with parsley. You can find the full recipe above. Yes, you can make these wraps ahead of time. Prepare the chickpea salad and store it in the fridge. Keep the wraps separate until you are ready to eat. This way, the wraps stay fresh and do not get soggy. You can assemble the wraps just before serving. If you plan to store them, wrap them tightly in plastic wrap or aluminum foil. Nutritious sides pair well with Greek Chickpea Salad Wraps. Consider serving a fresh side salad with greens and a light vinaigrette. You could also serve carrot sticks or cucumber slices for crunch. Another option is a bowl of Greek yogurt with herbs for dipping. These sides add variety and enhance the meal's freshness. These Greek Chickpea Salad Wraps are easy to prepare and delicious. We started with a simple list of fresh ingredients to create a hearty meal. I detailed step-by-step instructions for mixing, wrapping, and serving. You can customize your wraps with tips for ingredient swaps and flavor boosts. Whether you go vegan or add a Mediterranean twist, these wraps fit any taste. Remember to store them correctly to enjoy leftovers. Now, you have all you need to make a satisfying meal that’s fun to eat!

Greek Chickpea Salad Wraps Flavorful and Fresh Meal

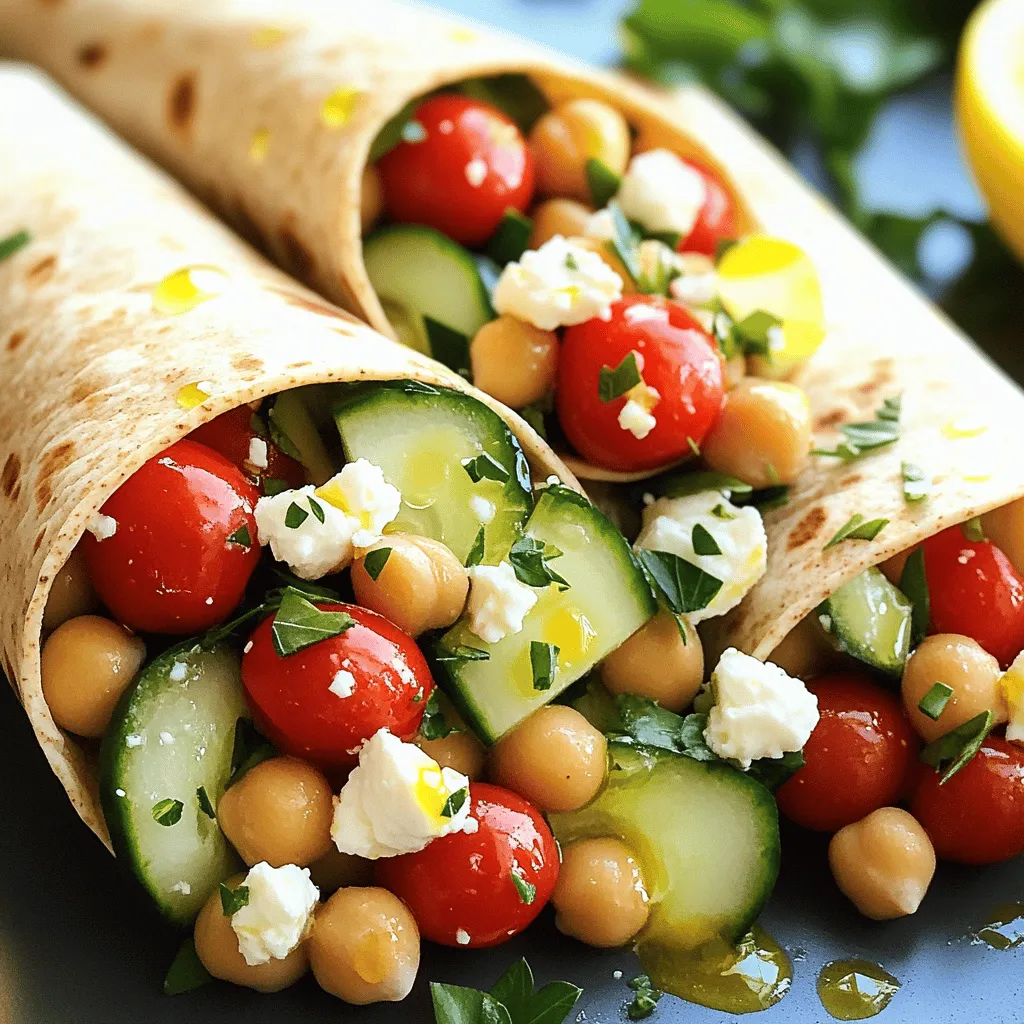
Are you ready to enjoy a fresh and flavorful meal? Greek Chickpea Salad Wraps are the perfect choice! Packed with

To make mocha ice cream sandwiches, gather these simple items: - 1 cup all-purpose flour - 1/2 cup unsweetened cocoa powder - 1/2 teaspoon baking soda - 1/4 teaspoon salt - 1/2 cup unsalted butter, softened - 1/2 cup granulated sugar - 1/2 cup brown sugar, packed - 1 large egg - 1 teaspoon vanilla extract - 1 tablespoon instant espresso powder - 1 pint coffee or mocha ice cream - Dark chocolate shavings, for garnish (optional) Each ingredient plays a key role in creating the perfect balance of flavors and textures. The all-purpose flour gives structure, while the cocoa powder adds rich chocolate taste. Baking soda helps the cookies rise, ensuring they are soft and chewy. Using both granulated and brown sugar enhances sweetness and moisture. The unsalted butter makes the cookies rich. The egg binds everything together. Vanilla extract brings out the other flavors, and espresso powder gives that lovely coffee kick. You can use any coffee or mocha ice cream you love. The dark chocolate shavings are optional but add a nice touch. Each ingredient matters in this delightful treat. Enjoy the process of making these indulgent sandwiches! {{ingredient_image_1}} - Preheat your oven to 350°F (175°C) and prepare the baking sheet with parchment paper. - In a medium bowl, whisk together the flour, cocoa powder, baking soda, and salt. Set this aside. - In a large bowl, cream the softened butter with both sugars until it’s light and fluffy. This takes about 2-3 minutes. - Mix in one egg, one teaspoon of vanilla extract, and one tablespoon of instant espresso powder. Blend until smooth. - Slowly incorporate the flour mixture into the butter mixture. Mix just until combined; don’t overdo it. - Scoop tablespoon-sized amounts of dough and place them on the prepared baking sheet. Space them about 2 inches apart. - Bake these cookies for 10-12 minutes. They should be set around the edges. Cool them on the sheet for 5 minutes, then move to a wire rack. - Once cool, scoop a generous amount of mocha ice cream onto the flat side of one cookie. Top it with another cookie, pressing gently to make a sandwich. - Repeat this until all cookies and ice cream are used up. - For a fancy touch, roll the edges of the ice cream sandwiches in dark chocolate shavings. - Freeze the sandwiches for at least 30 minutes to firm them up before serving. - To get the best cookie texture, you must cream the butter and sugars well. This step adds air to the dough, making the cookies soft. - Avoid overmixing the dough when adding the flour. Mix just until you see no dry flour. This keeps the cookies from being tough. - Choose a high-quality coffee or mocha ice cream. Look for a rich flavor and smooth texture for the best result. Brands that use real coffee are often the tastiest. - For portioning ice cream, use a scoop or spoon. This helps create even amounts for each sandwich. Aim for about 1/4 cup of ice cream per sandwich. - Serve the sandwiches on a chilled plate. This keeps them from melting too quickly. - For garnish, sprinkle chocolate shavings or cocoa powder on top. This adds a nice touch and makes the treat look fancy. You can also roll the edges in chocolate shavings for extra fun! Pro Tips Use Cold Ingredients: Ensure your ice cream is slightly softened but still cold before assembling the sandwiches to make it easier to scoop and spread. Experiment with Flavors: Try using different ice cream flavors like vanilla or chocolate to create unique combinations with the mocha cookies. Store Properly: Wrap each ice cream sandwich in plastic wrap before freezing to prevent freezer burn and maintain texture. Garnish Creatively: Enhance presentation by adding toppings like crushed nuts or sprinkles along with chocolate shavings for added texture and flavor. {{image_2}} You can switch up the ice cream flavor for a fun twist. Try vanilla or chocolate chip cookie dough ice cream. Both pair well with the mocha cookies. If you want something lighter, consider using yogurt-based ice cream. You can also find dairy-free ice cream made from almond or coconut milk. For cookies, you can make gluten-free versions. Use almond flour or a gluten-free all-purpose mix. You can also make dairy-free cookies by using coconut oil instead of butter. These swaps let everyone enjoy this treat. Adding extras can make your ice cream sandwiches even more special. Try mixing in chopped nuts like walnuts or pecans for crunch. You can also add chocolate chips or toffee bits to the cookie dough for extra sweetness. For flavor boosts, consider adding spices. A pinch of cinnamon or nutmeg can deepen the taste of your cookies. You can also blend in orange zest for a bright, fresh flavor. These small changes can create a whole new experience. Seasonal flavors add fun to your ice cream sandwiches. For fall, use pumpkin spice ice cream or add crushed candy corn to the cookies. In winter, peppermint ice cream can bring joy to your treats. You can also use gingerbread cookies for a festive touch. For kids, you can make fun shapes with cookie cutters. Use colorful sprinkles or edible glitter to decorate the edges. These little touches make the sandwiches exciting for any celebration. To keep your mocha ice cream sandwiches fresh, wrap each one in plastic wrap. Place them in an airtight container. This method helps prevent freezer burn. You can also use parchment paper between sandwiches to avoid sticking. These sandwiches can last in the freezer for up to two weeks. If you want them to last longer, consider storing the cookies and ice cream separately. This way, you can assemble fresh sandwiches as needed. If your sandwiches are too hard to bite into, soften them a bit. Let them sit at room temperature for about five minutes. This small wait makes them easier to enjoy. For leftover sandwiches, try cutting them into smaller pieces. You can serve them in a bowl topped with chocolate sauce or whipped cream. Another fun idea is to crush them and mix into milkshakes for a mocha treat! To make your cookies cakier, use more flour. You can add an extra 1/4 cup of flour. This gives the cookies more structure. You can also try using baking powder instead of baking soda. This change adds lift to the cookies. Mix the dough less to keep it light. Don’t over-mix; just combine the wet and dry ingredients well. Yes, you can swap flours and sugars. For a gluten-free option, try almond flour or oat flour. Use coconut sugar instead of brown sugar for a unique taste. If you want a lighter cookie, use powdered sugar. Just keep the same total amount of sugar. Make sure to adjust the liquid, too, if you use a different flour. You can find pre-made mocha ice cream sandwiches at many local stores. Brands like Ben & Jerry’s and Haagen-Dazs offer great options. Check the freezer section in grocery stores like Walmart or Target. You can also look online at grocery delivery services. If you want something special, visit local ice cream shops for homemade versions. You now have a solid recipe for coffee ice cream sandwiches. We covered all the key steps, from gathering simple ingredients to baking and assembling the treats. I shared tips to make your cookies perfect and ideas for fun variations. Remember, you can swap ingredients or ice cream flavors to match your taste. These sandwiches are a crowd-pleaser you can impress anyone with. Enjoy making them and adding your twist!

Mocha Ice Cream Sandwiches Delightful Sweet Treats

Craving a treat that combines coffee bliss with sweet satisfaction? Look no further than mocha ice cream sandwiches! These delightful

To make delicious Blueberry Oat Breakfast Bars, you need simple and healthy ingredients. Here’s what you'll need: - 2 cups rolled oats - 1 cup fresh blueberries (or frozen) - 1/4 cup honey or maple syrup - 1/2 cup almond butter (or any nut butter) - 1/2 teaspoon vanilla extract - 1/2 teaspoon baking powder - 1/4 teaspoon salt - 1/2 teaspoon cinnamon - Optional add-ins: chocolate chips or dried fruits These ingredients are rich in nutrients. Rolled oats provide fiber and energy. Blueberries add natural sweetness and antioxidants. Almond butter gives healthy fats and protein. Honey or maple syrup adds a touch of sweetness. The spices like cinnamon enhance the flavor. Each ingredient plays a role in making these bars tasty and healthy. Feel free to mix in extras like chocolate chips or dried fruits. These options can make your bars even more fun and flavorful. The best part? You can customize them to suit your taste! {{ingredient_image_1}} 1. First, preheat your oven to 350°F (175°C). This helps cook the bars evenly. 2. Next, prepare an 8x8 inch baking dish. Line it with parchment paper, leaving some overhang. This step makes it easy to lift the bars out later. 1. In a large mixing bowl, combine the rolled oats, baking powder, salt, and cinnamon. Stir until well mixed. This mix gives our bars a great texture. 2. In another bowl, whisk together the almond butter, honey (or maple syrup), and vanilla extract until smooth. This wet mixture adds flavor and binds the bars. 3. Now, pour the wet mixture into the dry ingredients. Stir until fully combined. The batter should be thick and sticky. 4. Gently fold in the blueberries and chopped nuts. If you want, add chocolate chips or dried fruits for extra flavor. 1. Pour the mixture into your prepared baking dish and spread it evenly. Press down firmly to pack it in. This ensures the bars hold together. 2. Bake in the preheated oven for 20-25 minutes. Check for doneness by looking for golden brown edges. 3. Once baked, remove the dish from the oven. Let it cool for about 10 minutes in the pan. Then, transfer the bars to a wire rack to cool completely. 4. When cooled, lift the bars from the pan using the parchment paper overhang. Cut them into squares or rectangles. Enjoy them for breakfast or as a tasty snack! To get the right consistency, aim for a thick and sticky mix. This helps the bars hold together well. Press the mixture firmly into the baking dish. Use a spatula or your hands to pack it down tightly. This step makes a big difference in how the bars turn out. If your mixture feels too dry, add a splash of water or more nut butter. If you want to switch up the nut butter, try peanut butter or sunflower seed butter. These can change the flavor but keep the bars tasty. For sweeteners, maple syrup works great if you want a plant-based option. You can also use agave syrup, but adjust to taste. Each sweetener gives a different hint of flavor. Fresh blueberries bring a burst of flavor and a nice texture. They are juicy and sweet. Frozen blueberries, however, can be just as good. They may burst a little when mixed in, which adds a fun texture. If using frozen, do not thaw them first. Just fold them in straight from the bag. This keeps them from getting mushy. Pro Tips Use Fresh Ingredients: Opt for fresh blueberries when in season for the best flavor, but frozen berries work well too if fresh ones are not available. Customize Your Sweetness: Adjust the amount of honey or maple syrup based on your sweetness preference; you can even reduce it for a less sweet bar. Storage Tips: Store the bars in an airtight container at room temperature for up to a week, or refrigerate for longer freshness. Perfect Serving Size: Cut the bars into smaller squares for a great on-the-go snack, or larger pieces for a hearty breakfast treat. {{image_2}} You can make your Blueberry Oat Breakfast Bars unique by changing the fruits. Try using bananas or apples for a sweet twist. Each fruit brings its own taste and texture. For a fun kick, add spices like nutmeg or ginger. These spices boost flavor without adding sugar. If you want a gluten-free option, use certified gluten-free oats. This change keeps the bars tasty and safe for gluten-sensitive folks. You can also lower the sugar by using less honey or maple syrup. Try unsweetened applesauce instead to keep it moist and sweet. These bars pair well with yogurt or nut butter. Spread almond butter on top for extra protein. You can also enjoy them with a smoothie for a filling breakfast. The combo of flavors and nutrients makes for a great start to your day. To keep your Blueberry Oat Breakfast Bars fresh, store them in an airtight container. This method keeps moisture out and helps maintain texture. If you plan to eat them within a week, they can sit at room temperature. Just make sure they are in a cool, dry place. For longer freshness, refrigerate them. The cool air slows down spoilage and keeps them tasty. You can freeze these bars for later enjoyment. First, cut the cooled bars into squares or rectangles. Wrap each piece tightly in plastic wrap or foil. Place the wrapped bars in a freezer-safe bag or container. When you want to eat one, simply thaw it in the fridge overnight. For a quick snack, you can also thaw it at room temperature for about an hour. When stored properly, your Blueberry Oat Breakfast Bars can last up to a week in the fridge. At room temperature, they stay fresh for about 3 to 5 days. If you freeze them, they can last up to 3 months. This makes them a great option for meal prep or a quick grab-and-go snack! Blueberry Oat Breakfast Bars can last up to one week when stored properly. Keep them in an airtight container at room temperature. If you want them to last longer, store them in the fridge. They can stay fresh for about two weeks there. Yes, you can easily make these bars vegan. Replace honey with maple syrup. Use a plant-based nut butter, like almond or peanut butter. Both swaps will keep these bars delicious and vegan-friendly. If you need a substitute for almond butter, try peanut butter or sunflower seed butter. Both options work well and add their own unique flavor. You can also use cashew butter for a creamier texture. You can use quick oats instead of rolled oats, but the texture may change. Quick oats will make the bars softer and less chewy. If you enjoy a firmer bar, stick with rolled oats. These delicious Blueberry Oat Breakfast Bars are easy to make and perfect for busy mornings. With simple ingredients like oats, blueberries, and nut butter, you can create a healthy snack. Remember to follow the step-by-step instructions to get these bars just right. Don't forget the tips on perfecting the texture and storing them for freshness. Get creative with variations to keep things fun and tasty. Enjoy them with yogurt or in your morning smoothie. These bars can fit into your routine easily and keep you satisfied throughout the day.

Blueberry Oat Breakfast Bars Healthy and Tasty Snack

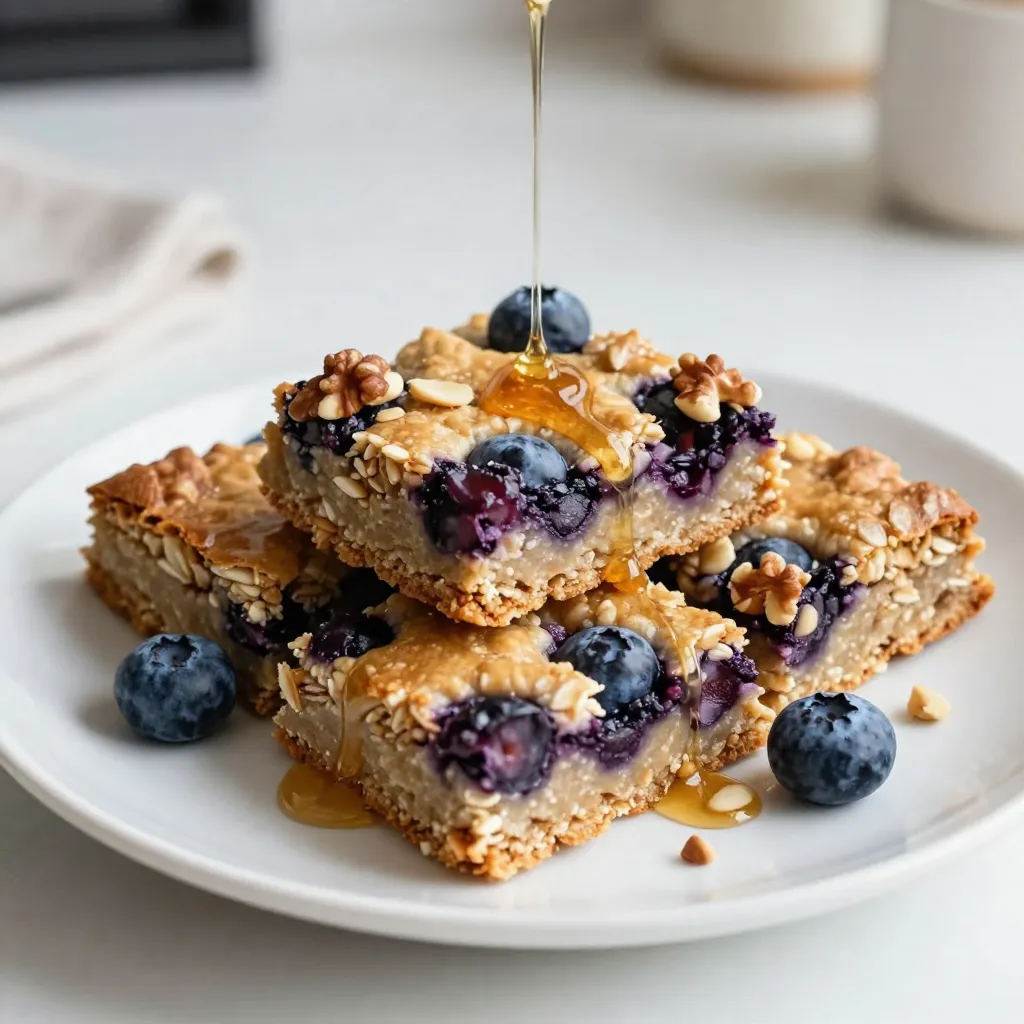
Looking for a healthy and tasty snack to kickstart your day? Blueberry Oat Breakfast Bars are your answer! Packed with

- 1 lb (450g) boneless, skinless chicken breasts - 1/2 cup buffalo sauce - 1 tablespoon olive oil - 1 teaspoon garlic powder - 1 teaspoon onion powder - 1/2 teaspoon smoked paprika - Salt and pepper to taste - 1 head of iceberg or butter lettuce - 1/2 cup ranch or blue cheese dressing - 1/4 cup green onions, chopped - 1/4 cup celery, finely diced - Optional: fresh parsley, chopped Each ingredient plays a role in making the dish flavorful and healthy. The chicken provides protein, while the buffalo sauce adds heat. The olive oil keeps everything moist. For seasonings, garlic powder and onion powder give depth, and smoked paprika adds a unique twist. You can adjust salt and pepper to your taste. Next, the lettuce acts as a crunchy wrap, making it fun to eat. Dressings like ranch or blue cheese add creaminess and contrast to the spicy chicken. The green onions and celery provide freshness and crunch. Fresh parsley can brighten the dish with color and flavor. For the full recipe, check the details above. Cooking Buffalo Chicken Lettuce Wraps is simple and fun. Let’s dive right into the steps! - Heat one tablespoon of olive oil in a large skillet. - Add 1 pound of shredded chicken. Season it with garlic powder, onion powder, smoked paprika, salt, and pepper. - Cook for about five minutes, stirring often. This step ensures the chicken absorbs all the tasty spices. - Now, pour in 1/2 cup of buffalo sauce. - Stir the sauce into the chicken until it’s all coated. - Let it cook for another three to five minutes. This warms the chicken and blends the flavors. Taste it and adjust seasonings if needed. - While the chicken cooks, take a head of iceberg or butter lettuce. Carefully separate the leaves and rinse them gently. - Spoon your warm buffalo chicken mixture into the center of each lettuce leaf. - Drizzle your choice of ranch or blue cheese dressing over the top. - For extra crunch, add chopped celery and green onions. - If you like, sprinkle some fresh parsley on top for a nice touch. This dish is quick to make and packed with flavor. You can find the Full Recipe for detailed instructions on each step! To make the best buffalo chicken, season it evenly. I sprinkle the garlic powder, onion powder, smoked paprika, salt, and pepper all over the chicken. This way, every bite is packed with flavor. After cooking, shred the chicken while it's hot. Shredding gives it the perfect texture. You want it juicy and tender for the wraps. Want more heat? Add extra buffalo sauce or a dash of hot sauce. Start with a little. You can always add more. If buffalo sauce is too spicy, try a milder sauce like barbecue. You can even mix ranch with your buffalo sauce for a creamy twist. When it comes to lettuce, I love iceberg for its crunch. Iceberg is sturdy and holds the chicken well. Butter lettuce offers a softer bite. It’s great for wraps too. To handle lettuce leaves, wash them gently and dry them well. This keeps them from tearing when you fill them. {{image_2}} You can change the sauce to fit your taste. If you want more heat, try sriracha. For sweetness, honey mustard works great. Both add a fun twist to your wraps. If you want a different protein, use turkey instead of chicken. You can also try tofu for a vegetarian option. Tofu absorbs flavors well and gives a nice texture. To make your wraps even crunchier, add some chopped bell peppers or shredded carrots. Nuts and seeds like chopped almonds or sunflower seeds are great toppings too. They add a nice crunch and extra flavor. To keep your leftover chicken mixture fresh, store it in an airtight container. Make sure to cool it down first. If you have leftover lettuce, store the leaves separately. This way, they stay crisp and fresh longer. For reheating, place the buffalo chicken in a skillet over medium heat. Stir it often for even heating. You can add a splash of water or more buffalo sauce to keep it moist. Avoid using the microwave, as it can make the chicken chewy. Yes, you can freeze buffalo chicken! To freeze, place the cooled mixture in a freezer-safe bag. Remove as much air as you can before sealing. When you're ready to eat, let it thaw in the fridge overnight. Reheat it on the stove for the best results. You can serve many tasty sides with Buffalo Chicken Lettuce Wraps. Here are some ideas: - Fresh veggie sticks like carrots and celery - Crispy sweet potato fries - A light salad with a zesty dressing - Homemade potato chips for crunch - A cooling yogurt dip to balance the spice These sides complement the wraps and add variety to your meal. Yes, you can prep some parts ahead. Here are some tips: - Cook the chicken and store it in the fridge. - Wash and dry the lettuce leaves and keep them in a container. - Cut veggies like celery and green onions for easy assembly. Assemble the wraps just before serving for the best taste. The spice level depends on the buffalo sauce you use. You can adjust it: - For milder wraps, use less buffalo sauce. - Mix in a bit of honey for sweetness. - Add more sauce if you like it hot. Tailor the spice to fit your taste. You can find the detailed instructions and ingredients in the Full Recipe. Enjoy making this fun and tasty meal! Buffalo Chicken Lettuce Wraps are easy and fun to make. You learned about the ingredients, step-by-step cooking, and tips. The options for sauces and proteins add variety. Always store leftovers properly for the best taste. You can make these wraps spicy or mild. With this guide, you can prepare a tasty meal for any event. Enjoy the fresh flavors and crunchy textures! These wraps are sure to be a hit. Happy cooking!

Buffalo Chicken Lettuce Wraps Flavorful and Healthy Meal

Are you craving a meal that’s both delicious and healthy? Look no further than Buffalo Chicken Lettuce Wraps! These tasty

Older posts
Newer posts
← Previous Page1 … Page65 Page66 Page67 … Page84 Next →

dsad

© 2026 juliesdish • Built with GeneratePress

Our Policies

  • Copyright Policy
  • Cookie Policy
  • GDPR Policy
  • Privacy Policy
  • Disclaimer
  • Terms Of Use

More Information

  • Home
  • About
  • Contact
  • Appetizers
  • Dessert
  • Dinner
  • Drinks
©2026, juliesdish About Back To Top