Skip to content
DisclaimerTerms Of UseGDPR PolicyCookie Policy

juliesdish

  • Home
  • Drinks
  • Appetizers
  • Dinner
  • Dessert
  • About
  • Contact
  • Privacy Policy
DisclaimerTerms Of UseGDPR PolicyCookie Policy

NO-ING-IMG

For this salad, use 4 cups of fresh kale. Choose kale that looks bright and crisp. Remove the tough stems and chop the leaves into bite-sized pieces. Kale adds a nice crunch and a lot of nutrients. You need 1 can of chickpeas. Drain and rinse them well. For a tasty crunch, toss the chickpeas with: - 2 tablespoons olive oil - 1 teaspoon garlic powder - ½ teaspoon smoked paprika - Salt and pepper to taste These seasonings give the chickpeas a lovely flavor and make them crispy when baked. The dressing is key for this salad. You'll need: - 2 tablespoons lemon juice - 1 tablespoon Dijon mustard - 1 teaspoon Worcestershire sauce (use a vegan version if you like) - 2 tablespoons tahini Mix these ingredients to create a creamy dressing. If it feels too thick, add a teaspoon of water to thin it out. This dressing adds zing and creaminess to the salad. For the full recipe, check out the details on how to prepare this delightful dish! Start by preheating your oven to 400°F (200°C). Grab a can of chickpeas and drain it well. Rinse them under cold water to remove the canning liquid. This helps with the flavor. In a bowl, mix the chickpeas with olive oil, garlic powder, smoked paprika, salt, and pepper. Make sure they are well coated. Spread them out on a baking sheet in a single layer. Bake for 20 to 25 minutes until they are golden brown and crispy. Remember to shake the pan halfway through to cook them evenly. While the chickpeas bake, let’s whip up the Caesar dressing. In a small bowl, combine lemon juice, Dijon mustard, Worcestershire sauce, and tahini. Use a whisk to mix them until smooth. If the dressing is too thick, add a teaspoon of water. This will help you get the right consistency. Taste it and adjust the flavor as needed. Now for the fun part! In a large bowl, add the chopped kale. Drizzle in half of the dressing. Use your hands to massage the kale for about 2 minutes. This softens the leaves and enhances the flavor. Once the kale is ready, add the crispy chickpeas, grated Parmesan cheese, and croutons. Drizzle the rest of the dressing on top. Toss everything gently until well combined. For a finishing touch, garnish with fresh chopped parsley. Enjoy your Kale Caesar Salad with Crispy Chickpeas! For the full recipe, check out the details above. To make your chickpeas crispy, start with a clean can of chickpeas. Drain and rinse them well. This step removes extra starch. Pat them dry with a towel. Moisture is the enemy of crispness. Toss chickpeas with olive oil and spices. Make sure they are well-coated. Spread them on a baking sheet in a single layer. This helps them cook evenly. Bake at 400°F (200°C) for 20-25 minutes. Shake the pan halfway through to ensure even cooking. Kale can be tough, but massaging it makes a big difference. After chopping your kale, place it in a large bowl. Drizzle half of your dressing over the leaves. Use your hands to gently squeeze and rub the kale. Do this for about two minutes. The leaves will soften and wilt, which makes them easier to eat. This step also helps the flavors soak in better. The dressing should be creamy but not too thick. If it is too thick, add a teaspoon of water to thin it out. Taste the dressing before serving. Adjust flavors by adding more lemon juice or mustard if needed. For an extra kick, add a dash of hot sauce. You can also mix in some fresh herbs like basil or dill for added flavor. For the complete recipe, check out the Full Recipe section. {{image_2}} You can easily make this salad vegan. Instead of Parmesan cheese, use nutritional yeast. It adds a cheesy flavor without dairy. For the dressing, replace the Worcestershire sauce with a vegan version. This keeps all the delicious taste while sticking to plant-based ingredients. Want more protein? You can add grilled chicken or shrimp for a tasty boost. If you prefer plant-based protein, try adding some quinoa or tofu. Both options mix well with the flavors of the salad. They keep you full and satisfied. Spice up your salad with new flavors. Try adding chopped sun-dried tomatoes or olives for a salty kick. You can also mix in some roasted red peppers for a sweet twist. If you like heat, a dash of red pepper flakes can add some zing. Experimenting with these ingredients will make each salad unique. You can follow the Full Recipe to keep it simple while exploring these new ideas. You can store leftover salad in an airtight container. This keeps it fresh for 1-2 days. However, the crispy chickpeas may lose their crunch. To keep the salad tasty, try to eat it soon after making it. To store crispy chickpeas, let them cool completely. Place them in a sealed container at room temperature. They stay crunchy for up to 3 days. Avoid putting them in the fridge, as moisture can make them soft. For the dressing, store it in a jar with a lid. It can last up to a week in the fridge. If it thickens, whisk in a bit of water to loosen it up. This helps maintain a smooth texture for your next salad. Check out the Full Recipe for more tips! To make chickpeas crispy, start with dried chickpeas. If using canned, rinse and drain them well. Then, dry them on a towel. Toss the chickpeas with olive oil, garlic powder, smoked paprika, salt, and pepper. Spread them on a baking sheet. Bake at 400°F (200°C) for 20-25 minutes. Shake the pan halfway through for even cooking. This method gives you crunchy, flavorful chickpeas. Yes, you can use other greens. Spinach, romaine, or arugula work well. Each green has a unique taste and texture. For a lighter salad, try using spinach. Romaine adds a nice crunch, while arugula gives a peppery kick. Just remember to adjust the dressing amount if you change the greens. If the dressing is too thick, add water a teaspoon at a time. Whisk it well after each addition. This helps reach your desired consistency. You can also use a bit of extra lemon juice for added flavor. Make sure the dressing coats the kale nicely for the best taste. For the full recipe, check out the [Full Recipe]. This blog post explored how to make a delicious kale salad. We covered fresh ingredients like kale and chickpeas, the right seasonings, and creamy dressing. I shared step-by-step instructions for preparing crispy chickpeas and mixing everything together. You learned helpful tips for the best results and storage advice to keep your salad fresh. Finally, we discussed fun variations to change up flavors and protein options. Now, you have the tools to create a healthy, tasty dish. Enjoy the process and make it your own!

Kale Caesar Salad with Crispy Chickpeas Delight

Are you ready to elevate your salad game? My Kale Caesar Salad with Crispy Chickpeas is a fresh twist on

To make a tasty Instant Pot Butter Chicken, gather these key ingredients: - 1.5 lbs boneless chicken thighs, cut into bite-sized pieces - Spices: - 2 tablespoons garam masala - 1 tablespoon ground cumin - 1 tablespoon ground coriander - 1/2 teaspoon turmeric - 1/2 teaspoon cayenne pepper (adjust to taste) - Vegetables: - 1 large onion, finely chopped - 4 cloves garlic, minced - 1 tablespoon fresh ginger, grated - Sauces: - 1 can (14 oz) crushed tomatoes - 1 cup coconut milk - 1 tablespoon honey - Salt to taste - Fresh cilantro, chopped (for garnish) You will need these simple tools to make this dish: - Instant Pot or electric pressure cooker - Measuring cups and spoons - Cutting board and knife These ingredients and tools make the process smooth. Each element adds its own flavor and texture. The spices create warmth, and the coconut milk adds creaminess. Everything comes together to make a delicious meal. For the complete step-by-step process, check the Full Recipe. First, gather all your ingredients. You will need chicken thighs, onions, garlic, ginger, and spices. - Chop 1 large onion into small pieces. - Mince 4 cloves of garlic. - Grate 1 tablespoon of fresh ginger. - Cut 1.5 lbs of chicken thighs into bite-sized pieces. These steps help build a strong base for your dish. Fresh cuts make the meal taste better. Now, set your Instant Pot to Sauté mode. Add 1 tablespoon of vegetable oil and let it heat for about one minute. - Add the chopped onion and sauté for 3-4 minutes until it turns clear. - Stir in the minced garlic and grated ginger. Cook for 1 more minute until you smell the great aroma. Next, add the spices: 2 tablespoons of garam masala, 1 tablespoon of ground cumin, 1 tablespoon of ground coriander, 1/2 teaspoon of turmeric, and 1/2 teaspoon of cayenne pepper. Stir well and sauté for 30 seconds. This toasts the spices and brings out their flavor. Now, toss in the chicken pieces. Stir to coat them in the spice mix. - Pour in 1 can of crushed tomatoes, 1 cup of coconut milk, and 1 tablespoon of honey. Mix everything well and ensure it's combined. Secure the lid on your Instant Pot. Make sure the valve is set to “Sealing.” Set it to cook on Manual mode for 10 minutes. Once the timer goes off, carefully use the quick release method. Move the valve to “Venting” to release steam. - Stir the chicken and taste it. Adjust the salt if needed. - If you want a thicker sauce, press “Sauté” and let it simmer a bit longer. Serve your butter chicken hot, and consider garnishing it with fresh chopped cilantro. Enjoy this tasty meal over basmati rice or with warm naan bread. For the complete process, refer to the Full Recipe. To get the best flavor in your butter chicken, toasting spices is key. When you toast spices, their oils release, making the dish more fragrant. In step three of the recipe, after adding the garlic and ginger, sprinkle in the garam masala, cumin, coriander, turmeric, and cayenne. Sauté them for about 30 seconds. This step adds depth to the sauce. To enhance the creaminess of the sauce, use full-fat coconut milk. This adds richness and balances the spices. For an extra creamy texture, stir in a bit of butter or cream just before serving. This small addition can elevate your dish. Cooking time can vary depending on the chicken cuts you use. If you opt for chicken breasts, reduce the cooking time to about 8 minutes. This ensures the chicken stays juicy. For those who like dark meat, chicken thighs are perfect and tender after 10 minutes. If you want a thicker sauce, you can adjust the cooking time slightly. After the quick release, use the sauté function. Let the sauce simmer for a few minutes until it thickens. If you prefer a thinner sauce, add a splash of coconut milk or water and stir. For serving, I love to pair butter chicken with fluffy basmati rice or warm naan. This makes each bite delightful. You can create a beautiful plate by layering rice and topping it with the chicken. Garnishing adds a nice touch. I recommend fresh cilantro for color and flavor. Sprinkle some over the top just before serving. You can also add a dash of paprika or chili powder for a pop of color. These simple tips make your dish look as good as it tastes. {{image_2}} You can switch chicken thighs for chicken breasts. Breasts are leaner but still tasty. If you want a vegetarian dish, try using paneer or chickpeas. Paneer adds creaminess, while chickpeas bring protein. Both options make a great meal. To make your butter chicken milder, reduce the cayenne pepper. For more heat, add extra cayenne or even some chili powder. You can also try adding spices like smoked paprika or a pinch of cinnamon. These spices help you create a unique flavor. If you want a dairy-free meal, use almond or oat milk instead of coconut milk. These give a nice creaminess without dairy. For those needing to avoid honey, use maple syrup or agave nectar. Both options add sweetness without the honey. To keep your butter chicken fresh, place it in an airtight container. Let it cool first, then cover it tightly. You can store it in the fridge for up to four days. Always check for any signs of spoilage before eating. I recommend glass or BPA-free plastic containers for storage. They are safe and help keep the flavors intact. For quick reheating, the microwave works well. Place your butter chicken in a microwave-safe bowl. Heat it in short bursts, stirring in between to avoid hot spots. If you prefer the stovetop, pour it into a pan over medium heat. Stir often until it is warm. To maintain the flavor and texture, add a splash of coconut milk if it seems dry. This keeps the sauce creamy and delicious. You can freeze butter chicken for up to three months. Use a freezer-safe container or heavy-duty freezer bags. Make sure to label them with the date. To thaw, place it in the fridge overnight. For reheating, use the microwave or stovetop as mentioned above. If frozen in a bag, you can run it under cold water to speed up the thawing process. You can serve this dish with simple sides. Here are some great options: - Fluffy basmati rice - Warm naan bread - Steamed vegetables These sides add balance and texture. You can also try a fresh salad or yogurt with mint. They bring coolness to the spicy chicken. Yes, you can prepare this dish in advance. Cook the butter chicken as directed. Let it cool and store it in the fridge. It holds up well for up to three days. To reheat, warm it on the stove or in a microwave. Add a splash of water if it seems thick. This keeps the sauce creamy and fresh. Adjusting spice levels is easy! Here are some tips: - For milder flavors, cut back on cayenne pepper. - For more heat, add extra cayenne or some chili powder. - Taste as you go to find your perfect level. Spices can change based on your personal taste. Feel free to experiment! You can check the Full Recipe for detailed instructions and more tips. It includes everything you need to create this tasty dish. You now have all the tools to make Instant Pot butter chicken at home. We covered the key ingredients, essential kitchen tools, and easy steps to cook this dish. I shared tips for the best flavor and presentation ideas. You can customize it to your taste and even store leftovers safely. Remember, cooking should be fun and rewarding. I hope this guide helps you create a delicious meal that brings joy to your table. Enjoy experimenting and savoring every bite!

Instant Pot Butter Chicken Delicious and Quick Meal

Are you ready to whip up a delicious meal in no time? This Instant Pot Butter Chicken recipe is both

- 2 cups edamame in pods (fresh or frozen) - 3 tablespoons olive oil - 4 cloves garlic, minced - 1 teaspoon red chili flakes (adjust to taste) - 1 tablespoon soy sauce - 1 tablespoon sesame oil - 1 teaspoon freshly squeezed lime juice - Sea salt to taste - Sesame seeds for garnish - Fresh cilantro, chopped (for garnish) To make spicy garlic edamame, you'll need simple yet flavorful ingredients. Edamame gives this dish its base. You can buy it fresh or frozen. Fresh edamame adds sweetness, while frozen is quick and easy. Next, we add olive oil. It brings richness and a smooth texture. Garlic is a star in this dish. Minced garlic adds a strong, bold flavor. Red chili flakes add the heat. Adjust this based on your taste. If you like spice, feel free to add more. Soy sauce gives a savory touch. It balances the spice from the chili. Sesame oil adds a layer of nutty flavor. Lime juice brightens the dish and adds freshness. Sea salt enhances all the flavors. Finally, garnish with sesame seeds and chopped cilantro. These add color and a pop of flavor. You can find the full recipe in the article. This snack is not only tasty but also healthy! Enjoy your cooking adventure! To start, you need to cook the edamame. You can use fresh or frozen edamame. - Cooking fresh edamame: Bring a pot of salted water to a boil. Add the fresh edamame pods. Cook them for 3-5 minutes until they look bright green and are tender. Then, drain and set aside. - Cooking frozen edamame: If you're using frozen edamame, just follow the package instructions. Cook them until tender, then drain and set aside. Next, it’s time to sauté the garlic. This step adds a rich flavor to your dish. - Heating olive oil: In a large skillet, heat 3 tablespoons of olive oil over medium heat. - Adding garlic and chili flakes: Once the oil is hot, add 4 minced garlic cloves. Sauté for about 1-2 minutes until fragrant and lightly golden. Be careful not to burn the garlic. Then, stir in 1 teaspoon of red chili flakes. Let them cook for about 30 seconds to release their flavors. Now, let's bring everything together for a tasty mix. - Tossing edamame with garlic mixture: Add the cooked edamame to the skillet. Toss them well to coat with the garlic and chili oil. - Adding soy sauce and sesame oil: Drizzle 1 tablespoon of soy sauce and 1 tablespoon of sesame oil over the edamame. Continue tossing for 2-3 minutes until everything is heated through. Finish off your dish with a few fresh elements. - Squeezing lime juice: Squeeze 1 teaspoon of fresh lime juice over the mixture. This adds a nice zing. - Garnishing with sesame seeds and cilantro: Transfer the edamame to a serving bowl. Top with sesame seeds and chopped cilantro for a beautiful finish. Enjoy your Spicy Garlic Edamame! For the full recipe, check out the detailed instructions above. To make the best spicy garlic edamame, you must pay close attention while sautéing. First, avoid burnt garlic. When you heat the olive oil, keep the heat at medium. Add the garlic, and watch it closely. It should turn golden, but not dark brown. If it burns, it will taste bitter. Next, infuse the oil with chili flavors. After adding the garlic, toss in the red chili flakes. Let them cook for about 30 seconds. This step brings out their heat and flavor. The oil will absorb the spice, making every bite delicious. Pair your spicy garlic edamame with other tasty dishes. It goes well with sushi, rice bowls, or salads. You can also serve it as an appetizer before a meal. The best serving temperature is warm. The flavors are most vibrant when the edamame is fresh from the skillet. If you let it cool, it still tastes good, but it won’t be as exciting. To adjust spice levels, simply change the amount of chili flakes you use. If you like it spicier, add more. For a milder taste, reduce the flakes or skip them altogether. Consider alternative garnishes to add flair. You can use chopped green onions or a sprinkle of crushed peanuts. These options add texture and a different taste to your dish. For the full recipe and detailed instructions, you can check the Full Recipe link. {{image_2}} You can change the spice in your spicy garlic edamame. If you want it milder, use fewer chili flakes. For those who love heat, add more chili flakes. You can also try adding sriracha. A spoonful will give a nice kick and depth of flavor. Adjust the heat to fit your taste buds. Want more texture? Incorporate nuts like cashews or almonds for crunch. They add a nice contrast to the soft edamame. Another idea is to add a splash of vinegar or citrus juice. Rice vinegar or lemon juice can brighten the dish and balance the spice. Experiment to find your favorite combo. If you need gluten-free options, choose tamari instead of soy sauce. It tastes great and keeps the dish safe for those with gluten issues. For vegan alternatives, check all sauces. Most soy sauces are vegan, but always read labels. This way, you can enjoy the snack without worry. For the full recipe, you can refer to the Spicy Garlic Edamame section. To keep your spicy garlic edamame fresh, store it properly. Place leftover edamame in an airtight container. Refrigerate it within two hours of cooking. It will stay good for up to three days. When storing, try to leave out extra sauce. This keeps the pods crisp and tasty. If you want to save it for longer, freezing is a great option. To freeze, let the edamame cool completely. Then, spread it in a single layer on a baking sheet. Freeze it for about one hour. Once frozen, transfer the edamame to a freezer-safe bag. Remove as much air as possible and seal it well. You can freeze it for up to three months. When you're ready to enjoy your leftovers, reheating is easy. The best method is to use a skillet. Heat the skillet on medium-low. Add the edamame, tossing it gently for about five minutes. This method keeps the flavor intact. You can also microwave it. Place the edamame in a microwave-safe bowl. Cover it with a damp paper towel and heat for about one minute. To keep the flavor strong, add a touch of olive oil or soy sauce while reheating. This helps maintain that delicious spicy garlic taste. Adjust the heat to your liking if needed. Enjoy your tasty snack again with ease! You can cook edamame in two main ways: boiling or steaming. If you choose fresh edamame, bring a pot of salted water to a boil. Add the edamame pods and cook them for 3-5 minutes until they are bright green and tender. Drain them well. For frozen edamame, follow the package instructions. Usually, it takes just a few minutes in boiling water. Drain and set aside, ready for flavor! Yes, you can use frozen edamame. Frozen edamame is just as nutritious as fresh. It’s convenient and saves time. Plus, it cooks quickly, making it perfect for busy days. Just remember to drain it well after cooking to avoid excess water in your dish. Spicy garlic edamame shines as a snack or appetizer. Serve it warm in a bowl, and let guests help themselves. Pair it with drinks like beer or sake for a fun touch. You can also serve it with rice or noodles for a fuller meal. Adding a sprinkle of sesame seeds and chopped cilantro makes it even tastier! You can find the full recipe for Spicy Garlic Edamame in the earlier sections. It includes all the steps and tips to make this dish perfect. Enjoy cooking! In this article, we explored how to prepare Spicy Garlic Edamame. We covered the key ingredients, cooking steps, and tips to enhance flavor. You learned how to sauté garlic, infuse oils, and use the right spices for your taste. Don't forget the variations and storage tips for leftovers. This dish is not only delicious but also easy to adapt for any meal. Enjoy experimenting with flavors and serving this tasty snack!

Spicy Garlic Edamame Flavorful and Healthy Snack

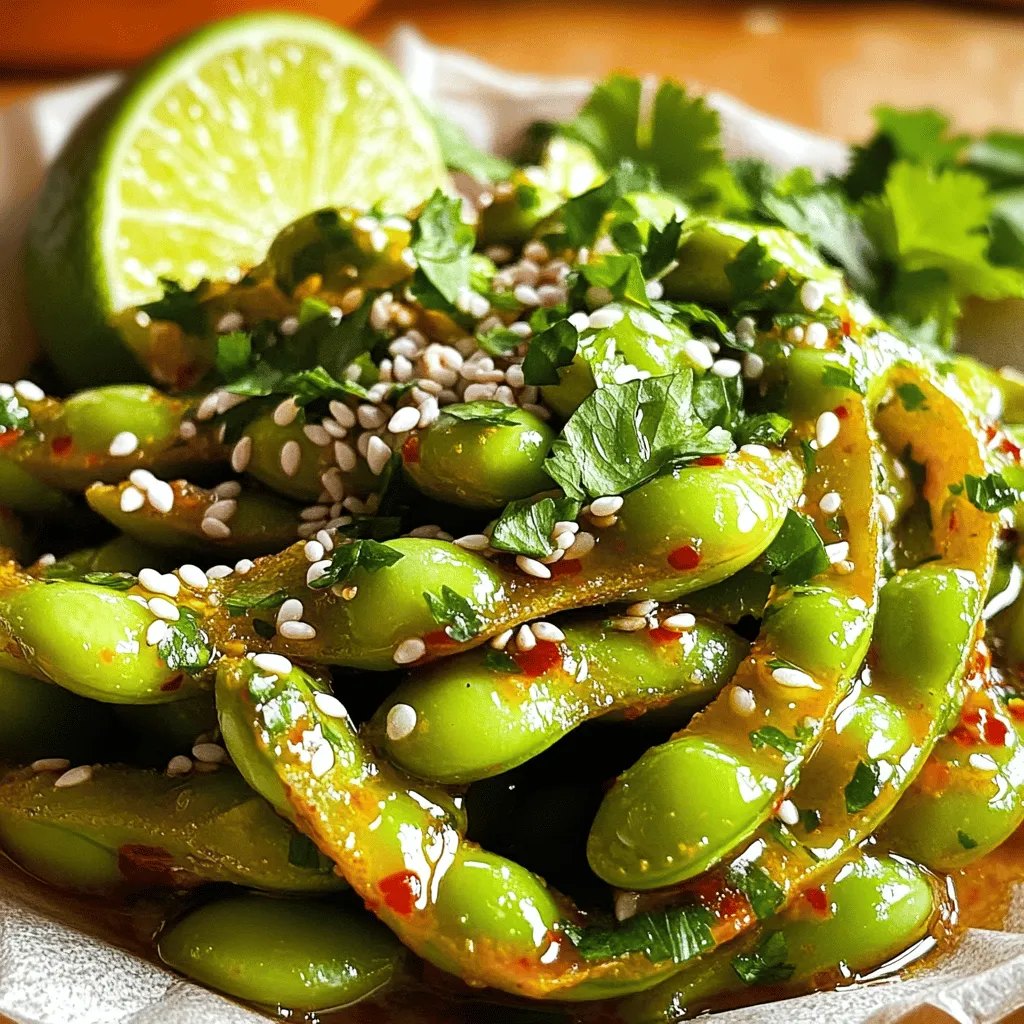
If you’re looking for a snack that packs a punch, Spicy Garlic Edamame is the answer. This easy dish combines

To make Lemon Blueberry Cheesecake Bars, you need fresh ingredients. Each adds flavor and texture. This recipe combines creamy cheese, tart lemons, and sweet blueberries. - 1 ½ cups graham cracker crumbs - ½ cup unsalted butter, melted - 2 cups cream cheese, softened - 1 cup granulated sugar - 2 large eggs - ¾ cup sour cream - Zest of 2 lemons - ½ cup fresh lemon juice - 1 teaspoon vanilla extract - 1 cup fresh blueberries (plus extra for topping) These ingredients create a perfect balance of flavors. The graham cracker crust gives a nice crunch. The cream cheese makes it rich and creamy. The lemon juice and zest add a bright, fresh taste. The blueberries add pops of sweetness. You can find the full recipe above. Start by gathering all your ingredients on the counter. This keeps things easy. I like to measure everything out first. It helps me stay organized. Line your baking pan with parchment paper. Leave some paper hanging over the edges. This will help you lift the bars out later. Preheat the oven to 350°F (175°C) so it’s ready when you are. Mix the graham cracker crumbs and melted butter in a bowl. Stir until it looks like wet sand. Press this mixture into the bottom of your pan. Make sure it is even. Bake the crust for 10 minutes. Let it cool slightly while you prepare the filling. In another large bowl, beat the cream cheese and sugar together. Do this for about 2-3 minutes until smooth. Add the eggs one at a time, mixing well after each. Then, stir in the sour cream, lemon zest, lemon juice, and vanilla extract. Now it's time for the blueberries. Gently fold them into the mix. Be careful not to crush them. Pour this creamy mixture over the cooled crust. Spread it out evenly with a spatula. Bake for 25-30 minutes. The edges should be set, but the middle can still jiggle a bit. When the baking time is up, turn off the oven. Leave the cheesecake bars inside for 1 hour with the door slightly open. This helps them cool slowly and reduces cracks. After that, move the pan to the fridge. Let it chill for at least 4 hours, but overnight is even better. Once it's set, lift the bars out using the parchment overhang. Cut them into squares. Serve them on a white platter with extra blueberries on top. You can also sprinkle some lemon zest for a nice touch. For a little extra sweetness, drizzle with lemon glaze. You can find the full recipe here. Use soft cream cheese for this recipe. Cold cream cheese makes mixing hard. Let it sit at room temperature for about 30 minutes before you start. This helps it blend well with sugar. A smooth batter means a smoother cheesecake. To prevent cracks, do not overmix the batter. Overmixing adds too much air. This can cause the cheesecake to rise and then crack when cooling. Also, let the cheesecake cool slowly. After baking, turn off the oven and leave the door slightly open. This step helps it cool evenly. Serve the lemon blueberry cheesecake bars cold. They taste best when chilled. Cut them into squares and place them on a nice plate. Add fresh blueberries and a sprinkle of lemon zest on top. For a sweet touch, drizzle with a light lemon glaze. Each bite is a burst of flavor! For the full recipe, check out the details above. {{image_2}} You can mix up the flavor by using different fruits. Try raspberries or strawberries for a sweet twist. Peaches or cherries also work well. These fruits pair nicely with the lemon flavor. You can use fresh or frozen fruit, but fresh gives the best taste. Just make sure to adjust the sugar based on the fruit's sweetness. If you want a lighter option, consider using Greek yogurt instead of cream cheese. It gives a nice tang and creamy texture. For a dairy-free choice, use vegan cream cheese made from nuts. You can also blend silken tofu with a bit of lemon juice for a fun twist. Each substitute can change the flavor slightly, so experiment to find your favorite. To make these bars gluten-free, swap regular graham crackers for gluten-free ones. You can also use almond flour mixed with a bit of sugar and coconut oil for a unique crust. Just remember to check that all ingredients are gluten-free. This way, everyone can enjoy these tasty treats without worry. To keep your lemon blueberry cheesecake bars fresh, store them in the fridge. Use an airtight container to prevent them from drying out. Place parchment paper between layers if you stack them. This step helps keep the bars intact and easy to serve later. You can freeze these cheesecake bars for later enjoyment. First, cut them into squares. Wrap each piece tightly in plastic wrap. Then, place them in a freezer-safe bag or container. They can last in the freezer for up to three months. When you’re ready to eat, thaw them in the fridge overnight. If you prefer your cheesecake bars warm, heat them in the oven. Preheat the oven to 300°F (150°C). Place the bars on a baking sheet and cover them with foil. Warm them for about 10 minutes. This method keeps the crust crunchy while softening the filling. Enjoy your delicious treat just the way you like it! For the complete recipe, check the Full Recipe section. You can tell when the cheesecake bars are done by checking the edges. The edges should look set and firm. However, the center should still have a slight jiggle when you gently shake the pan. This means that it will continue to set as it cools. If the edges start to brown, they might be overcooked. Trust your eyes and the jiggle! Yes, you can use frozen blueberries. They work well in this recipe. Just remember to let them thaw and drain any extra liquid first. This helps keep the cheesecake bars from getting too watery. Using frozen blueberries can also add a nice burst of flavor and color. These cheesecake bars can last up to five days in the fridge. Make sure to store them in an airtight container. If you want to keep them longer, you can freeze them. When ready to eat, just thaw them in the fridge overnight. Always enjoy them chilled for the best flavor! This blog post covered a delicious cheesecake bars recipe. We explored ingredients like graham crackers, cream cheese, and fresh blueberries. I shared simple steps for preparation, baking, and cooling to help you succeed. We discussed tips to avoid cracks and offered serving ideas. Remember, you can customize these bars with different fruits and options. Whether you store them in the fridge or freeze them, they stay tasty. Enjoy making these easy cheesecake bars for any occasion!

Lemon Blueberry Cheesecake Bars Fresh and Flavorful Treat

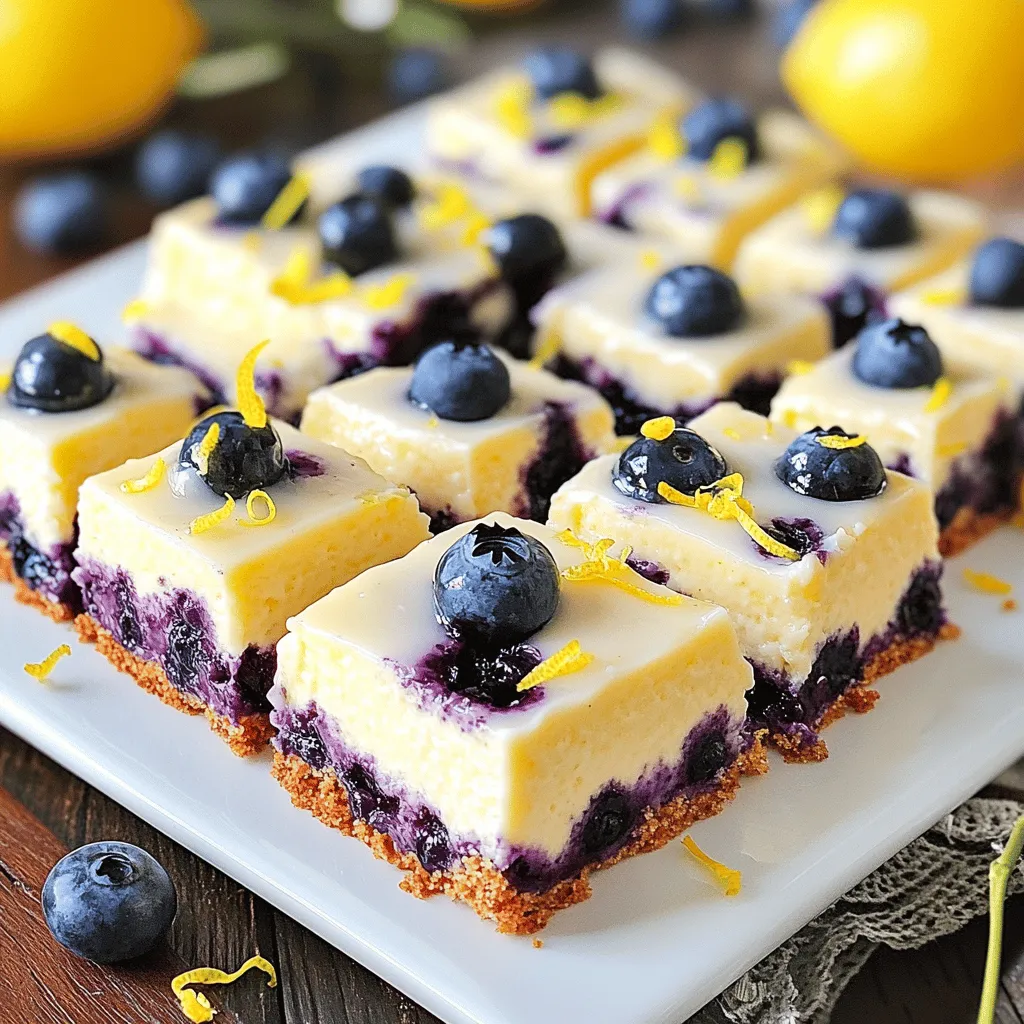
Are you ready for a bright and tasty dessert? These Lemon Blueberry Cheesecake Bars combine the tang of lemon with

To make a hearty Veggie Packed Minestrone Soup, you need both fresh vegetables and pantry staples. Here’s a detailed list to get you started: - Fresh Vegetables: - 1 onion, diced - 2 cloves garlic, minced - 2 carrots, diced - 1 zucchini, diced - 1 cup green beans, trimmed and chopped - 1 bell pepper (any color), diced - 1 cup spinach or kale, chopped - Key Pantry Staples: - 1 can (15 oz) diced tomatoes, with juice - 4 cups vegetable broth - 1 can (15 oz) kidney beans, drained and rinsed - 1 tablespoon olive oil - 1 teaspoon dried basil - 1 teaspoon dried oregano - Salt and pepper to taste - 1 cup small pasta (like ditalini or elbow) - Optional Garnishes: - Grated Parmesan cheese for serving These ingredients bring color, flavor, and nutrition to your soup. Feel free to mix and match based on what you have at home. You can find the full recipe in our earlier sections. Enjoy crafting this delicious dish! To start, gather all your fresh vegetables. This soup is all about vibrant flavors and textures. Dice the onion, carrots, and bell pepper. Mince the garlic and chop the zucchini, green beans, and spinach or kale. I love using fresh produce, as it adds life to the soup. Cooking techniques matter. Sautéing the onion and garlic first brings out their sweetness. This step is quick, just 3-4 minutes on medium heat. Next, add the harder veggies like carrots and bell pepper. They need a bit more time to soften, so sauté them for about 5 minutes. When you add ingredients is key. First, you need the broth and tomatoes to create a base. Once that boils, reduce the heat and let everything simmer. This allows the flavors to meld together beautifully. Now, let's cook! In a large pot, heat one tablespoon of olive oil over medium heat. Add the diced onion and sauté until it’s soft. Stir in the minced garlic and cook for one more minute. Next, toss in those diced carrots, zucchini, and bell pepper. Sauté for around 5 minutes until they begin to soften. Then add the trimmed green beans, diced tomatoes (with juice), vegetable broth, kidney beans, dried basil, oregano, salt, and pepper. Bring this mixture to a boil. Once boiling, reduce the heat. Let it simmer for about 15 minutes. This cooks the veggies without losing their crunch. After that, add the chopped spinach or kale and the small pasta. I like using ditalini or elbow pasta. Cook for another 10 minutes or until the pasta is al dente. Don't forget to taste your soup! Adjust the seasoning if needed. Serve it hot, and feel free to sprinkle some grated Parmesan on top if you like. For the full recipe, check above. Enjoy your delicious and nutritious veggie packed minestrone soup! You can easily change this soup to fit your taste. Start by swapping in seasonal vegetables. If you have fresh zucchini in summer, use it! In fall, try adding sweet potatoes or butternut squash. These changes keep your soup exciting and fresh. Adjusting for dietary preferences is simple. This soup can be vegan by using vegetable broth and skipping the cheese. If you need it gluten-free, choose gluten-free pasta. There are many options available today that work great in this recipe. For flavor-boosting tips, think about herbs and spices. Fresh herbs like basil or parsley can add a nice touch. Try adding a pinch of red pepper flakes for heat. You can also squeeze in some lemon juice for brightness. Each of these ideas makes your soup more flavorful. Avoid overcooking your vegetables. If you cook them too long, they turn mushy. Keep them slightly firm for the best texture. Choosing the wrong pasta can also ruin your soup. Small pasta shapes like ditalini work well. Larger pasta can make the soup too heavy and less enjoyable. Not seasoning the soup properly is a big mistake. Always taste as you go. Add salt and pepper to enhance the flavors. You can adjust the seasoning based on your preference, ensuring a delicious bowl every time. For more details on making this delightful soup, check out the Full Recipe. {{image_2}} You can easily swap ingredients in your Veggie Packed Minestrone Soup. Here are some fun ideas: - Different beans or legumes: Instead of kidney beans, try black beans or chickpeas. Each option adds a unique taste and texture. - Using different leafy greens: Spinach works great, but you can also use kale or Swiss chard. They all add nutrients and flavor. - Adding protein sources: If you want more protein, add cooked chicken or Italian sausage. This makes the soup heartier and adds a savory kick. You can also give your minestrone soup a global flair. Here are some ways to do that: - Italian-inspired variations: Keep it classic with extra Parmesan cheese and fresh basil. You might also add some Italian sausage for a rich flavor. - Mediterranean flair: Add olives and feta cheese for a salty bite. You can also use chickpeas for a Mediterranean twist. - Adapting for Asian influences: For a unique take, try adding bok choy and miso paste. These ingredients bring warmth and depth to the soup. Feel free to explore these variations as you make your Veggie Packed Minestrone Soup. For the complete recipe, check out the Full Recipe section. To keep your minestrone soup fresh, use an airtight container. Place it in the fridge within two hours of cooking. This helps prevent bacteria growth. Make sure to let the soup cool down before sealing it. For long-term storage, you can freeze the soup. Just use freezer-safe bags or containers. Leave some space at the top for expansion. When you want to eat it again, thaw the soup in the fridge overnight. In the fridge, your veggie packed minestrone soup lasts about 3 to 5 days. If you freeze it, it can stay good for up to 3 months. Check for signs of spoilage. If you see mold or it smells sour, it's time to toss it. Always trust your senses; they will guide you. You can add many vegetables to your minestrone soup. Some great options include: - Peas - Corn - Potatoes - Leeks - Cabbage - Celery For seasonal choices, consider adding: - Butternut squash in fall - Asparagus in spring - Fresh tomatoes in summer These additions bring new flavors and nutrients. You can mix and match based on what you like! Yes, you can make this soup ahead of time. To do this: - Cook the soup as directed and let it cool. - Store it in airtight containers in the fridge. For reheating, follow these tips: - Heat on the stove over low heat. - Add a splash of broth or water if it thickens. - Stir often to prevent sticking. This will keep your flavors fresh and vibrant! Minestrone soup is very healthy. It is packed with vegetables, beans, and whole grains. Here are some benefits: - High in fiber and protein. - Low in fat and calories. - Rich in vitamins and minerals. When you compare it to other soups, minestrone often has more nutrients. Creamy soups can be high in fat. Minestrone is a great choice for a nutritious meal. In this blog post, we covered how to make a veggie-packed minestrone soup. You learned about essential ingredients and effective cooking steps. Customization tips help you match the soup to your tastes. We also highlighted common mistakes to avoid and varied ingredients to try. In the end, minestrone soup is a versatile meal. It’s healthy and easy to adapt. Enjoy making your own tasty versions!

Veggie Packed Minestrone Soup Easy and Nutritious Dish

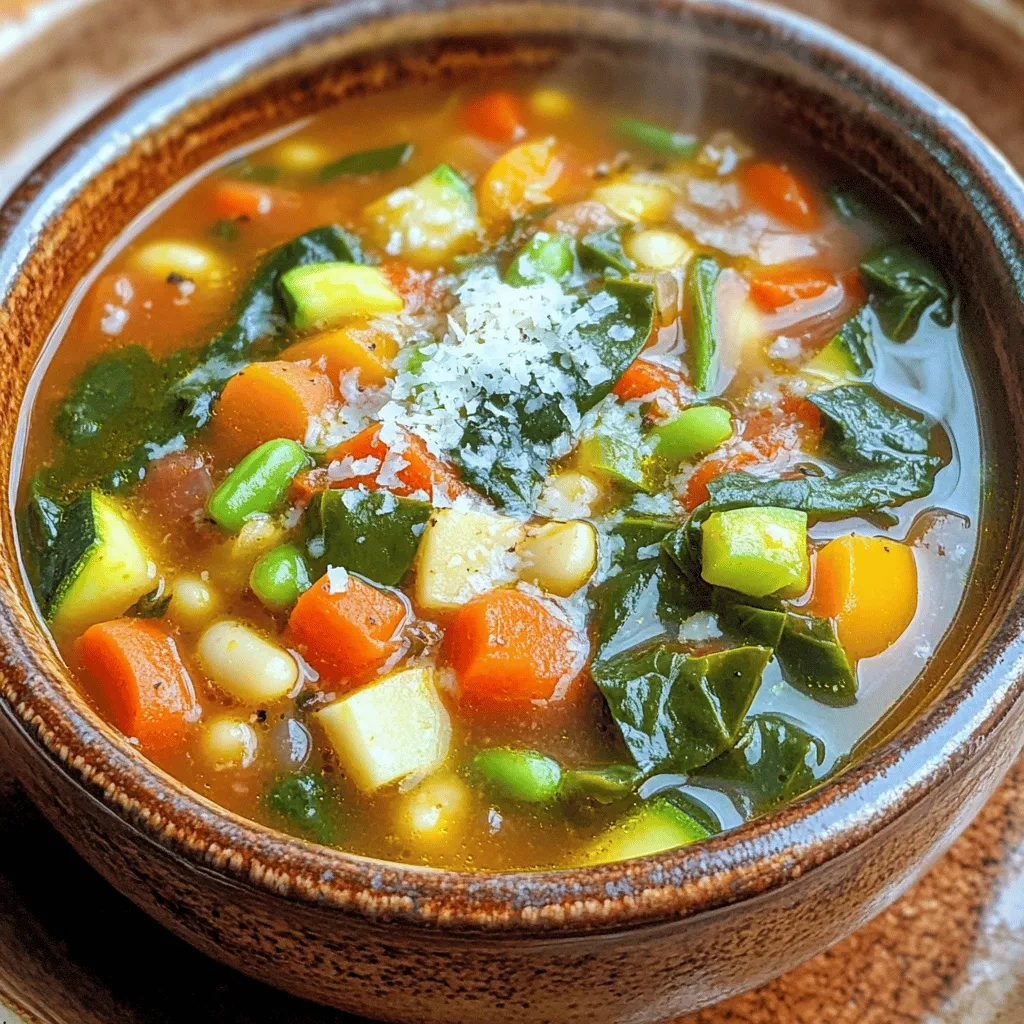
If you want a warm, hearty bowl of goodness, you’re in the right place! This Veggie Packed Minestrone Soup is

To make a delicious white chocolate raspberry cheesecake, gather these items: - 1 ½ cups graham cracker crumbs - ½ cup unsalted butter, melted - 2 cups cream cheese, softened - 1 cup white chocolate, melted - ¾ cup granulated sugar - 3 large eggs - 1 teaspoon vanilla extract - 1 cup fresh raspberries These ingredients work together to create a smooth, rich dessert. The graham cracker crust gives crunch, while the filling is creamy and sweet. You can swap some ingredients if needed: - For the crust, use crushed cookies like Oreos or nuts for a gluten-free option. - You can add sour cream or Greek yogurt to the filling for a slight tang. - If you like, add a splash of raspberry liqueur for a fun twist. These substitutions keep the dish tasty while adding your personal touch. Choosing quality ingredients enhances the cheesecake: - Look for high-quality white chocolate, like Callebaut or Ghirardelli, for the best flavor. - Use full-fat cream cheese for a smooth and creamy texture. Brands like Philadelphia work well. - Always use fresh raspberries for a burst of flavor. Frozen berries can work, but fresh gives the best taste and look. Using these tips will ensure your cheesecake shines at any gathering. Check the [Full Recipe] for more details on preparation and baking! 1. Preheating the oven: Start by preheating your oven to 325°F (160°C). This step is key to getting the cheesecake just right. 2. Mixing the crust ingredients: In a mixing bowl, combine 1 ½ cups of graham cracker crumbs with ½ cup of melted unsalted butter. Mix until the crumbs soak up the butter. Press this mixture firmly into the bottom of a 9-inch springform pan. This forms the crust. Bake it for 8 to 10 minutes until set, then set it aside to cool. 3. Preparing the cheesecake batter: In a large bowl, use a hand mixer to beat 2 cups of softened cream cheese until it is smooth and creamy. Then, gradually add in 1 cup of melted white chocolate and ¾ cup of granulated sugar. Mix until everything is well combined. Now, add 3 large eggs one at a time. Mix on low speed after each addition, being careful not to overmix. Next, stir in 1 teaspoon of vanilla extract and 1 tablespoon of all-purpose flour until the mixture is smooth. Finally, gently fold in 1 cup of fresh raspberries. 1. Layering the cheesecake: Pour the cheesecake batter over the cooled crust in the springform pan. Spread it evenly with a spatula. 2. Ideal baking time and temperature: Bake your cheesecake for 50 to 60 minutes. The edges should be set, and the center will still be slightly jiggly. 3. Cooling techniques to avoid cracks: Once baked, turn off the oven. Crack the door open and let your cheesecake cool in the oven for about an hour. This helps prevent cracks from forming. 1. Plating ideas for a stunning presentation: Serve chilled slices on a beautiful dessert plate. This enhances the overall look of your cheesecake. 2. Garnishing tips using raspberries and white chocolate: Garnish each slice with extra fresh raspberries on top. Drizzle melted white chocolate over the slices for an extra special touch. It adds flavor and looks lovely! For the complete process, refer to the Full Recipe for detailed steps and measurements. To avoid cracks and sinking, follow these tips: - Bake at a low temperature: Set your oven to 325°F (160°C). - Cool slowly: After baking, turn off the oven and crack the door. Let it cool for an hour inside. - Don't overmix: Mix just until combined to keep air from forming bubbles. Choosing the right pan is also key. A 9-inch springform pan works best. It allows easy removal and helps keep the shape. For the perfect creaminess, use room-temperature cream cheese. It blends smoothly. Also, add melted white chocolate gradually. This ensures a silky texture. To achieve a smooth batter, mix the ingredients gently. Avoid overmixing, which can incorporate air and lead to cracks. Scrape down the sides of the bowl often to combine everything evenly. If your cheesecake is undercooked, return it to the oven. Bake for an extra 10 to 15 minutes. Check that the edges are set and the center jiggles slightly. For a sagging structure, cool it properly. If it has already sagged, refrigerate for a few hours. This helps firm it up. You can also use a bit of whipped cream to cover up any imperfections. This White Chocolate Raspberry Cheesecake is a delight when you follow these tips. For the full recipe, refer to the instructions above. {{image_2}} You can change the flavor of your cheesecake easily. Swap the raspberries for other fruits like strawberries or blueberries. Both fruits add a fresh taste and vibrant color. You can also add a lemon or lime twist. A bit of citrus zest brightens the overall flavor. Just add a teaspoon of zest to the batter for a fun twist. The crust can also change your cheesecake's taste. An Oreo crust gives a nice chocolatey contrast. To make this, crush Oreos and mix them with butter, just like the graham cracker crust. For a gluten-free option, try a nut-based crust. Use ground almonds or pecans mixed with butter. This adds a rich, nutty flavor. A no-bake cheesecake is another fun option. It requires some adjustments, but it’s easy to make. You can skip the baking step and let the cheesecake set in the fridge instead. Use gelatin to help it firm up, or just chill it for several hours. The setting time is shorter for no-bake versions, usually about 3-4 hours. This way, you can enjoy your cheesecake more quickly without heating the oven. Check out the Full Recipe for more details. To store leftover cheesecake, wrap it well. Use plastic wrap or place it in an airtight container. This keeps it fresh. In the fridge, it stays good for about 4 to 5 days. If you notice any off-smells or a change in texture, it’s best to toss it. To freeze cheesecake, follow these steps: 1. Cool Completely: Make sure the cheesecake is fully cooled before freezing. 2. Wrap Tightly: Use plastic wrap to cover the cheesecake. Make sure there are no gaps. 3. Use Aluminum Foil: For extra protection, wrap it in aluminum foil as well. 4. Label: Write the date on the foil to track how long it’s been frozen. When you’re ready to enjoy it, take it out. Thaw it in the fridge overnight. Avoid thawing at room temperature. This helps keep the texture creamy and smooth. In the fridge, your cheesecake lasts about 4 to 5 days. In the freezer, it can last up to 2 months. Check for signs of spoilage. Look for: - Changes in color - Off or sour smell - Unusual texture If you see any of these, it’s time to say goodbye to your cheesecake. To make the cheesecake creamy, start by softening the cream cheese. Take it out of the fridge and let it sit for about 30 minutes. This helps the cream cheese mix easily. You can also cut it into smaller cubes to speed up softening. Use a hand mixer to beat the cream cheese until it’s smooth and fluffy. Mixing at low speed helps avoid lumps. Yes, you can use frozen raspberries. They are handy and still tasty. However, they can be more watery than fresh ones. To use them, thaw the raspberries first and drain any extra liquid. This prevents the cheesecake from being too wet. Fold them gently into the batter so they keep their shape. Look for a few signs to know if the cheesecake is done. The edges should look set, while the center may be slightly jiggly. This is normal. After baking, turn off the oven and crack the door open. Let it cool in the oven for about an hour. This helps avoid cracks on top. Then, chill it in the fridge for at least four hours. Cutting cheesecake can be tricky, but there are easy ways to do it. First, use a sharp knife. Dip the knife in hot water, then wipe it dry before cutting. This helps make clean slices. Cut straight down, not sawing back and forth. You can also run a spatula under each slice to help lift it out easily. Enjoy each piece! For the complete recipe, check the Full Recipe. You now have all the tools to create a fantastic White Chocolate Raspberry Cheesecake. From the key ingredients to expert tips, you can avoid common pitfalls. Remember to focus on freshness and texture for the best results. Use variations to make it your own, and store leftovers properly for later enjoyment. Crafting this dessert can be fun and rewarding. Trust your skills and enjoy making it for friends and family. Your cheesecake will surely impress everyone!

White Chocolate Raspberry Cheesecake Delight Recipe

Craving something sweet and creamy? Let’s dive into the world of White Chocolate Raspberry Cheesecake! This recipe balances rich white

- 4 cod fillets (about 6 ounces each) - 1/4 cup unsalted butter - 4 cloves garlic, minced - 1 lemon (juice and zest) - 1 teaspoon fresh thyme leaves (or 1/2 teaspoon dried thyme) - Salt and pepper to taste - 2 tablespoons fresh parsley, chopped (for garnish) - Lemon wedges - Recommended side dishes: steamed vegetables, rice When I prepare lemon garlic butter cod, I gather these ingredients first. The cod is tender and flaky, making it perfect for this dish. I love using unsalted butter for a fresh start. Garlic adds a strong flavor, while the lemon gives it brightness. Thyme brings a lovely herbal note. I always keep salt and pepper on hand to enhance the taste. Fresh parsley makes the dish look nice and adds a pop of color. Lastly, I serve lemon wedges on the side. They are great for squeezing over the fish right before eating. For the full recipe, check out the detailed steps in the cooking section. - Preheat oven to 400°F (200°C). This temperature works well for cod. - Lightly grease a baking dish with olive oil or butter. This step helps prevent sticking. - In a small saucepan, melt 1/4 cup of unsalted butter over medium heat. - Add 4 cloves of minced garlic and sauté for 1-2 minutes. You want it fragrant but not browned. - Stir in the juice and zest of 1 lemon, 1 teaspoon of fresh thyme, salt, and pepper. Mix well and remove from heat. - Place 4 cod fillets in the prepared baking dish. Make sure they fit well. - Pour the garlic butter mixture evenly over each cod fillet. Let them soak up all those great flavors. - Bake in the preheated oven for 12-15 minutes. The cod is done when it flakes easily with a fork. Cooking time may vary based on thickness. For the full recipe, check the details above. To choose fresh fish, look for bright eyes and shiny skin. The fillet should feel firm and spring back when pressed. Fresh cod has a mild scent, like the sea. If it smells strong or fishy, skip it. The color should be pale and even. Any brown spots may mean it's not fresh. When making garlic butter, taste as you go. This way, you can adjust the seasoning to your liking. If you want more punch, add a pinch of salt or extra lemon juice. Fresh herbs give the best flavor. Use fresh thyme for a bright taste. If you only have dried herbs, use less because they are more potent. Plating is key to a great meal. Serve the cod on a white plate for contrast. Add some steamed veggies or rice next to it. For garnish, use fresh parsley and lemon wedges. This adds color and freshness. A sprinkle of zest on top can also catch the eye. These small touches make your dish look fancy and inviting. For the full recipe, check out the Lemon Garlic Butter Cod section above. {{image_2}} You can switch up the fish in this recipe. Cod has a mild flavor, but you can try tilapia or haddock. Both have a nice texture. They will soak up the lemon garlic butter well. You can also use olive oil instead of butter. It gives a lighter taste but still tastes great. To add more flavor, try fresh herbs. Basil and dill work well with lemon. They add a bright taste. You can also use spices like paprika or chili flakes. These will bring warmth and depth to the dish. A little kick can make it exciting. If you need a gluten-free option, this recipe is perfect. All the ingredients are naturally gluten-free. For low-calorie changes, use less butter or olive oil. You can also serve smaller portions. This way, you can enjoy the dish without worry. After you enjoy the Lemon Garlic Butter Cod, store leftovers in the fridge. Use an airtight container to keep the fish fresh. This method helps lock in flavor and moisture. The best practice is to put it in the fridge within two hours of cooking. You can safely keep it for up to three days. When you're ready to eat leftovers, reheat them carefully. The key is to avoid drying out the fish. The best method is to use the oven. Preheat it to 350°F (175°C). Place the cod in a baking dish and cover it with foil. This helps keep moisture in. You can also use the stovetop. Heat a pan over low heat and add a splash of water. Cover it while reheating. The microwave works too, but it can dry out the fish quickly. Use it on low power for short bursts. If you want to save some for later, freezing cooked cod is a good choice. First, let it cool completely. Then, wrap it tightly in plastic wrap. Place it in a freezer-safe bag or container to prevent freezer burn. It can stay frozen for up to three months. When you're ready to eat it, thaw the cod in the fridge overnight. This method keeps the texture and flavor intact. Avoid thawing in the microwave, as it can change the fish's quality. For the best results, cook the cod fresh whenever you can. For the full recipe, check out the recipe section. The baking time for cod at 400°F varies based on thickness. For fillets around 1 inch thick, it takes about 12-15 minutes. Thicker fillets (1.5 inches) may need 15-20 minutes. Always check for doneness by seeing if the fish flakes easily with a fork. This ensures your cod is perfectly cooked. Yes, you can use frozen cod! However, it's best to thaw it first. Place the frozen fillets in the fridge overnight. If you're short on time, seal them in a bag and submerge in cold water for about 30 minutes. This way, the cod cooks evenly and absorbs all the flavors. Lemon garlic butter cod pairs well with many sides. Here are some great options: - Steamed vegetables like broccoli or green beans - Fluffy white rice or quinoa - Garlic mashed potatoes for a rich taste - A fresh green salad with lemon vinaigrette These sides complement the dish and create a balanced meal. Enjoy experimenting with different pairings! You now have a complete guide to making lemon garlic butter cod. We've covered the key ingredients, step-by-step instructions, and helpful tips. I shared ways to adapt the recipe and store leftovers effectively. Cooking can be simple and enjoyable, especially with this dish. Remember to choose fresh cod for the best flavor. Experiment with your favorite herbs and sides. Enjoy your meal, and impress your friends and family with your cooking skills!

Lemon Garlic Butter Cod Flavorful and Easy Recipe

Looking for a simple yet flavorful dish? Let me introduce you to my Lemon Garlic Butter Cod recipe. This easy

To make a great spicy Korean beef bulgogi, you need some key ingredients. Here’s what you will need: - 1 lb thinly sliced beef ribeye or sirloin - 1/4 cup soy sauce - 2 tablespoons brown sugar - 1 tablespoon gochujang (Korean chili paste) - 1 tablespoon sesame oil - 2 cloves garlic, minced - 1-inch piece of ginger, grated - 1 tablespoon rice vinegar - 4 green onions, chopped (plus more for garnish) - 1 small onion, thinly sliced - 1 tablespoon vegetable oil (for cooking) - Sesame seeds for garnish These ingredients create a great blend of flavors. The beef provides a rich base, while the soy sauce adds saltiness. Gochujang gives a spicy kick, and brown sugar adds sweetness. To make the marinade, mix these ingredients together. The soy sauce, brown sugar, gochujang, sesame oil, garlic, ginger, and rice vinegar combine to create a tasty sauce. This mixture helps tenderize the beef and infuses it with flavor. Make sure to mix well until the sugar dissolves. Marinating is key. It allows the beef to soak up all the flavors. You can marinate for 30 minutes or up to 2 hours. For a twist, you can add some optional ingredients. Consider adding: - 1 tablespoon of sesame seeds in the marinade for extra nutty flavor. - A splash of orange juice for brightness. - A bit of crushed red pepper for more heat. These extras can personalize your dish. You can also adjust them based on what you enjoy. Try different combinations to find your perfect bulgogi! For the full recipe, check out the link. Start by gathering all your marinade ingredients. You need soy sauce, brown sugar, gochujang, sesame oil, garlic, ginger, and rice vinegar. In a large mixing bowl, combine these items. Mix well until the sugar is fully dissolved. This step is crucial because it adds depth to the beef. The gochujang brings great heat, while the sugar balances it out. Next, you will add the thinly sliced beef. Make sure each piece is coated in the marinade. Cover the bowl with plastic wrap and place it in the fridge. Let it marinate for at least 30 minutes. If you have time, let it sit for up to 2 hours. This allows the flavors to soak into the meat. The longer it marinates, the better it tastes. After marinating, heat vegetable oil in a large skillet or wok over medium-high heat. Add the sliced onion and sauté for about 2 minutes until it softens. This step adds a sweet flavor to your dish. Increase the heat to high, then add the marinated beef along with the marinade. Stir-fry for about 5-7 minutes. You want the beef to be cooked through and caramelized. In the last minute, toss in chopped green onions. Stir to combine all the flavors. Once cooked, transfer the bulgogi to a serving platter. Garnish with sesame seeds and more green onions. For a complete meal, serve it with warm rice and lettuce leaves for wrapping. You can also add some kimchi on the side. For the full recipe, check the details above. To make the best marinade, start with good ingredients. Use fresh garlic and ginger for strong flavor. Combine soy sauce, brown sugar, and gochujang in a bowl. Mix until the sugar dissolves. This balance of salty, sweet, and spicy is key. Let the beef sit in this mix for at least 30 minutes. If you have time, try marinating for 2 hours. This gives the meat a deeper flavor. If you like it hot, add more gochujang. A little goes a long way. You can also add crushed red pepper flakes for extra heat. Taste the marinade before adding the beef. If it’s too spicy, add more sugar or soy sauce. This will balance the heat. Remember, you can always add spice, but you can't take it away! When cooking, use high heat for the best results. This helps caramelize the beef and bring out its flavor. Start by sautéing onions first; this adds a nice sweetness. Then, add the marinated beef. Stir-fry quickly for about 5-7 minutes. Don’t overcrowd the pan; this can make the beef steam instead of sear. For a great finish, toss in green onions at the end for a fresh pop of flavor. For more details, check the Full Recipe. {{image_2}} If you want a meat-free version, use mushrooms or tofu. Both can soak up flavors well. For mushrooms, shiitake or portobello work great. If using tofu, press it to remove extra water. Then cube it and marinate as you would the beef. This makes a tasty and hearty dish. You can follow the full recipe for the marinade to achieve that classic bulgogi flavor. You can use different cuts of beef for bulgogi. Ribeye and sirloin are popular, but flank steak is good too. Each cut has a unique flavor and texture. Flank steak may need a bit more marinating time. You can also try pork or chicken for a twist. Just adjust the cooking time based on the meat. Bulgogi varies by region in Korea. In some areas, they add fruits like pear or apple to the marinade. This gives the dish a sweet note. Others may use different soy sauces, like sweet or dark soy. Each region brings its twist, making bulgogi exciting. Explore these variations to find your favorite! Storing leftover bulgogi is easy. Let it cool down first. Use an airtight container to keep it fresh. Place it in the fridge. It lasts up to three days. Make sure it’s sealed well to avoid drying out. Freezing bulgogi is a great way to save it for later. After it cools, divide it into portions. Use freezer bags or airtight containers. Remove as much air as possible. Label each bag with the date. You can freeze it for about three months. Thaw it in the fridge before reheating. Reheating bulgogi properly keeps it tasty. You can use a skillet or microwave. For a skillet, add a splash of water to keep it moist. Heat over medium until warm. If using a microwave, cover the dish to trap steam. Heat in short bursts, stirring in between. This way, it stays juicy and flavorful. For the best taste, serve it with fresh rice or lettuce wraps. Check out the Full Recipe for more tips! Bulgogi means "fire meat" in Korean. This dish comes from Korea. It is made with thinly sliced beef. The beef marinates in a sweet and savory sauce. The sauce often includes soy sauce, sugar, and sesame oil. Cooking bulgogi over a hot grill adds a nice char. This gives it a smoky flavor. Yes, you can use different meats. While beef is classic, pork or chicken works well too. Just slice the meat thinly for best results. Marinate it the same way as you would beef. This keeps the flavors nice and strong. To spice up your bulgogi, add more gochujang. This Korean chili paste packs a punch. You can also include fresh chopped chili peppers. Sriracha or red pepper flakes are good options too. Adjust the spice level to your taste. Start with small amounts and taste as you go. Bulgogi pairs well with many sides. Warm rice is a great choice. You can also serve it with lettuce leaves for wraps. Kimchi adds a nice crunch and tang. Other good sides include pickled vegetables or steamed broccoli. These help balance the rich flavors of bulgogi. For the full recipe, check out the [Full Recipe]. You’ve learned how to make delicious Spicy Korean Beef Bulgogi from start to finish. We covered essential ingredients, step-by-step cooking, and useful tips for great taste. You can also explore fun variations and best storage methods. Remember, adjusting flavors suits your taste. Whether you stick with beef or try vegan options, Bulgogi is versatile and tasty. Enjoy crafting this dish and sharing it with friends and family!

Spicy Korean Beef Bulgogi Flavorful and Easy Recipe

Get ready to savor a taste of Korea with my Spicy Korean Beef Bulgogi recipe! This dish is flavorful, easy,

To make this delicious Blueberry Lemon Breakfast Cake, gather the following ingredients: - 1 ½ cups all-purpose flour - 1 teaspoon baking powder - ½ teaspoon baking soda - ¼ teaspoon salt - ½ cup unsalted butter, softened - 1 cup granulated sugar - 2 large eggs - 1 teaspoon vanilla extract - Zest of 1 lemon - ½ cup buttermilk - 1 ½ cups fresh blueberries - 2 tablespoons lemon juice - Powdered sugar for dusting (optional) These ingredients blend together to create a moist, tasty cake with a bright lemon flavor and juicy blueberries. The butter brings richness, while the buttermilk adds a lovely tang. The zest of the lemon adds freshness that wakes up your taste buds. Each bite offers a perfect balance of sweet and tart. You can always use the [Full Recipe] to guide you through the process. Preparing this cake is easy, and the ingredients are simple to find. So, let’s get ready to bake! To start, preheat your oven to 350°F (175°C). This step is crucial for even baking. While the oven heats, grease and flour a 9-inch round cake pan. You can also line it with parchment paper for easy removal. Next, gather your dry ingredients. In a medium bowl, whisk together 1 ½ cups of all-purpose flour, 1 teaspoon baking powder, ½ teaspoon baking soda, and ¼ teaspoon salt. This mix helps the cake rise and taste great. Now, it’s time to cream the butter and sugar. In a large bowl, use a mixer to beat ½ cup of softened unsalted butter with 1 cup of granulated sugar. Mix on medium speed until the mixture is light and fluffy, about 3-5 minutes. Once your butter and sugar are ready, it’s time to add the eggs. Beat in 2 large eggs, one at a time. Make sure to mix well after each egg. Next, add in 1 teaspoon of vanilla extract and the zest of 1 lemon. The zest gives a bright flavor and aroma. For the final assembly, alternate adding the dry flour mix and ½ cup of buttermilk into the butter mixture. Start and end with the flour. Mix until just combined. Be careful not to overmix, as this can make the cake tough. Now, gently fold in 1 ½ cups of fresh blueberries. Try not to burst them, as they add moisture and flavor. Pour the batter into your prepared cake pan and smooth the top with a spatula. Finally, bake the cake for 30-35 minutes. To check if it’s done, insert a toothpick into the center; it should come out clean. Let the cake cool in the pan for 10 minutes before transferring it to a wire rack. Drizzle 2 tablespoons of lemon juice over the top and dust with powdered sugar if you like. This cake is a sweet and simple treat that will delight your mornings. For the complete recipe, refer to the Full Recipe section. Avoiding Overmixing When you mix your batter, stop as soon as it comes together. Overmixing can make your cake tough. Stir gently when adding the blueberries. This helps keep them whole and juicy. Ensuring Even Baking To bake evenly, use an oven thermometer. This ensures your oven heats to the right temperature. Place your cake in the center of the oven for the best results. Rotate the cake halfway through baking for even heat. Serving Suggestions Serve slices of your blueberry lemon cake on colorful plates. This adds a nice pop to your table. Pair it with a cup of tea or coffee for a delightful breakfast treat. Garnishing Options For a beautiful finish, dust the top with powdered sugar. Add fresh blueberries and a mint sprig for color. This simple touch makes your cake look fancy. Cake Too Dense If your cake is dense, you may have overmixed the batter or used too much flour. Be sure to measure accurately. Use a spoon to fill your measuring cup, then level off with a knife. Blueberries Sinking To keep blueberries from sinking, toss them in a bit of flour before adding them to the batter. This helps them stay suspended as the cake bakes. Remember to fold them in gently! {{image_2}} You can change the flavor of your Blueberry Lemon Breakfast Cake easily. For a fun twist, try adding different fruits. Raspberries, strawberries, or peaches can bring a fresh taste. Each fruit adds its own charm and sweetness. Just make sure to adjust the amount so the batter stays balanced. Another great idea is experimenting with citrus zest. You can mix in lime or orange zest for a unique flavor. This adds a bright kick that pairs well with blueberries. The zest brings out the natural sweetness of the cake, making it even more delicious. If you need gluten-free options, you can substitute the all-purpose flour with a gluten-free blend. Look for blends that work well in baking. These blends often have a mix of rice flour, potato starch, and tapioca flour. This change keeps the texture light and fluffy. For vegan substitutes, replace the eggs with flaxseed meal. Mix one tablespoon of flaxseed meal with two and a half tablespoons of water. Let it sit for a few minutes until it thickens. You can also use plant-based butter instead of regular butter. These changes help keep the cake tasty while meeting your dietary needs. When it comes to serving, try different frosting ideas. A simple lemon glaze can add a sweet and tart flavor. Or you can use cream cheese frosting for a rich twist. Both options enhance the cake's taste and presentation. You can also pair the cake with sauces. A berry compote can add a fruity kick. Drizzling some honey or maple syrup on top creates a sweet finish. These simple additions make your breakfast cake even more special and enjoyable. If you want to see the full recipe, check out the details above. You can store your Blueberry Lemon Breakfast Cake at room temperature. Place it in an airtight container. It will stay fresh for about three days. If you want to keep it longer, consider refrigerating it. Just wrap it in plastic wrap first. If you want to enjoy the cake later, freezing is a great option. Cut the cake into slices and wrap each slice tightly in plastic wrap. Then, place the slices in a freezer bag. This way, they can last for up to three months. For the thawing process, move a slice from the freezer to the fridge. Let it thaw overnight. You can also thaw it at room temperature for about an hour. This keeps the cake moist and tasty. How long does it last? At room temperature, the cake lasts about three days. In the fridge, it can last up to a week. If you freeze it, aim to eat it within three months for the best taste. These simple storage tips will help you enjoy your Blueberry Lemon Breakfast Cake at its best! For the full recipe, check out the earlier section. How do I make my cake fluffier? To make your cake fluffier, use room temperature butter. Cream it well with sugar until light and airy. Also, avoid overmixing once you add flour. This keeps air in the batter. Can I use frozen blueberries instead? Yes, you can use frozen blueberries. Just toss them in flour before adding to the batter. This helps them stay suspended and not sink while baking. What can I substitute for buttermilk? You can make a quick substitute for buttermilk. Mix ½ cup of milk with 1 tablespoon of vinegar or lemon juice. Let it sit for five minutes, and it's ready to use. What is the ideal baking time for this recipe? The ideal baking time is 30 to 35 minutes. Always check for doneness with a toothpick. Insert it into the center; it should come out clean. How can I test if the cake is done? To test if your cake is done, use a toothpick or a knife. Insert it into the center. If it comes out clean or with a few crumbs, your cake is ready. Can I replace butter with oil? Yes, you can replace butter with oil. Use about ¾ of the amount of butter in oil. This will keep your cake moist but change the flavor slightly. What can I use instead of eggs in the recipe? For eggs, use a flaxseed meal. Mix 1 tablespoon of ground flaxseed with 2.5 tablespoons of water. Let it sit for five minutes before adding it to the batter. This post covered the key steps to bake a delicious blueberry lemon cake. You learned about essential ingredients, mixing techniques, and common baking tips. I shared ways to tweak the recipe for different diets and tastes. Storing your cake properly ensures it stays fresh longer. Remember, baking is fun and allows creativity. Experiment with flavors and let your cake be a joy for all. Happy baking!

Blueberry Lemon Breakfast Cake Sweet and Simple Treat

Start your day with a burst of flavor! This Blueberry Lemon Breakfast Cake is a sweet and simple treat perfect

To make Creamy Pesto Tortellini, you need fresh and simple ingredients. Here’s what you will need: - Cheese Tortellini - Basil Pesto - Heavy Cream - Grated Parmesan Cheese - Cherry Tomatoes - Garlic - Olive Oil - Salt and Pepper - Fresh Basil Leaves for Garnish Each ingredient plays a key role. Cheese tortellini brings a soft, chewy texture. Fresh basil pesto adds that vibrant green flavor, making the dish lively. Heavy cream gives the sauce its rich, smooth texture. Grated Parmesan cheese enhances the flavor with its salty, nutty notes. Cherry tomatoes add a burst of sweetness, while garlic brings warmth to the dish. Olive oil helps to sauté the garlic and adds richness. Salt and pepper balance all the flavors. Lastly, fresh basil leaves brighten up the dish when you serve it. For the full recipe, you can check out the details above. Happy cooking! Boiling Water and Cooking Time Start by filling a large pot with water. Add a good amount of salt to it. Bring the water to a boil over high heat. Once boiling, carefully add the cheese tortellini. Cook them for about 3 to 5 minutes. You will know they are ready when they float to the top. This shows they are cooked through. Draining the Tortellini After cooking, use a colander to drain the tortellini. Shake gently to remove excess water. Set them aside for later use in the sauce. Sautéing Garlic In a large skillet, pour in two tablespoons of olive oil. Heat it over medium heat. Once hot, add two cloves of minced garlic. Sauté the garlic for about one minute. You want it fragrant but not browned. Combining Heavy Cream and Pesto Next, pour in one cup of heavy cream. Bring this mixture to a gentle simmer. Stir occasionally to keep it from sticking. Reduce the heat to low. Now, add one cup of fresh basil pesto and half a cup of grated Parmesan cheese. Stir until the cheese melts and the sauce is nice and creamy. Mixing in Tortellini and Cherry Tomatoes Take the cooked tortellini and add it to the creamy sauce. Toss gently to coat all the pasta. Then, stir in one cup of halved cherry tomatoes. Adjusting Seasoning and Serving Suggestions Taste your dish. Add salt and pepper to your liking. Let it cook for an extra 2 to 3 minutes until everything is heated through. For a beautiful finish, serve it in bowls. Garnish with fresh basil leaves and extra Parmesan. A drizzle of olive oil adds a nice touch. You can find the full recipe above for more details. Ensuring Perfectly Cooked Tortellini To cook tortellini just right, start with a big pot of salted water. Bring the water to a boil first. When you add the tortellini, they should float when done, usually in 3-5 minutes. Keep an eye on them to avoid overcooking. Overcooked tortellini can turn mushy and lose their shape. How to Avoid a Watery Sauce To prevent a watery sauce, use heavy cream instead of milk. Heavy cream adds richness and thickness. Make sure to simmer the sauce gently after adding the cream. This allows the flavors to blend without diluting the sauce. If it seems too thin, let it cook a bit longer to thicken. Best Pairings with Creamy Pesto Tortellini Creamy pesto tortellini pairs well with a fresh salad or garlic bread. A simple green salad with lemon vinaigrette adds a nice crunch. Garlic bread complements the dish with its warm, buttery flavor. Both sides balance the richness of the tortellini. Creative Garnishing Ideas For garnishing, fresh basil leaves work great. They add color and a burst of flavor. You can also sprinkle extra grated Parmesan cheese on top for added taste. A drizzle of olive oil adds a nice touch. These simple garnishes elevate the dish and make it look beautiful. For the full recipe, check out the [Full Recipe](#). {{image_2}} Gluten-Free Tortellini Options If you need a gluten-free version, look for gluten-free tortellini at the store. Many brands offer options made from rice or chickpea flour. These alternatives taste great and cook similarly. Vegan Alternatives for Cream and Cheese To make this dish vegan, swap heavy cream with coconut cream or cashew cream. For the cheese, use nutritional yeast or vegan cheese. These swaps give the same creamy texture without animal products. Adding Protein: Chicken, Shrimp, or Tofu You can add protein to make the dish heartier. Chicken or shrimp works well. Just cook them separately and mix them in with the tortellini. For a plant-based option, try tofu. Cube it and sauté until golden for extra flavor. Incorporating Vegetables: Spinach, Peas, or Zucchini Adding veggies boosts nutrition and color. Spinach wilts nicely in the sauce. Peas add a pop of sweetness. Zucchini can be sliced thin and sautéed. Mix any of these in during the final steps to keep them fresh and vibrant. Explore these variations to make your creamy pesto tortellini a new delight every time! Check the Full Recipe for all the details on making this dish. To keep your creamy pesto tortellini fresh, follow these tips. First, let the dish cool down. Then, store it in an airtight container. Always use a container that seals well to prevent air from getting in. You can put it in the fridge right after cooling. How long does it last? Your leftovers will stay tasty for about 3 to 5 days in the fridge. If you want to keep it longer, consider freezing it. In the freezer, it can last for up to 3 months. Just make sure to label the container with the date. When you want to enjoy your creamy pesto tortellini again, reheating is key. The best way to reheat it is on the stove over low heat. This method warms it evenly and keeps the texture nice. Stir often to prevent sticking to the pan. Microwave reheating works too, but it can dry out the dish. If you choose this method, add a splash of cream or water before heating. This keeps the sauce creamy. Always check the temperature before serving. You want it hot but not boiling. Creamy Pesto Tortellini is a rich pasta dish made with cheese-filled tortellini. It mixes fresh basil pesto with cream for a smooth sauce. I love how the flavors blend to create a savory dish that feels fancy yet simple. Yes, you can make Creamy Pesto Tortellini ahead of time. Prepare the tortellini and sauce separately. Store them in the fridge in airtight containers. When you are ready to eat, just combine and heat. This saves time on busy nights. Homemade pesto often tastes fresher and more vibrant than store-bought. You can control the ingredients, like the amount of garlic or cheese. Store-bought pesto is quick and convenient, perfect for busy days. Choose what fits your needs best. To enhance the flavor of the pesto sauce, try adding more cheese or nuts. You can also squeeze in some lemon juice for brightness. Fresh herbs like parsley or spinach can add depth. Experiment to find your favorite combination. For the full recipe, check out the complete guide! This blog covered the basics for making creamy pesto tortellini. We discussed the ingredients, cooking steps, and tips for success. You can try various flavors with substitutions and enjoy it fresh or reheated. Remember, experimenting can lead to new favorites. Each dish can become your own with small changes. Let your taste guide you as you prepare this simple yet delicious meal. Enjoy the process and the tasty results!

Creamy Pesto Tortellini Savory and Rich Delight

Looking for a cozy, delicious meal? Creamy Pesto Tortellini is your answer! This rich dish combines soft cheese tortellini with

Older posts
Newer posts
← Previous Page1 … Page47 Page48 Page49 … Page84 Next →

dsad

© 2026 juliesdish • Built with GeneratePress

Our Policies

  • Copyright Policy
  • Cookie Policy
  • GDPR Policy
  • Privacy Policy
  • Disclaimer
  • Terms Of Use

More Information

  • Home
  • About
  • Contact
  • Appetizers
  • Dessert
  • Dinner
  • Drinks
©2026, juliesdish About Back To Top