Skip to content
DisclaimerTerms Of UseGDPR PolicyCookie Policy

juliesdish

  • Home
  • Drinks
  • Appetizers
  • Dinner
  • Dessert
  • About
  • Contact
  • Privacy Policy
DisclaimerTerms Of UseGDPR PolicyCookie Policy

NO-ING-IMG

- Cauliflower florets - Garlic - Olive oil - Parmesan cheese - Seasonings (smoked paprika, salt, black pepper) - Fresh parsley for garnish - Additional herbs or spices (thyme, basil) - Lemon juice for brightness - Red pepper flakes for heat Gathering the right ingredients is key to making Roasted Garlic Parmesan Cauliflower a hit. You need one large head of cauliflower cut into florets. The garlic adds a lovely flavor. I use four cloves of minced garlic for a rich taste. Olive oil is next; three tablespoons will help everything roast nicely. Parmesan cheese is a star here. I recommend using one cup of grated Parmesan for that cheesy crust. Seasonings bring it all together. I like one teaspoon of smoked paprika, half a teaspoon of salt, and half a teaspoon of black pepper. Finally, fresh parsley adds color and freshness as a garnish. You might want to enhance the dish even more. Adding herbs like thyme or basil can give a new twist. A splash of lemon juice brightens the dish. If you like heat, sprinkle in some red pepper flakes. These optional ingredients let you customize your dish to your taste. - Preheat the oven to 425°F (220°C). - Cut the large head of cauliflower into small florets. - In a large bowl, mix the cauliflower, minced garlic, and olive oil. Toss well to coat. - Spread the cauliflower on a baking sheet lined with parchment paper. Ensure they sit in a single layer. - Roast the cauliflower for 20 minutes. Stir halfway through. This helps them cook evenly and become golden brown. - After 20 minutes, take the baking sheet out of the oven. Sprinkle the grated Parmesan cheese over the hot cauliflower. - Return the baking sheet to the oven. Roast for another 5 to 7 minutes. The cheese should bubble and turn slightly crispy. Garnish with fresh parsley before serving. This adds a nice touch and brightens the dish. Enjoy your savory delight! - Choosing the right size florets: For the best results, cut your cauliflower into small, even-sized florets. Aim for pieces about 1 to 1.5 inches. This size helps them cook evenly and ensures you get that lovely golden brown color. - How to achieve the best texture: To get tender yet slightly crispy cauliflower, roast it at a high heat of 425°F (220°C). Toss the florets with olive oil and seasonings well. This step helps to create a nice crust while keeping the inside soft. - Ensuring even roasting: Spread the cauliflower in a single layer on your baking sheet. This prevents steaming and allows each piece to brown. Stir halfway through roasting to ensure they cook evenly. - Using nutritional yeast instead of cheese: For a dairy-free option, swap Parmesan with nutritional yeast. This adds a cheesy flavor while keeping the dish vegan-friendly. Plus, it’s rich in vitamins and minerals. - Low-calorie oil substitutions: If you want to cut down on calories, use a spray oil or a small amount of vegetable broth. This still adds moisture without the extra fat. - Serving suggestions that complement health goals: Pair your roasted cauliflower with a fresh salad or whole grains like quinoa. This adds fiber and nutrients, making the meal even healthier. {{image_2}} You can switch up the cheese for a different taste. Asiago cheese adds a nutty flavor. Cheddar gives a sharp kick. Both work great with the garlic and cauliflower. Spices can also change the dish's vibe. Try curry powder for a warm, aromatic flavor. Cajun seasoning adds a spicy kick. Both options can transform your roasted cauliflower into something special. You can use an air fryer for a faster option. Just toss the cauliflower and spices in a bowl, then place them in the air fryer. Cook at 400°F for about 15 minutes. This method gives a nice crispy texture. Grilling is another fun way to prepare this dish. Brush the cauliflower with oil and seasonings. Place it on a hot grill for about 10-12 minutes. This adds a smoky flavor, making the dish even more delicious. Experiment with these variations to find your favorite! To keep your roasted garlic Parmesan cauliflower fresh, follow these steps: - Let it cool down to room temperature. - Place it in an airtight container. - Store it in the fridge. It stays fresh for about 3 to 5 days. The cauliflower may lose some crispness over time. Reheating helps bring back some of the flavor and texture. If you want to save it for later, freezing is a great option. Here’s how: - Pack the cooled cauliflower in a freezer-safe bag. - Remove all air before sealing it shut. To enjoy it again, thaw it overnight in the fridge. When you're ready to eat, reheat it in the oven at 350°F (175°C) until warm. This method helps restore some of its original texture. Can I make this dish ahead of time? Yes, you can prepare Roasted Garlic Parmesan Cauliflower ahead of time. Cook it fully, let it cool, and store it in the fridge. When you are ready to eat, reheat it in the oven until warm. This keeps the flavors fresh. Is Roasted Garlic Parmesan Cauliflower a low-carb dish? Yes, this dish is low in carbs. Cauliflower is a great substitute for high-carb foods. It fits well in low-carb diets and offers a tasty option for everyone. What can I serve with Roasted Garlic Parmesan Cauliflower? You can serve this dish with grilled chicken, fish, or a fresh salad. It also pairs well with pasta or rice for a heartier meal. The flavors complement many main dishes. How to keep the cauliflower from getting soggy? To avoid soggy cauliflower, ensure it is dry before cooking. Toss it with oil and spices and spread it out on the baking sheet. This allows hot air to circulate and keeps it crisp. Can I use frozen cauliflower florets? Yes, you can use frozen cauliflower florets. Just thaw them and pat them dry before roasting. Frozen florets may need a bit more time to cook. What’s the best way to season this dish for extra flavor? For extra flavor, try adding herbs like thyme or basil. A squeeze of lemon juice adds brightness. You can also use red pepper flakes for a spicy kick. This blog post covered how to make Roasted Garlic Parmesan Cauliflower. You learned about the key ingredients, like cauliflower and Parmesan, and optional additions for more flavor. We also discussed steps to prepare and cook it perfectly. Tips for texture and healthy swaps helped enhance your dish. Lastly, I mentioned ways to store and reheat your leftovers. Remember, this recipe is flexible. Experiment with flavors and methods to find what you love best. Enjoy your cooking!

Roasted Garlic Parmesan Cauliflower Savory Delight

Are you ready to transform simple cauliflower into a mouthwatering dish? My Roasted Garlic Parmesan Cauliflower packs big flavor with

For the best taste, use the freshest ingredients. Here’s what you need: - 4 cups watermelon, cubed - 1 cup feta cheese, crumbled - 1/2 red onion, thinly sliced - 1/4 cup fresh mint leaves, chopped - 1 tablespoon olive oil - 2 tablespoons balsamic glaze - Salt and pepper to taste Choosing ripe watermelon adds a sweet touch. Look for a firm, heavy melon with a deep green color. For feta cheese, choose high-quality, creamy options for the best flavor. Fresh mint brings a bright note, so pick leaves that are vibrant and fragrant. Precise measurements help balance flavors. Use a measuring cup for the watermelon and feta. A kitchen scale can help if you want exact amounts. For the onion and mint, slice and chop carefully to ensure even distribution in the salad. This way, every bite is tasty and well-seasoned. Want to take this salad up a notch? Consider adding: - Chopped cucumber for extra crunch - Sliced avocado for creaminess - Toasted nuts for a nutty flavor These add-ins not only enhance taste but also provide different textures. Feel free to experiment based on what you have on hand! Start by taking 4 cups of watermelon. Cut it into nice cubes. Next, grab 1 cup of feta cheese. Crumble it into small bits. This cheese adds a salty taste that works well with the sweet watermelon. Now, take a large mixing bowl. Add the cubed watermelon and crumbled feta cheese. Then, slice a half of a red onion very thin. Add this to the bowl. Chop 1/4 cup of fresh mint leaves. Toss them in too. These mint leaves add a fresh touch that brightens the dish. Drizzle 1 tablespoon of olive oil over the mix. Gently toss everything together. You want all the flavors to blend but not break the watermelon. Next, add 2 tablespoons of balsamic glaze. Sprinkle some salt and pepper to taste. Toss the salad again to coat it all. Let the salad sit for about 5 minutes. This helps the flavors mix well. Serve it in a beautiful glass bowl for a colorful display. Add more mint leaves on top for a nice look. Enjoy your fresh and tasty watermelon feta salad! To pick a great watermelon, look for a few key signs. First, choose a firm melon with a smooth skin. Check for a yellow spot; that means it ripened on the ground. The weight should feel heavy for its size. This shows it has plenty of water. If possible, tap the melon. A deep sound indicates it is ripe and juicy. The magic in this salad comes from blending flavors. Use olive oil to add richness. Balsamic glaze provides sweetness that pairs well with salty feta. You can add a pinch of salt and pepper for extra flavor. If you want a kick, try a pinch of cayenne pepper. Fresh herbs like basil or parsley can add a nice touch. Always taste as you mix to find the perfect balance. A beautiful salad is a feast for the eyes. Serve it in a clear glass bowl to show off the vibrant colors. Garnish with extra mint leaves for a fresh look. Drizzle more balsamic glaze on top for a glossy finish. You can also use skewers to make fun watermelon and feta bites. This adds a playful twist to your serving style. {{image_2}} You can turn this salad into a full meal by adding protein. Grilled chicken works well. Shrimp or tofu can also be great choices. Simply cook your protein and slice it into pieces. Toss it in with the watermelon and feta. This adds flavor and makes the dish more filling. While feta is a star in this salad, you can try other cheeses too. Goat cheese adds a tangy taste. Mozzarella gives a creamy texture. For a bold flavor, use blue cheese. Each cheese brings its own twist to the dish, so feel free to experiment! You can enhance this salad by using seasonal ingredients. In summer, add fresh berries for sweetness. In fall, try diced apples or pears for crunch. Each season offers new flavors that can make your salad shine. Use what you find at your local market for the best taste. To keep your Fresh Watermelon Feta Salad fresh, use an airtight container. This prevents air and moisture from spoiling it. Layer the salad gently to avoid crushing the ingredients. If you have a lot of salad, divide it into smaller containers. This makes it easier to grab just what you need later. Fresh Watermelon Feta Salad lasts about 2 to 3 days in the fridge. After that, the watermelon can become mushy. The feta cheese may lose its flavor too. Always check for any strange smells or changes in texture. If it looks or smells off, it’s best to throw it away. Reviving your leftover salad is easy. Start by adding a splash of olive oil. This will help restore flavor and moisture. You can also add fresh mint leaves for a burst of taste. If it seems dry, a little balsamic glaze can brighten it up. Toss everything gently, and it will feel fresh again! Yes, you can make this salad ahead of time. However, I recommend making it no more than a few hours before serving. The watermelon can release juice, making the salad soggy. To keep it fresh, store it in the fridge in an airtight container. Just give it a gentle toss before serving to mix the flavors again. You can use many herbs in this salad. Basil adds a sweet touch. Cilantro gives a bright flavor. Dill offers a nice, fresh taste. Each herb brings a unique twist to the dish. Feel free to experiment and find your favorite combination! Yes, this salad is gluten-free and vegetarian. The ingredients, like watermelon, feta, and mint, are all safe for those diets. This makes it a great choice for gatherings. You can serve it to friends and family without worry! This blog post covered how to make a fresh watermelon feta salad. We discussed key ingredients, step-by-step instructions, and tips for a perfect blend of flavors. Variations showed how to customize your salad with proteins and cheese. We also shared storage tips and answered common questions to help you enjoy this dish longer. Eating this salad is refreshing and easy. By following these steps, you can make a delicious meal that brightens any gathering. Enjoy your cooking!

Fresh Watermelon Feta Salad Crisp and Flavorful Dish

Looking for a refreshing dish to brighten your meals? This Fresh Watermelon Feta Salad is the perfect mix of sweet

- 4 boneless, skinless chicken breasts - 1 cup grated Parmesan cheese - 1 cup panko bread crumbs - 2 teaspoons garlic powder - 1 teaspoon paprika - 1 teaspoon dried Italian herbs - Salt and pepper to taste - 2 large eggs - 2 tablespoons olive oil When making Baked Parmesan Crusted Chicken, you want to start with the right ingredients. The chicken serves as the main star. Choose four boneless, skinless chicken breasts. They cook evenly and stay juicy. Next, you need cheese. Grated Parmesan adds a rich and nutty flavor. It forms a crispy layer that contrasts with the tender chicken. The panko bread crumbs create that desired crunch. They are lighter and airier than regular breadcrumbs, adding to the crisp factor. Seasoning is key. Garlic powder gives a nice punch. Paprika adds warmth and a bit of color. Dried Italian herbs, like oregano and basil, enhance the dish’s flavor profile. Salt and pepper round out the taste. To bind everything together, you’ll need eggs and olive oil. The eggs coat the chicken, helping the cheese and crumbs stick. Olive oil keeps the crust crisp as it bakes. Gathering these ingredients sets you up for a tasty meal. You can easily customize them to suit your taste. 1. Preheat the oven: Start by setting your oven to 400°F (200°C). This heat will help make the chicken crispy. 2. Prepare the baking sheet: Line your baking sheet with parchment paper. This keeps the chicken from sticking and makes cleanup easy. 3. Combine Parmesan and bread crumb mixture: In a medium bowl, mix together the grated Parmesan cheese, panko bread crumbs, garlic powder, paprika, dried Italian herbs, salt, and pepper. Stir well until everything is even. 1. Whisk the egg mixture: In another bowl, whisk together the eggs and olive oil. Make sure it looks smooth and blended. 2. Dredge chicken in egg and breadcrumb mixtures: Take each chicken breast and dip it in the egg mixture. Make sure it gets coated well. Next, dredge it in the Parmesan mixture. Press lightly so it sticks well. 1. Arrange chicken on the baking sheet: Place the coated chicken breasts on the lined baking sheet. Leave some space between each piece. 2. Bake and check for doneness: Slide the baking sheet into the oven. Bake for 20-25 minutes. The chicken should be cooked through and have a golden, crispy crust. Use a meat thermometer; the internal temperature should reach 165°F (75°C). To get that perfect crunch, olive oil is key. It helps the coating turn golden and crisp. Drizzle a bit on top before baking for that extra crispiness. Panko is the best choice over regular breadcrumbs. Panko gives a lighter and airier texture, making the crust more enjoyable. You can boost the flavor with extra seasonings. Try adding some onion powder or red pepper flakes for a kick. Marinating the chicken in a mix of olive oil, lemon juice, and herbs for an hour will add great taste. This step is simple and makes a big difference. Pair your Baked Parmesan Crusted Chicken with sides like mashed potatoes or steamed veggies. A fresh salad also works well. For a nice touch, serve the chicken on a wooden platter. Add lemon wedges and a sprinkle of extra Parmesan on top. It looks great and enhances the meal. {{image_2}} For a lighter dish, you can make some easy swaps. - Gluten-free substitutions: Use gluten-free panko breadcrumbs or crushed nuts. This option works well and still gives a nice crunch. - Reducing cheese and oil: Cut down on the Parmesan cheese to half a cup. You can also use less olive oil. This change still keeps flavor but reduces fat. Mixing up the herbs and spices can take this dish to new levels. - Adding different herbs and spices: Try adding fresh rosemary or thyme for a fragrant touch. Smoked paprika gives a nice twist too. You can even add a pinch of cayenne for heat. - Different cheese options: Swap Parmesan for Pecorino Romano or a blend of cheeses. Each cheese adds its own unique flavor. You can also change how you cook the chicken for different results. - Air frying for a quicker option: Air fry the chicken at 375°F for about 12-15 minutes. This method gives you a crispy crust with less oil. - Grilling for a smoky flavor: Grill the chicken on medium heat for 6-8 minutes per side. This gives a nice char and smoky taste. These variations let you enjoy Baked Parmesan Crusted Chicken in new ways, keeping meals exciting and healthy! To keep your Baked Parmesan Crusted Chicken fresh, use an airtight container. Glass or plastic containers work well. Store the chicken in the fridge at a temperature below 40°F (4°C). This helps maintain its flavor and texture for up to three days. You can reheat the chicken in the oven or a microwave. For the oven, place it on a baking sheet at 350°F (175°C) for about 10-15 minutes. This method helps keep the crust crispy. If you use a microwave, heat it in short bursts. Be careful not to overcook it, as this can make the chicken dry. To maintain crispiness, consider using a toaster oven. This keeps the outside crunchy while warming the inside. Spraying a little oil on the crust before reheating can also help. If you want to freeze cooked chicken, let it cool first. Then wrap each piece tightly in plastic wrap or foil. Place the wrapped chicken in a freezer bag. Squeeze out as much air as you can before sealing. The chicken will last for up to three months in the freezer. When you're ready to eat, thaw the chicken in the fridge overnight. This keeps it safe and helps it stay juicy. After thawing, you can reheat it using the methods mentioned above. The best temperature for baking chicken is 400°F (200°C). This heat cooks the chicken well and gives it a crispy crust. When the oven is hot, the cheese and bread crumbs brown nicely. This creates a tasty outer layer that contrasts with juicy chicken inside. You should bake Baked Parmesan Crusted Chicken for 20 to 25 minutes. The cooking time depends on how thick the chicken breasts are. Thinner pieces cook faster, while thicker ones may need more time. Always check that the chicken’s internal temperature reaches 165°F (75°C) to ensure it is safe to eat. You can use regular breadcrumbs, but panko works better. Panko is coarser and lighter. It gives a crunchier texture. Regular breadcrumbs can make the crust denser. If you want a crispier finish, stick with panko. This blog covered everything you need for baked Parmesan crusted chicken. We discussed the key ingredients, like chicken breasts, cheese, and breadcrumbs. You learned how to prepare, coat, and bake the chicken for a crisp texture. I shared tips for flavor and variations to suit your taste. Lastly, I included storage methods for leftovers. With this information, you can create a delicious meal your family will love. Enjoy cooking and experimenting with different flavors in your kitchen!

Baked Parmesan Crusted Chicken Flavorful and Crispy Meal

Looking for a meal that’s both flavorful and crispy? You’ve come to the right place! This Baked Parmesan Crusted Chicken

To make glazed orange chicken, you need a few key items. Here’s a list of the main ingredients: - 1.5 pounds chicken thighs, boneless and skinless, cut into bite-sized pieces - 1 cup orange juice, freshly squeezed - Zest of 1 orange - 1/4 cup low sodium soy sauce - 2 tablespoons honey - 1 tablespoon sesame oil - 2 cloves garlic, minced - 1 teaspoon fresh ginger, grated - 2 tablespoons cornstarch - 1/4 cup water These ingredients bring together a bright and zesty flavor that makes this dish special. The flavor of glazed orange chicken is a perfect mix of sweet, salty, and tangy. The orange juice and zest give a fresh, citrus taste. Honey adds a nice sweetness. Low sodium soy sauce provides a deep, savory flavor. Garlic and ginger add warmth and depth. Together, they create a balanced sauce that coats the chicken well. When cooking, these ingredients work together to make a delicious glaze. The combination of sweet and savory keeps every bite exciting. Garnishing your dish can make it look even better. Here are some simple options: - 2 green onions, sliced - Sesame seeds These garnishes add a nice crunch and a pop of color. Green onions give a mild onion flavor, while sesame seeds add a nutty touch. You can sprinkle them on just before serving for a beautiful finish to your glazed orange chicken. First, gather your ingredients. You will need orange juice, orange zest, soy sauce, honey, sesame oil, garlic, and ginger. In a medium bowl, whisk these together to make a tasty marinade. Reserve about 1/4 cup of this marinade for later. Next, take your chicken thighs and cut them into small pieces. Place these pieces in a large zipper-lock bag or bowl. Pour the marinade over the chicken, making sure it covers all the pieces. Seal the bag or cover the bowl. Let it sit in the fridge for at least 30 minutes. If you have time, marinate for up to 2 hours. This helps the chicken soak up all the flavors. Now it’s time to cook the chicken. Heat a large skillet or wok over medium-high heat. Take the chicken out of the marinade, letting the extra liquid drip off. Add the chicken pieces to the hot skillet. Cook for about 5-7 minutes. Stir occasionally so the chicken cooks evenly. You want it to get golden brown and fully cooked through. While the chicken cooks, take the reserved marinade and add it to a small saucepan. Heat it over medium heat. In a separate bowl, mix the cornstarch with water until smooth. Once the marinade is hot, add the cornstarch mix to it. Stir constantly for about 3-5 minutes until the sauce thickens. Once the chicken is ready, pour the thick glaze over it in the skillet. Toss the chicken to coat it well in the orange glaze. Cook for another 1-2 minutes. This helps the glaze set on the chicken. Now your glazed orange chicken is ready to be served! To make a great marinade, use fresh orange juice and zest. The zest adds bright flavor. Combine orange juice, soy sauce, honey, sesame oil, garlic, and ginger. Whisk these ingredients well in a bowl. Marinate your chicken for at least 30 minutes. For more flavor, let it sit up to 2 hours. This step makes your chicken juicy and full of taste. To get the glaze just right, you need a smooth mix. After cooking the chicken, take the reserved marinade. Heat it in a saucepan. Mix cornstarch and water in a bowl until smooth. Add this mix to the marinade while stirring. It should thicken in about 3-5 minutes. The right consistency is key for a nice coating on the chicken. Cook your chicken on medium-high heat for the best results. This heat helps to brown the chicken nicely. Stir the chicken often to ensure it cooks evenly. Look for a golden-brown color. This means it’s done and tender. Avoid overcooking, as this can make the chicken dry. Aim for 5-7 minutes of cooking time. Enjoy your moist and flavorful orange chicken! {{image_2}} You can switch chicken for other proteins. Shrimp works great with this recipe. It cooks quickly and absorbs all the flavors. Tofu is another option for a tasty twist. Just make sure to press it well to remove excess water. This helps it soak up the marinade. You can also try pork or beef for a different bite. For a vegan dish, use tempeh or seitan. They both have great texture and flavor. Marinate them just like the chicken. You can also use cauliflower or chickpeas. They bring a nice crunch and absorb the glaze well. These swaps keep the dish vibrant and satisfying. Want to add some heat? Try adding red pepper flakes or sriracha. This gives a spicy kick to the glaze. If you like more citrus, add lime juice or zest. It brightens the dish and adds a nice zing. You can mix in herbs like cilantro or basil for extra freshness. These small changes can make a big impact on taste! To keep your glazed orange chicken fresh, store it in an airtight container. Make sure to let it cool down first. Store it in the fridge for up to three days. If you want to keep it longer, freezing is a great option. When you want to enjoy your leftovers, reheat them on the stove. Place the chicken in a skillet over medium heat. Add a splash of water to keep it moist. Stir occasionally until it's heated through. You can also use the microwave. Heat it in short bursts, checking often to avoid overcooking. To freeze glazed orange chicken, place it in a freezer-safe bag. Remove as much air as possible before sealing. Label the bag with the date, and it will last for up to three months. When ready to use, thaw it overnight in the fridge. Reheat it as mentioned above for the best results. To make glazed orange chicken spicy, add red pepper flakes or sriracha sauce. Start with a small amount, like 1/2 teaspoon. Taste the sauce and adjust the heat to your liking. You can also add minced jalapeños to the marinade for a fresh kick. This gives a zesty balance to the sweet orange flavor. Yes, you can use chicken breasts instead of thighs. Chicken breasts are leaner and will cook faster. Keep an eye on the cooking time, as they may dry out if overcooked. Cut the breasts into bite-sized pieces, just like the thighs. This will help them cook evenly. Glazed orange chicken pairs well with many sides. Here are some great options: - Steamed jasmine rice - Fried rice with vegetables - Roasted broccoli or green beans - A fresh garden salad - Egg rolls or spring rolls These sides add color and flavor to your meal. Enjoy your delicious feast! In this post, I shared how to make glazed orange chicken with clear steps. You learned about key ingredients, marinating, and cooking techniques. I also offered tips for perfecting flavor and texture. Don't forget to try variations and how to store leftovers. The right glaze can elevate your dish, and you can adapt it to your taste. This simple guide boosts your confidence in the kitchen. Enjoy your cooking journey!

Glazed Orange Chicken Flavorful Delight Recipe

Ready to enjoy a dish that bursts with flavor? My Glazed Orange Chicken recipe will bring zest to your dinner

To make this tasty chocolate zucchini bread, you will need: - 1 cup grated zucchini (about 1 medium zucchini) - 1 cup all-purpose flour - 1/2 cup cocoa powder - 1/2 teaspoon baking powder - 1/2 teaspoon baking soda - 1/4 teaspoon salt - 1/2 cup granulated sugar - 1/2 cup brown sugar, packed - 1/2 cup vegetable oil - 2 large eggs - 1 teaspoon vanilla extract These main ingredients give the bread its moist and rich flavor. The zucchini adds moisture, making it soft and delicious. You can make this recipe your own by adding other tasty ingredients: - 1/2 cup chocolate chips (optional) - 1/4 cup chopped walnuts or pecans (optional) Adding chocolate chips will make the bread extra chocolatey. Nuts add a nice crunch and flavor. To bake this bread, gather these tools: - Mixing bowls - Whisk - Grater - 9x5 inch loaf pan - Spatula - Toothpick for testing These tools will help you mix, bake, and check the bread perfectly. First, heat your oven to 350°F (175°C). This temperature is perfect for baking. While the oven heats, grease and flour a 9x5 inch loaf pan. This step helps the bread come out easily later. Next, grab a medium bowl. In it, whisk together these dry ingredients: - 1 cup all-purpose flour - 1/2 cup cocoa powder - 1/2 teaspoon baking powder - 1/2 teaspoon baking soda - 1/4 teaspoon salt Whisk well to mix. This helps the bread rise evenly. Now, take a larger bowl. Combine the granulated sugar and brown sugar with 1/2 cup vegetable oil. Mix these until they are well blended. Then, add 2 large eggs and 1 teaspoon vanilla extract. Whisk this mixture until smooth. This step makes your bread rich and flavorful. Stir in 1 cup of grated zucchini. This adds moisture and nutrition. Mix until the zucchini is evenly distributed in the wet ingredients. Gradually add the dry mix to the wet mix. Stir gently until just combined. Be careful not to overmix. If you like, fold in 1/2 cup chocolate chips or 1/4 cup chopped nuts. Pour the batter into your prepared loaf pan. Smooth the top with a spatula. Bake for 50-60 minutes. Check for doneness by inserting a toothpick into the center. If it comes out clean, your bread is ready! Remove it from the oven and let it cool in the pan for about 10 minutes. After that, transfer it to a wire rack to cool completely. Enjoy the aroma as it cools! Grating zucchini is simple. Start by washing the zucchini well. Then, trim off the ends. Use a box grater or a food processor. Grate it on the large holes for the best texture. You want about 1 cup of grated zucchini. Place the grated zucchini in a clean kitchen towel. Squeeze out any extra moisture. This step helps keep your bread from being too wet. For soft and moist chocolate zucchini bread, avoid overmixing. When you combine wet and dry ingredients, mix just until you see no dry flour. Lumps are fine! Overmixing makes the bread dense. Adding the zucchini last helps keep the batter light. If you like a bit of crunch, fold in nuts or chocolate chips. This adds texture and flavor. You can make this recipe healthier. Swap half the sugar for applesauce. It keeps the bread sweet and moist. Use whole wheat flour instead of all-purpose flour for more fiber. If you want a lighter option, use egg whites instead of whole eggs. You can also try using coconut oil instead of vegetable oil. These small changes make your chocolate zucchini bread more nutritious without losing taste. {{image_2}} You can add nuts for extra crunch. I love using walnuts or pecans. Just chop them up and fold them into the batter. Use about 1/4 cup of chopped nuts. This will add a nice texture and flavor. The nuts balance the sweetness of the bread. Plus, they give you a boost of healthy fats. If you want a nutty taste, try this option! You can make this bread gluten-free too. Swap the all-purpose flour with a gluten-free blend. Make sure it has xanthan gum for the right texture. The bread will still be moist and tasty. You may need to adjust the baking time slightly. Keep an eye on it as it bakes. You might find you love this version just as much! If you want a dairy-free bread, it's easy to change. Use a dairy-free milk like almond or oat milk. Replace regular chocolate chips with dairy-free ones. Use the same amount as the recipe calls for. This way, you can enjoy the rich chocolate flavor without dairy. It's perfect for those with lactose issues. Everyone can enjoy this delicious treat! To keep your chocolate zucchini bread fresh, wrap it in plastic wrap. This seals in moisture. Place the wrapped bread in an airtight container. You can also store it in a resealable bag. This method keeps the bread soft for about four days at room temperature. If you want to keep it longer, the fridge is not ideal. It can dry out the bread. If you have extra bread, freezing is a great option. Slice the bread before freezing. Wrap each slice tightly in plastic wrap. Then, place the slices in a freezer bag. This keeps them fresh for up to three months. When you want to enjoy a slice, just pull one from the freezer. Let it thaw at room temperature or pop it in the microwave for a quick treat. To reheat your chocolate zucchini bread, you can use the oven or microwave. For the oven, preheat it to 350°F (175°C). Place the bread on a baking sheet and heat for about 10 minutes. This helps revive its soft texture. If you’re in a hurry, use the microwave. Heat a slice for 15 to 20 seconds. Check it to ensure it’s warmed but not too hot. Enjoy your slice with some butter or cream! Yes, you can use frozen zucchini. Just thaw it first and drain excess water. This helps your bread stay moist. Frozen zucchini can be just as good as fresh. Check the bread with a toothpick. Insert it into the center. If it comes out clean or with a few crumbs, the bread is done. Baking usually takes 50 to 60 minutes. You can serve this bread warm with powdered sugar on top. A dollop of whipped cream also works well. For a fun twist, try it with a scoop of ice cream. Grate the zucchini finely and use enough oil. Don’t skip the eggs, as they add moisture. Also, don't overmix the batter. This keeps the bread soft and tender. It can be a bit healthier than regular chocolate bread. You get fiber from the zucchini, but it still has sugar. If you want, use less sugar or substitute with a healthier option. Enjoy it as an occasional treat! This article covered how to make chocolate zucchini bread from scratch. We explored key ingredients, recommended tools, and step-by-step instructions for baking. You learned tips for texture, substitutions for healthier options, and different variations to try. In closing, chocolate zucchini bread is easy and fun to make. Enjoy experimenting with flavors and share this treat with others!

Chocolate Zucchini Bread Moist and Delicious Recipe

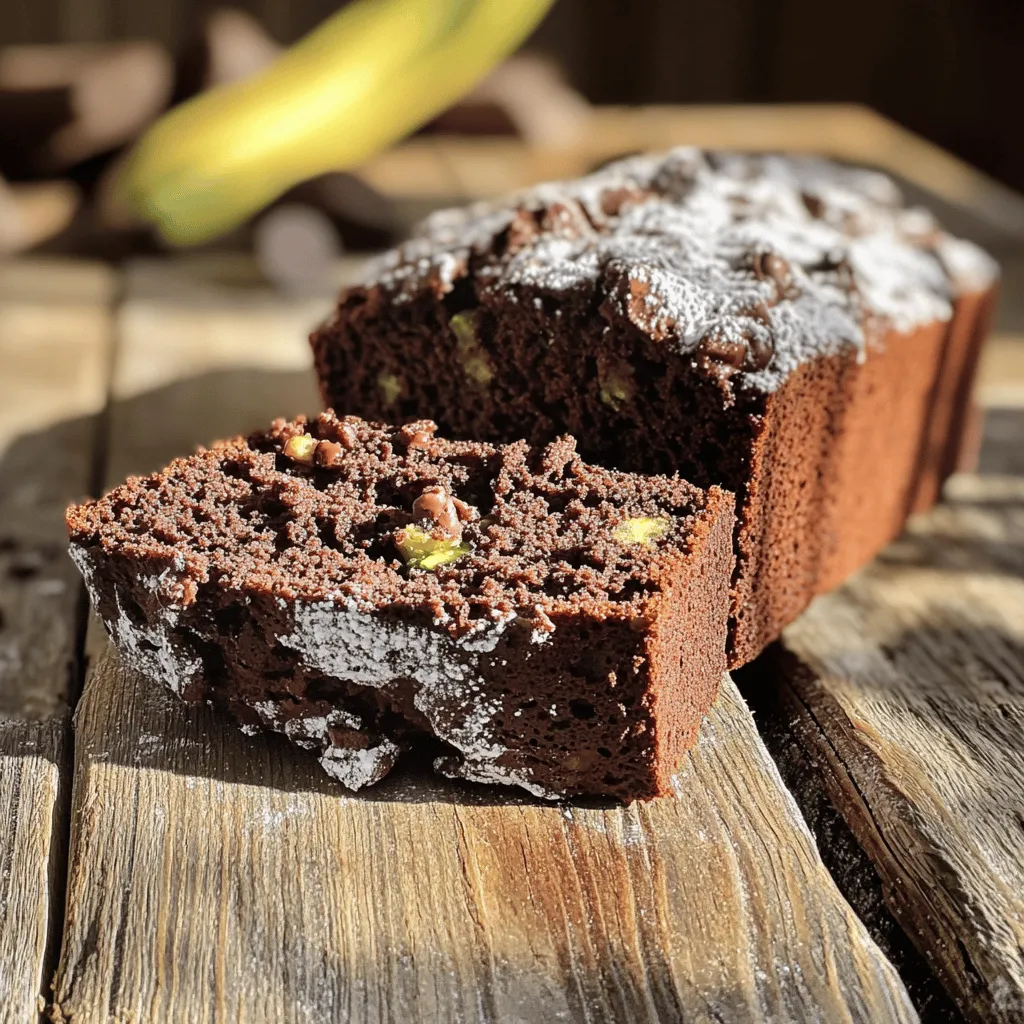
Are you ready to bake something truly special? This Chocolate Zucchini Bread recipe is moist, delicious, and easy to make!

- 1 ½ cups rolled oats - 1 cup all-purpose flour - ½ teaspoon baking soda - ½ teaspoon baking powder - ½ teaspoon salt - 1 teaspoon ground cinnamon - ½ cup unsalted butter, softened - ¾ cup brown sugar, packed - ¼ cup granulated sugar - 1 large egg - 1 teaspoon vanilla extract - 1 cup semi-sweet chocolate chips - ½ cup chopped nuts (optional, e.g., walnuts or pecans) To make the best Chocolate Chip Oatmeal Cookie Skillet, use fresh ingredients. Fresh oats and chocolate chips make a big difference in taste. I always suggest using high-quality butter for the rich flavor that adds to this cookie. If you like nuts, walnuts or pecans work well. - 10-inch cast-iron skillet or oven-safe skillet - Mixing bowls (one medium, one large) - Whisk - Hand mixer or stand mixer - Spatula - Measuring cups and spoons Having the right tools is key to success in this recipe. A good skillet helps with even baking. I prefer a cast-iron skillet for its heat retention and flavor. A hand mixer makes creaming the butter easy, but you can use a spatula if needed. - 1 ½ cups rolled oats = 135 grams - 1 cup all-purpose flour = 120 grams - ½ cup unsalted butter = 113 grams - ¾ cup brown sugar = 150 grams - ¼ cup granulated sugar = 50 grams - 1 large egg = about 50 grams - 1 cup semi-sweet chocolate chips = 170 grams When measuring, it helps to know the grams for more accuracy. This ensures you have the right amount of each ingredient. Baking is a science, so precise measurements lead to the best results. Start by preheating your oven to 350°F (175°C). Grab a 10-inch cast-iron skillet or an oven-safe skillet. Grease it well with non-stick spray or butter. This keeps the cookie from sticking. In a medium bowl, combine the rolled oats, flour, baking soda, baking powder, salt, and cinnamon. Use a whisk to blend these dry ingredients well. This step adds flavor and texture to your cookie. In a large mixing bowl, cream the softened butter with brown sugar and granulated sugar. Use a hand mixer or stand mixer for about 2-3 minutes. You want this mix to be light and fluffy. This creates a nice base for the cookie. Add the egg and vanilla extract to the butter-sugar mix. Beat these in until fully mixed. Gradually add the dry ingredient mix to the wet ingredients. Stir until just combined; avoid overmixing. This keeps the cookie soft. Spoon the cookie dough into the prepared skillet. Spread it out evenly with a spatula. Bake in the preheated oven for 20-25 minutes. The top should be golden brown, and the edges set. The center may look slightly underbaked, which is okay. It will continue cooking as it cools. Remove the skillet and let it cool for 10 minutes before serving. To get the best texture, use rolled oats. They give a chewy bite that quick oats can’t match. Make sure your butter is softened, not melted. Softened butter helps create a light and fluffy dough. Mixing the dry and wet ingredients until just combined keeps the cookies from being tough. One common mistake is overmixing the dough. This can lead to hard cookies. Another mistake is using too much flour. Measuring flour accurately is key. Make sure to spoon it into the cup and level it off with a knife. Lastly, don’t skip the cooling time. Letting it cool in the skillet lets the center finish cooking. Serve the cookie skillet warm for the best taste. Top it with a scoop of vanilla ice cream. Drizzle chocolate syrup for an extra sweet touch. You can also add whipped cream or nuts for crunch. Serve right from the skillet for a fun, casual vibe. {{image_2}} You can customize your chocolate chip oatmeal cookie skillet easily. For a nutty crunch, add ½ cup of chopped nuts like walnuts or pecans. You can swap in dark chocolate chips or even white chocolate chips for a new taste. If you want a fruity twist, try adding ½ cup of dried fruit, like cranberries or raisins. You can also use almond flour instead of all-purpose flour for a unique flavor. Each add-in brings its own charm. To make this recipe gluten-free, use a gluten-free flour blend in place of all-purpose flour. Make sure the oats are certified gluten-free, as cross-contamination can occur. Replace the baking powder with a gluten-free version too. These changes keep the cookie delicious while catering to gluten-free diets. I promise, you won't miss the gluten! You can easily make this recipe vegan. Use ½ cup of coconut oil or vegan butter instead of unsalted butter. Replace the egg with a flaxseed egg. Just mix 1 tablespoon of ground flaxseed with 2.5 tablespoons of water and let it sit for a few minutes. For sweetness, use brown sugar and granulated sugar that are vegan-friendly. These swaps create a tasty vegan treat that everyone can enjoy! After enjoying your cookie skillet, let it cool. Once cool, cover it with plastic wrap or foil. You can also place it in an airtight container. This keeps the cookie moist and fresh. Store it in the fridge for up to four days. To freeze, cut the cookie into slices. Wrap each slice in plastic wrap. Place the wrapped slices in a freezer-safe bag. This way, you can enjoy a slice anytime. To reheat, thaw the slice in the fridge overnight. Then, warm it in the oven at 350°F (175°C) for about 10 minutes. Alternatively, you can microwave it for about 30 seconds. The cookie skillet lasts about four days in the fridge. If frozen, it stays good for up to three months. For the best taste, eat it fresh. If you want to keep it longer, freezing is your best bet. Always check for any signs of spoilage before eating. Yes, you can use quick oats. They will make the cookie softer. Rolled oats add nice texture. I recommend using rolled oats for the best result. To reheat, place a slice in the microwave. Heat for about 10-15 seconds. Check if it’s warm enough. You can also bake it in the oven at 350°F for a few minutes. Yes, you can prepare the batter ahead of time. Store it in the fridge for up to 24 hours. When ready, just spread it in the skillet and bake. Look for a golden brown top and set edges. The center may look a bit soft. It will firm up as it cools. Serve it warm with vanilla ice cream or whipped cream. A drizzle of chocolate syrup adds extra flavor. You can also top it with fresh fruit or nuts. This blog post covered everything you need for a delicious chocolate chip oatmeal cookie skillet. We discussed key ingredients, kitchen tools, and how to measure them correctly. You learned step-by-step instructions for mixing and baking, plus tips for the best outcome. We explored variations for dietary needs and storage methods to keep your treats fresh. Lastly, I answered common questions to guide you further. Now, you are ready to bake a tasty and satisfying treat! Enjoy your time in the kitchen.

Chocolate Chip Oatmeal Cookie Skillet Delight

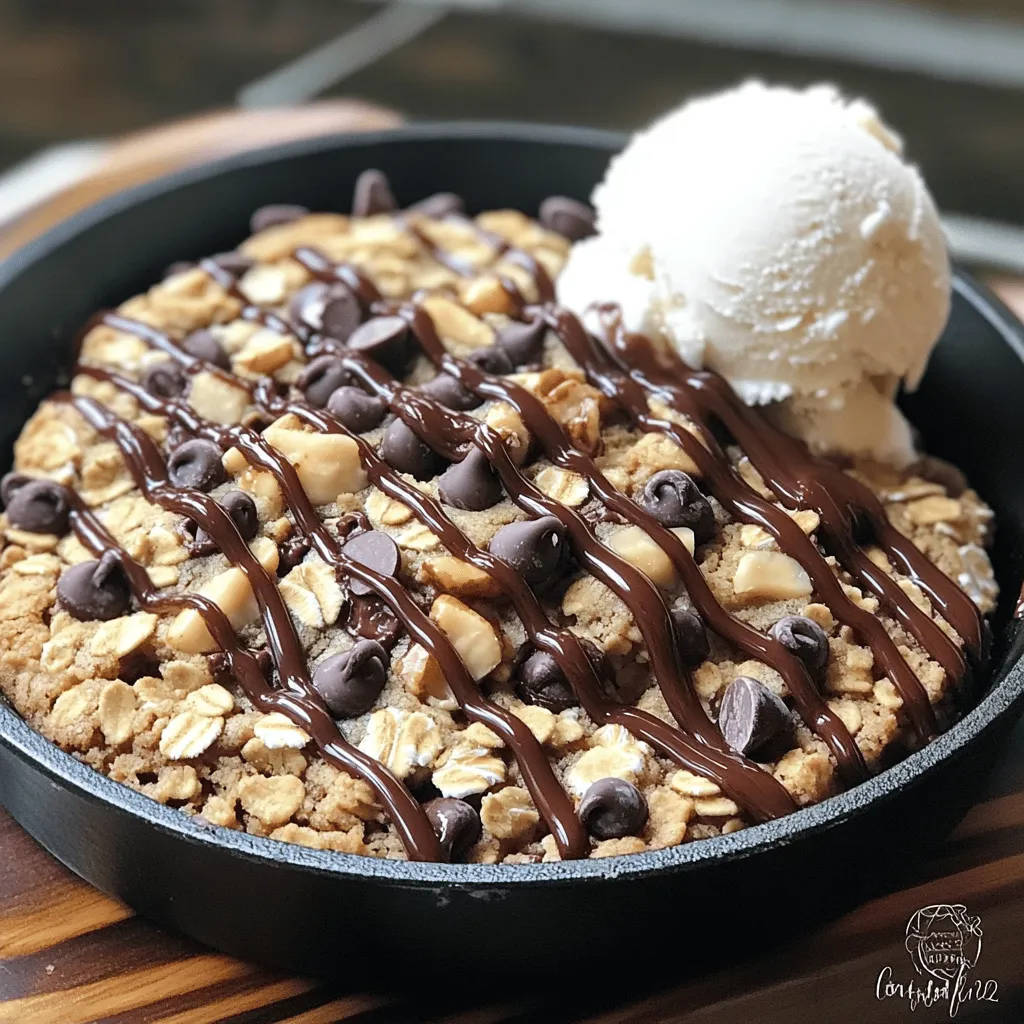
Craving a dessert that combines warmth and nostalgia? The Chocolate Chip Oatmeal Cookie Skillet Delight is your answer! In this

- 1 pound fresh green beans, trimmed - 3 tablespoons honey - 2 tablespoons soy sauce - 3 cloves garlic, minced - 1 tablespoon olive oil - 1 teaspoon sesame oil - Salt and pepper to taste - Toasted sesame seeds To make honey garlic green beans, you need fresh green beans. Start with ripe, crisp beans for the best taste. Honey brings sweetness and depth. Soy sauce adds saltiness and umami. Garlic gives a strong flavor that ties it all together. Olive oil helps with sautéing and adds richness. Sesame oil adds a nutty touch. Finally, salt and pepper enhance all the flavors. If you want to elevate your dish, consider using toasted sesame seeds. They add a nice crunch and nutty flavor. This combination of ingredients makes the dish sweet and savory, perfect for any meal. 1. First, fill a pot with water and add a good amount of salt. 2. Bring the salted water to a boil. 3. Once it's boiling, add in the fresh green beans. 4. Cook them for about 2-3 minutes. They should be bright green and crisp-tender. 5. Next, prepare a bowl of ice water while the beans cook. 6. Drain the beans and plunge them into the ice water. 7. This ice bath stops the cooking and keeps them crunchy. 8. After a few minutes, drain the beans again and set them aside. 1. In a small bowl, gather your sauce ingredients: honey, soy sauce, minced garlic, olive oil, and sesame oil. 2. Use a whisk to combine everything. 3. Whisk until the mixture is smooth and well blended. 1. Heat a large skillet over medium heat. 2. Add a splash of olive oil to the pan. 3. Once the oil is hot, add the blanched green beans. 4. Sauté for 3-4 minutes. Watch them closely as they turn golden. 1. Pour the honey garlic sauce over the green beans. 2. Toss the beans well to coat them evenly. 3. Let them cook for an extra 2-3 minutes. This helps the sauce thicken a bit. 1. Taste the green beans and adjust with salt and pepper as needed. 2. Remove the skillet from heat. 3. Transfer the green beans to a serving platter. 4. If you want, sprinkle some toasted sesame seeds on top for extra crunch. When picking green beans, look for bright colors. They should be firm and snap easily. If they look dull or limp, skip them. You can choose from several types, like the classic French green beans or the thicker, crunchy ones called haricots verts. Each has its charm, but they all taste great in this dish. You can adjust the sauce to your taste. If you like it sweeter, add more honey. For saltiness, add a touch more soy sauce. You can swap soy sauce with coconut aminos for a gluten-free option. If you want a kick, toss in some red pepper flakes. You can cook the beans on the stovetop or in the oven. Stovetop is quick and easy, while oven roasting gives a different flavor. Watch the beans closely to avoid overcooking; you want them crisp, not mushy. If you overcook them, they lose their bright color and crunch. {{image_2}} You can add protein to honey garlic green beans. Chicken or tofu work well. Simply cook the protein first. Then, toss it with the green beans and sauce. This makes a complete meal. You can also mix in other vegetables. Try bell peppers, carrots, or snap peas. They add color and crunch. Just sauté them with the green beans for a few minutes. Different types of honey can change the flavor. Try clover honey for a mild taste. Or go for wildflower honey for a richer flavor. Each honey brings its own unique sweetness. Adding spices can give the dish some heat. Red pepper flakes or a dash of chili powder work great. Start with a small amount, then taste. You can always add more! Honey garlic green beans pair well with many main dishes. Serve them alongside grilled chicken or baked salmon. They also complement rice or quinoa nicely. These green beans are perfect for meal prep. Cook a big batch and store them in the fridge. They taste great reheated and save time during busy weeks. To keep your honey garlic green beans fresh, let them cool first. Then, store them in a container. Use an airtight container to prevent moisture loss. This helps keep them tasty and crisp. You can store them in the fridge for up to 3 days. If you want to enjoy them later, make sure they are completely cooled before sealing the container. If you want to freeze the green beans, prepare them as usual. Place the cooled green beans in a freezer-safe bag. Remove as much air as possible before sealing. This helps prevent freezer burn. You can freeze them for up to 3 months. To thaw, move the bag to the fridge overnight. For a quick method, place the bag in cold water for a few hours. When ready to eat, reheat them in a skillet over medium heat. Add a splash of olive oil if they seem dry. Heat until warmed through, about 5 minutes. Enjoy your delicious green beans! To make honey garlic green beans, follow these simple steps: 1. Blanch the Green Beans: Bring a pot of salted water to a boil. Add 1 pound of trimmed fresh green beans and cook for 2-3 minutes. They should look bright green and feel crisp-tender. Quickly drain and plunge them into ice water to stop cooking. Drain again and set aside. 2. Prepare the Sauce: In a small bowl, whisk together 3 tablespoons of honey, 2 tablespoons of soy sauce, 3 minced garlic cloves, 1 tablespoon of olive oil, and 1 teaspoon of sesame oil. Mix until well combined. 3. Sauté the Beans: Heat a splash of olive oil in a large skillet over medium heat. Add the blanched green beans and sauté for about 3-4 minutes. They should start to turn golden. 4. Add the Sauce: Pour the honey garlic sauce over the beans. Toss to coat evenly and cook for an additional 2-3 minutes, allowing the sauce to thicken slightly. 5. Season and Serve: Taste the beans and season with salt and pepper. Transfer them to a platter and, if you want, sprinkle toasted sesame seeds on top. Yes, you can use frozen green beans, but there are some tips to keep in mind. - Thaw First: Thaw the green beans before using. This helps avoid excess water in the dish. - Cooking Time: Frozen beans may need extra cooking time compared to fresh ones. Sauté them longer to ensure they heat through and get tender. - Texture: Fresh green beans have a crisper texture, while frozen beans can be softer. Adjust your cooking to match your texture preference. Making honey garlic sauce is easy. Here’s a breakdown of the necessary components: - Honey: Use 3 tablespoons for sweetness. - Soy Sauce: Add 2 tablespoons for saltiness and depth. - Garlic: Use 3 minced cloves for flavor. - Olive Oil: 1 tablespoon adds richness. - Sesame Oil: 1 teaspoon provides a nutty note. Combine all these ingredients in a small bowl. Whisk them together until the mixture is smooth and well blended. Honey garlic green beans work great with many side dishes. Here are some recommendations: - Rice Dishes: Serve with jasmine or brown rice for a filling meal. - Grain Salads: Quinoa or farro salads add texture and nutrition. - Protein Options: Pair with grilled chicken, tofu, or shrimp for a balanced plate. - Other Vegetables: Roasted carrots or sautéed mushrooms complement the flavors well. These sides enhance the meal and create a vibrant dinner experience. In this blog post, we explored how to make honey garlic green beans from scratch. We covered fresh ingredients like green beans, honey, and garlic, along with easy cooking steps and tips for success. I shared ideas for variations and how to store leftovers. This dish is not just tasty; it’s versatile too. Enjoy experimenting with flavors and sharing this dish with your loved ones. Try it today, and enjoy a simple, healthy meal!

Honey Garlic Green Beans Savory and Flavorful Side

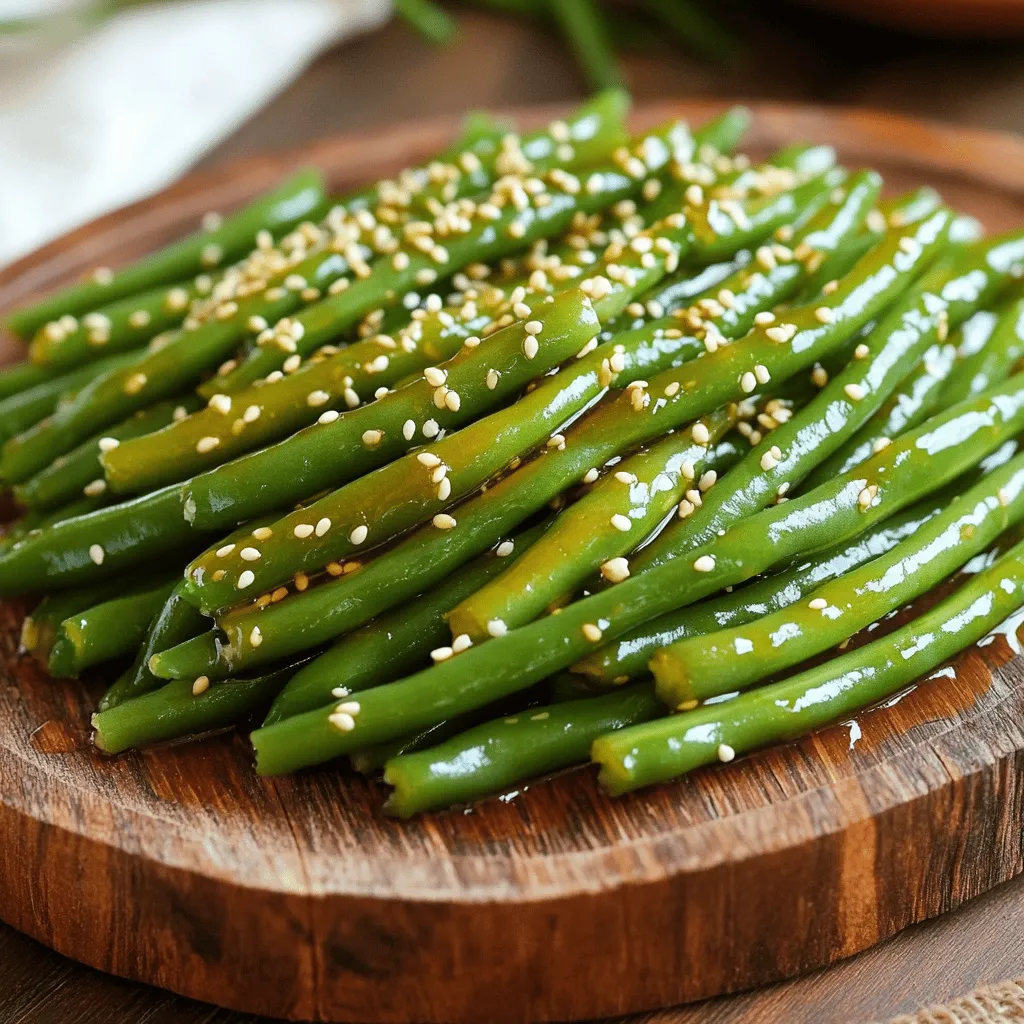
Looking for a side dish that’s both easy and bursting with flavor? Honey garlic green beans bring the perfect balance

- 1 ¾ cups graham cracker crumbs - ½ cup unsalted butter, melted - 2 tablespoons sugar - 2 (8 oz) packages cream cheese, softened - 1 cup sugar - 1 teaspoon vanilla extract - 2 large eggs - 2 cups peeled and diced apples (about 2 medium apples) - 1 teaspoon cinnamon - ½ teaspoon nutmeg - 1 cup caramel sauce (store-bought or homemade) - Sea salt for garnish (optional) The main ingredients create the rich and smooth base for these bars. The graham cracker crumbs form a crunchy crust that pairs well with the creamy cheesecake. Apples add a lovely texture and flavor. Spices like cinnamon and nutmeg bring warmth and depth to each bite. - 8x8-inch baking pan - Parchment paper - Mixing bowls - Electric mixer - Spatula These supplies help make baking easier. The parchment paper ensures the bars lift out cleanly. An electric mixer makes mixing the cream cheese a breeze. A spatula helps spread the cheesecake mixture evenly. - Extra caramel sauce for drizzling - Chopped nuts (like pecans or walnuts) - Whipped cream Garnishes add flair and flavor to your bars. Drizzling more caramel sauce enhances sweetness. Chopped nuts offer crunch, while whipped cream adds creaminess. Feel free to get creative with your toppings! Start by preheating your oven to 350°F (175°C). This step is key to getting a nice bake. Next, take an 8x8-inch baking pan and line it with parchment paper. Leave some overhang on the sides. This makes it easy to lift the bars out later. In a mixing bowl, combine 1 ¾ cups of graham cracker crumbs with ½ cup of melted butter and 2 tablespoons of sugar. Stir until the crumbs soak up the butter. Press this mixture firmly into the bottom of your prepared pan. This creates a solid base for your cheesecake. In a large bowl, beat 2 packages of softened cream cheese with an electric mixer. Mix until it’s smooth and creamy. Gradually add 1 cup of sugar and keep mixing. Add in 1 teaspoon of vanilla extract. This mixture should be well combined. Now, take 2 cups of peeled and diced apples and add them to the cream cheese mixture. Sprinkle in 1 teaspoon of cinnamon and ½ teaspoon of nutmeg. Gently fold everything together. Make sure the apples and spices are evenly spread in the batter. Pour the apple cheesecake mixture over the crust in the pan. Spread it evenly with a spatula. Place the pan in the preheated oven. Bake for 30-35 minutes. The edges should be set while the center remains slightly jiggly. After baking, remove the pan from the oven and let it cool at room temperature. Once cool, move the pan to the refrigerator. Chill for at least 2 hours. When ready to serve, drizzle with caramel sauce and sprinkle a bit of sea salt if you like. Use the parchment paper to lift the bars out. Cut them into squares or rectangles and enjoy! To get a smooth and creamy texture, start with softened cream cheese. Cold cream cheese can make lumps in your batter. Mix it well until it is fluffy and smooth. Beat in the eggs slowly. Overmixing can add too much air, causing cracks. After baking, let it cool at room temp before chilling. This helps it set nicely. One big mistake is skipping the chilling time. If you cut the bars too soon, they may fall apart. Make sure to bake until the edges are set. If the center jiggles too much, it needs more time. Also, avoid using too many apples. Too much moisture can make the bars soggy. Stick to about two medium apples for the best results. To cut the bars cleanly, use a sharp knife. Run the knife under hot water for easy slicing. Wipe the knife between cuts. This keeps the edges neat. Lift the bars out using the parchment paper. This way, you can cut them on a cutting board. It makes serving simple and keeps them looking great. {{image_2}} You can easily make these bars gluten-free. Use gluten-free graham cracker crumbs. They work well in the crust. Just check the labels to ensure they are safe. While apples shine in this recipe, you can try other fruits. Pears add a nice sweetness. Cherries or berries can bring a tart kick. Just chop them into small pieces and fold them into the batter. Caramel is a classic topping, but you have options. Drizzle chocolate sauce for a rich twist. Try whipped cream for a light touch. Nuts like pecans or walnuts add crunch and flavor. Sea salt sprinkled on top enhances sweetness, too. To keep your caramel apple cheesecake bars fresh, store them in an airtight container. Place the bars in the fridge if you plan to eat them within a week. If you leave them out, they will spoil quickly. Make sure to cover them well to avoid drying out. You can freeze these bars for later. Cut them into squares first. Wrap each piece in plastic wrap, then place them in a freezer-safe bag. They can last up to three months in the freezer. When you want to enjoy them, just thaw in the fridge overnight. If you prefer your cheesecake bars warm, reheating is easy. Place a square on a microwave-safe plate. Heat for about 10 to 15 seconds. Check if it's warm enough. You can also bake them at 300°F (150°C) for about 10 minutes. This warms them through without making them too soft. Yes, you can make caramel apple cheesecake bars ahead of time. I suggest you prepare them a day before you plan to serve. After baking, let them cool and chill in the fridge for at least two hours. This way, the flavors deepen, and the bars set perfectly. If you need a cream cheese substitute, try mascarpone cheese or Greek yogurt. Both options offer a creamy texture. However, they will change the flavor slightly. You may also use a vegan cream cheese for a dairy-free version. These bars pair well with whipped cream, vanilla ice cream, or a scoop of gelato. You might also enjoy them with a drizzle of extra caramel sauce on top. For a tart contrast, serve with a dollop of sour cream or yogurt. Cracks can happen for a few reasons. Overmixing the batter adds too much air, leading to cracks. Also, baking at a high temperature can cause them to puff up and crack. To avoid this, mix gently and bake at the right temperature. You can find the full recipe right here in this article. Scroll back to the ingredients and step-by-step instructions. You’ll have everything you need to make these delicious bars! To make Caramel Apple Cheesecake Bars, we explored key ingredients, tools, and steps. I shared my tips for perfecting texture and avoiding common mistakes. You learned about storage and how to adapt the recipe for your needs. These bars are not just tasty; they can also suit different diets and preferences. Enjoy baking and serving these delicious treats, knowing you have the skills to impress anyone!

Caramel Apple Cheesecake Bars Irresistible Treat

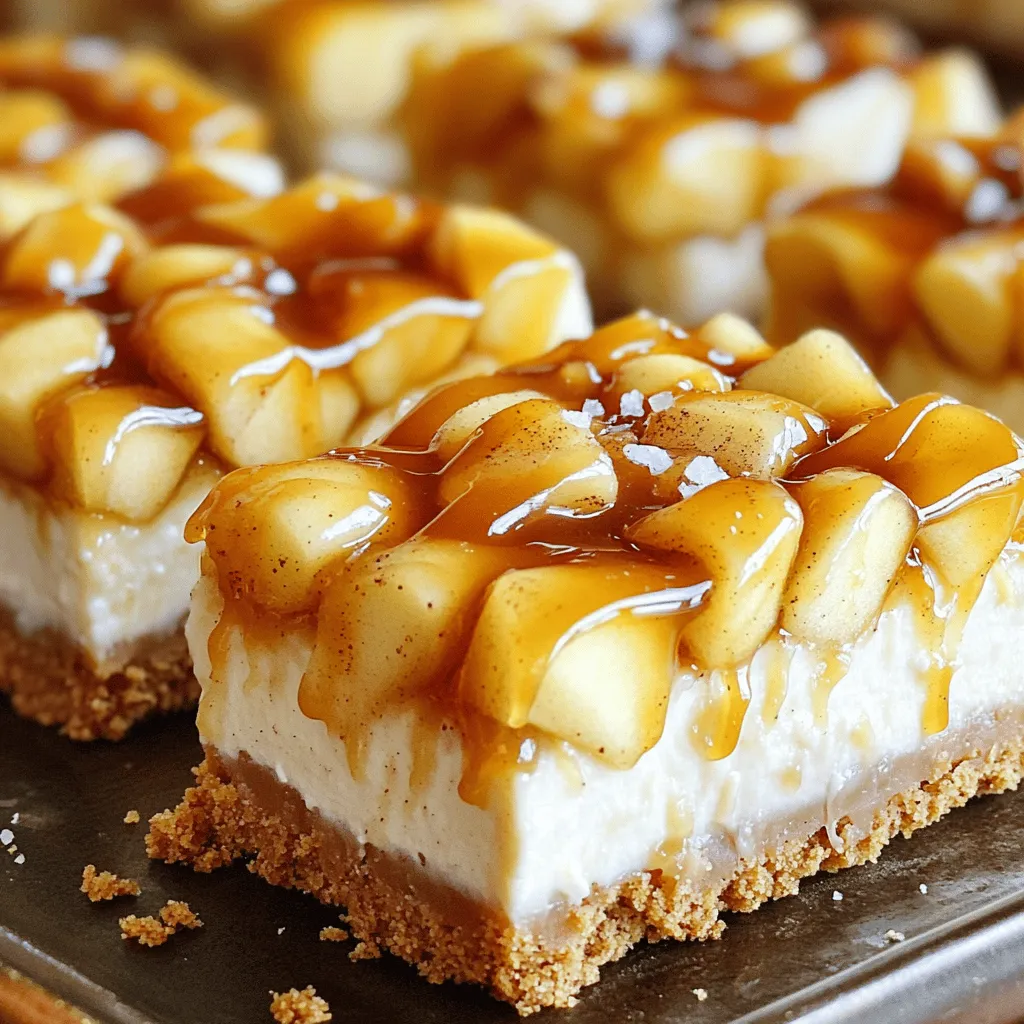
If you love a sweet treat that combines rich flavors, you’re in for a delight! Caramel Apple Cheesecake Bars are

- 1 cup almond flour - 2 tablespoons coconut flour - 2 tablespoons sugar or maple syrup - 1 teaspoon baking powder - 1/4 teaspoon salt - 2 large eggs - 1/2 cup milk (dairy or non-dairy) - 1 teaspoon vanilla extract - 1 tablespoon melted coconut oil (plus extra for the pan) These ingredients create a simple yet tasty pancake. Almond flour is the star. It gives a nutty flavor and a soft texture. Coconut flour adds a bit of sweetness and helps absorb moisture. You can choose sugar or maple syrup for sweetness. Baking powder makes the pancakes fluffy, while salt enhances the taste. For the wet mix, eggs bind the batter. Milk adds creaminess. You can use dairy or non-dairy options. Vanilla extract gives a warm, sweet note that pairs well with pancakes. Finally, melted coconut oil not only adds flavor but also helps keep the pancakes from sticking to your pan. Using the right ingredients is key. Each one plays a role in making your pancakes light and delicious. 1. Whisk together dry ingredients: In a large bowl, add 1 cup of almond flour, 2 tablespoons of coconut flour, 2 tablespoons of sugar or maple syrup, 1 teaspoon of baking powder, and 1/4 teaspoon of salt. Mix these well with a whisk. This helps blend all the dry bits evenly. 2. Mix wet ingredients separately: In another bowl, beat 2 large eggs. Then add 1/2 cup of milk, 1 teaspoon of vanilla extract, and 1 tablespoon of melted coconut oil. Whisk these until smooth. This step adds moisture and flavor. 3. Combine dry and wet mixtures: Slowly pour the wet mix into the dry mix. Stir gently until just combined. Do not overmix! Let the batter sit for about 5 minutes. This helps it thicken for fluffier pancakes. 1. Preheat the skillet: Set a non-stick skillet or griddle on medium heat. Lightly grease it with coconut oil. This ensures pancakes do not stick. 2. Pour in the batter: Use a 1/4 cup measuring cup to scoop the batter. Pour it onto the heated skillet. This size gives you perfect pancakes. 3. Cooking time and flipping tips: Cook each pancake for about 2-3 minutes. Watch for bubbles forming on the surface. When you see them, it’s time to flip! Carefully turn the pancake and cook for another 2-3 minutes until golden brown. - Presentation tips: Stack the pancakes high on a plate. Top them with fresh berries, a drizzle of maple syrup, and a dusting of powdered sugar. This makes them look yummy and inviting. - Best toppings to consider: You can try sliced bananas, nuts, or yogurt for extra flavor. Get creative! These toppings will make each bite even better. Letting the batter rest is key for fluffiness. After mixing, let it sit for five minutes. This helps the almond flour soak up moisture. You will notice a thicker batter that makes better pancakes. Correct heat settings matter too. Preheat your skillet to medium heat. Too hot, and the pancakes burn. Too cool, and they won’t cook through. A good temperature helps make a golden, fluffy pancake. One common mistake is overmixing the batter. Mix until just combined. If you mix too much, the pancakes turn tough. Gentle folding helps keep them light and airy. Another mistake is not using enough oil on the skillet. Greasing with coconut oil is vital. If the skillet is not oiled well, the pancakes stick. A little extra oil makes flipping easy and keeps them intact. You can add spices for extra flavor. A pinch of cinnamon or nutmeg adds warmth. Vanilla extract is another great choice. It brings a nice sweetness to your pancakes. For sweeteners, you can use sugar or maple syrup. Maple syrup gives a rich flavor. You can also try honey or agave syrup. Each adds a unique touch to your pancakes. {{image_2}} You can make these pancakes even tastier by adding fruit. Berries are a great choice. You can mix in blueberries or strawberries right into the batter. They add a nice pop of flavor and color. Sliced bananas also work well. They bring sweetness and moisture to your pancakes. Another tip is to use applesauce instead of some liquid. Applesauce keeps the pancakes moist and adds a fruity twist. If you love crunch, try adding chopped nuts. Walnuts or pecans give a great texture. You can stir them into the batter right before cooking. Another option is to use almond butter. It adds a creamy texture and rich flavor. Just swirl a spoonful into the batter for a nutty surprise with every bite. You can modify this recipe to fit different diets. For a vegan version, use flax eggs instead of real eggs. Mix one tablespoon of ground flaxseed with three tablespoons of water. Let it sit for a few minutes to thicken. You can also swap the milk for a non-dairy option like almond milk or oat milk. For those needing sugar-free options, you can use a sugar substitute like stevia or erythritol. This keeps the sweetness without the sugar. To store leftover pancakes, place them in a container. Make sure to cool them first. Layer parchment paper between pancakes to avoid sticking. Seal the container tightly. They last in the fridge for 2-3 days. For reheating, I recommend using a skillet. Heat it on low. Add a little coconut oil to the pan. Place the pancakes in and cover with a lid. This keeps them warm and soft. You can also use a microwave. Just heat for 15-20 seconds. To freeze pancakes, let them cool completely first. Stack them with parchment paper between each pancake. Place the stack in a freezer bag. Squeeze out the air before sealing. They can last for up to 2 months in the freezer. When you want to eat them, take out the pancakes. Thaw them in the fridge overnight. For reheating, use a skillet or a microwave. If using a microwave, heat in short bursts. This keeps them from getting rubbery. Enjoy your fluffy pancakes anytime! Yes, almond flour pancakes are gluten-free. Almond flour comes from ground almonds. It does not contain wheat or any gluten. This makes it a safe choice for those with gluten intolerance or celiac disease. I find that these pancakes taste great and have a nice texture. They are a healthy option for breakfast or a snack. You can substitute almond flour with other gluten-free flours. Some good options include coconut flour, oat flour, or gluten-free all-purpose flour. However, each flour behaves a bit differently. For example, coconut flour absorbs more liquid. You may need to adjust the amount of liquid in your recipe. Oat flour gives a similar texture but has a different flavor. It's best to experiment to find the one you like best. If you need an egg substitute, you have several options. You can use flaxseed meal mixed with water. Mix 1 tablespoon of flaxseed meal with 2.5 tablespoons of water. Let it sit for a few minutes to thicken. Applesauce is another great choice. Use 1/4 cup of unsweetened applesauce for each egg. Mashed bananas work well too. Just remember, each substitute may change the flavor a bit. These almond flour pancakes are easy to make and taste great. We covered key ingredients, steps to cook, and tips for success. You learned about variations, how to store leftovers, and answered common questions. Enjoy your cooking journey. Explore different flavors and make these pancakes your own. With practice, you’ll master them in no time!

Gluten-Free Almond Flour Pancakes Fluffy and Easy Recipe

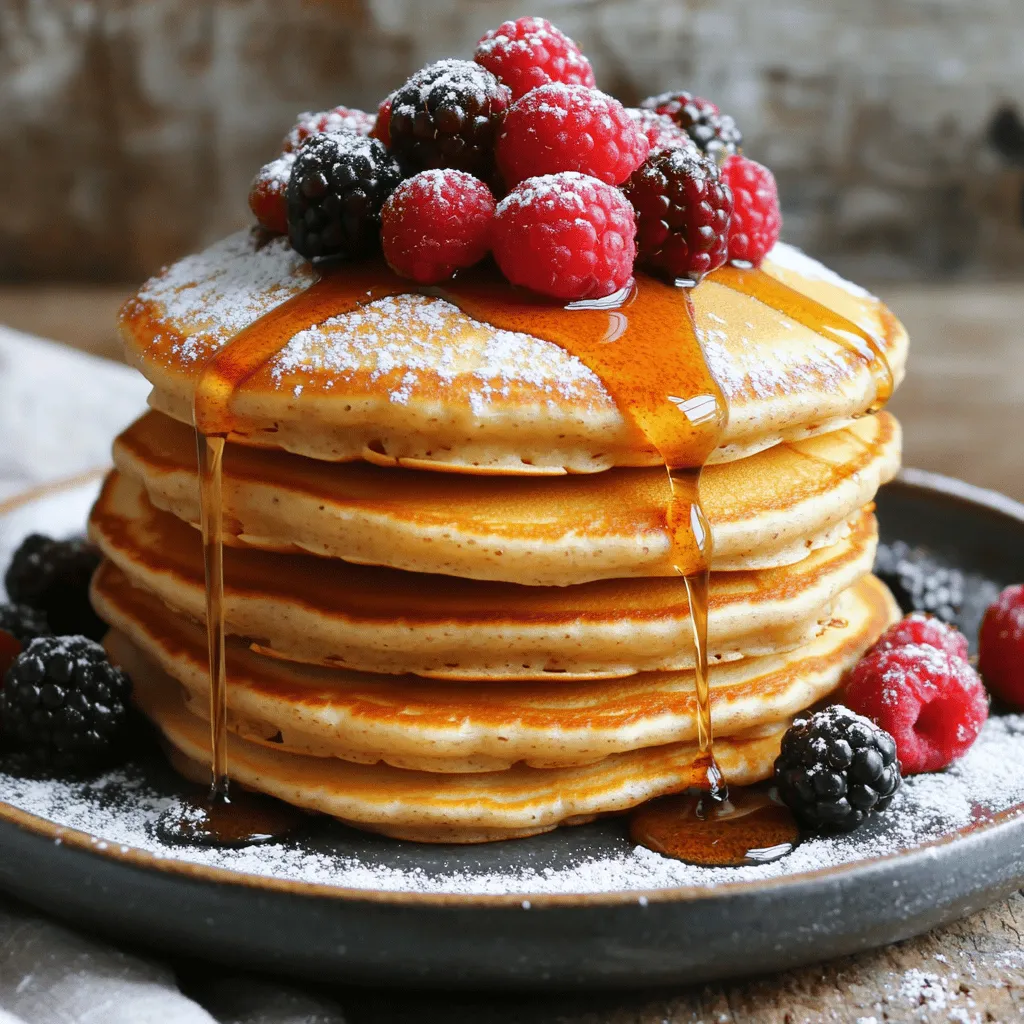
Are you ready to flip the best gluten-free pancakes? My Gluten-Free Almond Flour Pancakes are fluffy, easy, and delicious! Using

To make creamy spinach stuffed salmon, you need fresh and simple ingredients. Here’s the list of what you will need: - 4 salmon fillets (about 6 oz each) - 2 cups fresh spinach, chopped - 1/2 cup cream cheese, softened - 1/4 cup sour cream - 1/4 cup grated Parmesan cheese - 2 cloves garlic, minced - 1 teaspoon lemon zest - 1 tablespoon fresh dill, chopped (or 1 teaspoon dried) - Salt and pepper to taste - Olive oil (for brushing) - Lemon wedges (for serving) Each ingredient plays a key role in creating a rich and tasty dish. The salmon gives a nice base, while the fresh spinach adds color and nutrition. Cream cheese, sour cream, and Parmesan blend for that creamy filling. Garlic and lemon zest bring in flavor, and dill adds a fresh taste. Don’t forget the salt and pepper to enhance all the flavors. Olive oil helps keep the salmon moist while baking. Finally, lemon wedges make a great garnish and add a zesty kick. 1. Preheat the oven and prepare the baking sheet: Start by setting your oven to 375°F (190°C). While the oven heats, line a baking sheet with parchment paper. This keeps the salmon from sticking and makes clean-up easy. 2. Sauté the garlic and spinach: In a medium skillet, add a drizzle of olive oil. Heat it over medium. Add two minced garlic cloves to the skillet. Sauté them for about one minute until they smell great. Then, add two cups of chopped spinach. Cook until the spinach wilts, which takes about 2-3 minutes. Remove the skillet from the heat and let it cool for a few minutes. 1. Combine the ingredients in a bowl: In a large mixing bowl, combine the sautéed spinach and garlic with half a cup of softened cream cheese, a quarter cup of sour cream, and a quarter cup of grated Parmesan cheese. Add a teaspoon of lemon zest, one tablespoon of chopped fresh dill, and salt and pepper to taste. Mix until it looks creamy and well combined. 2. Stuff the salmon fillets: Take four salmon fillets, each about six ounces. Using a sharp knife, create a small pocket in the side of each fillet. Be careful not to cut all the way through. Generously stuff each fillet with the creamy spinach mixture. If you need to, use toothpicks to keep the filling inside. 1. Baking instructions: Place the stuffed salmon fillets on the prepared baking sheet. Brush the tops lightly with olive oil, and season with extra salt and pepper. Bake them in the preheated oven for 20-25 minutes. 2. Tips for checking doneness: The salmon is done when it flakes easily with a fork. If you have a meat thermometer, check for an internal temperature of 145°F (63°C) to ensure it is perfectly cooked. Enjoy this delightful and flavorful dish! To make the best stuffed salmon, you need to focus on a few key points. First, always use fresh salmon fillets. Fresh fish tastes better and flakier. You can tell if salmon is fresh by its bright color and mild scent. Next, I recommend using a few cooking techniques. Baking is the best method for this recipe. It cooks the salmon evenly and keeps it moist. Preheat your oven to 375°F (190°C) and line your baking sheet. This helps the salmon cook without sticking. To boost the flavors, consider adding a few seasonings. Fresh dill is a fantastic choice. It adds a nice herbal note that pairs well with salmon. You can also use lemon zest for a bright touch. When serving, presentation matters. Place the stuffed salmon on a bed of sautéed asparagus or wilted greens. This adds color and flavor to your plate. Finally, add a lemon wedge for a fresh finish. It looks great and gives a nice burst of flavor when squeezed over the fish. {{image_2}} You can change up the flavors with different cheeses or greens. Instead of cream cheese, try goat cheese for a tangy twist. Feta works well too, adding a salty kick. For greens, you can swap spinach for kale or Swiss chard. Both give a nice texture and taste. Adding proteins can also enhance the dish. Try mixing in cooked shrimp or crab for a seafood boost. You can even add some cooked chicken for a heartier option. Just remember to adjust the flavor balance to keep it delicious. You can cook creamy spinach stuffed salmon in various ways. Grilling gives it a smoky flavor. Just preheat your grill and cook the salmon on medium heat for about 8-10 minutes. Be careful, as it can dry out easily. Baking is the classic choice. It keeps the salmon moist and tender. Preheat your oven to 375°F (190°C) for the best results. Air frying is another great method. It cooks the salmon quickly while giving it a nice crisp outside. Set your air fryer to 375°F (190°C) and cook for 10-15 minutes. Check often to avoid overcooking. Each method brings out different flavors in the salmon. Try them all to see which one you enjoy the most! To keep your creamy spinach stuffed salmon fresh, follow these tips: - Refrigeration: Place leftovers in an airtight container. Store in the fridge for up to 3 days. This keeps the salmon moist and tasty. - Freezing: You can freeze the stuffed salmon. Wrap each piece tightly in plastic wrap, then place in a freezer-safe bag. It lasts up to 3 months. To enjoy later, thaw in the fridge overnight before reheating. Reheating your salmon carefully helps maintain its texture and flavor. Here are some tips: - Oven Method: Preheat the oven to 350°F (175°C). Place the salmon on a baking sheet. Cover with foil to prevent drying out. Bake for 15-20 minutes until warmed through. - Microwave Method: If you’re short on time, use the microwave. Place a salmon piece on a microwave-safe plate. Cover with a damp paper towel. Heat in short bursts of 30 seconds until warm. By following these storage and reheating tips, you can enjoy your creamy spinach stuffed salmon even after the first serving! How long to bake salmon for optimal results? I bake salmon at 375°F (190°C) for 20 to 25 minutes. The fish should flake easily with a fork when done. Cooking time may vary based on thickness. Always check for doneness with a fork for best results. Can I use frozen salmon fillets? Yes, you can use frozen salmon. Just thaw them first. Place them in the fridge overnight or use cold water for a quick thaw. This helps maintain their texture and flavor. What sides pair well with this dish? I love serving this salmon with sautéed asparagus or wilted greens. They add color and balance the creaminess. You might also try a light salad or roasted potatoes for a complete meal. Breakdown of calories and macros Each serving of creamy spinach stuffed salmon has about 400 calories. It contains protein, healthy fats, and carbs from the filling. You get around 30g of protein, 28g of fat, and 8g of carbs. Dietary considerations and substitutions This dish is great for many diets. If you're lactose intolerant, try dairy-free cream cheese and sour cream. For gluten-free options, check labels on all packaged ingredients. You can also swap salmon for another fish like chicken or tofu. This blog covered how to make creamy spinach stuffed salmon. We talked about the key ingredients, step-by-step prep, and cooking tips. You learned ways to swap ingredients and tried various cooking methods. Storing leftovers and reheating were both key points too. In summary, this dish is fun to make and can be tailored to your taste. Enjoy making it your own and share it with friends and family. Happy cooking!

Creamy Spinach Stuffed Salmon Delightful and Flavorful

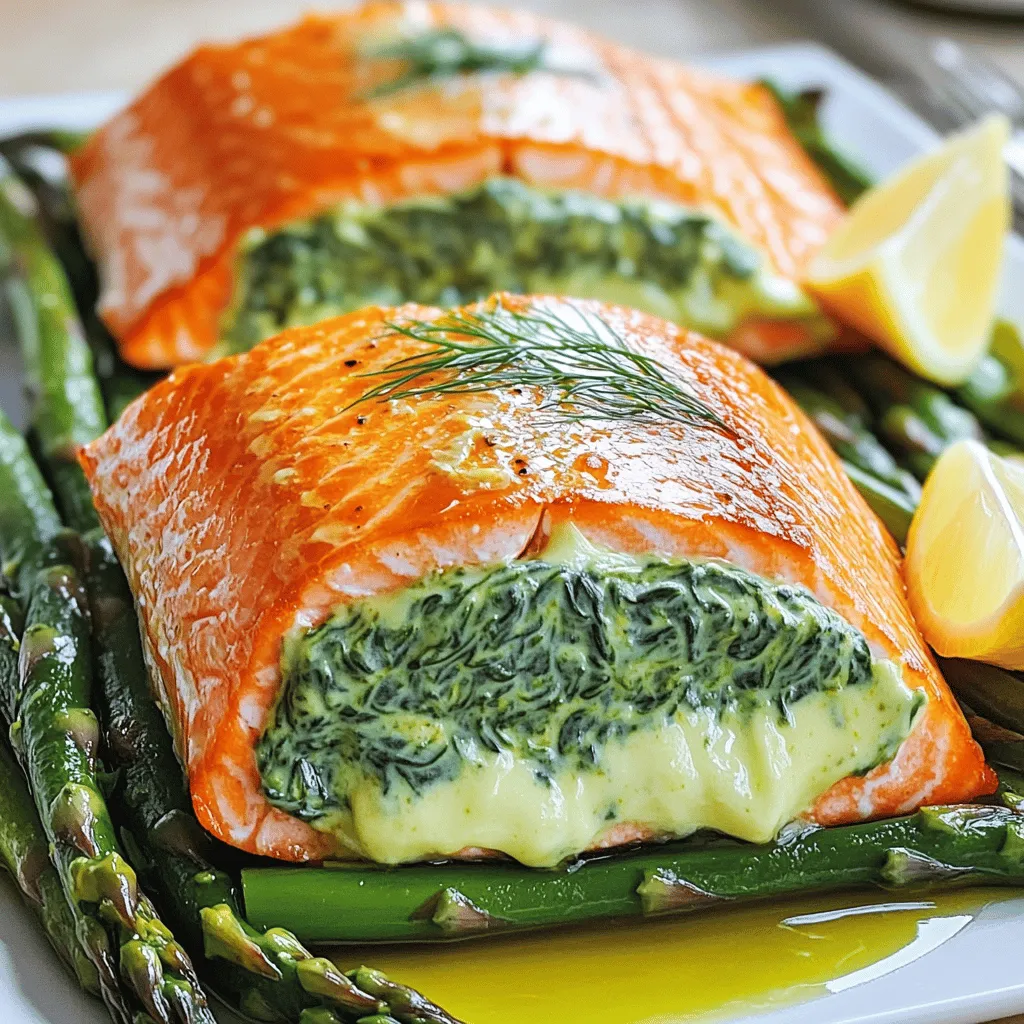
If you’re looking for a quick, delicious dinner, you’ve found it! Creamy Spinach Stuffed Salmon is a dish that bursts

Older posts
Newer posts
← Previous Page1 … Page39 Page40 Page41 … Page84 Next →

dsad

© 2026 juliesdish • Built with GeneratePress

Our Policies

  • Copyright Policy
  • Cookie Policy
  • GDPR Policy
  • Privacy Policy
  • Disclaimer
  • Terms Of Use

More Information

  • Home
  • About
  • Contact
  • Appetizers
  • Dessert
  • Dinner
  • Drinks
©2026, juliesdish About Back To Top