Skip to content
DisclaimerTerms Of UseGDPR PolicyCookie Policy

juliesdish

  • Home
  • Drinks
  • Appetizers
  • Dinner
  • Dessert
  • About
  • Contact
  • Privacy Policy
DisclaimerTerms Of UseGDPR PolicyCookie Policy

NO-ING-IMG

To make these Peanut Butter Chocolate Fudge Cups, gather the following items: - 1 cup natural peanut butter (choose creamy or crunchy) - 1 cup dark chocolate chips - 1/4 cup maple syrup - 1/2 teaspoon vanilla extract - 1/4 teaspoon sea salt - 10 to 12 mini cupcake liners You can swap items if needed. Instead of natural peanut butter, try almond butter or cashew butter. If dark chocolate does not suit your taste, use milk chocolate chips instead. For maple syrup, honey or agave nectar works well. If you want to avoid vanilla, skip it or add a pinch of cinnamon for warmth. The sea salt adds flavor, but you can leave it out if preferred. Each fudge cup contains a mix of healthy fats, protein, and sweetness. Here’s a rough breakdown per cup: - Calories: 150 - Protein: 4 grams - Fat: 10 grams - Carbohydrates: 14 grams - Fiber: 1 gram - Sugar: 6 grams These cups are not only tasty but also provide energy. Enjoy them in moderation! To start, grab your mini cupcake liners. I like to use 10 to 12 of them. Place each liner inside a muffin tin. This will help them hold their shape while we fill them. Make sure they fit snugly. This step is key for neat fudge cups. Next, we’ll melt the chocolate. Take a microwave-safe bowl and add 1 cup of dark chocolate chips. Add 2 tablespoons of peanut butter to the bowl. This makes the chocolate creamy and rich. Heat the bowl in the microwave. Set it for 30 seconds. After 30 seconds, stir the mixture. Repeat until the chocolate is smooth. This usually takes about 1 to 2 minutes. Now it’s time to layer! Spoon a little melted chocolate into each cupcake liner. Fill them about one-third full. This is where you want to tap the muffin tin gently on the counter. This helps level the chocolate. Once leveled, place the muffin tin in the freezer for about 10 minutes. While the chocolate sets, mix the rest of the peanut butter, maple syrup, vanilla extract, and sea salt in a bowl. Stir until it’s smooth. After the chocolate hardens, take the muffin tin out of the freezer. Spoon the peanut butter mixture into the chocolate-lined cups. Fill them almost to the top. Now, reheat any leftover melted chocolate if needed. Carefully spoon more chocolate on top of each peanut butter layer. Make sure each cup is filled. Return the muffin tin to the freezer for another 15 to 20 minutes. When they are fully set, they will be ready to enjoy! To melt chocolate well, use a microwave-safe bowl. Start with 30-second bursts. Stir between each interval to avoid burning. Chocolate can seize if it gets too hot. You want it smooth and shiny. Adding a bit of peanut butter helps it blend nicely. This creates a rich flavor and texture. Start by filling your cupcake liners with melted chocolate. Only fill them about one-third full. Gently tap the tin on the counter to level the chocolate. After that, freeze for about 10 minutes. Next, add the peanut butter mix. Fill them almost to the top, leaving some space for more chocolate. Finally, pour the remaining melted chocolate on top. One common mistake is overheating the chocolate. This can ruin the texture. Another mistake is not tapping the tin. This can lead to uneven layers. Also, make sure to chill the layers fully before adding more. If you skip this step, the layers might mix together. Lastly, use fresh ingredients for the best taste. {{image_2}} You can switch up the nut butter in this recipe. Almond butter works well, too. Cashew butter offers a creamy taste and smooth texture. Hazelnut butter adds a unique, rich flavor. Each nut butter gives a new twist to the fudge cups. You can make these fudge cups even more fun with mix-ins. Try adding chopped nuts like walnuts or pecans for crunch. Mini marshmallows can add sweetness and softness. You might also sprinkle sea salt on top for contrast. Shredded coconut gives a tropical flair. You can even add a bit of crushed candy for a festive touch. For a healthier take, try natural sweeteners like honey or agave syrup. You can use a sugar-free chocolate to cut sugar. Swap the peanut butter for a low-fat version. You might also try adding protein powder for a boost. These small changes keep the taste yummy while making them a bit healthier. To keep your Peanut Butter Chocolate Fudge Cups fresh, store them in an airtight container. Wrap each cup in plastic wrap to prevent sticking. This helps keep them safe from air and moisture. You can also place parchment paper between layers. This way, they won’t stick together. When stored properly, these fudge cups last up to one week at room temperature. If you want them to last longer, keep them in the fridge. They can stay fresh for up to two weeks when chilled. If you freeze them, they can last for up to three months. Just remember to label the container with the date! Freezing is a great option if you want to save some fudge cups for later. After they are set, remove them from the muffin tin. Place them in a single layer on a baking sheet. Freeze for about an hour until solid. Then, transfer them to an airtight container or freezer bag. Be sure to separate layers with parchment paper. When you’re ready to enjoy them, thaw them in the fridge. This keeps them from getting too soft. Yes, you can use milk chocolate. It will change the taste. Milk chocolate is sweeter and creamier. This choice can make the fudge cups taste more like a candy bar. Just melt it the same way as dark chocolate. You can use honey or agave syrup. Both will add sweetness. If you want a sugar-free option, try using a sugar-free syrup. Each option may change the flavor slightly. Make sure to use the same amount for the best results. To make these fudge cups vegan, swap the dark chocolate for dairy-free chocolate chips. Use maple syrup as usual. Ensure the peanut butter is also vegan-friendly. This way, you keep all the great taste without any animal products. In this blog post, we explored key ingredients, melting methods, and storage tips for fudge cups. I shared ways to customize your recipe and avoid common mistakes. Remember, the right ingredients and techniques make a big difference. With practice and creativity, you can enjoy delicious treats that suit your taste. Keep experimenting, and you’ll find the perfect fudge cup that you love. Happy baking!

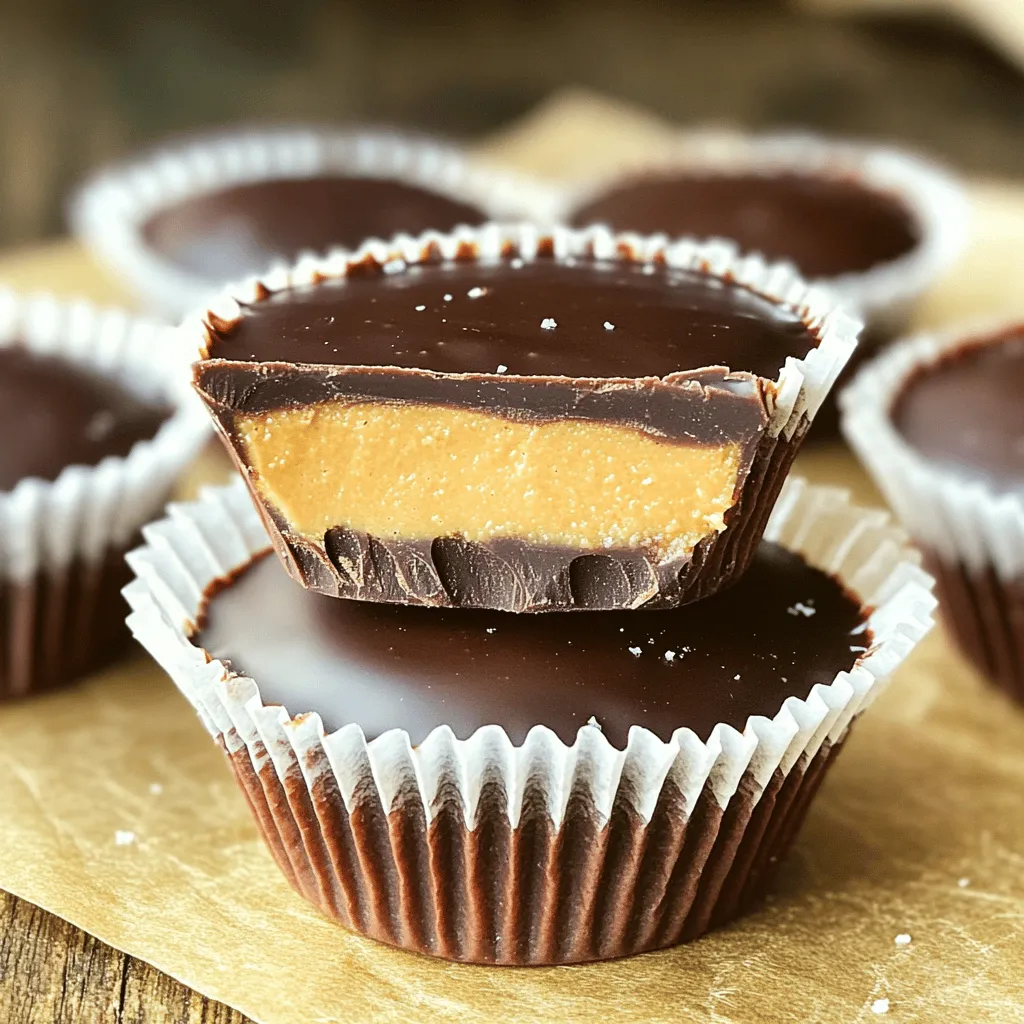
Peanut Butter Chocolate Fudge Cups Irresistible Treat

If you love the creamy blend of peanut butter and chocolate, you’ll adore these Peanut Butter Chocolate Fudge Cups. They’re

- 1 cup unsweetened almond milk - 1/2 cup canned pumpkin puree - 1/4 cup Greek yogurt - 1 scoop vanilla protein powder - 1 teaspoon pumpkin spice - 1 tablespoon honey or maple syrup (to taste) - 1/2 teaspoon vanilla extract - Ice cubes (optional, for desired thickness) - Whipped cream (for topping, optional) - Crushed graham crackers (for garnish, optional) This smoothie is not just tasty; it's also healthy. Here’s a quick breakdown of what you get: - Almond Milk: Low in calories, rich in vitamin E. - Pumpkin Puree: Packed with fiber, vitamin A, and antioxidants. - Greek Yogurt: High in protein and probiotics for gut health. - Vanilla Protein Powder: Boosts protein intake, aids muscle recovery. - Pumpkin Spice: Adds flavor and has anti-inflammatory properties. - Honey or Maple Syrup: Natural sweeteners with antioxidants. - Vanilla Extract: Enhances flavor, may have minor health benefits. You can easily swap ingredients based on what you have: - Almond Milk: Use oat milk or regular milk if needed. - Canned Pumpkin Puree: Fresh pumpkin or sweet potato works well. - Greek Yogurt: Substitute with regular yogurt or dairy-free yogurt. - Vanilla Protein Powder: Any protein powder can be used. - Pumpkin Spice: Make your own blend with cinnamon, nutmeg, and ginger. - Honey or Maple Syrup: Agave syrup or stevia can replace these. - Vanilla Extract: Leave it out or use almond extract for a twist. - Whipped Cream: Use coconut cream for a dairy-free option. - Crushed Graham Crackers: Try crushed nuts or granola for a different texture. These swaps keep the smoothie delicious while fitting your taste or diet! Making a pumpkin cheesecake protein smoothie is quick and easy. You can whip it up in just five minutes. Gather your ingredients first. This helps keep the process smooth. 1. Add Ingredients: In a blender, pour in 1 cup of unsweetened almond milk. Next, add 1/2 cup of canned pumpkin puree. Follow with 1/4 cup of Greek yogurt. Then, scoop in 1 scoop of vanilla protein powder. 2. Add Flavor: Sprinkle in 1 teaspoon of pumpkin spice. For sweetness, add 1 tablespoon of honey or maple syrup. Lastly, add 1/2 teaspoon of vanilla extract. 3. Blend: Blend all the ingredients until the mix is smooth and creamy. Make sure everything blends well. 4. Adjust Texture: If you want a thicker smoothie, toss in a handful of ice cubes. Blend again until you reach the thickness you like. 5. Taste: After blending, taste your smoothie. If you want it sweeter, add more honey or maple syrup. 6. Serve: Pour the smoothie into tall glasses. If you like, top it with whipped cream and sprinkle crushed graham crackers on top. - Ice for Thickness: Always add ice if you prefer a thick smoothie. Blend well to mix it in. - Adjust Liquid: If it’s too thick, add a splash more almond milk. Blend again until it’s just right. - Quality of Ingredients: Use fresh, high-quality ingredients. This impacts the flavor and texture. To boost the taste of your smoothie, use fresh spices. Freshly grated nutmeg adds warmth. You can also try a pinch of cinnamon for extra depth. Tasting as you blend is key. Adjust the sweetness with more honey or maple syrup if needed. If you want a richer taste, substitute regular yogurt for Greek yogurt. If you have leftover smoothie, store it in an airtight container. Keep it in the fridge for up to a day. Give it a good shake or stir before drinking. If your smoothie thickens, add a splash of almond milk to adjust the texture. You can also freeze leftovers in ice cube trays for later use in other smoothies. Start by adding liquids first in your blender. This helps blend all ingredients smoothly. Next, add softer items like yogurt and pumpkin puree. Finally, add protein powder and ice cubes. Blend until smooth, stopping to scrape down the sides if needed. Always taste before serving to ensure the right balance of flavors. {{image_2}} You can mix up your pumpkin cheesecake protein smoothie with fun flavors. Try adding a banana for creaminess. It makes the smoothie sweeter and adds more nutrients. You can also use chocolate protein powder. This will give your smoothie a delicious twist. If you want a spicier kick, add a pinch of ginger or nutmeg. For a vegan and dairy-free version, swap Greek yogurt for coconut yogurt. It gives a creamy texture. Use a plant-based protein powder too. Almond milk is a great choice, but you can use oat or soy milk. These options keep your smoothie tasty and plant-based. Boost the nutrition of your smoothie with superfoods. Add a tablespoon of chia seeds for fiber and omega-3s. You can also mix in a handful of spinach. It adds nutrients without changing the taste much. If you want more protein, try adding a tablespoon of nut butter. Each of these options makes your smoothie even better for you. This smoothie is rich and creamy. It goes well with many snacks. Try it with whole-grain toast or oatmeal. You can also pair it with a handful of nuts or a piece of fruit. These pairings add more fiber and protein. They also make a great breakfast or snack. Serve this smoothie in tall glasses for a fun look. You can also use mason jars for a rustic touch. For a party, make mini versions in shot glasses. This makes them easy to share and fun to drink. If you want a special treat, blend in a few chocolate chips for a twist. Garnishing makes your smoothie look appealing. Top it with whipped cream for a creamy touch. Sprinkle crushed graham crackers on top for a cheesecake vibe. Add a dash of pumpkin spice for extra flavor. You can also place a cinnamon stick in the glass for a cute touch. These simple additions boost the look and taste of your smoothie. A Pumpkin Cheesecake Protein Smoothie packs many health benefits. - High in Protein: The Greek yogurt and protein powder boost your protein intake. - Rich in Fiber: Canned pumpkin provides fiber, aiding digestion and keeping you full. - Low in Calories: Using almond milk keeps the calorie count low, making it a smart choice. - Packed with Vitamins: Pumpkin is full of vitamins A and C, which support your immune system. - Antioxidants: Pumpkin spice contains cinnamon and nutmeg, which have antioxidant properties. These benefits make this smoothie a tasty and healthy choice for any time of day. Yes, you can make this smoothie in advance. 1. Blend: Follow the recipe and blend all ingredients. 2. Store: Pour the smoothie into an airtight container. 3. Refrigerate: Keep it in the fridge for up to 24 hours. When you're ready to drink it, shake or stir well. If it’s too thick, add a splash of almond milk. To boost the protein in your smoothie, try these tips: - Add More Greek Yogurt: Increase the amount of Greek yogurt for extra protein. - Use Protein-Rich Milk: Swap almond milk for soy or protein-enriched milk. - Include Nut Butters: Add a tablespoon of almond or peanut butter for creaminess and protein. - Choose a Higher Protein Powder: Use a protein powder with more protein per scoop. These changes can help you meet your protein goals while enjoying this delicious treat. You’ve learned how to make a delicious Pumpkin Cheesecake Protein Smoothie. We covered key ingredients, their nutrition, and great substitutes. I walked you through each step to ensure you get the perfect texture. Don’t forget the tips on enhancing flavor and storing leftovers. You can try various flavor combinations and vegan options to switch things up. This smoothie pairs well with a light breakfast or snack. Enjoy experimenting with garnishes! Keep these tips handy for a tasty smoothie any time.

Savory Pumpkin Cheesecake Protein Smoothie Recipe

Are you ready to try a delicious twist on your morning routine? This Savory Pumpkin Cheesecake Protein Smoothie is a

- 1 cup rolled oats - 1 cup unsweetened almond milk (or milk of choice) - 1 tablespoon chia seeds - 1 tablespoon maple syrup or honey - 1 teaspoon vanilla extract - 2 tablespoons cooled coffee or espresso - 1/2 cup mascarpone cheese (or Greek yogurt for a lighter version) - 2 tablespoons cocoa powder (for dusting) - Dark chocolate shavings or chocolate flakes (for garnish) To make Tiramisu Overnight Oats, you need simple ingredients. Rolled oats form the base, giving you a hearty texture. Almond milk or any milk you prefer makes it creamy. Chia seeds help thicken the mix and add good nutrients. Sweeten it with maple syrup or honey for a touch of sweetness. Add vanilla extract for flavor depth. Coffee or espresso brings that classic tiramisu taste. For creaminess, use mascarpone cheese or Greek yogurt. Cocoa powder adds a rich chocolate flavor. Finally, dark chocolate shavings or flakes give a nice touch on top. - Additional cocoa powder - Chocolate sauce - Whipped cream Toppings are where you can have fun! You can dust on more cocoa powder for extra chocolatey goodness. A drizzle of chocolate sauce adds sweetness. Whipped cream makes it light and fluffy. Use these to customize your dish and impress your guests! {{ingredient_image_1}} Mixing the oat base Start by grabbing a mixing bowl. In it, combine 1 cup of rolled oats, 1 cup of almond milk, 1 tablespoon of chia seeds, 1 tablespoon of maple syrup, and 1 teaspoon of vanilla extract. Don't forget to add 2 tablespoons of cooled coffee. Stir everything well until it’s all mixed together. This mixture is the heart of your Tiramisu Overnight Oats. Layering the ingredients Next, you need jars or a large container. Spoon the oat mixture into the jars evenly. Press down slightly to make each layer compact. After that, add a layer of 1/2 cup of mascarpone cheese on top. If you want a lighter dish, Greek yogurt works too. Keep layering until you fill the jars, finishing with mascarpone on top. Overnight soaking process Now, cover the jars tightly with lids or plastic wrap. Place them in the fridge overnight. If you’re short on time, let them soak for at least 4 hours. This soaking lets the oats absorb the milk, making them soft and creamy. Dusting and garnishing before serving When you are ready to enjoy your Tiramisu Overnight Oats, take them out of the fridge. Dust the top of each jar with cocoa powder for that classic tiramisu flavor. For the final touch, add dark chocolate shavings or chocolate flakes on top. Enjoy them cool or at room temperature for a delightful treat! - Choosing the right type of coffee: Use strong coffee or espresso for the best taste. A bold coffee adds depth to your oats. Cold brew can also work well if you prefer less acidity. - Balancing sweetness with maple syrup: Maple syrup adds a warm sweetness. Adjust the amount based on your taste. If you like it sweeter, add a bit more. If not, use less. - Adjusting almond milk for desired creaminess: Use one cup of almond milk for a creamy texture. If you want thicker oats, reduce the milk slightly. You can also try adding more chia seeds for extra thickness. - Using chia seeds for added texture: Chia seeds help create a nice, thick texture. They absorb liquid and expand, making your oats more filling. Use one tablespoon to start, and feel free to add more if you like. Pro Tips Use Fresh Coffee: For the best flavor, use freshly brewed coffee or espresso. The rich aroma will elevate your overnight oats. Customize Your Sweetness: Adjust the sweetness by adding more or less maple syrup or honey, depending on your preference for sweetness. Chill Before Serving: Allowing the oats to chill overnight helps them absorb the liquid and enhances the flavors, making them creamier. Experiment with Toppings: Get creative with your garnishes! Consider adding nuts, berries, or a drizzle of chocolate for extra texture and flavor. {{image_2}} Chocolate Tiramisu Overnight Oats To make chocolate tiramisu overnight oats, add cocoa powder to your oat mix. Use two tablespoons for a rich flavor. You can also stir in chocolate chips. This gives a sweet surprise in every bite. Nutty Tiramisu Overnight Oats For nutty tiramisu oats, add chopped nuts like almonds or walnuts. Mix in a tablespoon of nut butter for creaminess. This adds a crunchy texture to your dish. The nuts pair well with the coffee flavor. Dairy-free options If you need a dairy-free version, replace mascarpone with coconut yogurt. You can also use almond milk or oat milk. These keep the dish creamy without dairy. Low-sugar alternatives To cut down on sugar, swap maple syrup for a sugar-free sweetener. You can also skip the sweetener if you prefer less sweetness. The natural flavors of coffee and cocoa will still shine through. To keep Tiramisu Overnight Oats fresh, use airtight containers. Glass jars work great. They let you see the delicious layers inside. Plastic containers are also good, but make sure they seal tight. Store your oats in the fridge. They stay fresh for up to five days. This makes them perfect for meal prep. You can enjoy Tiramisu Overnight Oats cold or at room temperature. There is no need to reheat them. If you like them cold, just grab a jar and dig in. For a softer texture, let them sit out for a few minutes. Dust with cocoa powder and add chocolate shavings before serving. This makes each bite even more delightful! Can I make Tiramisu Overnight Oats vegan? Yes, you can. Use almond milk and replace mascarpone with a vegan yogurt. Maple syrup is already vegan, making it easy. You will still get great flavor and texture. How long do overnight oats last in the fridge? Overnight oats last for about 3 to 5 days in the fridge. Store them in airtight containers to keep them fresh. The oats may get thicker, so add more milk if needed. Can I use instant oats instead of rolled oats? You can use instant oats, but the texture will be different. Instant oats may become mushy faster. Rolled oats provide a better bite and hold up well overnight. Calories per serving Each serving of Tiramisu Overnight Oats has about 350 calories. This makes it a satisfying breakfast or snack. Overview of macronutrients - Carbohydrates: Approximately 50g - Protein: Approximately 10g - Fat: Approximately 15g These oats offer a balanced mix of nutrients to kickstart your day. In this article, I shared how to create delicious Tiramisu Overnight Oats using simple ingredients. You learned about the key components like oats, milk, and coffee, along with optional toppings. I explained the easy preparation steps and offered helpful tips for flavor and consistency. Plus, I gave ideas for variations and best storage practices. You can enjoy this tasty treat in so many ways. Make it yours, and enjoy every bite!

Tiramisu Overnight Oats Simple and Flavorful Recipe

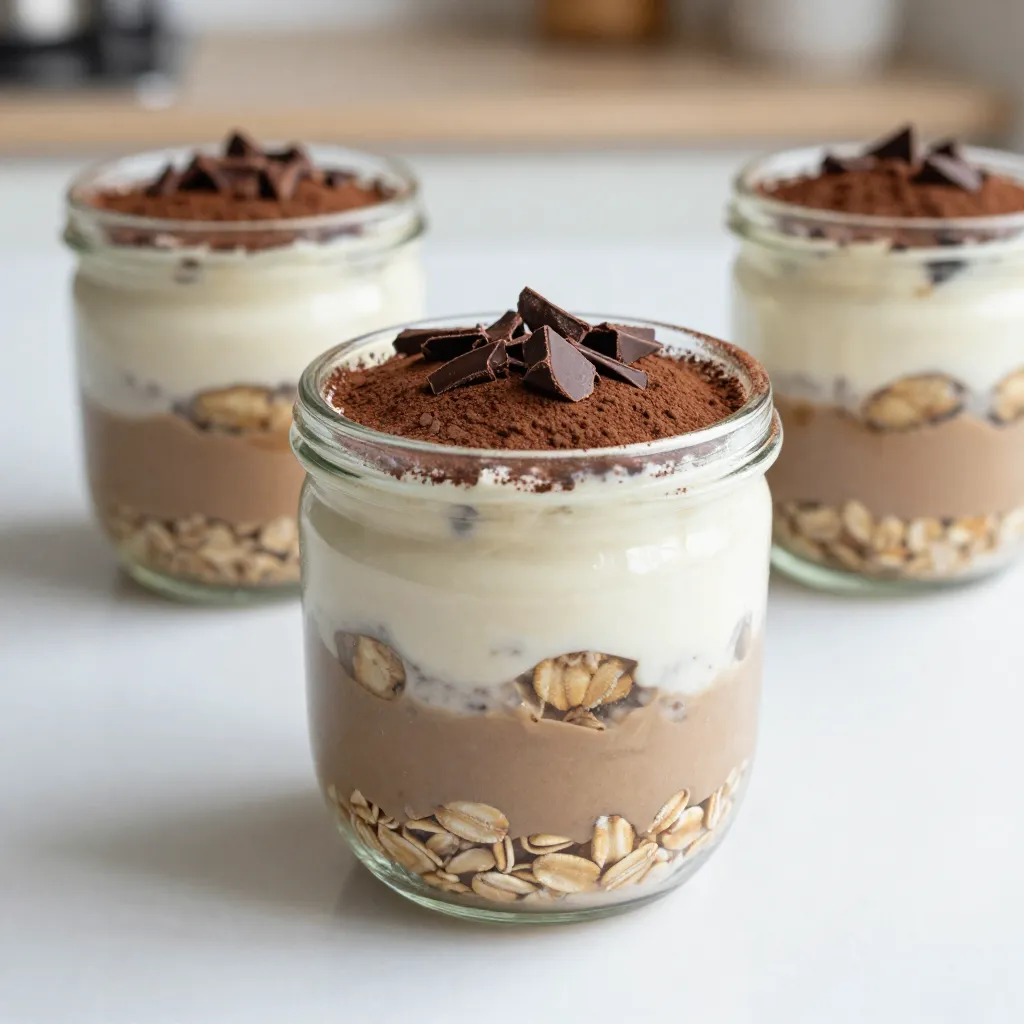
Imagine waking up to a delicious breakfast that tastes like dessert! With this Tiramisu Overnight Oats recipe, you can enjoy

- 1 cup unsalted butter, softened - 1 cup brown sugar, packed - 1/2 cup granulated sugar - 2 large eggs - 1 teaspoon pure vanilla extract - 2 1/2 cups all-purpose flour - 1 teaspoon baking soda - 1/2 teaspoon salt - 1 cup semi-sweet chocolate chips - 1 cup caramel bits (or soft caramel candy, unwrapped) - Sea salt for sprinkling To create the best Chocolate Caramel Turtle Cookies, you need to gather your ingredients. Start with unsalted butter for a rich base. This butter should be softened to make mixing easy. Combine this with brown sugar and granulated sugar for sweetness. Using both sugars gives the cookies a nice depth of flavor. Next, add two large eggs. They provide moisture and help bind the dough together. Don't forget pure vanilla extract! It enhances the overall taste, bringing warmth to each bite. For the dry ingredients, you will need 2 1/2 cups of all-purpose flour. This flour is key to achieving the right cookie texture. Add 1 teaspoon of baking soda to help the cookies rise. A pinch of salt (1/2 teaspoon) balances the sweetness. Now, for the fun part! Mix in 1 cup of semi-sweet chocolate chips and 1 cup of caramel bits. These add that gooey, chewy goodness that makes these cookies special. Finally, keep some sea salt on hand to sprinkle on top after baking. It adds a nice contrast to the sweet flavors. Gather all these ingredients, and you are ready to make delicious Chocolate Caramel Turtle Cookies! {{ingredient_image_1}} Start by preheating your oven to 350°F (175°C). While it warms up, line your baking sheets with parchment paper. This step helps the cookies bake evenly and prevents sticking. In a large bowl, beat the softened butter, brown sugar, and granulated sugar. Mix until it becomes light and fluffy. This usually takes about two to three minutes. Next, add the eggs one at a time. Mix well after each egg. Finally, pour in the vanilla extract and blend it into the mix for added flavor. In a separate bowl, whisk together the all-purpose flour, baking soda, and salt. Slowly add this dry mix to your wet ingredients. Stir until just combined. Be careful not to overmix, as this can make your cookies tough. Mixing should only take about 30 seconds. Now comes the fun part! Gently fold in the semi-sweet chocolate chips and caramel bits. Make sure they are evenly distributed throughout the dough. This ensures every bite has a perfect blend of chocolate and caramel. Use a cookie scoop or tablespoon to drop dough onto the prepared baking sheets. Leave enough space between each cookie, about two inches apart. This allows them to spread nicely while baking. Bake them for 10 to 12 minutes. Look for lightly golden edges and set centers. Remember, they will keep cooking after you take them out. Once the cookies are baked, sprinkle a small pinch of sea salt on top while they are still warm. Allow them to cool on the baking sheets for about five minutes. Then, transfer the cookies to a wire rack to cool completely. Serve them warm with a glass of milk or store them for later enjoyment. Baking cookies is fun, but small mistakes can happen. Here are common problems and how to fix them: - Overmixing dough: This can make cookies tough. Mix just until combined. - Incorrect oven temperature: Use an oven thermometer. This ensures even baking. - Crowded baking sheets: Leave space between cookies. They spread out while baking. Sometimes, you may not have all the ingredients. Here are some easy swaps: - Butter: Use coconut oil or applesauce for a dairy-free option. - Brown sugar: If you don’t have brown sugar, mix white sugar with molasses. - Flour: For gluten-free cookies, swap all-purpose flour with almond or oat flour. Want to make your cookies even better? Here are some fun ideas: - Add nuts: Chopped pecans or walnuts add crunch and flavor. - Try different chocolates: Use dark or white chocolate chips for variety. - Mix in spices: A pinch of cinnamon or sea salt can boost taste. These tips help you create the best Chocolate Caramel Turtle Cookies. Enjoy your baking! Pro Tips Chill the Dough: Refrigerating the cookie dough for about 30 minutes before baking can help prevent the cookies from spreading too much, resulting in thicker cookies. Use Fresh Ingredients: Always use fresh baking soda and high-quality chocolate and caramel for the best flavor and texture in your cookies. Customize the Toppings: Feel free to add chopped nuts or different types of chocolate to the dough for added texture and flavor. Storing Cookies: Store leftover cookies in an airtight container at room temperature for up to a week to keep them soft and fresh. {{image_2}} You can make nutty turtle cookies by adding nuts. Pecans or walnuts work great. Just chop them up and mix them into the dough. This adds a nice crunch and rich flavor. The nuts pair well with chocolate and caramel. Try using about 1 cup of nuts for a great balance. If you want a vegan option, you can swap some ingredients. Use coconut oil instead of butter. For eggs, try flaxseed meal or applesauce. Use plant-based chocolate chips and caramel. This way, you keep the taste while making it plant-friendly. These cookies are just as tasty and fun to eat! For a gluten-free choice, use gluten-free flour. Brands like Bob's Red Mill or King Arthur Flour work well. This makes it easy for those who need gluten-free diets. Just replace regular flour with the gluten-free flour in the same amount. The cookies will still taste amazing! These variations let you enjoy chocolate caramel turtle cookies in many ways. Feel free to mix and match to find your favorite! To keep your Chocolate Caramel Turtle Cookies fresh, store them in an airtight container. This helps keep moisture out and keeps the cookies soft. Place parchment paper between layers if you stack them. This prevents sticking. Keep the container in a cool, dry spot. Avoid direct sunlight to maintain their quality. Freezing these cookies is easy and great for later enjoyment! First, let the cookies cool completely. Then, place them on a baking sheet in a single layer. Freeze them for about 1 hour. After that, transfer the cookies into a freezer-safe bag or container. Be sure to remove excess air from the bag. To thaw, just take them out and leave them at room temperature for about 30 minutes. When stored properly, your cookies can last up to a week at room temperature. If frozen, they can stay good for up to three months. Just remember, the longer they stay in the freezer, the more the flavor may change. Always check for any signs of freezer burn before eating. Chocolate caramel turtle cookies are soft, chewy treats. They mix chocolate, caramel, and a hint of salt. The name "turtle" comes from the candy called turtle, which has chocolate, caramel, and nuts. These cookies are a twist on that classic candy. They bring joy with each bite! Yes, you can make these cookies ahead of time. You can prepare the dough and store it in the fridge for up to three days. Just scoop the dough onto baking sheets when you’re ready to bake. This helps save time on busy days. Absolutely! You can try dark chocolate, milk chocolate, or even white chocolate. Each type will give the cookies a unique taste. Dark chocolate adds a rich flavor, while milk chocolate is sweeter. Feel free to experiment with your favorite chocolate! Look for lightly golden edges and a set center. The cookies should look puffy but not wet. If you see these signs, they are ready to come out. Remember, they will keep cooking a bit as they cool on the baking sheet. If the dough feels too sticky, add a bit more flour. Start with one tablespoon at a time. Mix it in gently until the dough is easier to handle. You can also chill the dough for 30 minutes to make it less sticky. This helps with shaping the cookies! You now have everything to bake delicious Chocolate Caramel Turtle Cookies. We covered ingredients, mixing techniques, and the right baking methods. I shared tips to avoid common mistakes and offered fun variations to try. Remember, proper cooling makes a big difference in texture. With these insights, you can create tasty cookies that impress everyone. Enjoy your baking adventure and have fun experimenting with flavors!

Chocolate Caramel Turtle Cookies Delightful Treats

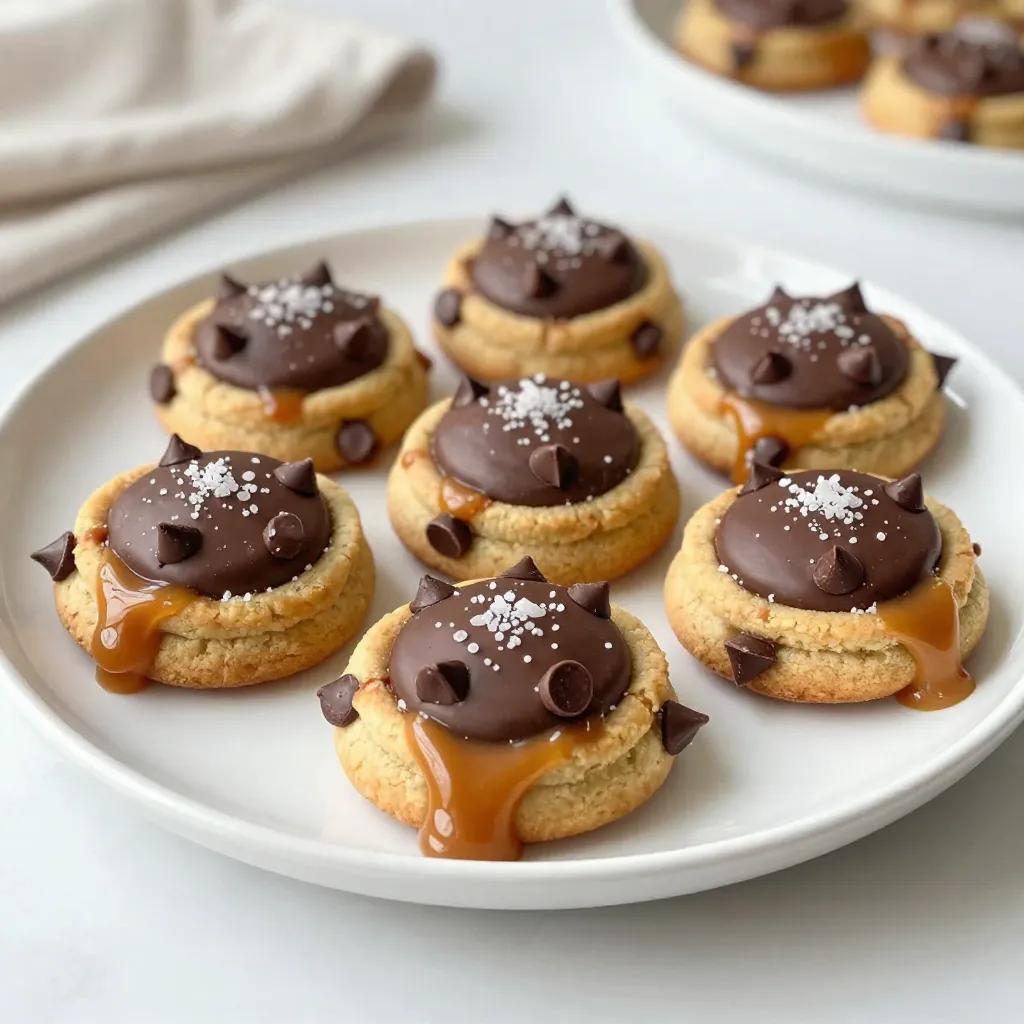
If you crave a sweet treat that combines rich chocolate and gooey caramel, you’re in for a delight! Chocolate Caramel

To make tasty apple pie overnight oats, you'll need these main items: - 1 cup rolled oats - 1 cup unsweetened almond milk (or any milk of choice) - 1 medium apple, peeled, cored, and diced - 1 tablespoon maple syrup (or honey) - 1 teaspoon cinnamon - 1/4 teaspoon nutmeg - 1 tablespoon chia seeds - A pinch of salt These ingredients create a creamy base and rich flavor. The oats soak up the milk and spices, making them soft and delicious by morning. If you want to add more creaminess and taste, consider these options: - 1/4 cup Greek yogurt - 1/4 cup chopped walnuts (or your choice of nuts) Greek yogurt makes the oats richer and adds protein. Nuts give a nice crunch, making each bite exciting. You can change the sweetener or milk to fit your taste. Here are some alternatives: - Use honey, agave syrup, or coconut sugar instead of maple syrup. - Try coconut milk, soy milk, or oat milk instead of almond milk. These swaps help you customize your oats. You can make them sweeter or creamier based on what you like best. {{ingredient_image_1}} To start your apple pie overnight oats, gather your ingredients. You will need rolled oats, almond milk, maple syrup, chia seeds, cinnamon, nutmeg, and a pinch of salt. 1. In a medium bowl, combine these items. 2. Mix well until everything blends evenly. This step is key for great flavor. 3. Make sure the oats soak up the milk and sweeteners. Next, it’s time to add the fresh apple and nuts. 1. Peel and dice one medium apple. 2. Gently fold in the apple pieces into your oat mixture. 3. If using Greek yogurt, add it now for creaminess. 4. Lastly, sprinkle in your choice of chopped walnuts or any nuts you prefer. This adds a nice crunch to your dish. Once your mixture is ready, it’s time to chill. 1. Divide the mixture into two jars or containers. 2. Seal them tightly and place them in your fridge overnight. 3. If you’re short on time, let them chill for at least four hours. In the morning, stir the oats well. If they seem too thick, add a splash of almond milk. For a special touch, top with more diced apples, a drizzle of maple syrup, and a sprinkle of cinnamon before serving. Present them in clear jars to show off those lovely layers. Enjoy your nutritious and tasty apple pie overnight oats! Use rolled oats for the best texture. They soak up liquid well. Mix oats with almond milk, maple syrup, chia seeds, cinnamon, nutmeg, and salt in a bowl. Stir the mixture well. Let it sit for at least four hours or overnight. This allows the oats to soften and absorb flavors. If you want, you can soak oats in a larger batch. After soaking, check the consistency of your oats. If it seems too thick, add a splash of almond milk. Stir until it reaches your desired creaminess. If you like it thicker, use less milk next time. If you want extra creaminess, fold in Greek yogurt. This makes the oats richer and tastier. Serve your overnight oats in clear glass jars. This shows off the beautiful layers. Top with diced apples or a sprinkle of cinnamon for a nice touch. You can also drizzle some maple syrup on top. This adds sweetness and makes it look inviting. Enjoy making it pretty! Pro Tips Use Quick Oats: If you're short on time, consider using quick oats instead of rolled oats for a faster absorption of liquid. Mix and Match Fruits: Feel free to experiment with other fruits like pears or berries in place of apples for a different flavor profile. Sweetness Adjustment: Adjust the sweetness of your overnight oats by adding more or less maple syrup based on your taste preference. Storage Tips: Store the overnight oats in an airtight container to keep them fresh for up to 3 days in the refrigerator. {{image_2}} To make your apple pie overnight oats even better, try adding dried fruits or spices. Dried cranberries or raisins add a sweet touch. They mix well with the apple and spices. You can also boost the flavor with a pinch of ginger or cloves. These spices give a warm taste that reminds you of fall. If you have dietary needs, you can easily adjust this recipe. For a vegan option, use almond milk and maple syrup. You can skip the Greek yogurt or replace it with a plant-based yogurt. If you need gluten-free oats, make sure to check the label. This way, you can enjoy your oats without worries. Changing up your ingredients can keep your oats fresh and exciting. In the fall, add pumpkin puree and pumpkin spice for a cozy treat. In summer, toss in fresh berries like strawberries or blueberries. Each season brings new flavors. This keeps your breakfast fun and delicious all year long! After making your apple pie overnight oats, you may have some left. To store them, place the oats in a jar or a container with a tight lid. This keeps them fresh and prevents spills. Never leave them uncovered in the fridge, as they can dry out. I recommend using glass jars for storage. They are easy to clean and let you see the layers. If you prefer, plastic containers can work, too. Just make sure they seal well. You can even use mason jars for a fun touch! Your apple pie overnight oats will stay good for up to four days in the fridge. After that, they may lose their taste and texture. If you notice any off smell or change in color, it’s best to toss them out. Enjoy them fresh for the best flavor! Yes, you can use steel-cut oats. Steel-cut oats have a chewier texture. They need more time to soak. I recommend soaking them overnight for best results. You may need to adjust the liquid. Try adding a bit more almond milk for creaminess. You can keep overnight oats for up to five days. They stay fresh if stored in a sealed jar. The flavors will deepen over time. Just stir before eating. If they seem too thick, add a splash of milk. You can add many tasty toppings! Here are a few ideas: - Fresh fruit like bananas or berries - A dollop of nut butter - A sprinkle of granola for crunch - More nuts for added protein - Coconut flakes for a tropical twist Experiment with your favorites to make it special! In this post, we explored how to make delicious apple pie overnight oats. We covered main and optional ingredients, plus sweetener choices. I shared step-by-step instructions for prep and serving. Tips helped you achieve the best texture and presentation. I also offered fun variations and storage advice. Now, you can enjoy a tasty, healthy breakfast. These oats are great for any day. Try different ingredients to find your favorite mix!

Apple Pie Overnight Oats Tasty and Nutritious Dish

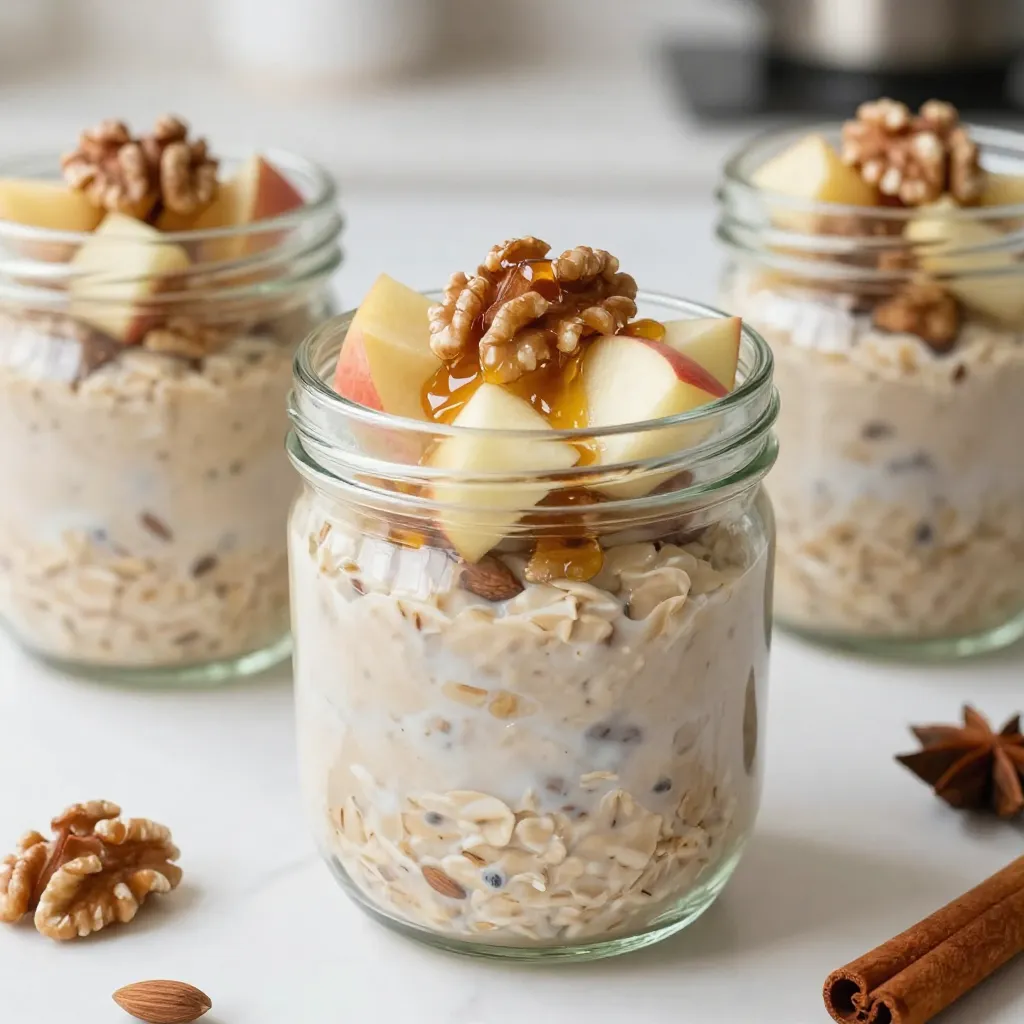
Start your day right with Apple Pie Overnight Oats—a tasty and nutritious dish you’ll love! This simple recipe combines sweet

- 4 chicken thighs (bone-in, skin-on) - 1 lb baby potatoes, halved - 2 cups green beans, trimmed - 6 cloves garlic, minced - 1 lemon, zested and juiced - 3 tablespoons olive oil - 1 tablespoon fresh rosemary, chopped - 1 tablespoon fresh thyme, chopped - Salt and pepper to taste - Optional: Fresh parsley for garnish This dish starts with chicken thighs. I love using bone-in, skin-on thighs. They give rich flavor and stay juicy. Next, we add baby potatoes. Halving them helps them cook evenly. Green beans bring a nice crunch. We trim them for a neat look. Garlic is next. I use six cloves, minced, for a strong taste. Lemon zest and juice brighten the dish. Olive oil keeps everything moist and helps the chicken brown. Fresh rosemary and thyme add depth. I always add salt and pepper to taste. Lastly, fresh parsley is optional. It looks great and adds a fresh taste. Each ingredient plays a role in making this meal special. The mix of flavors and textures makes every bite delicious. Set your oven to 425°F (220°C). This high heat helps to crisp the chicken skin and roast the potatoes nicely. Next, line a large sheet pan with parchment paper. This makes cleanup easy and prevents sticking. In a small bowl, mix together six minced garlic cloves, the zest and juice of one lemon, three tablespoons of olive oil, one tablespoon of chopped rosemary, and one tablespoon of chopped thyme. Add a generous sprinkle of salt and pepper. This mix will add great flavor to the chicken and potatoes. Take four chicken thighs and place them in a large bowl. Pour half of the garlic herb mixture over the chicken. Use your hands to coat the chicken well. Let it marinate for at least 15 minutes. This step really boosts the flavor. Add one pound of halved baby potatoes to the bowl with the remaining garlic herb mixture. Toss them well until they are evenly coated. The garlic and herbs will make the potatoes taste amazing. Spread the marinated chicken thighs on one half of the sheet pan. Place the coated potatoes on the other half. Put the pan in the oven and roast for 25 minutes. This initial roasting time gives the chicken and potatoes a good start. After 25 minutes, take the pan out of the oven. Add two cups of trimmed green beans to the pan. Drizzle them with a little olive oil and sprinkle with salt and pepper. Toss everything to combine. Return the sheet pan to the oven and roast for an additional 15-20 minutes. Make sure the chicken reaches an internal temperature of 165°F (74°C) before serving. Enjoy your delicious meal! Using bone-in, skin-on chicken is key. The skin keeps the meat moist and adds flavor. Bone-in meat cooks evenly and stays juicy. For best results, check the internal temperature. Insert a meat thermometer into the thickest part. The chicken should reach 165°F (74°C). This ensures it’s fully cooked but still tender. Don’t waste that tasty garlic herb mixture! You can use it in many ways. Try it as a marinade for fish or shrimp. It also works well on grilled vegetables. You can even brush it on bread before toasting. The flavor adds a nice kick to many dishes. You can adjust the roasting times for different veggies. For softer veggies like zucchini, add them later. If you use root vegetables, they may need more time. Make sure they are cut into similar sizes to cook evenly. Check their doneness by piercing with a fork. If they are tender, they are ready to serve! {{image_2}} You can swap out chicken for other meats. Pork chops work well. Just adjust the cooking time. Fish like salmon is also a great choice. It cooks quicker, so reduce the roasting time. Try using a meat thermometer to check for doneness. Salmon should reach 145°F (63°C). Pork needs to hit 145°F (63°C) too. This gives you juicy results every time. Feel free to add more veggies to your sheet pan. Carrots, bell peppers, or zucchini add color and flavor. Seasonal veggies like Brussels sprouts or asparagus are also great. Just cut them into similar sizes for even cooking. Toss them in the garlic herb mixture for extra taste. This makes the meal more colorful and nutritious. If you don’t have rosemary or thyme, try other herbs. Oregano or basil can add a fresh twist. Dill pairs well with chicken too. You can even use dried herbs if fresh ones are not available. Just remember to use less since dried herbs are more potent. Mixing up the herbs keeps the dish exciting every time you make it. Store your leftover sheet pan garlic herb roasted chicken in an airtight container. Place it in the fridge within two hours of cooking. This helps keep the chicken juicy and safe to eat. You can also freeze the dish if you want to save it for later. Wrap it tightly in plastic wrap and then place it in a freezer-safe bag. This keeps out air that can cause freezer burn. To reheat, place the chicken and veggies on a baking sheet. Preheat your oven to 350°F (175°C). Heat for about 15-20 minutes, or until warmed through. This method helps keep the chicken crispy and the veggies tender. You can also use the microwave, but this may change the texture a bit. If you use the microwave, heat in short bursts to avoid overcooking. In the fridge, your dish stays good for about 3-4 days. If you freeze it, it can last up to 2-3 months. Just remember to label your containers with the date. This way, you know when to enjoy your tasty leftovers. Always check for any off smells or changes in texture before eating. The best temperature to roast chicken is 425°F (220°C). This high heat helps the skin get crispy and the meat stay juicy. It cooks the chicken evenly and ensures a nice golden color. To check if chicken is cooked through, look for clear juices when you cut into it. The meat should not be pink. Using a meat thermometer is the best way. The internal temperature should reach 165°F (74°C) for safe eating. Yes, you can prepare this dish ahead of time! Marinate the chicken and toss the potatoes the night before. Store them in the fridge. When you’re ready to cook, just place everything on the sheet pan and roast. Roasted chicken pairs well with many sides. Consider serving it with: - Steamed broccoli - A fresh garden salad - Rice or quinoa - Crusty bread These sides add color and flavor to your meal. Enjoy! This blog post covered a simple and tasty roasted chicken dish. We looked at the key ingredients, step-by-step instructions, and helpful tips. You learned how to marinate chicken and veggies for full flavor. I shared ways to customize the recipe and make the most of leftovers. Remember, roasting brings out the best in food, and it’s easy to adjust this recipe. Enjoy making this meal and share it with others. Your kitchen is a place for fun and good food!

Sheet Pan Garlic Herb Roasted Chicken Delight

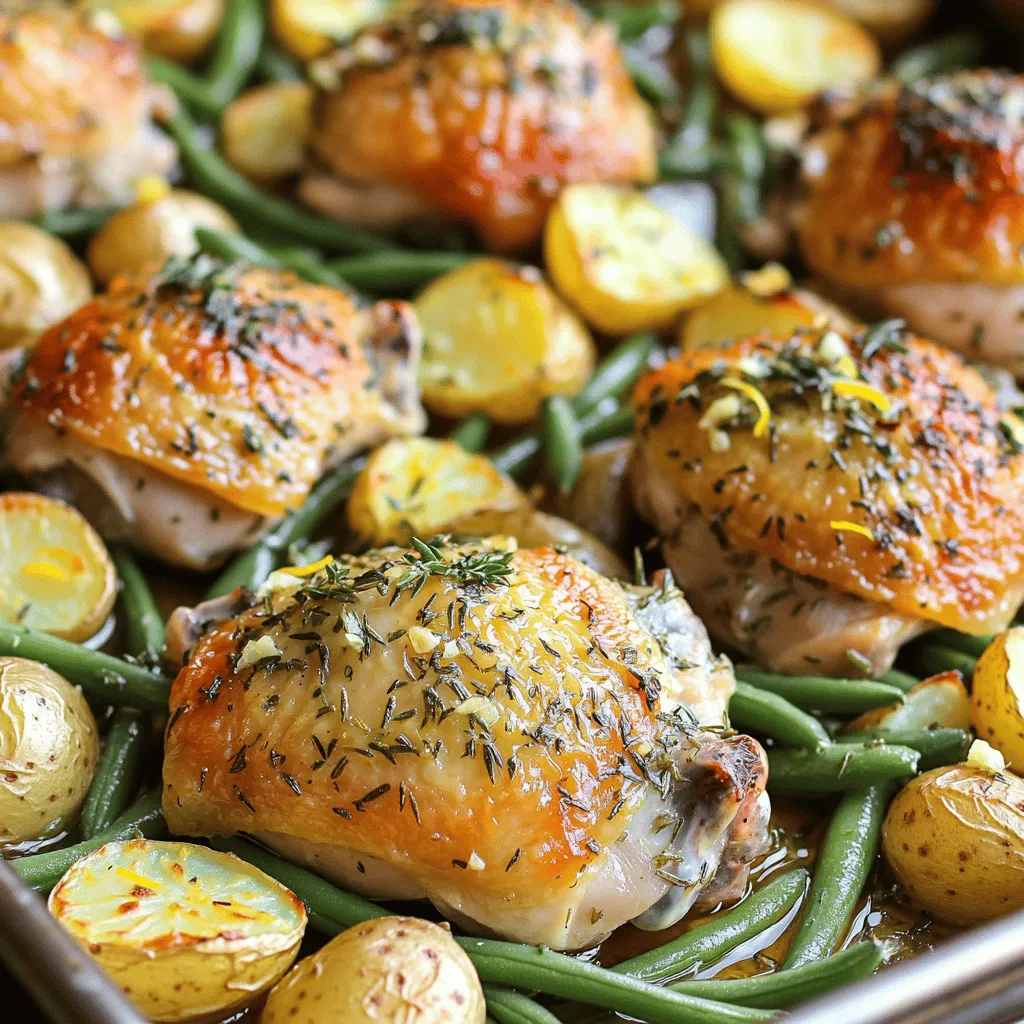
Welcome to Sheet Pan Garlic Herb Roasted Chicken Delight! If you want a simple, tasty dinner, this recipe is for

- 1 lb large shrimp, peeled and deveined - 4 cloves garlic, minced - 3 tablespoons olive oil - Juice of 1 lemon - Zest of 1 lemon - 1 teaspoon crushed red pepper flakes (optional) - Salt and pepper to taste - Fresh parsley, chopped, for garnish Gathering the right ingredients is key to making Air Fryer Garlic Lemon Shrimp. First, you need shrimp. I prefer large shrimp since they have a nice bite. Peel and devein them before cooking. Next, take four cloves of garlic and mince them finely. Garlic adds a rich flavor that blends well with shrimp. You will also need olive oil. Three tablespoons will keep the shrimp moist and flavorful. For that zesty kick, use the juice and zest of one lemon. This brightens the dish and makes it fresh. If you like some heat, add crushed red pepper flakes. It’s optional, but I think it adds great flavor. Finally, season with salt and pepper to your taste. Fresh parsley is important too. It adds color and a fresh taste when you garnish the dish. Make sure you have everything ready. This dish comes together quickly, and having all your ingredients prepped will make it easier to cook. - In a large bowl, combine: - 3 tablespoons olive oil - 4 cloves garlic, minced - Juice of 1 lemon - Zest of 1 lemon - 1 teaspoon crushed red pepper flakes (optional) - Salt and pepper to taste - Whisk these ingredients until fully mixed. This mix gives great flavor to the shrimp. - Add 1 pound of peeled and deveined shrimp to the marinade. - Toss the shrimp to coat them well. - Let them marinate for 15 minutes. This helps them soak up all the tasty flavors. - Preheat your air fryer to 400°F (200°C) for about 5 minutes. - Arrange the shrimp in a single layer in the air fryer basket. This helps them cook evenly. - Cook the shrimp for 6-8 minutes. Shake the basket halfway through. The shrimp should turn pink and look opaque when done. This method makes sure you get shrimp that are juicy and full of flavor. Enjoy the wonderful taste of garlic and lemon in every bite! - Use fresh shrimp for best flavor. Fresh shrimp makes a big difference. - Do not overcrowd the air fryer basket. This helps the shrimp cook evenly. - Serve with lemon wedges for added flavor. Squeezing lemon enhances the taste. - Pair with a side salad or rice. This makes a balanced meal. - Adjust cooking time based on shrimp size. Larger shrimp may need more time. - Keep an eye on shrimp to avoid overcooking. Watch for that perfect pink color. {{image_2}} You can change the taste of your shrimp dish easily. Add herbs like thyme or oregano for a twist. These herbs bring a fresh and earthy flavor. You can also try substituting lime juice for lemon. Lime gives a nice zing and pairs well with shrimp. Adding veggies can make this dish a full meal. Try including bell peppers or asparagus in the air fryer. Cut them into bite-sized pieces for even cooking. This adds color and nutrients, and it makes your meal more filling. Want some heat? You can increase the crushed red pepper for more spice. If you like it extra hot, add a dash of hot sauce in the marinade. This will give your shrimp a nice kick and wake up your taste buds. Store any leftovers in an airtight container. This keeps the shrimp fresh. You can keep it in the refrigerator for up to 2 days. If you want to save some for later, freeze the cooked shrimp. Use a freezer-safe bag for this. You can store them for up to 2 months. To eat, thaw overnight in the refrigerator before reheating. To reheat, use the air fryer at 350°F (175°C). Heat for about 3-4 minutes. This helps maintain the shrimp's tender texture. Avoid using the microwave. It can make the shrimp rubbery and tough. Yes, just thaw them completely before marinating. Frozen shrimp can work well in this dish. To thaw, place them in the fridge overnight or run them under cold water. Make sure they dry well before you marinate them. This helps the flavors stick better. They should turn pink and opaque. When shrimp cook, they change color. Look for a bright pink hue and a firm texture. They also curl slightly as they cook. If your shrimp look gray or translucent, keep cooking them. You can sauté the shrimp in a pan or bake them in the oven as an alternative. For sautéing, heat oil in a skillet over medium heat. Cook the shrimp for about 3-4 minutes on each side. If baking, spread them on a sheet pan and bake at 400°F for 8-10 minutes. Both methods will give you tasty shrimp! This blog post shared a simple recipe for cooking shrimp in an air fryer. We covered key ingredients, step-by-step instructions, and cooking tips. Using fresh shrimp and seasoning well makes a big difference in taste. Remember, you can vary flavors or add veggies for a complete meal. Store leftovers properly to keep them fresh. Enjoy this easy dish and feel confident trying the different options to make it your own!

Air Fryer Garlic Lemon Shrimp Quick and Flavorful Dish

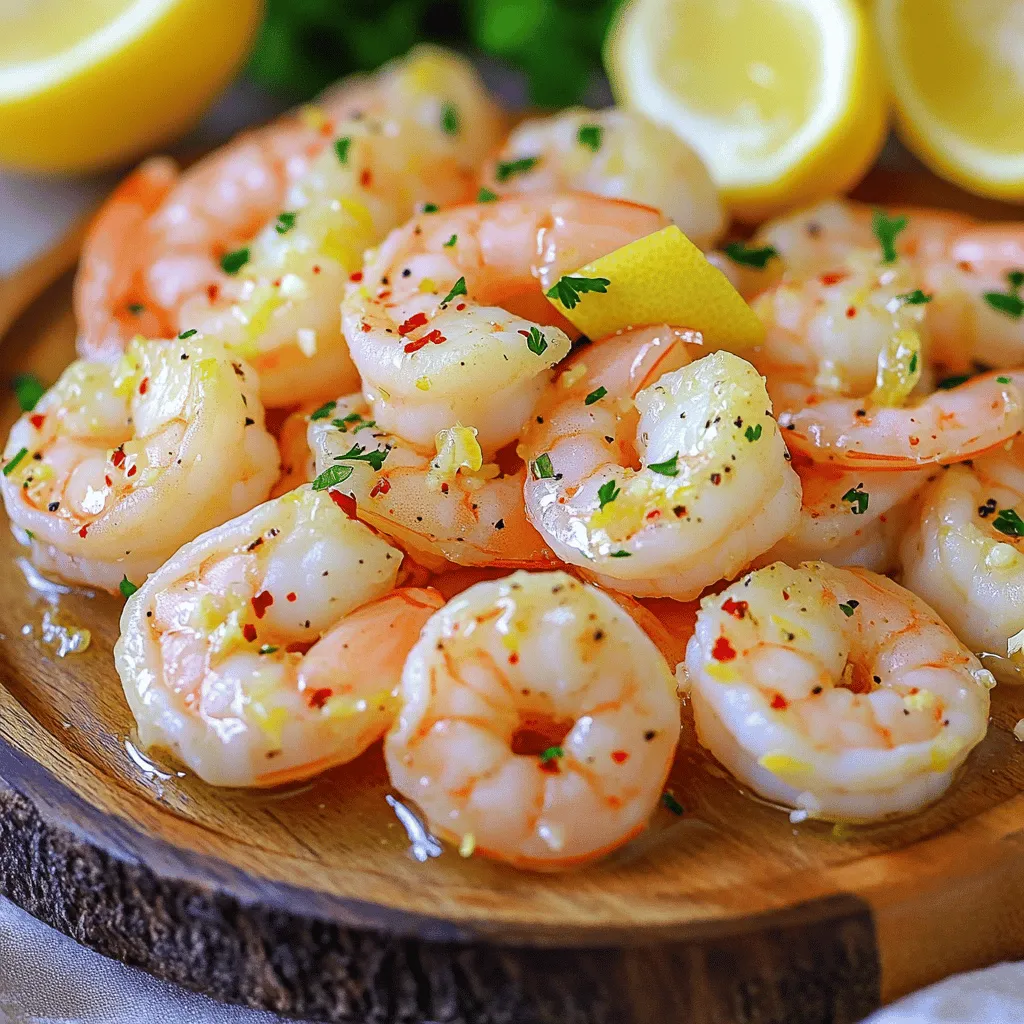
Craving a quick and flavorful meal? This Air Fryer Garlic Lemon Shrimp is your answer! With just a few fresh

To bake delicious Cranberry White Chocolate Blondies, you need the following main ingredients: - 1 cup unsalted butter, melted - 1 1/2 cups brown sugar, packed - 2 large eggs - 2 teaspoons vanilla extract - 2 cups all-purpose flour - 1 teaspoon baking powder - 1/2 teaspoon salt - 1 cup white chocolate chips - 1 cup dried cranberries For added flavor, consider these optional ingredients: - 1/2 cup chopped pecans - 1/4 cup sweetened shredded coconut These ingredients create a rich, sweet, and fruity treat. The butter adds moisture, while the brown sugar gives depth. Eggs help bind everything, and vanilla adds a lovely aroma. The flour provides structure, and baking powder gives a light texture. Salt balances the sweetness. White chocolate chips melt and offer creamy goodness, while cranberries give a tart contrast that brightens each bite. When you mix in the optional pecans, they add crunch. The coconut brings a hint of tropical flavor. You can customize your blondies based on your taste. Enjoy mixing these ingredients; they form the base of a delightful dessert! 1. Preheat and prepare baking pan: Start by preheating your oven to 350°F (175°C). Grease a 9x13 inch baking pan. Line it with parchment paper, leaving some hanging over the sides. This makes it easy to lift out the blondies later. 2. Mixing dry and wet ingredients: In a large bowl, pour in the melted butter. Add the packed brown sugar and mix until smooth. Then, add the eggs one at a time, stirring well after each. Add the vanilla extract and mix again. 3. Incorporating additional ingredients: In a separate bowl, whisk together the flour, baking powder, and salt. Gradually fold this dry mix into the wet mixture. Mix until just combined. Be careful not to overmix. This helps keep the blondies soft. Now, gently fold in the white chocolate chips, dried cranberries, and any optional ingredients like chopped pecans or shredded coconut. 1. Pouring and spreading batter: Pour the batter into your prepared baking pan. Use a spatula to spread it evenly. This ensures even baking and a nice texture. 2. Baking time and visual cues for doneness: Place the pan in the oven and bake for 25-30 minutes. Look for the edges to turn golden brown. Insert a toothpick in the center; it should come out with a few moist crumbs attached. This shows that your blondies are ready. 1. Cooling instructions: Once baked, remove the pan from the oven. Let the blondies cool in the pan for about 10 minutes. Then, use the parchment overhang to lift them out. Place them on a wire rack to cool completely. 2. Cutting blondies to serve: After they cool, cut the blondies into squares. Serve and enjoy your delicious Cranberry White Chocolate Blondies! To make the best blondies, follow these simple steps. - Avoiding overmixing: When you mix the wet and dry ingredients, do it gently. Overmixing makes the blondies tough. Mix until you see no dry flour. This keeps them soft and chewy. - Checking for doneness: Look for golden edges. Insert a toothpick in the center. If it comes out with a few moist crumbs, they are ready. Don't wait until it comes out clean. That can lead to dry blondies. To make your blondies even more special, try these ideas. - Suggestions for flavor variations: You can add spices like cinnamon or nutmeg. They add warmth and depth. You can also mix in nuts like walnuts or almonds for crunch. - Swapping ingredients for custom tastes: Want a twist? Swap white chocolate for dark chocolate chips. Use dried cherries instead of cranberries for a different fruit flavor. Coconut adds a tropical touch, too. {{image_2}} You can easily modify this recipe for different diets. If you want gluten-free blondies, use a gluten-free flour blend. Look for blends made with rice flour, almond flour, or oat flour. They work great in this recipe. For vegan substitutions, try using coconut oil instead of butter. Replace eggs with flax eggs or applesauce. Use dairy-free white chocolate chips for a tasty treat. These changes keep the blondies delicious and plant-based. While cranberries and white chocolate shine in this recipe, you can mix it up! Try using raspberries or blueberries for a fruity twist. The tartness of these berries pairs well with the sweet chocolate. You can also swap out the white chocolate chips. Dark chocolate chips or milk chocolate chips add a new depth of flavor. Each option changes the taste and makes the blondies uniquely yours. Feel free to experiment and find your favorite combo! To keep your cranberry white chocolate blondies fresh, use an airtight container. This helps prevent them from drying out. If you need to stack them, place parchment paper between layers. For longer storage, refrigerate them wrapped tightly in plastic wrap. If you want to freeze your blondies, cut them into squares first. Then, wrap each piece in plastic wrap and place them in a freezer-safe bag. This keeps them fresh for later enjoyment. You can store blondies at room temperature for up to three days. Keep them in a cool, dry place. If you refrigerate them, they last about a week. When you are ready to enjoy frozen blondies, thaw them in the fridge overnight. This way, they regain their soft texture. You can also warm them in the microwave for a few seconds for a warm treat. How do I know when the blondies are finished baking? You can tell the blondies are done when the edges are golden brown. Insert a toothpick in the center. If it comes out with a few moist crumbs, they are ready. Can I use fresh cranberries instead of dried? Yes, you can use fresh cranberries. They add a nice tartness. However, fresh cranberries may make the blondies moister, so adjust the baking time. What can I substitute for white chocolate chips? You can use dark chocolate chips or butterscotch chips. Both options will give a new twist to the flavor. Is it necessary to line the baking pan? Yes, lining the pan is very helpful. It makes it easy to lift the blondies out after baking. This way, you avoid sticking and can cut them nicely. What size pan should I use for these blondies? Use a 9x13 inch pan. This size will help the blondies bake evenly. If you use a smaller pan, they may take longer to bake. Cranberry white chocolate blondies are easy to make and delicious. We covered key ingredients, baking steps, and fun variations. You can even adjust recipes to fit dietary needs. Remember to avoid overmixing and check for doneness to ensure a perfect treat every time. Store them properly to keep them fresh longer. With these tips, you’ll impress your friends and family with your baking skills. Enjoy sharing these tasty blondies!

Cranberry White Chocolate Blondies Irresistible Treat

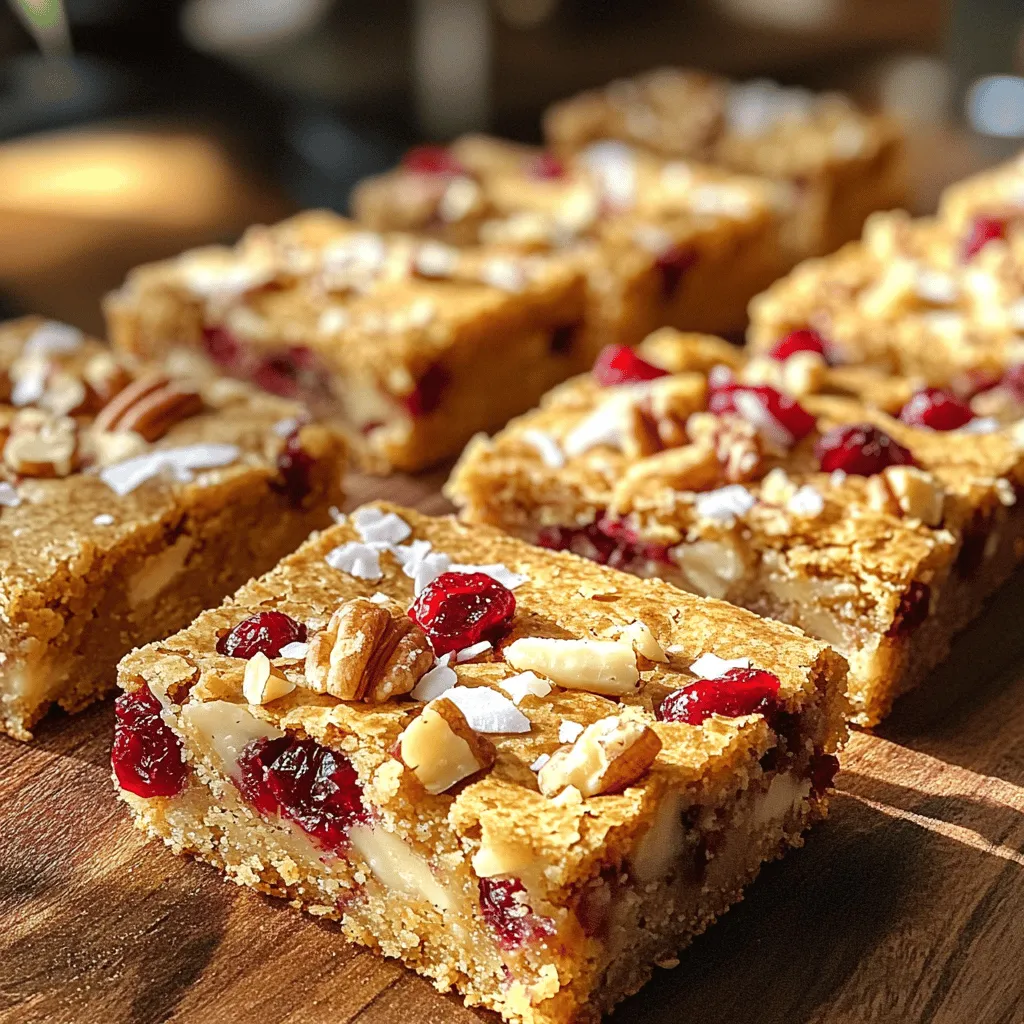
If you love sweet and tart treats, you’re in for a real delight! Cranberry White Chocolate Blondies are the perfect

- 2 medium sweet potatoes, peeled and diced - 1 red bell pepper, chopped - 1 green bell pepper, chopped - 1 medium onion, chopped - 3 cloves garlic, minced Sweet potatoes are the star of this stew. They add natural sweetness and creaminess. Bell peppers bring color and crunch. Onions and garlic give a nice depth of flavor. - 1 can (15 oz) black beans, rinsed and drained - 1 can (15 oz) diced tomatoes (with juice) Black beans add protein and fiber. They also make the stew filling. Diced tomatoes add acidity and richness to the dish. - 1 teaspoon ground cumin - 1 teaspoon smoked paprika - 1 teaspoon chili powder - Juice of 1 lime These spices bring warmth and depth. Cumin adds an earthy tone. Smoked paprika gives a hint of smoke. Lime juice brightens up the flavors. - 4 cups vegetable broth - Fresh cilantro for garnish - Salt and pepper to taste Vegetable broth keeps the stew rich and hearty. Fresh cilantro adds a burst of freshness on top. Salt and pepper enhance all the flavors in the bowl. Each ingredient plays a key role in making this stew delicious. It is easy to find these items at your local store. You can adjust quantities based on your taste. First, peel and dice two medium sweet potatoes. Aim for bite-sized pieces. Next, chop one red bell pepper, one green bell pepper, and one medium onion. Mince three cloves of garlic. Each vegetable adds great flavor to the stew. In your slow cooker, layer all the chopped and diced veggies. Add the black beans and diced tomatoes. Sprinkle in one teaspoon each of ground cumin, smoked paprika, and chili powder. Add salt and pepper to taste. Stir everything well to mix the spices evenly. Cover your slow cooker with its lid. Set it to cook on low for six to seven hours. If you’re in a hurry, you can use the high setting for three to four hours. The sweet potatoes should be tender when it's done. Once the cooking time is up, taste your stew. Adjust the seasoning if needed. Squeeze the juice of one lime into the stew for a fresh kick. Stir everything together again. Your stew is now ready to enjoy! To boost the flavor of your stew, try adding more spices. Consider using: - Cayenne pepper for heat - Oregano for a fresh taste - Cinnamon for warmth These spices can add depth and excitement. Start with small amounts and adjust to your liking. Getting the right texture is key. Aim for a thick, hearty stew. If it’s too thin, add a bit more sweet potato. Cook it longer if you want it thicker. You can also mash a few sweet potato pieces to thicken it naturally. Sometimes things don’t go as planned. If your stew is too salty, add more vegetable broth to balance it. If you find it too bland, add a pinch of salt or lime juice. It’s all about tasting as you go. {{image_2}} This stew is already vegan! It uses sweet potatoes, black beans, and lots of veggies. If you want to add more flavor, try using vegetable broth instead of water. You can also add some coconut milk for creaminess. If you like spice, add more chili powder or fresh peppers. All the ingredients in this stew are gluten-free. Just check that your vegetable broth has no gluten. Most brands are safe, but it's always good to read labels. You can keep enjoying this hearty stew without worry. Want to boost the protein? You can add meat like chicken or turkey. Just cook it first, then mix it in before serving. If you prefer plant-based options, try adding quinoa or lentils. They cook well in the slow cooker and add a nice texture. Once your stew cools, place it in an airtight container. This keeps it fresh and safe. Store the stew in the fridge. It lasts for about 3 to 5 days. Always label your container with the date. This way, you know when to use it up. To freeze the stew, let it cool completely first. Then, pour it into freezer-safe bags or containers. Make sure to leave some space for expansion. Seal tightly and label with the date. The stew can be frozen for up to 3 months. When you’re ready to eat, thaw it in the fridge overnight. Reheat your stew gently on the stove over low heat. Stir it often to keep it from sticking. You can also use a microwave. Heat in short bursts, stirring in between. This helps keep the flavors bright. If it’s too thick, add a splash of broth. Enjoy your warm stew without losing its taste! You can spice up your stew easily! Add some chopped jalapeños or a dash of hot sauce. You can also increase the chili powder. Start with a little, then taste and adjust. This way, you control the heat level to your liking. Absolutely! This stew is very flexible. You can add carrots, zucchini, or corn. Use what you have on hand. Just remember to cut them into small pieces. This helps them cook evenly and blend well with the other flavors. The stew can last for about 4 to 5 days in the fridge. Make sure to store it in an airtight container. This keeps it fresh and prevents odors from mixing. Just remember to reheat it well before eating. Yes, it is perfect for meal prep! You can make a big batch and portion it out. Store it in the fridge or freeze some for later. This makes busy days easier, and you have healthy meals ready to go. Yes, you can! To cook on the stovetop, use a large pot. Combine all the ingredients and bring it to a boil. Then, lower the heat and simmer for about 30-40 minutes. Stir occasionally until the sweet potatoes are tender. This blog post covered how to make a tasty Slow Cooker Sweet Potato Black Bean Stew. We explored fresh veggies, canned goods, spices, and essential ingredients. I gave you step-by-step instructions and tips to enhance flavor and texture. You can also find variations for vegan and gluten-free diets. In summary, this stew is flexible, healthy, and easy to store. Try it today for a warm, satisfying meal! Enjoy your cooking journey!

Slow Cooker Sweet Potato Black Bean Stew Delight

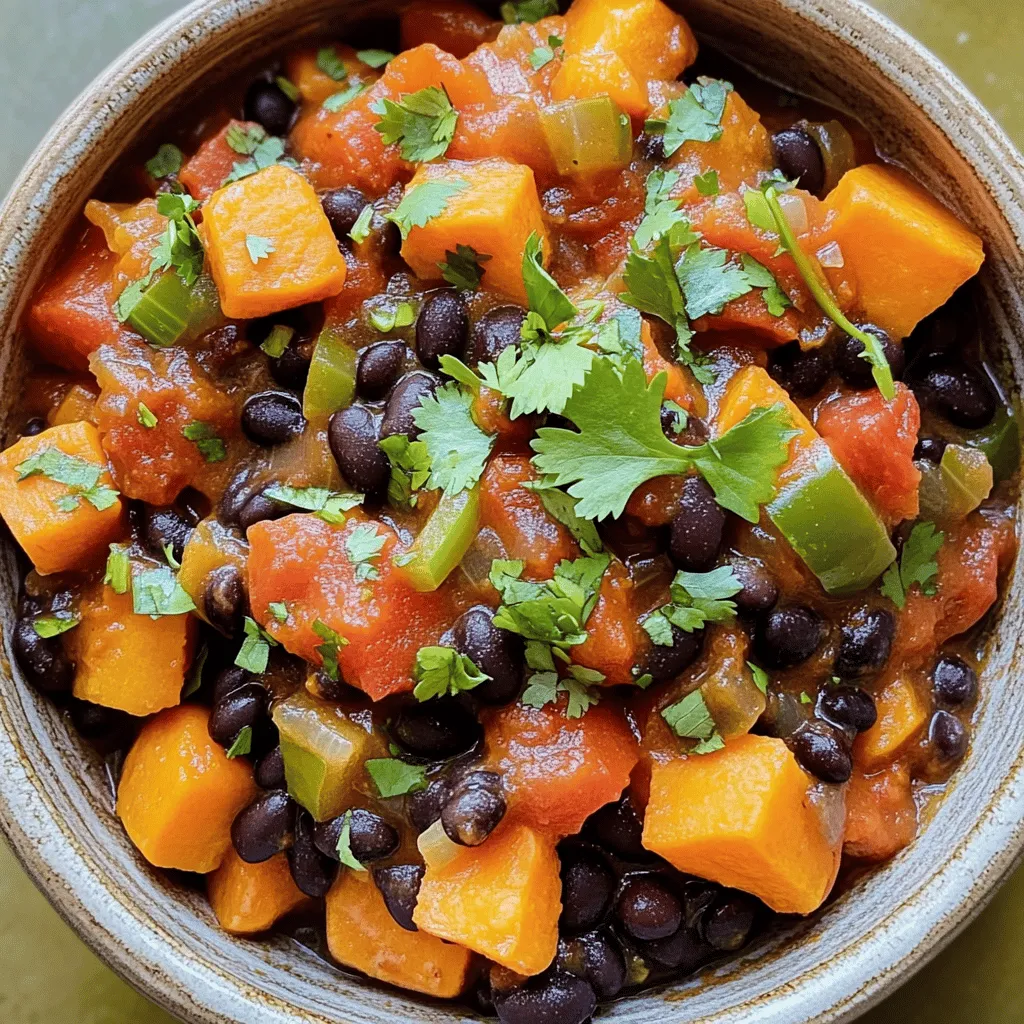
Welcome to Slow Cooker Sweet Potato Black Bean Stew Delight! If you’re looking for a cozy, hearty meal, you’re in

To create these No-Bake Chocolate Peppermint Cheesecake Cups, you need a few key ingredients. Each one adds flavor and texture to this sweet treat. Here’s your list of ingredients: - 1 cup chocolate graham cracker crumbs - 1/4 cup unsalted butter, melted - 2 cups cream cheese, softened - 1/2 cup powdered sugar - 1 teaspoon vanilla extract - 1/2 teaspoon peppermint extract - 1 cup whipped cream - 1/2 cup semi-sweet chocolate chips, melted - Crushed peppermint candies for garnish Each ingredient plays a special role. The chocolate graham cracker crumbs form a tasty crust. The melted butter helps bind the crumbs together. Cream cheese gives the cheesecake its rich and smooth texture. Powdered sugar adds sweetness without being grainy. The vanilla and peppermint extracts bring out the flavors we love. Whipped cream makes the filling light and fluffy. The melted chocolate chips add a rich chocolate taste. Finally, the crushed peppermint candies give a fun and festive finish. Gather these ingredients before you start. They come together quickly to create a dessert that will impress everyone. To start, grab a mixing bowl. Combine 1 cup of chocolate graham cracker crumbs with 1/4 cup of melted unsalted butter. Stir until the crumbs feel like wet sand. This mixture will form the base of your cheesecake cups. You want it to hold together but not be too wet. Next, divide the crumb mixture evenly into small dessert cups. I like to use clear jars for a nice view of the layers. Press the mixture down firmly in each cup. This creates a solid crust to hold the cheesecake filling later. In a large mixing bowl, beat 2 cups of softened cream cheese with an electric mixer. Mix until it is smooth and creamy. This step is key for a good texture. Now, gradually add 1/2 cup of powdered sugar. Also, mix in 1 teaspoon of vanilla extract and 1/2 teaspoon of peppermint extract. Keep mixing until everything blends well. The extracts add a nice flavor to the filling. Next, gently fold in 1 cup of whipped cream. Use a spatula to mix it in slowly. This helps keep the filling light and fluffy. Avoid mixing too hard, or you might deflate the whipped cream. Now, fold in 1/2 cup of melted semi-sweet chocolate chips. Mix it until the chocolate is evenly distributed. Then, spoon the cheesecake filling into each cup, filling them about three-quarters full. Place the filled cups in the fridge. Let them chill for at least 2 hours. This time helps the cheesecake set up nicely. Just before serving, sprinkle crushed peppermint candies on top for a festive touch. Enjoy your delicious no-bake chocolate peppermint cheesecake cups! You can make these cheesecake cups a day in advance. Just prepare the crust and filling, then layer them in cups. After that, chill them in the fridge. This helps the flavors blend well. For a quicker serve, keep them covered until you are ready to enjoy. To serve, place the cheesecake cups on a colorful platter. Add a sprig of fresh mint or a chocolate curl on top. This makes each cup look special and festive. A simple touch can elevate your dessert. When folding in the whipped cream, do it gently. Use a rubber spatula for this step. If you mix too hard, the cream can deflate. This will make your cheesecake less fluffy. Remember, gentle folds keep the light, airy texture you want. {{image_2}} You can easily switch up the flavor of your cheesecake cups. Try using almond or orange extract instead of peppermint. Almond gives a warm, nutty taste, while orange adds a bright, citrusy note. Both options can make your dessert unique while still being delicious. Just use the same amount as the peppermint extract. Toppings can elevate your cheesecake cups. Instead of crushed peppermint, consider using chocolate shavings or fresh fruit. Shaved chocolate adds richness, while fruit like strawberries or raspberries brings a fresh twist. You can also sprinkle nuts for a crunchy texture. These toppings make each cup feel special and fun! If you want to make these cheesecake cups fit your diet, there are simple swaps. Use gluten-free graham crackers for the crust to make it gluten-free. For a dairy-free option, substitute cream cheese with a dairy-free cream cheese. You can also use coconut cream instead of whipped cream. These adjustments let everyone enjoy this tasty treat. To keep your no-bake chocolate peppermint cheesecake cups fresh, store them in the fridge. Place them in an airtight container. You can also cover them tightly with plastic wrap. This helps prevent the cheesecake from drying out. Make sure to keep them away from strong-smelling foods. These cups are best when chilled but can last for a few days. If you want to freeze the cheesecake cups, place them in a freezer-safe container. This helps to keep them fresh for longer. Before freezing, ensure they are covered well. Thaw them in the fridge overnight before serving. This way, they regain their creamy texture without losing flavor. These delightful dessert cups can last up to five days in the fridge. If you freeze them, they can last for up to two months. Just remember to check for any signs of freezer burn. Always serve them chilled for the best taste and texture. Yes, you can make these cheesecake cups ahead of time. I recommend preparing them a day before you plan to serve. This way, they have enough time to chill and set perfectly. Just cover them well with plastic wrap, and store them in the fridge. They will taste even better after sitting, as the flavors meld together. If you want a different option, you can use mascarpone cheese or Greek yogurt. Both provide a creamy texture. Mascarpone gives a rich flavor, while Greek yogurt adds tanginess. You can also try silken tofu for a dairy-free choice. Just ensure it is blended well to achieve a smooth consistency. These cheesecake cups need to chill for at least 2 hours. This time allows the filling to firm up. If you can wait longer, that’s even better! They will set more and taste amazing after four hours or overnight. Absolutely! You can use dark chocolate or white chocolate instead of semi-sweet chocolate. Each type gives a unique taste. If you choose white chocolate, consider adding a bit more peppermint extract for balance. Just make sure to melt the chocolate properly for mixing. You can create delicious cheesecake cups using simple ingredients like cream cheese and chocolate. We covered each step, from making the crust to chilling the dessert. Remember to avoid common mistakes like deflating whipped cream. Try fun variations, like different flavors or toppings, to make it your own. Store your desserts properly to keep them fresh. Enjoy these tasty treats, and impress your friends and family with your skills!

No-Bake Chocolate Peppermint Cheesecake Cups Delight

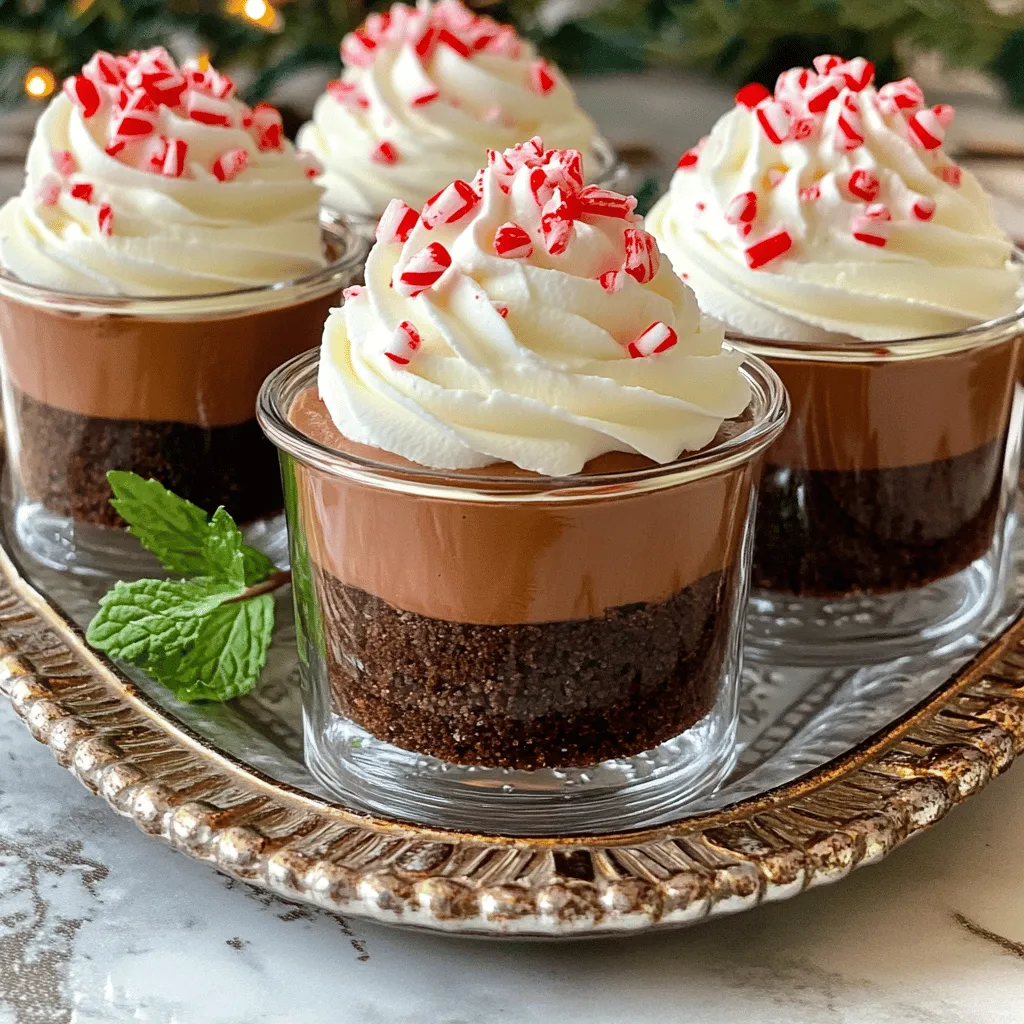
Looking for a sweet treat that combines rich chocolate and refreshing peppermint? I’ve got just the thing! These No-Bake Chocolate

Older posts
Newer posts
← Previous Page1 … Page25 Page26 Page27 … Page84 Next →

dsad

© 2026 juliesdish • Built with GeneratePress

Our Policies

  • Copyright Policy
  • Cookie Policy
  • GDPR Policy
  • Privacy Policy
  • Disclaimer
  • Terms Of Use

More Information

  • Home
  • About
  • Contact
  • Appetizers
  • Dessert
  • Dinner
  • Drinks
©2026, juliesdish About Back To Top