Skip to content
DisclaimerTerms Of UseGDPR PolicyCookie Policy

juliesdish

  • Home
  • Drinks
  • Appetizers
  • Dinner
  • Dessert
  • About
  • Contact
  • Privacy Policy
DisclaimerTerms Of UseGDPR PolicyCookie Policy

NO-ING-IMG

To make this vibrant dish, gather these fresh ingredients: - 2 cups watermelon, cubed - 1 cup strawberries, halved - 1 cup blueberries - 1 cup pineapple, diced - 1 cup kiwi, sliced - 2 tablespoons honey - 2 tablespoons fresh lime juice - 1 teaspoon lime zest You can add some fun touches to your salad! Consider these options: - Fresh mint leaves for garnish - Chopped nuts like almonds or walnuts - A sprinkle of coconut flakes for extra flavor To make your cooking easy, have these tools ready: - A large mixing bowl for fruits - A small bowl for the dressing - A whisk for mixing the dressing - A sharp knife for cutting fruits - A cutting board to chop on With these ingredients and tools, you are set to create a bright and refreshing Honey Lime Fruit Salad! Start by washing all your fruits well. I like to use fresh watermelon, strawberries, blueberries, pineapple, and kiwi. Each fruit brings its own flavor and texture. Next, cut the watermelon into cubes. Slice the strawberries in half, and dice the pineapple. For the kiwi, just peel and slice it into rounds. Once done, add all the fruit into a large mixing bowl. This colorful mix will make your salad pop! Now, let’s make the honey lime dressing. In a small bowl, add two tablespoons of honey. Then, squeeze in two tablespoons of fresh lime juice. The lime juice adds a bright taste. Don’t forget to add one teaspoon of lime zest. This zest gives the dressing an extra zing! Whisk these ingredients together until you see a smooth blend. With the dressing ready, it’s time to combine everything. Pour the honey lime dressing over your fruit in the large bowl. Gently toss the fruit to coat it evenly. Be careful not to mash the fruit; you want it to stay fresh and whole. Let the fruit salad sit for about ten minutes. This time helps all the flavors mix well. Finally, serve the salad in bowls or on a large platter. If you want, add fresh mint leaves on top for a nice touch. Enjoy your refreshing honey lime fruit salad! When picking fruits, go for ripe and fresh ones. Look for bright colors and firm textures. For watermelon, check for a uniform shape and a yellow spot where it rested on the ground. Strawberries should be red and free of white patches. Blueberries should be plump and round. Pineapples need to smell sweet and feel heavy. Kiwis should be slightly soft to the touch but not mushy. Choosing the best fruits makes your salad tasty and vibrant. Make your salad right before serving. This helps keep the fruits fresh and crisp. If you mix the fruits too early, they may get mushy. Let them sit for about 10 minutes after you add the honey-lime dressing. This brief wait lets the flavors blend well without losing texture. Serve your fruit salad in a large bowl or individual cups. For a fun twist, use hollowed-out fruits like pineapples or watermelon as bowls. This adds color and makes your dish special. Garnish with fresh mint leaves for a pop of green. You can also sprinkle some lime zest on top to enhance the look and taste. A beautiful presentation makes the dish more appealing and enjoyable. {{image_2}} You can mix in more fruits for fun. Try adding mango, grapes, or peaches. These fruits add different flavors and textures. Each one makes the salad more colorful and tasty. You can also use seasonal fruits. They are often fresher and juicier. If you have leftover fruits, toss them in too! Adding nuts or seeds gives a nice crunch. Chopped almonds or walnuts work well. You can also add sunflower seeds or pumpkin seeds. These add healthy fats and protein. Just sprinkle them on top before serving. This makes the salad even more satisfying. To create a tropical twist, think about coconut. Shredded coconut or coconut flakes add a sweet touch. You can also add passion fruit or papaya. These fruits bring the beach to your table. This variation is perfect for summer picnics or barbecues. Use your favorite tropical fruits to make it your own! After enjoying your honey lime fruit salad, you might have some left. It's best to store it right away. Place any leftover fruit salad in a clean bowl. Cover it tightly with plastic wrap or a lid. This helps keep the fruit fresh. If you want to keep it longer, consider separating the dressing. Store the dressing in a small jar. This way, the fruits stay crisp. For storing fruit salad, I recommend clear glass or plastic containers. They let you see the colorful fruit inside. Choose a container with a tight lid for best results. You can also use reusable silicone bags. They are great for saving space and keeping the salad fresh. If you plan to eat it soon, a simple bowl will work just fine. Honey lime fruit salad is best when fresh. It can stay good for 1-2 days in the fridge. After that, the fruit may start to get mushy. To keep it fresh longer, avoid mixing in the dressing until serving. If you notice any browning, a splash of lime juice can help. This keeps the fruit looking bright and tasty. Always check for any off smells before eating leftovers. The best fruits for honey lime fruit salad are fresh, sweet, and juicy. I love using: - Watermelon - Strawberries - Blueberries - Pineapple - Kiwi These fruits not only taste great together, but they also look colorful and bright. Feel free to mix in your favorites, like oranges or peaches. Yes, you can make this salad ahead. However, I recommend making it no more than a few hours in advance. The fruit can get soggy if it sits too long. If you make it early, store it in the fridge. Just add the dressing right before serving to keep the fruit fresh. You can use bottled lime juice, but fresh lime juice tastes better. Fresh juice has a brighter flavor. If you're in a pinch, bottled juice works fine. Just remember that fresh lime juice adds a zest that enhances the salad. This salad is nearly vegan! Just replace honey with agave syrup or maple syrup. Both options will give a similar sweetness without using animal products. This keeps the salad plant-based and delicious. Enjoy your honey lime fruit salad guilt-free! In this post, we explored how to make a delicious honey lime fruit salad. We discussed key ingredients, helpful tools, and step-by-step instructions. You learned tips on choosing fruits, ensuring great taste, and creative ways to present the salad. We also shared storage tips to keep leftovers fresh and answered common questions. Making this fruit salad is easy and fun. Enjoy mixing flavors and sharing with friends. It’s a tasty way to add healthy fruits to your meals. Dive into your next fruit salad with confidence!

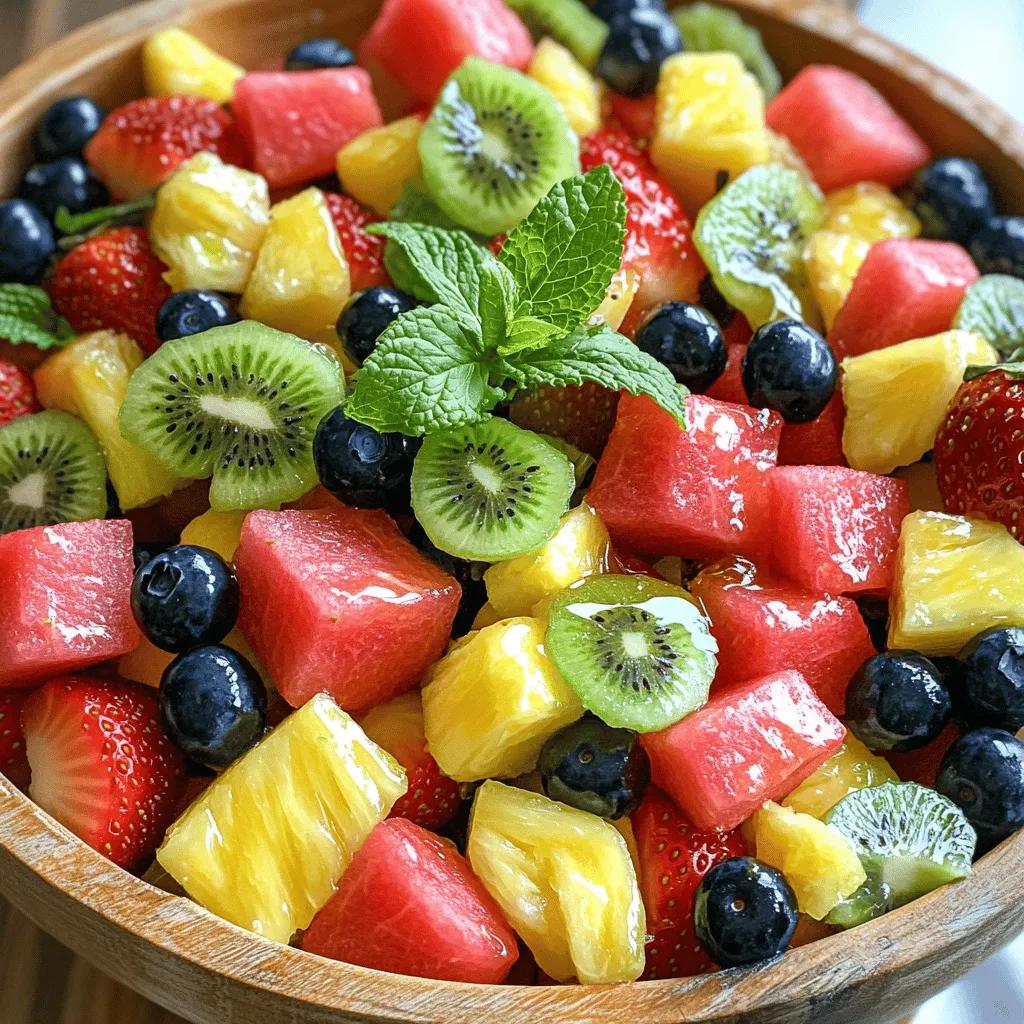
Honey Lime Fruit Salad Refreshing and Simple Recipe

Looking for a fun and tasty way to enjoy fruit? This Honey Lime Fruit Salad is simple and refreshing! With

- 1 lb large shrimp, deveined and peeled - 1 lb baby potatoes, halved - 2 ears of corn, cut into thirds - 1/2 lb smoked sausage, sliced - 3 tablespoons olive oil - 3 cloves garlic, minced - 2 teaspoons Old Bay seasoning - 1 teaspoon paprika - Salt and pepper to taste - 1 lemon, sliced - Fresh parsley, chopped The ingredients for this sheet pan shrimp boil are simple yet full of flavor. You start with large shrimp, which I like because they cook quickly and absorb all the spices well. The baby potatoes add heartiness, and they become tender and creamy in the oven. Corn brings a sweet crunch, and the smoked sausage adds a savory touch. When it comes to seasonings, I use olive oil to help everything roast nicely. Garlic gives a wonderful aroma and taste. Old Bay seasoning is key; it brings that classic shrimp boil flavor that I love. A sprinkle of paprika adds warmth and color. Don’t forget salt and pepper to make all the flavors pop. For garnishes, lemon slices add brightness to the dish, while fresh parsley makes it look pretty. These simple ingredients come together to create a meal everyone will enjoy. First, preheat your oven to 400°F (200°C). This heat will help cook everything evenly. Next, get your ingredients ready. Halve the baby potatoes and cut the corn into thirds. Peel and devein the shrimp if you haven't done so already. On a large sheet pan, mix the halved baby potatoes, sliced sausage, and corn pieces. Drizzle 2 tablespoons of olive oil over them. Add salt, pepper, and 1 teaspoon of Old Bay seasoning. Toss everything well to coat it. Now, roast this mixture in the oven for about 15 minutes. This initial roast gives the potatoes time to soften and flavors to blend. While the veggies roast, grab a mixing bowl. Toss the shrimp with minced garlic, the remaining Old Bay seasoning, paprika, and the last tablespoon of olive oil. Make sure each shrimp gets coated nicely. After 15 minutes, take the pan out of the oven. Add the seasoned shrimp to the pan. Top it all with lemon slices for a fresh kick. Return the pan to the oven and cook for another 8-10 minutes. Watch for the shrimp to turn pink and opaque, which means they are done. To ensure even cooking of shrimp and vegetables, spread them out on the sheet pan. Avoid overcrowding. This way, heat circulates well. Stir the mix halfway through cooking. This helps everything cook evenly. Check for doneness by looking for a bright pink color in the shrimp. They should curl into a C shape. The potatoes should be fork-tender. You can taste a piece to ensure it's soft. For a fun presentation, serve directly from the pan. This gives a casual feel. You can also transfer everything to a large platter for a more formal look. Add lemon wedges on the side. They give a zesty touch that brightens the dish. Guests can squeeze them over their servings for extra flavor. Adjust the spice levels to suit your taste. Add more Old Bay seasoning if you like it spicy. You can also sprinkle some cayenne pepper for an extra kick. Feel free to add more vegetables. Bell peppers, zucchini, or asparagus work well. If you want to change the protein, chicken or tofu can be great substitutes. Just adjust the cooking time as needed. {{image_2}} You can switch up the shrimp with other proteins. Chicken works well in this dish. Just cut it into small pieces. Tofu is a great choice for a vegetarian meal. It absorbs flavors nicely. When it comes to sausage, you have choices too. Smoked sausage adds a deep, rich flavor. Fresh sausage offers a milder taste. Try both to see which you like best. If you want to mix in different veggies, go for it! Bell peppers and zucchini add color and crunch. Broccoli and asparagus also roast nicely. Use seasonal vegetables for the best flavor and freshness. In summer, fresh green beans or cherry tomatoes work great. In fall, sweet potatoes or butternut squash are tasty options. For gluten-free diets, make sure your sausage is gluten-free. All the vegetables and shrimp are naturally gluten-free, so you're in luck! If you're watching carbs, skip the potatoes. You can use cauliflower instead; it roasts well and adds a nice texture. This keeps your meal low in carbs while still being filling. After enjoying your sheet pan shrimp boil, store any leftovers right away. Place shrimp and veggies in airtight containers. This keeps them fresh and tasty. Use glass or plastic containers that seal well. Avoid using metal, as it can affect the flavor. Label the container with the date to track how long it's been stored. You should eat leftovers within three days for the best taste. To reheat your shrimp boil, use the oven or microwave. If you choose the oven, set it to 350°F (175°C). Place the leftovers in an oven-safe dish and cover it with foil. This keeps moisture in. Heat for about 15 minutes or until warm. If using the microwave, place the food in a microwave-safe bowl. Cover it loosely and heat in 1-minute bursts. Stir between each minute. The shrimp should be hot but not overcooked. Yes, you can freeze a shrimp boil! However, the texture may change slightly. To freeze, let the dish cool completely. Then, place it in freezer-safe bags or containers. Remove as much air as possible to prevent freezer burn. For best results, eat within three months. When ready to eat, thaw the shrimp boil in the fridge overnight. Reheat it as mentioned above for a delicious meal. Yes, you can prepare a shrimp boil ahead of time. Here are some tips: - Cook the potatoes and corn first, then let them cool. - Store them in an airtight container in the fridge for up to two days. - Cook the shrimp fresh just before serving for the best taste. - You can also prepare the shrimp mix with seasonings in advance. Perfectly cooked shrimp have a bright pink color and a firm texture. Here are the signs: - The shrimp curl into a C shape. - The flesh turns opaque and no longer looks gray. - They should take about 8-10 minutes in the oven. Pair your shrimp boil with these tasty side dishes: - A fresh garden salad for a crisp contrast. - Garlic bread to soak up the juices. - Coleslaw for a crunchy texture. - Lemon wedges to enhance the flavor. These sides complement the shrimp boil well and create a complete meal. This blog post covered how to create a delicious sheet pan shrimp boil. You learned about the key ingredients, helpful tips, and variations to suit your taste. Remember, you can switch out proteins and veggies to keep things fresh. Proper storage and reheating methods keep flavors intact. With these steps, you can enjoy a tasty meal that impresses everyone. Try it out, and bring joy to your table with this easy recipe!

Sheet Pan Shrimp Boil Savory and Easy Recipe

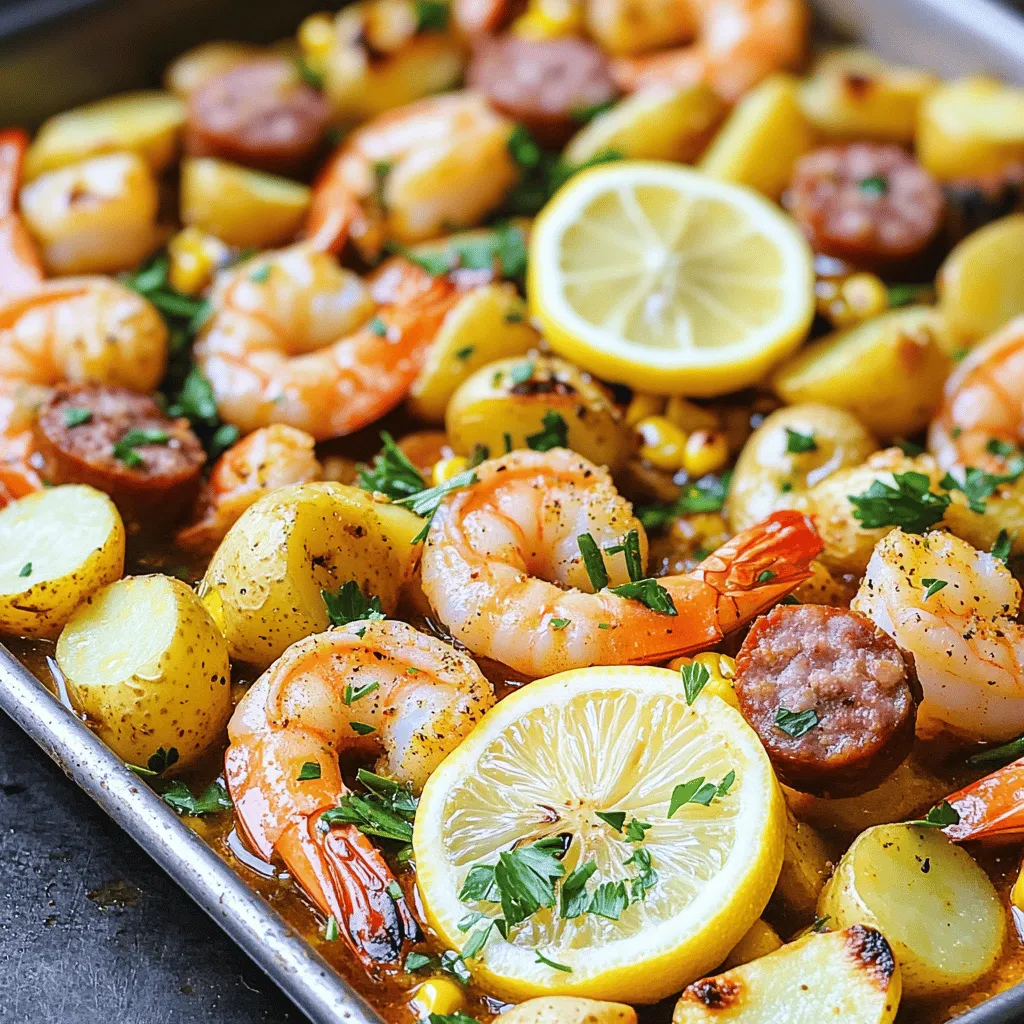
Craving a delicious seafood feast that’s simple to make? This Sheet Pan Shrimp Boil is your answer! With juicy shrimp,

To make delicious brown butter chocolate chip cookies, gather these simple ingredients: - 1 cup unsalted butter (2 sticks) - 1 cup brown sugar, packed - 1/2 cup granulated sugar - 1 large egg - 1 teaspoon vanilla extract - 2 1/4 cups all-purpose flour - 1 teaspoon baking soda - 1/2 teaspoon salt - 1 cup semi-sweet chocolate chips - 1/2 cup chopped pecans or walnuts (optional) These ingredients come together to create a rich and chewy cookie. The brown butter gives a nutty flavor that makes these cookies special. You can add nuts if you like, but they taste great without them too. Prepare your space by measuring everything out before you start mixing. This helps keep you organized and makes the process more fun! To start, you will melt the butter in a medium saucepan over medium heat. Stir the butter often as it melts. In about 5-7 minutes, the butter will begin to brown. You will know it is ready when it smells nutty. This step adds a rich, deep flavor to your cookies. Always keep an eye on it to prevent burning. Once the butter has cooled for a few minutes, grab a large mixing bowl. Combine the brown sugar and granulated sugar with the browned butter. Mix them until they blend well together. Then, add in the egg and vanilla extract. Stir until everything is mixed smoothly. In another bowl, whisk together the flour, baking soda, and salt. This helps to mix the dry ingredients evenly. Gradually add this dry mix to the wet mix. Stir gently until just combined. Be careful not to overmix. This keeps your cookies soft and chewy. Now, fold in the chocolate chips and nuts if you want them. Now it’s time to bake! Preheat your oven to 350°F (175°C). Line a baking sheet with parchment paper. Using a tablespoon, scoop rounded balls of dough onto the sheet. Space them about 2 inches apart. This gives them room to spread while baking. Bake for 10-12 minutes. The edges should be golden, and the middle may look slightly underbaked. Once done, let them cool on the baking sheet for 5 minutes before moving them to a wire rack. This allows them to set perfectly. To get a chewy cookie, start with the right butter. Brown the butter until it has a rich, nutty aroma. This adds depth. Use both brown sugar and white sugar for a nice balance. Brown sugar gives moisture, while white sugar helps the cookie rise. For soft centers, keep an eye on the baking time. Bake for 10-12 minutes. The edges should be golden, but the centers might look a bit underbaked. This is okay! Let them sit on the baking sheet for five minutes. They will continue to cook as they cool. Want to boost the flavor? Try adding a sprinkle of sea salt on top before baking. This enhances the sweetness of the chocolate. You can also add spices like cinnamon or nutmeg for warmth. Using high-quality chocolate is key. Choose semi-sweet chocolate chips that you enjoy eating on their own. They will melt beautifully and make your cookies taste amazing. One common mistake is overmixing the dough. Mix until just combined. Overmixing leads to tough cookies. Another mistake is not chilling the dough. Chilling helps the cookies hold their shape and improve flavor. If you have time, chill the dough for at least 30 minutes before baking. This small step makes a big difference! {{image_2}} You can change the butter in your cookies. Use coconut oil or vegan butter for a dairy-free option. For sugar, try using coconut sugar or maple syrup. Each substitute gives a unique flavor and texture. When it comes to chocolate, think outside the box! Use dark chocolate for a richer taste. Milk chocolate adds sweetness, while white chocolate offers a creamy surprise. You can even mix different types for fun flavor. Want to switch things up? Add dried fruits like cranberries or cherries. They add a sweet and chewy element. You can also mix in shredded coconut for a tropical twist. A dash of cinnamon or nutmeg can create a warm, cozy flavor, perfect for chilly days. For the holidays, add festive spices! Ginger or pumpkin spice can make your cookies extra special. Consider using crushed candy canes for a peppermint surprise during winter. To make gluten-free cookies, swap all-purpose flour for a gluten-free blend. Make sure it has xanthan gum to help with texture. You can also use almond flour for a nutty taste. If you want a vegan version, replace the egg with a flax egg. Mix one tablespoon of flaxseed meal with three tablespoons of water and let it sit until thick. Use a plant-based milk instead of regular milk. Enjoy your treats while staying true to your dietary needs! To keep your brown butter chocolate chip cookies fresh, store them in airtight containers. These containers lock in moisture and keep your cookies soft. Zip-top bags also work, but they can let air in. If you use bags, press out as much air as you can before sealing. This method helps prevent cookies from becoming hard. Always let cookies cool completely before storing them. This step prevents steam from building up and making your cookies soggy. Freezing cookie dough is a great way to save time. Scoop the dough onto a baking sheet lined with parchment paper. Place the sheet in the freezer for about two hours. Once frozen, transfer the dough balls to a zip-top bag. Label the bag with the date and type of cookie. To freeze baked cookies, let them cool first. Then, place them in an airtight container or a zip-top bag. When you're ready to enjoy, thaw the cookies at room temperature. You can also warm them in the oven for a few minutes. Homemade brown butter chocolate chip cookies last about one week when stored properly. Keep them in a cool, dry place. If stored in the fridge, they may last longer but can dry out. Watch for signs of staleness, like a hard texture or an off smell. If the cookies lose their soft feel or taste, it's time to toss them. Always trust your senses; they guide you best! Yes, you can use margarine. Margarine can create a different texture. Cookies may spread more with margarine. This could lead to a thinner cookie. Butter gives a rich flavor that margarine lacks. If you use margarine, pick one with a high fat content. Check the edges of the cookies. They should be golden brown. The centers may look a little soft. They will firm up as they cool. To be sure, use a toothpick. Insert it in the center. If it comes out clean, they are done. Absolutely! You can use white, dark, or milk chocolate chips. Each type adds a unique taste. White chocolate is sweet and creamy. Dark chocolate is rich and bold. Milk chocolate is smooth and sweet. Mix and match your favorites for fun flavors. Cookies may spread too much for several reasons. Too much butter can cause this. If your dough is warm, it can also spread. Make sure to chill the dough before baking. Using too little flour can also lead to spreading. Always measure flour properly to prevent this. Yes, you can make it vegan! Replace the egg with a flax egg. Mix 1 tablespoon of flaxseed meal with 3 tablespoons of water. Let it sit until it thickens. You can also use dairy-free chocolate chips. Make sure your margarine is dairy-free if you choose to use it. In this blog, we explored the essential ingredients and steps for baking perfect cookies. We covered tips to achieve the right texture and flavor. Remember, small changes can lead to big results. Try variations and adapt the recipe to your taste. With proper storage and freezer techniques, you can enjoy fresh cookies anytime. Baking is fun, so don’t fear mistakes—they're part of the process. Keep experimenting and enjoy every bite!

Brown Butter Chocolate Chip Cookies Delightful Treat

Do you crave a cookie that melts in your mouth? Brown butter chocolate chip cookies offer a warm, nutty twist

To make Chocolate Chip Cookie Dough Dip, gather these simple ingredients: - 1 cup all-purpose flour - 1/2 cup brown sugar, packed - 1/4 cup granulated sugar - 1/2 cup unsalted butter, softened - 2 tablespoons cream cheese, softened - 1 teaspoon vanilla extract - 1/2 teaspoon salt - 1/2 cup mini chocolate chips - 1/4 cup milk (adjust for desired consistency) You can swap out some ingredients if needed: - For a lighter dip, use reduced-fat cream cheese. - Instead of unsalted butter, use any unsalted margarine. - If you prefer, you can use coconut milk for a dairy-free option. - You can replace mini chocolate chips with chunks or other types of chocolate if you like. Choosing the right ingredients makes a big difference in taste: - Pick all-purpose flour that is fresh for the best flavor. - Use real butter, as it adds richness and creaminess. - Choose light brown sugar for a deeper flavor and moisture. - Always use pure vanilla extract instead of imitation for better taste. {{ingredient_image_1}} To make this dip, start by gathering all your ingredients. You need: - 1 cup all-purpose flour - 1/2 cup brown sugar, packed - 1/4 cup granulated sugar - 1/2 cup unsalted butter, softened - 2 tablespoons cream cheese, softened - 1 teaspoon vanilla extract - 1/2 teaspoon salt - 1/2 cup mini chocolate chips - 1/4 cup milk (adjust for desired consistency) First, grab a medium mixing bowl. Combine the softened butter and cream cheese. Use an electric mixer to mix until it is smooth and creamy. This step is key for a rich flavor. Next, slowly add the brown sugar and granulated sugar. Mix until the mixture is fluffy and well combined. This helps to create a light dip. Now, sift in the all-purpose flour and salt. Mix on low speed to avoid flour clouds. This keeps the dip light, too. When adding the milk, do it a little at a time. This helps you control the dip's thickness. You want it smooth and spreadable, not runny. After mixing, add the vanilla extract. This gives the dip that classic cookie dough flavor. Finally, gently fold in the mini chocolate chips. This way, you keep them intact and evenly spread throughout the dip. Your dip should be thick yet creamy. If it's too thick, add a bit more milk. If it's too runny, you might need a little more flour. Once you reach the desired consistency, transfer the dip to a serving dish. Cover it with plastic wrap and refrigerate for at least 30 minutes. This allows the flavors to mix and deepen. When ready to serve, enjoy it chilled with your favorite dippers like graham crackers, pretzels, or fresh fruit. When making Chocolate Chip Cookie Dough Dip, it’s easy to mess up. One common mistake is using too much flour. This can make your dip dry. Always measure flour correctly. Another mistake is not softening your butter and cream cheese enough. Soft ingredients mix better. Don’t skip the chilling step! Letting it rest in the fridge helps the flavors mix. To get an extra creamy dip, use more cream cheese. Adding an extra tablespoon works well. You can also mix in a little more milk. Add it slowly until you reach the right texture. For a richer flavor, try using a bit of sour cream. This keeps the dip smooth and tasty. This dip is a crowd-pleaser! Serve it with fun dippers like graham crackers, pretzels, or apple slices. You can also use mini marshmallows or fruit skewers for a colorful touch. Create a beautiful display by placing the dip in a fun bowl. Surround it with your dippers for that extra wow factor! Pro Tips Use Heat-Treated Flour: To make this dip safe to eat raw, consider heat-treating your all-purpose flour by baking it at 350°F (175°C) for 5-10 minutes to kill any harmful bacteria. Customize the Dippers: Experiment with different dippers like honey-infused pretzels, apple slices, or even chocolate chip cookies for a fun and unique tasting experience. Adjust Consistency: If your dip is too thick, gradually add more milk until you reach your desired consistency. Conversely, if it's too runny, mix in a bit more flour. Flavor Variations: For a twist, add a pinch of cinnamon or nutmeg, or mix in some peanut butter or Nutella for a different flavor profile. {{image_2}} You can make this dip unique with different flavors. Try adding peanut butter for a nutty twist. Just mix in 1/2 cup of creamy peanut butter with the butter and cream cheese. Butterscotch chips can also add a sweet touch. Swap half the mini chocolate chips for butterscotch chips to change the flavor profile. You can even mix in some toasted coconut for a tropical vibe. The options are endless, so get creative! You can easily adapt this dip for different diets. For a dairy-free version, use vegan butter and dairy-free cream cheese. There are many brands that offer great options today. For gluten-free, replace all-purpose flour with almond flour or a gluten-free flour blend. Just make sure to check the label for safe ingredients. These swaps keep the dip tasty while meeting your dietary needs. Kids love fun flavors! To make the dip kid-friendly, try adding sprinkles. Just fold in a handful of colorful sprinkles after mixing in the chocolate chips. You can also serve it with fun dippers like fruit kabobs. Use strawberries, bananas, or even marshmallows. This makes it not just a dip, but a fun activity too! Kids can help pick their favorite dippers and enjoy the dip together. To keep your Chocolate Chip Cookie Dough Dip fresh, store it in an airtight container. This helps prevent the dip from drying out or absorbing any odors from your fridge. Cover the container tightly with a lid or plastic wrap. If you plan to serve it later, avoid adding any dippers until you are ready to enjoy it. When stored properly, the dip lasts for about five days in the fridge. I recommend checking it before serving. If you see any signs of spoilage, it's best to toss it out. Always trust your senses—if it smells off or looks strange, do not eat it! You can freeze this dip for up to three months. To freeze, place it in an airtight container. When you're ready to eat it, move the dip to the fridge to thaw overnight. After thawing, give it a good stir and check the consistency. You may need to add a splash of milk to restore its creamy texture. Enjoy your dip with fresh dippers after thawing! No, I do not recommend using self-rising flour. Self-rising flour has baking powder in it, which can change the dip's texture. Stick with all-purpose flour for the best results. This will keep the dip smooth and creamy. I love using graham crackers, pretzels, and fresh fruit as dippers. Each adds a unique flavor and crunch. You can also try vanilla wafers or even chocolate cookies for a fun twist. Get creative with your choices! Yes, you can make this dip ahead of time. It actually tastes better after chilling. Just cover it well and keep it in the fridge. It’s perfect for parties or snack time! To adjust the sweetness, add more or less sugar. If you find it too sweet, try adding a pinch of salt. This can balance the flavors and reduce the sweetness. Taste as you go to find your perfect mix! Raw flour does pose a slight risk for foodborne illness. To make it safer, you can heat-treat the flour. Spread it on a baking sheet and bake at 350°F for five minutes. Let it cool before using it in the dip. This step helps kill any harmful bacteria. In this blog post, we explored great recipes for a chocolate chip cookie dough dip. You learned about key ingredients and smart substitutions. I shared tips for picking quality items and preparing the dip perfectly. We discussed fun variations and ways to store leftovers. Now, you can create a tasty treat that everyone will love. Enjoy making your dip, experimenting with flavors, and serving it at your next gathering. With these tips, you'll impress your guests and satisfy your cravings!

Chocolate Chip Cookie Dough Dip Delightful and Easy

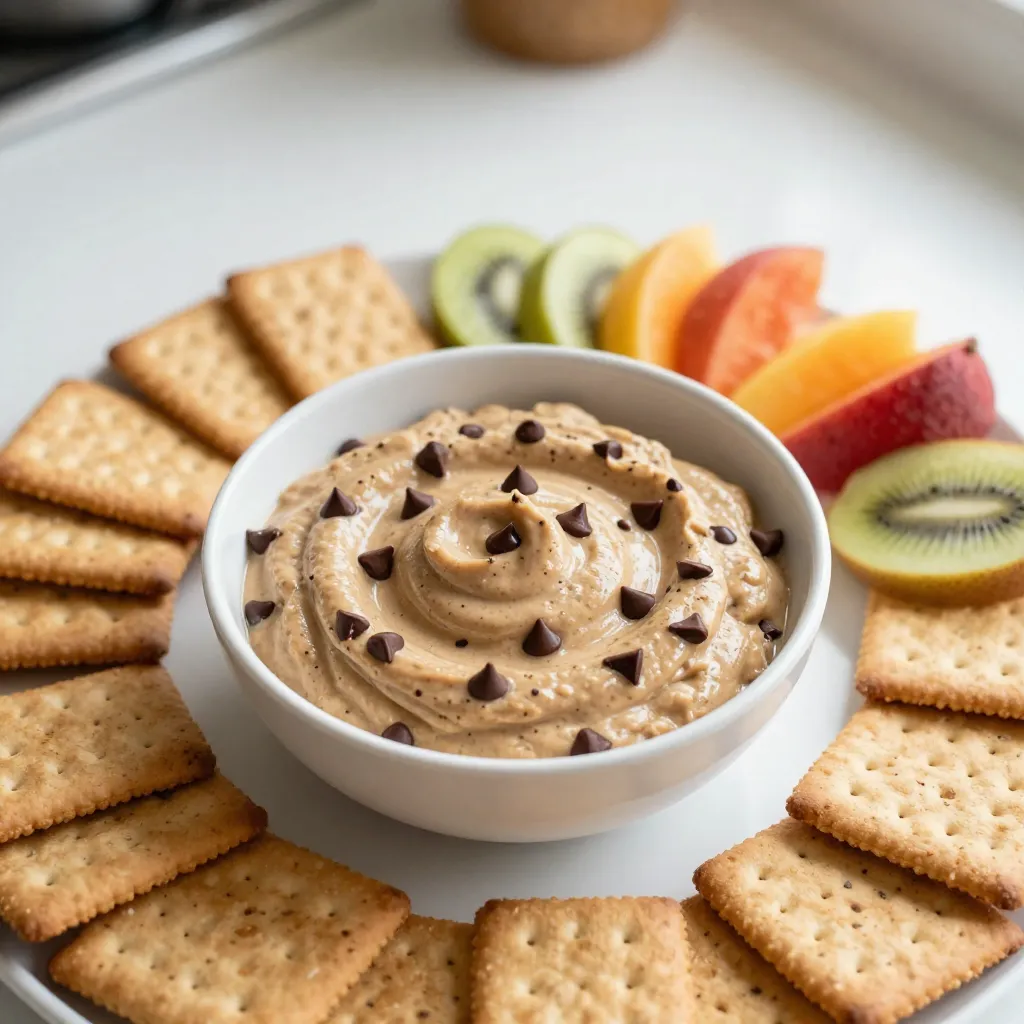
Are you ready to indulge in a creamy, sweet treat that brings joy to any gathering? My Chocolate Chip Cookie

To make the caramel apple crisp cheesecake bars, gather these ingredients: - 1 cup graham cracker crumbs - 1/4 cup unsalted butter, melted - 2 cups cream cheese, softened - 1 cup granulated sugar - 1 teaspoon vanilla extract - 3 large eggs - 2 cups apples, peeled and diced (about 2 medium apples) - 1 teaspoon cinnamon - 1/2 teaspoon nutmeg - 1 cup brown sugar - 1/2 cup old-fashioned oats - 1/4 cup all-purpose flour - 1/4 teaspoon salt - 1/4 cup caramel sauce (store-bought or homemade) I suggest using high-quality cream cheese for the best flavor. Brands like Philadelphia give great results. For butter, unsalted works best so you can control the salt in your dessert. If you want to make this recipe dairy-free, use vegan cream cheese and coconut butter. For gluten-free bars, swap graham cracker crumbs with gluten-free crumbs. If you prefer fresh apples, I recommend Granny Smith for their tartness. You can also use canned apples if you are short on time. Just be sure to drain them well. For a healthier version, consider using honey or maple syrup instead of granulated sugar. This adds a unique flavor and cuts refined sugar. 1. Preheat your oven to 350°F (175°C). This helps the cheesecake bake evenly. 2. Grease a 9x13 inch baking dish. Line it with parchment paper. Leave some paper hanging over the edges. This makes it easy to lift the bars out later. 3. In a medium bowl, mix graham cracker crumbs and melted butter. Press this mixture firmly into the bottom of your baking dish. This is your crust. 4. Bake the crust for 8-10 minutes until it looks light golden. Then, remove it from the oven and let it cool a bit. 5. In another bowl, beat cream cheese and granulated sugar until smooth. This will be your cheesecake base. 6. Add vanilla extract and mix well. This adds flavor to your cheesecake. 7. Beat in eggs one at a time. Mix on low speed after each egg. This helps keep the batter smooth. 8. In a separate bowl, mix diced apples with cinnamon and nutmeg. These spices give the apples a warm taste. 9. Fold the apple mixture into the cream cheese mix. Do this carefully so you don't lose any air. 10. Pour the cheesecake filling over the cooled crust. Spread it evenly with a spatula. 11. In a new bowl, combine brown sugar, oats, flour, and salt. Add melted butter and mix it until crumbly. This is your topping. 12. Sprinkle the topping over the cheesecake layer. Make sure it covers it well. 13. Bake the bars for 40-45 minutes. The edges should be set, and the center should jiggle a bit. 14. Remove from the oven and let them cool completely in the pan. 15. Drizzle with caramel sauce before serving. This adds a sweet finish. 16. Use the parchment paper to lift the bars out of the pan. Cut them into squares for serving. To get a smooth cream cheese mixture, beat the cream cheese well. Make sure it is soft before mixing. If it’s too cold, it will not mix well. Add the sugar slowly. This ensures it blends in smoothly. When you fold in the apples, be gentle. Use a spatula and lift the mixture. This helps keep air in it, making the bars fluffy. For a beautiful presentation, arrange the bars on a nice platter. Drizzle extra caramel sauce on top for a sweet look. You can add sliced apples around the bars. A sprinkle of cinnamon gives a nice touch. Cut the bars into 12 squares. Each piece is a perfect size for a treat. You can also serve them with whipped cream or vanilla ice cream on the side. This makes each bite even more special! To get the best cheesecake texture, always start with softened cream cheese. Cold cream cheese can cause lumps. Mix the cream cheese and sugar slowly. Overmixing can add too much air and lead to cracks. When you fold in the apples, be gentle. You don’t want to break the apples down too much. Common mistakes include not cooling the crust enough before adding the filling and overbaking the bars. The center should be slightly jiggly when you take it out. This ensures a smooth, creamy finish. To save time, you can prepare the crust a day in advance. Just store it in the fridge. You can also chop the apples ahead of time. Keep them in lemon water to prevent browning. If you're short on time, using store-bought graham cracker crumbs can speed things up. Buying pre-made caramel sauce cuts down on prep time, too. Homemade can be fun but takes longer to make. Want to boost the flavor? Add more spices! Try a pinch of ginger or cloves for a warm twist. For a nutty flavor, mix in chopped walnuts or pecans. This adds crunch and richness to the bars. You can also drizzle melted chocolate over the top for extra sweetness. A sprinkle of sea salt can enhance the caramel flavor beautifully. Don't be afraid to experiment with flavors! {{image_2}} You can switch up the fruit in this recipe. Try pears or peaches for a fresh twist. Both fruits add unique flavors that work well with the creamy cheesecake. For winter, add spices like ginger or cloves to warm the taste. These spices bring a cozy feel, perfect for holiday gatherings. You can make this recipe fit your diet. For a low-sugar version, use sugar substitutes like erythritol or monk fruit. If you're looking for a keto-friendly option, swap out the graham cracker crust for almond flour. You can also make a vegan version. Use cashew cream instead of cream cheese and flax eggs in place of regular eggs. Serving ideas can be fun! Try layering the cheesecake filling in jars for a cute parfait. This way, guests can enjoy individual servings. You can also drizzle chocolate sauce or berry compote on top. These toppings add color and flavor, making each bite special. To keep your caramel apple crisp cheesecake bars fresh, store them in the fridge. Place the bars in an airtight container or cover them tightly with plastic wrap. This helps avoid drying out and keeps the flavors strong. Enjoy them within five days for the best taste and texture. If you want to save some bars for later, freezing is a great option. First, let the bars cool completely. Then, cut them into squares. Wrap each square in plastic wrap and place them in a freezer-safe bag. Squeeze out any air before sealing. You can freeze them for up to three months. When you’re ready to eat, thaw them in the fridge overnight. To warm up your cheesecake bars, preheat your oven to 350°F (175°C). Place the bars on a baking sheet and heat for about 10 minutes. This warms them without making them soggy. You can also microwave them for about 20 seconds. Just be careful not to overheat them, as this can change their creamy texture. Enjoy your bars warm for a cozy treat! Can I make this ahead of time? Yes, you can make these bars a day before. Just store them in the fridge. They taste even better the next day! How do I know when the cheesecake bars are done? Check the edges. They should be set, and the center will be slightly jiggly. It’s okay if it looks a bit wet, but not too much! What to do if the crust is too crumbly? If your crust crumbles, try adding more melted butter. This will help it stick together better. Press it down firmly when you make the crust. How to fix separation in the cheesecake filling? If you see separation, it might be from overmixing. Mix just until combined. If it happens, you can blend it again gently. Can I use store-bought caramel sauce? Absolutely! Store-bought caramel works great and saves time. Just drizzle it on top before serving. Tips for making homemade caramel sauce? To make caramel sauce, heat sugar in a pan until it melts. Stir gently until it turns golden. Then add cream slowly, whisking until smooth. It’s simple and delicious! This blog post outlined all the key ingredients and steps for crafting delicious cheesecake bars. You learned about ingredient swaps for dietary needs and tips for perfect baking. We covered how to store, reheat, and serve these treats, ensuring they stay fresh and tasty. In the end, you can customize these bars to fit your taste and dietary choices. Experimenting will make your dessert journey fun. Enjoy creating your own unique cheesecake bars!

Caramel Apple Crisp Cheesecake Bars Delightful Treat

Are you ready to indulge in the sweet delight of Caramel Apple Crisp Cheesecake Bars? These tasty treats combine creamy

- 1 lb boneless, skinless chicken breasts, cut into bite-sized pieces - 8 oz fettuccine pasta, uncooked - 2 cups heavy cream - 1 cup chicken broth These main ingredients form the heart of your Creamy Chicken Alfredo. The chicken brings protein, while the fettuccine adds a nice texture. The heavy cream and chicken broth create a rich and tasty sauce. - 4 cloves garlic, minced - 1 teaspoon Italian seasoning - Salt and pepper to taste - 1 tablespoon olive oil - Fresh parsley, chopped (for garnish) Seasoning is key to flavor. Garlic adds a warm aroma. Italian seasoning gives depth. Salt and pepper enhance all the flavors. Olive oil helps cook the chicken, while fresh parsley brightens the dish. This mix makes every bite delicious and fresh. Start by heating one tablespoon of olive oil in a pan over medium heat. Once hot, add one pound of boneless, skinless chicken breasts cut into bite-sized pieces. Season the chicken with salt, pepper, and one teaspoon of Italian seasoning. Cook it until it's lightly browned, which should take about five to seven minutes. The chicken will finish cooking later in the slow cooker, so focus on getting that nice color and flavor. Now it’s time to layer everything in the slow cooker. First, add the cooked chicken on the bottom. Then, place eight ounces of uncooked fettuccine pasta right on top of the chicken. This way, the pasta absorbs all those tasty flavors. Pour two cups of heavy cream and one cup of chicken broth over the chicken and pasta. Make sure the pasta is fully submerged in the liquid. This step is key to making sure the pasta cooks well. Cover the slow cooker and set it to low heat. Let it cook for three to four hours. Check the pasta and chicken around the three-hour mark. The pasta should be tender, and the chicken should be fully cooked. If you have a slow cooker with a timer, use it! This helps you keep track of time without worrying. Once everything is cooked, add one cup of freshly grated Parmesan cheese to the slow cooker. Stir it in until it melts and gives the sauce a creamy texture. If the sauce looks too thick, add a splash of chicken broth to loosen it up. This will help you get the perfect consistency for your creamy chicken Alfredo pasta. To boost flavor, try adding more Italian seasoning. You can also use fresh herbs like basil or oregano. For chicken, cook it in olive oil until lightly browned. This adds a nice taste before the slow cooker does its magic. Every slow cooker is different. If yours cooks faster, check the pasta after 2.5 hours. If the pasta is overcooked, it can turn mushy. To prevent this, stir the dish halfway through cooking. This helps the pasta cook evenly. Pair this creamy chicken Alfredo pasta with a side salad or garlic bread. A crisp Caesar salad complements the dish well. For wine, a light Pinot Grigio works perfectly. It balances the creaminess of the pasta. {{image_2}} You can make this dish your own by swapping ingredients. Instead of chicken, try shrimp. Shrimp cooks fast, so add it late in the cooking time. You can also use vegetables like broccoli or bell peppers for a meatless option. This adds color and crunch. If you need gluten-free options, go for gluten-free pasta. Many brands offer tasty alternatives. Just keep an eye on the cooking time. Gluten-free pasta often cooks faster than regular pasta. To boost flavors, add sun-dried tomatoes or fresh spinach. Sun-dried tomatoes bring a nice tang. Spinach adds nutrition and a pop of green. You can mix them in during the last hour of cooking for the best results. Cheese is another way to enhance flavor. Try using a mix of cheddar or mozzarella with the Parmesan. Each cheese adds its unique taste, making each bite special. You can give your dish a regional twist with herbs. Try adding fresh basil or oregano for an Italian flair. These herbs brighten the flavors and make the dish feel fresh. Another fun idea is to use different Alfredo sauce kinds. Some sauces have garlic or herbs mixed in. These variations can change the taste profile and keep things exciting. Mix it up and see what you like best! To store leftovers, let your creamy chicken Alfredo pasta cool first. Then, place it in an airtight container. This keeps the pasta fresh and tasty. I recommend using glass containers. They work well and do not stain. Store in the fridge for up to three days. To reheat, the best method is using a stove. Gently warm it in a pan over low heat. Add a splash of chicken broth to keep the creaminess. Stir often to avoid sticking. If it seems dry, add a bit more broth or cream. This helps restore the sauce's smooth texture. You can freeze creamy chicken Alfredo pasta. First, let it cool completely. Then, place it in a freezer-safe container. Make sure to leave some space at the top for expansion. You can freeze it for up to three months. When ready to eat, thaw in the fridge overnight. Reheat on the stove with a splash of broth or cream. This keeps it creamy and delicious. Enjoy your meal! You should cook the pasta for 3 to 4 hours on low heat. This time works well for most slow cookers. If your slow cooker runs hot, check the pasta after 2.5 hours. It should be tender but not mushy. Overcooking can make the pasta gummy. So, keep an eye on it! Yes, you can use cream cheese. It will change the flavor and texture a bit. Cream cheese makes the dish thicker and richer. Mix it well to avoid lumps. You may need to add a little chicken broth to reach your desired creaminess. You can use several other cheeses. Pecorino Romano adds a salty kick. Mozzarella gives a soft, gooey texture. For a sharper taste, try aged Gouda. Each cheese brings a unique flavor to the dish. Don't be afraid to experiment with what you have! In this blog post, I covered how to make creamy chicken Alfredo pasta in a slow cooker. I shared key ingredients like chicken, fettuccine, and heavy cream, along with tips for seasoning and cooking. I also explored variations and storage ideas to enjoy leftovers later. With these simple steps and tips, you can create a satisfying meal. Enjoy trying different flavors and ingredients for your own twist on this dish!

Creamy Chicken Alfredo Pasta Slow Cooker Delight

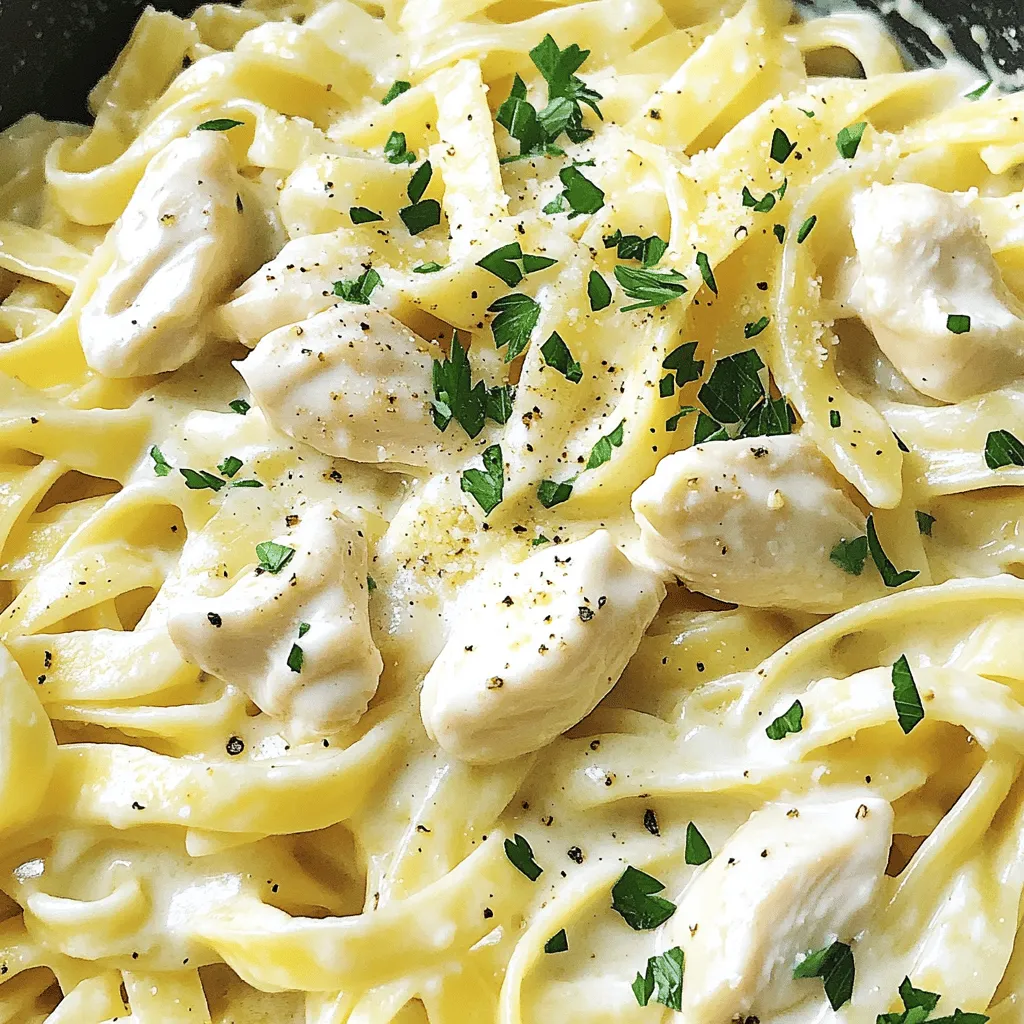
Get ready to impress your family with my Creamy Chicken Alfredo Pasta made in a slow cooker! This comforting recipe

- 2 cups all-purpose flour - 1 cup granulated sugar - 1 tablespoon baking powder - ½ teaspoon baking soda - ½ teaspoon salt - 1 teaspoon ground cinnamon To make great muffins, start with the dry ingredients. All-purpose flour gives structure. Sugar adds sweetness. Baking powder helps them rise. Baking soda keeps them fluffy. Salt enhances flavor. Ground cinnamon brings warmth. - 2 large eggs - ½ cup unsalted butter, melted - 1 cup buttermilk - 1 teaspoon vanilla extract Next, gather the wet ingredients. Eggs bind everything together. Melted butter adds richness. Buttermilk keeps muffins moist and tender. Vanilla extract gives a lovely aroma. - 1 ½ cups apples, peeled and diced (about 2 medium apples) For the apples, choose firm varieties like Granny Smith or Honeycrisp. Peel and dice them into small pieces. This step ensures even distribution in muffins. Measuring tips: Use a dry measuring cup for accurate amounts. Fill the cup, then level it off with a knife. - ½ cup all-purpose flour - ½ cup brown sugar, packed - ½ teaspoon ground cinnamon - ¼ cup unsalted butter, cold and cubed - ¼ cup rolled oats The streusel topping adds crunch. Combine all-purpose flour and brown sugar for sweetness. Ground cinnamon adds flavor. Cold, cubed butter creates crumbs. Rolled oats give extra texture. These ingredients set you up for success. Enjoy crafting your Apple Streusel Muffins! First, preheat your oven to 350°F (175°C). This step is key. A hot oven helps the muffins rise well. Now, line your muffin tin with paper liners. If you don’t have liners, grease the tin with butter or oil. This keeps the muffins from sticking. In a large bowl, whisk together the following dry ingredients: - 2 cups all-purpose flour - 1 cup granulated sugar - 1 tablespoon baking powder - ½ teaspoon baking soda - ½ teaspoon salt - 1 teaspoon ground cinnamon Make sure the mixture is even. This helps the muffins rise and taste great. In another bowl, beat 2 large eggs. Then, mix in ½ cup melted butter. Add 1 cup buttermilk and 1 teaspoon vanilla extract. Stir until well combined. This mix adds moisture and flavor to your muffins. Now, pour the wet ingredients into the dry ones. Mix gently until just combined. Do not overmix; this keeps your muffins light. Next, fold in 1 ½ cups diced apples. Make sure the apples are evenly spread in the batter. For the streusel, mix together these dry ingredients in a bowl: - ½ cup all-purpose flour - ½ cup brown sugar - ½ teaspoon ground cinnamon Cut in ¼ cup cold, cubed butter. You can use a pastry cutter or your fingers. Mix until it looks like coarse crumbs. Finally, stir in ¼ cup rolled oats. This adds a nice crunch. Divide the muffin batter evenly in the prepared muffin cups. Fill each about 2/3 full. Next, sprinkle the streusel topping generously over each muffin. Bake them in the oven for 18-20 minutes. Check doneness by inserting a toothpick. If it comes out clean, your muffins are ready! Let them cool in the pan for 5 minutes. Then transfer them to a wire rack. Enjoy the sweet smell and flavor of your apple streusel muffins! To get the best muffin texture, do not overmix. Overmixing makes the muffins tough. Mix just until the dry and wet ingredients combine. This helps keep your muffins light and fluffy. Also, use room temperature ingredients. Cold butter or eggs can make it hard to mix. They can lead to uneven baking. You can make your muffins even better by adding spices or extracts. A pinch of nutmeg or some vanilla can boost the flavor. You might also want to try adding nuts or raisins. Chopped walnuts or pecans give a nice crunch. Raisins add sweetness and chewiness. Just fold them in with the apples for a tasty twist. To present your muffins well, serve them warm. A light dusting of powdered sugar looks great. Arranging them on a wooden board with apple slices adds charm. For extra sweetness, drizzle caramel or honey on top. Pair your muffins with a cup of tea or coffee. They also go well with a spread like butter or cream cheese. Enjoy! {{image_2}} You can swap apples for other fruits in this recipe. Pears work well and add a nice sweetness. You can also try berries like blueberries or raspberries. These fruits give a fresh twist to the muffins. Seasonal variations also work great. In fall, use pumpkin or squash. In summer, peaches or cherries can bring a juicy flavor. If you want a healthier muffin, try whole wheat flour instead of all-purpose flour. This change adds fiber and nutrients. You can also cut back on sugar. Use half the amount called for or try natural sweeteners like honey or maple syrup. These options keep your muffins tasty while making them better for you. For gluten-free muffins, choose flours like almond flour or coconut flour. These add unique flavors and textures. When using gluten-free flour, you may need to adjust the liquid. Add a bit more buttermilk or eggs to keep the batter moist. This way, you’ll still enjoy fluffy and delicious muffins. Store your Apple Streusel Muffins at room temperature for up to three days. Keep them in a tight container to stay fresh. If you want to store them longer, put them in the fridge. For best results, use a plastic or glass container with a lid. This helps prevent them from drying out. You can also wrap each muffin in plastic wrap. This keeps them moist and tasty. Freezing your muffins is a great way to save them for later. To freeze them properly, let the muffins cool completely first. Then, wrap each muffin in plastic wrap. Place them in a freezer-safe bag or container. Squeeze out as much air as you can before sealing. To thaw, take a muffin out of the freezer. Leave it at room temperature for about an hour. If you want to enjoy it warm, pop it in the microwave for about 15 seconds. This keeps the texture nice and soft. Enjoy your muffins anytime! To make Apple Streusel Muffins, follow these simple steps: 1. Gather Ingredients: You need flour, sugar, baking powder, baking soda, salt, cinnamon, eggs, butter, buttermilk, diced apples, and vanilla. 2. Preheat Oven: Set your oven to 350°F (175°C). Prepare a muffin tin with paper liners or grease it. 3. Mix Dry Ingredients: In a bowl, whisk together the flour, sugar, baking powder, baking soda, salt, and cinnamon. 4. Blend Wet Ingredients: In a separate bowl, beat the eggs, then mix in melted butter, buttermilk, and vanilla. 5. Combine Mixtures: Pour the wet mix into the dry ingredients. Stir gently until just combined. 6. Add Apples: Fold in the diced apples carefully. 7. Make Streusel: In another bowl, mix flour, brown sugar, and cinnamon. Cut in cold butter until crumbly. Stir in oats. 8. Fill Muffin Cups: Divide the batter among the muffin cups. Fill each about 2/3 full. Top with streusel. 9. Bake: Bake for 18 to 20 minutes. Check with a toothpick to ensure it comes out clean. 10. Cool: Let the muffins cool for 5 minutes in the pan, then move to a wire rack. Yes, you can use various apple types for this recipe. Some great choices include: - Granny Smith: They add a tart flavor. - Honeycrisp: They offer a sweet and crisp bite. - Fuji: These are very sweet and juicy. - Gala: They have a mild sweetness and tender texture. Mixing different apples can create a nice balance of tartness and sweetness. Apple Streusel Muffins can stay fresh for several days when stored correctly. Here are some tips: - Room Temperature: Keep them in an airtight container for up to 3 days. - Refrigerator: They can last up to a week in the fridge. - Freezing: If you want to store them longer, freeze them for up to 3 months. Wrap well in plastic wrap and foil before freezing. Yes, you can prepare the batter in advance. Here are some tips: - Refrigerate: You can mix the batter and keep it in the fridge for up to 24 hours. - Storing: Store the batter in an airtight container. - Baking: When ready to bake, just scoop into the muffin tin and add the streusel topping before baking. This way, you can enjoy fresh muffins with little effort! Making Apple Streusel Muffins is fun and rewarding. You learned about the right dry and wet ingredients, plus how to prepare apples. I shared tips for perfecting texture and offered variations for health and flavor. These muffins are a great treat for breakfast or snack time. Store them well to enjoy longer. I hope you feel excited to bake these muffins and share them with friends! Your kitchen will smell amazing, and the taste will be even better.

Apple Streusel Muffins Delicious and Easy Recipe Guide

Are you ready to fill your kitchen with the warm, sweet smell of freshly baked Apple Streusel Muffins? In this

- 4 boneless, skinless chicken thighs - 2 cups fresh green beans, trimmed - 1/4 cup honey - 3 tablespoons soy sauce - 3 cloves garlic, minced - 1 tablespoon olive oil - 1 teaspoon ground ginger - 1/2 teaspoon black pepper - Salt to taste - 1 teaspoon sesame seeds (for garnish) When making honey garlic chicken, the main ingredients are key. The chicken thighs give a juicy base. Fresh green beans add color and crunch. Next, we need the marinade. Honey brings sweetness. Soy sauce adds saltiness. Garlic gives a strong flavor. Olive oil helps everything stick. Ground ginger adds warmth, while black pepper gives a little spice. You can adjust the salt to your taste. Finally, sesame seeds make a lovely garnish. They add a nutty flavor and nice texture. This simple combination makes the dish shine. Enjoy the balance of flavors and textures in every bite! - Preheat your oven to 400°F (200°C). This step is key for great cooking. - Line a baking sheet with parchment paper. It helps with easy cleanup later. To make the marinade, grab a bowl. Add 1/4 cup of honey, 3 tablespoons of soy sauce, 3 minced garlic cloves, 1 tablespoon of olive oil, 1 teaspoon of ground ginger, and 1/2 teaspoon of black pepper. Whisk these together well. This mix gives your chicken amazing flavor. Take 4 boneless, skinless chicken thighs. Place them in a large resealable bag or a shallow dish. Pour half of your marinade over the chicken. Seal the bag or cover the dish. Let it marinate in the fridge for at least 30 minutes. For even more flavor, you can let it sit for up to 2 hours. For optimal marination, try to use a shallow dish. This allows the marinade to coat the chicken evenly. If you are short on time, 30 minutes will still add good flavor. After marinating, take the chicken out of the fridge. Place the chicken on the prepared baking sheet. Make sure to space them out well. Now, take the remaining marinade. Toss the 2 cups of green beans in the marinade until they are well coated. Spread the green beans around the chicken on the sheet pan. Bake everything in your preheated oven for 25 to 30 minutes. Check that the chicken is cooked through. It should reach an internal temperature of 165°F (75°C). The green beans should be tender but still crisp. Once it’s done, remove the pan from the oven. Let it rest for 5 minutes. Before serving, sprinkle 1 teaspoon of sesame seeds over the chicken and green beans. Enjoy your delicious meal! To ensure chicken is cooked through, use a meat thermometer. The chicken should reach 165°F (75°C). This keeps it juicy and safe to eat. Check the thickest part of the thigh. For perfect green beans, cook them until they are tender but still crisp. Toss them in the marinade just before baking. This gives them full flavor without overcooking. For a rustic look, serve the meal directly from the sheet pan. It looks casual yet inviting. You can also plate the chicken and green beans for a more polished appearance. To garnish, sprinkle fresh herbs like parsley or cilantro over the dish. This adds color and a fresh taste that enhances the meal. Use a large, rimmed baking sheet for even cooking. A non-stick or parchment-lined sheet helps with cleanup too. For preparation, a whisk is great for mixing the marinade. A resealable bag or shallow dish works well for marinating the chicken. Both make it easy to coat the meat fully. {{image_2}} You can switch out chicken thighs for chicken breasts or drumsticks. Chicken breasts are leaner and cook faster. Drumsticks have more flavor and stay juicy. Both options work well with the marinade. If you don’t have green beans, try broccoli or snap peas. Broccoli adds a nice crunch, while snap peas bring a sweet snap. Both can cook in the same time as green beans. Want a little heat? Add some red pepper flakes or a pinch of cayenne. These spices give a nice kick without overpowering the dish. You can also use fresh ginger instead of ground for a bolder taste. For more variety, add colorful bell peppers or carrots. These veggies add sweetness and texture. Just chop them into similar sizes as the other veggies for even cooking. If you prefer grilling, this recipe works great on the grill too. Just marinate the chicken and veggies as usual. Then, grill them for about 15-20 minutes, turning occasionally. This method gives a smoky flavor. You can also use an Instant Pot or slow cooker. For the Instant Pot, add chicken, marinade, and veggies. Cook on high for 10 minutes with a quick release. If using a slow cooker, cook on low for 4-5 hours. Both methods make the chicken tender and full of flavor. Store your Honey Garlic Chicken and Green Beans in an airtight container. This keeps it fresh. Place the dish in the fridge within two hours of cooking. If stored properly, it lasts up to three days. To reheat in the oven, preheat it to 350°F (175°C). Place the chicken and green beans on a baking sheet. Cover with foil to prevent drying out. Heat for about 15-20 minutes or until warm. For microwave reheating, use a microwave-safe plate. Cover the food with a damp paper towel. Heat in 30-second intervals until fully hot. This keeps it moist and tasty. You can freeze leftovers for later use. First, let the dish cool completely. Then, place it in a freezer-safe container or bag. It can last up to three months in the freezer. When ready to eat, thaw in the fridge overnight. After thawing, you can reheat it using the oven or microwave. This way, you enjoy a quick meal any time! The cook time for Honey Garlic Chicken and Green Beans is about 25 to 30 minutes. Preheat your oven to 400°F (200°C). Bake until the chicken reaches an internal temperature of 165°F (75°C). The green beans should be tender yet crisp. Yes, you can use bone-in chicken. Bone-in chicken will need more time to cook, usually about 35 to 40 minutes. The flavor will be richer due to the bones. Always check that the chicken is fully cooked. You can add many vegetables to this dish. Carrots, bell peppers, or broccoli work well. Just remember to adjust cooking times. For quicker-cooking veggies, you might add them halfway through baking. This keeps everything fresh and tasty. This recipe brings together simple ingredients for a delicious meal. You learned how to marinate chicken thighs and perfect green beans. We covered tips for cooking and storing leftovers. Don't forget that you can switch ingredients or cooking methods to suit your taste. With these ideas, you can enjoy this dish many different ways. Make it your own and savor every bite!

Honey Garlic Chicken and Green Beans Sheet Pan Delight

Looking for a quick, tasty dinner? Try my Honey Garlic Chicken and Green Beans Sheet Pan Delight! This easy dish

For this recipe, you can use either store-bought or homemade pizza dough. Store-bought dough saves time and is easy to find. Look for fresh or frozen options. If you have the time and want to try, homemade dough adds a personal touch. It allows you to control the flavors and texture. Both options work great for making garlic knots. The flavor comes from garlic, herbs, and seasoning. Use four cloves of minced garlic for a bold taste. You can mix in dried Italian herbs like oregano, basil, and thyme. These herbs bring warmth and depth to the knots. If you like a bit of heat, add half a teaspoon of red pepper flakes. Adjust the salt to your taste. This blend creates a savory garlic butter that coats the knots perfectly. Garnishing adds an extra touch to your garlic knots. Chopped fresh parsley brightens the dish with color and flavor. You can also sprinkle some grated cheese on top for a cheesy twist. Other herbs like rosemary or thyme can enhance the taste. Feel free to get creative with your garnishes! To start, preheat your air fryer to 400°F (200°C) for about 5 minutes. Next, take your pizza dough and place it on a clean surface. Roll it out into a rectangle that is about 1/4 inch thick. This thickness helps the knots cook well. Use a sharp knife or a pizza cutter to slice the dough into strips. Each strip should be about 1 inch wide and 6 inches long. Now comes the fun part! Take one strip of dough and tie it into a knot. Start by making a loop and then twist the ends around each other. Tuck the ends underneath to keep the knot secure. This helps them hold their shape while cooking. Place your formed knots on a plate as you go. Make sure you have enough space for all the knots. In a small bowl, combine 4 tablespoons of melted butter with 4 cloves of minced garlic. Add 1 teaspoon of dried Italian herbs, like oregano, basil, and thyme, to the mix. If you like a little heat, toss in 1/2 teaspoon of red pepper flakes. Finally, add a pinch of salt. Mix everything well until it becomes a smooth garlic butter mixture. This will give the knots a lovely flavor. Place the knots in the air fryer basket in a single layer. Make sure they don’t touch each other to allow even cooking. You may need to cook them in batches. Air fry the knots for 8 to 10 minutes. You want them to be golden brown and fully cooked. Keep an eye on them to avoid overcooking. When they are done, take them out and brush any leftover garlic butter on top. Garnish with chopped fresh parsley before serving. Enjoy your delicious air fryer garlic knots! To get those garlic knots just right, look for a nice golden brown color. Check the knots at about 8 minutes. If they aren’t brown yet, give them another minute. They should feel firm to the touch. If you want extra crispiness, air fry them for another minute or two. Just watch closely to avoid burning. Every air fryer cooks a bit differently. If your air fryer runs hot, reduce the cooking time by a minute or two. If your knots are still pale after 10 minutes, add more time. Always check them early. Write down the time that works best for your air fryer. This way, you can make the perfect garlic knots every time. Garlic knots taste amazing with dips. Try marinara sauce for a classic touch. You can also serve them with ranch dressing or garlic aioli. For a fun twist, pair them with a spicy dip. Fresh parsley on top adds color and flavor. Serve them warm for the best taste. Your family and friends will love these tasty bites! {{image_2}} You can add different flavors to your garlic knots. Cheese is a great option. Try adding shredded mozzarella or parmesan before you tie the knots. Pesto sauce can bring a fresh taste. Just spread a thin layer on the dough before cutting. You can also explore spices like smoked paprika or cumin. These spices add a unique twist and make your knots even more fun. If you need a gluten-free option, use gluten-free pizza dough. Many stores sell this type of dough. You can also make your own using almond flour or coconut flour. Just follow a gluten-free recipe. For a low-carb option, try using cauliflower dough. It’s easy to make and works well for knots. These alternatives let everyone enjoy garlic knots, no matter their diet. Garlic knots can be served in many ways. They make great appetizers for parties. Serve them with marinara sauce for dipping. You can also pair them with salads or pasta as a main dish. For a fun twist, turn them into sliders. Slice them open and add your favorite sandwich fillings. The options are endless. Enjoy exploring different ways to serve your delicious garlic knots! To keep your garlic knots fresh, store them in an airtight container. You can refrigerate the knots for up to three days. If you want them to last longer, freeze them. Wrap each knot in plastic wrap and then place them in a freezer bag. This helps prevent freezer burn. Reheat the garlic knots in your air fryer for about 3-5 minutes at 350°F (175°C). This method keeps them crispy. You can also use an oven. Just place them on a baking sheet at 350°F (175°C) for about 5-7 minutes. Avoid the microwave, as it can make them soggy. Garlic knots can last in the fridge for about 3 days. If frozen, they are best used within three months. After this time, they may lose flavor and texture. Always check for signs of spoilage before eating. You typically cook garlic knots in the air fryer for 8 to 10 minutes at 400°F (200°C). Smaller knots may cook faster, while larger ones may need a bit longer. Always check them at the 8-minute mark. Look for a golden brown color and a fluffy texture. This way, you get perfect garlic knots every time. Yes, you can use homemade pizza dough! Just make sure your dough is soft and elastic. Roll it out to about 1/4 inch thick, then cut it into strips. Homemade dough gives you a fresher taste but may take a bit more effort. Store-bought dough is quick and easy. Both options work great for making delightful garlic knots. You can add various toppings to your garlic knots. Some popular options are: - Grated Parmesan cheese - Shredded mozzarella cheese - Fresh herbs like basil or thyme - Additional spices like garlic powder or Italian seasoning Feel free to mix and match toppings based on your taste. This adds extra flavor to your garlic knots. Yes, you can prepare garlic knots ahead of time. Form the knots and store them on a plate, covered with plastic wrap, in the fridge for up to 24 hours. When ready to cook, just brush them with garlic butter and pop them in the air fryer. You can also freeze the formed knots for up to a month. To cook from frozen, add an extra 2-3 minutes to the cooking time. This makes it easy to enjoy fresh garlic knots any time! In this article, I covered how to make delicious garlic knots. We explored dough options, flavor enhancements, and garnishing ideas. You learned step-by-step instructions on preparing, tying, and cooking the knots in an air fryer. No matter your cooking skill, you can enjoy tasty garlic knots. Experiment with spices and toppings to make them your own. Follow the tips for perfect results every time. Enjoy your cooking journey and share these knots with family and friends!

Air Fryer Garlic Knots Savory and Simple Recipe

If you love garlic and dough, you’re in for a treat! Today, I’ll show you how to make Air Fryer

To make Minute Spicy Peanut Noodles, gather these key ingredients: - 8 oz. noodles (rice noodles or spaghetti) - 1/4 cup creamy peanut butter - 2 tablespoons soy sauce (low sodium) - 2 tablespoons sriracha (adjust to taste) - 1 tablespoon maple syrup (or honey) - 1 tablespoon sesame oil - 1 clove garlic, minced - 1 teaspoon fresh ginger, grated - 1/4 cup green onions, chopped - 1/4 cup crushed peanuts (for garnish) - Fresh cilantro (for garnish) - Lime wedges (for serving) These ingredients create a rich, spicy flavor that makes this dish shine. You can swap out some ingredients if needed: - Use whole wheat noodles for a healthier option. - Almond butter works well if you don’t have peanut butter. - Coconut aminos can replace soy sauce for a gluten-free choice. - Agave syrup can be used instead of maple syrup for sweetness. These swaps maintain taste while fitting your needs. Garnishes add fun and flavor: - Top with crushed peanuts for extra crunch. - Fresh cilantro gives a burst of freshness. - Lime wedges add a zesty kick. Feel free to get creative with your garnishes! First, bring a large pot of water to a boil. Add 8 oz. of noodles. You can use rice noodles or spaghetti. Cook the noodles according to the package instructions until they are al dente. This usually takes about 4 to 6 minutes. Once done, drain the noodles in a colander. Set them aside, but don't rinse them. This keeps the starch, helping the sauce stick better. In a small bowl, gather your ingredients for the sauce. Add 1/4 cup of creamy peanut butter. Then, mix in 2 tablespoons of low-sodium soy sauce. Next, add 2 tablespoons of sriracha. Adjust this based on how spicy you want it. For some sweetness, add 1 tablespoon of maple syrup or honey. Then, pour in 1 tablespoon of sesame oil. Finally, add 1 clove of minced garlic and 1 teaspoon of grated fresh ginger. Whisk everything together until it is smooth and creamy. In the same pot where you cooked the noodles, add the drained noodles back in. Pour the peanut sauce over the noodles. Toss everything well to coat the noodles evenly in the sauce. Stir in 1/4 cup of chopped green onions for freshness. Serve the noodles in deep bowls. Top each bowl with 1/4 cup of crushed peanuts and some fresh cilantro. Don’t forget to squeeze a lime wedge over the top for a burst of flavor. Enjoy your quick and flavorful meal! To get the sauce just right, mix the peanut butter well. Start with creamy peanut butter for smoothness. If the sauce is too thick, add a little water or more soy sauce. This will help it coat the noodles better. Keep mixing until it looks glossy and smooth. These spicy peanut noodles taste great with many sides. Try serving them with grilled chicken or sautéed shrimp for protein. You can also add steamed broccoli or snap peas for crunch. Fresh cucumber slices add a nice coolness to balance the spice. Lime wedges are perfect for a zesty touch. Using the right tools makes cooking fun! A large pot for boiling noodles is essential. A whisk is great for mixing the sauce smoothly. Use a sharp knife for chopping green onions and garlic. Don’t forget a large bowl for tossing everything together. Having these tools on hand speeds up your cooking time. {{image_2}} You can easily add protein to your Minute Spicy Peanut Noodles. Chicken, tofu, or shrimp work great. For chicken, use cooked, shredded meat. If you prefer tofu, use firm tofu and cut it into cubes. Sauté the tofu until golden before mixing it in. Shrimp is another quick option. Just cook shrimp in a pan until they turn pink. Mix your chosen protein with the noodles and sauce for a hearty meal. If you want a vegetarian or vegan dish, skip the chicken or shrimp. You can add more veggies instead. Try bell peppers, carrots, or snap peas for crunch. Adding mushrooms gives a nice umami flavor. For a vegan twist, ensure your maple syrup is 100% pure and check your soy sauce for additives. These changes make the dish healthy and satisfying without meat. Want to kick up the flavor? Add extra spices or veggies! Red pepper flakes can boost the heat. You can also try a splash of lime juice for zest. Sauté garlic and onions with your veggies to add depth. Fresh herbs like basil or mint can make your dish pop, too. Experiment with your favorite flavors to make each serving unique. To store leftover Minute Spicy Peanut Noodles, first let them cool down. Place the noodles in an airtight container. Make sure to cover them well to keep moisture in. You can keep them in the fridge for up to three days. This way, you can enjoy this tasty dish later! When you’re ready to eat, you can reheat the noodles easily. Use a microwave-safe bowl and add a splash of water. This helps keep the noodles from drying out. Heat in short bursts of 30 seconds, stirring in between. You can also reheat them in a skillet over medium heat. Just add a little sesame oil or water to keep them moist. If you want to keep your noodles longer, freezing is a great choice. Portion the noodles into small containers or zip-top bags. Make sure to remove as much air as possible. They can last up to three months in the freezer. When you’re ready to eat, just thaw them overnight in the fridge. Reheat as mentioned earlier for a quick meal. Yes, you can use other noodles. Rice noodles and spaghetti work well. You can also try soba noodles or udon. Each type brings its own flavor and texture. Just make sure to cook them as per the package instructions. This way, you get the best taste and feel for your dish. To reduce the spice, cut back on sriracha. Start with one teaspoon instead of two. You can also add more peanut butter to balance the heat. Mixing in a bit of sugar or maple syrup helps too. If you want, serve the dish with lime wedges on the side. Lime juice can help tone down the spice as well. Spicy peanut noodles go well with many dishes. Try serving them with grilled chicken or tofu for protein. A simple side salad adds freshness and crunch. You can also serve steamed veggies for a healthy touch. For a full meal, pair it with spring rolls or dumplings. These options complement the flavors nicely. This blog post covered everything you need for spicy peanut noodles. We explored key ingredients, cooking steps, and handy tips. You learned how to make the sauce just right and what tools help in the kitchen. We also looked at tasty variations and smart ways to store leftovers. To wrap it up, these noodles are fun to make and customize. With practice, you’ll create a dish your friends and family will love. Enjoy your cooking journey with these delicious flavors!

Minute Spicy Peanut Noodles Fast and Flavorful Meal

Looking for a quick, tasty meal? Try my Minute Spicy Peanut Noodles! They’re ready in just a few minutes and

Older posts
Newer posts
← Previous Page1 … Page18 Page19 Page20 … Page84 Next →

dsad

© 2026 juliesdish • Built with GeneratePress

Our Policies

  • Copyright Policy
  • Cookie Policy
  • GDPR Policy
  • Privacy Policy
  • Disclaimer
  • Terms Of Use

More Information

  • Home
  • About
  • Contact
  • Appetizers
  • Dessert
  • Dinner
  • Drinks
©2026, juliesdish About Back To Top