Indulge your sweet tooth with my Chocolate Dipped Cannoli Cones recipe! Combining creamy ricotta, rich mascarpone, and a delightful chocolate dip, these treats are perfect for any occasion. Whether you're a seasoned baker or a curious beginner, I’ll guide you step-by-step to create a delicious dessert that impresses. Let’s dive into this fun, mouthwatering recipe that will make your friends and family ask for seconds!
Why I Love This Recipe
- Decadent Flavor: The combination of creamy ricotta and mascarpone with rich chocolate creates a heavenly dessert that satisfies any sweet tooth.
- Fun Presentation: Serving cannoli in sugar cones adds a playful twist and makes them easy to enjoy at parties or gatherings.
- Customizable Toppings: You can easily switch up the garnishes with nuts, sprinkles, or even seasonal fruits to match any occasion.
- Quick and Easy: This recipe takes less than an hour to prepare, making it a perfect last-minute dessert option that impresses!
Ingredients
List of Ingredients
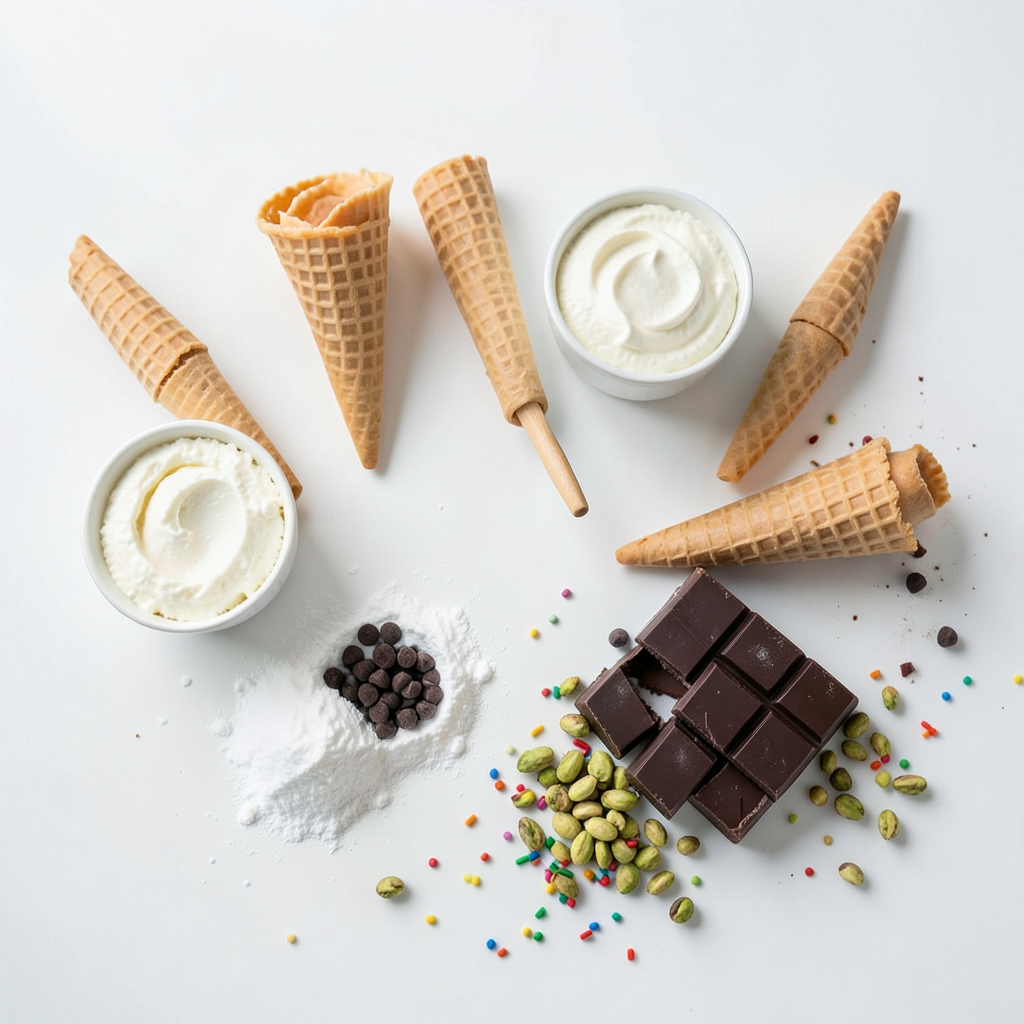
- 6 sugar cones
- 1 ½ cups ricotta cheese
- 1 ½ cups mascarpone cheese
- ½ cup powdered sugar
- 1 teaspoon vanilla extract
- ½ cup mini chocolate chips
- 4 ounces dark chocolate, chopped
- 1 tablespoon coconut oil
- Garnishes: Chopped pistachios or colorful sprinkles
Gather these ingredients to create your chocolate dipped cannoli cones. First, you'll need sugar cones, which act as the crunchy shell. Ricotta cheese and mascarpone cheese create a creamy and rich filling. The powdered sugar adds sweetness, while the vanilla extract gives a lovely flavor. Mini chocolate chips add delightful bites of chocolate throughout.
For the chocolate dipping, dark chocolate and coconut oil come together to create a smooth coating. You can choose chopped pistachios or colorful sprinkles for a fun finish. Each ingredient plays a key role in making these cones a treat you will love.
Make sure to measure your ingredients accurately for the best results. Fresh ingredients will ensure your cannoli cones taste amazing. Enjoy the process of preparing these delightful treats!
Step-by-Step Instructions
Preparing the Cannoli Filling
1. In a large mixing bowl, add the ricotta cheese, mascarpone cheese, and powdered sugar.
2. Mix these ingredients well until they become smooth and creamy.
3. Next, add the vanilla extract for flavor. Stir it in gently.
4. Fold in the mini chocolate chips. Make sure they are evenly mixed in.
Filling the Sugar Cones
1. Grab a piping bag or a ziplock bag. Cut one corner off the bag if using a ziplock.
2. Carefully fill each sugar cone with the cannoli filling. Fill them generously.
3. Make sure the filling goes all the way to the top.
Melting and Dipping the Chocolate
1. In a microwave-safe bowl, combine the chopped dark chocolate and coconut oil.
2. Melt this mixture in the microwave in 30-second intervals. Stir after each time.
3. Once smooth, dip the filled end of each cone into the melted chocolate.
4. Let any excess chocolate drip off.
5. Immediately sprinkle chopped pistachios or colorful sprinkles on the chocolate.
6. Place the dipped cones upright in a cup or on a baking sheet lined with parchment paper.
7. Refrigerate for about 30 minutes to let the chocolate set.
8. Serve chilled for a delightful dessert experience!
Tips & Tricks
Ensuring Smooth Cannoli Filling
To make your filling smooth, mix ricotta and mascarpone well. Use a sturdy whisk or electric mixer. This helps to blend the cheeses into a creamy base. Add powdered sugar and vanilla next. Mix until there are no lumps. If you find lumps, keep mixing. Folding in mini chocolate chips should be gentle. This keeps the filling fluffy and light.
Perfect Chocolate Dipping
When melting chocolate, use dark chocolate and coconut oil. This mix creates a great dipping chocolate. Melt them in 30-second bursts in the microwave. Stir after each burst until smooth. Check the consistency; it should be shiny and easy to dip. To prevent hardening, keep the melted chocolate warm. You can place it over a warm pot of water.
Serving Suggestions
Serve the cannoli cones chilled. The cool filling contrasts nicely with the warm chocolate. For drinks, try pairing with coffee or sweet dessert wine. These flavors complement each other well. You can also serve with fresh fruit for extra color and taste. Enjoy these delightful treats with family or friends!
Pro Tips
- Use Fresh Ingredients: Ensure that your ricotta and mascarpone cheeses are fresh for the best flavor and texture in your filling.
- Melt Chocolate Properly: When melting chocolate, do it in small intervals and stir frequently to avoid burning.
- Chill the Filling: For a firmer texture, chill the cannoli filling before piping it into the cones.
- Experiment with Toppings: Feel free to mix up the toppings – crushed nuts, sprinkles, or even edible glitter can add a fun twist!
Variations
Flavor Variations
You can change the cheeses for different flavors. Try using ricotta alone for a lighter taste. Or use cream cheese for a richer filling. Adding flavored extracts can also enhance your cannoli. Almond or orange extracts add a nice twist. Just a few drops can make a big difference!
Garnishment Ideas
Toppings can make your cannoli even more special. Instead of pistachios, try crushed almonds or walnuts. You can also use coconut flakes for a tropical vibe. For seasonal treats, consider red and green sprinkles for Christmas. Or use pastel colors for Easter celebrations. The right garnish can add fun and flair!
Dietary Modifications
Need gluten-free options? Use gluten-free sugar cones. They work just as well and taste great! If you're looking for vegan alternatives, swap the cheeses for cashew cream. You can make cashew cream by soaking nuts and blending them with a bit of water. Use coconut chocolate instead of dark chocolate for dipping. These changes keep the joy of cannoli while meeting dietary needs!
Storage Info
Best Storage Practices
To keep your chocolate dipped cannoli cones fresh, store them in the fridge. Use a covered container to prevent them from drying out. You can also place parchment paper between cones to avoid sticking. They taste best within 2 to 3 days. After that, the cones may get soft.
Freezing Cannoli Cones
You can freeze cannoli cones for later enjoyment. Here’s how:
1. Prepare the cones: Do not dip them in chocolate yet.
2. Wrap each cone: Use plastic wrap to cover them tightly.
3. Store in a freezer bag: Label it with the date.
4. Freeze: Cannoli cones can last up to 2 months in the freezer.
When you're ready to eat, here’s how to thaw:
- Take them out of the freezer.
- Let them sit in the fridge overnight.
- Once thawed, dip them in chocolate and garnish.
Reheating Instructions
If you want to serve your cannoli cones warm, you can use a simple method:
- Preheat your oven to 350°F (175°C).
- Place the cones upright on a baking sheet.
- Heat for about 5 to 7 minutes.
This warms the filling and slightly melts the chocolate, making each bite even more delightful!
FAQs
What can I use instead of mascarpone cheese?
You can use cream cheese as a substitute. Cream cheese gives a nice creaminess. Mix it with a bit of sour cream for a better texture. If you want a lighter option, try Greek yogurt. It gives a nice tang and is less rich.
Can I make these ahead of time?
Yes, you can make these ahead of time. Prepare the filling and fill the cones. Cover them tightly and store them in the fridge. Enjoy them within two days for the best taste. The chocolate coating may soften, but they will still be yummy.
How do I know when the chocolate has melted correctly?
The chocolate should be smooth and shiny. Stir it well after each interval in the microwave. It should not have any lumps. If it looks grainy, it may have overheated. Always melt in short bursts to keep it just right.
Can I substitute sugar cones with other types of cones?
Absolutely! You can use waffle cones or even chocolate cones. Waffle cones add a nice crunch. Chocolate cones give extra flavor. Choose what you like best for your treat!
You’ve learned how to make these tasty cannoli-filled sugar cones. We covered the key ingredients, step-by-step filling techniques, and the best ways to dip in chocolate. I shared helpful tips for smooth filling and exciting variations for everyone’s taste. Remember, these sweets can be stored or modified to fit diets. Enjoy making them, and share your results with friends! You’ll impress anyone who takes a bite.