![- 2 cups all-purpose flour - 1 teaspoon baking powder - 1 teaspoon baking soda - 1 teaspoon ground cinnamon - 1/2 teaspoon ground nutmeg - 1/2 teaspoon salt - 3/4 cup granulated sugar - 1/2 cup packed brown sugar - 1/2 cup unsalted butter, softened - 2 large eggs - 1 cup canned pumpkin puree - 1/4 cup milk - 1 teaspoon vanilla extract For the Pecan Streusel Topping: - 1/2 cup all-purpose flour - 1/2 cup chopped pecans - 1/2 cup brown sugar - 1/2 teaspoon ground cinnamon - 1/4 cup unsalted butter, melted The flour gives structure to the cake. I prefer all-purpose flour for a light texture. Baking powder and baking soda help the cake rise, making it fluffy. Ground cinnamon and nutmeg add warm spices that remind us of fall. Salt balances the sweetness in this treat. I use granulated sugar for sweetness and brown sugar for a rich, caramel flavor. The unsalted butter keeps the cake moist and adds a creamy taste. Eggs act as a binder, helping to hold everything together. Canned pumpkin puree gives moisture and a lovely pumpkin flavor. Milk helps mix and keep the batter smooth, while vanilla extract adds a nice touch of sweetness. For the pecan streusel topping, I use more flour, chopped pecans for crunch, and brown sugar for sweetness. Ground cinnamon in the streusel brings the flavors together, while melted butter makes it crumbly. If you need a gluten-free option, substitute the all-purpose flour with a gluten-free blend. For a dairy-free cake, use coconut oil instead of butter and almond milk for the milk. You can also replace eggs with flax eggs. To make a vegan version, use a plant-based butter and skip the eggs. If you want less sugar, try using a sugar substitute or applesauce. First, set your oven to 350°F (175°C). This is the perfect temperature for baking. While it heats up, grab a 9x13 inch baking pan. Grease it well with butter and sprinkle flour all around. This step helps the cake come out easily after baking. In a medium bowl, mix the dry ingredients. Combine 2 cups of flour, 1 teaspoon of baking powder, and 1 teaspoon of baking soda. Add 1 teaspoon of ground cinnamon, 1/2 teaspoon of nutmeg, and 1/2 teaspoon of salt. Stir these together and set aside. In a larger bowl, beat 1/2 cup of softened butter and 3/4 cup of granulated sugar with an electric mixer. Once it’s light and fluffy, add 1/2 cup of brown sugar. Mix well. Next, add 2 large eggs one at a time. Then, mix in 1 cup of pumpkin puree, 1/4 cup of milk, and 1 teaspoon of vanilla extract until smooth. In another bowl, make the streusel topping. Mix 1/2 cup of flour, 1/2 cup of chopped pecans, and 1/2 cup of brown sugar together. Sprinkle in 1/2 teaspoon of ground cinnamon. Pour in 1/4 cup of melted butter and mix until it looks crumbly. This topping will add a nice crunch. Now, it's time to layer everything. Pour half of the coffee cake batter into your prepared pan. Then, sprinkle half of the streusel topping on top. Pour the rest of the batter over this layer. Finish by adding the remaining streusel topping. Bake in your preheated oven for 35-40 minutes. To check if it’s done, insert a toothpick into the center. If it comes out clean, your cake is ready! Let it cool in the pan for about 10-15 minutes before slicing. Enjoy it warm or at room temperature. For the complete recipe, check the Full Recipe. To make a great Pumpkin Pecan Streusel Coffee Cake, follow these steps: - Use fresh ingredients: Fresh baking powder and spices make a big difference. - Measure flour correctly: Spoon flour into the cup and level it off for accuracy. - Preheat your oven: Always preheat for even baking. This step is key. - Grease the pan: Use butter or cooking spray to prevent sticking. A fluffy cake is all about mixing. Here are my tips: - Cream butter and sugars well: Mix them until light and fluffy. This adds air. - Don’t overmix the batter: Stop mixing as soon as it comes together. A few lumps are fine. - Use room temperature eggs: They mix better and help the batter rise. Pair this coffee cake with your favorite drinks or snacks. Here are my ideas: - Coffee or tea: The warm spices complement both drinks. - Vanilla ice cream: A scoop on the side adds a delightful contrast. - Fresh fruit: Slices of apple or pear enhance flavors and add freshness. For a full recipe, check the [Full Recipe]. {{image_2}} You can easily make this coffee cake gluten-free. Just swap the all-purpose flour for a gluten-free blend. Many brands offer mixes that work great in baking. Make sure the mix has a good balance of starches and flours for the best results. This change keeps the cake light and fluffy. Always check the label to ensure it is gluten-free. Want to switch things up? You can add chocolate chips to the batter. Chocolate pairs well with pumpkin and pecans. Just fold in about 1 cup of semi-sweet chocolate chips. If you prefer a nutty twist, try swapping pecans for walnuts or almonds. Each nut adds its own flavor and crunch. For a spicier kick, add a pinch of ginger or cloves to the batter. This will enhance the warmth of the pumpkin. While pecans are great, you can explore other toppings. Try oats for a chewy texture. Mixing oats with brown sugar creates a nice crunch. You can also use coconut flakes for a tropical twist. If you want a sweeter finish, drizzle some caramel sauce over the warm cake. It adds a rich layer of flavor that is hard to resist. For a simpler option, just sprinkle powdered sugar on top before serving. Each variation offers a new way to enjoy this delicious treat. For complete details on making this cake, check out the Full Recipe. To keep your coffee cake fresh, store it in an airtight container. Place a paper towel inside to absorb any moisture. This will help keep the texture nice. You can store it at room temperature for up to three days. If you need to keep it longer, the fridge is a good option. Just remember, it might dry out a bit in the fridge. Freezing is a great way to save extra coffee cake. First, let the cake cool completely. Then, slice it into pieces. Wrap each slice tightly in plastic wrap. Place the wrapped slices in a freezer bag or container. Label it with the date. You can freeze the cake for up to three months. When you're ready to enjoy it, simply thaw it in the fridge overnight. To reheat your coffee cake, preheat your oven to 350°F (175°C). Place the slice on a baking sheet. Heat it for about 10-15 minutes. This will warm it up while keeping it soft. You can also use the microwave for quick reheating. Heat on medium for about 20-30 seconds. Be careful not to overheat, or it may become tough. Enjoy your warm slice with a nice cup of coffee! For the full recipe, check out the provided details. You can swap some ingredients for healthier options. Use whole wheat flour instead of all-purpose flour. This increases fiber. You can also reduce sugar by using a sugar substitute or less granulated sugar. For a lighter version, use unsweetened applesauce in place of butter. This will keep the cake moist while lowering fat content. Yes, you can prepare this coffee cake in advance. Bake the cake and let it cool completely. Wrap it well in plastic wrap or foil. Store it in the fridge for up to three days. You can also freeze it for up to three months. Just remember to thaw it in the fridge overnight before serving. To keep your coffee cake moist, do not overmix the batter. A few lumps are okay. Use fresh pumpkin puree for best results. Additionally, avoid overbaking. Check the cake a few minutes early with a toothpick. If it comes out clean, it's ready. Finally, don’t forget to let the cake cool in the pan for a bit before serving. This helps retain moisture. For the full recipe, check out the Pumpkin Pecan Streusel Coffee Cake section above! This blog post covered everything you need to know about making Pumpkin Pecan Streusel Coffee Cake. We explored the key ingredients and their roles, shared step-by-step baking instructions, and offered tips for the perfect texture and flavor. You now have ideas for variations and clear storage instructions. Remember, this cake is versatile and can adapt to your needs. Enjoy baking, sharing, and savoring this delightful treat!](https://juliesdish.com/wp-content/uploads/2025/07/6b77673b-366a-413c-a5ec-9bbfcdf46b81.webp)
Pumpkin Pecan Streusel Coffee Cake Delightful Treat
Looking for a warm, cozy treat? This Pumpkin Pecan Streusel Coffee Cake is just the answer. With layers of spiced

Looking for a warm, cozy treat? This Pumpkin Pecan Streusel Coffee Cake is just the answer. With layers of spiced
![- 4 large flour tortillas - 2 cups shredded cheese (Mexican blend or your favorite) - 1 cup cooked chicken, shredded - 1 cup black beans, drained and rinsed - 1 cup corn (frozen or canned) - 1 red bell pepper, diced - 1 small red onion, diced - 1 tablespoon taco seasoning - 1 avocado, sliced (for topping) - 1 cup salsa (for serving) - Fresh cilantro, chopped (for garnish) - Cooking spray or olive oil for greasing To make a tasty Loaded Sheet Pan Quesadilla, you'll need these simple ingredients. Start with flour tortillas for a soft base. Choose your cheese—Mexican blend melts great, but any type works. For protein, shredded chicken is easy and delicious. Black beans add fiber and flavor, while corn gives a nice sweetness. Fresh veggies like red bell pepper and onion add crunch and color. A tablespoon of taco seasoning brings all the flavors together. Top off your quesadilla with avocado and salsa for a fresh touch. Don't forget fresh cilantro for a burst of flavor! This recipe is fun and flexible. You can swap out any ingredient you want. Want it vegetarian? Leave out the chicken and add more beans or veggies. The options are endless! For the full recipe, check here: [Full Recipe]. 1. Preheating the oven First, set your oven to 400°F (200°C). This helps cook the quesadilla evenly and makes it crispy. 2. Preparing the filling In a bowl, mix these items: - 1 cup cooked chicken, shredded - 1 cup black beans, drained and rinsed - 1 cup corn (frozen or canned) - 1 red bell pepper, diced - 1 small red onion, diced - 1 tablespoon taco seasoning Stir well. Make sure all the ingredients are coated with the seasoning. 3. Assembling the quesadilla Place two large tortillas on a lined baking sheet. Let them overlap a bit. This covers the pan fully. Spread half of the shredded cheese over the tortillas. Then, add the chicken mixture on top. Finish by adding the rest of the cheese. 1. Layering ingredients Place two more tortillas on top of the filling. Press down gently to secure the layers. 2. Suggested baking time Bake in the oven for 15-20 minutes. The top should turn golden and the cheese should melt. 1. How to slice and serve Once baked, let the quesadilla cool for a few minutes. Then, slice it into wedges. 2. Recommended dips and side dishes Serve with sliced avocado and a cup of salsa. You can also sprinkle fresh cilantro on top for extra flavor. For the full recipe, check the section above. To make your cheese melt perfectly, use a mix of cheeses. A blend of Mexican cheese is great. It melts well and gives a rich flavor. You can also try Monterey Jack or cheddar. To avoid sogginess, don’t overload your quesadilla with too many wet ingredients. Drain beans and corn well. Spread your filling evenly to keep each bite balanced. You can swap out ingredients to fit your taste. Use vegetables like spinach or mushrooms. For protein, try ground beef or shrimp instead of chicken. If you like heat, add sliced jalapeños or a pinch of cayenne. You can also use spicy taco seasoning. Adjust spice levels to match your preferences. For the full recipe, check this [Full Recipe]. {{image_2}} For a meatless option, swap in tasty veggies. Use mushrooms, zucchini, or spinach. You can also add more beans for protein. Black beans or pinto beans work well. A mix of bell peppers adds color and crunch. Don't forget the cheese; it makes it all better! To make it nacho-style, pile on toppings. Add sliced jalapeños for some heat. A dollop of sour cream brings coolness. You can also sprinkle on some tortilla chips for crunch. This twist adds fun and flavor. Serve it with salsa for a dip that everyone loves. For breakfast, think eggs and bacon. Scramble eggs and cook crispy bacon. Layer them on top of the cheese. You can also toss in some diced tomatoes or spinach. This version will kick-start your day. Pair it with salsa or hot sauce for extra flavor. For the full recipe, be sure to check out the details earlier in the article. To keep your loaded sheet pan quesadilla fresh, let it cool first. Once cooled, wrap it tightly in plastic wrap or place it in an airtight container. Store it in the fridge for up to three days. This keeps the quesadilla moist and tasty. For the best results when reheating, use an oven or a skillet. Preheat your oven to 350°F (175°C) and place the quesadilla on a baking sheet. Heat it for about 10-15 minutes. If you use a skillet, warm it over medium heat for 5-7 minutes. Cover it with a lid to melt the cheese evenly. You can freeze loaded quesadillas for later. Wrap each piece in plastic wrap, then place them in a freezer bag. Squeeze out the air before sealing. They last up to three months in the freezer. To reheat, let them thaw in the fridge overnight. Then use the oven or skillet method to warm them up. Enjoy your easy meal at any time! For quesadillas, I love using a mix of cheeses. A Mexican blend works great. It melts well and gives a rich flavor. You can also try cheddar or Monterey Jack. They add a nice taste too. Feel free to mix cheeses for fun flavors! You can prep this recipe ahead of time! Make the filling and store it in the fridge. Then, just assemble and bake when you are ready. If you want, you can even assemble the whole dish. Just cover it and chill until baking time. It saves time during busy days. Look for a golden-brown top. The cheese should be melted and bubbly. This usually takes about 15 to 20 minutes in the oven. If you see the edges crisping up, it's almost ready! Let it cool a bit before slicing for the best results. Yes, you can use corn tortillas! They give a nice flavor and crunch. Just keep in mind that they may break more easily. If you want a firmer quesadilla, consider using flour tortillas. Either way, you’ll get a tasty treat! You learned how to make delicious loaded quesadillas. We covered ingredients, from tortillas to toppings. You saw step-by-step instructions for preparation and baking. I shared tips for perfecting every bite and ideas for fun variations. Proper storage keeps leftovers fresh, while reheating brings them back to life. Whether for lunch or a snack, these quesadillas are tasty and easy to make. Get creative with your fillings and enjoy your cooking journey!](https://juliesdish.com/wp-content/uploads/2025/07/8ff81390-80ae-4784-affc-988618c0f15b.webp)
Craving something tasty and fun to make? Look no further than this Loaded Sheet Pan Quesadilla! It’s packed with flavor,
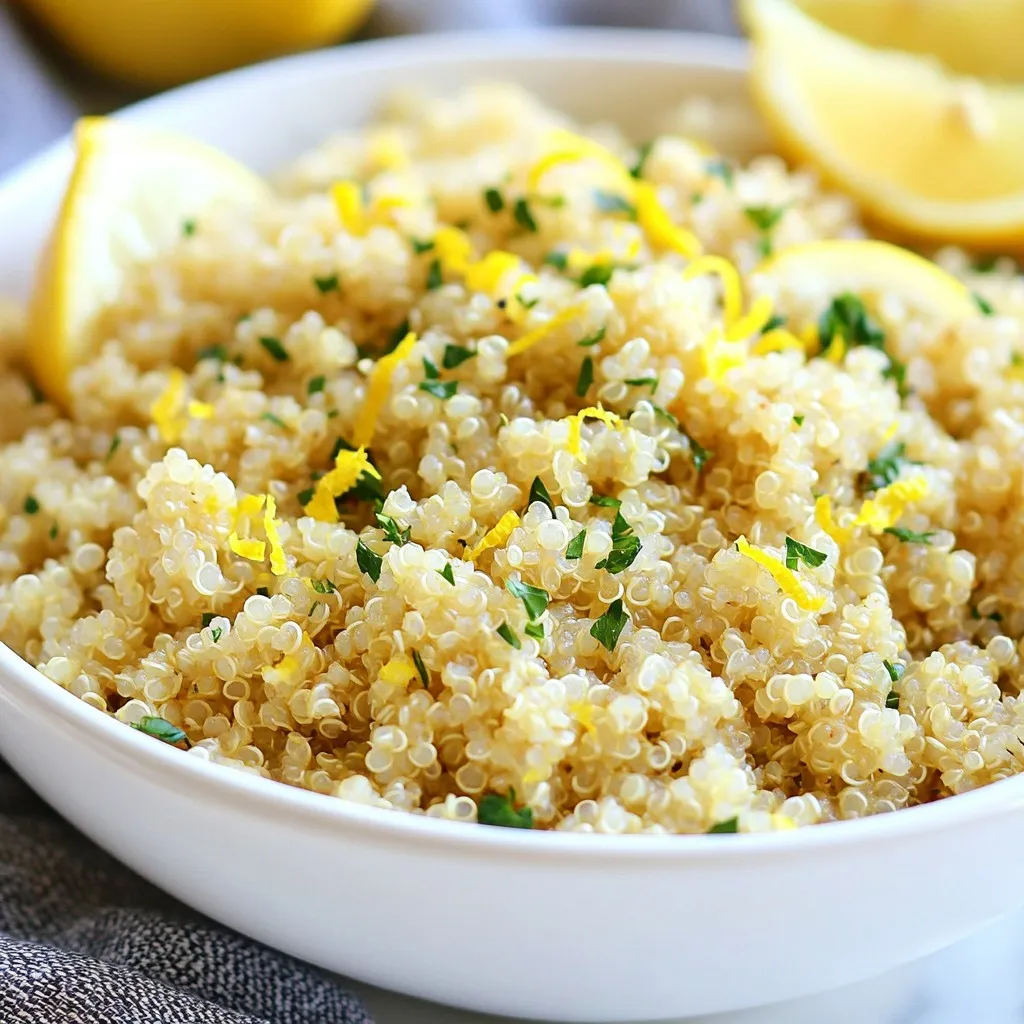
Looking for a quick, tasty dish that’s both healthy and easy to make? You’ve found it! My Instant Pot Lemon

Welcome to my guide on Black Pepper Udon! If you’re looking for a tasty, quick meal, you’ve come to the

Looking for a quick, tasty meal that both kids and adults will love? Try my Air Fryer Parmesan Chicken Tenders!
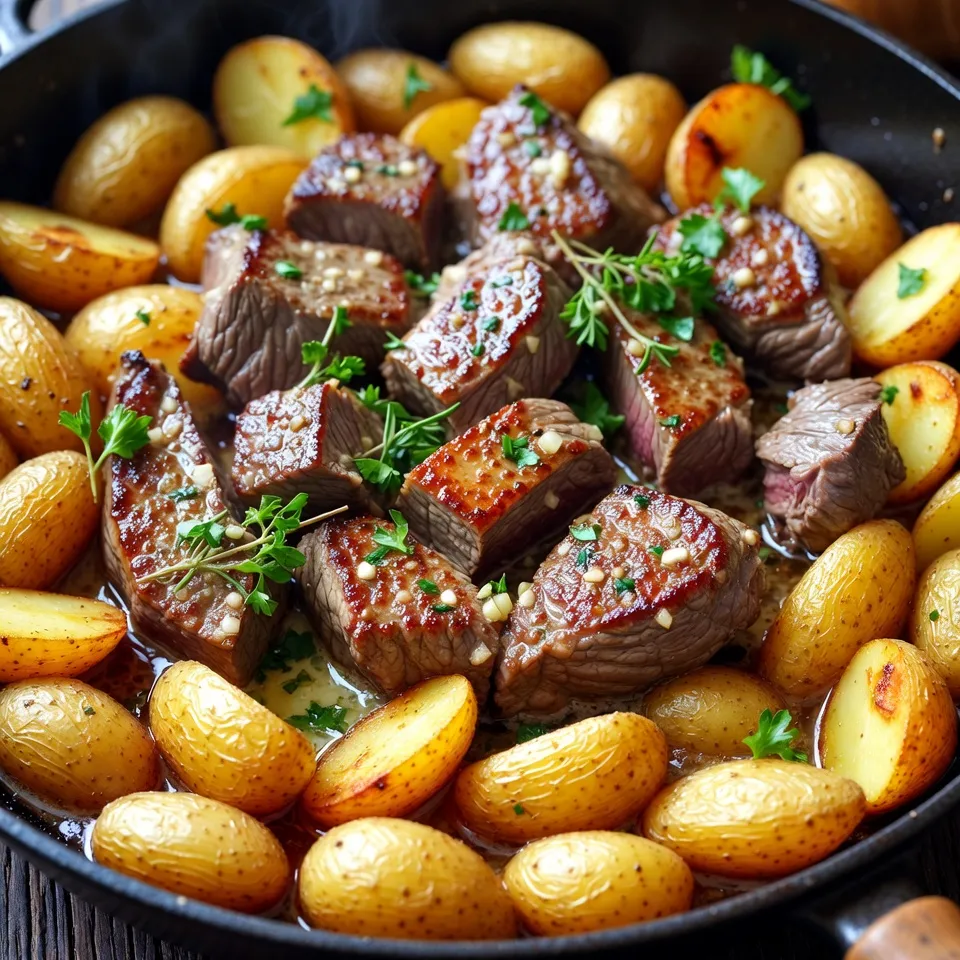
Are you ready to elevate your weeknight dinner? Our Garlic Butter Steak and Potatoes Skillet Delight is your new go-to

Are you ready to fuel your day with a tasty treat? This Chocolate Peanut Butter Protein Shake isn’t just delicious;
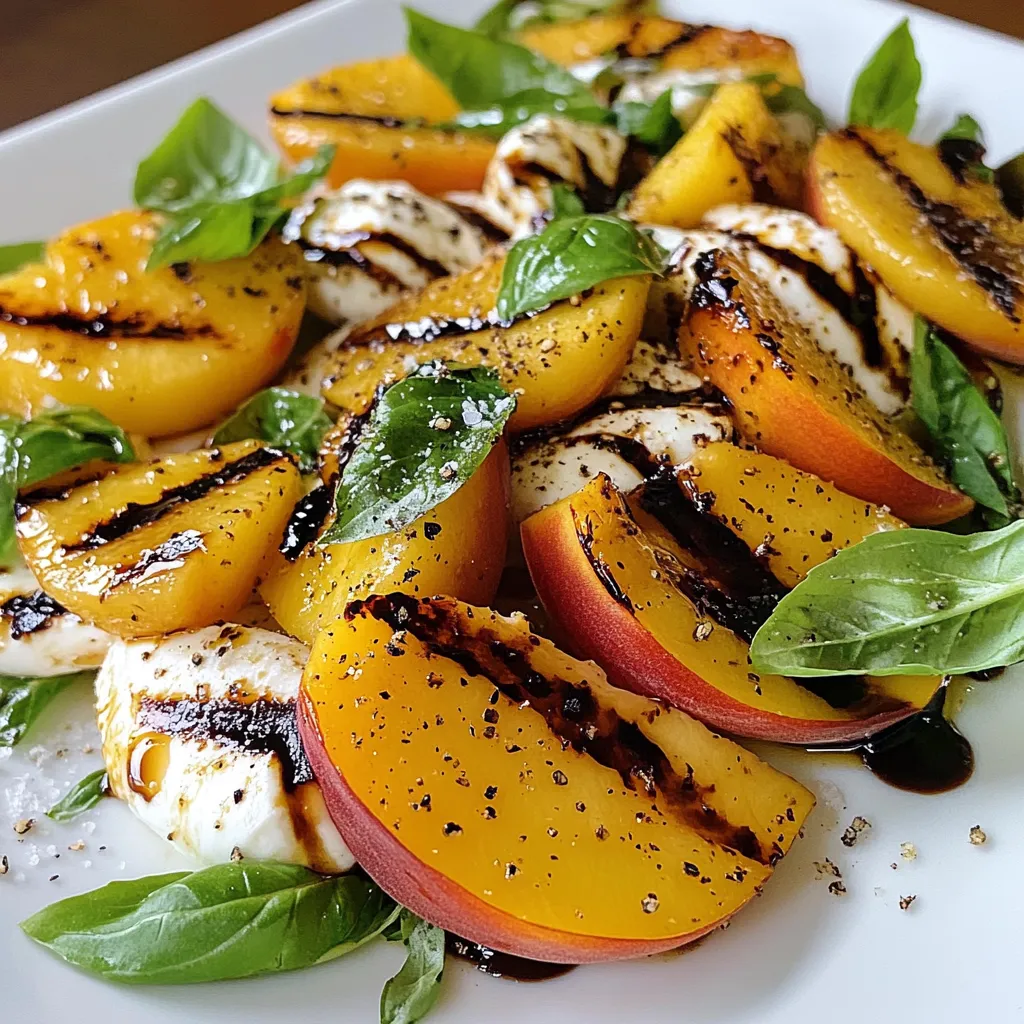
Welcome to your new summer favorite: Grilled Peach Caprese Salad! This dish blends sweet grilled peaches with creamy mozzarella and

Are you ready for a fresh twist on dinner? Try my Pickle Ranch Chicken Zoodle Bowls! These bowls combine juicy
![- 2 cups shredded unsweetened coconut - 1 cup sweetened condensed milk - 1/2 cup maraschino cherries, chopped These main ingredients create the base of your cherry coconut macaroons. The shredded coconut gives them a chewy texture. Sweetened condensed milk adds sweetness and binds everything together. Chopped maraschino cherries bring a burst of flavor and color. - 1/4 cup dark chocolate chips - Flavor extracts: vanilla and almond - A pinch of salt Optional ingredients can elevate your macaroons. Dark chocolate chips add a rich touch. Vanilla and almond extracts enhance the flavor profile. A pinch of salt balances the sweetness and brings out the other flavors. For the full recipe, follow the detailed instructions. Enjoy baking these tasty treats! 1. Preheat the oven and prepare baking sheets. Start by setting your oven to 325°F (160°C). This heat helps the macaroons turn golden. Line your baking sheet with parchment paper. This keeps the macaroons from sticking. 2. Mix the coconut and condensed milk. In a large bowl, combine 2 cups of shredded coconut with 1 cup of sweetened condensed milk. Add 1 teaspoon of vanilla extract, 1/4 teaspoon of almond extract, and a pinch of salt. Stir well until the coconut is coated. 1. Incorporate cherries and form mounds. Gently fold in 1/2 cup of chopped maraschino cherries. Be careful not to break them. Use a small cookie scoop or your hands to shape the mixture into small mounds, about 1 to 1.5 inches in size. 2. Placement on the baking sheet. Place the mounds on the lined sheet, leaving space between each one. This allows them to bake evenly and not stick together. 1. Bake until golden brown. Put the baking sheet in the oven. Bake for 18-20 minutes or until the edges turn golden brown. Keep an eye on them, so they don’t burn. 2. Cooling process on wire rack. Once baked, take them out and let them cool on the sheet for about 10 minutes. After that, transfer them to a wire rack to cool completely. This step makes them chewy and tasty. For the complete recipe, refer to the [Full Recipe]. Enjoy the fun of making these delicious cherry coconut macaroons! To get that perfect chew in your macaroons, focus on the coconut-to-liquid ratio. I recommend using 2 cups of shredded coconut to 1 cup of sweetened condensed milk. This balance keeps the macaroons moist but not too wet. If your mix feels too dry, add a bit more condensed milk. Even baking is key to a great texture. Make sure you space the mounds at least an inch apart on the baking sheet. This helps hot air reach all sides, giving you a nice golden color around the edges. Adding extra flavor can make a big difference. I love using a splash of vanilla or almond extract. Just a teaspoon can brighten the taste. For a special touch, try drizzling melted dark chocolate on top. It adds a rich contrast to the sweet cherries and coconut. Sometimes, your mix may be too wet or too dry. If it’s too wet, add a little more coconut. If it’s too dry, a dash of condensed milk can help. Shaping your macaroons evenly is important for even baking. Use a small cookie scoop for uniform size. If you’re using your hands, wet them slightly to prevent sticking. This way, you’ll get nice, round mounds that bake evenly. For the complete recipe, refer to the [Full Recipe]. {{image_2}} You can switch things up with flavor variations for your cherry coconut macaroons. Try a tropical twist by adding fresh pineapple. Just chop it finely and mix it in with the cherries. This adds a bright, fruity taste. Another fun option is to dip them in chocolate. Melt dark chocolate and drizzle it over the cooled macaroons. This adds a rich layer of flavor and makes them look fancy. If you need gluten-free options, you’re in luck! This recipe is already gluten-free since it uses coconut and sweetened condensed milk. For vegan alternatives, swap sweetened condensed milk with a coconut milk-based version. You can find this in many stores. Just check the label to ensure it’s dairy-free. When serving these macaroons, think about pairing them with beverages. A hot cup of coffee or a cold glass of almond milk works great. For parties, display them on a pretty platter. You can add colorful fruits around the macaroons for a nice touch. A simple garnish of mint leaves adds freshness and makes the plate pop. For the full recipe, check the details provided earlier. To keep your cherry coconut macaroons fresh at room temperature, use an airtight container. This helps keep them chewy and prevents them from drying out. You can stack them in the container, but place parchment paper between layers. This avoids sticking. Store them in a cool, dark place for up to five days. For long-term storage, freezing is the best option. Allow the macaroons to cool completely. Then, place them in a single layer on a baking sheet. Freeze them for about one hour. After that, transfer them to a freezer-safe bag or container. Make sure to remove as much air as possible. They can stay in the freezer for up to three months. When you want to enjoy them, thaw the macaroons in the fridge overnight. You can also let them sit at room temperature for a few hours. If you prefer them warm, reheat them in the oven at 300°F for about 5-10 minutes. This brings back their chewy texture. Enjoy your delicious treat anytime! For the Full Recipe, check the earlier section. Cherry coconut macaroons can last about a week at room temperature. To keep them fresh, store them in an airtight container. This helps prevent them from becoming dry. If you want them to last longer, you can freeze them. Just make sure to wrap them well. Yes, you can use fresh cherries! Just make sure to chop them small and remove the pits. Fresh cherries can add a nice tartness to the macaroons. However, they have more moisture than maraschino cherries, so reduce the sweetened condensed milk slightly. This keeps the texture just right. Macaroons and macarons are not the same. Macaroons are made with coconut and have a chewy texture. They are often shaped into mounds. Macarons are made with almond flour and have a smooth, crisp shell. They are filled with cream or ganache. Both are delightful but quite different in taste and texture! To make your macaroons chewier, use more coconut and less liquid. You can also bake them for a shorter time. This helps keep them soft and chewy inside. Another tip is to add a bit more sweetened condensed milk. This gives them a richer texture. For the full recipe, check out Cherry Coconut Macaroons. Cherry coconut macaroons are simple and fun to make. You learned about the key ingredients, such as coconut and sweetened condensed milk. We discussed steps to prepare, form, and bake your treats. I also shared tips for the perfect texture and flavor. You can customize them in many ways. Finally, remember to store them right to keep them fresh. Enjoy your baking and share these delicious treats with others!](https://juliesdish.com/wp-content/uploads/2025/07/a413e314-d5b5-499b-b5d3-be4447614031.webp)
Are you ready to dive into a world of chewy, cherry-filled delight? Cherry Coconut Macaroons are a sweet treat that
