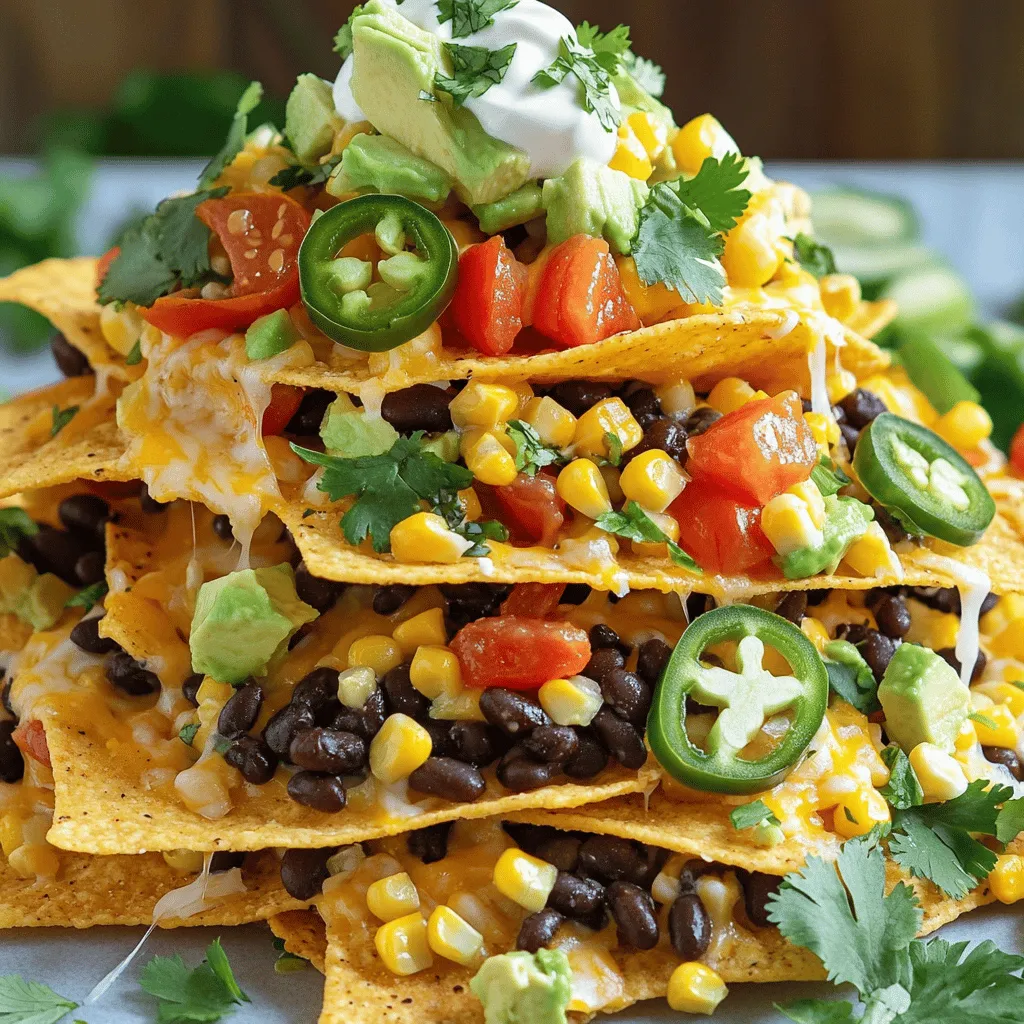
Loaded Veggie Nachos Flavorful and Easy Delight
If you’re craving a fun and tasty snack, Loaded Veggie Nachos are a winning choice! These nachos bring layers of

If you’re craving a fun and tasty snack, Loaded Veggie Nachos are a winning choice! These nachos bring layers of
![When I prepare a classic chicken pot pie, I focus on fresh and simple ingredients. Here’s what you need: - 2 cups cooked chicken, shredded - 1 cup carrots, diced - 1 cup peas (fresh or frozen) - 1 cup potatoes, diced - 1 small onion, chopped - 3 tablespoons butter - 3 tablespoons all-purpose flour - 2 cups chicken broth - 1/2 cup milk - 1 teaspoon garlic powder - 1 teaspoon dried thyme - Salt and pepper to taste - 1 package refrigerated pie crusts (or homemade crust) - 1 egg (for egg wash) These ingredients create a warm, hearty filling that comforts the soul. When I choose chicken, I often use leftover roasted chicken. This adds flavor and saves time. Fresh vegetables give the pie a bright taste. You can use frozen veggies if fresh isn’t available. They work well, too. The butter and flour create a rich base for the filling. I love adding garlic powder and thyme for extra flavor. Make sure to season with salt and pepper to bring everything together. For the crust, I typically use store-bought for convenience. But if you have time, a homemade crust can take your dish to the next level. Remember to brush the top with an egg wash. It gives the pie a golden, shiny finish. This combination of ingredients makes a chicken pot pie that everyone will love. For the full recipe, check the other sections. - Preheat Oven: Preheat your oven to 425°F (220°C). - Sauté Vegetables: Melt the butter in a large skillet. Add chopped onions, carrots, and potatoes. Cook for about 5 minutes until they start to soften. - Make Roux: Sprinkle in the flour. Stir continuously for 1-2 minutes until it's golden. - Add Broth and Milk: Gradually whisk in the chicken broth. Then add the milk, stirring until thickened, about 3-5 minutes. - Combine Filling: Stir in the cooked chicken, peas, garlic powder, thyme, salt, and pepper. Heat through until warm. - Prepare and Fill Crust: Roll out one pie crust and fit it into a 9-inch pie dish. Pour in the chicken mixture, spreading it evenly. - Top with Crust: Roll out the second pie crust and place it on top. Seal the edges by crimping with your fingers. Cut slits in the top crust for steam to escape. - Egg Wash: Beat the egg in a small bowl. Brush it over the top crust for a golden finish. - Bake: Place the pot pie in the oven. Bake for 30-35 minutes until the crust is golden brown and the filling bubbles. For more detailed instructions, check out the [Full Recipe]. Using Homemade vs. Store-Bought Crust I often use store-bought pie crusts for ease. They save time and still taste good. However, if you want to try homemade, it can add a special touch. Use cold butter and chilled water for best results. This keeps your crust flaky and light. Techniques for a Flaky Pie Crust To achieve a flaky crust, handle the dough gently. Overworking it can make it tough. When rolling out, keep it thick enough to hold the filling but thin enough to cook well. A few small slits in the top allow steam to escape, ensuring a crisp crust. Suggested Herbs and Spices I love adding herbs to boost flavor. Thyme is classic for chicken pot pie. Rosemary and parsley also work well. A pinch of garlic powder adds depth without overpowering the dish. Adding Extra Vegetables or Cheese Feel free to add more veggies. Corn, green beans, or even mushrooms can make it heartier. For a cheesy twist, sprinkle some cheddar or Gruyère before adding the top crust. This makes for a creamy, rich filling. Importance of Proper Sautéing Sautéing your vegetables is key to flavor. Start with onions; they add a sweet base. Sauté until they are soft, then add other veggies. This step builds a great flavor foundation for your filling. Tips for Thickening the Filling To ensure a thick filling, make a roux with flour and butter. Cook it briefly to remove raw flour taste. Then slowly whisk in chicken broth and milk. This helps create a silky sauce that holds everything together. {{image_2}} You can change the proteins in your chicken pot pie. Try using turkey instead of chicken. It gives a nice twist while keeping it hearty. If you want a veggie option, use mushrooms or lentils. They add great texture and flavor. For those who need gluten-free options, swap out regular flour. You can use gluten-free flour blends instead. Make sure to check for a good brand that binds well. Also, use gluten-free pie crusts, which you can find in stores. The sauce is key to a great pot pie. You can use different stocks to change the taste. Instead of chicken broth, try vegetable broth for a lighter flavor. You could even use a creamy mushroom soup for a rich twist. Cheese is another fun way to enhance your dish. Mixing in some cheddar adds a sharp bite. For a more unique taste, consider adding goat cheese or feta. This will give your pot pie a creamy texture and a burst of flavor. Make a Mexican-inspired pot pie for a fun change. Use shredded chicken and add taco seasoning. You can throw in black beans and corn for extra flavor. Top it with a sprinkle of cheese and fresh cilantro before baking. For an Asian twist, think about adding soy sauce and ginger. Use cooked chicken and mix in some snow peas and carrots. You can even top it with a flaky wonton wrapper instead of a pie crust. This brings a new crunch to your dish. Explore these variations to make your chicken pot pie your own. Don't forget to check out the Full Recipe for guidance! To store leftover chicken pot pie, let it cool first. Cover it tightly with plastic wrap or foil. You can also use an airtight container. This helps keep the pie moist and fresh. In the fridge, it lasts about 3 to 4 days. Freezing chicken pot pie is a great way to keep it longer. First, let it cool completely. Wrap it well in plastic wrap, then in foil. Label it with the date. You can freeze it for up to 3 months. To reheat, remove the wrapping. Place the pie on a baking sheet. Heat it in a 350°F (175°C) oven for about 30-40 minutes. If it’s frozen solid, it may take longer. Check that it’s hot all the way through before serving. If you have leftover filling, there are many fun ways to use it. You can make chicken pot pie soup by adding broth and veggies. You can also stuff it in tortillas for tasty wraps. Another option is to use it as a filling for crepes. These ideas help you enjoy the flavors in new ways. For the full recipe, check out the Comforting Chicken Pot Pie section. You can make chicken pot pie from scratch by using fresh ingredients. Start with cooking chicken, then sauté vegetables like carrots and onions. Make a roux with butter and flour, then add chicken broth and milk. Mix in your chicken and veggies. Pour the filling into a pie crust, cover it, and bake until golden. For a full guide, check the Full Recipe. Yes, you can use frozen vegetables for your chicken pot pie. They save time and can be just as tasty as fresh ones. Just make sure to thaw and drain them before adding them to the filling. This helps avoid extra moisture in your pot pie. If you want a different protein, you can use turkey, beef, or even tofu. Each option will give the pie a unique flavor. For a vegetarian version, try using mushrooms or lentils for a hearty filling. Your pot pie is done when the crust is golden brown and the filling bubbles. You can check by inserting a knife into the filling. If it comes out hot, your pie is ready to eat. Yes, you can prepare the filling ahead of time. Store it in the fridge for up to two days. When you're ready, simply assemble your pot pie and bake. This makes meal prep easy and quick! This blog post has shown you how to make a delicious chicken pot pie. We covered ingredients, step-by-step cooking, and tips for the perfect crust. You learned about flavors, variations, and how to store leftovers. With these easy steps, you can create a comforting meal that everyone will love. Don't hesitate to experiment with your own flavors. Happy cooking!](https://juliesdish.com/wp-content/uploads/2025/07/c2b02b7b-088f-4937-a045-30bc4fcff6ed.webp)
Are you ready for a warm hug in pie form? Classic chicken pot pie is the perfect mix of comfort
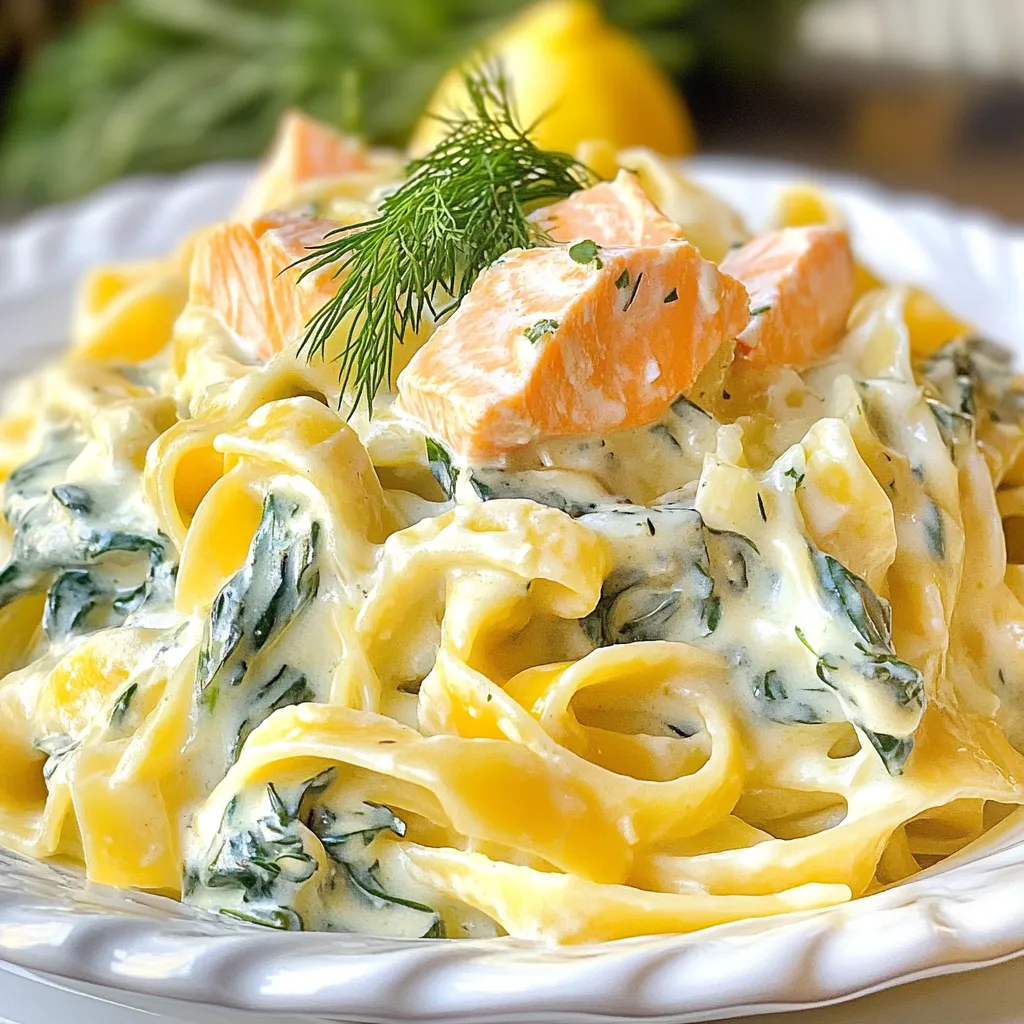
Are you ready to impress your taste buds? This Creamy Salmon Spinach Pasta is simple to make and bursting with
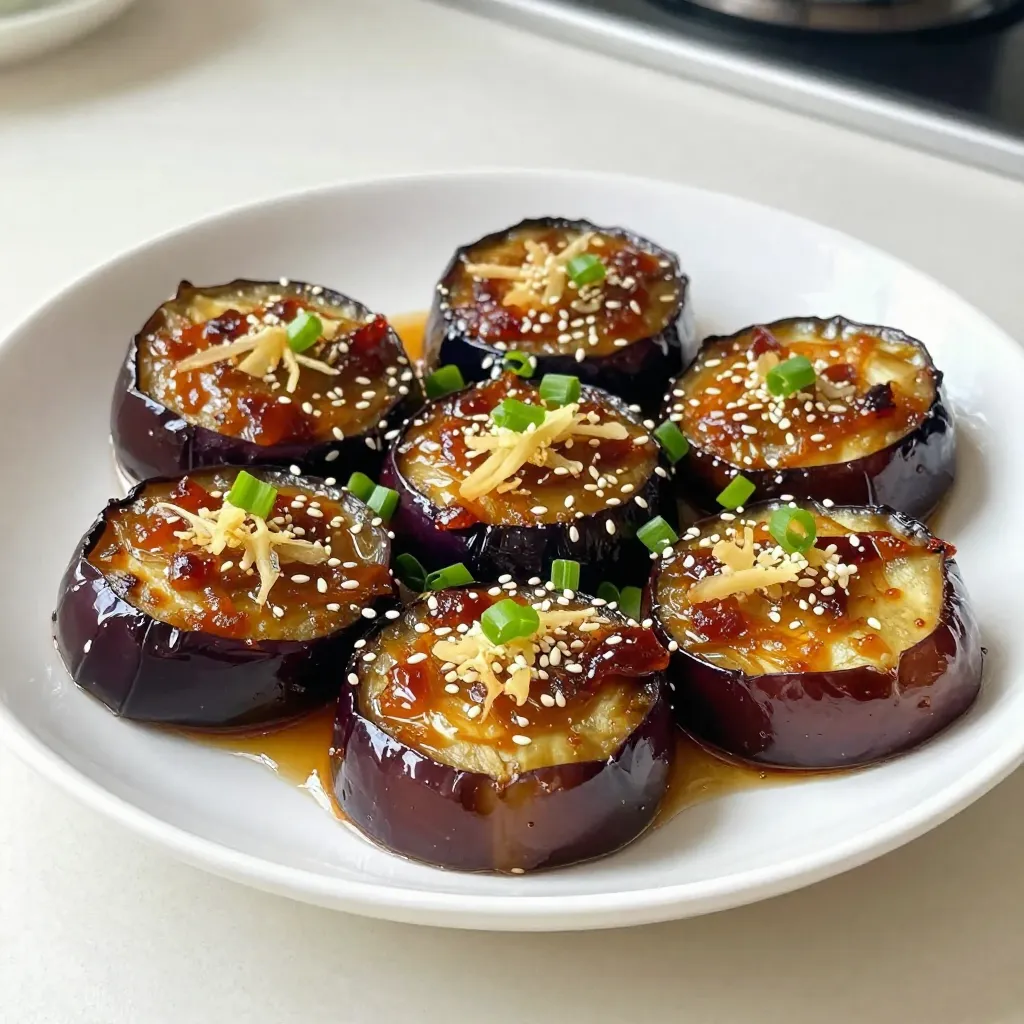
If you’re craving a dish that’s savory, simple, and bursting with flavor, you’re in the right spot! My Miso Ginger
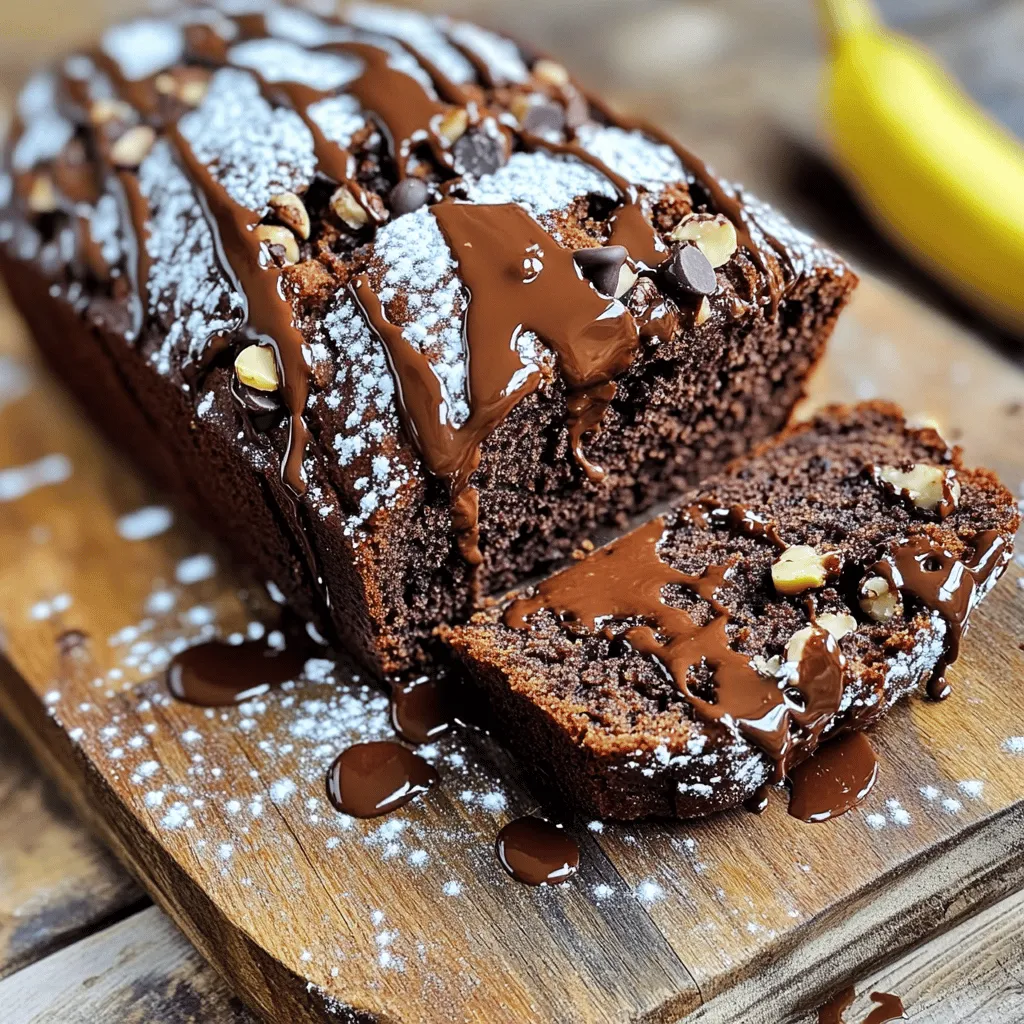
Are you ready to treat yourself to something amazing? My Double Chocolate Banana Bread is the perfect blend of moist,
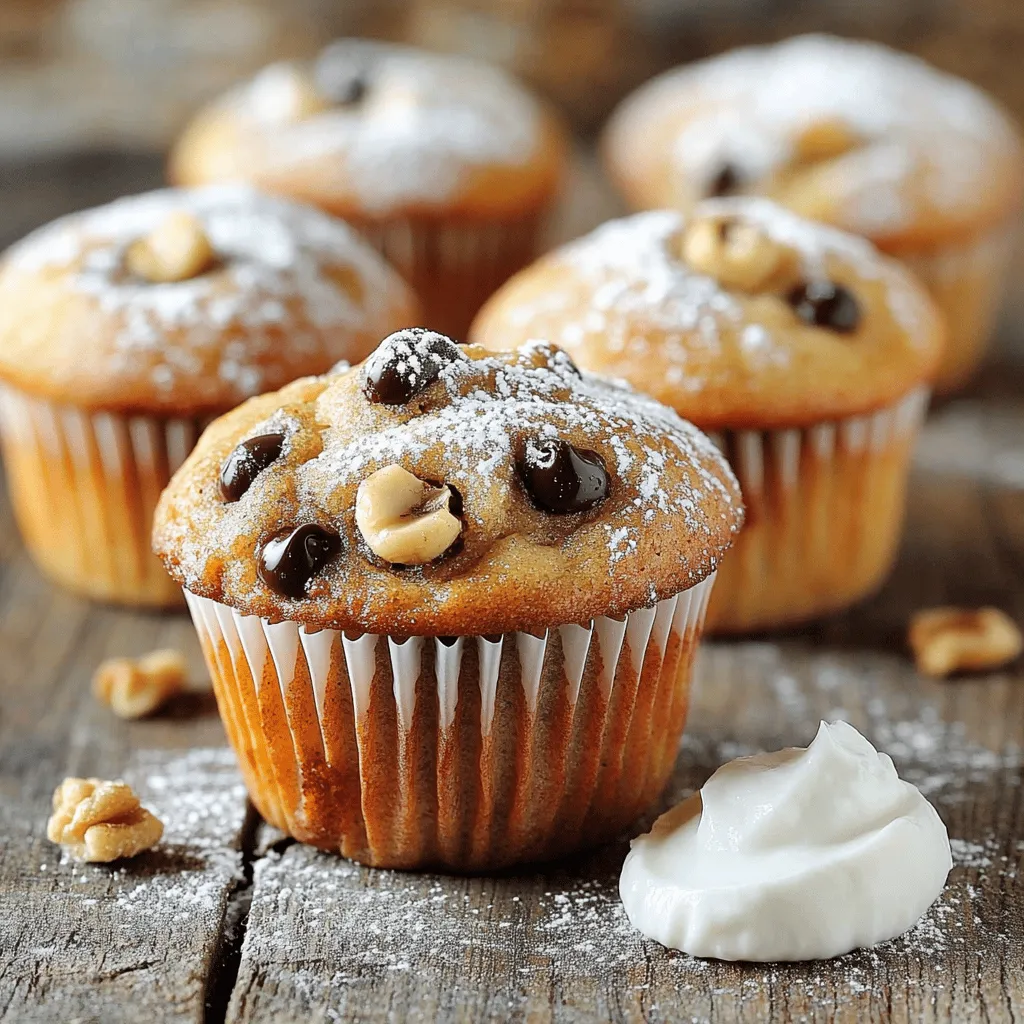
![To make this tasty treat, you need simple ingredients. Here’s what you will use: - 3 ripe bananas, mashed - 1/2 cup unsalted butter, melted - 1/2 cup brown sugar - 1/4 cup granulated sugar - 2 large eggs - 1 teaspoon vanilla extract - 1 teaspoon baking soda - Pinch of salt - 1 1/2 cups all-purpose flour - 1 cup semi-sweet chocolate chips These ingredients work together to create a moist and sweet banana bread. You can add some extras to make it your own. Here are a few ideas: - 1/2 cup chopped walnuts - 1/2 teaspoon cinnamon - 1/2 cup shredded coconut These optional add-ins add flavor and texture. Feel free to mix and match based on your taste. Gather some tools to help you bake. Here’s what you will need: - 9x5-inch loaf pan - Large mixing bowl - Whisk or fork - Spatula - Measuring cups and spoons Having the right equipment makes the process smooth and fun. Once you have everything, you’re ready to bake! For the complete process, check the Full Recipe. Start by preheating your oven to 350°F (175°C). Grab a large bowl. Mash three ripe bananas with a fork until they are smooth. You want a creamy texture. Next, melt half a cup of unsalted butter. Add this melted butter to your mashed bananas. Stir them together well until they blend nicely. Now, it’s time to sweeten things up! Add half a cup of brown sugar and a quarter cup of granulated sugar. Mix until the sugars dissolve into the banana and butter mixture. Beat in two large eggs, one at a time. Finally, add a teaspoon of vanilla extract for extra flavor. Ensure all the ingredients are mixed well. In another bowl, whisk together a teaspoon of baking soda, a pinch of salt, and one and a half cups of all-purpose flour. This step is key to getting your banana bread just right. Slowly add the dry ingredients to your wet mixture. Use a spatula to fold them together gently. Do not overmix; just blend until you see no dry flour. Now, it’s time for the fun part! Stir in one cup of semi-sweet chocolate chips. If you like nuts, you can also add half a cup of chopped walnuts. Make sure the chocolate chips and nuts spread evenly throughout the batter. Pour your batter into a greased 9x5-inch loaf pan. Smooth the top with a spatula to even it out. Place the pan in the oven and bake for 60 to 65 minutes. To check if it’s done, insert a toothpick into the center. If it comes out clean, your banana bread is ready! Once baked, let it cool in the pan for about 10 minutes. After that, transfer it to a wire rack to cool completely. The aroma in your kitchen will be amazing! You can find the full recipe for more details. When picking bananas, look for ripe ones. Ripe bananas are yellow with brown spots. These spots mean the sugars have developed, making the fruit sweeter. Avoid green bananas; they are not sweet enough for your bread. If you need bananas to ripen fast, place them in a paper bag. The bag traps gases that speed up ripening. One common mistake is overmixing the batter. Mix just until the dry ingredients vanish. If you mix too much, your bread can become dense. Also, make sure your oven is at the right temperature. An oven that is too hot can burn the bread. Use an oven thermometer to check the heat. Lastly, don’t skip the cooling time. Letting it cool helps improve the flavor and texture. To boost flavor, add a dash of cinnamon or nutmeg. These spices give the bread a warm taste. You can also use chopped walnuts for crunch. For more chocolate, try using dark chocolate chips. They add a rich taste that pairs well with bananas. If you like a sweeter bread, add more sugar. Just remember to adjust the other wet ingredients to keep the right texture. For the complete recipe, check the [Full Recipe]. {{image_2}} If you want a healthier version of chocolate chip banana bread, try using whole wheat flour instead of all-purpose flour. Whole wheat adds fiber and nutrients. You can also replace some or all of the sugar with a sugar substitute like honey or maple syrup. These options add sweetness without a lot of empty calories. You can boost the flavor of your banana bread with spices. Adding a teaspoon of cinnamon or nutmeg can make a big difference. You might also want to toss in some chopped nuts. Walnuts or pecans add a nice crunch and a nutty taste. Chocolate chips and nuts together create a great mix! The type of chocolate you use can change your bread's flavor. Semi-sweet chocolate chips are classic, but you can try dark chocolate for a richer taste. If you like a sweeter bread, use milk chocolate chips. You can even mix different types of chocolate for a fun twist. Experiment and find your favorite combo! For the full recipe, check out the Choco-Banana Delight. To keep your chocolate chip banana bread fresh, store it in an airtight container. Place parchment paper between slices to avoid sticking. If your home is warm, refrigerate it to prevent spoilage. It will stay fresh for about 3 to 5 days at room temperature. Freezing banana bread is easy and a great way to save it. First, let the bread cool completely. Then, wrap it tightly in plastic wrap. You can also use aluminum foil for extra protection. Label the package with the date. It will last up to 3 months in the freezer. When you're ready to enjoy it, simply thaw it in the fridge overnight or at room temperature. To enjoy warm banana bread, preheat your oven to 350°F (175°C). Place the slices on a baking sheet and heat for about 10 minutes. You can also use a microwave. Heat each slice for about 15 to 20 seconds. If you want, spread some butter on top for extra flavor. For a delicious twist, add a sprinkle of cinnamon or sugar before reheating. To make your banana bread moist, use ripe bananas. The riper the bananas, the better the flavor. Mash them well before mixing. Also, don’t overmix the batter. Mix just until combined. Adding a bit of sour cream or yogurt can help too. This adds moisture without changing the taste. Yes, you can use frozen bananas. Just let them thaw first. They become soft and easy to mash. This also brings out their sweetness. Drain excess liquid before adding to your mix. Frozen bananas work great in this recipe and save time. If you need an egg substitute, try mashed bananas. Use 1/4 cup of mashed banana per egg. You can also use applesauce or yogurt. Each option keeps the bread moist and tasty. Choose what you like best for your recipe. In this post, we covered how to make delicious chocolate chip banana bread. We looked at key ingredients and equipment you need. I shared step-by-step instructions to guide you through the process. Plus, I offered tips and tricks to avoid common mistakes and enhance your bread's flavor. You also learned about variations and storage methods. Remember, banana bread is fun to make and great for sharing. Enjoy your baking adventure and impress others with your tasty treats!](https://juliesdish.com/wp-content/uploads/2025/07/f052e6f1-d196-44d4-ab03-fd8d7f66889a.webp)
Are you ready to transform ripe bananas into a delightful treat? My easy and tasty Chocolate Chip Banana Bread recipe
Looking for a simple, tasty treat? My savory banana bread muffins will delight your taste buds! With just a few
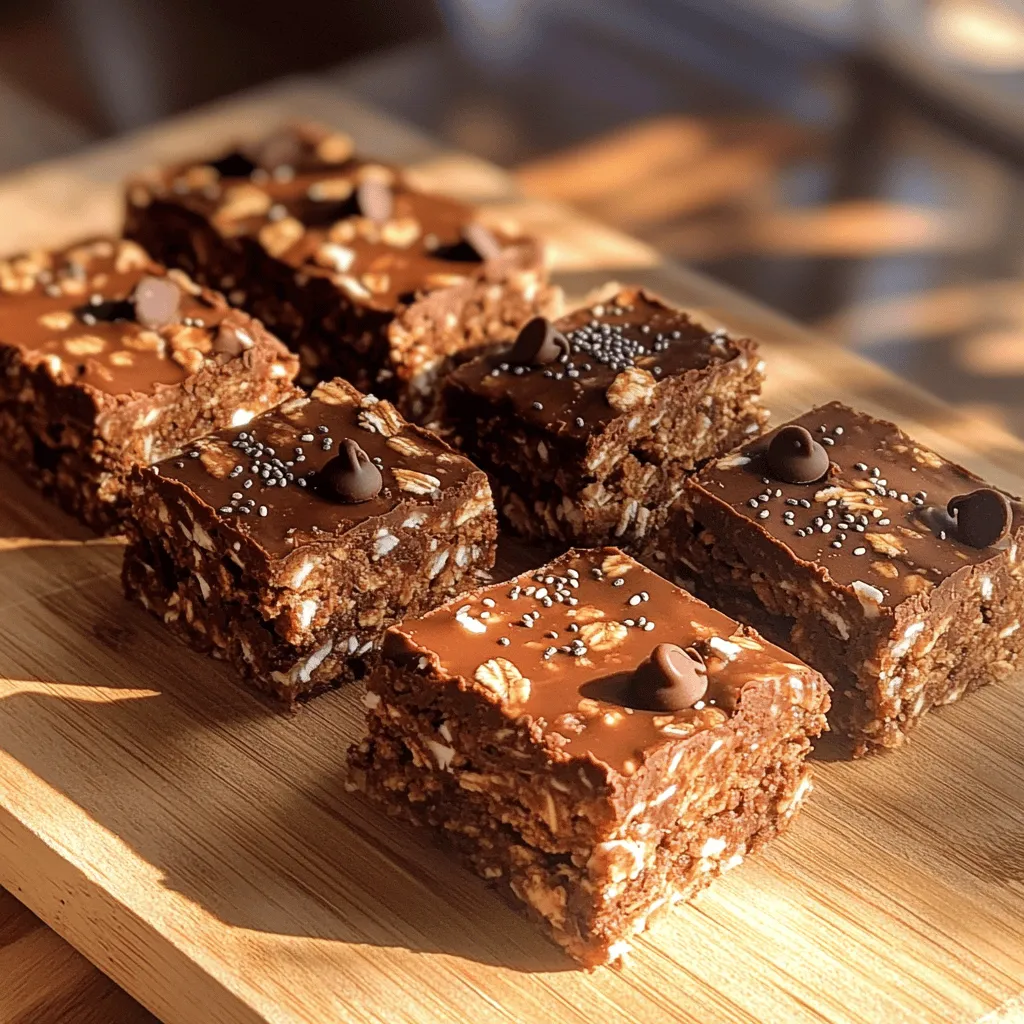
![- 2 cups rolled oats - 1 cup unsweetened apple sauce - 1/2 cup creamy peanut butter - 1/4 cup honey (or maple syrup for a vegan option) - 1 teaspoon vanilla extract - 1 teaspoon baking powder - 1/4 teaspoon salt - 1/2 cup chocolate chips or dried fruit (optional) When I create Peanut Butter Oatmeal Cups, I choose my ingredients carefully. Each one plays a key role in flavor and texture. Rolled oats provide a hearty base. They make the cups chewy yet satisfying. Unsweetened apple sauce adds moisture without extra sugar. It keeps the cups light and soft. Creamy peanut butter gives a rich taste and smooth texture. Honey or maple syrup sweetens the mixture naturally. Vanilla extract brightens the flavor, while baking powder helps them rise. A pinch of salt enhances all the flavors. You can also customize these cups. Adding chocolate chips brings a sweet surprise. Dried fruit adds chewiness and bursts of flavor. - Vegan alternatives: Use maple syrup instead of honey. - Gluten-free options: Choose certified gluten-free rolled oats. - Sweetener choices: You can use agave syrup or coconut sugar as a sweetener. These substitutions let anyone enjoy the cups. Whether you follow a vegan diet or need gluten-free options, you can make this recipe work for you. I always encourage experimentation, so feel free to mix and match! For the full recipe, check out the details above. 1. Preheating the oven: Start by preheating your oven to 350°F (175°C). This step ensures even baking for your peanut butter oatmeal cups. 2. Preparing the muffin tin: Lightly grease a muffin tin or line it with paper liners. This makes it easy to remove the cups once they are baked. 1. Combining dry and wet ingredients: In a large bowl, mix 2 cups of rolled oats, 1 teaspoon of baking powder, and 1/4 teaspoon of salt. In another bowl, whisk together 1 cup of unsweetened apple sauce, 1/2 cup of creamy peanut butter, 1/4 cup of honey, and 1 teaspoon of vanilla extract until everything is smooth. Pour the wet mix into the dry mix and stir until combined. 2. Adding optional ingredients: If you want, you can fold in 1/2 cup of chocolate chips or dried fruit at this point. This adds a sweet touch to your cups. 1. Baking time and tips: Spoon the mixture into the prepared muffin tin, filling each cup about 3/4 full. Bake for 15-20 minutes. Check if they are done by inserting a toothpick into the center. If it comes out clean, they’re ready. 2. Cooling process: Once baked, take the cups out and let them cool in the tin for a few minutes. After that, transfer them to a wire rack to cool completely. This step helps them firm up and makes them easy to handle. To avoid dry or crumbly cups, use ripe apple sauce. The moisture in ripe apples helps bind the mixture. Also, do not overbake. Keep an eye on the time and check for doneness at 15 minutes. If the tops feel firm and a toothpick comes out clean, they are ready. For a golden-brown top, make sure your oven is preheated. This step is key to even baking. Brush a little peanut butter on the tops before baking for extra color and flavor. You can serve Peanut Butter Oatmeal Cups warm or at room temperature. They make a great snack at any time of the day. For breakfast, add fresh fruit or yogurt on the side. Pair these cups with milk, coffee, or a smoothie. They also go well with a glass of almond milk for a nutty twist. Enjoy these cups as a healthy treat that fits into your busy life! {{image_2}} You can make these Peanut Butter Oatmeal Cups even more fun with different flavors. Try using chocolate chips or dried fruit. Chocolate chips add sweetness and richness. Dried fruit gives a chewy texture and natural sweetness. You can mix and match to find what you love. You can also use different nut butters. Almond butter or cashew butter work well too. Each nut butter brings its own unique taste. You can even mix peanut butter with almond butter for a blend of flavors. The options are endless! If you need gluten-free options, use gluten-free oats. They have the same great taste and texture. You can enjoy these cups without worry. For those watching sugar, consider using a sugar-free sweetener. You can replace honey with a sugar-free syrup. You can also lower the sugar by using less sweetener. Just remember to adjust the other ingredients slightly. This way, you still get tasty cups without added sugar. Enjoy the freedom to make these cups work for your diet! To keep your Peanut Butter Oatmeal Cups fresh, store them in an airtight container. This helps lock in moisture and flavor. If you plan to eat them within a week, keep them on the countertop. For longer storage, the refrigerator is a great option. Just remember, they may dry out a bit in the fridge, so be sure to cover them well. Freezing is an excellent way to save your Peanut Butter Oatmeal Cups. To freeze them, wrap each cup tightly in plastic wrap or place them in a freezer-safe bag. This prevents freezer burn and keeps them tasty. They can last up to three months in the freezer. When you’re ready to enjoy them, just take out the desired amount. You can reheat them in the microwave for about 20-30 seconds. If you prefer, you can also warm them in the oven at 350°F (175°C) for about 10 minutes. Either way, you'll have a warm, delicious treat ready to enjoy. What are Peanut Butter Oatmeal Cups? Peanut Butter Oatmeal Cups are tasty snacks made with oats, peanut butter, and apple sauce. They are easy to make and packed with flavor. You can enjoy them as a breakfast option or a sweet treat anytime. How long do they last? These cups last about five days when stored in an airtight container. If you keep them in the fridge, they can last even longer, up to a week. Can I make them ahead of time? Yes! You can prepare Peanut Butter Oatmeal Cups ahead of time. Just bake them, let them cool, and store them. This makes for quick snacks or breakfasts on busy days. Caloric content per serving Each Peanut Butter Oatmeal Cup has around 150 calories. This can vary based on add-ins like chocolate chips. Dietary benefits These cups are high in fiber due to the oats. They also provide protein from the peanut butter, making them a filling snack. Plus, they are naturally sweetened with honey or apple sauce. What to do if they don't turn out as expected? If your cups fall apart, they may need more binding. Try adding a bit more peanut butter or apple sauce. If they are too dry, adding a splash of milk can help. How to fix texture issues? For a chewy texture, do not overbake them. Keep an eye on the baking time and remove them when the tops are golden. If they are too dense, consider adding a bit more baking powder. For the full recipe, check out the [Full Recipe]. Peanut Butter Oatmeal Cups are easy to make and tasty. We covered the key ingredients, prep steps, and baking tips. I shared ideas for variations and storage to keep them fresh. Don’t hesitate to try out your own twists on this recipe. Remember, making these cups can be fun, and they are great for snacks. Enjoy your cooking and share your results with friends or family!](https://juliesdish.com/wp-content/uploads/2025/07/3e3f1ed7-062c-42d7-a66e-8914556af6a9.webp)
Looking for a simple yet tasty treat? You’ll love these Peanut Butter Oatmeal Cups. They pack flavor and are easy
Looking for a snack that’s both easy to make and delicious? You’ve stumbled upon the perfect recipe for Chocolate Coconut
Are you ready to spice up your breakfast routine? Chunky Monkey Granola is the easy and tasty treat you need!
