![To make the vegan chocolate avocado mousse, you need just a few simple ingredients. Here’s the list: - 2 ripe avocados - 1/3 cup unsweetened cocoa powder - 1/4 cup maple syrup (adjust for sweetness) - 1/4 cup almond milk (or any plant-based milk) - 1 teaspoon vanilla extract - A pinch of sea salt - Optional toppings: shredded coconut, fresh berries, or chopped nuts Each ingredient plays a key role in creating a mousse that is rich and creamy. The ripe avocados provide a smooth base and healthy fats. Cocoa powder brings in the chocolate flavor, while maple syrup adds natural sweetness. Almond milk keeps the texture light and fluffy. Vanilla extract enhances the overall taste, and sea salt balances the flavors. You can also get creative with the toppings. Shredded coconut adds chewiness, fresh berries lend tartness, and chopped nuts offer crunch. Feel free to mix and match! For the full recipe, you can check the [Full Recipe]. - Slice avocados and remove pits. - Scoop flesh into a food processor. To start, take two ripe avocados. Cut each in half and gently remove the pit. This step is easy but be careful! Then, scoop the green flesh into your food processor. The texture of ripe avocados makes for a creamy mousse. - Add cocoa powder, maple syrup, almond milk, vanilla, and sea salt. - Blend until smooth and creamy. Next, it's time to add flavor. Pour in 1/3 cup of cocoa powder, 1/4 cup of maple syrup, and 1/4 cup of almond milk. You should also add 1 teaspoon of vanilla extract and a pinch of sea salt. Blend all these ingredients on high. Stop to scrape down the sides if needed. You want a smooth and creamy texture. - Taste test and adjust sweetness if preferred. - Transfer mousse to serving dishes and refrigerate. Once blended, taste your mousse. If you want it sweeter, add more maple syrup. Blend again to mix in the sweetener. After it reaches the taste you love, spoon the mousse into serving dishes. Cover and refrigerate for at least 30 minutes. This helps it firm up. For the full recipe, check the details above. To get a smooth mousse, blend well. I suggest using a high-speed blender or food processor. This way, you break down the avocado fully. Stop occasionally to scrape down the sides. This helps blend everything evenly. Ripe avocados are key. They must feel soft when you squeeze them gently. If they are too hard, the mousse will be lumpy. For a stunning look, garnish your mousse. Try adding shredded coconut on top. Fresh berries add a pop of color and flavor too. You can also sprinkle chopped nuts for a crunchy texture. Pair the mousse with mint leaves for a fresh taste. This combo makes your dessert even more delightful. Avocados are packed with good fats. They help keep your heart healthy. They also provide vitamins like E and K. Plus, they have fiber, which is great for digestion. Maple syrup is a better choice than white sugar. It has minerals and antioxidants. This makes your dessert not just tasty but also healthy. {{image_2}} You can make this mousse even more exciting. Try adding spices like cinnamon or a hint of chili powder. These spices bring warmth and depth to the flavor. You can also switch up your sweeteners. Use agave or coconut sugar for a unique twist. Each sweetener changes the taste slightly, so feel free to experiment. If you want to change the milk, you can use coconut or oat milk. Both options add a creamy texture. If you have nut allergies, just skip almond milk. You can easily find many plant-based milks that will work well. Just make sure they are dairy-free. Choosing the right cocoa powder can change the mousse's flavor. Raw cocoa gives a rich taste, while dark cocoa offers a deep, bold flavor. You can also add dairy-free chocolate chips. These chips create delightful chunks in your mousse. They add a fun texture and extra chocolatey goodness to this sweet treat. For the full recipe, check out the details above. To keep your vegan chocolate avocado mousse fresh, store it in the fridge. Place it in an airtight container. Cover the top with plastic wrap if you don't have a lid. This helps keep the mousse smooth and creamy. It can last about 3 to 5 days in the fridge. Always check for any changes in smell or color before serving. Yes, you can freeze vegan mousse! Freezing is a great way to save leftovers. To do this, use a freezer-safe container. Make sure to leave some space at the top. The mousse expands when it freezes. It can stay good for up to 2 months in the freezer. When you are ready to eat it, thaw it in the fridge overnight. If your mousse is too thick after refrigeration, you can fix it. Add a splash of almond milk and blend it again. This will help bring back the smooth texture. You can also use leftover mousse in new ways. Spread it on toast, add it to smoothies, or layer it in parfaits. Each idea adds a fun twist to your dessert! For the full recipe, check out the details above. Yes, Vegan Chocolate Avocado Mousse is healthy! This treat offers several nutritional benefits. - Avocados are rich in healthy fats, fiber, and vitamins. They support heart health and help you feel full. - Cocoa powder is packed with antioxidants. It can boost your mood and lower blood pressure. - Maple syrup provides natural sweetness and contains minerals like manganese and zinc. - Almond milk is low in calories and dairy-free. It’s a good alternative for those with lactose intolerance. Overall, this mousse is a wholesome dessert option that satisfies your sweet tooth without guilt. Yes, you can make this mousse ahead of time! It’s a great make-ahead dessert. - Refrigeration: Store the mousse in an airtight container. This keeps it fresh for up to three days. - Timing: Make it a few hours before serving. This allows the flavors to meld and the mousse to get firmer. I love making it the night before a gathering. It’s ready to impress your guests when you need it! If you want to swap avocados, you have options! - Silken tofu: It blends well and gives a creamy texture. It’s also high in protein. - Bananas: They add natural sweetness. However, they may change the flavor a bit. - Nut butters: Use almond or cashew butter for a rich taste, but this will alter the mousse's texture. Each option will create a different flavor and texture, so choose based on your taste! There are several ways to sweeten your mousse! - Maple syrup: Add more maple syrup to enhance the sweetness. - Agave nectar: It’s a great alternative with a similar flavor profile. - Coconut sugar: This offers a caramel-like sweetness. Just use it sparingly as it’s quite sweet. Always taste as you go. Adjust until it’s just right for you! For the full recipe, check out the details above. This blog post showed you how to make a tasty vegan chocolate avocado mousse. We discussed key ingredients, like ripe avocados and cocoa powder, and shared easy steps to blend them. You learned tips for perfecting your mousse's texture and serving ideas to impress your guests. Plus, we explored variations and health benefits of the ingredients. In conclusion, this simple dessert brings joy and good nutrition. Enjoy making it your own!](https://juliesdish.com/wp-content/uploads/2025/07/2c9e8022-22bf-49d2-8dd8-e907e36fa848.webp)
Vegan Chocolate Avocado Mousse Divine Flavor Treat
Are you ready to indulge in a dessert that feels rich and guilt-free? I’m excited to share my recipe for

Are you ready to indulge in a dessert that feels rich and guilt-free? I’m excited to share my recipe for
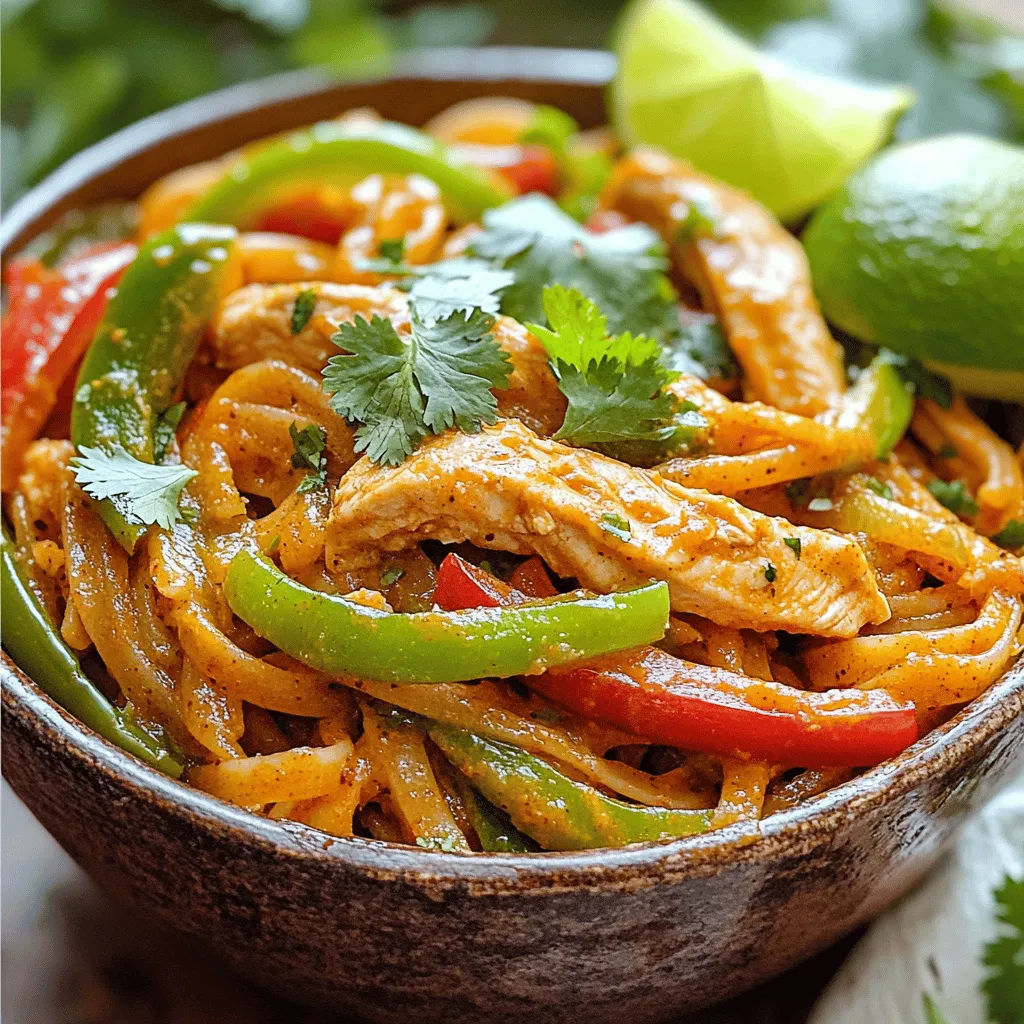
Looking for a tasty, quick dinner? Try my One-Pot Chicken Fajita Pasta. This simple recipe combines chicken, colorful veggies, and
![- 2 cups all-purpose flour - 1 teaspoon baking powder - 1 teaspoon baking soda - 1 teaspoon ground cinnamon - ½ teaspoon ground nutmeg - ½ teaspoon salt - ¾ cup granulated sugar - ½ cup unsalted butter, softened - 2 large eggs - 1 cup apple cider - 1 teaspoon vanilla extract - ½ cup powdered sugar (for glazing) - 1 tablespoon apple cider (for glazing) When it comes to making Apple Cider Donut Cake, the ingredients are key. You want the best flavors to shine. This cake uses simple items found in most kitchens. The mix of spices like cinnamon and nutmeg warms your soul. The apple cider gives it that sweet, fruity taste. I always use fresh, high-quality apple cider. It makes a huge difference. The butter should be softened, so it blends well with the sugar. This helps create a light and airy texture. Don’t skip on the eggs; they add moisture and richness. The powdered sugar is for the glaze. It adds a sweet finish to every slice. When mixed with a bit of cider, it gives a perfect drizzle. You can find the full recipe at the end of this section. Make sure to gather everything before you start. It makes cooking more fun and less hectic! 1. Preheat the oven and prepare the bundt pan: Start by setting your oven to 350°F (175°C). While it heats, grease a 9-inch bundt pan. This step ensures your cake slides out easily after baking. 2. Combine dry ingredients in a medium bowl: In a medium bowl, whisk together 2 cups of all-purpose flour, 1 teaspoon of baking powder, 1 teaspoon of baking soda, 1 teaspoon of ground cinnamon, ½ teaspoon of ground nutmeg, and ½ teaspoon of salt. This mix adds great flavor and helps the cake rise. 3. Cream butter and sugar, then add eggs: In a large mixing bowl, beat ½ cup of softened unsalted butter and ¾ cup of granulated sugar. Use an electric mixer on medium speed for 3-4 minutes until the mixture is light and fluffy. Next, add 2 large eggs, one at a time. Mix well after each addition, then stir in 1 teaspoon of vanilla extract. 4. Alternate adding dry mix and apple cider to the batter: Slowly add the dry flour mixture and 1 cup of apple cider to the butter mixture. Start and end with the dry mix. Mix until just combined. Be careful not to overmix, as this can make the cake dense. 5. Pour batter into the bundt pan and bake: Pour the batter into your prepared bundt pan, smoothing the top with a spatula. Bake in the preheated oven for 35-40 minutes. A toothpick inserted into the center should come out clean when it’s done. 6. Cool and glaze the cake before serving: After baking, let the cake cool in the pan for 10 minutes. Then, invert it onto a wire rack to cool completely. While it cools, make the glaze by mixing ½ cup of powdered sugar with 1 tablespoon of apple cider until smooth. Drizzle the glaze over the cool cake in a pretty pattern. For the full recipe, check the provided details and enjoy making this delicious Apple Cider Donut Cake! - Choosing the right type of apples for cider: Use sweet apples like Fuji or Honeycrisp. These apples add great flavor and sweetness. Tart apples like Granny Smith can balance the taste if you prefer more zing. - Preventing overmixing for a light texture: Mix just until the ingredients combine. Overmixing can make your cake dense. Stop as soon as you see no dry flour. This keeps it light and fluffy. - Best practices for glazing the cake: Wait until the cake cools completely before glazing. This helps the glaze stick better. Drizzle the glaze in a back-and-forth motion for a nice look. Adjust the glaze thickness by adding more powdered sugar or cider to your taste. These tips will help you create the best Apple Cider Donut Cake. For the full recipe, check the detailed instructions above. Happy baking! {{image_2}} You can make your apple cider donut cake even more exciting with a few simple twists. Here are some fun ideas to try: - Adding nuts or chocolate chips for texture: Chopped walnuts or pecans can add a nice crunch. If you prefer a sweeter touch, toss in some chocolate chips. Both options give your cake a delightful surprise in every bite. - Using different spices for added flavor: While cinnamon and nutmeg are classic, consider adding ginger or allspice. These spices bring warmth and depth. You might discover a new favorite flavor combo! - Gluten-free options for the cake base: If you need a gluten-free cake, swap the all-purpose flour for a gluten-free blend. Ensure it has a good balance of starches and flours to keep your cake moist and fluffy. These variations can make your cake unique and cater to different tastes. Each twist adds a personal touch to this cozy treat. For the full recipe, check out the Apple Cider Donut Cake recipe above and let your creativity shine! To keep your Apple Cider Donut Cake fresh, store it in an airtight container. This method helps lock in moisture and flavor. You can place the cake at room temperature for up to three days. If you want it to last longer, refrigerate it. In the fridge, it will stay good for about a week. When you want to enjoy a slice, you can reheat it in a few ways. The best way is to use the microwave. Place a slice on a microwave-safe plate and heat for about 10-15 seconds. This warms it nicely without drying it out. For a crispy edge, you can use an oven. Preheat it to 350°F (175°C) and warm the slice for about 5-7 minutes. This cake stays fresh for a week if stored right. With each slice, you get that sweet, spiced flavor. So, indulge yourself; you deserve it! For the full recipe, check back to ensure you have all the steps and tips. Can I make this cake ahead of time? Yes, you can make this cake a day ahead. Just store it in an airtight container. This keeps it fresh and moist. You can glaze it right before serving to keep it looking nice. What can I substitute for apple cider? If you don’t have apple cider, you can use apple juice. It will give you a similar sweet flavor. Mix in a bit of lemon juice to mimic the tartness of cider. How do I know when the cake is done baking? To check if the cake is done, insert a toothpick in the center. If it comes out clean, your cake is ready. If it has wet batter on it, bake for a few more minutes. Can I freeze Apple Cider Donut Cake? Yes, you can freeze the cake. Wrap it tightly in plastic wrap, then in foil. It stays good for about three months in the freezer. Thaw it in the fridge overnight before serving. For the best taste, enjoy it fresh! For the full recipe, check out the [Full Recipe]. Making an apple cider donut cake is fun and easy. We covered the key ingredients, from flour to butter. The step-by-step guide helps you bake it just right. Add your creative twist with nuts or spices for extra flavor. Store the cake properly to keep it fresh. With these tips and answers, you can enjoy this tasty treat anytime. Now, it's time to bake and share! Enjoy every slice of your delicious cake.](https://juliesdish.com/wp-content/uploads/2025/07/6a0a96bf-a1b2-44be-9e9c-f2c1e6452be8.webp)
Are you ready to enjoy a cozy fall treat? My Apple Cider Donut Cake combines the delightful flavors of fresh
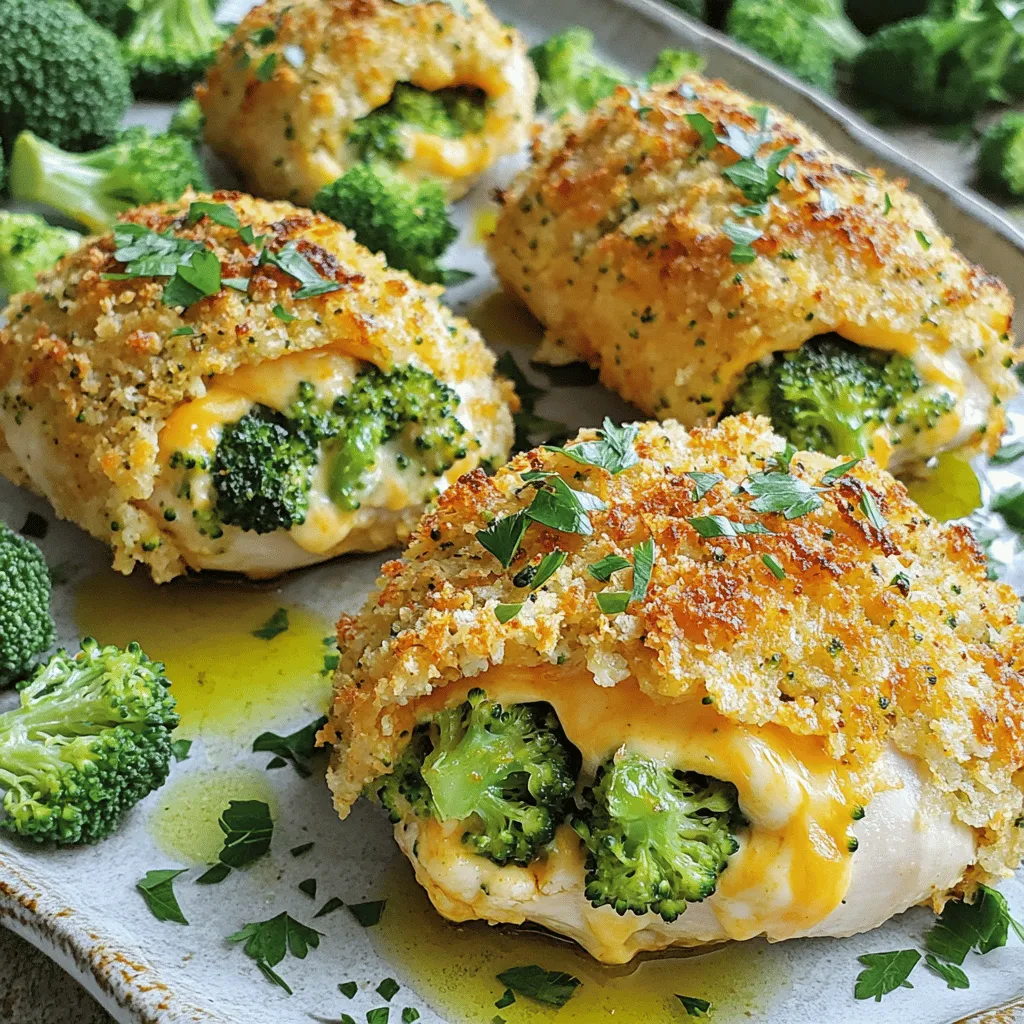
Are you ready to elevate your dinner game? Cheesy Broccoli Stuffed Chicken is here to bring bold flavor and comfort
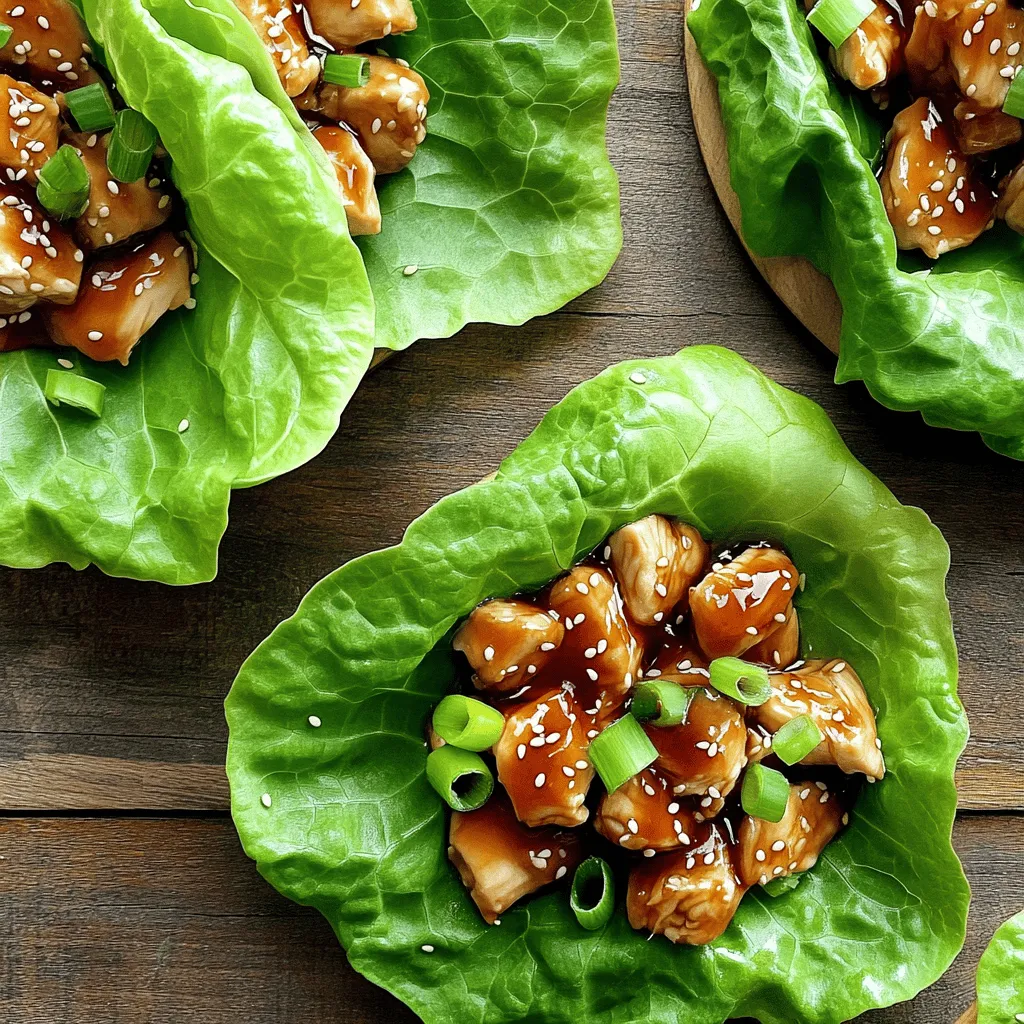
Looking for a quick, tasty meal? Teriyaki Chicken Lettuce Wraps are your answer! They combine tender chicken, a sweet soy
![To make this grilled peach burrata salad, you need some fresh, quality items. Here’s what to gather: - 2 ripe peaches, halved and pitted - 4 cups arugula or mixed greens - 8 oz burrata cheese, torn into pieces - Fresh basil leaves for garnish You will also need a few simple pantry staples. They add flavor and richness to the salad: - 1 tablespoon olive oil - Salt and pepper, to taste - 1/4 cup balsamic glaze Adding some crunch and extra flavor is easy with these optional garnishes: - 1/4 cup toasted walnuts or pecans These ingredients come together beautifully in the grilled peach burrata salad. For the full recipe, check the details above. You will love how fresh and tasty it is! To make grilled peach burrata salad, gather your ingredients. You need peaches, olive oil, greens, and burrata cheese. This salad is easy and fun to make. You can prepare it in about 20 minutes. First, preheat your grill to medium-high heat. Brush the peach halves with olive oil. Then, sprinkle a pinch of salt and pepper on them. Place the peaches cut-side down on the grill. Grill them for 3-4 minutes. You want nice grill marks and soft peaches. Once done, take them off the grill and let them cool for a bit. In a large bowl, place your arugula or mixed greens as the base. Slice the grilled peaches and arrange them over the greens. Tear the burrata cheese into pieces and spread it on top. Drizzle balsamic glaze over the salad to add sweetness. Finally, sprinkle toasted walnuts or pecans for crunch. Add fresh basil leaves for a lovely touch. Enjoy this fresh salad with a rustic wooden board for a beautiful look. For the full recipe, check out the [Full Recipe]. Pick peaches that are ripe and slightly soft. Look for a rich color. They should smell sweet. Avoid peaches with bruises or dark spots. If you can’t find ripe peaches, let them sit at room temperature for a day or two. This will help them soften and develop flavor. Burrata is delicate, so handle it with care. Keep it in the refrigerator until you're ready to use it. Use your hands to gently tear it into pieces. This keeps the creamy center intact. Place the torn burrata on the salad just before serving. This way, it stays fresh and delicious. Enjoy this salad fresh for the best flavor. Serve it on a rustic wooden board for a nice look. Pair it with crusty bread or grilled chicken for a full meal. If you're feeling adventurous, add a sprinkle of chili flakes for a spicy kick. Don't forget, a good balsamic glaze is key to tying all the flavors together. For the full recipe, check here: [Full Recipe]. {{image_2}} You can make your grilled peach burrata salad heartier by adding protein. Grilled chicken adds a nice texture. Shrimp is also great if you want seafood. For a vegetarian choice, try chickpeas or lentils. These options give you energy and keep you full longer. While balsamic glaze shines in this salad, you can switch it up. A honey mustard dressing adds sweetness and tang. For a fresh twist, try a lemon vinaigrette. Both options work well with the creamy burrata and sweet peaches. Experiment with your favorite flavors for a unique touch. Peaches are perfect in summer, but you can change the fruit with the seasons. Grilled plums or apricots give a similar taste. In fall, try grilled apples for a crisp bite. Each fruit brings its own flavor, making this salad fun all year round. Store any leftover grilled peach burrata salad in an airtight container. Keep it in the fridge. It stays fresh for about two days. If you have extra dressing, store it separately to avoid soggy greens. This helps keep the salad crisp and tasty. You don’t need to reheat this salad. It’s best served cold or at room temperature. If you really want to warm up the peaches, do it gently in a pan. Just a minute or two over low heat will work. But be careful not to overcook them. Always start with fresh ingredients for the best flavor. Choose peaches that are ripe but firm. This way, they will hold up on the grill. Wash the greens just before you serve. This keeps them crisp and clean. For the burrata, use it fresh from the fridge. It should be creamy and soft. Following these tips ensures your salad tastes great every time. For the full recipe, check out the recipe section above. For grilling, look for ripe, juicy peaches. Yellow peaches work well. They are sweet and soft. White peaches also grill nicely. They have a milder flavor. Always choose peaches that yield slightly when pressed. This means they are ripe and ready. You can prepare some parts ahead. Grill the peaches and cool them. Store them in the fridge. Assemble the salad just before serving. This keeps the greens fresh and crisp. If you make it too early, the salad can get soggy. If you can't find burrata, try fresh mozzarella. It has a similar creamy taste. You can also use goat cheese for a tangy flavor. Feta cheese is another option. It adds a nice salty touch to the salad. Each choice will change the taste a bit, but all are tasty. For more details, check the [Full Recipe]. This blog post focused on creating a delicious salad with fresh, grilled peaches. We covered key ingredients, preparation steps, and helpful tips. You learned how to pick the best peaches and store leftovers properly. Variations let you customize the salad to your taste. Try different proteins or dressings to keep things exciting. Enjoy the process of cooking and savor each bite. With these insights, you are ready to impress everyone with your peach salad!](https://juliesdish.com/wp-content/uploads/2025/07/9c5d25fd-2d9c-461b-a969-04579b092159.webp)
Are you ready to taste summer in a bowl? This Grilled Peach Burrata Salad is fresh, tasty, and easy to
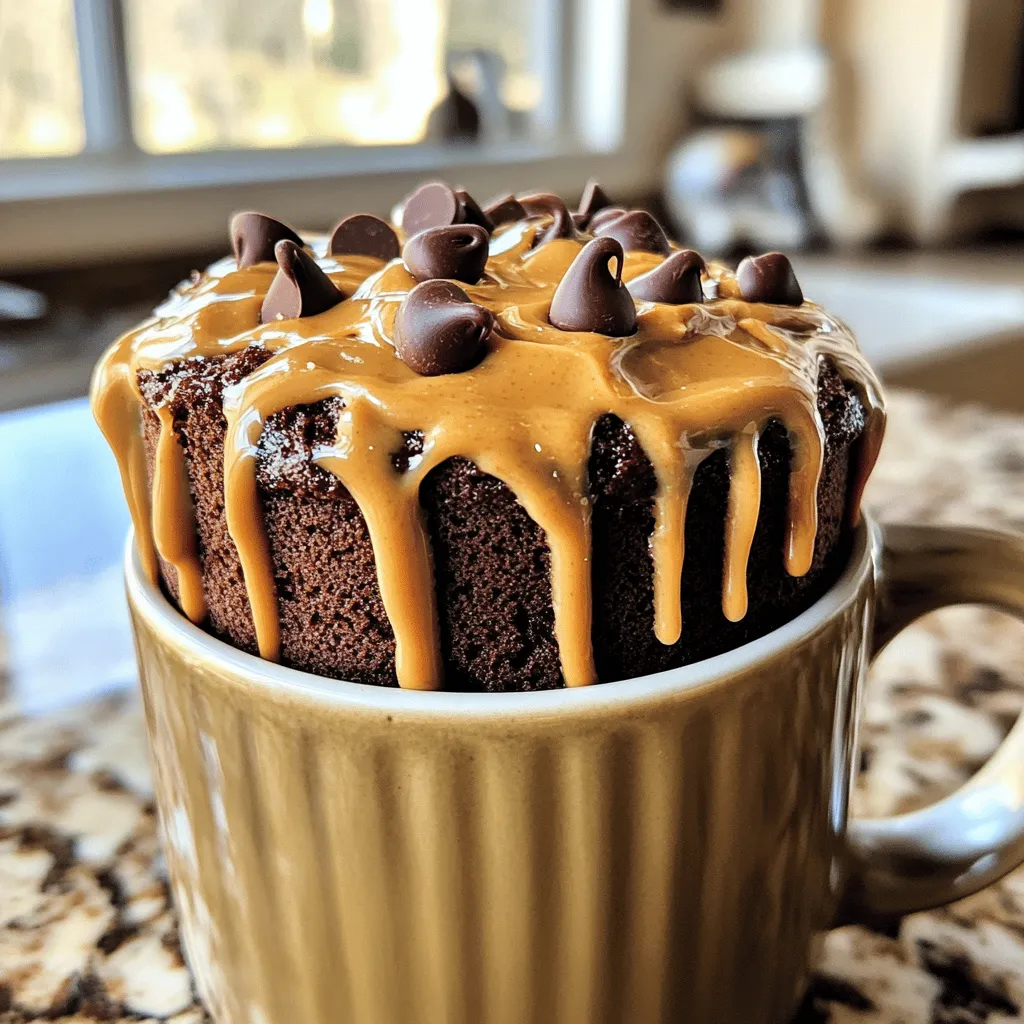
Craving a sweet treat but short on time? You’re in the right place! This Chocolate Peanut Butter Mug Cake is
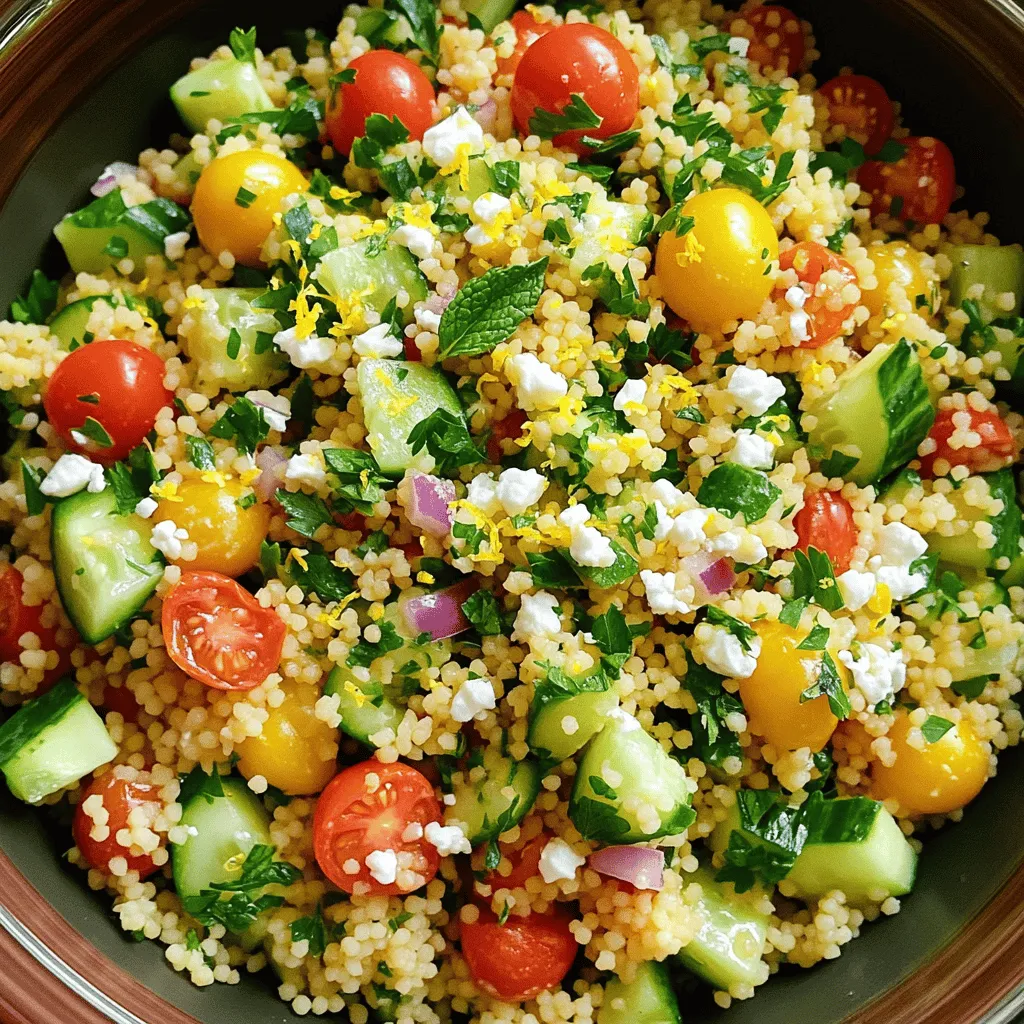
Looking for a fresh and flavorful dish? This Lemon Herb Couscous Salad is just what you need! Packed with bright
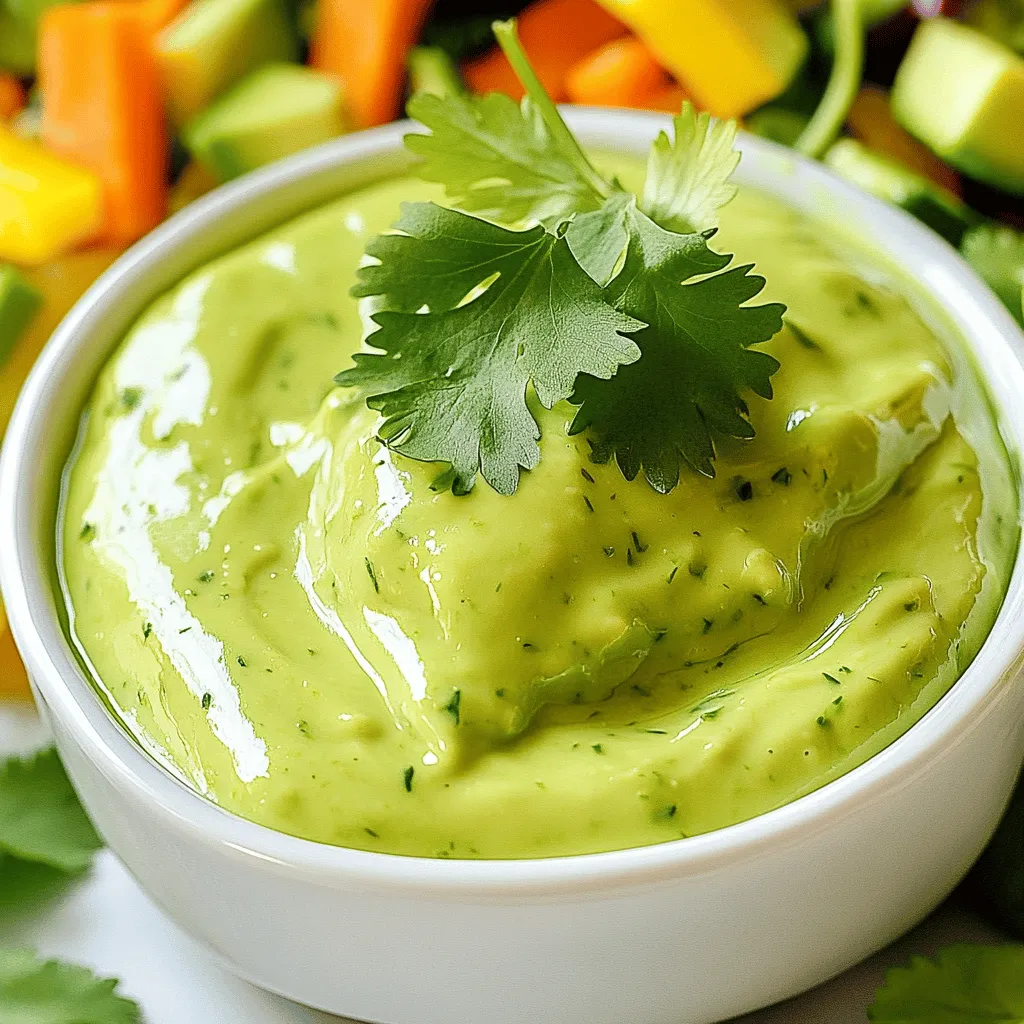
Are you ready to elevate your meals with a bright, zesty twist? This Creamy Avocado Cilantro Dressing is your answer!
![To make the perfect Salted Caramel Pretzel Brownies, you need a few key ingredients. Each one adds a special touch to this sweet treat. Here’s the list you will need: - 1 cup unsalted butter, melted - 1 cup granulated sugar - 1 cup brown sugar, packed - 4 large eggs - 1 teaspoon vanilla extract - 1 cup all-purpose flour - 1 cup cocoa powder - 1/2 teaspoon baking powder - 1/2 teaspoon salt - 2 cups mini pretzels, chopped - 1 cup salted caramel sauce (store-bought or homemade) - Sea salt flakes for topping Each ingredient plays an important role. The butter gives the brownies a rich flavor. The sugars add sweetness and create a nice texture. Eggs help bind everything together while adding moisture. Cocoa powder is key for that deep chocolate taste. The baking powder helps the brownies rise, creating a soft bite. Salt balances the sweetness and enhances flavors. Chopped pretzels add crunch and a salty kick. The salted caramel sauce adds a smooth, sweet layer that makes every bite special. Finally, sea salt flakes on top give that perfect salty finish. For the full recipe and detailed instructions, check out the [Full Recipe]. - Preheat your oven to 350°F (175°C). Grease a 9x13 inch baking pan or line it with parchment paper. - In a large mixing bowl, whisk together 1 cup of melted butter, 1 cup of granulated sugar, and 1 cup of brown sugar. Mix until it looks smooth. - Add 4 large eggs, one at a time. Make sure to whisk well after each egg. Then, mix in 1 teaspoon of vanilla extract. - In another bowl, sift together 1 cup of all-purpose flour, 1 cup of cocoa powder, 1/2 teaspoon of baking powder, and 1/2 teaspoon of salt. - Gradually add the dry mixture to the wet ingredients. Stir gently until just combined. - Fold in 2 cups of chopped mini pretzels. Set aside a handful for later. - Pour half of the brownie batter into your prepared baking pan. Spread it evenly. - Drizzle half of 1 cup of salted caramel sauce over the brownie layer. - Spread the rest of the brownie batter on top. Smooth it out to cover the caramel. - Drizzle the remaining caramel sauce on top. Sprinkle reserved pretzels and sea salt flakes to taste. - Bake for 25-30 minutes. A toothpick inserted in the center should come out mostly clean, with a few moist crumbs. - Allow the brownies to cool in the pan on a wire rack for at least 30 minutes before slicing into squares. For more details, check the Full Recipe. For the perfect brownies, you need to adjust the baking time. If you like fudgy brownies, bake them for 25 minutes. For a more cake-like texture, go for 30 minutes. To check for doneness, use a toothpick. Insert it into the center of the brownies. If it comes out with a few moist crumbs, they are ready. If there is wet batter, bake a bit longer. Want to boost flavor? Try adding chocolate chips or chopped nuts. They add texture and richness. You can also mix in some espresso powder for a deeper chocolate taste. For a richer caramel flavor, use homemade caramel sauce. It will taste fresher and creamier than store-bought. Just be sure to let it cool before drizzling over the brownies. Cutting and displaying brownies can be fun! Use a sharp knife for clean edges. Wipe the knife between cuts for neat squares. For serving, place brownies on a pretty platter. Drizzle extra caramel sauce on top for a nice touch. Pair them with vanilla ice cream for a delightful treat. Check out the Full Recipe for more ideas! {{image_2}} You can enjoy these brownies without gluten. Use alternative flours like almond flour or coconut flour. These flours add a nutty taste and a soft texture. Adjust the liquid in your recipe. Gluten-free flours absorb more moisture. Start with less flour and add more if needed. You can get creative with toppings. Try adding crushed nuts like pecans or walnuts. They add crunch and flavor. Mix in chocolate chips for extra sweetness. You can also use different kinds of caramel sauce or drizzle chocolate on top for fun. Think about adding a sprinkle of sea salt for a bold taste. Serve brownies in fun ways. Cut them into small squares for a party. You can stack them with ice cream for a sundae. Pour warm fudge sauce over the brownies for a rich treat. You can even serve them with fresh fruit, like strawberries or raspberries, for a fresh twist. To keep your brownies fresh, store them in an airtight container. This prevents them from drying out. Use a container that fits the brownies snugly. You can layer parchment paper between layers to avoid sticking. Keep them at room temperature for up to four days. If you want to keep them longer, refrigeration is an option. To freeze your brownies, first let them cool completely. Cut them into squares and wrap each piece in plastic wrap. Then, place the wrapped brownies in a freezer bag or container. This keeps them fresh for about three months. When you’re ready to enjoy, take them out and let them thaw at room temperature. You can also microwave them for a few seconds for a warm treat. At room temperature, brownies last about four to five days. If they look dry or hard, it’s time to toss them. Watch for any signs of mold or an off smell. If you notice any changes, it’s best to discard them. For the best flavor and texture, enjoy them fresh! For more information, check the Full Recipe. You can test your brownies with a toothpick. Insert it into the center of the brownies. If it comes out mostly clean with a few moist crumbs, they are done. This method helps avoid overbaking. Keep an eye on the time, but the toothpick test is your best friend. Yes, you can make these brownies ahead of time. I suggest baking them a day before serving. This allows the flavors to meld. Once cooled, store them in an airtight container. They stay fresh and tasty for up to four days. To reheat brownies, use the microwave or oven. For the microwave, warm them for 10-15 seconds. Check them often to avoid drying out. If using the oven, set it to 350°F (175°C). Wrap the brownies in foil and heat for about 5-10 minutes. This keeps them soft and gooey. You now have everything you need to bake delicious brownies. We covered the key ingredients, step-by-step instructions, and useful tips. You can enhance your brownies with fun flavors and toppings. Remember to store them properly for the best taste. These treats are perfect for sharing or enjoying yourself. So gather your ingredients and try this recipe. Happy baking!](https://juliesdish.com/wp-content/uploads/2025/07/518be44b-9ee9-40d4-8751-9199d6243257.webp)
If you love sweet and salty treats, you’re in for a real treat. Salted Caramel Pretzel Brownies combine fudgy brownies
