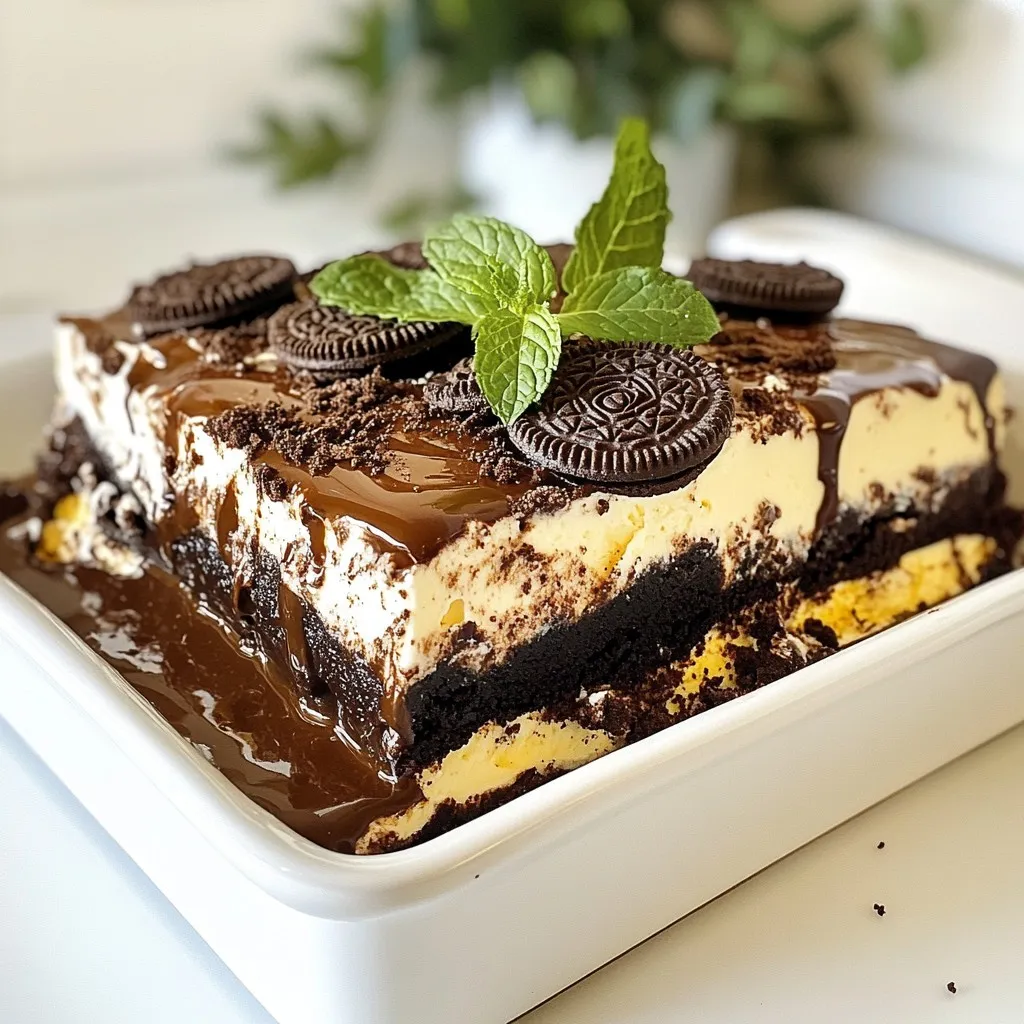
Chocolate Oreo Icebox Cake Delightful No-Bake Treat
If you’re craving a quick and delicious dessert, look no further! The Chocolate Oreo Icebox Cake is a simple, no-bake

If you’re craving a quick and delicious dessert, look no further! The Chocolate Oreo Icebox Cake is a simple, no-bake

If you’re craving a festive treat that’s as simple to make as it is delicious, look no further than my
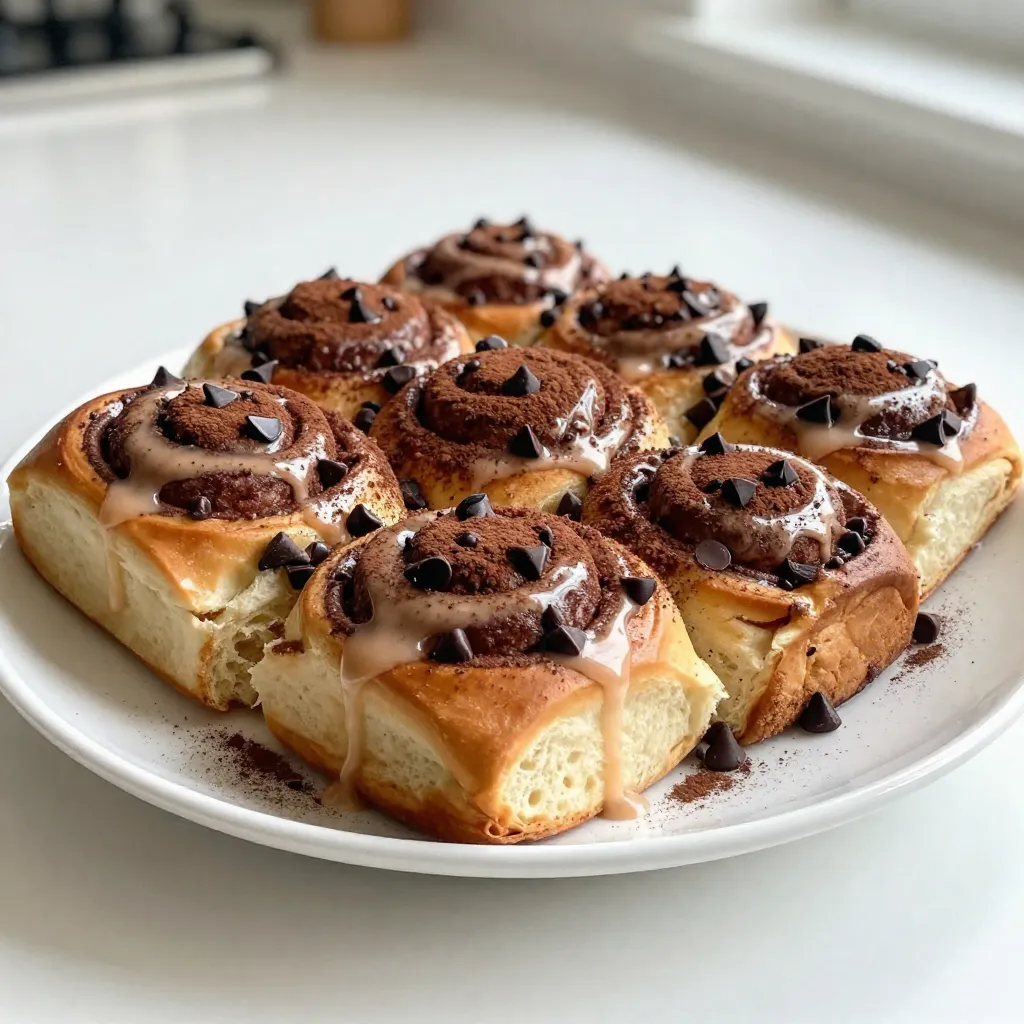
Start your morning right with Mocha Cinnamon Rolls, a treat that blends rich coffee and sweet cinnamon. I’ll guide you
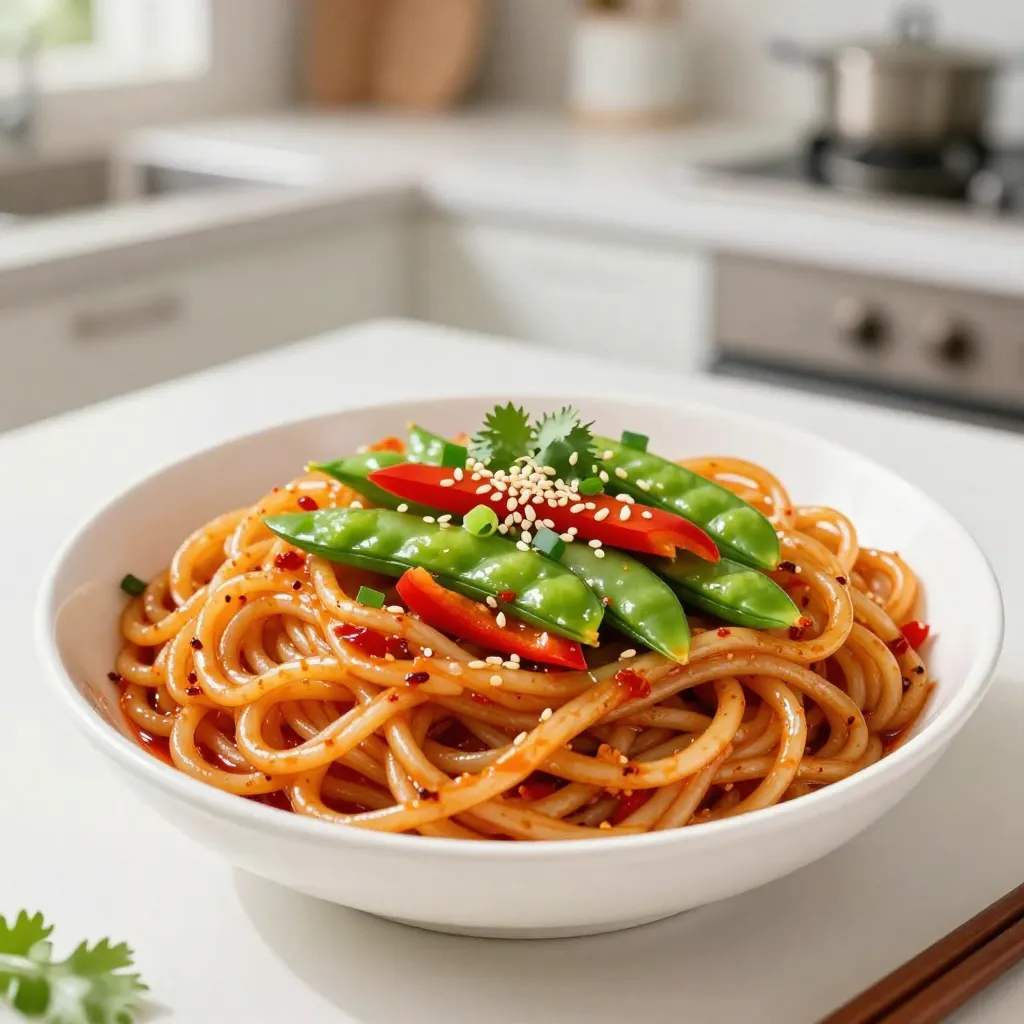
Craving a quick and delicious meal? Look no further! My Sweet Chili Garlic Noodles recipe is simple, tasty, and ready
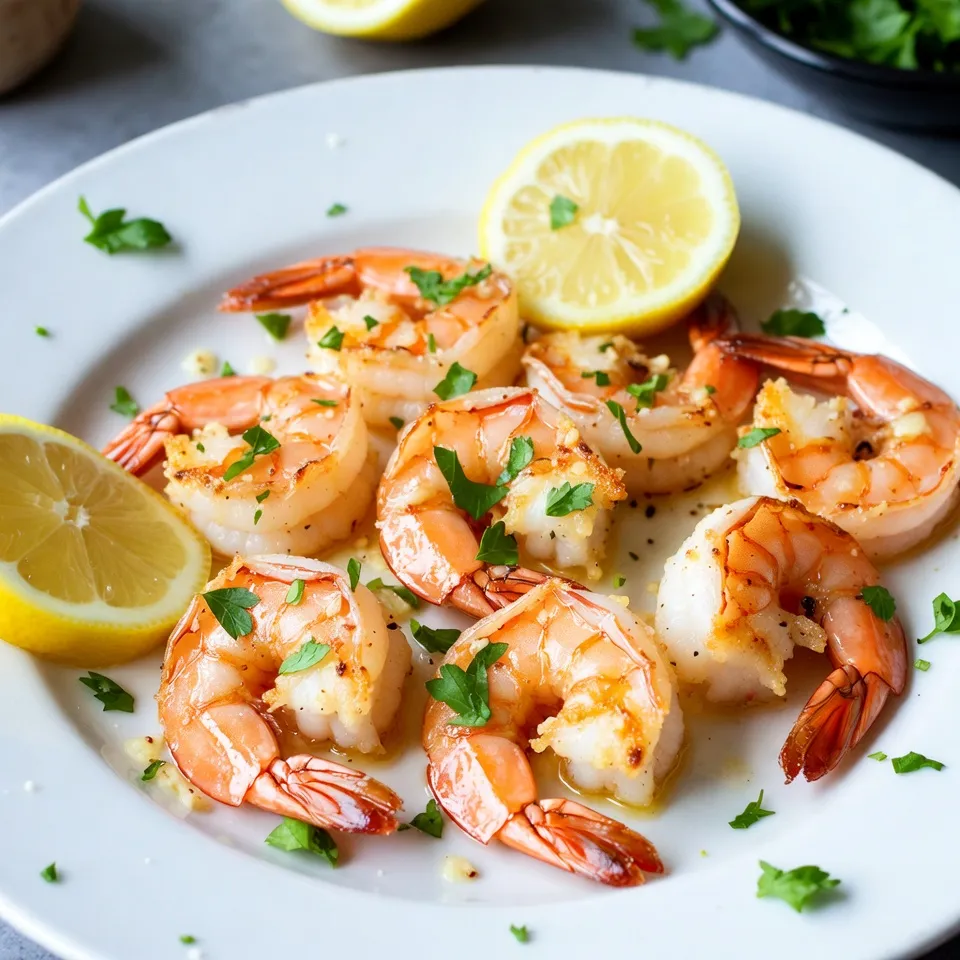
Are you ready to elevate your dinner game with a simple and tasty dish? Garlic Parmesan Air Fryer Shrimp is
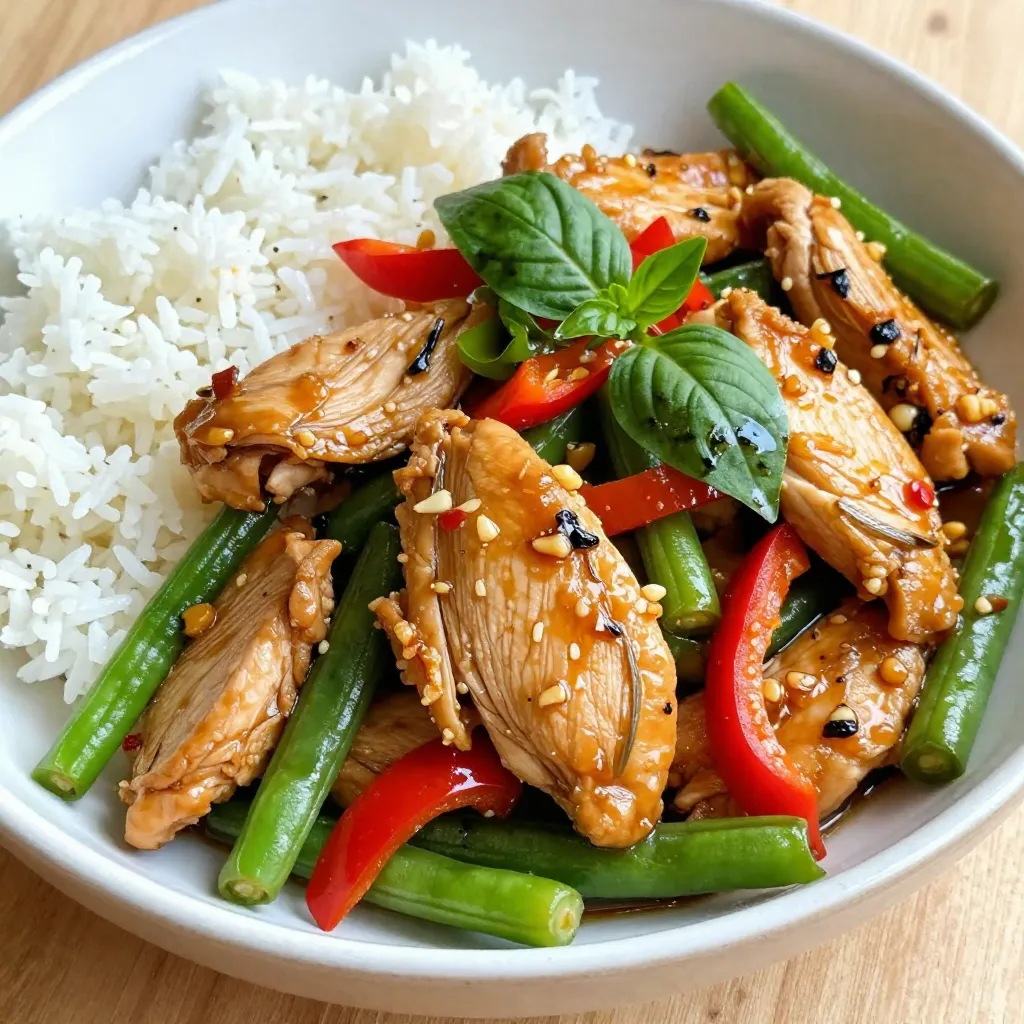
Looking for a quick and tasty meal? Thai Basil Chicken Stir-Fry checks all the boxes! It’s easy to make and

Craving something tasty and quick? These Thai Sweet Chili Chicken Bites are perfect for you! With just a few simple
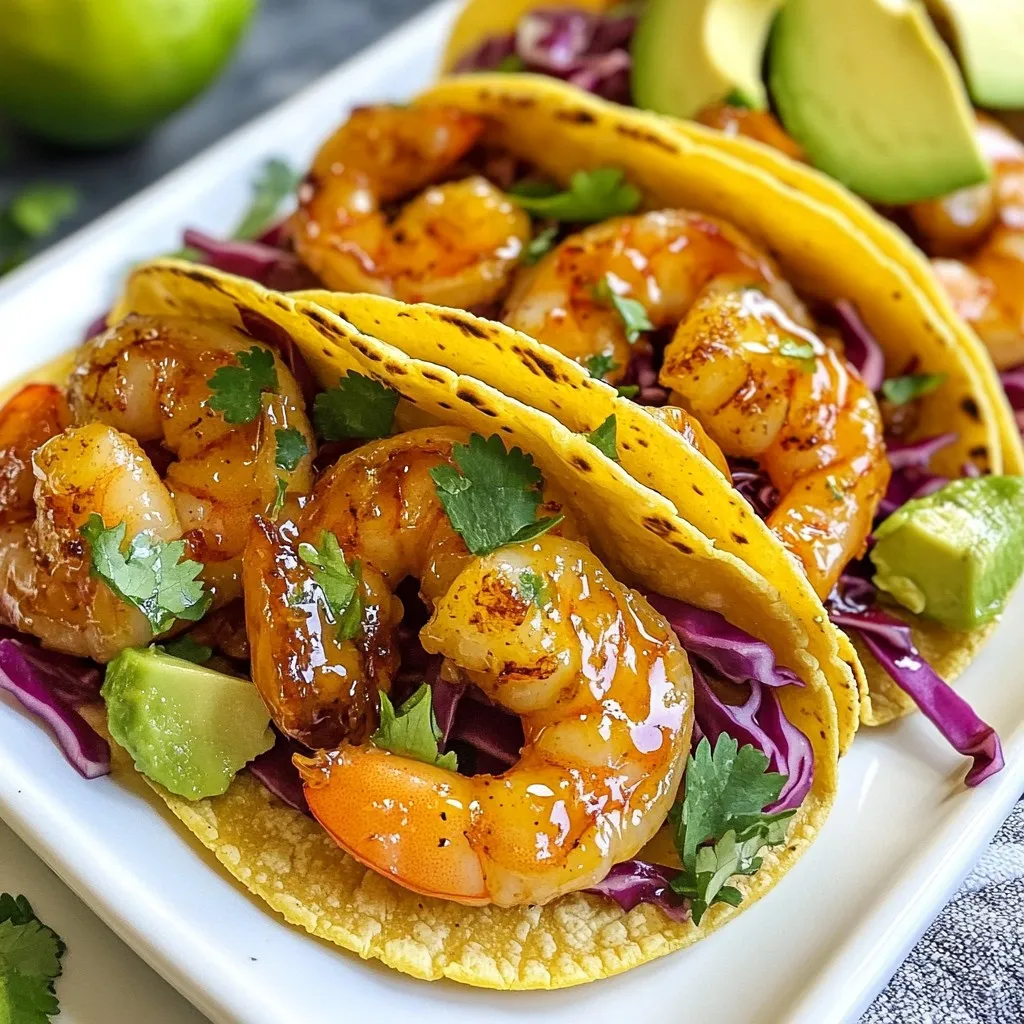
If you crave a quick, tasty meal, you’ve found the right recipe! Honey Lime Shrimp Tacos are bursting with flavor
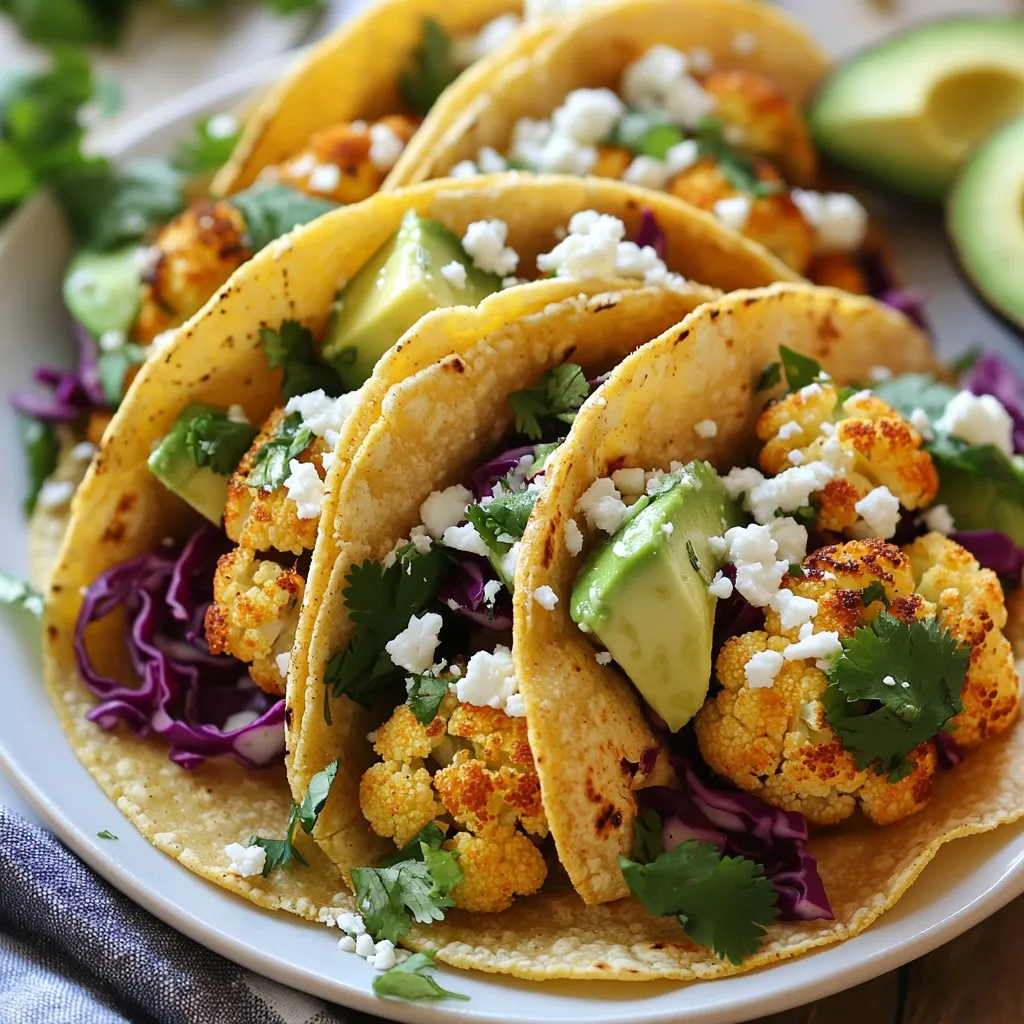
If you’re craving a meal that’s both tasty and healthy, you’re in the right place! My Roasted Cauliflower Tacos are
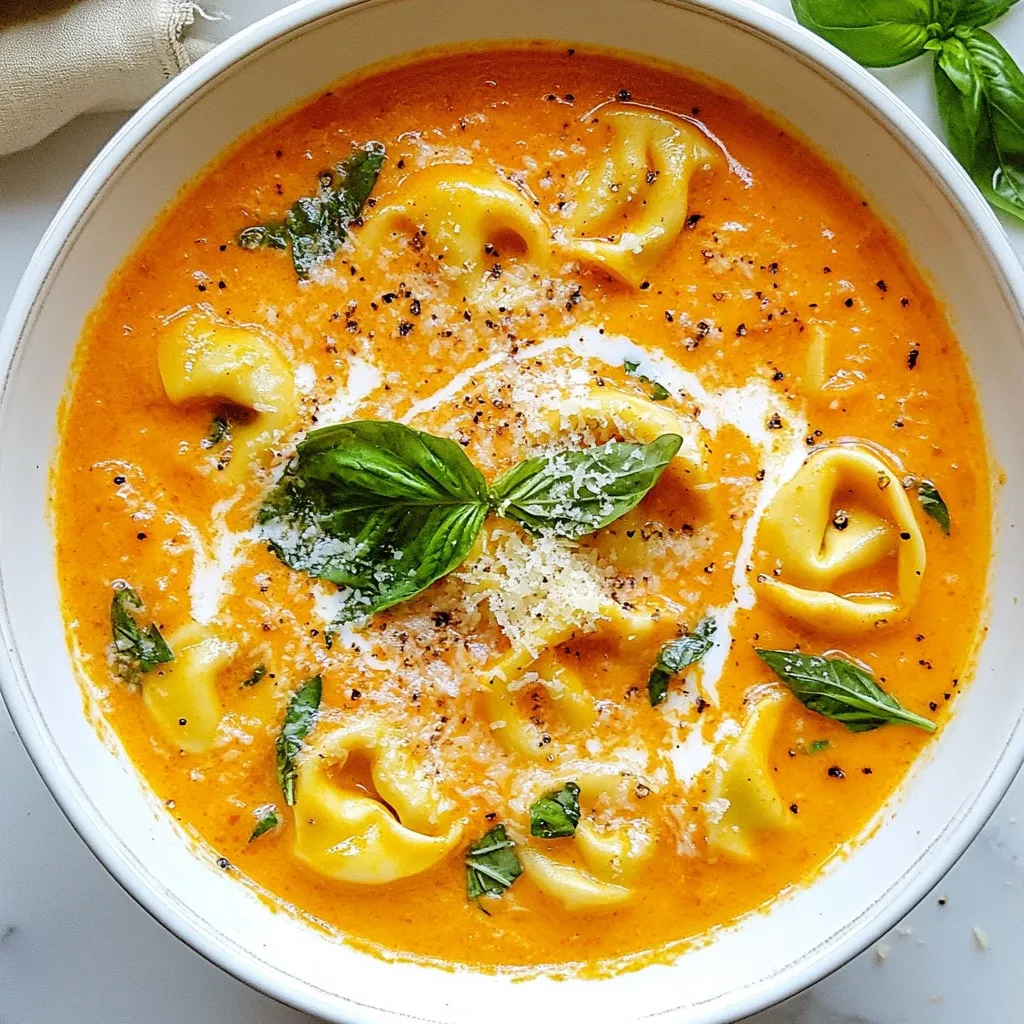
Are you ready to enjoy a warm, comforting bowl of Creamy Tomato Basil Tortellini Soup? This delightful recipe combines simple,
