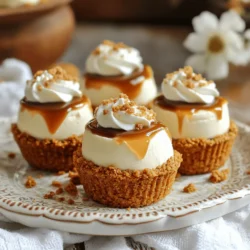
Are you ready for a sweet treat that’s simple and satisfying? No-Bake Biscoff Cheesecake Cookie Cups are your answer! These delightful cups blend creamy cheesecake with delicious Biscoff cookies, perfect for any dessert lover. With easy steps and a few key ingredients, you’ll impress your friends and family in no time. Let’s dive into this fun recipe and make something unforgettable!
Ingredients
List of Ingredients
To make No-Bake Biscoff Cheesecake Cookie Cups, gather these simple items:
– 12 Biscoff cookies, crushed
– 3 tablespoons unsalted butter, melted
– 8 oz cream cheese, softened
– ½ cup powdered sugar
– 1 teaspoon vanilla extract
– ½ cup whipped cream
– ¼ cup Biscoff spread, melted (for drizzling)
– Extra Biscoff cookies, crushed (for topping)
These ingredients combine to create a rich and creamy treat.
Optional Toppings
You can add fun toppings to make your cookie cups even better. Here are some ideas:
– A dollop of whipped cream on top
– A sprinkle of cinnamon for warmth
– Shaved chocolate for extra sweetness
Feel free to get creative!
Ingredient Substitutions
Not all ingredients are set in stone. Here are some swaps you can try:
– Use gluten-free cookies if you need a gluten-free option.
– Swap cream cheese for Greek yogurt for a lighter version.
– Try using whipped coconut cream instead of regular whipped cream for a dairy-free treat.
These swaps keep the flavor while meeting dietary needs.
Step-by-Step Instructions
Preparation of the Cookie Crust
To make the crust, start by crushing 12 Biscoff cookies. You can use a food processor or place them in a zip bag and crush them with a rolling pin. The goal is to have fine crumbs. Next, mix the crushed cookies with 3 tablespoons of melted unsalted butter. Combine them well in a medium bowl. This mixture should be moist but not too wet.
Now, take your serving cups and divide the cookie mixture evenly among them. Press the crumbs down firmly in each cup to form a solid base. This crust will hold everything together and give a nice crunch.
Making the Cheesecake Filling
In another bowl, beat 8 ounces of softened cream cheese with ½ cup of powdered sugar and 1 teaspoon of vanilla extract. Use an electric mixer for a smooth and creamy texture. It should blend well without lumps.
Once the cream cheese mixture is smooth, gently fold in ½ cup of whipped cream. This step is important for a light and airy filling. Use a spatula and mix carefully. You want to keep the fluffiness of the whipped cream.
Assembling the Cookie Cups
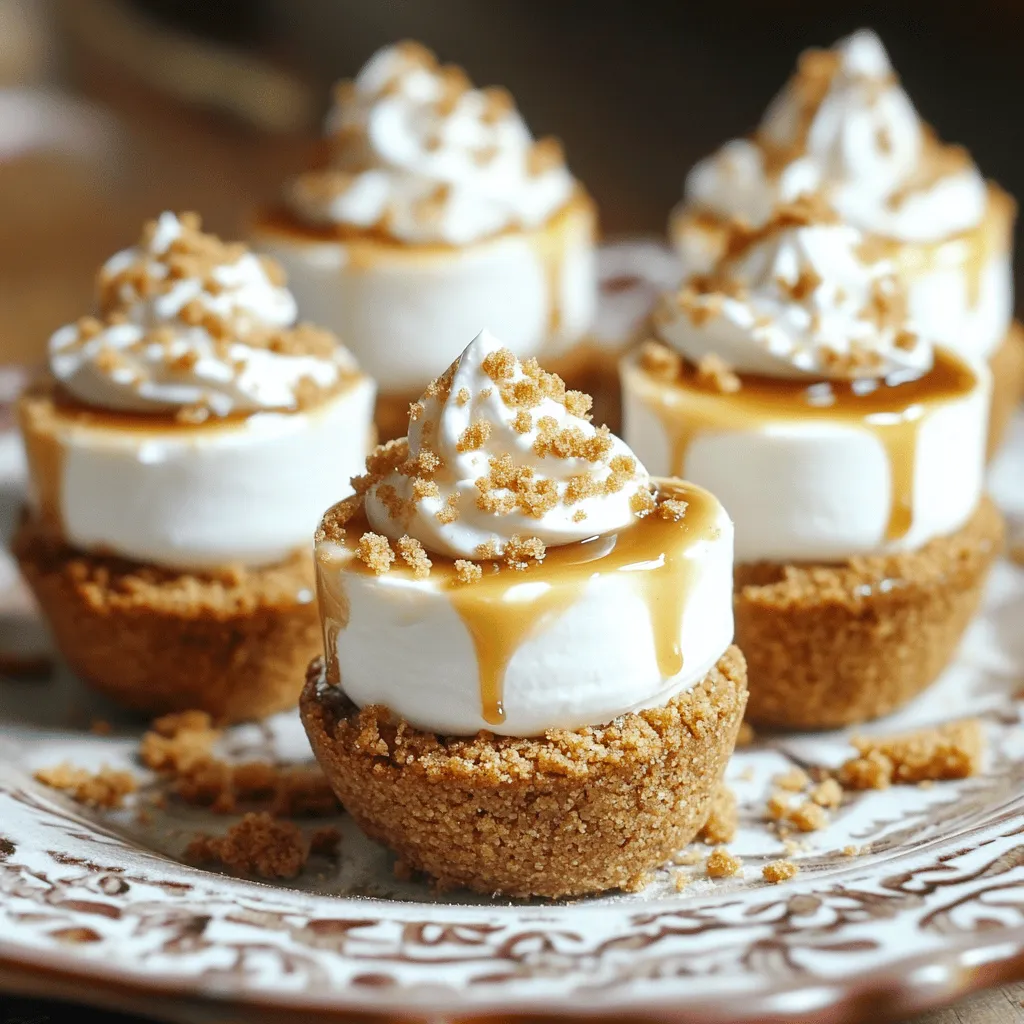
Now it’s time to assemble. Spoon the cheesecake filling over the cookie crusts in each cup. Use a spatula to smooth the tops, making them look nice. After that, drizzle ¼ cup of melted Biscoff spread on top of each cheesecake layer. This adds a delicious layer of flavor.
For the finishing touch, sprinkle some crushed Biscoff cookies on top of the drizzle. They give a nice crunch and look great. Finally, place the cups in the fridge for at least 2 hours. This helps the cheesecake set properly. Enjoy your delicious no-bake Biscoff cheesecake cookie cups!
Tips & Tricks
How to Achieve the Perfect Cheesecake Texture
To get a smooth cheesecake, start with soft cream cheese. I recommend leaving it out for about 30 minutes before you mix. Mix it with powdered sugar and vanilla until it’s creamy. Then, gently fold in the whipped cream. This adds air and keeps the texture light. If you mix too hard, it can get dense.
Storage and Serving Suggestions
These cookie cups need to chill for at least 2 hours. This helps them set. After chilling, keep them in the fridge. They stay fresh for up to 3 days. When you serve, use a fun platter. A scoop of whipped cream on top makes it look fancy. Drizzle leftover Biscoff spread around the cups for a pretty touch.
Common Mistakes to Avoid
One big mistake is not crushing the cookies finely enough. If the pieces are too big, the crust won’t hold. Make sure to press the crust firmly into the cups. Another mistake is skipping the chill time. Without it, the cheesecake won’t set well. Finally, don’t skip the whipped cream. It makes the filling light and fluffy, which is key for a great cheesecake.
Variations
Flavor Variations for the Filling
You can change the flavor of the filling to suit your taste. For a chocolate twist, add cocoa powder or melted chocolate to the cream cheese mix. You could also mix in peanut butter for a nutty flavor. If you love fruit, try adding pureed strawberries or raspberries. Each choice brings a new taste adventure.
Alternative Cookie Base Options
If you want to switch the cookie base, there are many choices. You can use graham crackers for a classic feel. Oreos work great for a chocolatey base. For a nutty taste, try crushed almond cookies. Each cookie adds a unique flavor and texture to the cheesecake cups.
Dietary Adjustments (Gluten-free, Vegan)
To make these cookie cups gluten-free, use gluten-free cookies. Many brands offer great options. For a vegan version, swap cream cheese for a plant-based alternative. Use coconut cream instead of whipped cream for a rich texture. Adjust the sweetener to suit your needs, and you can enjoy this treat without gluten or dairy!
Storage Info
How to Properly Store Cookie Cups
To keep your cookie cups fresh, place them in an airtight container. Use layers of parchment paper between the cups to avoid sticking. Store them in the fridge for best results. This method keeps the cheesecake creamy and the crust crunchy.
Freezing Instructions
You can freeze the cookie cups if you want to save some for later. Place them in a freezer-safe container. Make sure to cover them well to prevent freezer burn. When ready to enjoy, thaw them in the fridge for several hours before serving.
Shelf Life
These cookie cups last about 3 to 5 days in the fridge. If frozen, they can last up to 2 months. Always check for any signs of spoilage before eating. Enjoy your tasty treats while they are fresh!
FAQs
How long does it take for the cheesecake to set?
The cheesecake needs at least 2 hours in the fridge. This time lets it firm up. You can leave it longer if you want a firmer texture. Just make sure to cover the cups to keep them fresh.
Can I make these in advance?
Yes, you can make these cookie cups a day ahead. Just store them in the fridge. They stay tasty and fresh, making them perfect for parties or gatherings.
What can I use instead of Biscoff cookies?
If you can’t find Biscoff cookies, try graham crackers or digestive biscuits. They both offer a different flavor but still work well. You can also use chocolate cookies for a sweeter twist.
Is there a vegan option for this recipe?
Yes, you can make a vegan version! Use vegan cream cheese and plant-based whipped cream. Replace Biscoff spread with a vegan chocolate or nut spread. The cookie base can stay the same with vegan cookies.
This blog post covered all you need for delicious cheesecake cookie cups. We explored ingredients, with options for toppings and swaps. I shared simple steps to prepare the crust and filling.
We discussed tips for perfect texture and serving ideas. The section on variations helps you tailor this treat to your taste or needs. Now that you know how to store and freeze them, you’ll keep these cups fresh longer. Enjoy every bite!