Chocolate Coconut Granola Bars Easy and Tasty Snack

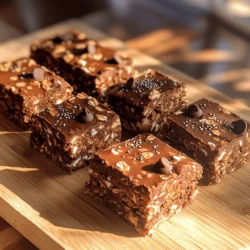
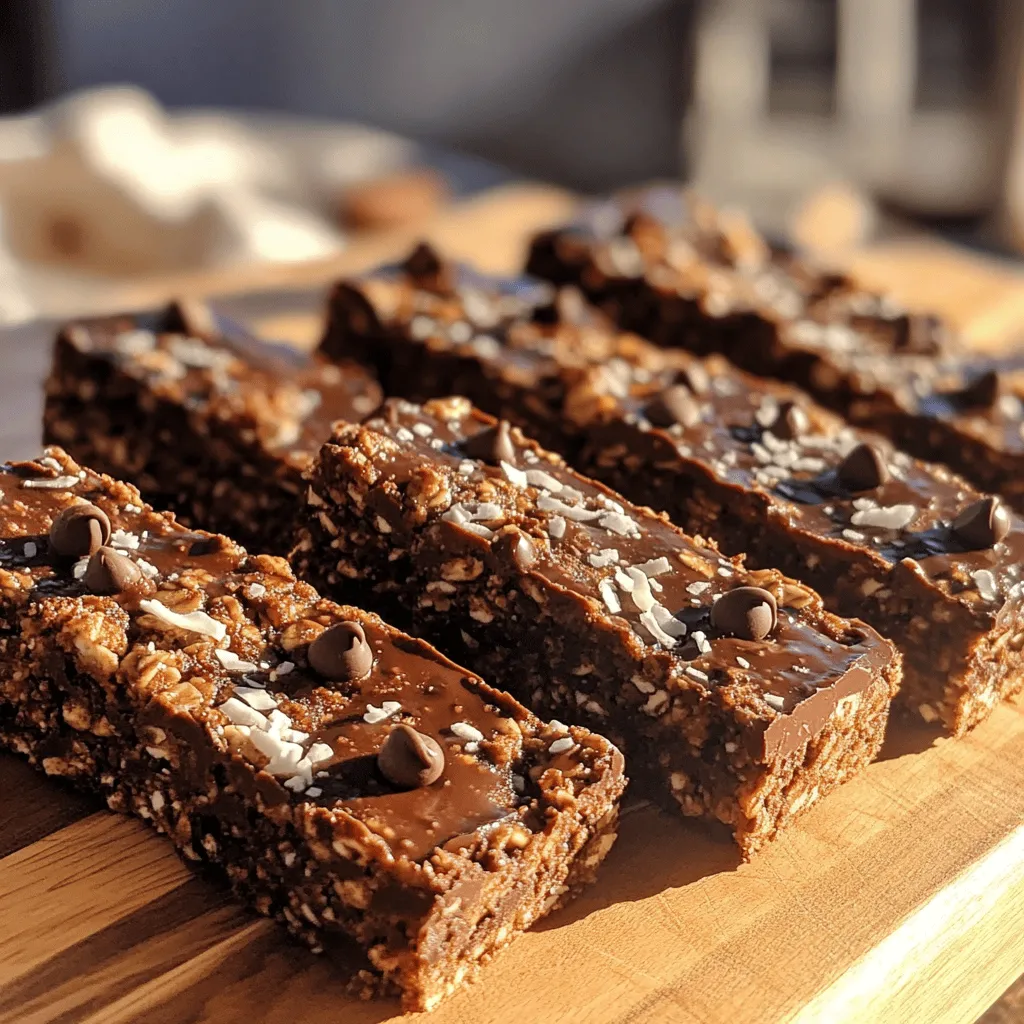
Looking for a snack that’s both easy to make and delicious? You’ve stumbled upon the perfect recipe for Chocolate Coconut Granola Bars! With just a handful of simple ingredients, you can whip up these tasty treats in no time. Packed with nutrients and flavor, they make a great on-the-go option. Join me as we explore how to create your own custom bars that satisfy your cravings and keep you energized!

Ingredients

Main Ingredients for Chocolate Coconut Granola Bars

To make these tasty bars, gather the following ingredients:

– 2 cups rolled oats

– 1 cup unsweetened shredded coconut

– 1/2 cup almond butter or peanut butter

– 1/3 cup honey or maple syrup

– 1/4 cup cocoa powder

– 1/2 cup mini chocolate chips

– 1/4 cup chia seeds (optional)

– 1/4 teaspoon sea salt

– 1 teaspoon vanilla extract

These simple ingredients blend well. Each item adds flavor and nutrition. Rolled oats give a hearty base. Shredded coconut adds a sweet, chewy texture. Nut butter binds the bars and gives healthy fat. Honey or maple syrup sweetens and helps everything stick. Cocoa powder brings rich chocolate flavor. Mini chocolate chips melt in your mouth. Chia seeds add a boost of omega-3s if you choose to include them. Sea salt enhances all the flavors, while vanilla adds warmth.

Nutritional Benefits

These bars are packed with nutrients. Oats provide fiber, which helps keep you full. They also help with heart health. Coconut is rich in healthy fats and can boost energy. Cocoa powder has antioxidants and can improve mood. If you use chia seeds, they add protein and omega-3 fatty acids. These nutrients support brain health and digestion.

Suggested Substitutes

You can easily swap some ingredients. If you need a nut-free option, try sunflower seed butter. For sweeteners, agave syrup or brown rice syrup works well. If you want gluten-free granola bars, ensure your oats are certified gluten-free. You can also use puffed rice or quinoa for a different crunch. These swaps keep the bars delicious and cater to various tastes.

Step-by-Step Instructions

Preparation Preparation Time: 15 minutes

First, gather all your ingredients. You will need rolled oats, shredded coconut, almond butter, honey, cocoa powder, and mini chocolate chips. If you want, add chia seeds for extra nutrition.

Start by preheating your oven to 350°F (175°C). This step is key for even baking. Next, line an 8×8 inch baking dish with parchment paper. Leave some paper hanging over the edges. This will help you lift the bars out later.

In a large mixing bowl, combine the rolled oats, shredded coconut, cocoa powder, chia seeds, and sea salt. Mix these dry ingredients well. This ensures every bite has a great flavor.

Baking Instructions

Once your mixture is ready, it’s time to make the sticky part. In a small saucepan, heat the almond butter and honey over low heat. Stir this mix for about 2-3 minutes until smooth. Remove it from the heat and add the vanilla extract.

Now pour this warm mixture over your dry ingredients. Stir well until everything is coated. Then, fold in the mini chocolate chips.

Transfer the mixture to your prepared baking dish. Use a spatula to press it down firmly. Make sure it’s even across the bottom.

Bake in your preheated oven for 20-25 minutes. Look for the edges to turn slightly golden and the center to set. This will give you a nice texture.

Cooling and Cutting Instructions

After baking, let your granola bars cool in the pan for at least 15 minutes. This time allows them to firm up. Once cool, use the parchment paper to lift them out of the pan.

To cut the bars, use a sharp knife. This helps you get clean edges without crumbling. You can slice them into any size you like.

Store your chocolate coconut granola bars in an airtight container. They stay fresh at room temperature for a week. If you want them to last longer, put them in the fridge.

For the full recipe, check the details above. Enjoy your tasty snack!

Tips & Tricks

Perfecting Your Granola Bars

To avoid crumbly bars, make sure to use enough binding ingredients. Almond butter or peanut butter plays a key role. When mixing, stir until all dry ingredients coat well. This step ensures a firmer texture.

Press the mixture firmly into the baking dish. Use a spatula to push it down evenly. This helps the bars hold together when cut. If you find the bars still crumble, try adding a bit more nut butter next time.

Storage Tips

Store your homemade granola bars in an airtight container. This keeps them fresh and tasty. You can leave them at room temperature for up to a week. For longer freshness, place them in the fridge.

To maximize freshness, consider wrapping each bar in plastic wrap. This way, they stay moist and flavorful.

Flavor Enhancements

You can customize your bars with different mix-ins. Try adding nuts like almonds or cashews for a crunchy bite. Dried fruits like cranberries or raisins also add sweetness.

If you want a tropical twist, include more coconut or even some pineapple bits. The options are endless, so feel free to experiment! For the full recipe, check out the Chocolate Coconut Granola Bars section.

Variations

Vegan and Gluten-Free Options

You can easily make these bars vegan and gluten-free. To do this, simply use maple syrup instead of honey. This swap keeps the bars sweet and plant-based. For the oats, make sure you choose certified gluten-free oats. These oats ensure no cross-contamination occurs. You can still enjoy the same tasty flavor without worry.

Alternative Flavor Profiles

If you want to try different flavors, go for it! A peanut butter chocolate version is one of my favorites. Just swap almond butter for creamy peanut butter. You can also add some chopped peanuts for crunch. Another option is coconut almond. Replace half the cocoa powder with almond extract for a nutty twist. You can even mix in dried fruit or seeds to change things up. The possibilities are endless!

Homemade vs. Store-bought

When comparing homemade and store-bought chocolate coconut granola bars, homemade bars win in many ways. They are fresh, free of preservatives, and you can control the taste. Store-bought bars can be convenient, but they often have extra sugar and unhealthy fats. Some brands do offer decent options, so check the labels. Look for bars with minimal ingredients that match the full recipe. This approach will help you find tasty and healthy choices.

Storage Info

Best Storage Practices

To keep your Chocolate Coconut Granola Bars fresh longer, store them in an airtight container. This helps prevent them from getting stale. You can keep them at room temperature for up to a week. If you live in a humid area, consider refrigerating them. This extra step can help maintain their texture and taste. Always use parchment paper to separate layers if you stack them. This avoids sticking and ensures easy access.

Shelf Life

Homemade granola bars can last a while if stored right. In an airtight container at room temperature, they last about a week. If you refrigerate them, you can enjoy them for up to two weeks. Freezing extends their life even more. If frozen, they can last up to three months. Just make sure to wrap them well to prevent freezer burn.

Freezing Instructions

Freezing your granola bars is easy and a great way to keep them fresh. First, let the bars cool completely. Then, wrap each bar in plastic wrap. Place them in a freezer-safe bag or container. Label the bag with the date. When you want to eat one, just take it out and let it thaw at room temperature. Enjoy your tasty snack anytime!

FAQs

How do I customize my Chocolate Coconut Granola Bars?

You can easily change these bars to fit your taste. Here are some fun ideas:

Add-ins: Try mixing in dried fruits like cranberries or apricots. Seeds like pumpkin or sunflower can add crunch.

Flavors: Swap cocoa powder for carob or add spices like cinnamon or nutmeg.

Sweeteners: Use agave syrup or brown rice syrup instead of honey for a different sweetness.

Can I make these bars without nuts?

Yes, you can make nut-free granola bars! Here are some options:

– Use sunflower seed butter instead of almond or peanut butter.

– If you want a creamy texture, try tahini. It’s made from sesame seeds and is nut-free.

– Make sure to check all labels to avoid any nut contamination.

What’s the best way to cut homemade granola bars?

Cutting granola bars can be tricky. Here’s how to do it right:

– Let the bars cool completely before cutting. This helps them hold together better.

– Use a sharp knife for clean cuts. A serrated knife works well too.

– To avoid crumbling, press down firmly but gently as you slice.

How long do these granola bars last?

These granola bars stay fresh for about a week at room temperature. Here are some tips:

– Store them in an airtight container to keep them soft.

– If you want them to last longer, put them in the fridge. They can last up to two weeks there.

– You can freeze them for up to three months. Just wrap each bar in plastic wrap before freezing.

You’ve learned how to make chocolate coconut granola bars from scratch. The main ingredients, like oats and honey, provide nutrients and great taste. I shared tips to avoid crumbly bars and keep them fresh. Remember, you can customize these bars with your favorite flavors or dietary needs. Homemade granola bars are simple, tasty, and healthy snacks. Enjoy making your own at home, and feel free to experiment with different ingredients!

To make these tasty bars, gather the following ingredients: - 2 cups rolled oats - 1 cup unsweetened shredded coconut - 1/2 cup almond butter or peanut butter - 1/3 cup honey or maple syrup - 1/4 cup cocoa powder - 1/2 cup mini chocolate chips - 1/4 cup chia seeds (optional) - 1/4 teaspoon sea salt - 1 teaspoon vanilla extract These simple ingredients blend well. Each item adds flavor and nutrition. Rolled oats give a hearty base. Shredded coconut adds a sweet, chewy texture. Nut butter binds the bars and gives healthy fat. Honey or maple syrup sweetens and helps everything stick. Cocoa powder brings rich chocolate flavor. Mini chocolate chips melt in your mouth. Chia seeds add a boost of omega-3s if you choose to include them. Sea salt enhances all the flavors, while vanilla adds warmth. These bars are packed with nutrients. Oats provide fiber, which helps keep you full. They also help with heart health. Coconut is rich in healthy fats and can boost energy. Cocoa powder has antioxidants and can improve mood. If you use chia seeds, they add protein and omega-3 fatty acids. These nutrients support brain health and digestion. You can easily swap some ingredients. If you need a nut-free option, try sunflower seed butter. For sweeteners, agave syrup or brown rice syrup works well. If you want gluten-free granola bars, ensure your oats are certified gluten-free. You can also use puffed rice or quinoa for a different crunch. These swaps keep the bars delicious and cater to various tastes. First, gather all your ingredients. You will need rolled oats, shredded coconut, almond butter, honey, cocoa powder, and mini chocolate chips. If you want, add chia seeds for extra nutrition. Start by preheating your oven to 350°F (175°C). This step is key for even baking. Next, line an 8x8 inch baking dish with parchment paper. Leave some paper hanging over the edges. This will help you lift the bars out later. In a large mixing bowl, combine the rolled oats, shredded coconut, cocoa powder, chia seeds, and sea salt. Mix these dry ingredients well. This ensures every bite has a great flavor. Once your mixture is ready, it's time to make the sticky part. In a small saucepan, heat the almond butter and honey over low heat. Stir this mix for about 2-3 minutes until smooth. Remove it from the heat and add the vanilla extract. Now pour this warm mixture over your dry ingredients. Stir well until everything is coated. Then, fold in the mini chocolate chips. Transfer the mixture to your prepared baking dish. Use a spatula to press it down firmly. Make sure it's even across the bottom. Bake in your preheated oven for 20-25 minutes. Look for the edges to turn slightly golden and the center to set. This will give you a nice texture. After baking, let your granola bars cool in the pan for at least 15 minutes. This time allows them to firm up. Once cool, use the parchment paper to lift them out of the pan. To cut the bars, use a sharp knife. This helps you get clean edges without crumbling. You can slice them into any size you like. Store your chocolate coconut granola bars in an airtight container. They stay fresh at room temperature for a week. If you want them to last longer, put them in the fridge. For the full recipe, check the details above. Enjoy your tasty snack! To avoid crumbly bars, make sure to use enough binding ingredients. Almond butter or peanut butter plays a key role. When mixing, stir until all dry ingredients coat well. This step ensures a firmer texture. Press the mixture firmly into the baking dish. Use a spatula to push it down evenly. This helps the bars hold together when cut. If you find the bars still crumble, try adding a bit more nut butter next time. Store your homemade granola bars in an airtight container. This keeps them fresh and tasty. You can leave them at room temperature for up to a week. For longer freshness, place them in the fridge. To maximize freshness, consider wrapping each bar in plastic wrap. This way, they stay moist and flavorful. You can customize your bars with different mix-ins. Try adding nuts like almonds or cashews for a crunchy bite. Dried fruits like cranberries or raisins also add sweetness. If you want a tropical twist, include more coconut or even some pineapple bits. The options are endless, so feel free to experiment! For the full recipe, check out the Chocolate Coconut Granola Bars section. {{image_2}} You can easily make these bars vegan and gluten-free. To do this, simply use maple syrup instead of honey. This swap keeps the bars sweet and plant-based. For the oats, make sure you choose certified gluten-free oats. These oats ensure no cross-contamination occurs. You can still enjoy the same tasty flavor without worry. If you want to try different flavors, go for it! A peanut butter chocolate version is one of my favorites. Just swap almond butter for creamy peanut butter. You can also add some chopped peanuts for crunch. Another option is coconut almond. Replace half the cocoa powder with almond extract for a nutty twist. You can even mix in dried fruit or seeds to change things up. The possibilities are endless! When comparing homemade and store-bought chocolate coconut granola bars, homemade bars win in many ways. They are fresh, free of preservatives, and you can control the taste. Store-bought bars can be convenient, but they often have extra sugar and unhealthy fats. Some brands do offer decent options, so check the labels. Look for bars with minimal ingredients that match the full recipe. This approach will help you find tasty and healthy choices. To keep your Chocolate Coconut Granola Bars fresh longer, store them in an airtight container. This helps prevent them from getting stale. You can keep them at room temperature for up to a week. If you live in a humid area, consider refrigerating them. This extra step can help maintain their texture and taste. Always use parchment paper to separate layers if you stack them. This avoids sticking and ensures easy access. Homemade granola bars can last a while if stored right. In an airtight container at room temperature, they last about a week. If you refrigerate them, you can enjoy them for up to two weeks. Freezing extends their life even more. If frozen, they can last up to three months. Just make sure to wrap them well to prevent freezer burn. Freezing your granola bars is easy and a great way to keep them fresh. First, let the bars cool completely. Then, wrap each bar in plastic wrap. Place them in a freezer-safe bag or container. Label the bag with the date. When you want to eat one, just take it out and let it thaw at room temperature. Enjoy your tasty snack anytime! You can easily change these bars to fit your taste. Here are some fun ideas: - Add-ins: Try mixing in dried fruits like cranberries or apricots. Seeds like pumpkin or sunflower can add crunch. - Flavors: Swap cocoa powder for carob or add spices like cinnamon or nutmeg. - Sweeteners: Use agave syrup or brown rice syrup instead of honey for a different sweetness. Yes, you can make nut-free granola bars! Here are some options: - Use sunflower seed butter instead of almond or peanut butter. - If you want a creamy texture, try tahini. It’s made from sesame seeds and is nut-free. - Make sure to check all labels to avoid any nut contamination. Cutting granola bars can be tricky. Here’s how to do it right: - Let the bars cool completely before cutting. This helps them hold together better. - Use a sharp knife for clean cuts. A serrated knife works well too. - To avoid crumbling, press down firmly but gently as you slice. These granola bars stay fresh for about a week at room temperature. Here are some tips: - Store them in an airtight container to keep them soft. - If you want them to last longer, put them in the fridge. They can last up to two weeks there. - You can freeze them for up to three months. Just wrap each bar in plastic wrap before freezing. You’ve learned how to make chocolate coconut granola bars from scratch. The main ingredients, like oats and honey, provide nutrients and great taste. I shared tips to avoid crumbly bars and keep them fresh. Remember, you can customize these bars with your favorite flavors or dietary needs. Homemade granola bars are simple, tasty, and healthy snacks. Enjoy making your own at home, and feel free to experiment with different ingredients!

Chocolate Coconut Granola Bars

Indulge in these easy-to-make Chocolate Coconut Granola Bars that are perfect for a healthy snack! Packed with rolled oats, shredded coconut, and mini chocolate chips, they offer a delightful treat that satisfies your sweet tooth. Whip up a batch in just 40 minutes and enjoy them all week long. Click through for the full recipe and learn how to create these delicious granola bars that are sure to please everyone!

Ingredients
  

2 cups rolled oats

1 cup unsweetened shredded coconut

1/2 cup almond butter (or peanut butter)

1/3 cup honey or maple syrup

1/4 cup cocoa powder

1/2 cup mini chocolate chips

1/4 cup chia seeds (optional for added nutrition)

1/4 teaspoon sea salt

1 teaspoon vanilla extract

Instructions
 

Preheat your oven to 350°F (175°C) and line an 8x8 inch baking dish with parchment paper, leaving some overhang for easy removal.

    In a large mixing bowl, combine the rolled oats, shredded coconut, cocoa powder, chia seeds (if using), and sea salt.

      In a small saucepan over low heat, mix the almond butter and honey (or maple syrup). Stir continuously until the mixture is smooth and well combined, about 2-3 minutes.

        Remove the saucepan from heat and add the vanilla extract. Pour this mixture over the dry ingredients in the large bowl and stir until everything is thoroughly coated and combined.

          Fold in the mini chocolate chips, ensuring they are evenly distributed throughout the mixture.

            Transfer the granola mixture to the prepared baking dish. Use a spatula to press it down firmly and evenly across the bottom.

              Bake in the preheated oven for 20-25 minutes, or until the edges are slightly golden and the center has set.

                Allow the granola bars to cool in the pan for at least 15 minutes before lifting them out using the parchment paper overhang.

                  Once cooled, slice into desired bar sizes using a sharp knife.

                    Store the bars in an airtight container at room temperature for up to a week, or refrigerate for extended freshness.

                      Prep Time: 15 minutes | Total Time: 40 minutes | Servings: 12 bars

                        Leave a Comment

                        Recipe Rating