Skip to content
DisclaimerTerms Of UseGDPR PolicyCookie Policy

juliesdish

  • Home
  • Drinks
  • Appetizers
  • Dinner
  • Dessert
  • About
  • Contact
  • Privacy Policy
DisclaimerTerms Of UseGDPR PolicyCookie Policy

NO-ING-IMG

- 500g gnocchi (store-bought or homemade) - 250g cherry tomatoes, halved - 200g feta cheese, crumbled - 2 tablespoons olive oil - 3 cloves garlic, minced - 1 teaspoon dried oregano - 1 teaspoon red chili flakes (optional) - Salt and pepper to taste - Fresh basil leaves for garnish Gather these items before you start. The gnocchi will be the base. You can buy it or make your own. Fresh cherry tomatoes add sweetness and color. Crumbled feta brings a salty kick. Olive oil helps with cooking and adds flavor. Garlic gives a nice aroma. Dried oregano adds a touch of herbiness. You can spice it up with red chili flakes if you like heat. Salt and pepper enhance all the flavors. Fresh basil is perfect for a pretty finish. This dish is simple but full of taste. You’ll love how easy it is to make. For the full recipe, check the section above. - Preheat your oven to 200°C (400°F). This helps cook the dish evenly. - In a large baking dish, combine the halved cherry tomatoes, crumbled feta cheese, minced garlic, olive oil, and dried oregano. If you like a little heat, add red chili flakes too. Season with salt and pepper to taste. Mix everything gently until well combined. This step builds the flavor base for our dish. - Bring a pot of salted water to a boil. Add the gnocchi and cook according to package instructions. Usually, this takes about 2-3 minutes. You know they’re ready when they float to the top. Drain the gnocchi and let them sit for a moment. Then, add the cooked gnocchi to the baking dish. Carefully mix it with the tomato and feta mixture. Make sure each gnocchi is coated well. - Place the baking dish in your preheated oven. Bake for about 20-25 minutes. Keep an eye on it. You want the tomatoes to soften and the feta to turn lightly brown. Your kitchen will smell amazing! Once done, remove it from the oven and let it cool for a minute. Now it’s ready to serve. Enjoy your hearty meal! You can find the full recipe with detailed steps above. To cook gnocchi just right, follow these steps: - Boil water: Start with a big pot of salted water. - Add gnocchi: Drop the gnocchi in when the water boils. - Watch for floating: Cook them until they float, about 2-3 minutes. - Drain gently: Use a slotted spoon to lift them out. These steps give you light and fluffy gnocchi. Overcooking makes them mushy, so keep an eye on them. Feta adds a nice tang, but you can try other cheeses too. Here are a few ideas: - Mozzarella: Creamy and melts well. - Parmesan: Sharp and nutty flavor. - Goat cheese: Adds a different tang. Mixing cheeses can give your dish a new twist. Don't be afraid to experiment! Herbs and spices can make your baked gnocchi pop. Here are some great options: - Basil: Fresh or dried, it works well with tomatoes. - Thyme: Adds a nice earthy flavor. - Rosemary: Strong and fragrant, use it sparingly. You can also sprinkle in some lemon zest for a bright touch. Adding these flavors makes every bite exciting. For the full recipe, check out the details above. {{image_2}} You can add more vegetables to your baked gnocchi. Spinach is a great choice. It cooks down nicely and adds a rich color. Bell peppers bring a sweet crunch. Just chop them into bite-sized pieces. Toss them in with the tomatoes and feta. You can even use zucchini or mushrooms for extra flavor. Feel free to mix and match to your liking. Want to boost the protein? Chicken is a fantastic option. Cook and cube it before adding it to the dish. Shrimp works well too. Just peel and devein them, then mix them in. Both options will make your meal heartier. You can also use cooked sausage for a savory twist. Just slice it up and add it in. If you need a gluten-free meal, swap the gnocchi for gluten-free options. Look for gluten-free gnocchi at the store. You can also use potato gnocchi made from only potatoes and rice flour. This keeps the dish tasty and safe. Always check labels to ensure the ingredients fit your needs. Enjoy this dish without worry! To store your leftover baked gnocchi, let it cool first. Use an airtight container. This keeps the flavors fresh. Place it in the fridge. It will last for about 3 to 5 days. Always label your container with the date. This way, you won’t forget about it. When you're ready to enjoy your leftovers, preheat your oven to 180°C (350°F). Place the gnocchi in an oven-safe dish. Add a splash of water or olive oil to keep it moist. Cover the dish with foil. This helps prevent drying out. Heat for about 15 to 20 minutes. Check to see if it’s warmed through. If you want to freeze the dish, do it before baking. Prepare the gnocchi as per the recipe. Once combined, place it in a freezer-safe container. Seal it tightly. It can stay in the freezer for up to 3 months. When you’re ready to cook, thaw it in the fridge overnight. Then, bake as usual. For the best results, do not refreeze after baking. Enjoy your Feta and Tomato Baked Gnocchi later with ease! Feta and Tomato Baked Gnocchi lasts about 3 to 5 days in the fridge. Keep it in an airtight container. If you notice any signs of spoilage, like a sour smell or mold, it's best to throw it out. Always check your food before eating! Yes, you can use frozen gnocchi! Just cook it directly from the freezer. Boil it for an extra minute or two. This helps to keep the texture nice. Follow the same steps in the recipe after cooking the gnocchi. Baked gnocchi pairs well with a light salad or crusty bread. A simple arugula salad with lemon dressing adds a nice touch. You could also enjoy it with a glass of white wine. These options elevate your meal and make it more special! This blog post covered a delicious baked gnocchi recipe. We explored the main ingredients like gnocchi, cherry tomatoes, and feta. I shared easy steps to make it, from mixing to baking. I also gave tips for perfecting the gnocchi and adding your favorite flavors. Remember, you can customize it with veggies or proteins. The storage and reheating tips will help you enjoy leftovers easily. This dish delivers warmth and flavor. Enjoy making this tasty meal for friends or family!

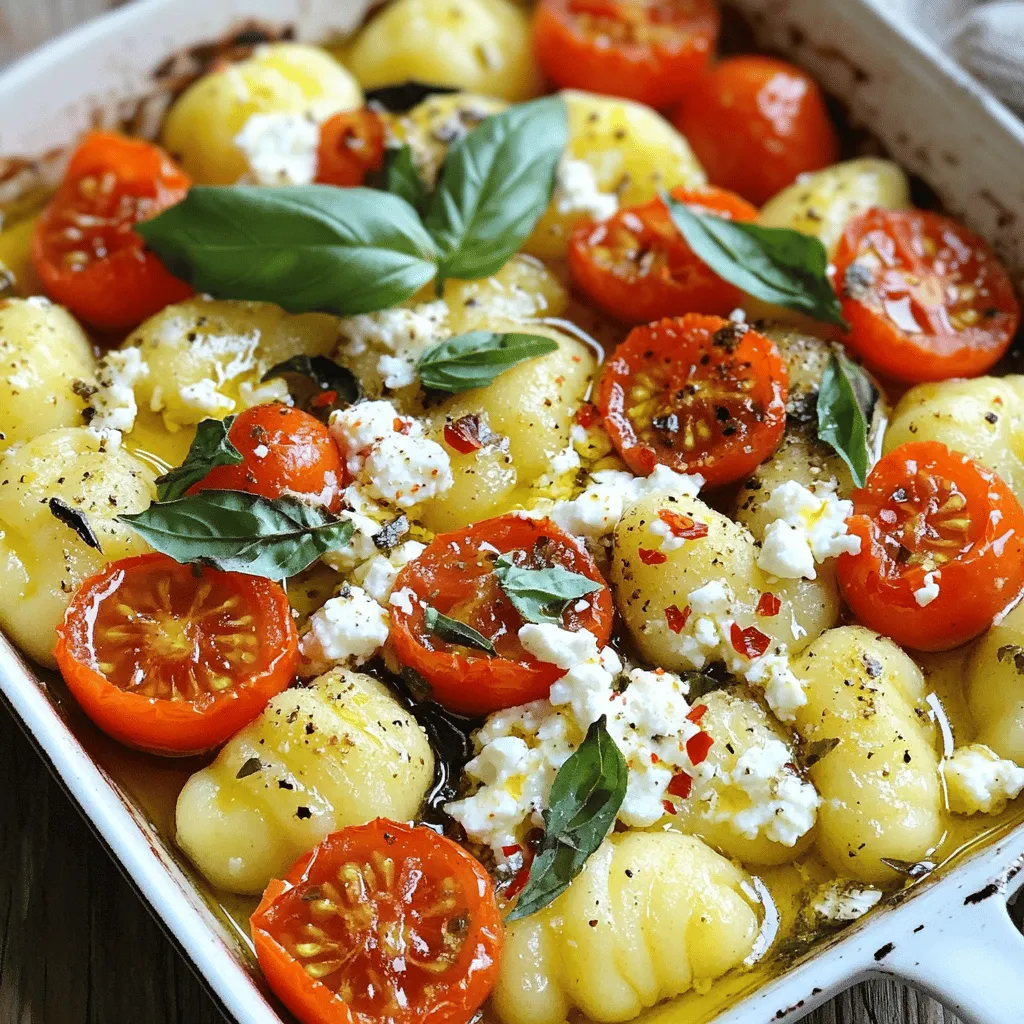
Feta and Tomato Baked Gnocchi Simple Comfort Meal

Craving a warm, cozy meal that’s easy to whip up? Let me introduce you to Feta and Tomato Baked Gnocchi.

- 1 block (14 oz) firm tofu, drained and pressed - 1/2 cup cornstarch - 1 teaspoon garlic powder - 1 teaspoon onion powder - 1 teaspoon smoked paprika - 1/2 teaspoon cayenne pepper (optional for heat) - Salt and pepper to taste - 1 tablespoon soy sauce - 1 tablespoon olive oil - Cooking spray Crispy air fryer tofu nuggets need firm tofu. This tofu holds its shape well and gives a great texture. Make sure to drain and press it. This step removes excess water and helps the nuggets get crispy. You need a seasoning mix to give the tofu flavor. Combine cornstarch, garlic powder, onion powder, smoked paprika, cayenne pepper, salt, and pepper in a bowl. This mix will coat the tofu and create a crunchy crust when cooked. Soy sauce adds a savory taste, while olive oil helps the nuggets crisp up in the air fryer. Don't skip these! They make a big difference in flavor. - Dipping sauces (sweet chili sauce, vegan ranch) - Garnishes (fresh herbs, scallions) While the nuggets are tasty on their own, dipping sauces add extra flavor. Sweet chili sauce gives a sweet kick. Vegan ranch adds creaminess. Try both to find your favorite! Garnishes like fresh herbs or sliced scallions make the dish look nice. They also add a fresh taste. You can try different herbs to match your style. For the full recipe, check the details above. To start, you need to drain and press the tofu. This step is key. Pressing removes excess water. Squeeze out the moisture for about 15 minutes. You can use a tofu press or wrap the tofu in a clean towel. Place a heavy object on top to help it drain. Next, cut the tofu into bite-sized cubes. Aim for pieces about 1 inch. This shape helps them cook evenly. Uniform sizes ensure each nugget gets crispy. Now it’s time to mix the seasoning blend. In a bowl, combine cornstarch, garlic powder, onion powder, smoked paprika, and cayenne pepper if you like heat. Add salt and pepper to taste. Stir well to mix all the spices. Toss the tofu cubes with soy sauce and olive oil in a separate bowl. Make sure each piece is coated. Then, sprinkle your seasoning mix over the tofu. Toss again until every nugget is covered. This coating gives the tofu its crispy texture. Preheat your air fryer to 400°F (200°C) for about 5 minutes. This step helps achieve that perfect crunch. Lightly spray the air fryer basket with cooking spray to prevent sticking. Place the tofu nuggets in a single layer in the basket. Avoid overcrowding. If you have a small air fryer, cook in batches. This ensures even cooking. Air fry the nuggets at 400°F (200°C) for 12-15 minutes. Halfway through, shake the basket to promote even crispiness. Keep an eye on them. You want them golden brown and crispy when done. Once cooked, let the nuggets cool for a minute before serving. Enjoy them with your favorite dipping sauce. For a full recipe, check out the earlier section. To get that perfect, crispy bite, cornstarch is key. It creates a nice crunch on the outside. When you coat the tofu, make sure every piece is covered. This helps lock in flavor and adds to the texture. Avoid overcrowding in the air fryer. If you place too many nuggets at once, they won’t cook evenly. Give them space to breathe. Cook in batches if needed. This way, you ensure each nugget gets crispy and golden brown. Don’t be afraid to play with flavors! You can add extra seasonings to the mix. Try adding some chili powder for heat or Italian herbs for a different twist. For dipping sauces, sweet chili sauce is a favorite. Vegan ranch also works great. Serve the nuggets with fresh herbs like cilantro or scallions for a pop of color and flavor. These additions can elevate your dish and make it even more enjoyable. For the full recipe, check the [Full Recipe]. {{image_2}} You can change up the flavor of your crispy air fryer tofu nuggets with just a few tweaks. For a spicy kick, add extra cayenne pepper to the seasoning mix. This adds heat and makes the nuggets exciting. If you want a fresh twist, try herbed tofu nuggets. Just use Italian seasoning instead of the usual spices. This will give your nuggets a delightful taste of Italy. Do you not have an air fryer? No problem! You can bake them in the oven. Preheat your oven to 400°F (200°C). Spread the coated tofu nuggets in a single layer on a baking sheet lined with parchment paper. Bake for about 25-30 minutes, flipping halfway through for even crispiness. Another option is pan-frying. Heat a little oil in a pan over medium heat. Cook the nuggets in batches for about 3-4 minutes on each side until golden brown. This method gives a nice, crispy texture on the outside while keeping the inside soft. Feel free to explore these variations and find what you love most! For the full recipe, check out the crispy air fryer tofu nuggets. To store leftover tofu nuggets, first, let them cool completely. This helps keep them crisp. Place the nuggets in an airtight container. Make sure to layer parchment paper between layers to absorb moisture. Store them in the fridge for up to three days. To reheat, use the air fryer for the best results. Set it to 375°F (190°C). Heat the nuggets for about 5-7 minutes. This will help them regain their crunch. You can freeze tofu nuggets for longer storage. Before freezing, let them cool completely. Place them in a single layer on a baking sheet. Freeze until solid, about 1-2 hours. Then, transfer them to a freezer bag. When ready to eat, thaw the nuggets in the fridge overnight. Reheat them in the air fryer to keep the texture. Aim for 375°F (190°C) for 8-10 minutes. This helps maintain their crispy goodness. To make tofu nuggets crispy, focus on temperature and cooking time. Preheat your air fryer to 400°F (200°C). This high heat helps create that golden crust. Cook the nuggets for 12-15 minutes. Remember to shake the basket halfway through to ensure even cooking. This step is key for maximum crispiness. You can use soft tofu, but it will change the texture. Soft tofu is more delicate and may not hold its shape well. This could lead to mushy nuggets instead of crispy ones. Firm tofu gives you the best texture and a nice crunch. Dipping sauces can elevate your tofu nuggets. Some popular choices include sweet chili sauce and vegan ranch. You can also try sriracha for heat or soy sauce for a savory touch. Pairing these sauces adds extra flavor and makes the meal more enjoyable. This blog post gave you a clear path to making tasty tofu nuggets. You learned about key ingredients, preparation steps, and best cooking methods. Using firm tofu is essential for that perfect crunch. Remember to coat the tofu well and keep the air fryer basket loose for even cooking. Try out different flavors and sauces to keep things exciting. Store leftovers wisely so they stay fresh. With a little practice, you'll create a yummy, healthy snack every time. Enjoy your cooking journey!

Crispy Air Fryer Tofu Nuggets Quick and Easy Recipe

Are you ready to elevate your snacking game? These Crispy Air Fryer Tofu Nuggets are a quick and easy treat,

- Whole grain bread - Ripe tomatoes - Avocado - Vegan mayonnaise To make a great Vegan BLT, start with whole grain bread. It gives a nice texture and flavor. Next, use ripe tomatoes. They add a fresh taste and juicy bite to the sandwich. Don’t forget the avocado. It makes the sandwich creamy and rich. Finally, spread some vegan mayonnaise. It adds moisture and a bit of tang. - Tempeh or coconut bacon - Kale chips or lettuce - Optional pickles For a twist, try tempeh or coconut bacon. Both give a smoky taste that mimics real bacon. You can also use kale chips or fresh lettuce for crunch. If you want more flavor, add sliced pickles. They give a nice crunch and tang. - Smoked paprika - Salt and pepper - Olive oil Seasoning is key for a tasty Vegan BLT. Smoked paprika adds a warm, smoky flavor. Salt and pepper enhance all the other tastes. A drizzle of olive oil adds richness and helps the seasonings stick. For the full recipe, check out the details above. Enjoy your delicious Vegan BLT! 1. Preheating the oven: Start by preheating your oven to 350°F (175°C). This is key if you plan to make kale chips. If you use store-bought kale chips, skip this step. 2. Washing and preparing kale: Rinse your kale leaves under cold water. Make sure to dry them well with a towel. Remove the tough stems from the leaves. Now, you are ready to create crispy kale chips. 1. Making kale chips (if desired): In a bowl, toss the kale leaves with olive oil, smoked paprika, salt, and pepper. Spread the seasoned leaves on a baking sheet. Bake for 10-15 minutes until they are crispy and slightly browned. 2. Toasting the bread: While the kale chips bake, toast your slices of whole grain bread. Aim for a nice golden brown color. This adds crunch and flavor to your sandwich. 1. Spreading vegan mayonnaise: In a small bowl, mix vegan mayonnaise with a pinch of salt and pepper. You can also add chopped pickles for a tangy twist. Spread a good amount on one slice of toasted bread. 2. Layering the ingredients: Start layering! Add sliced tomatoes on top of the mayo. Next, spread mashed avocado over the tomatoes. If you made kale chips, add those next. If not, use lettuce instead. Top it off with another slice of bread that has mayo spread on the top side. Repeat the layering with tomatoes, avocado, and kale. Finally, place the last slice of bread on top. Now, you can slice your sandwich in half and enjoy this fresh and flavorful vegan delight! To boost the taste of your Vegan BLT, use fresh herbs and spices. You can try: - Basil for a sweet touch - Oregano for a savory flavor - Garlic powder for depth Pair your sandwich with sweet potato fries or a bright mixed salad. This adds color and freshness. Crispy kale makes a big difference. To get that perfect crunch: - Wash and dry kale well. - Toss it with olive oil and seasoning. - Bake until crisp. For the bread, toast it until golden brown. This gives a nice crunch and keeps the sandwich from getting soggy. Make your Vegan BLT look great! You can: - Cut the sandwich diagonally for a nice touch. - Serve it on a colorful plate. Best side options include crispy sweet potato fries or a fresh salad. You can also add sesame seeds on the avocado for extra flavor and flair. {{image_2}} For those on a gluten-free diet, swap whole grain bread for gluten-free bread. Many brands offer great options. This change keeps the sandwich tasty while meeting your needs. If you want lower calories, use less vegan mayo or skip the avocado. Instead, add more veggies for bulk and flavor. You can make this sandwich fit your diet easily. Adding different veggies can change the taste of your Vegan BLT. Try fresh spinach, cucumber slices, or roasted red peppers. Each veggie adds its own flair. Want more spice? Use a sprinkle of chili powder or a dash of hot sauce. These small changes can make the sandwich exciting every time you make it. You can put vegan cheese in your sandwich for a creamy texture. Look for brands that melt well. If you love spreads, consider hummus or pesto. These options add new flavors and keep the sandwich fun. Mix and match to find your favorite combo. Check out the Full Recipe for more ideas on how to customize your Vegan BLT! To keep your Vegan BLT fresh, wrap it tightly in plastic wrap. This helps prevent the bread from getting soggy. If you have extra ingredients, store them in separate containers. This way, the flavors stay bright. Keep tomatoes and avocado together in the fridge. This prevents browning. For the kale chips, store them in an airtight container. This keeps them crispy longer. If you want to reheat your Vegan BLT, use a skillet. Heat it on low. This warms the sandwich without making it soggy. Flip it gently to warm both sides. You can also use a toaster oven for the same effect. If you have leftover ingredients, mix them into a salad or grain bowl. Toss them with some dressing for a new dish. You can freeze the components of your Vegan BLT. For the bread, slice it before freezing. Place parchment paper between the slices for easy use. You can freeze the kale chips too, just make sure they are cool. To thaw, leave them in the fridge overnight. For tomatoes and avocado, it’s best to use them fresh instead of freezing. This keeps their taste and texture at their best. You can use tempeh or coconut bacon as great options. Tempeh has a hearty texture. It absorbs flavors well when marinated. You can slice it thin and pan-fry it until crispy. Coconut bacon adds a sweet and smoky flavor. It is made from coconut flakes and seasoning. Both options give you that satisfying crunch. Making homemade vegan mayonnaise is simple. You need a few basic ingredients: - 1 cup of unsweetened plant milk - 1 cup of oil (like sunflower or canola) - 1 tablespoon of apple cider vinegar or lemon juice - 1 teaspoon of mustard - Salt to taste Blend these together until smooth and creamy. You can adjust the taste by adding more salt or vinegar. Yes, this Vegan BLT is healthy compared to a traditional BLT. It has fresh veggies, healthy fats, and no cholesterol. The whole grain bread provides fiber, which is good for digestion. The avocado gives you healthy fats and nutrients. Overall, it’s a tasty and nutritious choice. You can absolutely prep this sandwich in advance. Keep the ingredients separate until you're ready to eat. This keeps the bread from getting soggy. You can slice the tomatoes and mash the avocado ahead of time. Just store them in airtight containers in the fridge. Whole grain bread is an excellent choice for a Vegan BLT. It adds flavor and texture. You can also use sourdough or rye for a different taste. Look for bread that is fresh and soft. This makes it easier to bite into your sandwich. Enjoy it with your favorite dipping sauce or salad. For the complete recipe, check out the Full Recipe. This blog post covered a tasty and healthy Vegan BLT. We discussed essential ingredients like whole grain bread, ripe tomatoes, and avocado. I shared fun ways to add flavor and texture, with tips for cooking and assembly. You can customize your sandwich with different seasonings or veggies. Don't forget about storage tips for leftovers and reheating. Whether you're new to vegan food or a seasoned chef, this Vegan BLT brings joy to your meals. Enjoy experimenting with flavors and sharing your creations!

Vegan BLT Sandwich Fresh and Flavorful Delight

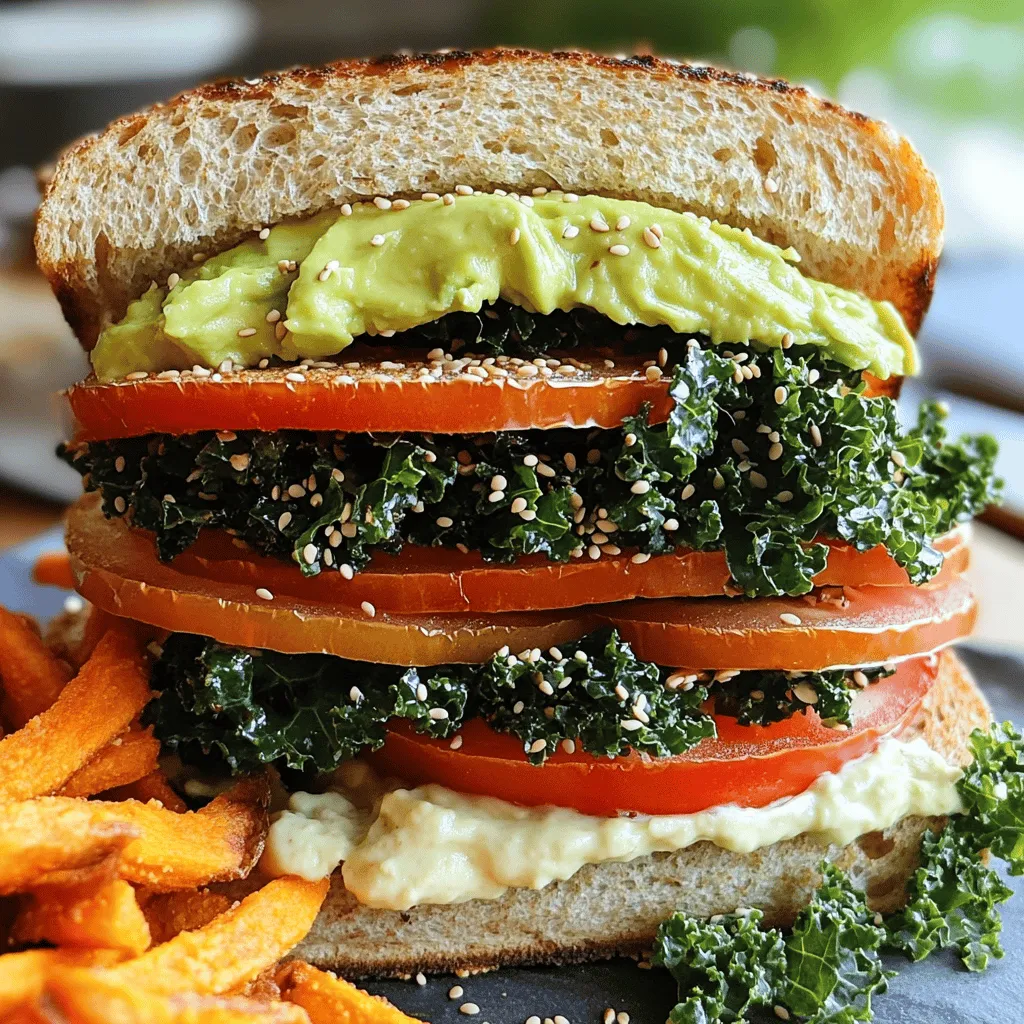
If you crave a sandwich that’s both satisfying and plant-based, look no further than my Vegan BLT Sandwich. With fresh

To make this tasty avocado chicken salad, gather these simple ingredients: - 2 cups cooked chicken, shredded - 1 ripe avocado, peeled and diced - 1/4 cup Greek yogurt - 1 tablespoon Dijon mustard - 1 tablespoon lemon juice - 1/4 cup celery, finely chopped - 1/4 cup red bell pepper, diced - 1/4 cup green onions, sliced - Salt and pepper to taste - Optional: Mixed greens for serving This salad is not just tasty; it's also good for you. Here’s why: - Avocado: Packed with healthy fats, avocados support heart health and boost energy. - Chicken: A great source of protein, chicken helps build strong muscles and keeps you full. - Greek Yogurt: It adds creaminess and gives you probiotics for gut health. - Lemon Juice: This adds flavor and vitamin C, which is good for your skin. - Vegetables: Celery, bell pepper, and green onions provide fiber and vitamins. Choosing the right ingredients makes a big difference. Here’s how to select fresh avocados and chicken: - Avocados: Look for ones that are firm but slightly soft when you press gently. The skin should be dark green. - Chicken: Opt for chicken breast that is pink and smells fresh. Avoid any that looks grey or has a strong odor. - Storage: Keep avocados at room temperature until ripe, then store in the fridge. Chicken should be kept cold and cooked within a few days. For the full recipe, check out the detailed instructions included. To make a tasty avocado chicken salad, gather all your ingredients. This recipe is simple and quick. You will need cooked chicken, avocado, Greek yogurt, and a few veggies. You can prep everything in about 15 minutes. 1. Start by shredding the cooked chicken. You can use rotisserie chicken for ease. 2. Next, peel and dice the ripe avocado. 3. In a large mixing bowl, combine the chicken and avocado. 4. Add Greek yogurt and Dijon mustard to the bowl. 5. Squeeze lemon juice over the mix. Fold everything together gently. You want the avocado to be chunky, not mushy. 6. Now, chop the celery, red bell pepper, and green onions. Add them to the bowl. 7. Season with salt and pepper to taste. Mix until everything is well combined. 8. For a cold salad, chill it in the fridge for about 30 minutes. 9. Serve the salad on mixed greens or in pita pockets for a delightful meal. To get the best texture, use a ripe avocado. It should be soft but not brown. When mixing, fold gently. This keeps the avocado chunks intact. If you want a creamier salad, add more Greek yogurt. Remember, chilling the salad helps the flavors blend nicely. Enjoy every bite of this fresh and flavorful delight! You can make avocado chicken salad ahead of time. This saves time when you're busy. If you plan to eat it later, add lemon juice to keep it fresh. Store it in a sealed container in the fridge. This salad tastes great for up to two days. Just give it a gentle stir before serving. Using the right tools can make salad prep quick and easy. A sharp knife helps you cut the avocado and veggies. A sturdy cutting board gives you a safe space to chop. A large mixing bowl is perfect for combining everything. A spatula or spoon helps you mix without mashing too much. Having these tools ready makes cooking fun. Avocado chicken salad pairs well with many sides. Try serving it on a bed of mixed greens. You can also use pita pockets or whole-grain bread for sandwiches. Fresh herbs like cilantro or parsley add a burst of flavor. For extra crunch, serve with tortilla chips or veggie sticks. Each bite becomes a delightful experience! For the full recipe, check out the details above. {{image_2}} You can switch up the avocado chicken salad by adding new ingredients. Try adding fruits like grapes or apples for a sweet twist. You can also mix in nuts like almonds or walnuts for crunch. Fresh herbs like cilantro or parsley can bring a lovely taste. Each ingredient adds a unique flavor and texture to the dish. While Greek yogurt gives a creamy touch, feel free to explore other dressings. A simple olive oil and vinegar mix can keep it light. You can also use a ranch or balsamic dressing for a bold kick. Experimenting with different dressings can change the whole taste of the salad. If you want a gluten-free option, just make sure all your ingredients are gluten-free. For a vegan salad, replace chicken with chickpeas or tofu. Use avocado and a vegan yogurt to keep it creamy. These changes keep the flavor while meeting different dietary needs. For the full recipe, check out Avocado Chicken Salad Delights. To keep your avocado chicken salad fresh, store it in an airtight container. Make sure to press a piece of plastic wrap against the surface of the salad. This step helps reduce air exposure. It keeps the flavors bright and the texture nice. Always place the salad in the fridge right after making it. Avoid leaving it out at room temperature for long periods. Avocado chicken salad stays fresh in the fridge for about 2 to 3 days. After that, the avocado may start to brown. The salad will still be safe to eat, but it may not look as nice. Always check for any off smells or changes in texture before eating. If it looks off, it's better to toss it out. I do not recommend freezing avocado chicken salad. Avocado does not freeze well. It can become mushy and lose its taste. If you have leftover chicken salad, try to eat it fresh. If you must freeze it, use only the chicken part. You can mix the avocado in later when you thaw it. This way, you keep the flavor and texture intact. For a full recipe, check out the details above. Yes, you can use canned chicken for this recipe. Canned chicken is easy and quick. It saves time if you are in a hurry. Just drain and shred it before mixing. The flavor will still be great, but fresh chicken offers better taste and texture. To prevent the avocado from browning, use lemon juice. The acid in the juice slows browning. Once you slice the avocado, squeeze lemon juice on it right away. You can also store the salad in an airtight container. This helps keep it fresh and green longer. You can serve this salad in many fun ways. Try it on a bed of mixed greens. It tastes great in pita pockets, too. For a crunchy twist, serve it with tortilla chips. You can also enjoy it on whole-grain bread as a sandwich. Check out the Full Recipe for more ideas! In this post, we covered the key parts of making avocado chicken salad. We looked at ingredients, health benefits, and tips for using fresh avocados and chicken. I shared steps on preparing and cooking the salad, plus ways to achieve the best texture. As you create this dish, remember the variations and storage tips we discussed. Enjoy this healthy meal and make it your own!

Avocado Chicken Salad Fresh and Flavorful Delight

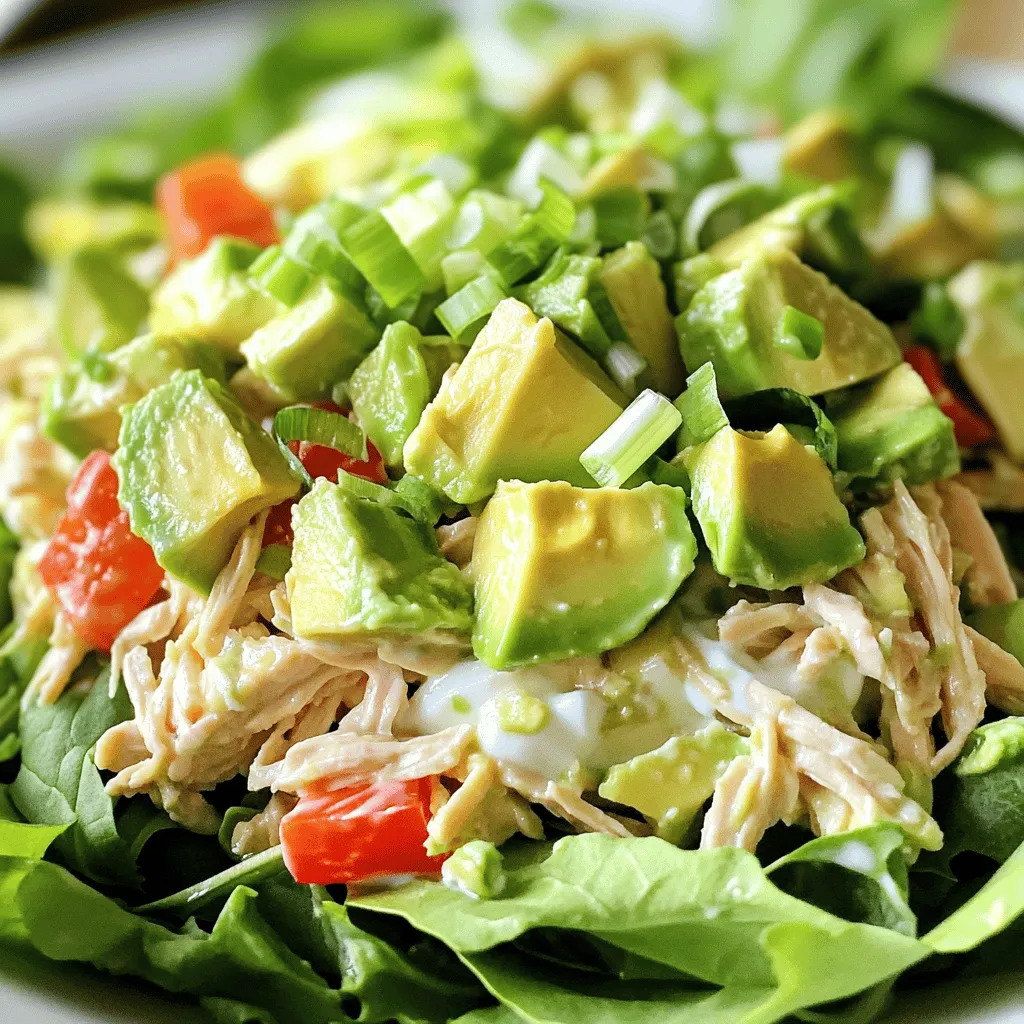
Are you ready to spice up your lunch with a tasty twist? This Avocado Chicken Salad is your go-to recipe

For my rice paper spring rolls, you need: - 10 rice paper wrappers - 1 cup cooked vermicelli noodles - 1 cup shredded carrots - 1 cucumber, julienned - 1 cup purple cabbage, thinly sliced - 1 avocado, sliced - 1 cup fresh mint leaves - 1 cup fresh cilantro leaves - 1 cup cooked shrimp or tofu (optional) - 1/4 cup soy sauce - 2 tablespoons sesame oil - 1 tablespoon lime juice - 1 tablespoon honey or agave syrup - Salt and pepper to taste You can change your spring rolls to match your taste. Here are some fun options: - Add cooked chicken or beef for more protein. - Use bell peppers or radishes for extra crunch. - Swap in different noodles like rice noodles or soba. - Try adding fruits like mango or pineapple for a sweet twist. Fresh herbs make your spring rolls pop with flavor. I suggest using: - Mint: It gives a fresh, cool taste. - Cilantro: It adds a bright, zesty note. - Basil: It brings a sweet touch to the mix. Feel free to mix and match these herbs for a unique flavor in each roll! Check out the full recipe for more tips. To start, gather all your ingredients. You will need rice paper wrappers, cooked vermicelli noodles, and fresh veggies. Here is what you need: - 10 rice paper wrappers - 1 cup cooked vermicelli noodles - 1 cup shredded carrots - 1 cucumber, julienned - 1 cup purple cabbage, thinly sliced - 1 avocado, sliced - 1 cup fresh mint leaves - 1 cup fresh cilantro leaves - 1 cup cooked shrimp or tofu (optional) If you use shrimp, boil it until pink. For tofu, pan-fry or bake until golden. Set them aside to cool. Cook the vermicelli noodles as the package says. Drain and rinse them in cold water. This stops them from sticking. Now, let’s make the dipping sauce. In a small bowl, combine: - 1/4 cup soy sauce - 2 tablespoons sesame oil - 1 tablespoon lime juice - 1 tablespoon honey or agave syrup - Salt and pepper to taste Mix everything well. Let it sit while you make the spring rolls. Next, it’s time to assemble the rolls. Fill a shallow dish with warm water. Dip one rice paper wrapper in the water for about 10 to 15 seconds. It should be soft but not too soggy. Lay it flat on a clean surface. On the bottom third of the rice paper, add a small handful of noodles. Then, layer the carrots, cucumber, cabbage, avocado, mint, cilantro, and shrimp or tofu if you choose to use it. Now, fold in the sides of the rice paper. Start rolling from the bottom tightly to cover the filling. Repeat this with the rest of the wrappers. Once done, place the rolls on a platter. Serve them with your tasty dipping sauce on the side. Enjoy your fresh and vibrant rice paper spring rolls! For a complete guide, check the Full Recipe. When making rice paper spring rolls, there are a few common mistakes to watch out for. First, do not soak the rice paper for too long. If you do, it becomes too soft and hard to handle. Soak it just until it feels pliable. Second, avoid overfilling the rolls. If you add too much, the paper can tear. Keep the filling light. Lastly, don’t skip the dipping sauce. It adds the perfect flavor. If you have leftover spring rolls, store them properly. Place them in a single layer in an airtight container. You can also use parchment paper between layers to keep them from sticking. Keep them in the fridge for up to two days. To revive them, simply dip in warm water for a few seconds before serving. Soaking rice paper is key to getting it just right. Use warm water, as it helps the rice paper soften quickly. Dip each wrapper for about 10-15 seconds. If you see bubbles forming, it is time to take it out. Lay it flat on a clean surface to fill. Wet a few at a time to keep up with rolling. This will help keep them fresh and prevent drying out. For the complete recipe, check out the Full Recipe link. {{image_2}} You can easily make rice paper spring rolls vegetarian or vegan. Simply skip the shrimp or tofu. Use extra veggies instead. Try adding bell peppers, bean sprouts, or radishes. These add fresh crunch and flavor. You can also include more herbs, like basil or parsley. For a protein boost, include edamame or chickpeas. This way, your rolls stay light and tasty. Feel free to get creative with fillings. You can use cooked chicken, beef, or even crab if you like. If you want something different, try adding fruits like mango or pineapple. They add a sweet twist. You can also use grains like quinoa for added texture. Mix and match your favorite ingredients to create unique rolls. The dipping sauce makes a big difference. While soy sauce is great, try mixing it up. A peanut sauce adds a rich flavor. You can blend peanut butter with soy sauce, lime juice, and a bit of water. Another option is sweet chili sauce for a spicy kick. You can even make a yogurt-based sauce with herbs for a creamy touch. Each sauce will change the taste of your spring rolls. To keep rice paper wrappers fresh, store them in a cool, dry place. Make sure the package is sealed tightly. If you open a package, place unused wrappers in an airtight container. This helps prevent them from drying out. If you have leftover spring rolls, place them in a single layer on a plate. Cover them with a damp paper towel. This keeps them moist. Then, wrap the plate in plastic wrap. Store it in the fridge. They will stay fresh for up to two days. You can freeze spring rolls for later use. First, place them on a baking sheet in a single layer. Freeze them for about an hour until firm. Then, transfer them to a freezer-safe bag. Remove as much air as possible. They can last up to three months in the freezer. When ready to eat, thaw them in the fridge overnight before serving. For a crispy texture, reheat them in the oven or air fryer. For a detailed recipe, check the Full Recipe section. Rice paper spring rolls taste best fresh. If you store them, they can last in the fridge for about one day. Wrap them in a damp paper towel and place them in an airtight container. This helps keep them moist. If they dry out, they become hard and tough to eat. Yes, you can prepare spring rolls ahead of time. Make them up to a few hours before you serve. Just be sure to keep them covered. Use a damp cloth to keep them moist. This way, they won't dry out before your meal. You can find rice paper wrappers at most grocery stores. Look in the Asian foods aisle. You can also buy them at Asian markets or online. They usually come in packs, so you can make many rolls at once. Just be sure to check the expiration date before you buy. This blog post covered all you need to make rice paper spring rolls. We looked at ingredients, with a list of main and optional choices. You learned how to prepare and assemble the rolls, along with tips to avoid common mistakes. We also explored tasty variations and how to store them. Remember, customizing your rolls can make cooking fun! Enjoy making these rolls fresh or frozen, and don’t forget to share with friends. Happy cooking!

Rice Paper Spring Rolls Easy and Flavorful Recipe

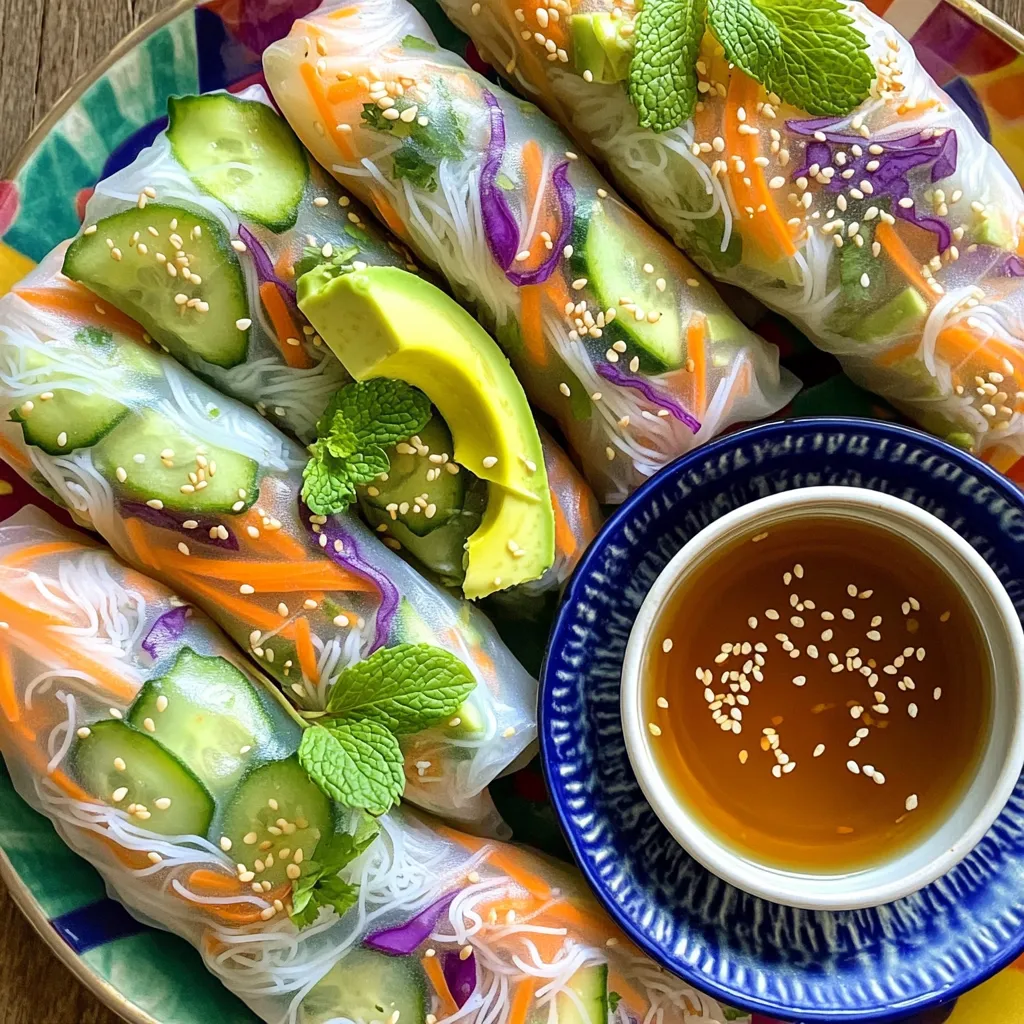
Are you ready to roll? Rice paper spring rolls are light, fresh, and full of flavor. In this easy and

To make baked Parmesan crusted tilapia, you need a few key ingredients. Here’s what you will need: - 4 tilapia fillets - 1 cup grated Parmesan cheese - 1/2 cup breadcrumbs (preferably panko) - 1 teaspoon garlic powder - 1 teaspoon onion powder - 1 teaspoon paprika - Salt and pepper to taste - 2 tablespoons olive oil - 1 tablespoon lemon juice These ingredients create a tasty crust that enhances the tilapia flavor. The Parmesan cheese gives a rich taste, while the breadcrumbs add crunch. Want to add more flavor? Here are some optional ingredients you can use: - Fresh herbs like dill or thyme - A pinch of cayenne pepper for heat - Lemon zest for a bright touch - A splash of white wine for depth These add-ons can make your dish even more exciting. Feel free to mix and match based on what you love. For a complete meal, pair the tilapia with these sides: - Steamed vegetables like broccoli or green beans - A light salad with mixed greens - Garlic bread for a crunchy side These options will balance the meal and add more nutrients. You can find the full recipe for this dish to ensure your dinner is a hit! First, gather all your ingredients. You need tilapia fillets, Parmesan cheese, breadcrumbs, and spices. Lay out the measuring cups and bowls. Preheat your oven to 400°F (200°C). This step ensures that the fish cooks evenly. Line a baking sheet with parchment paper. This makes cleaning up easier. Now, let’s start cooking! In a medium bowl, mix the grated Parmesan cheese with breadcrumbs and spices. I like to add garlic powder, onion powder, and paprika. These flavors make the fish so tasty! In another bowl, coat the tilapia fillets with olive oil and lemon juice. This gives them a nice flavor and helps the crust stick. Next, press each fillet into the cheese mixture. Make sure to coat both sides well. Lay the coated fillets on the baking sheet, leaving space between them. Bake for about 15 to 20 minutes. You’ll know they’re done when the fish flakes easily with a fork. The crust should look golden brown and crisp. To get that perfect crispy crust, use panko breadcrumbs. They create a light, airy texture. Make sure the fish is well-coated with the cheese mixture. If you want extra crunch, you can spray the top lightly with olive oil before baking. This helps the crust brown nicely. Keep an eye on the fish as it cooks. You want it golden, not burnt. For a complete meal, serve your tilapia with steamed vegetables or a light salad. You can find the full recipe for more details. Enjoy your delicious Baked Parmesan Crusted Tilapia! One mistake is not preheating your oven. This can lead to uneven cooking. Make sure your oven is ready before you bake. Another mistake is not coating the fish well. Press the tilapia firmly into the crumb mixture. This helps form a nice crust. Also, avoid overcooking the fish. Tilapia cooks quickly. Bake it for just 15 to 20 minutes. Check for doneness by flaking it with a fork. If it flakes easily, it’s done. Baked Parmesan crusted tilapia tastes great with many sides. I love to serve it with steamed broccoli. The bright green color looks nice on the plate. You can also try a fresh salad with mixed greens. A light vinaigrette adds a nice touch. If you want something heartier, consider roasted potatoes. They add a nice crunch and flavor. You can even serve it with rice or quinoa. These sides balance the meal well. Adjusting the seasoning is easy. If you like more spice, add more paprika or some cayenne. For a milder taste, cut back on the garlic powder. You can also add herbs like thyme or dill for a fresh flavor. Always taste your seasoning mix before coating the fish. This way, you can make changes as needed. Remember, cooking is about what you enjoy. Make it your own! For the full recipe, check out the earlier section. {{image_2}} You can switch up the crust if you want. Try using crushed cornflakes instead of breadcrumbs. They give a nice crunch. You can also add herbs like oregano or thyme for more flavor. For a spicy kick, mix in some cayenne pepper. You can even use different cheeses like cheddar or feta. Each option gives a unique taste to your dish. If you want a faster way to cook, use an air fryer. Preheat it to 400°F (200°C). Cook the tilapia for about 10-12 minutes. You’ll get a great crispy crust without much oil. If you prefer grilling, brush the fillets with oil. Grill them over medium heat for about 5-7 minutes on each side. Both methods keep the fish juicy and flaky. Feel free to add more to your meal. You can top the tilapia with shrimp before baking. This adds a seafood twist. Try mixing in chopped spinach or bell peppers with the crust. They add color and nutrients. You can also serve the tilapia with roasted asparagus or green beans. These choices make your dish even more healthy and flavorful. For the full recipe, check out the details above. After you enjoy your baked Parmesan crusted tilapia, store leftovers in the fridge. Place the fish in an airtight container. It stays fresh for up to three days. Make sure to cool it down before sealing it. This helps keep the crust crispy longer. If you want to keep it longer, consider freezing the tilapia. Wrap each piece tightly in plastic wrap. Then, place them in a freezer bag. This method prevents freezer burn. You can freeze it for up to three months. When you’re ready to eat, just thaw it in the fridge overnight. To reheat, preheat your oven to 350°F (175°C). Place the tilapia on a baking sheet. Cover it loosely with foil to keep it moist. Heat for about 10-15 minutes. Check if it’s warm all the way through. For extra crispiness, remove the foil for the last few minutes. Enjoy your meal again just like the first time! I bake tilapia at 400°F for about 15 to 20 minutes. The fish should flake easily with a fork when done. Keep an eye on it to avoid overcooking. Thin fillets cook faster, while thicker ones may need more time. Always check for a golden crust on top. Yes, you can use frozen tilapia. Just remember to thaw it first. You can do this by placing it in the fridge overnight or using cold water for a quicker thaw. Make sure to pat the fillets dry before coating them. This helps the crust stick better and keeps it crispy. Baked Parmesan Crusted Tilapia pairs well with many sides. Here are some tasty options: - Steamed broccoli - Roasted asparagus - A light salad with lemon vinaigrette - Quinoa or rice for a filling option - Garlic bread for a crunchy bite These sides balance the flavors of the fish and make a complete meal. Feel free to mix and match based on your taste! For the full recipe, check out the earlier section. This blog post shared the best way to make Baked Parmesan Crusted Tilapia. You learned about key ingredients, optional flavors, and perfect sides to pair. I explained how to prepare and cook this dish for crispiness. Also, I offered tips to avoid common mistakes and made suggestions for variations. Remember to store leftovers correctly to enjoy them later. Cooking can be fun and easy. With these tips, you can impress family and friends. Enjoy your tasty meals!

Baked Parmesan Crusted Tilapia Simple and Tasty Meal

Looking for a simple and tasty meal that impresses? Baked Parmesan Crusted Tilapia is the answer! This dish combines flaky

To make Chicken Alfredo Lasagna Roll Ups, you need simple ingredients. This recipe combines creamy Alfredo sauce with hearty chicken and cheese. It’s easy to follow and perfect for dinner. - 8 lasagna noodles - 2 cups cooked chicken, shredded - 1 cup ricotta cheese - 1 cup mozzarella cheese, shredded - 1/2 cup Parmesan cheese, grated - 2 cups Alfredo sauce (store-bought or homemade) - 1 cup spinach, fresh or thawed from frozen, chopped - 1 teaspoon garlic powder - Salt and pepper to taste - Fresh parsley, chopped (for garnish) Each ingredient plays a role in flavor and texture. The chicken gives protein, while the cheeses add creaminess. Spinach adds color and nutrients. You can swap some ingredients if needed. Use ground turkey instead of chicken for a lighter option. Cottage cheese can replace ricotta for a different taste and texture. If you want a dairy-free version, try a plant-based cheese. You can also use zucchini noodles for a gluten-free meal. These changes will keep the dish tasty and fun! First, you need to preheat your oven. Set it to 375°F (190°C). This will get it hot and ready for your lasagna roll-ups. While the oven warms, bring a large pot of salted water to a boil. Once boiling, add the lasagna noodles. Cook them according to the package instructions until they are al dente, which means firm but not hard. This usually takes about 8 to 10 minutes. After cooking, drain the noodles in a colander. Lay them flat on a clean kitchen towel to help them cool and avoid sticking. Now it's time to make the filling. In a mixing bowl, combine your shredded cooked chicken, ricotta cheese, half of the mozzarella cheese, and grated Parmesan cheese. Add the chopped spinach, garlic powder, salt, and pepper. Mix all these ingredients well until they blend into a smooth filling. You want it to be creamy and flavorful. This filling is the heart of your roll-ups, so make sure it tastes good! To assemble the roll-ups, spread a thin layer of Alfredo sauce on the bottom of a 9x13 inch baking dish. Take one lasagna noodle and place a generous amount of the chicken filling along its length. Carefully roll the noodle up from one end. Place the roll seam-side down into the baking dish. Repeat this with the remaining noodles and filling until they are all in the dish. Once all the roll-ups are in place, pour the remaining Alfredo sauce evenly over them. Finally, sprinkle the rest of the mozzarella cheese on top. This will create a delicious, cheesy crust when baked. To make perfect roll-ups, start with cooked noodles. Lay them flat on a towel to cool. This prevents sticking. Spread the filling evenly along the noodle. Leave space at the edges. Roll the noodle tightly from one end. Place the seam side down in the dish. Repeat this for all the noodles. When baked, they will hold well together. Sticky noodles can be a hassle. To avoid this, cook the noodles just until al dente. This means they should be firm but not hard. After cooking, rinse them in cold water. This stops the cooking process. Then lay them flat on a towel. Keep them separate to prevent sticking. Garnishing adds a nice touch. I love to use fresh parsley for a pop of color. Simply chop the parsley and sprinkle it on top. You can also add extra grated Parmesan cheese for flavor. Serve the roll-ups warm. Pair them with a side salad or garlic bread for a complete meal. Enjoy your delicious Chicken Alfredo Lasagna Roll Ups! For the complete recipe, check out the full recipe section. {{image_2}} You can easily make a vegetarian version of Chicken Alfredo Lasagna Roll Ups. Instead of chicken, use a mix of veggies. Spinach, mushrooms, and zucchini work well. You can also add bell peppers for extra flavor. Just sauté the vegetables before mixing them with the cheeses. This gives a fresh taste that everyone will enjoy. If you like spicy food, add some heat! Mix red pepper flakes into the Alfredo sauce. You can also add diced jalapeños to the filling. For a smoky touch, try chipotle powder. Adjust the spice level to your taste. This adds a fun twist to the creamy dish. For a gluten-free version, use gluten-free lasagna noodles. Many brands offer tasty options that cook just like regular noodles. Check the package for cooking times. You can also use zucchini slices instead of noodles. This makes a lighter dish that is still satisfying. Just layer the sauce and filling as you would with noodles. To store leftover Chicken Alfredo Lasagna Roll Ups, let them cool first. Place them in an airtight container. You can keep them in the fridge for up to four days. If you want to save some for later, freezing is a great option. When you’re ready to eat the leftovers, you can reheat them easily. Preheat your oven to 350°F (175°C). Place the roll-ups on a baking sheet. Cover them with foil to keep them moist. Heat for about 20 minutes or until warm. You can also use the microwave. Just place them on a microwave-safe plate and heat for 2-3 minutes. Freezing is a smart way to enjoy these roll-ups later. After you assemble the roll-ups, you can freeze them before baking. Wrap each roll-up tightly in plastic wrap and place them in a freezer bag. They can last up to three months. When you’re ready to bake, thaw them overnight in the fridge before cooking. This will help them cook evenly. For best results, follow the baking instructions from the Full Recipe after thawing. Yes, you can use homemade Alfredo sauce. In fact, it can add a special touch. Just make sure it is creamy and well-seasoned. If you need a quick sauce, store-bought works great too. Just choose a brand you like. The best way to reheat these roll-ups is in the oven. Preheat your oven to 350°F (175°C). Place the roll-ups in a baking dish. Cover them with foil to keep them moist. Heat for about 20 minutes or until warm. You can also use the microwave. Heat on medium power for about 2-3 minutes. Check to make sure they are hot all the way through. Leftovers of Chicken Alfredo Lasagna Roll Ups last for about 3 to 4 days in the fridge. Make sure to store them in an airtight container. This keeps the flavors fresh and prevents drying out. If you want to keep them longer, consider freezing them. In this blog post, we explored how to make delicious Chicken Alfredo Lasagna Roll-Ups. You learned about key ingredients, step-by-step instructions, and handy tips. We discussed variations for different diets, and how to store extra roll-ups effectively. As you try this recipe, remember that cooking is fun and creative. Don’t be afraid to experiment and make it your own. Enjoy every bite of your tasty creation!

Chicken Alfredo Lasagna Roll Ups Easy Recipe Guide

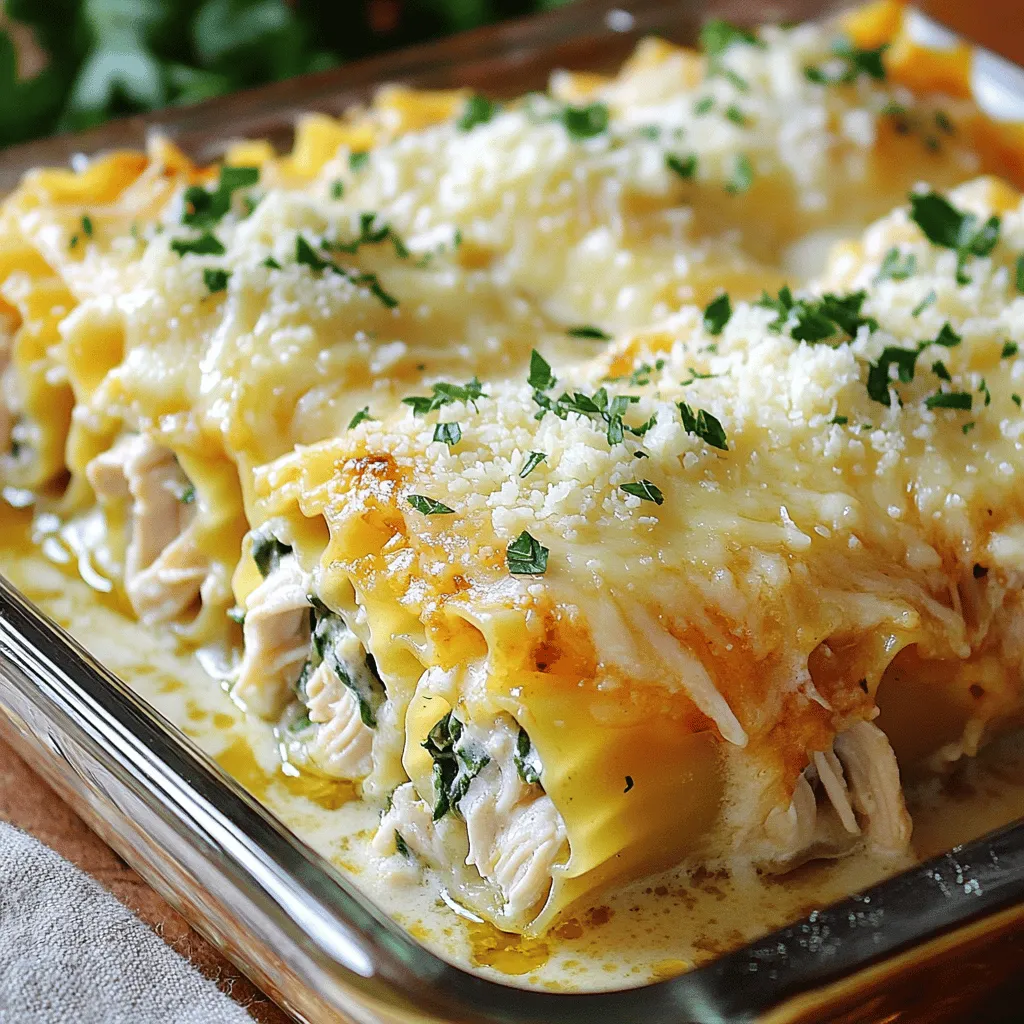
Looking for a fun twist on a family favorite? Chicken Alfredo Lasagna Roll Ups are your answer! This easy recipe

- 2 cups cooked chicken, shredded - 1/2 cup buffalo sauce - 1/2 cup ranch dressing - 1 cup romaine lettuce, chopped - 1/2 cup cherry tomatoes, halved - 1/4 cup red onion, thinly sliced - 4 whole wheat tortillas - 1/2 cup shredded cheddar cheese - Olive oil spray The main ingredients are simple and flavorful. The cooked chicken brings protein and texture. Buffalo sauce adds heat and zest. Ranch dressing offers creaminess that balances the spice. Fresh vegetables like romaine, tomatoes, and onions add crunch and color. Whole wheat tortillas hold everything together while keeping it healthy. Shredded cheddar cheese gives a nice finish. - Extra toppings: avocado, jalapeños, or cilantro - Substitute options: grilled chicken, tofu, or beans - Dietary considerations: gluten-free tortillas or dairy-free cheese You can customize the wrap with extra toppings. Avocado adds creaminess, while jalapeños boost the heat. You can also swap chicken for tofu or beans for a vegetarian option. For dietary needs, use gluten-free tortillas or dairy-free cheese. This way, more people can enjoy this tasty wrap. - Kitchen utensils: mixing bowls, measuring cups, and spoons - Cooking equipment: skillet and spatula Having the right tools makes cooking easier. You will need mixing bowls for sauces and chicken. Measuring cups help with accurate portions. A skillet is key for crisping the wraps. A spatula will assist in flipping them safely. With these tools, you will craft delicious Buffalo Ranch Chicken Wraps with ease. Cooking the chicken First, use cooked chicken for the best taste. Shred your chicken into small pieces. You can use leftover chicken or cook it fresh. If cooking fresh, season it lightly before cooking. This adds flavor. Combining the sauces In a medium bowl, add 2 cups of shredded chicken. Pour in 1/2 cup of buffalo sauce. Mix it until the chicken is fully coated. In another bowl, combine 1/2 cup of ranch dressing with chopped romaine lettuce, halved cherry tomatoes, and thinly sliced red onion. This adds a fresh crunch. Layering ingredients Grab a whole wheat tortilla and lay it flat. Lightly spray it with olive oil. This helps it get crispy. In the center, add a generous scoop of the buffalo chicken. Then, top it with the ranch salad mixture. Finish with a sprinkle of 1/2 cup of shredded cheddar cheese. Folding techniques To fold, first, tuck in the sides of the tortilla. Then, start rolling it from the bottom. Roll tightly to keep the filling inside. This helps prevent spills. Repeat this step with the rest of the tortillas and fillings. Skillet instructions Heat a skillet over medium heat. Place the wraps seam side down in the skillet. Cook for about 2-3 minutes on each side. You want them golden brown and crispy. Achieving crispiness If you want extra crispiness, lightly spray the outside of the wraps with olive oil before cooking. Keep an eye on them to avoid burning. Once done, remove them from the skillet and let them cool slightly. You can find the Full Recipe for more details. To get the right spice level, start with less buffalo sauce. You can add more if you like it spicier. Mix in some hot sauce for extra heat. If you prefer mild flavors, reduce the buffalo sauce to a quarter cup. You can also customize ranch dressing. Try adding some garlic powder or dill for a twist. You can even mix in some lime juice for a fresh taste. This way, your wraps will be unique and tasty! Serve your wraps with fresh veggies or chips. Carrot sticks and celery go great with a tangy dip. You can also add a fruit salad for a sweet touch. For a nice presentation, slice the wraps in half. Secure them with a toothpick. This makes them easy to hold and eat. You can place extra ranch dressing on the side for dipping. A sprinkle of parsley adds color and freshness! Avoid overfilling the wraps. If you add too much, they will be hard to roll. Keep the filling to about a cup. This ensures they wrap well and stay together. Make sure you cook the wraps thoroughly. Heat them until they are golden brown. This helps the tortillas crisp up nicely. A well-cooked wrap has a better texture and taste. Follow the [Full Recipe] to get it right! {{image_2}} You can switch up the protein in your wrap for great taste. Instead of chicken, use turkey. Turkey adds a lean, rich flavor that pairs well with buffalo sauce. If you want a meat-free option, try chickpeas or lentils. Both options give a hearty bite and soak up the sauce well. Get creative with your sauces! Instead of buffalo sauce, use BBQ sauce for a smoky twist. You can mix hot sauce with honey for a sweet and spicy flavor. Adding veggies boosts freshness. Try diced bell peppers or cucumbers for crunch. This adds color and makes the wrap more filling. The type of tortilla you choose can change your wrap. Whole wheat tortillas give a nutty taste. Corn tortillas are gluten-free and add a nice flavor. For low-carb options, use lettuce wraps. They are fresh and light, perfect for a healthy meal. For the full recipe, check out the details provided earlier! To keep your Buffalo Ranch Chicken Wraps fresh, store them in the fridge. Place the wraps in an airtight container. This helps keep the flavors in and the wraps moist. You can also wrap them in plastic wrap before putting them in the container. This method helps prevent drying out. Eat the leftovers within three days for the best taste. When you're ready to enjoy your wraps again, you can reheat them in the microwave or skillet. If you use the microwave, place the wrap on a microwave-safe plate. Heat it for about 30 seconds, checking often. If you want a crispy wrap, heat it in a skillet. Place the wrap in a skillet over medium heat for 2-3 minutes on each side. This keeps the texture nice and crunchy. You can freeze the Buffalo Ranch Chicken Wraps if you want to save some for later. Wrap each assembled wrap tightly in plastic wrap. Then, place the wrapped wraps in a freezer-safe bag or container. This way, they won't get freezer burn. To thaw, move the wrap to the fridge for a few hours or overnight. Once thawed, you can reheat them as mentioned above. Enjoy your tasty wraps anytime! To make the best Buffalo Ranch Chicken Wraps, start with cooked chicken. Shred it and mix with buffalo sauce. This gives the chicken a spicy kick. In another bowl, mix ranch dressing with romaine lettuce, cherry tomatoes, and red onion. This salad adds crunch and flavor. Lay out a whole wheat tortilla and spray it with olive oil. Place the buffalo chicken in the center of the tortilla. Top it with the ranch salad and sprinkle cheddar cheese on top. Fold the sides and roll it up tightly. Cook each wrap in a skillet until golden brown. This makes the outside crispy. Yes, you can prepare these wraps in advance. Make the buffalo chicken and ranch salad ahead of time. Store them in the fridge. When you are ready to eat, just assemble the wraps. This saves time and makes lunch or dinner easy. You can also wrap them in foil for a quick grab-and-go meal. Buffalo Ranch Chicken Wraps pair well with many sides. Here are some ideas: - Fresh fruit salad - Veggie sticks with ranch dip - Sweet potato fries - Potato chips - A simple green salad These sides balance the spicy wraps and add freshness. To make these wraps healthier, try these tips: - Use grilled chicken instead of fried. - Swap ranch dressing for a yogurt-based dressing. - Add more veggies like bell peppers or cucumbers. - Choose whole grain tortillas for more fiber. These changes keep the taste while boosting nutrition. Yes, you can make a vegetarian version of Buffalo Ranch Chicken Wraps. Replace the chicken with grilled veggies or tofu. Use the same buffalo sauce for flavor. You can also add beans for protein. This version is just as tasty and filling. You can find the Full Recipe for more details on preparing these wraps. Buffalo Ranch Chicken Wraps are fun and easy to make. You learned about tasty ingredients, helpful tools, and step-by-step instructions. I shared tips to improve flavor and avoid common mistakes. You can try different proteins and sauces to mix things up. Remember, storage and reheating are key to enjoying leftovers. With these ideas, you can make great wraps every time. Enjoy your cooking and wrap-making adventures!

Buffalo Ranch Chicken Wraps Flavorful and Easy Recipe

Are you ready to spice up your meal routine? Buffalo Ranch Chicken Wraps deliver bold flavors and are super easy

- 1 pound large shrimp, peeled and deveined - 1 cup shredded coconut (sweetened or unsweetened) - 1 cup panko breadcrumbs - 1/2 cup all-purpose flour - 2 large eggs - 1 teaspoon garlic powder - 1 teaspoon paprika - Salt and pepper to taste - Oil for frying (coconut oil or vegetable oil) Gathering the right ingredients is key to making easy coconut shrimp. The shrimp should be large, peeled, and deveined for the best results. You can use sweetened or unsweetened shredded coconut based on your taste. Panko breadcrumbs add crunch, while all-purpose flour helps the coating stick. The two eggs will bind everything together. For seasoning, garlic powder and paprika add flavor. Don't forget salt and pepper to enhance the taste. Choose coconut oil or vegetable oil for frying; both will give a nice crispiness. You can find the full recipe with step-by-step instructions to create this delicious dish. Cooking is all about using good ingredients. This makes the shrimp not just tasty but also fun to make. Enjoy the process! - Place flour in one bowl. - Beat eggs in another bowl. - Mix panko breadcrumbs with shredded coconut, garlic powder, paprika, salt, and pepper in a third bowl. Setting up your breading station is key. It makes the process smooth and fun. Each bowl plays its own role in making the shrimp crispy and tasty. The flour helps the egg stick, the egg binds the crumbs, and the coconut-panko mix gives that perfect crunch. - Rinse the shrimp and pat dry with paper towels. - Coat shrimp in flour, then eggs, and finally the coconut-panko mixture. Start by rinsing the shrimp. This step ensures they are clean and ready to cook. Dry them well with paper towels. Next, coat them first in flour. This helps the egg stick. Then dip them in the eggs. Finally, roll them in the coconut-panko mix. Press gently to get a nice layer on each shrimp. - Heat oil in a frying pan over medium heat. - Fry shrimp for 2-3 minutes on each side until golden brown. Heat about 1/4 inch of oil in a large frying pan. Wait until the oil shimmers. This shows it’s hot enough. Carefully add the shrimp to the pan. Fry for about 2-3 minutes on each side. Look for a golden brown color. This means they are crispy and ready. Once cooked, place them on paper towels to drain excess oil. This cooking method gives you that delightful crunch. It's the perfect way to enjoy your shrimp! For the complete recipe, check out the Full Recipe. To make your shrimp crispy, fry in batches. This keeps the oil hot and helps each shrimp cook well. Overcrowding the pan can lead to soggy shrimp. Be patient and fry just a few at a time. Next, watch the oil temperature. Heat oil until it shimmers but not too hot that it burns the shrimp. Use a thermometer if you have one. A steady medium heat is key to that perfect crunch. These coconut shrimp shine with a sweet chili sauce or mango salsa on the side. The sweet dip pairs perfectly with the crispy shrimp. You can also try a spicy sauce for a kick. Add lime wedges and fresh cilantro to your plate. The lime adds a fresh zing, while cilantro gives a pop of color. These simple additions make your dish look and taste even better. For the full recipe, check out the complete guide. {{image_2}} You can spice up your coconut shrimp with a few easy tweaks. First, add cayenne pepper or chili powder for a kick. This adds a nice heat that contrasts with the sweet coconut. You can also play with different types of breadcrumbs. Try plain breadcrumbs, seasoned ones, or even crushed crackers. Each choice gives a unique crunch. Coconut shrimp is versatile. Serve it as an appetizer, main dish, or snack. For a fun touch, pair it with dipping sauces. Sweet chili sauce is a classic choice, but you could also use spicy aioli. A citrus vinaigrette adds a fresh twist. Each dip changes the flavor profile, making each bite exciting. Enjoy experimenting with these ideas! For the full recipe, check out the details above. To keep your coconut shrimp fresh, cool them completely. Place them in an airtight container. This method helps to keep them from getting soggy. You can refrigerate your shrimp for up to 2 days. Make sure to eat them within this time for the best taste. When it’s time to enjoy your leftover shrimp, you have options. For the best texture, use the oven. Preheat it to 375°F (190°C). Place the shrimp on a baking sheet and heat for about 10 minutes. This method makes them crispy again. If you're in a hurry, you can use the microwave. Place the shrimp on a microwave-safe plate and cover them with a paper towel. Heat in short bursts of 30 seconds. Check often to avoid overcooking. Though this method is faster, it may not keep the shrimp crispy. For full details on how to make this delicious dish, check out the Full Recipe. Yes, but thaw thoroughly before preparing. Frozen shrimp can work well if you defrost them first. To thaw, place shrimp in the fridge overnight or run them under cold water for quick results. This step ensures the shrimp cook evenly and stay juicy. You can use regular breadcrumbs or crushed cornflakes for a different texture. Both options give a nice crunch. Regular breadcrumbs will be finer, while crushed cornflakes add a fun twist. Choose based on what you have at home. Use gluten-free flour and breadcrumbs. Many brands offer great gluten-free options. This way, you can enjoy crispy coconut shrimp without any gluten. Always check the labels to ensure they are safe for your dietary needs. We covered how to make tasty coconut shrimp with simple steps. You learned about required ingredients, cooking tips, and serving ideas. Remember to prep well for a crispy finish. You can adjust flavors and serve this dish in many ways. Enjoy experimenting with your coconut shrimp, and don't forget to store leftovers properly. Whether it's a snack or a full meal, this dish is sure to impress!

Easy Coconut Shrimp Crispy and Delicious Recipe

If you crave a quick, tasty dish, this Easy Coconut Shrimp recipe is for you. You’ll enjoy crunchy, golden shrimp

To make creamy mushroom risotto, you'll need these main ingredients: - 1 cup Arborio rice - 4 cups low-sodium vegetable broth - 1 cup mushrooms (cremini or button), sliced - 1 small onion, finely chopped - 2 cloves garlic, minced - 1/2 cup grated Parmesan cheese (or nutritional yeast for a vegan option) - 2 tablespoons butter (or olive oil for vegan option) - 1/2 cup heavy cream (or coconut cream for a dairy-free version) - Salt and pepper to taste - Fresh parsley, chopped (for garnish) These ingredients create a rich and creamy dish that warms the heart. You can add these optional ingredients to boost the flavor of your risotto: - White wine (about 1/2 cup) - Fresh thyme or rosemary - Peas or spinach for color and nutrition - Lemon zest for a citrus twist These additions can take your risotto to the next level and make it even more delicious. If you have specific dietary needs, here are some easy swaps: - Use quinoa instead of Arborio rice for a gluten-free option. - Replace butter with vegan margarine or olive oil for dairy-free cooking. - Try cashew cream instead of heavy cream for a nut-based alternative. These substitutions help you enjoy creamy mushroom risotto while meeting your dietary preferences. For the full recipe, check out the recipe section. To make creamy mushroom risotto, you need to prep a few items first. Gather your ingredients. You will need: - 1 cup Arborio rice - 4 cups low-sodium vegetable broth - 1 cup mushrooms (cremini or button), sliced - 1 small onion, finely chopped - 2 cloves garlic, minced - 1/2 cup grated Parmesan cheese (or nutritional yeast for a vegan option) - 2 tablespoons butter (or olive oil for vegan option) - 1/2 cup heavy cream (or coconut cream for a dairy-free version) - Salt and pepper to taste - Fresh parsley, chopped (for garnish) Next, measure out your ingredients. This step saves time and helps you stay organized. Chop the onion and garlic finely. Slice the mushrooms thinly. Keeping everything ready makes cooking smoother. Start by warming the vegetable broth in a saucepan over low heat. Keeping it warm is key for a creamy risotto. In a large skillet, melt the butter or heat the olive oil over medium heat. Add the chopped onion first. Cook it until it turns soft and clear, about 3-4 minutes. Now, add the minced garlic and sliced mushrooms. Cook for another 5 minutes. You want the mushrooms to be tender. Once cooked, add the Arborio rice. Stir the rice well to coat it with the onion and mushroom mix. Let it cook for about 2 minutes. This helps the rice absorb flavors. It's time for the broth. Add one ladle of warm broth to the skillet. Stir continuously while it cooks. Wait until most of the liquid absorbs before adding more broth. Repeat this step for about 18-20 minutes. The rice should be creamy and just slightly firm. Once the rice reaches the right texture, stir in the heavy cream and grated Parmesan cheese. Season it with salt and pepper to taste. Mix everything well until smooth. Now, remove the skillet from heat and let it sit for a couple of minutes. This helps the flavors meld together. Just before serving, garnish your risotto with chopped fresh parsley. The green parsley adds color and freshness to your creamy mushroom risotto. Enjoy your delicious homemade dish! For the complete cooking guide, check out the Full Recipe. To make the best risotto, you need to cook it slowly. Start by heating your broth in a separate pot. It should be warm, not boiling. This helps the rice cook evenly. When you add broth, do it one ladle at a time. Stir it in and wait until most of the liquid is gone. This method gives risotto its creamy texture. Make sure to keep the heat on medium. Too high heat will burn the rice. Too low will make it take too long to cook. One common mistake is adding too much broth at once. This can make the rice gummy instead of creamy. Another mistake is not stirring enough. Stirring helps release the starch from the rice, which creates creaminess. Don't skip adding salt until the end. This can cause the rice to absorb it unevenly. Lastly, avoid using cold broth. Cold broth shocks the rice and slows down cooking. If you have leftover risotto, store it in an airtight container. It will keep in the fridge for about 3 days. When you want to reheat it, add a splash of broth or water. This helps bring back its creamy texture. Heat it gently on the stove over low heat. Stir often to warm it evenly. You can also use the microwave, but keep an eye on it. Stir in some fresh cheese or herbs when reheating for extra flavor. For the full recipe, check out the [Full Recipe]. {{image_2}} You can easily make a vegan version of creamy mushroom risotto. Start by swapping regular butter for olive oil. Use nutritional yeast instead of Parmesan cheese. This adds a cheesy flavor without dairy. For creaminess, replace heavy cream with coconut cream. It gives a nice, rich texture. To boost nutrition, add proteins or vegetables. You can mix in cooked chickpeas or lentils. These add fiber and protein. Try adding spinach or peas for extra color and nutrients. They cook quickly and blend well. You can even toss in roasted butternut squash for sweetness. Experiment with flavors to create your version. Add herbs like thyme or rosemary for depth. A splash of white wine can add brightness. You could also mix in sun-dried tomatoes for a tangy twist. Try different mushrooms like shiitake for unique tastes. These small changes can make a big difference. Check the full recipe for more ideas. Each serving of creamy mushroom risotto is around 400-450 calories. This dish has a balance of carbs, fat, and protein. The Arborio rice gives it a hearty base. The cheese and cream add richness, while mushrooms provide fiber and vitamins. Depending on your choices, calories may vary a bit. - Mushrooms: They are low in calories and high in nutrients. They boost your immune system and add antioxidants. - Arborio Rice: This rice is high in carbs, which give you energy. It also has some protein and fiber. - Parmesan Cheese: It adds protein and calcium, good for bones. - Butter: It provides healthy fats, but you can swap it for olive oil for a heart-friendly option. - Heavy Cream: It adds creaminess and richness, but you can use coconut cream for a lighter touch. - Use low-fat cheese or nutritional yeast for a vegan twist. - Swap heavy cream for a lighter version like almond milk or coconut cream. - Add veggies like spinach or peas for extra nutrients. - Limit salt by using low-sodium broth. - Control portion sizes to ensure balanced meals. For a full recipe, check out the Creamy Mushroom Risotto recipe above! To make creamy risotto from scratch, follow a few simple steps. First, heat broth in a pot. In a skillet, cook chopped onion in butter until soft. Add mushrooms and garlic, cooking until tender. Stir in Arborio rice, coating it well. Then, add warm broth gradually, stirring often. This helps the rice release its starch. Keep adding broth until the rice is creamy and just tender. Finally, stir in cream and cheese for extra flavor. This method ensures a rich, creamy texture every time. Yes, you can make risotto ahead of time. Cook it fully and let it cool. Store it in the fridge for up to three days. When ready to serve, reheat it on the stove. You might need to add a bit more broth or water. Stir often to regain that creamy texture. This is a great way to save time on busy days. The best rice for risotto is Arborio rice. It has a high starch content, which helps create that creamy texture. Other good options are Carnaroli and Vialone Nano. These types of rice absorb liquid well and stay firm. Avoid using long-grain rice, as it won't give you the same results. Yes, you can make risotto without broth. Use water instead, but it may lack flavor. You can add herbs or spices to enhance the taste. Cooking with wine also adds depth. However, using broth is recommended for the best flavor and creaminess. Creamy mushroom risotto pairs well with many dishes. Serve it with a simple green salad for freshness. Grilled chicken or fish complements the richness nicely. You can also add roasted vegetables for a colorful plate. For a cozy meal, serve with garlic bread or crusty rolls. These options balance the flavors and textures beautifully. You learned how to make creamy mushroom risotto step by step. I shared tips to avoid mistakes and make it perfect. Remember, you can customize it with different flavors and ingredients. This dish is both tasty and healthy if you choose wisely. Enjoy every bite and share it with friends. Happy cooking!

Creamy Mushroom Risotto Simple and Flavorful Delight

Are you ready to make a creamy mushroom risotto that’s simple and oh-so-delicious? This dish is perfect for cozy nights

Older posts
Newer posts
← Previous Page1 … Page80 Page81 Page82 … Page84 Next →

dsad

© 2026 juliesdish • Built with GeneratePress

Our Policies

  • Copyright Policy
  • Cookie Policy
  • GDPR Policy
  • Privacy Policy
  • Disclaimer
  • Terms Of Use

More Information

  • Home
  • About
  • Contact
  • Appetizers
  • Dessert
  • Dinner
  • Drinks
©2026, juliesdish About Back To Top