
Maple Dijon Roasted Carrots Flavorful and Simple Dish
Looking to impress at your next meal without breaking a sweat? Maple Dijon Roasted Carrots are your answer! This dish
Looking to impress at your next meal without breaking a sweat? Maple Dijon Roasted Carrots are your answer! This dish
![To make No Bake Chocolate Lasagna, gather these ingredients: - 1 package of chocolate cream cookies (about 15 oz) - 1/2 cup unsalted butter, melted - 2 cups cream cheese, softened - 1 cup powdered sugar - 2 cups whipped cream (or cool whip) - 1 cup chocolate pudding mix - 2 1/2 cups milk - 1 teaspoon vanilla extract - Shaved chocolate or chocolate chips for garnish - Optional: Fresh raspberries or strawberries for topping Here are some tips for measurements and substitutions: - Use gluten-free cookies if you need a gluten-free option. - If you like a richer taste, swap regular cream cheese for mascarpone. - You can replace powdered sugar with granulated sugar if you blend it well. - Use almond milk or oat milk instead of regular milk for dairy-free. - If you want a lighter touch, use light whipped cream or yogurt. To make this dessert, you’ll need a few tools: - Mixing bowls (large and medium) - Electric mixer or whisk - 9x13 inch baking dish - Spatula for spreading layers - Plastic wrap for chilling These tools help you create the perfect layers. Enjoy making this fudge-like dessert! For the complete recipe, check the [Full Recipe]. To make No Bake Chocolate Lasagna, start with the cookie crust. Take your chocolate cream cookies and crush them finely in a large bowl. Mix in the melted butter. Press this mixture evenly into the bottom of a 9x13 inch dish. This forms the base of your dessert. Next, you'll create the cream cheese layer. In another bowl, beat the softened cream cheese until it’s smooth. Slowly add the powdered sugar while mixing. Once combined, fold in one cup of whipped cream. This makes the cream cheese layer light and fluffy. Now, spread the cream cheese mixture over the cookie crust. Use a spatula to smooth it out evenly. This layer should be thick and creamy. For the chocolate pudding layer, whisk the pudding mix and milk in a separate bowl. Keep mixing until it thickens. Add vanilla extract for a richer flavor. Pour this pudding over the cream cheese layer and spread it evenly. Finally, top the pudding with the remaining whipped cream. Spread it to create a smooth finish on top. Layering is key to a great No Bake Chocolate Lasagna. Start with a firm base. Press the cookie crust tightly to prevent it from crumbling. Each layer should be spread smoothly. Use a spatula to ensure even distribution. When adding the cream cheese layer, make sure it covers the crust completely. This prevents the pudding from soaking into the crust. When you pour the pudding, do it gently to keep the layers distinct. Consider chilling the dish between layers to set each one. This helps maintain separation and keeps everything looking neat. To achieve smooth layers, use softened cream cheese. It blends easily and creates a creamy texture. Always mix slowly to avoid lumps. When preparing the pudding, whisk thoroughly to remove any clumps. If you notice lumps, strain the mixture before adding it to the dessert. Chilling each layer for about 15 minutes helps firm them up. This makes it easier to spread the next layer without mixing. Lastly, for a polished finish, use an offset spatula to smooth the whipped cream on top. It gives a professional look to your dessert. For the full recipe, check out the complete guide above. To get the best texture for your no bake chocolate lasagna, focus on your layers. Start with a firm cookie crust. Press it down well to avoid crumbling later. For the cream cheese layer, beat the cream cheese until it's smooth. Mix in powdered sugar slowly. This helps avoid lumps. Fold in whipped cream gently. This keeps it light and fluffy. When making the pudding, whisk it until it’s thick. This ensures it won't run into other layers. If you have leftovers, store them in the fridge. Cover the dish tightly with plastic wrap. This keeps it fresh and prevents odors from other foods. You can also transfer it to an airtight container. It’s best to eat leftovers within three days for the best taste. If you want to keep it longer, consider freezing individual slices. Just wrap each slice in plastic wrap and place them in a freezer-safe bag. Avoid common mistakes to make your dessert shine. First, don’t skip chilling time. It’s key for the layers to set. Second, be careful with the whipped cream. Don't overmix it; otherwise, it can become grainy. Third, make sure to measure your ingredients accurately. Too much pudding mix can make it too thick. Lastly, don't rush the layering process. Take your time to spread each layer evenly. This way, you get a beautiful, tasty dessert. For more details, you can check the Full Recipe. {{image_2}} You can easily change the flavors in no bake chocolate lasagna. Here are some fun ideas: - Peanut Butter Surprise: Mix in peanut butter with the cream cheese layer. This adds a nutty twist. - Mint Chocolate: Add mint extract to the pudding layer. It gives a refreshing taste. - Espresso Delight: Stir in some espresso powder for a coffee flavor. It pairs well with chocolate. These options let you personalize your dessert for any occasion. Garnishing is key for making your dish look great. Try these ideas for a unique touch: - Fruit Medley: Top with fresh raspberries, strawberries, or banana slices. They add color and freshness. - Nutty Crunch: Sprinkle chopped nuts like walnuts or pecans on top. This adds texture and flavor. - Drizzle Magic: Drizzle caramel or chocolate sauce over the whipped cream. It looks fancy and tastes amazing. These garnishes make your dessert not just tasty but also eye-catching. You can modify this recipe to fit different diets. Here are some easy swaps: - Gluten-Free: Use gluten-free chocolate cookies for the crust. This keeps it safe for gluten-free eaters. - Dairy-Free: Substitute cream cheese and whipped cream with plant-based alternatives. Look for coconut or almond options. - Lower Sugar: Use sugar alternatives in the cream cheese layer. This makes it better for those watching their sugar. These adjustments let everyone enjoy this tasty dessert without worry. For the complete recipe, refer to the Full Recipe mentioned above. To keep your no bake chocolate lasagna fresh, refrigerate it right away. Cover the dish tightly with plastic wrap or foil. This helps keep air out and moisture in. Chill it for at least four hours. For the best taste, let it sit overnight. The flavors will meld beautifully. Remember, the longer it chills, the better the layers set. You can freeze no bake chocolate lasagna for later. Cut it into portions for easy serving. Wrap each piece tightly in plastic wrap. Place the wrapped slices in a freezer-safe bag. This way, you can enjoy a slice whenever you want. When ready to eat, let it thaw in the fridge overnight. Avoid freezing for more than two months to keep the flavor fresh. When stored correctly in the fridge, no bake chocolate lasagna lasts about 5 days. If you freeze it, the taste will stay good for about two months. However, keep in mind that the texture may change slightly after thawing. Always check for any signs of spoilage before eating. Enjoy your sweet treat while it’s fresh! No Bake Chocolate Lasagna is a layered dessert made without baking. It features a cookie crust, creamy layers, and rich chocolate pudding. This dessert is easy to make and great for gatherings. You combine simple ingredients to create a delightful treat. The layers blend together for a tasty experience. Kids and adults love it alike! Yes, you can make No Bake Chocolate Lasagna ahead of time. It needs to chill for at least four hours. For best results, chill it overnight. Preparing it in advance saves you time on the day of your event. Just remember to cover it tightly with plastic wrap. This will keep it fresh and delicious. To prevent soggy layers in No Bake Chocolate Lasagna, let the crust set well. Use crushed cookies mixed with melted butter for a firm base. Avoid adding too much liquid to your layers. Make sure your cream cheese mix and pudding are thick. Always refrigerate it for the right amount of time. This will help the layers hold together well. In this post, we explored the key steps to making No Bake Chocolate Lasagna. We covered the important ingredients, tools needed, and the step-by-step process for great results. I shared tips for perfect texture and ways to store leftovers. You also learned about fun variations and best practices for storage. Now, you can easily create a delicious dessert. Enjoy experimenting with flavors and impressing your friends!](https://juliesdish.com/wp-content/uploads/2025/06/b672780c-e639-438c-8e68-f53887013e5f.webp)
Are you ready to indulge in a simple yet decadent treat? No Bake Chocolate Lasagna is the answer to your

Looking for the perfect drink to wow your guests this holiday season? I’ve got just the thing! This Sparkling Cranberry

Looking for a simple yet delicious dessert? These peach tartlets are the answer! With their flaky crust and sweet peach
![To make your zucchini chocolate muffins, gather these items: - 1 cup grated zucchini (about 1 medium zucchini) - 1 cup all-purpose flour - 1/2 cup unsweetened cocoa powder - 1/2 teaspoon baking soda - 1 teaspoon baking powder - 1/4 teaspoon salt - 1/2 cup granulated sugar - 1/2 cup brown sugar, packed - 1/2 cup vegetable oil (or melted coconut oil) - 2 large eggs - 1 teaspoon vanilla extract - 1/2 cup semi-sweet chocolate chips (plus extra for topping) When measuring ingredients, precision matters. Use a dry measuring cup for flour and cocoa powder. For brown sugar, pack it tightly into the cup. For liquids like oil and eggs, a liquid measuring cup works best. This ensures your muffins rise well and taste great. You can add fun flavors to your muffins. Consider these options: - 1/2 cup chopped nuts (like walnuts or pecans) - 1/2 teaspoon cinnamon for warmth - 1/2 cup shredded coconut for a tropical twist - A splash of espresso for deeper chocolate flavor These add-ins can elevate your muffins and make them unique. Feel free to get creative! For the full recipe, check the earlier section. To make zucchini chocolate muffins, start by gathering all your ingredients. You need grated zucchini, flour, cocoa powder, sugars, oil, eggs, vanilla, baking powder, baking soda, salt, and chocolate chips. This recipe is easy and takes about 15 minutes to prep. Preheat your oven to 350°F (175°C) and get your muffin tin ready by lining it with paper liners or spraying it with nonstick spray. 1. In a medium bowl, mix the grated zucchini, granulated sugar, brown sugar, vegetable oil, eggs, and vanilla. Stir until everything is well combined. 2. In another large bowl, whisk together the flour, cocoa powder, baking soda, baking powder, and salt. 3. Pour the wet mixture into the dry mixture. Stir gently until just combined. It’s okay if there are a few lumps. 4. Fold in the semi-sweet chocolate chips, but save some for topping the muffins. 5. Spoon the batter into the muffin tin, filling each cup about two-thirds full. Sprinkle a few extra chocolate chips on top. 6. Bake for 18 to 20 minutes. Use a toothpick to check; it should come out clean. 7. Let the muffins cool in the pan for 5 minutes. Then move them to a wire rack to cool completely. To check if your muffins are done, stick a toothpick into the center of one. If it comes out clean or with a few crumbs, they are ready. If the toothpick has wet batter, bake for a few more minutes. Remember, overbaking can make them dry. So, watch them closely! Enjoy your tasty and healthy zucchini chocolate muffins! For the full recipe, click here. Grating zucchini is simple. First, wash the zucchini well. Use a box grater or a food processor. Grate the zucchini with the skin on for added nutrients. Aim for fine shreds; they mix better in the batter. After grating, place the zucchini in a clean kitchen towel. Squeeze the towel to remove excess moisture. This step helps avoid soggy muffins. One common mistake is overmixing the batter. Mix until just combined to keep muffins soft. Another mistake is not measuring ingredients correctly. Use measuring cups and spoons for accuracy. Make sure your baking powder and soda are fresh for the best rise. Finally, don’t skip preheating the oven. A hot oven helps the muffins rise properly. Zucchini adds moisture, but you can do more. Use vegetable oil for a rich texture. You can also add yogurt or applesauce to boost moisture. If you want a sweeter muffin, try adding a bit more sugar. Just be careful not to overdo it. You want a balance of flavors. For even more moisture, use semi-sweet chocolate chips. They melt and add a gooey texture. For the full recipe, check the section above. {{image_2}} If you want to make these muffins gluten-free, use gluten-free flour instead of all-purpose flour. Look for a blend that has good starch content for the best texture. For a vegan option, replace the eggs with flax eggs. To make a flax egg, mix one tablespoon of ground flaxseed with three tablespoons of water. Let it sit for 5 minutes to thicken. You can also swap out vegetable oil for applesauce to cut some fat. To boost the flavor, consider adding spices. A half teaspoon of cinnamon or nutmeg can add warmth. You might also enjoy a pinch of cayenne for a spicy kick. Adding nuts like walnuts or pecans will give a nice crunch. Just chop them roughly and fold them into the batter with the chocolate chips. This adds texture and flavor that pairs well with the chocolate. You can switch up the veggies based on what’s fresh. Grated carrots or sweet potatoes work great. They add sweetness and moisture too. In summer, try adding fresh corn for a sweet touch. This keeps the muffins interesting and helps you use what’s in season. You can find more ideas in the Full Recipe. To keep your zucchini chocolate muffins fresh, store them in an airtight container. Place a paper towel inside to absorb extra moisture. This helps maintain softness and flavor. Keep them at room temperature for short-term storage. If you want to store them longer, consider freezing. To freeze muffins, let them cool completely first. Wrap each muffin tightly in plastic wrap. Then, place them in a freezer-safe bag or container. Make sure to remove as much air as possible. They will stay fresh in the freezer for up to three months. When you want to enjoy one, thaw it at room temperature or microwave it for 15 seconds. At room temperature, these muffins last about 3 to 5 days. If you refrigerate them, they can last up to a week. However, refrigeration may change their texture. For the best taste and texture, consume them within the first few days. Check out the Full Recipe for more tips on enjoying these delightful muffins! Yes, you can use frozen zucchini. Just thaw it first. Drain any extra water after thawing. This helps keep your muffins from getting too soggy. Frozen zucchini works well because it still has great flavor. Your muffins are done when a toothpick comes out clean. Insert the toothpick in the center. If it has wet batter, bake longer. The tops should look set and slightly springy. A golden color is a good sign too. Zucchini is low in calories and high in vitamins. It adds moisture without extra fat. This vegetable is rich in fiber, aiding digestion. Plus, it has antioxidants that support your health. Using zucchini in baking makes treats more nutritious. Enjoying these muffins is a great way to sneak in veggies. For the full recipe, check [Full Recipe]. This blog post covers the key ingredients and steps to make delicious zucchini muffins. I shared the full list of ingredients, including optional add-ins for extra flavor. You learned simple, clear instructions for baking and tips for checking if they are done. I highlighted common mistakes and how to keep your muffins moist. You can also explore dietary substitutions and seasonal variations. Proper storage methods ensure freshness. Use frozen zucchini and enjoy the health benefits of this veggie in your baked goods. Enjoy your baking adventure!](https://juliesdish.com/wp-content/uploads/2025/06/565adfe5-b7e7-449f-a635-6e59acc797fd.webp)
Are you ready to bake something delicious and healthy? These Zucchini Chocolate Muffins are a game-changer! They’re easy to make,
![For a delightful Cucumber Watermelon Salad, you need fresh and vibrant ingredients. Here’s the complete list: - Watermelon and cucumber - 2 cups watermelon, cubed - 1 large cucumber, diced - Additional ingredients - 1/2 red onion, thinly sliced - 1/4 cup fresh mint leaves, chopped - 1/4 cup feta cheese, crumbled - Dressing components - 2 tablespoons honey - 2 tablespoons lime juice - Salt and pepper to taste Each ingredient plays a key role. The sweet watermelon and crisp cucumber create a refreshing base. The red onion adds a gentle bite, while mint brings a burst of freshness. Feta cheese introduces a creamy, salty taste that balances the flavors perfectly. For the dressing, honey and lime juice blend into a sweet and tangy mix. This dressing ties everything together. Just drizzle it over the salad for a burst of flavor. You can find the [Full Recipe] for detailed steps on how to make this salad. How to prepare watermelon and cucumber Start by washing your watermelon and cucumber well. Cut the watermelon in half. Use a knife to slice it into cubes. Scoop out the cubes and place them in a large bowl. For the cucumber, slice off both ends. Then, cut it in half lengthwise. Finally, dice the cucumber into bite-sized pieces and add them to the bowl. Mixing the salad ingredients Next, add the red onion and mint leaves to the bowl. Thinly slice the red onion before adding it. This helps mix the flavors well. Chop the mint leaves into small pieces. The mint gives a fresh taste to the salad. Creating the dressing To make the dressing, take a small bowl. Measure out the honey and lime juice. Whisk them together until smooth. This dressing balances the sweetness of the fruit with a tangy note. Combining salad with dressing Pour the dressing over the salad mixture. Gently toss everything together. Make sure all the ingredients are coated with the dressing. This step makes each bite flavorful. Presentation tips for serving To serve, use a chilled bowl. This keeps the salad fresh and cool. Garnish with a few whole mint leaves on top for a pop of color. This adds a nice touch when serving. Ideal serving temperature Serve the salad cold for the best taste. Chilling it helps enhance the flavors. Enjoy this crisp salad on hot summer days for a refreshing treat. For the full recipe, check out the recipe card above! Choosing the best watermelon and cucumber is key for this salad. For watermelon, look for a smooth rind. It should feel heavy for its size. A yellow spot on one side means it ripened on the ground. This spot is a good sign of sweetness. Give it a tap; a deep sound means it’s ripe. For cucumbers, select firm ones with a vibrant color. Avoid soft spots or wrinkles. They should feel heavy and have a fresh smell. This ensures crispness and flavor in your salad. To elevate the taste of your cucumber watermelon salad, add fresh herbs. Basil and cilantro pair well with mint. They bring a new twist and freshness. You can also sprinkle a pinch of chili flakes for heat. If you want some protein, grilled chicken works great. It adds a nice texture and makes it a full meal. You could even use shrimp or chickpeas for a different flavor. Experiment with your favorite ingredients to find what you love! For the full recipe, check out the complete details above. {{image_2}} You can make your cucumber watermelon salad even better. Try adding citrus fruits like oranges or lemons. The bright, zesty taste will wake up your palate. Just chop the citrus into small pieces and mix them in. Another option is to add nuts for crunch. Almonds or walnuts add a great texture. Just chop them roughly and sprinkle them on top. This gives your salad a nice contrast with the soft watermelon and cucumber. You can also explore regional twists to this salad. For a Mediterranean version, add olives. The salty flavor pairs well with sweet watermelon. Just slice the olives and mix them in. This adds depth to your dish. For an Asian-style twist, try a sesame dressing. Mix soy sauce, sesame oil, and a little ginger. Drizzle this over your salad for a savory kick. It gives a whole new vibe to the dish. These variations allow you to customize your cucumber watermelon salad. You can make it suit any taste or occasion. For the full recipe, check out the detailed instructions above. To keep your cucumber watermelon salad fresh, store it in the fridge. Use an airtight container to prevent odors and moisture from getting in. If possible, separate the dressing from the salad. This helps maintain crispness. When ready to eat, just drizzle the dressing on top and mix. Your salad will last about 2 to 3 days in the fridge. After that, it may lose its freshness. Watch out for slimy cucumber or mushy watermelon. These are signs that the salad has spoiled. Always trust your senses; if it looks or smells off, it's best to toss it. Cucumber watermelon salad packs a punch of nutrition. - Low in calories: This salad is light, perfect for warm days. - Rich in vitamins: Watermelon is high in vitamins A and C. - Hydration: Both cucumber and watermelon have high water content. Antioxidants in this salad help fight free radicals. Watermelon contains lycopene, which may reduce heart disease risk. Mint adds a fresh taste and can aid digestion. Yes, you can make this salad ahead of time. - Pre-preparation tips: Chop the watermelon and cucumber a few hours early. - Keeping ingredients fresh: Store them separately in the fridge. Mix everything just before serving to keep it crisp. The honey-lime dressing can also be made ahead. Yes, cucumber watermelon salad works well for vegans. - Vegan modifications: Instead of feta, use avocado or a vegan cheese. - Nutritional considerations: This salad still offers vitamins and hydration. It's a great choice for anyone wanting a light meal. For the full recipe, check out the full recipe section. This article covered a refreshing cucumber and watermelon salad. You learned the key ingredients and how to prepare them. We discussed tips for choosing ripe produce and ways to enhance flavor. Variations added exciting twists, while storage tips ensured freshness. This salad is easy to make and perfect for any meal. Experiment with flavors and enjoy a nutritious dish. Try making it your own, and savor every bite. You’ll love how simple and tasty it is.](https://juliesdish.com/wp-content/uploads/2025/06/7fec256e-4b0b-4194-bbff-272faf969516.webp)
Looking for a refreshing summer dish that bursts with flavor? Look no further! Cucumber Watermelon Salad is the perfect blend
![- 2 medium zucchinis, grated and water squeezed out - 1 cup ground turkey or chicken - 1/2 cup breadcrumbs (or gluten-free breadcrumbs) - 1/4 cup grated Parmesan cheese - 1 large egg - Salt and pepper to taste - Fresh herbs for extra flavor - Additional seasonings - Each serving has about 200 calories. - The meatballs contain 20g protein, 10g fat, and 15g carbs. In this dish, zucchini adds moisture and nutrients. Ground turkey or chicken gives protein. The breadcrumbs bind the mix and help shape the meatballs. Parmesan cheese adds a nice, salty flavor. You can change things up with fresh herbs or spices. I like to use parsley, garlic powder, or Italian seasoning. These add a burst of flavor and freshness. This recipe is great for anyone wanting a tasty and healthy meal. It's low in carbs and high in protein. You can easily make this dish gluten-free by using gluten-free breadcrumbs. For more details on the full recipe, check out [Full Recipe]. 1. Preheat your oven to 400°F (200°C). Line a baking sheet with parchment paper to make cleanup easy. 2. Grate the zucchinis using a box grater. Place them in a clean kitchen towel. Squeeze out as much water as you can. This step is key. Too much moisture will make the meatballs soggy. 1. In a large mixing bowl, add the drained zucchini. 2. Add the ground turkey or chicken. 3. Then, mix in the breadcrumbs, Parmesan cheese, parsley, garlic powder, onion powder, Italian seasoning, egg, salt, and pepper. 4. Use your hands to mix everything well until combined. 5. To form meatballs, grab a handful of the mixture and roll it into a ball about 1.5 inches wide. Place them on the baking sheet, spaced about 2 inches apart. 1. Drizzle the olive oil over the meatballs. This helps them brown nicely in the oven. 2. Bake the meatballs for 20-25 minutes. They should turn golden brown and reach an internal temperature of 165°F. 3. To check for doneness, use a meat thermometer. Insert it into the center of a meatball. If it reads 165°F, they are ready. 4. While they bake, you can warm marinara sauce in a small pot over low heat for serving. To avoid soggy meatballs, squeeze out water from the zucchini well. You want to get rid of as much moisture as possible. Use a clean kitchen towel for this. After grating the zucchini, place it in the towel, twist, and squeeze until dry. This simple step makes a big difference in texture. For even cooking, shape meatballs the same size. Aim for about 1.5 inches in diameter. This helps them cook through at the same rate. Also, space them about 2 inches apart on the baking sheet. This ensures hot air circulates, letting them brown nicely. Marinara sauce pairs perfectly with these meatballs. The rich sauce adds great flavor. You can also try pesto or a yogurt dip for a twist. For sides, consider serving them with whole-grain pasta or a fresh salad. Quinoa or brown rice also complements the meal well. Adding roasted veggies makes it even better. You need a few essential tools to make this recipe easy. A box grater is must-have for the zucchini. You’ll also want a large mixing bowl for combining ingredients. For baking, use a baking sheet lined with parchment paper. This helps prevent sticking and makes cleanup easy. An instant-read thermometer is great for checking if your meatballs are done. Aim for 165°F for safe eating. {{image_2}} You can easily swap ground turkey or chicken with other meats. Ground beef works well if you want a richer flavor. For a leaner option, try ground bison. If you prefer plant-based choices, consider using lentils or chickpeas. These options keep the dish healthy while adding unique tastes. To amp up the flavor, add spices like smoked paprika or chili flakes. A dash of soy sauce lends a savory kick. You can mix in chopped bell peppers, carrots, or spinach for added nutrition. These vegetables not only boost the flavor but also add color. If you want a crispy texture, try air frying the meatballs. Set your air fryer to 375°F and cook for about 12-15 minutes. For a quick option, pan-frying in a skillet gives a nice crust. You can even grill them for a smoky flavor. Just preheat your grill to medium heat and cook them for about 10 minutes. Each method adds its own twist to the dish, making it fun to try different styles. Check the Full Recipe for more details. To keep your baked zucchini meatballs fresh, store them in an airtight container. Place a layer of parchment paper between layers to prevent sticking. Refrigerate them right after they cool down. For freezing, place the meatballs on a baking sheet first. Freeze until firm, then transfer to a freezer-safe bag. This way, they won’t stick together. When it’s time to enjoy your leftovers, reheat them in the oven. Preheat your oven to 350°F (175°C). Place the meatballs on a baking sheet and cover them with foil. This helps keep them moist. Heat for about 10 to 15 minutes. You can also microwave them, but add a splash of marinara sauce to keep them juicy. In the fridge, your meatballs will last about three to four days. If you freeze them, they can stay good for up to three months. Always check for signs of spoilage before eating. If they smell off or look discolored, it’s best to toss them. Enjoy your baked zucchini meatballs fresh for the best taste! For the full recipe, check out the details above. Yes, you can use other meats. Ground beef, pork, or lamb work well. For a lighter option, ground turkey or chicken is great. If you prefer a plant-based choice, try lentils or black beans. Just make sure to adjust the seasonings to match your meat choice. Yes, you can easily make these meatballs gluten-free. Use gluten-free breadcrumbs instead of regular ones. Many stores sell these, or you can crush gluten-free crackers. Always check labels to avoid cross-contamination if you have severe allergies. Check the internal temperature with a meat thermometer. They should reach 165°F (74°C) for safety. Look for a golden brown color on the outside. If they are firm to the touch, they are likely done. These meatballs pair well with many sides. Serve them with marinara sauce over pasta or zucchini noodles. A fresh salad or roasted veggies make great sides too. You can also try them on a sub roll for a tasty meatball sandwich. For more ideas, check the Full Recipe. In this article, we explored how to make delicious baked zucchini meatballs. We listed essential ingredients, shared helpful preparation steps, and provided baking tips. I offered variations, storage advice, and answered common questions. Remember, these meatballs are nutritious and can fit any diet. Whether you choose turkey, chicken, or a veggie option, you can enjoy a tasty meal. Try different flavors and enjoy cooking! It's an easy and fun dish for everyone.](https://juliesdish.com/wp-content/uploads/2025/06/d4c3d459-f799-48a5-b99b-3e7fa7cf0f78.webp)
Looking for a healthy dish that packs a flavorful punch? These Baked Zucchini Meatballs are the answer! Combining tender zucchini
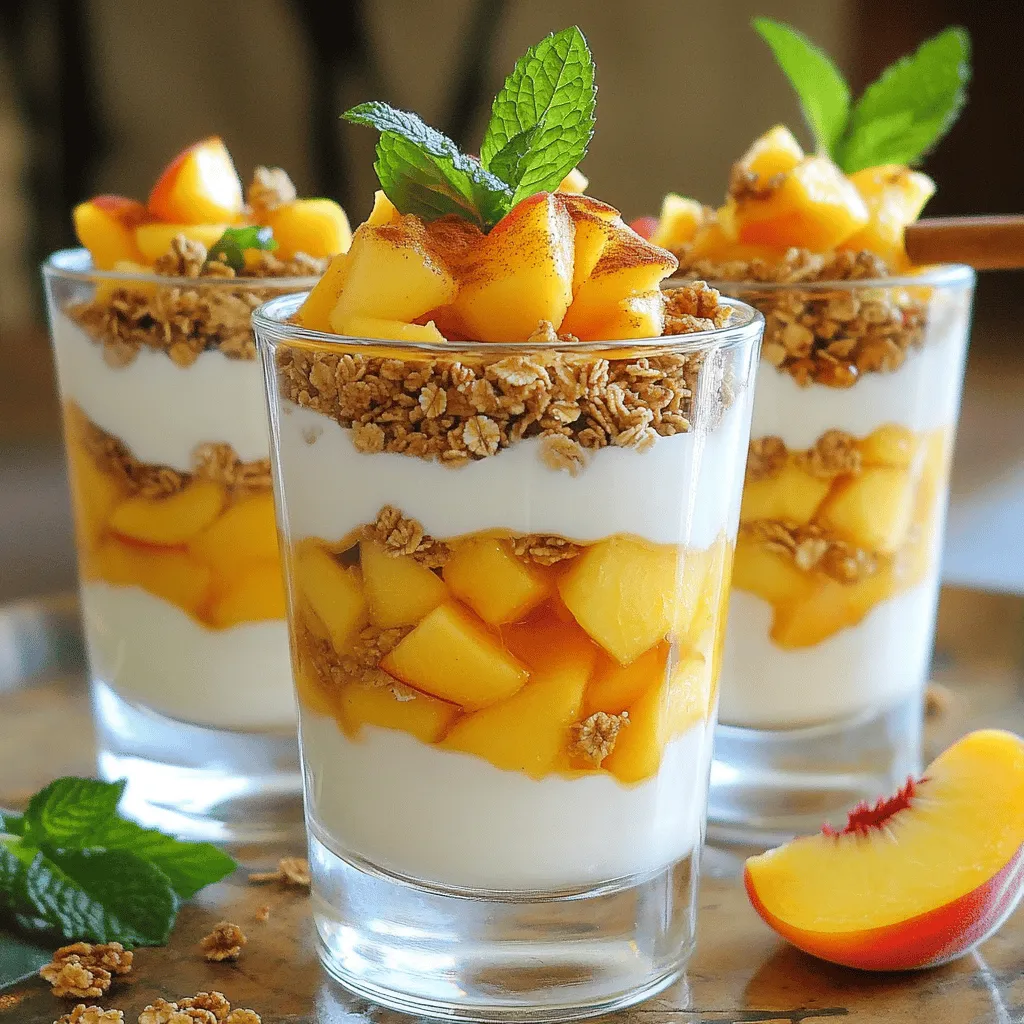
Are you ready to indulge in a sweet and healthy treat? This Peach Yogurt Parfait is a delightful way to
![To make tasty zucchini corn muffins, you need the right mix of ingredients. Here’s what you should gather: - Grated Zucchini: 1 cup - Corn Kernels: 1 cup (fresh or canned) - Dry Ingredients: - 1 cup all-purpose flour - 1 cup cornmeal - 1/2 cup sugar (brown or coconut sugar adds a nice twist) - 1 tablespoon baking powder - 1/2 teaspoon baking soda - 1/2 teaspoon salt - Wet Ingredients: - 1 large egg, beaten - 1/2 cup milk (dairy or non-dairy works) - 1/4 cup vegetable oil or melted coconut oil - Optional Spices and Sugars: - 1/2 teaspoon ground cumin (for warmth) - 1/4 teaspoon cayenne pepper (for a spicy kick) These ingredients bring great flavor and texture to the muffins. The grated zucchini keeps them moist, while the corn adds a sweet crunch. The spices give them a unique touch. For the full recipe, you can follow the instructions provided above. Enjoy the process of mixing these ingredients together! 1. Preheat the Oven Start by preheating your oven to 375°F (190°C). This step ensures even baking. 2. Combine Wet Ingredients In a large bowl, mix the grated zucchini, corn kernels, and beaten egg. Stir well until everything is combined. 3. Mix Dry Ingredients In another bowl, whisk together all-purpose flour, cornmeal, sugar, baking powder, baking soda, salt, cumin, and cayenne pepper. This blends the flavors. 4. Combine Wet and Dry Ingredients Pour the dry mix into the bowl of wet ingredients. Stir gently until just combined. Don’t overmix; a few lumps are okay. 5. Fill Muffin Tin Spoon the batter into the muffin tin. Fill each cup about two-thirds full for the best rise. 1. Bake Time and Temperature Place the muffin tin in the oven and bake for 18 to 20 minutes. The muffins should turn golden brown. 2. Testing for Doneness To check if they are done, insert a toothpick into the center. If it comes out clean, the muffins are ready. If not, bake for a few more minutes. Enjoy the full recipe for Zucchini Corn Muffins, and relish the delightful flavors! Key Mixing Techniques Mixing is key to the right texture. Start with the wet ingredients. Combine the grated zucchini, corn, and egg in a bowl. Stir until mixed well. In a separate bowl, whisk the dry ingredients together. This helps ensure even flavor and texture. When you add the dry mix to the wet, do it gently. This is where you want to be careful. Avoiding Overmixing Overmixing makes your muffins dense. Stir just until you see no dry flour. A few lumps are okay. Letting the batter rest for a few minutes can help too. It allows the flour to hydrate and makes the muffins fluffier. Adding Spices for Depth Spices can elevate your muffins. Ground cumin adds warmth. A bit of cayenne pepper gives a nice kick. If you like it spicy, adjust the cayenne to your taste. You can also try adding a pinch of cinnamon for sweetness. Sweetness Adjustments Sugar is important for flavor, but you can change it up. Try using brown sugar or coconut sugar. Both give a unique taste. If you prefer less sweetness, cut the sugar by a quarter cup. This will still keep them tasty. For a fun twist, add some honey or maple syrup in place of sugar. For the full recipe, check out the [Full Recipe]. {{image_2}} Gluten-Free Options You can easily make gluten-free zucchini corn muffins. Swap all-purpose flour with a gluten-free blend. Look for a blend that can replace regular flour cup for cup. This swap keeps the texture light and fluffy. Dairy-Free Alternatives To make these muffins dairy-free, use a non-dairy milk. Almond, soy, or oat milk works well. You can also swap regular yogurt for a plant-based option. These changes let everyone enjoy the muffins. Adding Cheese For a savory twist, add cheese. Cheddar or pepper jack melts well and adds a nice flavor. Mix in about a cup of shredded cheese with your wet ingredients. This simple addition makes the muffins even more delicious. Incorporating Different Vegetables Feel free to mix in other veggies. Bell peppers or grated carrots add color and taste. You can use about a half-cup of any extra veggies and still keep the muffins moist. This way, you can create your own unique version of zucchini corn muffins. You can find the full recipe above to get started on these tasty variations! Once your zucchini corn muffins cool, store them in an airtight container. Keep them in the fridge for up to five days. This helps keep them fresh and moist. If you want a quick snack, just grab one from the fridge. They taste great chilled or warmed up. If you want to save muffins for later, freezing is a great option. Place the cooled muffins in a freezer-safe bag. Squeeze out as much air as you can before sealing. They will stay good for about three months. When you’re ready to eat, you can reheat them in the oven or microwave. To reheat frozen muffins, you can use the oven. Preheat it to 350°F (175°C). Place the muffins on a baking sheet and warm them for about 10-15 minutes. You can also use the microwave. Just heat each muffin for about 30-45 seconds. Enjoy your muffins as fresh as the day you baked them! Yes, you can use frozen corn. Just thaw it first. The muffins will still taste great! To make these muffins vegan, replace the egg with a flax egg. Mix one tablespoon of ground flaxseed with three tablespoons of water. Let it sit for five minutes. Substitute the milk with a non-dairy alternative like almond or oat milk. Serve these muffins warm. Add a dollop of sour cream or yogurt on top. Fresh herbs like cilantro or chives brighten the dish. They make a hearty breakfast or a tasty snack! Yes, you can double the recipe. Just make sure to use a larger mixing bowl. Bake in two muffin tins or bake them in batches. Enjoy making more muffins for everyone! You can find the full recipe for these delightful muffins above. We explored the key ingredients for zucchini corn muffins, their preparation, and baking steps. I shared tips for texture and flavor, plus some fun variations. Remember, simple swaps can make a big difference in taste. Store your muffins correctly for long-lasting freshness. With these insights, you can create inviting muffins that suit your taste. Dive into your kitchen and enjoy this delightful baking adventure. You now have all the tools to impress family and friends.](https://juliesdish.com/wp-content/uploads/2025/06/532cedf2-7cc4-4d71-b5b3-c6c3aea7d71e.webp)
If you love tasty and simple baked goods, you’ll adore my Zucchini Corn Muffins! These muffins blend fresh zucchini and
![To make Cucumber Pineapple Agua Fresca, you need a few key items. Here’s what you'll need: - 1 medium cucumber, peeled and chopped - 2 cups fresh pineapple, chopped - 4 cups cold water - 3 tablespoons agave syrup or honey (adjust to taste) - Juice of 1 lime - Fresh mint leaves for garnish - Ice cubes These ingredients create a bright and refreshing drink. The cucumber gives a crisp taste, while the pineapple adds sweetness. If you don't have fresh pineapple, you can use canned pineapple juice. Just make sure it is 100% juice with no added sugar. If you want a lighter drink, you can use sparkling water instead of still water. For the sweetener, agave syrup is great, but honey works well too. You can skip sweeteners altogether if you prefer a more natural taste. Just add more lime juice to balance flavors. To make your drink stand out, consider adding a few optional garnishes. Fresh mint leaves are perfect for this. They add aroma and a pop of color. You might also try slices of cucumber or pineapple on the rim of the glass. This adds flair and makes the drink look even more inviting. Enjoy your refreshing Cucumber Pineapple Agua Fresca! For the full recipe, you can check the details above. Start by peeling and chopping the cucumber. Use a medium cucumber for the best taste. Next, chop the fresh pineapple into small pieces. Make sure to remove the core. This mix of cucumber and pineapple gives the drink its fresh flavor. Now, take your chopped cucumber and pineapple. Add them to a blender with 1 cup of cold water. Blend until the mixture is smooth. This step is vital, as it combines the flavors well. After blending, use a fine mesh sieve. Strain the mix into a large pitcher. Press down with a spatula to get all the juice. This removes the pulp for a smoother drink. Next, add the remaining 3 cups of cold water to the pitcher. Stir it well to mix everything. Then, add 3 tablespoons of agave syrup or honey. Adjust the sweetness to your liking. Squeeze in the juice of 1 lime for some tartness. Mix again. Chill the agua fresca in the fridge for about 30 minutes. When ready, serve it over ice cubes in tall glasses. Don’t forget to garnish with fresh mint leaves. This adds a lovely touch to your drink. For the full recipe, check the earlier section. To make your cucumber pineapple agua fresca just right, focus on the balance. Start with the agave syrup or honey. I suggest three tablespoons at first. Blend it in and taste. If it’s not sweet enough, add more. If it’s too sweet, squeeze in more lime juice. Lime adds a nice tang. Adjust until you love the taste. You can save time by prepping ahead. Chop the cucumber and pineapple a day before. Store them in the fridge. You can also blend the fruits and strain them ahead of time. Keep the juice in the fridge. Just mix in the water, sweetener, and lime juice when you’re ready to serve. This makes it quick and easy for parties. Using the right tools improves your drink. A good blender breaks down the fruits well. A fine mesh sieve helps strain the pulp. This gives you a smooth agua fresca. A large pitcher is handy for mixing and storing. Finally, grab tall glasses for serving. They show off the pretty color and make it look special. {{image_2}} You can mix and match fruits for your agua fresca. Try adding mango for a sweet twist. Watermelon gives a refreshing taste. Strawberries add a lovely color and flavor. Each fruit brings its own charm. Use what you love or have on hand. If you want to cut sugar, use less agave syrup or honey. You can also try stevia or monk fruit. These options keep it sweet without the calories. For a vegan version, stick with agave syrup. It is plant-based and delicious. In summer, use ripe summer fruits like peaches or berries. They add bright flavors and are juicy. In fall, spice it up with a hint of cinnamon or cloves. These spices warm up the drink nicely. Adjust your ingredients based on what is fresh and in season. This keeps your agua fresca exciting and tasty. For the full recipe, check out the [Full Recipe]. To keep your cucumber pineapple agua fresca fresh, store it in a pitcher. Make sure to cover it well with a lid or plastic wrap. This keeps out air and light, which can change the taste. Always put it in the fridge right after you make it. This helps it stay cold and tasty. Your agua fresca will stay fresh for about three days in the fridge. If you notice any change in color or smell, it’s best to toss it. Always check for any signs of spoilage before drinking. Freshness is key to enjoying this drink! You can freeze agua fresca to enjoy later. Pour it into ice cube trays or freezer-safe containers. This way, you can use it for smoothies or as ice cubes in drinks. When you're ready to drink it, thaw it in the fridge overnight. It's a fun way to enjoy this refreshing drink anytime! Agua fresca is a popular drink in Mexico. It means "fresh water" in Spanish. This drink mixes fruits, water, and sometimes sugar. People often enjoy it on hot days. You can find many flavors, like watermelon and hibiscus. Agua fresca is more than just a drink. It brings people together during meals and celebrations. It's a way to enjoy nature’s flavors while keeping cool. Yes, you can use other sweeteners. Honey works well in this recipe. If you prefer no sugar, try stevia or monk fruit sweetener. Maple syrup is also a tasty choice. Just remember to adjust the amount to taste. Each sweetener will change the flavor a bit. Experiment with what you enjoy most! Cucumber pineapple agua fresca is quite healthy. Cucumber has many vitamins and is low in calories. Pineapple adds sweetness and vitamin C. This drink is hydrating and refreshing. It has no added preservatives or artificial flavors. Enjoy it as a healthy option on warm days. You can feel good about sipping this delicious drink. For the full recipe, check out the [Full Recipe]. This blog post covered the key parts of making Cucumber Pineapple Agua Fresca. You learned about the best ingredients, how to mix and serve them, and tips for great taste. Remember to experiment with different fruits and adjust the sweetness to your liking. The storage tips will help keep your drink fresh. Enjoy creating this refreshing drink. It's a simple way to stay cool and healthy. Now go ahead and make your own delicious Agua Fresca!](https://juliesdish.com/wp-content/uploads/2025/06/9692db4b-7184-470f-b2ec-2b1a367ecef7.webp)
Looking for a cool drink to beat the heat? This Cucumber Pineapple Agua Fresca is your perfect choice! With fresh
