Skip to content
DisclaimerTerms Of UseGDPR PolicyCookie Policy

juliesdish

  • Home
  • Drinks
  • Appetizers
  • Dinner
  • Dessert
  • About
  • Contact
  • Privacy Policy
DisclaimerTerms Of UseGDPR PolicyCookie Policy

NO-ING-IMG

- Whole wheat flour: This flour gives the muffins a hearty base. It adds fiber and nutrients. Whole wheat flour also boosts the flavor. - Almond flour: This nutty flour adds moisture and a delicate texture. It’s lower in carbs and high in protein. Almond flour makes these muffins soft and rich. - Sweeteners: honey vs. maple syrup: Both honey and maple syrup bring natural sweetness. Honey is thicker and stickier. Maple syrup has a lighter, more distinct flavor. Choose based on your taste preference. - Unsweetened applesauce: This ingredient keeps the muffins moist. It also reduces the need for added fats. Applesauce adds a subtle sweetness without extra sugar. - Almond milk and its alternatives: Almond milk is a great dairy-free option. You can also use oat milk or soy milk. Each milk brings a unique taste to the muffins. - Eggs and their role in the recipe: Eggs bind the ingredients together. They also provide structure and help the muffins rise. You can replace eggs with flaxseed meal for a vegan option. - Additional flavoring options: vanilla extract and lemon zest: Vanilla extract enhances sweetness. Lemon zest gives a bright, fresh flavor. Both ingredients add depth to your muffins. Try this simple recipe for berrylicious blueberry muffins, which is packed with healthy ingredients. You can find the full recipe for a delicious treat that everyone will love! First, you need to preheat your oven to 350°F (175°C). This helps the muffins bake evenly. While the oven heats, prepare your muffin tin. You can use paper liners or grease the cups with a bit of oil. Liners make cleanup easy, but greasing helps the muffins pop out smoothly. In a medium bowl, combine these dry ingredients: - 1 cup whole wheat flour - 1 cup almond flour - 1 tablespoon baking powder - 1/2 teaspoon baking soda - 1/4 teaspoon salt Whisk them together well. This step is key for even rising and flavor. In a separate large bowl, mix your wet ingredients. Whisk together: - 1/3 cup honey or maple syrup - 1/2 cup unsweetened applesauce - 1/4 cup almond milk - 2 large eggs - 1 teaspoon vanilla extract - Zest of 1 lemon (optional) Make sure everything is smoothly blended. The sweeteners and applesauce add moisture and flavor. Now, gently add the dry mixture to the wet mixture. Stir just until combined. It’s important not to overmix, as this can make the muffins tough. You want a soft batter. Fold in 1 cup of fresh blueberries. Be gentle to avoid crushing them. Next, spoon the batter evenly into the muffin tin. Fill each cup about 2/3 full. Bake in your preheated oven for 18-20 minutes. Check for doneness by inserting a toothpick into the center of a muffin. If it comes out clean, they’re ready! You can find the complete process in the Full Recipe. Enjoy your baking! Getting the right texture in your muffins is key. Always use room temperature ingredients. Cold eggs or milk can make your muffins dense. Let them sit out for about 30 minutes before you start. When adding blueberries, be gentle. Fold them in slowly. This helps keep them whole and prevents them from breaking. If you crush the berries, you’ll end up with a blue batter instead of beautiful muffins. You can easily swap ingredients for common allergens. For nut-free muffins, use oat or coconut flour instead of almond flour. If you want to lower sugar, use half the amount of honey or maple syrup. You can also try mashed bananas as a sweetener. To cut calories, replace some of the almond milk with water. This keeps moisture without adding extra calories. You can also use less applesauce if you want to save calories. Presentation matters! Serve your muffins warm for the best taste. Dust them with a little powdered sugar for a sweet look. Top with fresh blueberries to make them pop. Pair these muffins with herbal tea or coffee. The warm drinks enhance the flavor. This makes for a cozy breakfast or snack. Enjoy with family or friends for a delightful treat. {{image_2}} You can easily adapt this blueberry muffin recipe to fit different diets. For gluten-free options, use gluten-free flour instead of whole wheat and almond flour. This swap keeps the muffins soft while making them safe for those with gluten sensitivities. If you're vegan, you can replace the eggs. Try using flaxseed meal or applesauce as an egg substitute. For milk, choose any plant-based milk like soy or oat milk. These changes keep the muffins tasty and healthy for everyone. Want to mix things up? You can add other fruits like raspberries or diced apples. Spices are also a fun way to change the flavor. A pinch of cinnamon or nutmeg adds warmth and richness to the muffins. To make the texture even better, mix in some chopped nuts or seeds. Walnuts, pecans, or chia seeds work great. These additions will make your muffins crunchy and delightful. Muffins can celebrate the seasons, too! In spring, toss in fresh strawberries or rhubarb. Summer brings peaches or cherries. In fall, use pumpkin puree or apples to capture those cozy flavors. Winter can be brightened with citrus zest or cranberries. Each season brings new tastes, making your muffins unique all year round. For the full recipe, check out the Berrylicious Blueberry Muffins. To keep your healthy blueberry muffins fresh, you have two main options. You can store them at room temperature or in the fridge. - Room temperature: Place muffins in an airtight container. They stay good for about 2-3 days. This option keeps them soft and ready to eat. - Refrigerated storage: If you prefer, you can store them in the fridge. This helps them last longer, about a week. However, they might dry out a bit. To keep them moist, wrap each muffin in plastic wrap before placing them in a container. If you have leftover muffins, freezing is a great way to save them. Here’s how to do it right: - First, let the muffins cool completely. Warm muffins can create moisture, which leads to freezer burn. - Wrap each muffin in plastic wrap, then place them in a freezer bag. This helps keep them fresh for up to 3 months. - When you are ready to eat one, take it out and thaw it. You can leave it at room temperature or use the microwave for about 30 seconds. This method helps maintain the soft texture. With these tips, your blueberry muffins will always taste fresh and delicious! For the full recipe, check out the Berrylicious Blueberry Muffins section above. You can swap out some ingredients for healthier options. Here are my top suggestions: - Replace honey or maple syrup with mashed bananas for less sugar. - Use Greek yogurt in place of applesauce for added protein. - Add nuts or seeds for healthy fats and crunch. - Choose a gluten-free flour if you need a gluten-free option. - Try adding chia seeds or flaxseeds for fiber and omega-3s. These swaps keep the muffins tasty while boosting their health benefits. Yes, you can use frozen blueberries. Here are some pros and cons: Pros: - Frozen blueberries are often picked at peak ripeness, so they taste great. - They are available year-round, making them easy to find. Cons: - They can release extra juice while baking, making the muffins a bit wetter. - You may want to adjust baking time slightly when using frozen berries. Overall, frozen blueberries work well and provide a great flavor. Measuring flour correctly is important for good muffins. Here are some tips: - Use a spoon to scoop flour into your measuring cup. - Avoid packing the flour down; it should be light and fluffy. - Level off the top with a knife for an accurate amount. - If you have a kitchen scale, measuring by weight is best. These tips help you avoid common mistakes that can affect your muffins' texture. These muffins stay fresh for a few days. Here are best practices for storage: - Store them in an airtight container at room temperature. - If you want them to last longer, keep them in the fridge for up to a week. - To keep muffins moist, add a slice of bread in the container. For longer storage, you can freeze them. Just wrap each muffin well in plastic wrap and place them in a freezer bag. These blueberry muffins combine wholesome ingredients for tasty, healthy snacks. We discussed choosing the right flours and sweeteners, along with baking steps that ensure great texture and flavor. Tips help perfect your muffins, plus variations fit any diet. Remember, fresh muffins are best enjoyed right away, but you can store or freeze them for later. Now you can bake delicious muffins that everyone will love! Enjoy making them your own!

Healthy Blueberry Muffins Soft and Simple Recipe

If you crave a quick, healthy snack, these Healthy Blueberry Muffins are your answer! I promise this soft and simple

To make oven baked chicken tenders, you need a few key ingredients. Here’s what you will need: - 1 pound chicken breast, sliced into strips - 1 cup buttermilk (or plain yogurt) - 1 cup breadcrumbs (panko for extra crunch) - 1/2 cup grated Parmesan cheese - 1 teaspoon garlic powder - 1 teaspoon onion powder - 1 teaspoon paprika - 1/2 teaspoon cayenne pepper (optional for heat) - Salt and pepper to taste - 1/4 cup all-purpose flour - Cooking spray or olive oil for drizzling These ingredients create a tasty and crispy coating that makes the tenders shine. If you want to take your chicken tenders up a notch, consider adding some optional ingredients. Here are a few ideas: - Fresh herbs like parsley or thyme for a burst of flavor - Lemon zest for a bright, fresh taste - Different spices like cumin or chili powder for a unique kick These extras can make your tenders even more fun and exciting to eat. You can easily adjust this recipe to fit different diets. Here are some substitutions you might consider: - Use gluten-free breadcrumbs for a gluten-free option. - Swap chicken for tofu or eggplant for a plant-based dish. - Use almond milk or oat milk instead of buttermilk for dairy-free needs. These changes help everyone enjoy this delicious meal without worry. For the complete recipe, check out the Full Recipe. Start by preheating your oven to 400°F (200°C). Line a baking sheet with parchment paper. This keeps the chicken from sticking and makes clean-up easy. Next, soak your chicken strips in buttermilk for at least 30 minutes. This step adds flavor and keeps the chicken juicy. If you have time, soak them for up to 2 hours in the fridge for even better results. Now, it’s time to set up your dredging station. You will need three shallow dishes. First, pour the flour into one dish. In the second dish, place the buttermilk-soaked chicken strips. Finally, mix breadcrumbs, Parmesan cheese, garlic powder, onion powder, paprika, cayenne pepper, salt, and pepper in the last dish. This mix gives the chicken a crunchy and tasty coating. To coat the chicken, follow these easy steps: 1. Lift a chicken strip from the buttermilk, letting the extra liquid drip off. 2. Dip it into the flour, coating it lightly. 3. Return it to the buttermilk, then coat it well in the breadcrumb mixture. Make sure each piece is fully covered for that perfect crunch. Place the coated chicken tenders on your lined baking sheet. Lightly spray them with cooking spray or drizzle olive oil on top. This helps them get even crispier while baking. Bake in the preheated oven for 20-25 minutes. Flip the chicken tenders halfway through to cook them evenly. You want them golden brown and cooked through, reaching an internal temperature of 165°F (75°C). Remember, the key to great oven-baked chicken tenders is the coating and the baking time. Follow these steps for a crispy and flavorful delight! For a detailed recipe, check the Full Recipe section. To get that crunchy outer layer, follow these simple steps. First, use panko breadcrumbs. They create a better texture than regular ones. Second, ensure each chicken strip is coated evenly. This helps them crisp up. Lastly, spray or drizzle the chicken with oil before baking. This adds extra crunch. Bake them until golden brown and watch them shine! Flavor is key to great chicken tenders. Start by soaking the strips in buttermilk. This adds moisture and taste. Use a mix of spices to elevate flavor. Garlic powder and onion powder are musts. Paprika brings a nice color and warmth. If you want heat, cayenne pepper is great. Don't forget to season with salt and pepper! Both cooking spray and olive oil work well. Cooking spray is easy to use and helps with even coverage. It adds no extra flavor, which keeps the chicken's taste front and center. Olive oil, on the other hand, adds a rich flavor. It also helps with browning. Choose what fits your taste and enjoy those crispy oven-baked chicken tenders! For the full recipe, check it out above! {{image_2}} To give your chicken tenders a spicy kick, add cayenne pepper. You can use one teaspoon for mild heat. If you want more spice, try two teaspoons. You can also mix in hot sauce into the buttermilk. This adds flavor and heat. Serve with ranch or blue cheese dip to cool down the spice. For a gluten-free version, swap the breadcrumbs with gluten-free panko. You can use almond flour or crushed gluten-free crackers instead. Both options give a nice crunch. Make sure to check labels on all ingredients to avoid gluten. This way, everyone can enjoy these tasty tenders! Get creative with your coatings! Try using crushed nuts like almonds or pecans for a nutty flavor. Seeds like sesame or sunflower seeds are great, too. They will add extra crunch and flavor. You can even mix different coatings for fun taste combos. This makes each bite unique and delicious. For the full recipe, check the details above! To keep your chicken tenders fresh, let them cool first. Place them in an airtight container. You can store them in the fridge for up to three days. If you want them to last longer, freezing is a great option. When ready to eat your chicken tenders, preheat your oven to 375°F (190°C). Place the tenders on a baking sheet. Heat them for about 10 to 15 minutes. This helps them regain their crispiness. You can also reheat them in an air fryer for about 5-7 minutes for extra crunch. To freeze chicken tenders, wrap each one in plastic wrap. Place them in a freezer-safe bag or container. You can freeze them for up to three months. When you want to use them, thaw in the fridge overnight before reheating. This way, you enjoy a crispy treat anytime! For the full recipe, check out the entire guide. To bake chicken tenders, set your oven to 400°F (200°C). Bake them for 20 to 25 minutes. Check the chicken's inside temperature; it should reach 165°F (75°C). This gives you juicy, safe chicken. Yes, you can make them ahead. Prepare the chicken tenders and coat them as directed. Place them on a baking sheet. Cover with plastic wrap and keep in the fridge for up to 24 hours. When ready to bake, just pop them in the oven. The best dipping sauce depends on your taste. Some popular choices include: - Honey mustard - BBQ sauce - Garlic aioli - Ranch dressing These sauces add flavor and fun to your meal. For the full recipe and detailed instructions, check out the Crispy Oven-Baked Chicken Tenders recipe. This includes all the tips to make them perfect every time. Enjoy cooking and exploring new flavors! You learned how to make oven baked chicken tenders. We discussed ingredients, preparation, and baking steps. I shared tips for crispiness and flavor. You also saw cool variations and how to store leftovers properly. Now, you can enjoy tasty chicken tenders that fit your taste. Whether you prefer spicy or gluten-free, there's a choice for everyone. Cooking at home can be fun and simple. Dive into this recipe and make it your own!

Oven Baked Chicken Tenders Crispy and Flavorful Delight

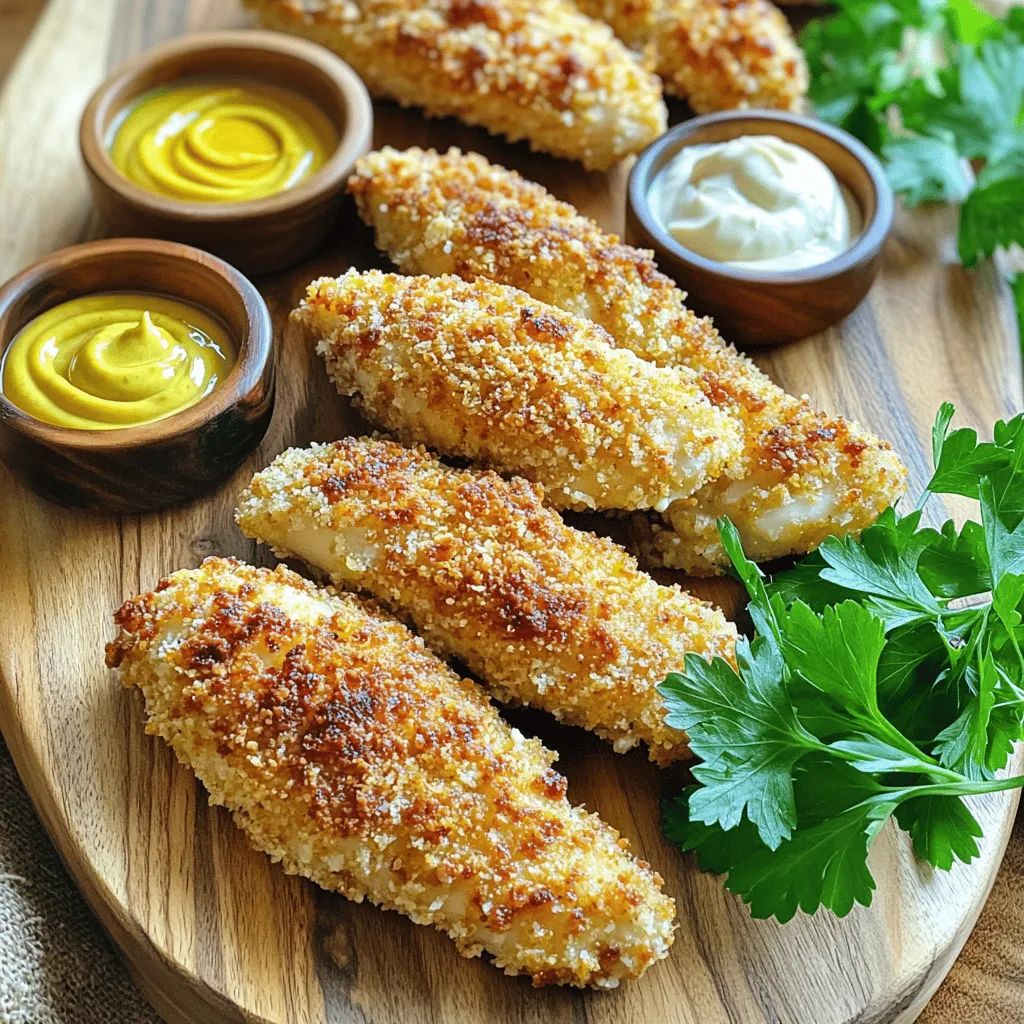
Are you craving a crispy and flavorful treat? Look no further! Oven baked chicken tenders are the answer to your

- 1 pound large shrimp, peeled and deveined - 8 ounces linguine or spaghetti - 4 tablespoons unsalted butter - 3 tablespoons olive oil - 4 cloves garlic, minced - 1 teaspoon red pepper flakes - Zest and juice of 1 lemon - Salt and pepper to taste - Fresh parsley, chopped - Lemon slices for garnish To make my easy shrimp scampi, I start with fresh, large shrimp. They should be peeled and deveined for quick cooking. I love using linguine or spaghetti for this dish. The pasta holds the sauce well. Butter and olive oil create a rich base for my sauce. Garlic is a must for flavor. I use four cloves, minced finely. Red pepper flakes add a nice kick. Adjust these to your taste. I always add lemon zest and juice. The acidity brightens the dish. Don't forget salt and pepper for seasoning. For a lovely finish, I like to sprinkle some fresh parsley on top. Lemon slices make a great garnish too. They add color and extra flavor. This combination makes the dish pop. You can find the full recipe in the complete Lemon Garlic Shrimp Scampi recipe section. - Boil water in a large pot. Add salt to the water. - Cook 8 ounces of linguine or spaghetti until it is al dente. - Drain the pasta and save ½ cup of the pasta water. Cooking the pasta this way gives it the right texture. Al dente means it has a slight bite. It also holds the sauce better. - In a large skillet, heat 3 tablespoons of olive oil and 4 tablespoons of butter over medium-high heat. - Once hot, add 1 pound of shrimp in a single layer. - Season with salt and pepper. Sauté for 2-3 minutes until the shrimp turn pink. - Remove the shrimp from the skillet and set them aside. Shrimp cook quickly. Be careful not to overcook them. They should be firm but tender. - Lower the heat to medium. In the same skillet, add 2 more tablespoons of butter and 1 tablespoon of olive oil. - Add 4 cloves of minced garlic and 1 teaspoon of red pepper flakes. Stir for about 1 minute, until the garlic is fragrant. - Pour in the zest and juice of 1 lemon. - Return the shrimp to the skillet and toss to coat in the sauce. - If the sauce seems dry, add some reserved pasta water until it reaches the right consistency. This sauce is bright and full of flavor. The lemon complements the shrimp well. - Add the cooked pasta to the skillet and toss everything together. - Taste and adjust seasoning with salt and pepper if needed. For a delicious finish, sprinkle chopped fresh parsley on top. Serve hot, with lemon slices for extra zest. For the full recipe, check out the Lemon Garlic Shrimp Scampi. Choosing the right shrimp Select large shrimp. They have a sweet taste and firm texture. Fresh shrimp will give you the best flavor. Look for shrimp that smell like the ocean, not fishy. You can use frozen shrimp too, just thaw them before cooking. The importance of fresh ingredients Fresh ingredients make your dish shine. Use whole garlic cloves, not pre-minced. Fresh lemon adds brightness. Buy fresh parsley to garnish your dish. Each ingredient adds its own flavor. Prepping ingredients ahead of time Prep your ingredients before cooking. Chop garlic, zest the lemon, and measure spices. This makes cooking quick and fun. You won’t feel rushed when you're ready. Adjusting cooking times for different pasta types Different pasta cooks at different times. Check package instructions for cooking times. Linguine usually takes 9 to 11 minutes. Spaghetti takes about the same time. Start cooking pasta before the shrimp for smooth timing. Recommended side dishes Pair shrimp scampi with a light salad. A simple green salad balances the meal. Garlic bread is also a great side. It helps soak up the delicious sauce. Best wine pairings for shrimp scampi Choose a crisp white wine. Sauvignon Blanc or Pinot Grigio works well. The acidity cuts through the richness of the butter. Enjoy your meal with a glass of wine for a special touch. {{image_2}} You can easily change the pasta type for shrimp scampi. While I love linguine or spaghetti, you can try fettuccine or even penne. Each pasta brings its own texture and flavor. If you want to swap butter for olive oil, go ahead! Olive oil adds a nice touch and keeps it light. It also gives a different flavor that many people enjoy. Adding herbs can boost the dish. Fresh basil or thyme works great. They add a lovely aroma and taste that brightens the meal. You can also mix in vegetables like spinach or cherry tomatoes. Spinach wilts nicely, while cherry tomatoes burst with flavor. Both add color and nutrients to your dish. If you need a gluten-free option, try using gluten-free pasta. Many brands taste just as good as regular pasta. You won’t miss out on flavor! For low-calorie shrimp scampi, use less butter and olive oil. You can also add more veggies to fill you up. This keeps the dish tasty and lighter on calories. For the full recipe, check out the Lemon Garlic Shrimp Scampi recipe. To store leftover shrimp scampi, use airtight containers. Glass or plastic containers work well. Make sure they are sealed tight to keep out air and moisture. Store your shrimp scampi in the fridge for up to three days. This keeps the flavors fresh and tasty. When you are ready to eat your leftovers, reheating is key. You can use a skillet or microwave. If using a skillet, heat it over low. Add a splash of water or broth to keep it moist. Stir often to prevent it from sticking. If using a microwave, cover the dish with a lid. Heat in short bursts, stirring in between. This helps ensure the shrimp remain tender and do not overcook. If you want to save shrimp scampi for later, freezing works great. Portion out the scampi into freezer-safe bags or containers. Remove as much air as possible to prevent freezer burn. Shrimp scampi can be frozen for up to three months. When you are ready to eat it, thaw it in the fridge overnight. Reheat as mentioned above for the best results. This way, you can enjoy a quick meal anytime! For the full recipe, check out the Lemon Garlic Shrimp Scampi. I recommend using large shrimp for scampi. They have a nice size and taste. Fresh shrimp is best if you can find it. Fresh shrimp has a sweet flavor and a firm texture. If fresh isn’t available, frozen shrimp works well too. Just make sure to thaw them properly before cooking. Yes, you can! Shrimp scampi is great on its own. You can serve it over rice or with crusty bread. It also pairs well with steamed veggies. For a lighter meal, toss it on a salad. These options keep the dish fresh and fun. To avoid rubbery shrimp, cook them quickly. Shrimp need just 2-3 minutes on high heat. Remove them from the pan as soon as they turn pink. Overcooking makes them tough. Also, let them rest for a minute before serving. This keeps them tender and juicy. Yes, you can change the sauce! A creamy sauce works well if you want a twist. Try adding cream or cheese for something different. You can also use a white wine sauce for depth. Each option gives a unique flavor that makes the dish exciting. For the complete Lemon Garlic Shrimp Scampi recipe, check out the [Full Recipe]. In this blog post, we covered the simple yet delicious shrimp scampi recipe. You learned about the main ingredients, step-by-step cooking instructions, and helpful tips. We also explored variations for taste and dietary needs, plus storage info for leftovers. Remember, fresh ingredients make a big difference. Try adding your favorite herbs or veggies. Cooking shrimp perfectly can elevate your dish. Enjoy making this classic meal, and share it with family and friends. With these tips, you’ll impress everyone at the dinner table.

Easy Shrimp Scampi Quick and Flavorful Dinner Recipe

Looking for a quick and tasty dinner? This Easy Shrimp Scampi is perfect! You’ll make a flavorful meal in under

Making a Peanut Butter Banana Smoothie is simple and fun. You only need a few fresh ingredients. Here’s what you will need: - 1 ripe banana, sliced - 2 tablespoons creamy peanut butter - 1 cup almond milk (or any milk of choice) - 1 tablespoon honey or maple syrup (optional) - 1/2 teaspoon vanilla extract - 1/2 cup Greek yogurt (optional for creaminess) - A handful of ice cubes - Chopped peanuts and banana slices for garnish Using ripe bananas gives your smoothie a sweet taste. The creamy peanut butter adds a rich texture. Almond milk makes it smooth and light. You can also use any milk you like. Honey or maple syrup add extra sweetness, but they are not a must. If you want it extra creamy, add Greek yogurt. Ice cubes make the drink cold and refreshing. You can top your smoothie with chopped peanuts and banana slices. This makes it look great and adds a nice crunch. For the full recipe, visit Nutty Banana Bliss Smoothie. Enjoy creating your tasty treat! To make your Peanut Butter Banana Smoothie, follow these steps closely for the best results. 1. Combine the Ingredients: Start by adding the sliced banana, peanut butter, and almond milk to your blender. If you want it sweeter, add honey or maple syrup. For extra creaminess, toss in Greek yogurt. Don’t forget the vanilla extract for flavor! 2. Add Ice Cubes: Next, throw in a handful of ice cubes. They help make your smoothie nice and cold. 3. Blend Until Smooth: Blend everything on high speed. Stop to scrape down the sides if needed. Blend until the mixture is smooth and creamy. This usually takes about 30 seconds to a minute. 4. Taste and Adjust: After blending, give your smoothie a taste. If it’s not sweet enough, add more honey or syrup. Blend again for a few seconds. 5. Serve and Garnish: Pour the smoothie into glasses. For a nice touch, sprinkle chopped peanuts and banana slices on top. This makes your drink look great and adds a yummy crunch. Enjoy your quick and creamy Peanut Butter Banana Smoothie! For more details, check the Full Recipe. You can make this smoothie your own in many ways. If you want to boost protein, try adding protein powder. A scoop of vanilla or chocolate works great. You can also add a handful of spinach. It blends well and adds nutrients without changing the taste much. To adjust the sweetness, taste your smoothie before serving. If you want it sweeter, add more honey or maple syrup. If you prefer it less sweet, skip the sweeteners. You can also use ripe bananas, as they are naturally sweeter. For those on a lactose-free or vegan diet, swap Greek yogurt with a plant-based yogurt. Use almond milk or oat milk instead of regular milk. This keeps your smoothie creamy without dairy. You can also skip the honey for a vegan option. Just use ripe bananas for natural sweetness. {{image_2}} You can make your Peanut Butter Banana Smoothie more exciting with fun flavors. Here are some tasty ideas: - Adding cocoa powder for a chocolatey twist: Just one tablespoon of cocoa powder transforms the smoothie. It adds rich chocolate flavor without overpowering the banana and peanut butter. This gives you a dessert-like treat that's still healthy. - Incorporating other fruits like strawberries or blueberries: Want to mix it up? Toss in a handful of strawberries or blueberries. These fruits add natural sweetness and a burst of color. They also pack extra vitamins and antioxidants into your drink. - Spice options—adding cinnamon or nutmeg: A pinch of cinnamon or nutmeg can enhance the flavor. Cinnamon brings warmth, while nutmeg offers a hint of spice. Both work well with the creamy texture of the smoothie. These variations help you create your perfect blend. Feel free to experiment with different flavors based on your mood or what you have at home. Each option keeps the base of the Peanut Butter Banana Smoothie while adding new layers of taste. To keep your peanut butter banana smoothie fresh, store it in an airtight container. This helps prevent it from absorbing other fridge smells. Fill the container to the top to reduce air exposure. If you have leftover smoothie, drink it within 1 to 2 days for best taste. You can also freeze your smoothie for later. Pour it into ice cube trays or freezer bags. When frozen, you can blend the cubes for a quick treat. Just remember to use it within 1 to 3 months for the best flavor. To maintain flavor and texture, shake or stir the smoothie before drinking. This helps mix any separation that might happen during storage. If it's too thick after freezing, add a splash of milk and blend again. For the full recipe, check out the Nutty Banana Bliss Smoothie. Enjoy your delicious creation! How to make a Peanut Butter Banana Smoothie thicker? To make your smoothie thicker, add more banana or yogurt. You can also use less milk. Frozen banana slices work great for a thicker texture. Can I use other nut butters instead of peanut butter? Yes, you can use almond butter or cashew butter. Each nut butter will give a different taste. Try sunflower seed butter for a nut-free option. What are the nutritional benefits of this smoothie? This smoothie is rich in protein, healthy fats, and fiber. It gives you energy and keeps you full. Bananas add potassium, and yogurt adds calcium. How long can Peanut Butter Banana Smoothie be stored? You can store the smoothie in the fridge for up to 24 hours. Use an airtight container to keep it fresh. Shake or stir before drinking to mix it well again. For the full recipe, check out Nutty Banana Bliss Smoothie. This blog post covered how to make a tasty Peanut Butter Banana Smoothie. We looked at fresh ingredients, simple steps, and great tips. You can customize your smoothie to fit any diet. Try adding fruits or spices for a fun twist. Remember to store your leftovers right to keep them fresh. Smoothies are easy and quick to make. Enjoy this healthy drink whenever you want a snack!

Peanut Butter Banana Smoothie Quick and Creamy Recipe

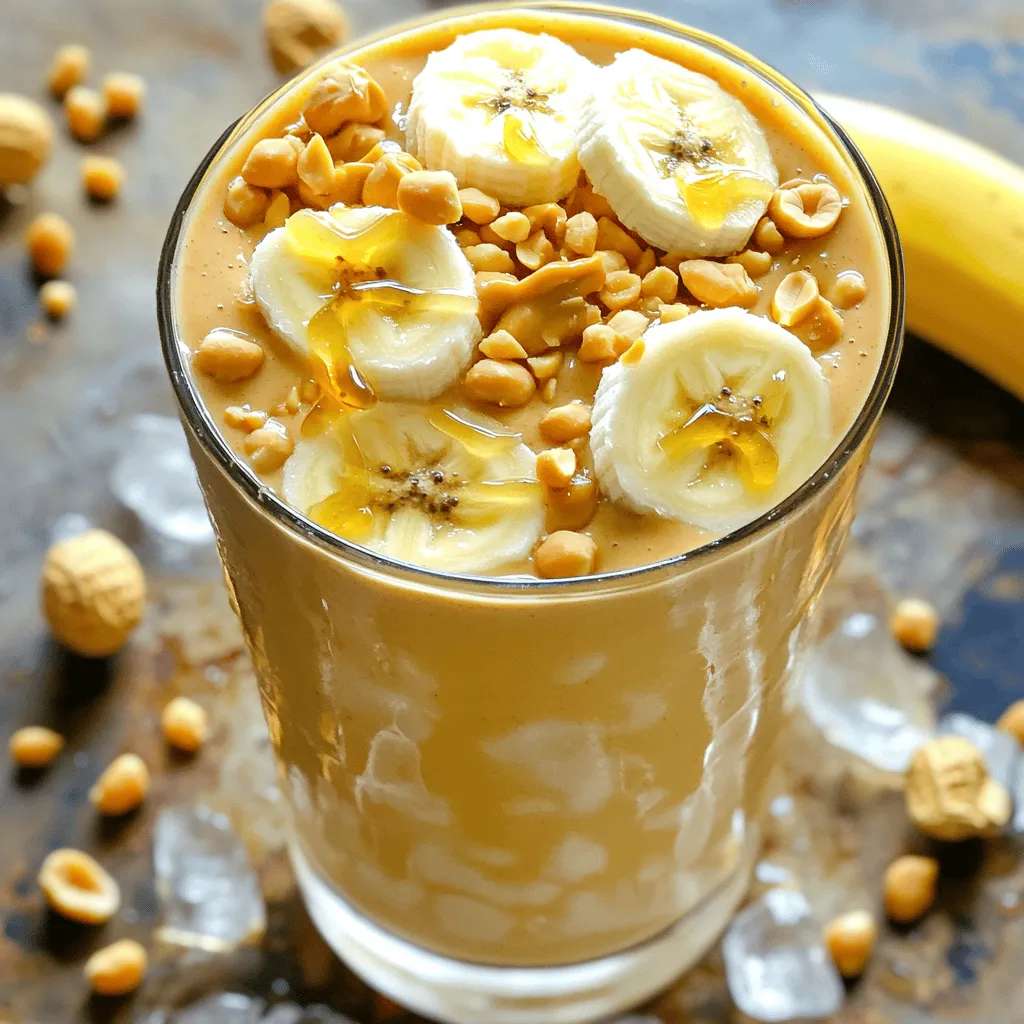
Welcome to the world of deliciousness with my Peanut Butter Banana Smoothie! If you’re looking for a quick, creamy, and

- 4 boneless, skinless chicken breasts - 4 tablespoons olive oil - 4 cloves garlic, minced - 1 tablespoon fresh rosemary, chopped - 1 tablespoon fresh thyme, chopped - 1 tablespoon fresh parsley, chopped - Juice of 1 lemon - Salt and pepper to taste - Mixing bowl - Whisk - Resealable plastic bag or shallow dish - Grill - Meat thermometer - Tongs When picking chicken, look for bright pink meat. It should feel firm but not too hard. Fresh herbs should look vibrant and smell strong. Avoid any wilted or brown leaves. For garlic, choose bulbs that feel heavy and firm. If the garlic is sprouted, it's still good but might taste sharper. Use fresh lemons for juice; they should be firm and yield slightly when you squeeze them. Always inspect your ingredients carefully to ensure the best taste. For the full recipe, check the instructions above. To make the marinade, gather these ingredients: - 4 tablespoons olive oil - 4 cloves garlic, minced - 1 tablespoon fresh rosemary, chopped - 1 tablespoon fresh thyme, chopped - 1 tablespoon fresh parsley, chopped - Juice of 1 lemon - Salt and pepper to taste In a bowl, whisk together the olive oil, garlic, rosemary, thyme, parsley, lemon juice, salt, and pepper. This mixture gives your chicken a fresh and zesty flavor. The garlic and herbs blend well, making each bite tasty. Take 4 boneless, skinless chicken breasts and place them in a resealable plastic bag or shallow dish. Pour the marinade over the chicken, making sure each piece is well-coated. Seal the bag or cover the dish tightly. Refrigerate for at least 1 hour, but up to 4 hours is best for more flavor. This step is key to making your chicken juicy and full of taste. Preheat your grill to medium-high heat. Once ready, remove the chicken from the marinade. Let any extra marinade drip off. Place the chicken on the grill and cook for about 6-7 minutes on each side. Use a meat thermometer to check if the chicken reaches 165°F (75°C). This ensures it is safe to eat and fully cooked. Once done, take it off the grill and let it rest for about 5 minutes before slicing. Resting helps keep the chicken moist. Serve the grilled chicken with extra fresh herbs for a lovely touch. For the full recipe, check out the details above. To get those perfect grill marks, start with a hot grill. Make sure your grill reaches medium-high heat before placing the chicken on it. Dry the chicken with paper towels. A dry surface gets better marks. Place the chicken on the grill at a 45-degree angle. After about 3-4 minutes, rotate the chicken 90 degrees for those nice crosshatch marks. Flip the chicken after 6-7 minutes and repeat the process. Juicy chicken starts with marinating. Use the marinade from the recipe to soak the chicken. The olive oil and lemon juice help keep it moist. Don't skip the resting step after grilling. Let the chicken rest for 5 minutes before slicing. This allows the juices to redistribute throughout the meat, keeping it tender and delicious. Having the right tools makes cooking easier. Here are some must-haves: - A sharp chef's knife for cutting the chicken. - A cutting board for safe prep. - A whisk for mixing the marinade. - A resealable plastic bag or shallow dish for marinating. - A grill thermometer to check the chicken's doneness. These tools will help you create the best garlic herb grilled chicken. For the full recipe, check the section above. {{image_2}} You can change the herbs in this recipe to suit your taste. Try using basil instead of parsley for a sweeter note. Oregano adds a warm, earthy flavor that pairs well with chicken. If you love a stronger taste, use sage. Each herb brings its own charm. You can even mix and match to find your favorite blend. Adding more flavor is easy. Consider including crushed red pepper flakes for a spicy kick. A tablespoon of honey can balance the garlic with a touch of sweetness. You might also add a splash of balsamic vinegar for richness. Each of these additions will change the dish while keeping it simple and tasty. If you don’t have a grill, don’t worry! You can use your oven or a skillet. For the oven, preheat it to 400°F (200°C). Place the marinated chicken on a baking sheet. Cook for about 20-25 minutes, or until the chicken is done. Using a skillet is another great option. Heat a little olive oil over medium heat. Cook the chicken for about 6-7 minutes on each side, just like on the grill. This method gives a nice sear and keeps the chicken juicy. No matter how you cook it, you can enjoy this garlic herb grilled chicken. Don’t forget to check the full recipe for all the details. After enjoying your Garlic Herb Grilled Chicken, cool the leftovers. Place them in an airtight container. This keeps the chicken fresh. Store it in the fridge for up to three days. If you want to keep it longer, freezing is a great option. To reheat your chicken, use the oven or stovetop. For the oven, preheat it to 350°F (175°C). Place the chicken on a baking tray. Heat for about 15-20 minutes. If using the stovetop, warm it in a skillet over low heat. Add a splash of water or broth to keep it moist. To freeze, wrap each piece of chicken in plastic wrap. Place the wrapped chicken in a freezer bag. Squeeze out as much air as possible. This helps to prevent freezer burn. You can freeze it for up to three months. When ready to eat, thaw it in the fridge overnight before reheating. For best flavor, use the chicken within a month. Enjoy your delicious Garlic Herb Grilled Chicken even later! To butterfly chicken breasts, lay the breast flat on a cutting board. Hold the breast steady with one hand. Use a sharp knife to slice horizontally through the thickest part. Stop before cutting all the way through. Open the breast like a book. This method helps it cook evenly. Yes, you can. Chicken thighs add more flavor and stay moist. They also grill well and are forgiving if overcooked. Just ensure the thighs reach 165°F (75°C) for safe eating. You may need to adjust grilling time since thighs are thicker. Marinate the chicken for at least 1 hour. For the best flavor, marinate for up to 4 hours. This allows the herbs and garlic to soak in. Avoid marinating longer than 24 hours, as the chicken can become mushy. For a full recipe, check the detailed steps provided. In this blog post, we covered key ingredients, tools, and tips for grilling chicken. I shared step-by-step instructions for preparing marinades and grilling techniques. We also discussed ensuring juicy chicken, achieving perfect grill marks, and offered variations for your recipes. Don't forget how to store leftovers and reheat them properly. With these tips, you’ll become a grilling pro in no time. Remember, cooking chicken can be simple and fun with the right approach. Enjoy your meals and share your tasty results!

Garlic Herb Grilled Chicken Flavorful Summer Dish

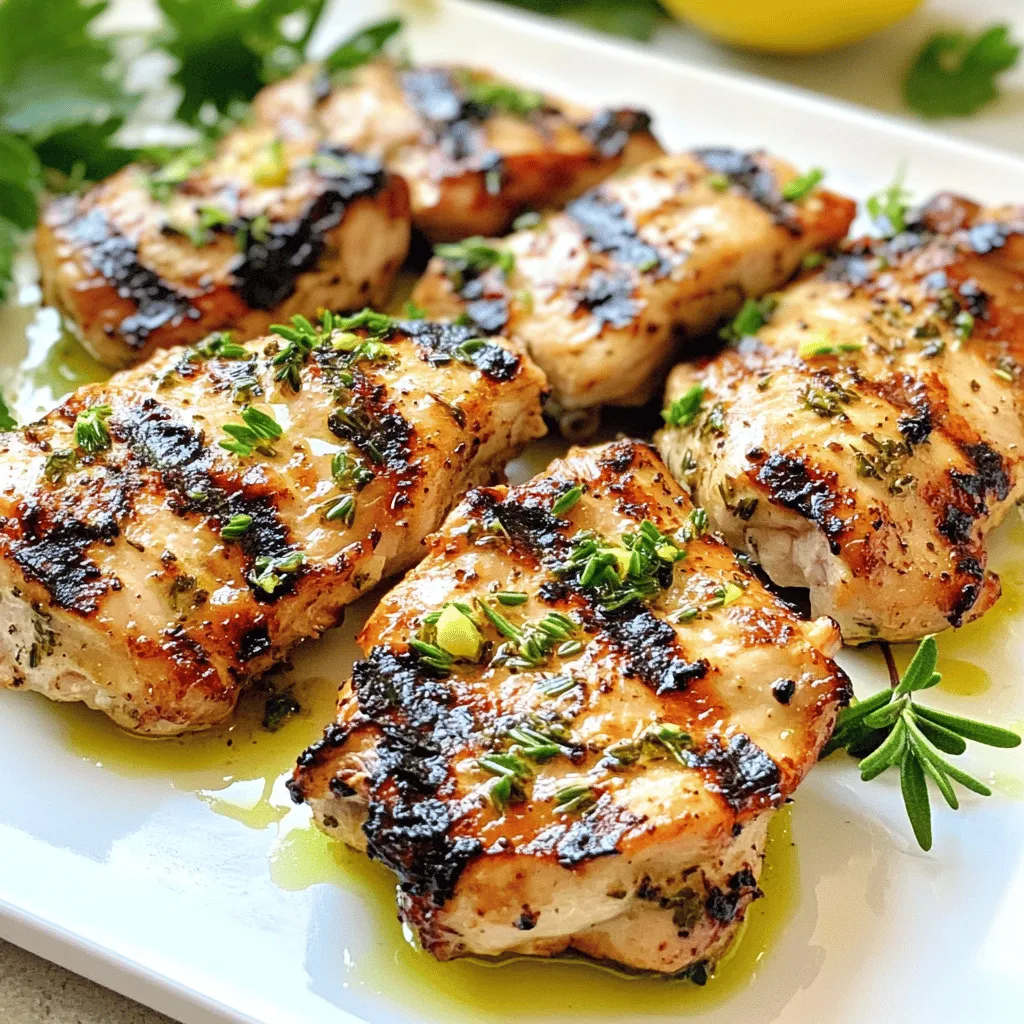
Are you ready to elevate your summer meals? Garlic Herb Grilled Chicken is the perfect dish! Packed with fresh flavors,

- 1 lb Brussels sprouts, trimmed and halved - 2 tablespoons olive oil - 3 tablespoons honey - 2 tablespoons Sriracha sauce - 1 tablespoon soy sauce - 2 cloves garlic, minced - Salt and pepper to taste - 1 tablespoon sesame seeds (for garnish) - Green onions, chopped (for garnish) Gathering the right ingredients is key. Fresh Brussels sprouts bring a great crunch. Honey adds sweetness, while Sriracha gives a spicy kick. The soy sauce deepens the flavor. Garlic adds depth, making every bite delicious. I like to use olive oil for roasting. It gives the sprouts a nice golden color. - Baking sheet - Mixing bowl - Whisk - Measuring spoons You will need a few tools to make this dish. A baking sheet is essential for roasting. A mixing bowl helps combine the ingredients. A whisk is great for blending the sauce. Measuring spoons ensure you use the right amounts. With these tools, you'll create a tasty dish with ease. For the full recipe, check out the link above! - Preheat oven to 425°F (220°C). - Prepare Brussels sprouts by trimming and halving. First, you need to get your oven hot. Set it to 425°F (220°C). This high heat gives the Brussels sprouts a nice crisp. Next, take your Brussels sprouts. Trim off the ends and cut them in half. This helps them cook evenly and makes them easier to eat. - Toss Brussels sprouts with olive oil, salt, and pepper. - Spread sprouts on a baking sheet and roast for 20-25 minutes. Now, grab a large bowl. Toss your halved Brussels sprouts with olive oil, salt, and pepper. Make sure they are well coated. This will add flavor and help them roast nicely. Next, spread the sprouts on a baking sheet. Place them cut side down for the best results. Roast them in the oven for about 20 to 25 minutes. You want them to turn golden brown and crispy. - In a small bowl, whisk together the sauce ingredients. - Drizzle sauce over roasted Brussels sprouts and return to oven. While those sprouts are roasting, let’s make the sauce! In a small bowl, whisk together honey, Sriracha sauce, soy sauce, and minced garlic. This blend gives a sweet and spicy kick. Once your Brussels sprouts are roasted, take them out of the oven. Drizzle the sauce over the hot sprouts and toss them gently. This ensures every piece is covered. Return the coated sprouts to the oven for another 5 to 7 minutes. This helps the sauce caramelize and stick. For the full recipe, check the complete instructions above. To get evenly cooked Brussels sprouts, cut them in half. Trim the ends and remove any yellow leaves. This helps them cook evenly and stay tender. Roast them at 425°F for 20 to 25 minutes. This high heat gives them a nice crisp. To enhance the flavor, add a pinch of smoked paprika or some fresh thyme. These spices give a lovely depth. You can pair these sprouts with grilled chicken or salmon for a tasty meal. They also work well with rice or quinoa for a vegetarian option. For a pretty plate, arrange the Brussels sprouts in a circle. Drizzle some extra sauce over the top for shine. If you have a crowd, serve about a cup per person. This makes it easy for guests to enjoy the dish at parties or meal prep. For the full recipe, check out our detailed cooking steps. {{image_2}} If you don't have honey, you can use maple syrup or agave nectar. Both add sweetness without losing flavor. If you want a different kick, you can swap Sriracha for another hot sauce. Try chili garlic sauce or even a spicy barbecue sauce for a twist. Brussels sprouts are great with other seasonal veggies. Try adding carrots or butternut squash in the fall. You can also toss in some sweet potatoes for extra flavor. If you want more protein, consider adding cooked chicken or chickpeas. This makes the dish heartier and more filling. You can make Honey Sriracha Brussels sprouts in an air fryer. Just toss the sprouts with oil and sauce, then cook for about 15 minutes. This method gives you crispy results in less time. If you prefer stovetop cooking, sauté the sprouts in a pan. Heat oil, add sprouts, and cook until they are tender. This method is quick and easy, perfect for busy nights. To store leftovers, place the Brussels sprouts in an airtight container. This keeps them fresh and tasty. Cooked Brussels sprouts last about 3 to 5 days in the fridge. Make sure they cool before sealing. For reheating, the oven works best. Preheat it to 350°F (175°C). Spread the sprouts on a baking sheet. Heat for about 10 minutes or until they’re warm. This method keeps them crispy. To avoid sogginess, do not cover them with foil. Yes, this dish is freezer-friendly! To freeze, let the Brussels sprouts cool completely. Place them in a freezer-safe bag. Remove as much air as possible before sealing. When ready to eat, thaw in the fridge overnight. Then, reheat in the oven for best results. Yes, you can easily make this dish vegan. Here are some simple swaps: - Honey: Use maple syrup or agave nectar for sweetness. - Soy Sauce: Ensure it's gluten-free if needed, but it's already vegan. - Olive Oil: This is vegan-friendly, so no need to change. These changes keep the flavor while meeting vegan needs. Honey Sriracha Brussels sprouts go well with many main dishes. Here are some ideas: - Grilled Chicken: The spice complements the savory flavor. - Tofu Stir-Fry: Pair it with tofu for a tasty vegan meal. - Steak: The sweet and spicy notes add great balance. - Rice or Quinoa: Serve them over a bed of grains for a filling meal. These pairings enhance your meal and make it fun! If you love heat, you can easily boost the spice. Try these tips: - Add More Sriracha: Increase the amount in the sauce for extra kick. - Chili Flakes: Sprinkle some on top before roasting. - Fresh Peppers: Toss in sliced jalapeños or red chili peppers. These methods raise the heat without losing flavor. Enjoy experimenting with spice! In this post, we explored how to make Honey Sriracha Brussels Sprouts. We covered the key ingredients, tools, and step-by-step instructions for roasting. You now have tips for perfecting your dish and ideas for variations or additions. These sprouts are flavorful and easy to prepare. Enjoy your cooking journey and share this tasty dish with friends and family!

Honey Sriracha Brussels Sprouts Flavorful and Simple Dish

If you’re ready to elevate your vegetable game, Honey Sriracha Brussels Sprouts are the perfect dish for you. This simple

To make cheesy garlic breadsticks, you need simple items. Here’s the complete list of ingredients: - 2 cups all-purpose flour - 1 packet (2 1/4 teaspoons) active dry yeast - 1 cup warm water (110°F/45°C) - 1 tablespoon sugar - 1 tablespoon olive oil - 1 teaspoon salt - 1 teaspoon garlic powder - 1 cup shredded mozzarella cheese - 1/2 cup grated Parmesan cheese - 2 tablespoons unsalted butter, melted - Fresh parsley, finely chopped (for garnish) Each ingredient plays a vital role. The flour gives the breadsticks structure. Active dry yeast helps the dough rise. Warm water activates the yeast. Sugar feeds the yeast and adds a touch of sweetness. Olive oil keeps the dough moist. Salt enhances flavor, while garlic powder adds that distinct taste we love. The cheeses bring richness, and melted butter gives a golden finish. Finally, fresh parsley adds color and freshness. For the full recipe, you can check out the entire process to make these delicious breadsticks. To start, combine 1 cup of warm water, 1 tablespoon of sugar, and 1 packet of active dry yeast in a small bowl. Stir gently and let it sit for about 5 to 10 minutes. You will see it become foamy, which means the yeast is active. This step is crucial for giving your breadsticks a nice rise. In a large mixing bowl, mix 2 cups of all-purpose flour, 1 teaspoon of salt, and 1 teaspoon of garlic powder. Make sure these dry ingredients are well combined. Next, add the yeast mixture and 1 tablespoon of olive oil. Stir everything until a dough forms. Knead the dough on a lightly floured surface for about 5 minutes. You want the dough to be smooth and elastic. Now, place the kneaded dough in a greased bowl. Cover it with a kitchen towel and let it rise in a warm place for 1 hour. The dough should double in size. Once it has risen, punch it down gently. Roll the dough out into a rectangle, about 1/2 inch thick. Use a pizza cutter or sharp knife to cut the dough into strips, about 1 inch wide. Preheat your oven to 425°F (220°C). Prepare a baking sheet by lining it with parchment paper. Place the strips of dough on the sheet. Brush the melted 2 tablespoons of unsalted butter over each strip. Top them with 1 cup of shredded mozzarella cheese and 1/2 cup of grated Parmesan cheese. Bake in the oven for 12 to 15 minutes or until the breadsticks turn golden brown. Enjoy the aroma as they bake! To get that soft and chewy texture, kneading is key. Knead the dough for about five minutes. This helps develop gluten, making the breadsticks stretchy. If you find the dough too sticky, add a bit more flour, but not too much. Letting the dough rise is just as important. After kneading, place it in a greased bowl. Cover it and let it rise in a warm spot for one hour. This step allows the dough to double in size, making your breadsticks light and fluffy. Spice up your breadsticks with extra flavor! Consider adding dried herbs like oregano or basil to the dough. You can also mix in some crushed red pepper flakes for a kick. After baking, sprinkle fresh herbs like parsley on top. This adds a bright touch and a lovely aroma. Checking for doneness is simple. Look for a golden brown color on the breadsticks. You can also tap on the bottom; it should sound hollow. If they're not ready, give them a few more minutes in the oven. Adjusting the oven temperature can help too. If you want crispier breadsticks, bake them a bit longer at 425°F. Just keep an eye on them to avoid burning. Following these tips will lead you to perfect cheesy garlic breadsticks every time! For the complete process, refer to the Full Recipe. {{image_2}} You can change the cheese in your breadsticks for fun. Try using sharp cheddar or gouda. These cheeses add a different taste. If you want a creamier texture, add cream cheese. This will make the breadsticks richer and smoother. Imagine biting into a warm stick with gooey cheese inside; it's pure bliss! Herbs can take your breadsticks to the next level. Instead of just garlic powder, try Italian seasoning. This mix adds a nice touch of flavor. Garlic salt is another great option; it gives that extra kick. You can also mix in fresh herbs like basil or oregano. They brighten the taste and smell amazing! If you're gluten-free, don't worry! You can use alternative flours like almond or coconut flour. These flours work well and taste good, too. For those who follow a vegan diet, swap out butter and cheese. Use vegan butter and nut-based cheese. They melt nicely and create a tasty treat without dairy. With these easy changes, everyone can enjoy cheesy garlic breadsticks! To keep your cheesy garlic breadsticks fresh, store them in an airtight container. Place parchment paper between layers to prevent sticking. This helps keep them soft. You can refrigerate the breadsticks for up to four days. If you want to save them longer, freezing is a great choice. To freeze breadsticks, wrap them tightly in plastic wrap. Then, place them in a freezer-safe bag or container. Make sure to remove as much air as possible. This keeps them from getting freezer burn. They can last up to three months in the freezer. When it’s time to enjoy your leftover breadsticks, reheating is key. The best method is to use an oven. Preheat it to 350°F (175°C). Place the breadsticks on a baking sheet. Heat them for about 10 minutes. This method keeps them warm and crispy. If you’re short on time, you can use a microwave. Heat them for 15 to 30 seconds. Check often to avoid making them soggy. To keep them crispy, place a paper towel underneath. This absorbs excess moisture and helps maintain that perfect texture. Enjoy your cheesy garlic breadsticks just like they were fresh! Making Cheesy Garlic Breadsticks takes about 1 hour and 30 minutes. You need 15 minutes to prep the dough. The dough then rises for 1 hour. After that, baking takes 12 to 15 minutes. Yes, you can use frozen dough. Many stores sell pre-made frozen bread dough. Just thaw it first. Then, follow the same steps as the recipe. This saves time and works well for quick snacks. These breadsticks pair well with many dishes. You can serve them with marinara sauce for dipping. They also go great with soups or salads. Try them alongside pasta for a full meal. To add heat, use red pepper flakes. Sprinkle them on top before baking. You can also mix hot sauce into the dough. For a twist, try jalapeños or spicy cheese. Experiment with the flavors you love! In this post, we explored how to make Cheesy Garlic Breadsticks from scratch. I guided you through each step, from mixing ingredients to baking. Remember to let the dough rise for the best texture. Feel free to experiment with different cheeses and herbs for unique flavors. Store leftovers properly to enjoy later, and reheating tips can help keep them tasty. Making these breadsticks can be a fun experience, so get creative and enjoy!

Cheesy Garlic Breadsticks Fresh and Delectable Snack

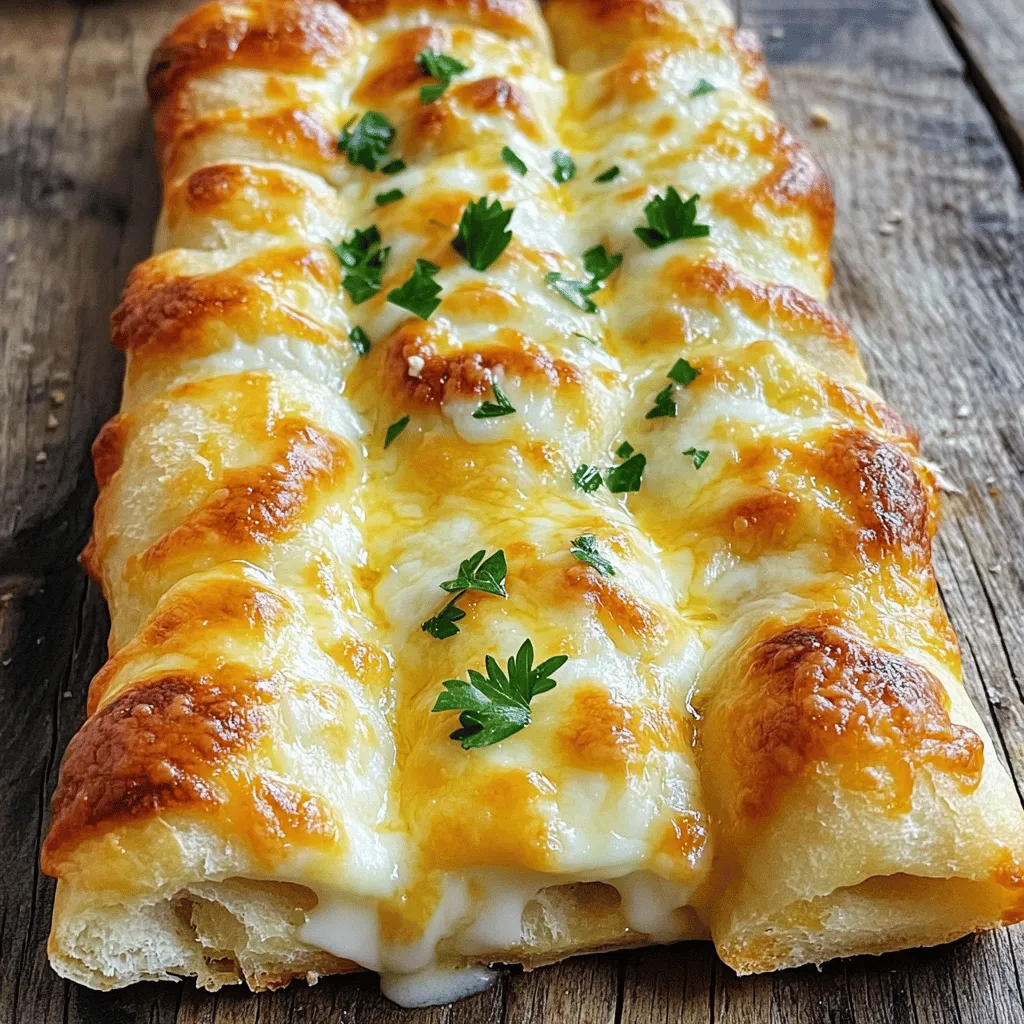
Craving a tasty snack that’s easy to make? Look no further! Cheesy garlic breadsticks are the perfect solution. Soft, warm,

- Chickpeas and other essentials You will need 1 can (15 oz) of chickpeas. Make sure to drain and rinse them well. This step removes excess sodium and makes them crispy. - Spices and seasonings Gather the following: - 2 tablespoons olive oil - 1 teaspoon smoked paprika - 1 teaspoon garlic powder - 1 teaspoon ground cumin - ½ teaspoon cayenne pepper (you can add more for spice) - Salt to taste These spices give the chickpeas a great flavor. They transform a simple snack into a tasty treat. - Optional garnishes For a fresh touch, you can use fresh parsley, chopped. It adds color and brightness to your roasted chickpeas. This recipe is simple but packed with flavor. For the full recipe, check out the Crunchy Spiced Roasted Chickpea Snack. To make roasted chickpeas, start by preparing the chickpeas. Open a can of chickpeas and drain them well. Rinse the chickpeas under cold water. This helps remove extra salt and keeps them clean. Next, spread the rinsed chickpeas on a clean kitchen towel. Pat them dry gently. This step is very important for getting that crispy texture. You want to remove as much moisture as possible. Now it’s time to combine your ingredients. In a mixing bowl, add the dried chickpeas. Pour in two tablespoons of olive oil. This oil helps the spices stick and adds flavor. Then, add one teaspoon of smoked paprika, garlic powder, and ground cumin. For a kick, include half a teaspoon of cayenne pepper. Adjust the amount to your taste. Finish with a pinch of salt. Toss everything together until the chickpeas are well coated. For roasting, set your oven to 400°F (200°C). This temperature works best for crispy chickpeas. Spread the seasoned chickpeas on a baking sheet in a single layer. Make sure they aren’t crowded. Crowding can lead to steaming instead of roasting. Roast the chickpeas for about 25 to 30 minutes. Stir them halfway through to ensure even cooking. Keep an eye on them. You want them golden brown and crispy, but not burnt. Once the chickpeas are roasted, take them out of the oven. Let them cool for a few minutes. They will get even crispier as they cool down. For a pop of color and extra flavor, sprinkle some chopped parsley on top. You can serve them as a snack on their own or with your favorite dips. Enjoy the crunchy goodness of your roasted chickpea snack! For the full recipe, check the details above. To get crispy roasted chickpeas, start with a good drying method. After rinsing, spread the chickpeas on a clean towel. Pat them dry gently but thoroughly. This step is key to a crunchy snack. Avoid common mistakes like overcrowding the baking sheet. If chickpeas are too close, they will steam instead of roast. Also, don’t skip the oil. It helps the spices stick and aids in crisping. You can try many spice blends to make your chickpeas exciting. A mix of garlic powder and smoked paprika adds warmth. Or, go for a zesty blend of lemon zest and dill. For sweet roasted chickpeas, toss them with cinnamon and a bit of honey. The mix creates a tasty snack that satisfies your sweet tooth. Roasted chickpeas offer many health benefits. They are high in protein and fiber, making them filling. This helps keep you satisfied between meals. Include them in a balanced diet. They are a great snack option for people looking to eat healthier. Whether you enjoy them on their own or as part of a meal, they are a smart choice. {{image_2}} You can make roasted chickpeas in different ways. Air frying is fast and fun. It makes them crunchy without using much oil. Just set your air fryer to 400°F (200°C) and cook for about 15 minutes. Shake the basket halfway through for even cooking. Oven roasting takes a bit longer but gives great flavor. With the oven, you can roast them at 400°F (200°C) for 25-30 minutes. Both methods create a crispy snack, but your choice depends on your time and tool. You can also change the flavors. Instead of smoked paprika, try curry powder for a warm spice. Or use lemon zest for a fresh twist. You can even add a sprinkle of cinnamon and sugar for a sweet treat. The options are endless! Roasted chickpeas are tasty on their own. But they pair well with dips and sauces. Try hummus for a creamy, rich taste. You can also enjoy them with tzatziki for a cool flavor. These dips add extra fun to your snack time. If you want more healthy snacks, think about veggie sticks! Carrots, cucumbers, or bell peppers add crunch and freshness. You could also serve them with whole-grain crackers for a satisfying bite. Both options work great with roasted chickpeas as a side. For the full recipe, check out the Crunchy Spiced Roasted Chickpea Snack 🥙. It's easy to make and delicious to eat! Store your roasted chickpeas in an airtight container. Glass or plastic containers work well. Make sure they are cool before sealing. This helps keep them crunchy. Homemade roasted chickpeas last about 4 to 5 days at room temperature. If you want them to last longer, you can refrigerate them. In the fridge, they should last about a week. However, they may lose some crunchiness in the fridge. To reheat your chickpeas, use an oven or an air fryer. Preheat the oven to 350°F (175°C). Spread the chickpeas on a baking sheet. Heat them for about 10 minutes. This helps them regain their crispiness. The best time to eat roasted chickpeas is right after cooking. They taste best fresh out of the oven. If you have leftovers, try to eat them within a few days for the best flavor. Enjoy your crunchy snack! How long should I roast chickpeas? I recommend roasting chickpeas for about 25 to 30 minutes. This time helps them get golden brown and crispy. Check them halfway through. Stir them to ensure even cooking. Can I freeze roasted chickpeas? Yes, you can freeze roasted chickpeas. Make sure they cool completely first. Place them in an airtight container or a freezer bag. They will keep well for up to three months. When you're ready to eat them, just reheat in the oven. Are roasted chickpeas healthy snacks? Absolutely! Roasted chickpeas are a great source of protein and fiber. They are low in calories and can help you feel full. Plus, they contain vitamins and minerals that support your health. How many calories are in roasted chickpeas? A serving of roasted chickpeas, about 1 ounce or 28 grams, has around 120 calories. The calorie count can change based on the oil and spices you use. For a healthier snack, use less oil. Popular brands for pre-made options You can find many brands that sell roasted chickpeas. Some popular ones include Biena and Hippeas. They offer various flavors for your taste. Local or online stores for purchasing You can buy roasted chickpeas at your local grocery store. Many health food stores carry them too. Online, you can check Amazon or specialty food websites for more options. Roasted chickpeas are tasty, healthy snacks. We covered required ingredients and preparation steps. You learned roasting tips for crispiness and garnishing ideas. I shared texture tricks and flavor variations, plus health benefits. You also discovered free storage methods and reheating tips. Now, you can make your crispy chickpeas at home. Enjoy them alone or with your favorite dips. This simple snack can fit perfectly into your diet. Plus, it’s a fun way to explore new flavors. Happy roasting!

Roasted Chickpea Snack Healthy Crunchy Treat

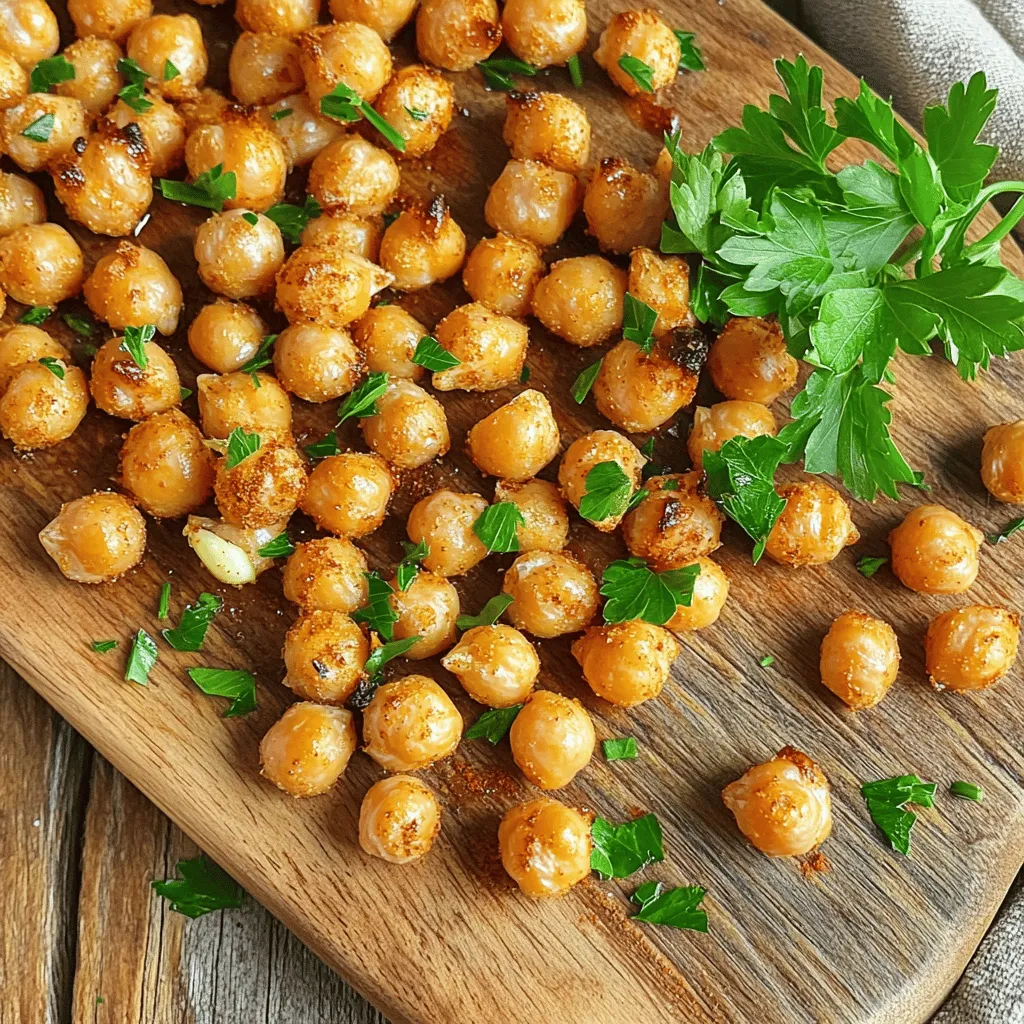
If you’re looking for a healthy snack that packs a crunch, roasted chickpeas are your answer! These little gems are

To make a great Caprese Pasta Salad, you need a few key ingredients: - Pasta selection options: You can use 8 oz of penne or fusilli pasta. Both work well and hold the dressing nicely. - Fresh produce: I love using 1 cup of cherry tomatoes, halved. Fresh basil is a must, so grab 1/2 cup of chopped leaves. - Cheese options: Fresh mozzarella is perfect here. Use 1 cup of mozzarella balls, halved, for that creamy goodness. - Dressing components: For the dressing, you’ll need 3 tablespoons of olive oil and 2 tablespoons of balsamic glaze. Don’t forget 1 clove of minced garlic for a robust flavor. These ingredients come together to create a fresh and flavorful delight in your bowl. You can find the Full Recipe for detailed steps on how to prepare this dish. Enjoy the mix of textures and tastes! To start, boil water in a pot. Add salt to the water. This helps flavor the pasta. Cook the pasta until it is al dente. That means it should be firm but not hard. Check the package for cooking time. Once it's done, drain the pasta. Rinse it under cold water. This stops the cooking. It also cools the pasta quickly. Next, take a large bowl. Add the cooled pasta. Toss in the halved cherry tomatoes and mozzarella balls. Then, add the chopped basil. Using fresh basil is key. It adds bright flavor and aroma. Dried basil won't give the same taste. For the dressing, grab a small bowl. Whisk together olive oil, balsamic glaze, and minced garlic. Add salt and pepper to taste. Whisk until it’s well mixed. This dressing gives a nice balance. You can adjust the seasoning if needed. Taste it to see if you like it. Now it's time to toss everything together. Pour the dressing over the salad mix. Use a gentle hand to mix it. You want everything coated without breaking the pasta. After mixing, let the salad sit for about 15 minutes. This helps the flavors blend together. Now, you can enjoy a fresh and tasty Caprese Pasta Salad! For the complete details, check the Full Recipe. To make your Caprese Pasta Salad shine, consider these seasoning tips: - Add a pinch of red pepper flakes for a touch of heat. - Sprinkle some Italian herbs like oregano or thyme. - Fresh lemon juice brightens the dish and adds zest. If you want to switch things up, try different dressings: - Pesto adds a rich, herby kick. - Greek yogurt dressing gives a creamy texture with less fat. How you serve your salad matters too. Here are some fun ideas: - Serve in a large bowl for a family-style meal. - Use small, clear cups for single servings at parties. Garnishing can make your salad pop: - Top with whole basil leaves for a fresh look. - Drizzle extra balsamic glaze just before serving for shine. Want to save time? Here are some easy tips: - Cook pasta in advance and store it in the fridge. - Chop veggies while pasta cooks to cut down on prep time. For efficient cooking techniques: - Use a large pot to boil pasta faster. - Rinse pasta under cold water to cool it quickly and stop cooking. These small steps can make your cooking smoother and quicker. For the complete instructions, check the Full Recipe. {{image_2}} You can change up the cheese in your Caprese Pasta Salad. Try using feta or goat cheese instead of mozzarella. These cheeses add a tangy twist. Seasonal vegetables can also enhance your salad. Think of adding bell peppers in summer or roasted butternut squash in fall. This keeps your dish fresh and fun. Want to boost the taste? Add proteins like grilled chicken or shrimp. This makes the salad heartier. The mix of flavors will surprise you. Incorporating grains or legumes can change the texture. Quinoa or chickpeas add a nice crunch. These options make the salad more filling and nutritious. You can easily make this salad vegan. Simply swap out the mozzarella for avocado or a vegan cheese. This keeps the creamy texture while being plant-based. For a gluten-free version, choose gluten-free pasta. There are many great options available now. This way, everyone can enjoy this delicious dish. If you're watching calories, reduce the amount of olive oil. You can also skip the cheese. This helps to keep the flavors while cutting back on calories. If you want to see the full recipe, check out the detailed instructions. To keep your Caprese Pasta Salad fresh, use airtight containers. Glass or plastic containers work well. Make sure they seal tightly to keep air out. This helps maintain the salad’s taste and crunch. Store the salad in the fridge right after making it. It’s best to chill it quickly to keep ingredients fresh longer. If you have leftovers, you can enjoy them cold. To reheat, use the microwave on low power. Heat it for short intervals to prevent overcooking. Stir it gently between heats. If you prefer it cold, add a drizzle of olive oil to freshen it up. It also tastes great with some extra balsamic glaze. Caprese Pasta Salad stays fresh for about three days in the fridge. Always check for freshness before eating. Signs of spoilage include a sour smell or slimy texture. If you notice either, it’s best to discard it. Enjoy your salad while it’s still tasty! Yes, you can make Caprese Pasta Salad ahead of time. This salad tastes even better after resting. Store it in a sealed container in the fridge. To keep it fresh, add the dressing just before serving. This prevents the pasta from soaking up too much liquid. If you plan to store it for a few days, use a container that keeps air out. This helps maintain flavor and texture. You can boost the flavor of your Caprese Pasta Salad with several tasty additions. Consider adding: - Grilled chicken for protein - Avocado for creaminess - Olives for a salty kick - Spinach for extra greens - Sun-dried tomatoes for a sweet touch These ingredients can create a unique twist and make each bite exciting. Adjusting the Caprese Pasta Salad for dietary needs is easy. For a vegan option, swap fresh mozzarella for vegan cheese or omit it altogether. Use a gluten-free pasta to make it gluten-free. If you want to reduce calories, use less oil or balsamic glaze. You can also add more veggies for bulk without adding many calories. Serve your Caprese Pasta Salad in a large bowl for gatherings. For single servings, use small cups or plates. Garnish with whole basil leaves for color. Drizzle extra balsamic glaze over the top to make it look fancy. This salad pairs well with grilled meats or a light white wine. For detailed instructions on how to make this delicious dish, check out the [Full Recipe](#). In this blog post, I outlined how to create a delicious Caprese Pasta Salad. We discussed essential ingredients, step-by-step cooking instructions, and tips for flavor enhancement. You learned about ingredient substitutions and dietary adjustments to fit your needs. Remember, whether you’re preparing it for a meal or storing leftovers, fresh ingredients make a big difference. This salad is simple yet flavorful and is sure to impress at any gathering. Enjoy making it your own!

Caprese Pasta Salad Fresh and Flavorful Delight

Are you ready to brighten your meals with a burst of flavor? Our Caprese Pasta Salad combines fresh tomatoes, creamy

- 1 lb chicken breast, cut into 1-inch cubes - 1 cup fresh pineapple, cut into 1-inch cubes - 1 bell pepper (red or yellow), cut into 1-inch pieces - 1/2 cup BBQ sauce (store-bought or homemade) - 2 tablespoons olive oil - 1 teaspoon garlic powder - 1 teaspoon smoked paprika - Salt and pepper to taste - Skewers (soaked if wooden) - Optional: fresh cilantro for garnish Gathering these ingredients is simple. You want fresh chicken that is juicy and tender. Use ripe pineapple for a sweet punch. The bell pepper adds a nice crunch and color. For the marinade, you can use your favorite BBQ sauce. If you prefer homemade, it only takes a few minutes. Olive oil helps everything stick and adds flavor. The garlic powder and smoked paprika boost the taste. Salt and pepper are key to bring it all together. Make sure your skewers are ready. If you use wooden ones, soak them for about 30 minutes. This keeps them from burning on the grill. You can also add fresh cilantro on top for a pop of color. For the full recipe, check out the complete guide. It walks you through every step to make these kabobs perfect! To start, you need to marinate the chicken. This step adds great taste. In a large bowl, combine the chicken cubes, BBQ sauce, olive oil, garlic powder, smoked paprika, salt, and pepper. Mix it all together until the chicken is coated well. Cover the bowl and place it in the fridge. Let it marinate for at least 30 minutes. If you have time, refrigerate for up to 2 hours. This longer time helps the flavors soak in deeply. While the chicken marinates, prepare your skewers. If you use wooden skewers, soak them in water for 30 minutes. This helps prevent burning on the grill. After soaking, take the skewers and thread the marinated chicken on them. Alternate the chicken with pieces of pineapple, bell pepper, and red onion. Aim for 3-4 pieces of chicken on each skewer, followed by a piece of pineapple and a piece of bell pepper or onion. This mix gives each bite a burst of flavor. Now it's time to grill! Preheat your grill to medium-high heat. If using a grill pan, heat it over medium heat and brush it with a bit of oil. This keeps the kabobs from sticking. Once the grill is hot, place the skewers on it. Grill the kabobs for about 10-12 minutes. Turn them occasionally. You want the chicken to cook fully and get nice grill marks. Check the internal temperature; it should reach 165°F (75°C). For extra flavor, brush some more BBQ sauce on the kabobs during the last few minutes of grilling. This adds a tasty glaze to your kabobs. If you want to see the complete instructions, check out the Full Recipe. Marinating the chicken is key to great flavor. I suggest marinating for at least 30 minutes. This allows the chicken to soak up all the tasty BBQ sauce and spices. If you have more time, go for up to 2 hours. This gives even more flavor. Just remember, do not marinate too long. The acid in the sauce can change the chicken's texture. For even cooking, preheat your grill well. Medium-high heat works best. Place the kabobs on the grill and turn them every few minutes. This helps cook the chicken evenly and gives nice grill marks. Always check that the internal temperature hits 165°F (75°C). Avoid overcooking, as this can make the chicken dry. If using wooden skewers, soak them in water for 30 minutes first. This prevents burning on the grill. To boost flavor, glaze your kabobs with extra BBQ sauce in the last few minutes of grilling. This adds a tasty caramelized layer. After grilling, garnish with fresh herbs like cilantro for color. A squeeze of lime juice also brightens the dish. The sweet and smoky flavors work great together. If you want more heat, add red pepper flakes to your sauce. Check the Full Recipe for more tips! {{image_2}} You can switch up the chicken in your kabobs. Try using shrimp, beef, or tofu. Each protein brings its own taste. You can also add more veggies. Zucchini, mushrooms, or cherry tomatoes work great. They add color and flavor. If you want a twist, use different fruits. Mango or peaches can shine on the grill. To change the taste, experiment with marinades. Try teriyaki sauce for an Asian flair. Or use curry paste for a spicy kick. You can even mix honey with mustard for a sweet and tangy sauce. Spices are also fun. Add cumin, chili powder, or fresh herbs to your BBQ sauce. These will make your kabobs pop with flavor. Serve your kabobs with tasty side dishes. Rice or quinoa is a great base. You can also make a fresh salad with greens and citrus. Grilled corn on the cob adds a sweet crunch. For a fun twist, serve with flatbreads or pita. A cool yogurt dip can balance the heat from the grill. Enjoy your meal with a refreshing drink. You have endless options to make your meal special. Check out the Full Recipe for more ideas! To keep your Pineapple BBQ Chicken Kabobs fresh, store them in the fridge. First, let the kabobs cool down to room temperature. Then, place them in an airtight container. This way, they stay juicy and tasty for up to four days. If you want to keep them longer, consider freezing. When it's time to eat your leftovers, you can reheat them safely. The best way is to use the oven. Preheat your oven to 350°F (175°C). Place the kabobs on a baking sheet and cover them with foil. Heat for about 10-15 minutes until warmed through. This keeps the chicken moist and the flavors intact. You can also reheat them in a microwave. Just cover them with a damp paper towel and heat in short bursts, checking often. To freeze your kabobs, wrap them well in plastic wrap or foil. Then, place them in a freezer bag. Make sure to remove as much air as possible. This way, they can last for up to three months. When you are ready to grill them, thaw the kabobs in the fridge overnight. Once thawed, you can grill them as fresh. This method helps keep the taste and texture just right. For the full recipe, check out the details above. For kabobs, I recommend chicken breast. It cooks evenly and stays juicy. You can also use chicken thighs. They have more fat, which adds flavor. Both cuts are easy to cut into cubes. Choose what you like best! Yes, you can prepare these kabobs ahead of time. Marinate the chicken for at least 30 minutes. If you want more flavor, let it sit for up to 2 hours. You can assemble the kabobs, cover them, and refrigerate. Just remember to grill them fresh for the best taste. Kabobs pair well with many sides. I love serving them with rice or a fresh salad. You can also add grilled vegetables, corn on the cob, or coleslaw. These sides add color and balance to your meal. For the full recipe, check out the Pineapple BBQ Chicken Kabobs details! In this post, we covered how to make delicious Pineapple BBQ Chicken Kabobs. We discussed the main ingredients, marinade, and grilling steps. You learned tips for marinating, cooking techniques, and even variations. Don’t forget about storage for leftovers and reheating. These kabobs are fun to make and full of flavor. Try different ingredients and sides to make it your own. Enjoy your cooking and have fun grilling!

Pineapple BBQ Chicken Kabobs Flavorful Grilling Recipe

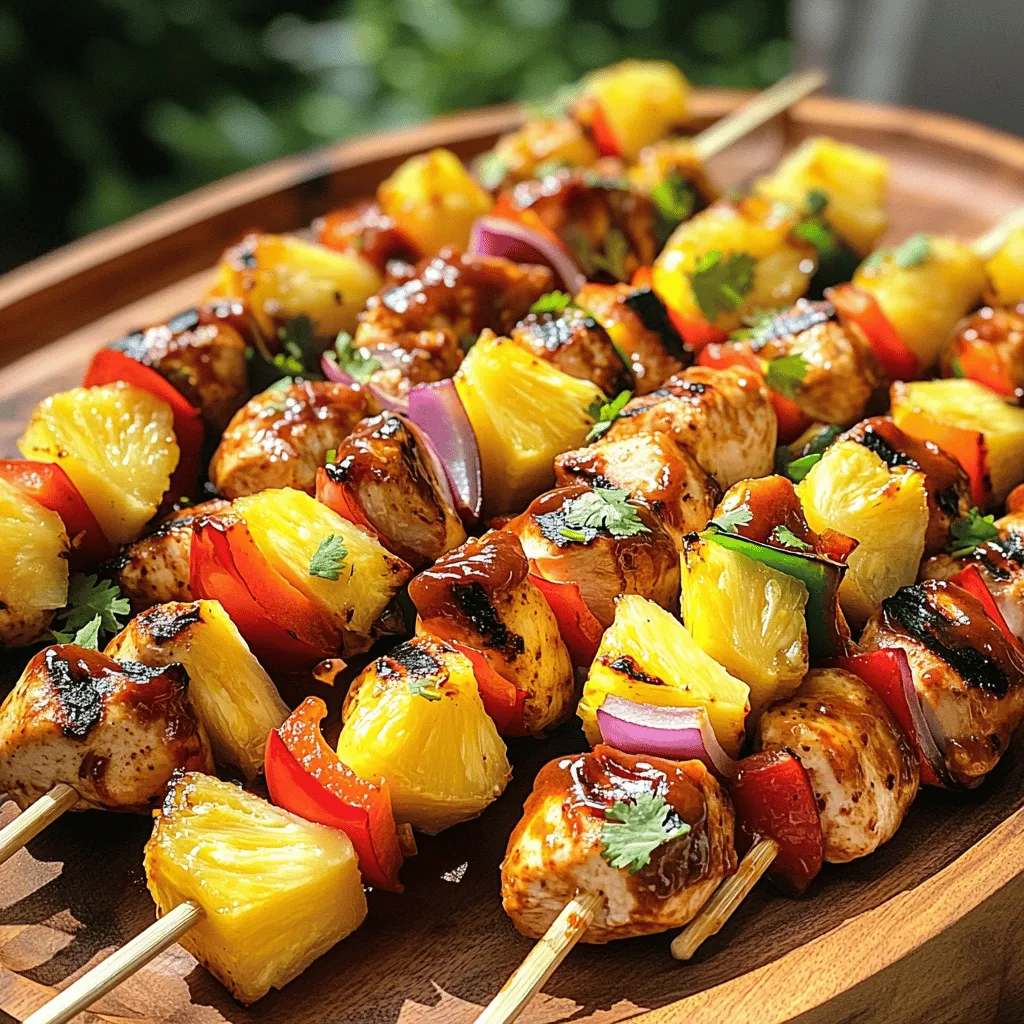
Are you ready to elevate your next BBQ? Pineapple BBQ Chicken Kabobs are a game-changer. Imagine juicy chicken and sweet

Older posts
Newer posts
← Previous Page1 … Page73 Page74 Page75 … Page84 Next →

dsad

© 2026 juliesdish • Built with GeneratePress

Our Policies

  • Copyright Policy
  • Cookie Policy
  • GDPR Policy
  • Privacy Policy
  • Disclaimer
  • Terms Of Use

More Information

  • Home
  • About
  • Contact
  • Appetizers
  • Dessert
  • Dinner
  • Drinks
©2026, juliesdish About Back To Top