Skip to content
DisclaimerTerms Of UseGDPR PolicyCookie Policy

juliesdish

  • Home
  • Drinks
  • Appetizers
  • Dinner
  • Dessert
  • About
  • Contact
  • Privacy Policy
DisclaimerTerms Of UseGDPR PolicyCookie Policy

NO-ING-IMG

To start, gather the main ingredients for your loaded veggie nachos. Here’s what you need: - 1 large bag of tortilla chips - 1 cup black beans, drained and rinsed - 1 cup corn kernels (fresh or frozen) - 1 red bell pepper, diced - 1 yellow bell pepper, diced - 1 small red onion, finely chopped - 1 jalapeño, sliced (optional) - 1 cup shredded cheese (cheddar and mozzarella blend) These ingredients mix together for a colorful and tasty nacho base. The black beans add fiber and protein. The corn gives a sweet crunch. The bell peppers and onion add flavor and color. You can customize your nachos with these optional toppings: - 1 avocado, diced - 1/2 cup Greek yogurt or sour cream - 1/4 cup fresh cilantro, chopped - 2 tablespoons lime juice - Salt and pepper to taste - Hot sauce (optional, for serving) Adding avocado brings creaminess. Greek yogurt or sour cream adds tang. Fresh cilantro adds a burst of freshness. Lime juice brightens the flavors. Choosing the right cheese is key to delicious nachos. I often use a blend of cheddar and mozzarella. Cheddar gives a sharp taste. Mozzarella melts beautifully. You can also try pepper jack for a spicy kick. For the full recipe, check out the [Full Recipe] section. This ensures you have all the details you need to create your loaded veggie nachos. Enjoy experimenting with flavors! Start by preheating your oven to 350°F (175°C). This step is key for melting the cheese just right. Grab a large baking sheet and spread the tortilla chips in a single layer. Make sure they don’t overlap. This helps each chip get nice and crunchy. In a mixing bowl, combine the black beans, corn, diced red and yellow bell peppers, and red onion. If you like some heat, add in the jalapeño slices. Squeeze in the lime juice, and season with salt and pepper. Mix all the ingredients well until combined. This veggie mix adds flavor and color to your nachos. Once your veggie mix is ready, evenly distribute it over the tortilla chips. This step ensures every chip gets a taste of that fresh veggie goodness. Now, sprinkle a generous amount of shredded cheese on top. Place the baking sheet in your preheated oven. Bake for about 10 to 12 minutes. Keep an eye on it until the cheese is melted and bubbly. After removing it from the oven, let the nachos cool for a minute. Top them with diced avocado, a dollop of Greek yogurt or sour cream, and a sprinkle of fresh cilantro. Enjoy your loaded veggie nachos! For the complete guide, check the Full Recipe. To make your nachos shine, season the veggie mix well. Use salt and pepper to taste. You can also add chili powder or cumin for a kick. A sprinkle of garlic powder boosts the flavor too. Just mix these in with the beans and veggies. This step takes your nachos from good to great! Layering is key for crunchy nachos. Start with a layer of tortilla chips. Then, add a generous scoop of your veggie mix. Sprinkle cheese on top before adding more chips and veggies. This creates a crunchy base and keeps the chips from getting soggy. Repeat this until you run out of ingredients. To prevent soggy nachos, serve them right after baking. Use fresh chips for a crispier bite. Avoid adding toppings like sour cream too early. Wait until just before serving to add those toppings. This keeps everything fresh and crunchy. If you follow these tips, your nachos will be a hit! For the full recipe, check out the detailed instructions above. {{image_2}} You can use many cheeses for loaded veggie nachos. Cheddar gives a sharp taste. Mozzarella melts well and adds creaminess. Pepper jack brings some heat to your dish. You might also try feta for a tangy twist. Mixing these cheeses can create a rich flavor. Choose your favorites based on your taste. Adding protein makes nachos more filling. Tofu works well for a plant-based option. Just cube the tofu and sauté it with some spices. Chicken adds a savory touch. Cook it with taco seasoning for extra flavor. Either option will boost the nutrition and taste of your nachos. For those who like spice, add more peppers. Sliced jalapeños are a classic choice. You can also use serrano or habanero for more heat. Roasting peppers before adding them gives a smoky taste. If you want a milder spice, consider sweet peppers. Adjust the heat to suit your crowd. After you enjoy your loaded veggie nachos, you may have some left. Store them in an airtight container. This keeps them fresh for about two days. Avoid stacking them too high to prevent sogginess. Keep any toppings, like avocado or yogurt, separate. This way, they stay fresh and tasty. To heat leftover nachos, place them on a baking sheet. Preheat your oven to 350°F (175°C). Bake for about 5-7 minutes. This helps the cheese melt again and keeps the chips crunchy. You can also use a microwave, but watch out! It can make the chips soft. Heat in short bursts, checking often. You can freeze some of the ingredients for later use. Black beans and corn freeze well. Place them in freezer bags and remove as much air as possible. This keeps them fresh for up to three months. Just remember, nachos do not freeze well. They lose their crunchy texture when thawed. Use the full recipe to enjoy fresh nachos whenever you want! Yes, you can prepare some parts ahead. Cook the veggie mix and store it in the fridge. You can also cut the toppings like avocado and cilantro. When you are ready to eat, just layer everything on the chips and bake. This saves time and makes serving easy. The best vegetables for nachos include: - Bell peppers (red and yellow) for sweetness - Red onion for sharpness - Corn for crunch - Jalapeños for heat (if you like spice) You can also add black beans for protein and fiber. Feel free to mix and match your favorites! To make nachos healthier, try these tips: - Use whole grain tortilla chips for more fiber. - Load up on veggies like spinach, mushrooms, or zucchini. - Swap regular cheese for low-fat cheese or a plant-based option. - Replace sour cream with Greek yogurt for added protein. These changes keep the taste delicious while boosting nutrition. For the full recipe, check the details above! Loaded veggie nachos are fun and tasty. We covered the main ingredients, step-by-step prep, and tips for crunch. Plus, we explored many delicious variations that make nachos exciting. Remember to store leftovers wisely for the best taste later. By following these methods, you’ll make nachos everyone loves. Enjoy the flavors and creativity these nachos bring to your table. Dive in, and happy cooking!

Loaded Veggie Nachos Flavorful and Easy Recipe

Craving a delicious snack? You’re in the right place! Loaded Veggie Nachos are a tasty twist on a classic dish.

- 1 ½ cups all-purpose flour - 1 teaspoon baking powder - ½ teaspoon salt - 1 cup unsalted butter, softened - 1 cup granulated sugar - 4 large eggs - 2 teaspoons vanilla extract - 2 tablespoons lemon zest - ½ cup buttermilk - 1 cup powdered sugar (for glaze) - 3 tablespoons fresh lemon juice When measuring flour, spoon it into the cup and level it off. Do not pack it down. For liquids, use a clear measuring cup for accuracy. If you need to convert cups to grams, use these simple conversions: - 1 cup all-purpose flour = 120 grams - 1 cup granulated sugar = 200 grams - 1 cup unsalted butter = 227 grams To make this lemon glazed pound cake, gather these tools: - Mixing bowls: One large and one medium - Electric mixer: For creaming butter and sugar - Measuring cups: For accurate ingredient measurements - Measuring spoons: For small quantities - Loaf pan: A 9x5-inch pan works best - Parchment paper: For easy cake removal - Wire rack: To cool the cake after baking Using the proper tools makes baking easier and helps achieve the best results. Check your kitchen for these items before you start baking. Start by gathering all your ingredients. This ensures you have everything at hand. You will need: - 1 ½ cups all-purpose flour - 1 teaspoon baking powder - ½ teaspoon salt - 1 cup unsalted butter, softened - 1 cup granulated sugar - 4 large eggs - 2 teaspoons vanilla extract - 2 tablespoons lemon zest (from about 2 lemons) - ½ cup buttermilk - 1 cup powdered sugar (for glaze) - 3 tablespoons fresh lemon juice Now, preheat your oven to 350°F (175°C). This step is key for even baking. Grease and flour a 9x5-inch loaf pan, or use parchment paper. This will help the cake come out easily. Mixing: In a medium bowl, whisk together the flour, baking powder, and salt. Set this aside. In a large bowl, beat the softened butter and sugar until they are light and fluffy. This takes about 3 to 5 minutes. Next, add the eggs one at a time, mixing well after each. Stir in the vanilla extract and lemon zest for that fresh flavor. Gradually add the dry ingredients, alternating with the buttermilk. Start and end with the dry mix. Be careful not to over-mix. Baking: Pour the batter into the prepared loaf pan. Spread it evenly. Bake in the preheated oven for 50 to 60 minutes. To check if it’s done, insert a toothpick in the center. If it comes out clean, the cake is ready. Cooling Details: Once baked, take the cake out and let it cool in the pan for 10 minutes. After that, carefully move it to a wire rack to cool completely. Glaze Preparation and Application: In a small bowl, whisk together the powdered sugar and fresh lemon juice until smooth. Adjust the glaze as needed by adding more lemon juice or sugar. When the cake is cool, drizzle the glaze over the top. Let it drip down the sides for a beautiful finish. You can find the Full Recipe for a detailed guide. Enjoy your delicious lemon glazed pound cake! Baking can be tricky. Here are some common mistakes you should avoid: - Skipping Ingredients: Always use all the ingredients listed. Missing even one can change the taste. - Not Measuring Correctly: Use dry measuring cups for flour and wet ones for liquids. This helps maintain the right balance. - Overmixing the Batter: Mix just until combined. Overmixing makes the cake dense and tough. - Opening the Oven Door: Avoid peeking while the cake bakes. This can cause the cake to sink. Getting the right texture for your lemon glazed pound cake is key. Here are some tips: - Use Room Temperature Ingredients: Make sure butter and eggs are at room temperature. This helps create a smooth batter. - Cream Butter and Sugar Well: Beat them until light and fluffy. This adds air, giving your cake a light texture. - Check the Oven Temperature: Use an oven thermometer to ensure it is accurate. An oven that’s too hot can cause the cake to rise too fast and then collapse. To make your cake burst with lemon flavor, consider these ideas: - Use Fresh Lemons: Fresh lemon zest and juice add brightness. Bottled lemon juice does not compare in flavor. - Add More Zest: Feel free to add extra lemon zest for a stronger taste. Zest packs a punch of flavor. - Try Lemon Extract: A few drops of lemon extract can boost the lemon flavor even more. Just be careful; a little goes a long way. For the complete recipe, check out the Full Recipe section. {{image_2}} You can mix things up with different glazes and toppings. Instead of lemon glaze, try a vanilla or chocolate glaze. A simple cream cheese frosting can make it richer. You can also use a berry compote for added flavor. This adds color and a fruity taste that pairs nicely with pound cake. Looking for a healthier twist? You can swap some ingredients. Use whole wheat flour instead of all-purpose flour. Replace sugar with honey or maple syrup for natural sweetness. You can also use Greek yogurt in place of buttermilk. These small changes can make a big difference without losing taste. Want to add more flavor? Berries work great! Try folding in fresh blueberries or raspberries into the batter. You can also add nuts like walnuts or pecans for a crunchy texture. For a fun twist, mix in some chocolate chips. These flavors create a delightful surprise in each bite. For the full recipe, check out the detailed instructions to bring your lemon glazed pound cake to life! To keep your lemon glazed pound cake fresh, wrap it well. Use plastic wrap or foil. Store it in an airtight container. This will prevent it from drying out. Always keep it at room temperature. Avoid storing it in the fridge, as it can become dry. You can freeze this cake for later enjoyment. First, let it cool completely. Wrap it tightly in plastic wrap. Then, place it in a freezer bag. Label the bag with the date. This way, you will know how long it has been frozen. Your pound cake can stay good in the freezer for up to three months. When ready to enjoy, thaw it overnight in the fridge. If stored correctly, the cake lasts about 4 to 5 days at room temperature. If you freeze it, it can last for months. Just remember to check for any signs of freezer burn or spoilage before serving. Enjoy your slice of lemon happiness! Yes, you can use other flours. For a gluten-free option, try almond or coconut flour. Just remember that the texture might change. These flours absorb more moisture, so you may need to adjust the liquids. Always check the package for specific ratios. To check if your cake is done, insert a toothpick into the center. If it comes out clean, the cake is ready. Another sign is the cake pulling away from the sides of the pan. It should be golden brown on top and spring back slightly when touched. Yes, you can make this cake ahead of time! It stays fresh for several days at room temperature. Wrap it well in plastic wrap to keep it moist. You can also freeze it for up to three months. Just thaw it in the fridge before serving. For the full recipe and more tips, check the section above. Serve this lemon glazed pound cake with a cup of tea or coffee. It pairs well with fresh berries or whipped cream. Adding a sprig of mint can enhance its look and flavor. Enjoy sharing this delightful treat with friends and family! This blog post covered a delicious lemon pound cake recipe. We explored key ingredients, baking steps, and unique variations. You learned how to avoid common mistakes and enhance flavors. Proper storage tips ensure your cake stays fresh. In conclusion, baking a great lemon pound cake is simple with the right guide. With practice, you'll impress friends and family. Enjoy the sweet rewards of your baking journey!

Lemon Glazed Pound Cake Simple and Tasty Delight

If you crave a sweet treat that’s easy to make, I have just the thing! My Lemon Glazed Pound Cake

This savory spinach artichoke dip is easy and perfect for parties. It takes only 15 minutes to prep and 30 minutes to bake. You will end up with a creamy, cheesy dip. It serves 6 to 8 people, making it a great choice for gatherings. Here’s what you need for this delicious dip: - 1 cup frozen spinach, thawed and drained - 1 cup canned artichoke hearts, chopped - 1 cup cream cheese, softened - 1/2 cup sour cream - 1/2 cup mayonnaise - 1 cup shredded mozzarella cheese - 1/2 cup grated parmesan cheese - 2 cloves garlic, minced - 1 teaspoon onion powder - 1 teaspoon lemon juice - Salt and pepper to taste This dip packs a tasty punch. Each serving has about 200 calories. It also provides protein and healthy fats. To keep it balanced, pair it with fresh veggies or whole-grain chips. Enjoying this dip can be a fun way to add flavor to your snacks. To start, gather your ingredients. You will need: - 1 cup frozen spinach, thawed and drained - 1 cup canned artichoke hearts, chopped - 1 cup cream cheese, softened - 1/2 cup sour cream - 1/2 cup mayonnaise - 1 cup shredded mozzarella cheese - 1/2 cup grated parmesan cheese - 2 cloves garlic, minced - 1 teaspoon onion powder - 1 teaspoon lemon juice - Salt and pepper to taste First, preheat your oven to 350°F (175°C). In a large bowl, mix the cream cheese, sour cream, and mayonnaise. Stir until the mix is creamy. Next, add the chopped artichokes, drained spinach, minced garlic, onion powder, and lemon juice. Stir well until everything combines. Fold in the mozzarella and parmesan cheese. Add salt and pepper to taste. This mix should be thick and flavorful. Now, transfer the dip mixture to a baking dish. Spread it out evenly. Place the dish in your preheated oven. Bake for 25 to 30 minutes. Look for the dip to be bubbly and the top to turn golden brown. Once ready, pull it out and let it cool for a few minutes. Cooking times may vary slightly based on your oven. Check the dip at the 25-minute mark. If it’s not bubbly yet, give it a few more minutes. Letting it cool is important, as it will be very hot. Your savory spinach artichoke dip is now ready to serve! For the full recipe, refer to the instructions above. To make your spinach artichoke dip creamy, use softened cream cheese. This helps it mix well. Blend all ingredients until smooth. If you want a chunkier dip, leave some artichokes and spinach larger. Serve the dip warm with tasty sides. Tortilla chips are a classic choice. You can also use toasted baguette slices. For a healthy option, try fresh vegetable sticks. Add a sprinkle of extra parmesan for a nice touch. One common mistake is not draining the spinach well. Excess water can make your dip runny. Also, avoid using low-fat cream cheese. It doesn’t melt as well and can change the flavor. Lastly, don’t skip seasoning. Salt and pepper bring out the dip's best flavors. For the full recipe, check out the details above. Enjoy making this delicious dip! {{image_2}} To make spinach artichoke dip healthier, swap some ingredients. Use Greek yogurt instead of sour cream. It adds creaminess and boosts protein. You can also try low-fat cream cheese. This change keeps the taste while cutting calories. Adding flavor can make your dip even better. Try mixing in a bit of red pepper flakes for heat. You can also add a splash of hot sauce for a kick. Fresh herbs like basil or parsley can bring a bright taste too. Experiment with different cheeses, like feta or goat cheese, for a unique twist. If you need a dairy-free option, substitute with plant-based cream cheese. Use cashew cream or coconut cream for a rich texture. Those with gluten concerns can enjoy the dip with fresh veggies. Always check labels on store-bought items for hidden gluten. To store leftover spinach artichoke dip, let it cool first. Place it in an airtight container. This helps keep it fresh for later. Make sure to seal the lid tightly. You can store it in the fridge for up to three days. If you want to keep it longer, consider freezing it. When you're ready to enjoy your dip again, preheat your oven to 350°F (175°C). Transfer the dip to an oven-safe dish. Cover it with foil to keep it moist. Heat for about 20 minutes. Check if it’s warm enough. If not, add a few more minutes. You can also microwave it. Use a microwave-safe bowl, and heat in short bursts. Stir in between until it’s hot. To freeze, store the dip in a freezer-safe container. Leave some space at the top for expansion. The dip can last for up to two months in the freezer. When you're ready to use it, thaw it overnight in the fridge. After thawing, stir it well. You may need to add a splash of cream or milk for the right texture. Then, reheat it as directed above. For the full recipe, check out the Creamy Spinach Artichoke Delight. You can make Spinach Artichoke Dip healthier by swapping some ingredients. Use Greek yogurt instead of sour cream and mayonnaise. This change cuts fat and adds protein. You can also use low-fat cream cheese. If you want more veggies, add chopped bell peppers or mushrooms. These will add fiber and nutrients without many calories. Yes, you can use fresh spinach instead of frozen. Fresh spinach gives a bright taste. To use fresh spinach, you should wash it well, then chop it. Cook it lightly in a pan until it wilts. This helps remove excess water. Make sure to drain it well before adding it to the dip. This prevents the dip from becoming too watery. For dipping, you have many tasty choices. Tortilla chips are popular and crunchy. Pita chips add a nice touch too. You can also use toasted baguette slices for a gourmet feel. Fresh veggie sticks like carrots, celery, or bell peppers are healthy options. They add a nice crunch and color to your spread. In this blog post, we explored the key ingredients and steps to make delicious Spinach Artichoke Dip. You learned how to prepare the dip, bake it, and avoid common mistakes. We also shared tips for perfect texture and options for variation. You now have storage info and answers to FAQs. Remember, cooking should be fun. Experiment with flavors and enjoy sharing your dip with friends!

Savory Spinach Artichoke Dip Easy Party Recipe

Looking for a crowd-pleasing dip for your next party? My Savory Spinach Artichoke Dip is the perfect choice! It’s creamy,

- 1 cup natural peanut butter (creamy or chunky) - 1 cup rolled oats - 1/2 cup crushed pretzels - 1/2 cup honey or maple syrup - 1/2 cup chocolate chips (dark or milk) - 1/4 cup chia seeds (optional for added nutrients) - 1/2 teaspoon vanilla extract - A pinch of sea salt These ingredients make the perfect blend for Peanut Butter Pretzel Energy Balls. Each one offers a unique flavor and texture. The peanut butter gives a rich, nutty taste. Rolled oats add a chewy base and fiber. Crushed pretzels bring crunch and a salty twist. Honey or maple syrup sweetens the mix, while chocolate chips add a delightful touch. Chia seeds, if used, boost nutrition. Vanilla extract enhances the flavor, and sea salt balances the sweetness. - Calories per serving: Each energy ball has about 100 calories. - Protein content: There are roughly 3 grams of protein per ball. - Fiber and sugar levels: Expect about 2 grams of fiber and 5 grams of sugar. These energy balls pack a punch of nutrients. They provide lasting energy without a sugar crash. The protein helps keep you full, and the fiber aids digestion. Enjoy these as a smart snack before or after workouts or as an afternoon pick-me-up. You can find the full recipe to make these tasty snacks easily. - Combine wet ingredients Start by taking a large mixing bowl. Scoop 1 cup of natural peanut butter into it. Add 1/2 cup of honey or maple syrup. Pour in 1/2 teaspoon of vanilla extract. Use a spatula and mix until smooth. - Mix in dry ingredients Next, add 1 cup of rolled oats, 1/2 cup of crushed pretzels, and 1/2 cup of chocolate chips. If you want more nutrients, sprinkle in 1/4 cup of chia seeds. Finish with a pinch of sea salt. Stir until everything blends well, forming a sticky dough. - Form and roll the energy balls Now it's time to make the balls. Take a tablespoon of the mixture and roll it into a ball with your hands. Place each ball on a baking sheet lined with parchment paper. Keep going until you use all the mixture. You should have around 20-25 energy balls. - Refrigerate for optimal firmness After rolling the balls, place the baking sheet in the refrigerator. Let them chill for 30 to 60 minutes. This step helps them firm up and hold their shape. - Suggested presentation tips To serve, arrange the energy balls in a small bowl or on a platter. For a fun touch, sprinkle some crushed pretzels and chocolate chips on top. You can also pack them in individual snack bags for easy grab-and-go treats. Getting the right measurements is key to great energy balls. Use a measuring cup for each ingredient. This helps keep the taste balanced. Too much peanut butter can make them too sticky. Too little oats may lead to a loose texture. Aim for a mix that holds together well. When mixing, a good rule is to combine until just right. The dough should be sticky but not wet. You want a nice blend of flavors. If the mixture feels dry, add a touch of honey. If it’s too wet, a bit more oats can help. One common issue is overmixing. This can make your energy balls tough. Mix just until everything is combined. On the flip side, under-mixing can lead to uneven flavor. Make sure all the ingredients are well-distributed. Another mistake is not keeping ball sizes consistent. If some balls are big and others are small, cooking time will vary. Aim for about a tablespoon for each ball. This size is perfect for snacking. It gives you just the right boost without being too filling. {{image_2}} You can change up the flavors of your Peanut Butter Pretzel Energy Balls easily. Adding in dried fruits or nuts gives a new twist. Think about using raisins, cranberries, or even chopped almonds. Each add-in brings its own flavor and texture. You might also like to play with flavors. For a chocolate twist, mix in cocoa powder. It adds a rich taste. If you love coconut, add shredded coconut. This gives a nice chewiness. Both options take your energy balls to the next level. If you need vegan or gluten-free options, you can modify the recipe. Use maple syrup instead of honey for a vegan treat. For gluten-free balls, choose gluten-free oats and pretzels. This way, everyone can enjoy these snacks. You can also make them sugar-free. Use a sugar-free syrup or sweetener instead of honey or maple syrup. This lets you enjoy the snack without extra sugar. No matter your needs, these energy balls can fit right in! To keep your Peanut Butter Pretzel Energy Balls fresh, store them in the refrigerator. They will stay good for about a week. If you want them to last longer, put them in the freezer. In the freezer, they can last up to three months. Just remember to let them thaw before you eat them. Packing these energy balls for snacks is easy. You can use small snack bags or airtight containers. This makes it simple to grab one when you're busy. If you want to share, pack a few in a larger container. They are great for road trips, school lunches, or after workouts. Enjoy the tasty crunch and creamy flavor wherever you go! Peanut Butter Pretzel Energy Balls last about one week in the fridge. Store them in an airtight container. If you freeze them, they can last up to three months. Just make sure to thaw them before you eat. This helps keep them fresh and tasty. Yes, you can totally customize the recipe! Want more crunch? Add nuts or seeds. Want some sweetness? Toss in dried fruits like raisins or cranberries. You can also mix in spices like cinnamon for extra flavor. Get creative with your favorite tastes and textures. These energy balls pack a healthy punch. They are rich in protein from the peanut butter. The oats give you fiber, which is great for your tummy. The healthy fats in peanut butter and chia seeds help keep you full. Plus, they provide a quick energy boost, perfect for an afternoon snack or pre-workout fuel. You can find the full recipe for Peanut Butter Pretzel Energy Balls [here](#). This link leads you to detailed steps and ingredient amounts. Enjoy making these delicious snacks! These Peanut Butter Pretzel Energy Balls are a simple and tasty snack. We covered ingredients, healthy nutrition facts, and step-by-step instructions. I shared tips to help you make perfect energy balls and ideas for tasty variations. Proper storage is key for freshness. Remember, you can customize the recipe to fit your needs. Enjoy these easy snacks for a quick energy boost anytime. Now, get in the kitchen and start mixing!

Peanut Butter Pretzel Energy Balls Healthy Snack Boost

Looking for a tasty way to fuel your day? These Peanut Butter Pretzel Energy Balls are your answer! Packed with

To make Garlic Parmesan Roasted Broccoli, you need some simple ingredients. Here’s the list: - 2 heads of fresh broccoli, cut into florets - 4 cloves of garlic, minced - 3 tablespoons olive oil - 1/4 teaspoon red pepper flakes (optional) - 1/2 cup grated Parmesan cheese - Salt and pepper to taste - Zest of 1 lemon - Juice of 1/2 lemon - Fresh parsley, chopped (for garnish) These ingredients work well together. The broccoli is crunchy and healthy. The garlic adds a rich taste. Olive oil makes everything nice and smooth. Parmesan cheese gives it a cheesy finish. You can add a few extra ingredients to boost the flavor. Try these: - Red Pepper Flakes: These add a nice kick. Use them if you like spice. - Lemon Zest: This adds brightness. It makes the dish taste fresh. - Fresh Herbs: You can use thyme or oregano for extra flavor. These options let you customize the dish. You can make it more personal based on what you like. If you want a healthier take, here are some swaps: - Olive Oil: Use a light spray of cooking oil to cut calories. - Parmesan Cheese: Try nutritional yeast for a dairy-free option. - Broccoli: You can mix in other veggies like cauliflower or Brussels sprouts. These swaps help you enjoy the dish while making it healthier. You still get great taste without losing flavor. For the full recipe, check out the Garlic Parmesan Roasted Broccoli section. First, gather your ingredients. You will need fresh broccoli, garlic, olive oil, red pepper flakes, Parmesan cheese, salt, pepper, lemon zest, lemon juice, and parsley. Start by preheating your oven to 425°F (220°C). While the oven warms up, wash the broccoli. Cut the broccoli into florets. Make sure they are about the same size for even cooking. Next, take a large bowl. Add the broccoli florets, minced garlic, olive oil, red pepper flakes, salt, and pepper. Toss everything together. Ensure the broccoli is well coated in olive oil and garlic. Spread the broccoli mixture on a baking sheet. Make sure the florets are in a single layer. Crowding them will cause steaming instead of roasting. Place the baking sheet in the oven. Roast the broccoli for about 20 minutes. Keep an eye on it. You want the broccoli to be tender and slightly crispy on the edges. After 20 minutes, take the broccoli out of the oven. Sprinkle the grated Parmesan cheese over the hot broccoli. This will melt beautifully. Return the baking sheet to the oven for another 5 minutes. This allows the cheese to get bubbly and golden. Once ready, squeeze fresh lemon juice over the broccoli. Add lemon zest and chopped parsley for a fresh taste. Now, you have a tasty Garlic Parmesan Roasted Broccoli dish. Enjoy it as a side or snack! For the complete steps, refer to the Full Recipe. To get that perfect roast, start by cutting the broccoli into even florets. This helps them cook at the same rate. I recommend using fresh broccoli for the best taste and texture. When you toss the florets with olive oil and garlic, make sure they are well-coated. This not only adds flavor but also helps them crisp up nicely. Spread the florets in a single layer on the baking sheet. Crowding them can lead to steaming instead of roasting. Keep an eye on them in the oven. You want them tender yet slightly crispy, which usually takes about 20 minutes. You can easily change the flavor of this dish. For a spicy kick, add more red pepper flakes. If you like a tangy touch, try adding some balsamic vinegar before roasting. For a nutty flavor, mix in some toasted pine nuts or walnuts just before serving. You can also swap the Parmesan for nutritional yeast to make this dish vegan. Experiment with other herbs like thyme or rosemary for a different twist. Avoid using old or wilted broccoli. Fresh broccoli has the best crunch. Don't skip the oil; it helps the broccoli roast well. If you don’t add enough salt, the dish may taste bland. Make sure to taste the broccoli before serving. Lastly, don’t overcrowd the baking sheet. This can cause the broccoli to steam instead of roast. Following these tips will help you make Garlic Parmesan Roasted Broccoli that everyone loves. For the full recipe, check out the section above. {{image_2}} You can make Garlic Parmesan Roasted Broccoli even better by adding more flavor. Here are some ideas: - Lemon slices: Add thin lemon slices before roasting for a bright taste. - Balsamic vinegar: Drizzle a bit of balsamic vinegar before serving for a sweet touch. - Nuts: Toss in some slivered almonds or pine nuts for a crunchy twist. - Cheese: Try adding feta or goat cheese for a creamy contrast. If you want to switch things up, you can use different cooking methods: - Air Fryer: This method cooks quickly and gives you crispy edges. Just toss the broccoli with oil and seasonings, then air fry at 375°F for about 10-12 minutes. - Stovetop: Sauté the broccoli in a pan with oil and garlic over medium heat. Cook until tender, around 8-10 minutes. Add the cheese at the end to melt it. You can easily adapt this dish for different diets: - Vegan: Use nutritional yeast instead of Parmesan cheese for a cheesy flavor without dairy. - Gluten-Free: This recipe is already gluten-free! Just make sure all ingredients, like seasonings, are gluten-free as well. These variations help you enjoy Garlic Parmesan Roasted Broccoli in new ways. For the full recipe, check the main section. After you enjoy your Garlic Parmesan Roasted Broccoli, store any leftovers in an airtight container. This keeps the broccoli fresh and tasty. Place it in the fridge if you plan to eat it within a few days. Proper storage helps maintain its flavor and texture. You can keep it for up to 3 days. Make sure it cools down before sealing. This way, you prevent steam build-up, which could make it soggy. When it’s time to reheat your broccoli, the oven works best. Preheat your oven to 350°F (175°C). Spread the broccoli on a baking sheet and heat for about 10 minutes. This warms it nicely without losing its crispiness. You can also use a microwave. Place it in a microwave-safe dish and cover it. Heat for 1-2 minutes, checking every 30 seconds. Just be careful not to overcook it. You want to enjoy the crunchy texture and great taste. If you want to keep your Garlic Parmesan Roasted Broccoli for longer, freezing is a great option. Start by letting it cool completely. Then, place it in a freezer-safe bag or container. Try to remove as much air as possible. This prevents freezer burn. You can freeze it for up to 3 months. When you're ready to eat it, thaw it overnight in the fridge. Reheat it in the oven for the best taste. This way, you can enjoy this snack anytime you want. For the full recipe, check the earlier section. To cut broccoli for roasting, start with fresh heads. Remove the tough stems first. Then, cut the broccoli into bite-sized florets. Make sure they are similar in size. This helps them cook evenly. Larger pieces may stay crunchy, while smaller ones can burn. Yes, you can use frozen broccoli for this recipe. However, it may not get as crispy. Thaw the broccoli first and pat it dry. This step removes excess moisture. Moisture can lead to soggy broccoli. Follow the same steps in the Full Recipe to ensure good taste. To spice up your Garlic Parmesan Roasted Broccoli, add red pepper flakes. Start with 1/4 teaspoon in your mix. If you like more heat, add extra flakes. You can also try a dash of hot sauce after roasting. This adds flavor and heat, making your snack exciting. Garlic Parmesan roasted broccoli offers tasty flavors and healthy benefits. You learned about key and optional ingredients to boost taste. I shared steps for proper preparation and roasting. You now know tips to keep your broccoli perfectly crunchy and tasty. You can also explore variations and cooking methods to fit your needs. Lastly, proper storage helps keep leftovers fresh. Enjoy making this dish your own and impressing others with your new skills.

Garlic Parmesan Roasted Broccoli Flavorful and Easy Snack

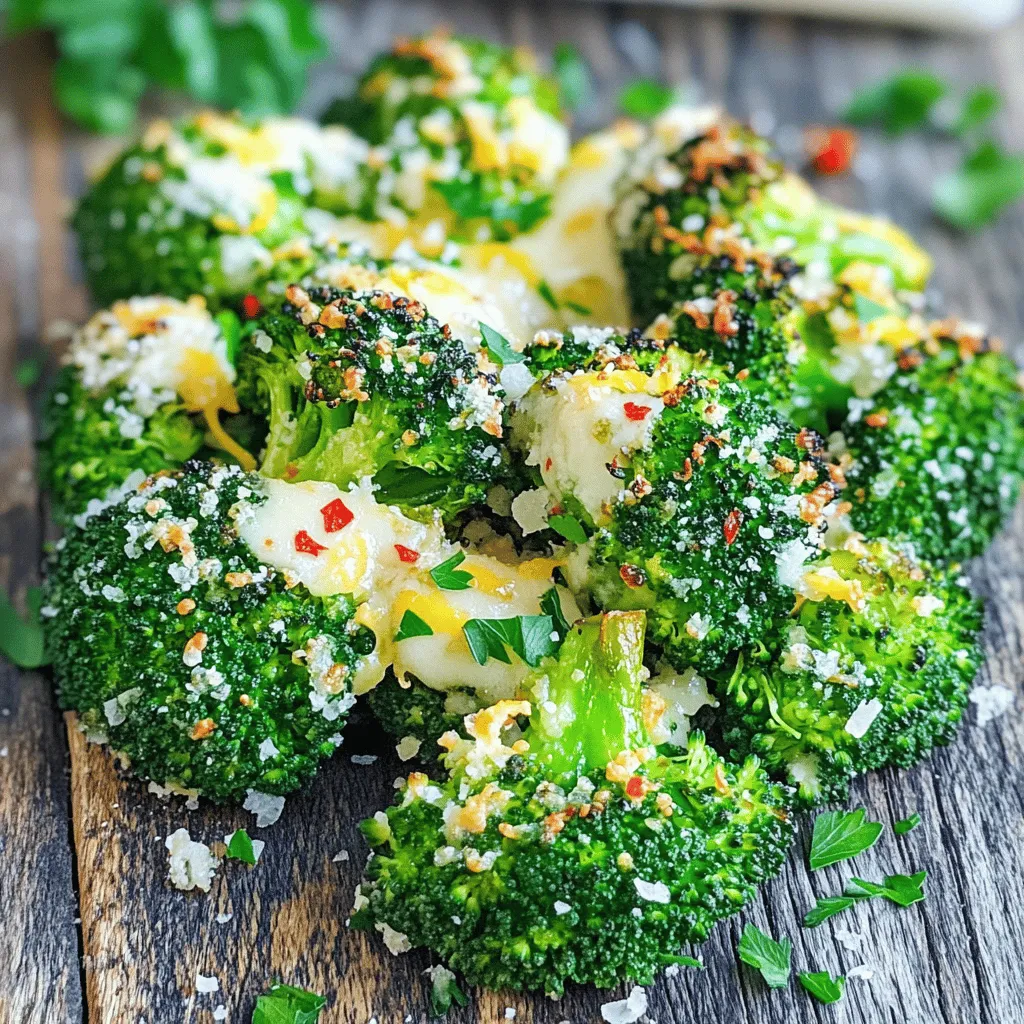
Looking for a quick and tasty snack? You’ve found it! Garlic Parmesan Roasted Broccoli is simple to make and full

- 2 ripe avocados, pitted and peeled - 1/2 cup unsweetened cocoa powder - 1/2 cup maple syrup (adjust to taste) - 1/4 cup almond milk (or any plant-based milk) - 1 teaspoon vanilla extract - A pinch of sea salt - Optional garnishes: Fresh berries and mint Gathering the right ingredients is key to making this vegan avocado chocolate pudding. Use ripe avocados for the best creamy texture. Look for avocados that yield slightly when you press them. The cocoa powder brings rich chocolate flavor, while maple syrup adds sweetness. You can adjust the syrup to suit your taste. Almond milk keeps it plant-based, but feel free to swap it with any milk you prefer. Vanilla extract adds a warm note, and sea salt enhances all the flavors. Don’t forget the optional garnishes! Fresh berries and mint make your dish look and taste even better. You can find the complete recipe above for all the details! - Step 1: Combine ingredients in the blender. Start by adding the ripe avocados, cocoa powder, maple syrup, almond milk, vanilla extract, and sea salt. This blend creates a rich taste that you will love. - Step 2: Blend until smooth and creamy. Turn on your blender and mix the ingredients. Stop to scrape down the sides if needed. You want a silky texture. - Step 3: Adjust sweetness and blend again. Taste your pudding. If it's not sweet enough, add more maple syrup. Blend again to mix it well. This step makes it just right for you. - Step 4: Transfer to serving bowls. Once smooth, scoop the pudding into individual bowls. This makes it easy for serving. - Step 5: Cover and refrigerate. Cover the bowls with plastic wrap. This keeps the pudding fresh and helps it chill. Place them in the fridge for at least 30 minutes. The full recipe shows how simple it is to create this vegan delight. Enjoy the creamy texture and rich flavor! - Use ripe avocados for the best flavor. - Adjust the sweetness to your liking. - Ensure a smooth texture by blending thoroughly. Using ripe avocados is key. They offer a rich taste and creamy texture. Look for avocados that give slightly when you press them. If they feel hard, wait a few days. A perfectly ripe avocado will make your pudding shine. Sweetness is personal. Start with 1/2 cup of maple syrup. After blending, taste your pudding. If you want more sweetness, add a bit more syrup. Blend again until it's just right. For the best texture, blend your ingredients well. I recommend stopping once to scrape down the sides. This helps mix everything evenly. You want a pudding that is silky, not chunky. - Presentation ideas with garnishes. - Pairing with fruits or whipped coconut cream. When serving, think about presentation. Top your pudding with fresh berries. A sprig of mint adds a nice touch. This makes your dish look fancy and inviting. You can also pair it with whipped coconut cream. The lightness of the cream balances the rich pudding. Fresh fruits like strawberries or bananas work well, too. They add flavor and color. Enjoy this delightful treat chilled for the best experience. {{image_2}} You can make this pudding even more fun with a few tweaks. Here are my favorite flavor variations: - Add a pinch of cayenne for a spicy kick: This small change can make your pudding exciting. The heat from the cayenne balances the sweetness of the chocolate. Just a pinch goes a long way! - Try different plant-based milks for varied taste: Almond milk is great, but you can use oat, soy, or coconut milk too. Each milk brings its unique taste and creaminess. Experiment to find your favorite! - Incorporate nut butter for added richness: Adding a scoop of almond or peanut butter makes the pudding even creamier. It also adds a nutty flavor that pairs well with chocolate. Plus, it gives a protein boost! I know some people have dietary needs. Here are some easy modifications to make this pudding fit for everyone: - Nut-free options using different milk: If you need a nut-free option, use oat or soy milk instead of almond milk. Both are creamy and work well in this recipe. - Sugar-free substitutions for maple syrup: If you want to cut sugar, you can swap maple syrup for a sugar-free sweetener. Stevia or monk fruit sweetener can work well, keeping the pudding sweet without the sugar. These variations and modifications allow you to enjoy Vegan Avocado Chocolate Pudding in many ways! Check the full recipe for all the details. To keep your Vegan Avocado Chocolate Pudding fresh, store it in the fridge. Use an airtight container for the best results. This will keep the pudding cool and safe to eat for up to three days. If you notice any browning, don't worry. The taste will still be great. To prevent oxidation, cover the surface directly with plastic wrap. This keeps air away from the pudding. You can also press the wrap down onto the pudding. This method helps maintain its rich color and creamy texture. You can freeze your Vegan Avocado Chocolate Pudding for later enjoyment. To do this, transfer the pudding into freezer-safe containers. Leave some space at the top to allow for expansion. This pudding can last up to three months in the freezer. When you are ready to eat it, thaw the pudding in the fridge overnight. After thawing, give it a good stir to restore its creamy texture. If it seems too thick, mix in a little almond milk to make it smooth again. Enjoy your delicious treat anytime! Is Vegan Avocado Chocolate Pudding healthy? Yes, it is very healthy! This pudding has good fats from avocados. It is also rich in fiber and nutrients. The cocoa powder adds antioxidants too. This dessert is a smart choice for a sweet treat. How long does it last in the fridge? This pudding lasts about three days in the fridge. Make sure to keep it in a sealed container. Covering it helps keep it fresh and tasty. Can I make this pudding ahead of time? Yes, you can make this pudding ahead of time. It actually tastes better after chilling. Just store it in the fridge for a few hours or overnight before serving. What can I use instead of almond milk? You can use any plant-based milk you like. Soy milk, oat milk, or coconut milk work well. Choose one that fits your taste or diet. How do I know when the avocados are ripe? Ripe avocados feel slightly soft when you squeeze them gently. The skin should also be dark green or almost black. Avoid avocados that feel very mushy or have dark spots. Can I add protein powder to this recipe? Yes, you can! Adding protein powder is a great way to boost nutrition. Just mix in a scoop while blending. Make sure to adjust sweetness if needed. What is the best way to serve leftovers? The best way to serve leftovers is cold. Spoon the pudding into bowls and add fresh fruit or nuts on top. This adds a nice crunch and flavor. This blog post showed how to make a tasty vegan avocado chocolate pudding. We covered the simple ingredients, step-by-step instructions, and helpful tips. I shared ideas for variations and storage options, too. This pudding is not only easy to make but also healthy and delicious. You can adjust flavors to fit your taste. Enjoy experimenting with this fun recipe! It's a guilt-free dessert you can love and share.

Vegan Avocado Chocolate Pudding Rich and Creamy Delight

Imagine enjoying a rich and creamy dessert that’s healthy too! Vegan Avocado Chocolate Pudding is just that, blending smooth avocado

For the Honey Sriracha Chicken Skewers, you will need: - 1 lb chicken breast, cut into 1-inch cubes - 1/4 cup honey - 1/4 cup Sriracha sauce - 2 tablespoons soy sauce - 2 tablespoons olive oil - 1 tablespoon garlic, minced - 1 tablespoon ginger, minced - Salt and pepper to taste - 1 lime, juiced - Fresh cilantro, for garnish - Wooden or metal skewers These ingredients work together to create a sweet and spicy flavor that makes this dish so enjoyable. You can mix things up with these alternatives: - Use chicken thighs instead of chicken breast for a juicier bite. - Substitute maple syrup for honey if you want a vegan option. - Try a different hot sauce if you want to change the spice level. - Coconut aminos can replace soy sauce for a gluten-free option. - Use garlic powder instead of fresh garlic if that’s what you have on hand. These substitutions can help you tailor the dish to your taste or dietary needs. Using fresh ingredients matters. Fresh chicken makes your skewers tender and juicy. Fresh garlic and ginger boost the flavor and aroma. Lime juice adds a zesty kick that brightens the dish. When you choose fresh, you ensure the best taste. It can truly elevate your dining experience and make the meal special. This focus on freshness is key to crafting great dishes, and it shows in every bite of your Honey Sriracha Chicken Skewers. For the full recipe, check out the detailed instructions. To make the marinade, grab a large mixing bowl. Combine the honey, Sriracha sauce, soy sauce, olive oil, minced garlic, minced ginger, and lime juice. Stir everything well to blend the flavors. This sweet and spicy mix will coat the chicken and bring it to life. Next, add your chicken cubes to the marinade. Make sure every piece gets a good coating. This step is key for flavor. Cover the bowl with plastic wrap and place it in the fridge. Let the chicken soak for at least 30 minutes. If you can, let it marinate for up to 2 hours for even more flavor. When you're ready, preheat your grill or grill pan over medium-high heat. If you're using wooden skewers, soak them in water for 20 minutes first. This helps prevent burning. Now, thread the marinated chicken onto the skewers. Leave a little space between each cube for even cooking. Season them with salt and pepper. Place the skewers on the hot grill. Cook them for about 5-7 minutes on one side. Then, flip them and grill for another 5-7 minutes. You want the chicken to reach an internal temperature of 165°F (75°C). In the last minute of grilling, brush some extra marinade on top for added flavor. Just make sure it hasn’t touched raw chicken. Once done, take the skewers off the grill. Let them rest for a few minutes before serving. Garnish with fresh cilantro for a nice touch. For the full recipe, you can refer to the earlier section. Grilling chicken can be simple if you follow a few key steps. First, ensure your grill is hot before placing the skewers on it. This helps the chicken sear well and keeps it juicy. Also, avoid flipping the skewers too often. Let them cook for a few minutes on each side. This allows the chicken to get those nice grill marks and a good flavor. Lastly, always check the chicken’s internal temperature. It should reach 165°F (75°C) for safety. The beauty of Honey Sriracha Chicken Skewers is their flexibility with heat. If you love spice, use more Sriracha in the marinade. For a milder taste, reduce the Sriracha and add more honey. You can also add a pinch of cayenne pepper for extra heat or a splash of lime juice for tang. Taste the marinade before adding the chicken. This way, you can adjust the spice to your liking. Marinating is key to making your chicken tasty. For best results, let the chicken sit in the marinade for at least 30 minutes. You can go up to 2 hours for more flavor. If you want, you can try different herbs or spices in your marinade. Fresh cilantro or basil can add a nice touch. Remember to save some marinade to brush on the skewers while grilling. This adds even more flavor without risking food safety. For the full recipe, check the earlier section. {{image_2}} If you want a plant-based option, try honey sriracha tofu skewers. Use firm tofu instead of chicken. Cut the tofu into 1-inch cubes. Marinate it just like the chicken. This gives you a tasty and spicy meal. Grill the tofu until it gets nice grill marks. The flavors blend well, and it’s a great choice for vegans or anyone wanting to reduce meat. You can also add vegetables to your skewers. Bell peppers, onions, and zucchini add color and flavor. Cut them into bite-sized pieces. Mix them with the chicken or tofu in the marinade. Skewering them together makes it a fun dish. The veggies soak up the honey sriracha flavor, making every bite delicious. Plus, they add nutrients to your meal. Feel free to try other sauces. For a sweeter taste, add some teriyaki sauce to the marinade. If you want more heat, use a spicy chili sauce. You can even mix in some peanut sauce for a nutty twist. Each sauce gives a new flavor to the skewers. Play around with the sauces to find your favorite blend. The full recipe includes options to help you get started. Storing leftover Honey Sriracha Chicken Skewers is easy. Place them in an airtight container. Make sure to cool them first. You can keep them in the fridge for up to three days. If you have extra sauce, store that separately. This keeps the chicken from getting too soggy. Reheating is simple. You can use a microwave, oven, or grill. If using a microwave, place the skewers on a plate and cover with a damp paper towel. Heat in 30-second intervals until warm. For the oven, preheat to 350°F (175°C). Place skewers on a baking sheet and heat for 10-15 minutes. If you use the grill, heat for about 5 minutes. This keeps the chicken juicy and tasty. Freezing is a great option if you want to save skewers for later. First, let them cool completely. Then, wrap each skewer in plastic wrap. Place them in a freezer bag, removing as much air as possible. Label the bag with the date. You can freeze them for up to three months. When you’re ready to eat, thaw them overnight in the fridge. Reheat as mentioned above. Enjoy your Honey Sriracha Chicken Skewers later without any fuss! You can serve Honey Sriracha Chicken Skewers with many sides. Here are some great options: - Jasmine rice for a fluffy base. - A fresh salad with crunchy veggies. - Grilled corn on the cob for sweetness. - Roasted potatoes for a hearty side. - Sliced cucumbers for a refreshing bite. Each side adds flavor and texture. You can mix and match to find your favorite combo. I recommend marinating the chicken for at least 30 minutes. This time lets the flavors soak in. For a deeper taste, you can marinate for up to 2 hours. Just keep it in the fridge during this time. The longer you marinate, the better the chicken will taste. Yes, you can use other proteins! Here are some great options: - Shrimp cooks quickly and absorbs the marinade well. - Tofu is a great plant-based choice. - Pork tenderloin gives a nice twist. - Beef cubes add a rich flavor. Make sure to adjust cooking times based on the protein you choose. Each will bring its own unique taste to the skewers. Try different proteins to find your favorite! For the full recipe, check out the section above. This blog shared key tips for making delicious Honey Sriracha Chicken Skewers. We discussed ingredients, step-by-step instructions, and smart grilling tips. You can also try different flavors with tofu or veggies. Storing leftovers is easy, and reheating keeps them tasty. With these ideas, you'll impress anyone at your next cookout. Enjoy your grilling and make the most of your skewers!

Honey Sriracha Chicken Skewers Savory and Simple Meal

Get ready to fire up your grill for a tasty treat: Honey Sriracha Chicken Skewers! This dish is not just

- 1 lb ground turkey or chicken - 4 cups coleslaw mix (shredded cabbage and carrots) - 3 green onions, sliced - 2 cloves garlic, minced For a hearty base, I love using ground turkey or chicken. Both options blend perfectly with the fresh crunch of the coleslaw mix. It gives that authentic egg roll flavor without the wrap. Green onions and garlic add a nice punch to the dish. - 1 tablespoon fresh ginger, grated - 2 tablespoons soy sauce (low sodium) - 1 tablespoon sesame oil - 1 teaspoon rice vinegar To elevate the taste, I add fresh ginger. It gives warmth and depth to the dish. Soy sauce brings that savory umami that makes it feel like comfort food. Sesame oil adds a nutty flavor, while rice vinegar brings a hint of tanginess. - Salt and pepper to taste - Sesame seeds for garnish (optional) Finally, I season with salt and pepper to balance the flavors. Sesame seeds are optional, but they add a lovely crunch and look great on top. For the full recipe, you can check out the details above. First, gather all your ingredients. You need 1 pound of ground turkey or chicken. Measure out 4 cups of coleslaw mix, which is a blend of shredded cabbage and carrots. This adds crunch and color. Next, chop 3 green onions and mince 2 cloves of garlic. Grate 1 tablespoon of fresh ginger for a zesty kick. Now, let's cook! Heat 1 tablespoon of sesame oil in a large skillet over medium heat. Once hot, add the ground turkey or chicken. Break it up with a spatula as it cooks. Cook for about 5 to 7 minutes until it browns completely. After the meat is done, stir in the minced garlic and grated ginger. Cook for an additional minute until you smell their wonderful aroma. Now, add the coleslaw mix and sliced green onions to the skillet. Stir well and let it cook for about 5 to 6 minutes. You want the veggies to be tender but still crisp. It's time to season! Drizzle 2 tablespoons of low-sodium soy sauce and 1 teaspoon of rice vinegar over the mixture. Stir everything together to coat the ingredients evenly. Add salt and pepper to taste. Cook for an extra 2 to 3 minutes to let the flavors meld. When done, remove it from the heat. Let it cool slightly. For a lovely presentation, serve it in bowls. Garnish with extra sliced green onions and a sprinkle of sesame seeds for a nice crunch. Enjoy your Easy Egg Roll in a Bowl hot! For the full recipe, check the earlier section. To make your Easy Egg Roll in a Bowl just right, follow these tips. - Best practices for sautéing: Use medium heat when sautéing. This helps the meat cook evenly. Make sure to stir often to prevent sticking and burning. A non-stick skillet works best for this dish. - How to prevent overcooking vegetables: Add your veggies after the meat is browned. Stir them in for about 5-6 minutes. You want them tender but still crisp. Keep an eye on them. You can easily change the flavor of your Easy Egg Roll in a Bowl. - Adding heat with chili flakes: If you like spice, sprinkle in some chili flakes. Start with a small amount and adjust to your taste. - Using different proteins or veggies: Swap the ground turkey for chicken, beef, or tofu. You can also add bell peppers, snap peas, or mushrooms. Get creative with what you have! Make your meal even better with these ideas. - Complementary side dishes: Serve with rice or steamed dumplings. A side salad with sesame dressing pairs well, too. - Storage and reheating instructions: Store leftovers in an airtight container. They last for up to 3 days in the fridge. Reheat in the microwave or on the stove. Add a splash of soy sauce to refresh the flavors. For the full recipe, check out the earlier section. Enjoy cooking! {{image_2}} If you want a lighter dish, consider substituting ground turkey for tofu. Tofu soaks up flavors well and is a great source of protein. Simply crumble the tofu into the skillet and cook until slightly golden. Using low-carb vegetables is another smart choice. Swap coleslaw mix for zucchini noodles or cauliflower rice. Both options keep the dish crunchy and fresh while cutting carbs. You can give your meal an Asian flair by adding soy sauce or hoisin sauce. These sauces boost flavor and give a nice depth to your dish. Try adding a splash of rice wine vinegar for a kick. Creating a fusion recipe is fun too! Mix in some Italian herbs or spices like oregano. It creates a unique taste that surprises your palate. This twist can make your egg roll in a bowl feel new and exciting. Making this dish in bulk saves time. Cook a double batch and enjoy it for lunch or dinner throughout the week. It stays fresh and tasty in the fridge. Freezing portions is also a great idea. Pack them in airtight containers. When you need a quick meal, just thaw and reheat. It’s easy and convenient, letting you enjoy your favorite meal anytime. For the full recipe, check out the details above. To keep your Easy Egg Roll in a Bowl fresh, store it correctly. First, let it cool. Then, place it in an airtight container. It can last in the fridge for about 3 to 4 days. Make sure to eat it within this time frame for the best taste. If you want to save some for later, freezing is a great option. Divide the dish into single servings and put them in freezer-safe containers. This way, you can enjoy it later without losing flavor. When you're ready to eat, thaw the bowl in the fridge overnight. Reheat it in a skillet or microwave until hot. Check for signs that your dish has gone bad. If you see mold or a strange smell, it’s time to throw it away. If it looks dry or discolored, it’s best to discard it. Store it properly to keep it fresh longer. To serve Easy Egg Roll in a Bowl, I like to use deep bowls. This adds a nice touch. Start by scooping the mixture in. Then, top it with extra sliced green onions and a sprinkle of sesame seeds. This not only looks great but adds extra flavor and crunch. Serve it hot for the best taste. Yes, you can! This recipe is flexible. You can swap ground turkey or chicken for ground beef, pork, or even shrimp. If you use beef or pork, cook them a bit longer to ensure they are done. Check the meat with a thermometer. It should reach 160°F for safety. Shrimp cooks faster, so just a few minutes will do. Making this dish vegetarian or vegan is easy! You can replace the meat with tofu or tempeh. Just cut them into small pieces and cook them the same way. For a vegan option, ensure the soy sauce is plant-based. You can also use coconut aminos for a soy-free version. Add in extra veggies like bell peppers or mushrooms for more taste. You now have a solid guide to making Easy Egg Roll in a Bowl. We covered key ingredients like ground turkey, coleslaw mix, and fresh flavors. You learned step-by-step instructions, helpful tips, and creative variations. Remember, you can customize the dish with different proteins or flavors. It’s easy to make and perfect for meal prep. Keep your leftovers fresh by storing them properly. I hope this recipe inspires you to cook and enjoy a tasty meal!

Easy Egg Roll in a Bowl Quick and Tasty Meal

Looking for a quick and tasty meal? Try my Easy Egg Roll in a Bowl! This dish combines ground turkey

- 1 cup frozen spinach, thawed and drained - 1 cup canned artichoke hearts, drained and chopped - 1 cup cream cheese, softened - ½ cup sour cream - ½ cup mayonnaise - 1 cup shredded mozzarella cheese - ½ cup grated Parmesan cheese - 2 cloves garlic, minced - 1 teaspoon onion powder - ½ teaspoon red pepper flakes (optional for spice) - Salt and pepper to taste When making Creamy Spinach Artichoke Dip, each ingredient plays a key role. The frozen spinach gives a nice green color and earthy taste. Canned artichoke hearts add a unique flavor that you can't resist. Cream cheese brings a rich, creamy base. Sour cream and mayonnaise enhance the dip's smooth texture. Cheeses like mozzarella and Parmesan not only add flavor but also create a lovely, gooey melt. Garlic and onion powder bring depth to the dip. Red pepper flakes give a hint of heat, which you can adjust to your liking. Don’t forget to add salt and pepper to make all the flavors pop! - Alternatives for cream cheese: You can use Greek yogurt or a nut-based cream cheese. - Non-dairy options for sour cream and mayonnaise: Use cashew cream or coconut yogurt. - Using fresh spinach or artichokes: Fresh spinach can be sautéed, and fresh artichokes can be cooked and chopped for a more vibrant taste. These substitutions let you enjoy the dip while catering to different diets. They help keep the dip tasty, no matter the choice! For the full recipe, refer to the section above. 1. Preheat your oven to 375°F (190°C). This helps the dip cook evenly. 2. Grab a medium mixing bowl. Combine the softened cream cheese, sour cream, and mayonnaise. Mix until smooth and creamy. This base is key for a rich dip. 1. Now, add in the thawed, drained spinach and chopped artichoke hearts. These add tasty flavor and texture. 2. Stir in minced garlic, onion powder, and optional red pepper flakes. These seasonings give the dip a nice kick. 3. Finally, add the shredded mozzarella and grated Parmesan cheese. Mix well until everything is combined. This blend makes the dip cheesy and delicious. 1. Transfer the dip mixture into a baking dish. Spread it evenly across the dish. This ensures even cooking. 2. Bake in the preheated oven for 25 to 30 minutes. Look for a bubbly surface that is lightly golden on top. This shows your dip is ready. 3. Once done, remove it from the oven and let it cool slightly before serving. Enjoy your warm, creamy spinach artichoke dip! For exact details, you can check the Full Recipe. To make your dip creamy, use softened cream cheese. This helps it blend well. Mix it with sour cream and mayonnaise for a smooth base. If the dip feels too thick, add a little milk. This keeps it creamy without making it watery. To avoid a watery dip, drain the spinach and artichokes well. Squeeze out excess moisture from the spinach. Use a towel if needed. This step is key to keeping your dip thick and rich. Adding seasonings can elevate your dip. Try garlic powder or a sprinkle of Italian herbs. You can also toss in fresh herbs like basil or parsley for a fresh touch. Incorporating different cheeses can change the flavor. Mixing in some cheddar or cream cheese can add depth. Experiment to find your favorite blend. Each cheese brings a unique taste to the mix. Serve your creamy spinach artichoke dip warm. Pair it with crispy tortilla chips or fresh veggie sticks. Sliced baguette also works well for dipping. For a party, present the dip in an attractive dish. Arrange your dippers around the dip for a colorful spread. Garnish with extra Parmesan or fresh spinach leaves for a lovely finish. These small touches make a big impact! For the full recipe, check out the details above. {{image_2}} You can make a lighter version of creamy spinach artichoke dip. Use low-fat cream cheese, sour cream, and mayonnaise. This keeps the flavors while cutting calories. Adding more veggies boosts nutrition. Try mixing in chopped bell peppers or diced zucchini. These add color and crunch. You can also use fresh spinach instead of frozen for extra vitamins. Want a little heat? Make a spicy spinach artichoke dip! Add more red pepper flakes for a kick. You can also mix in jalapeños for extra spice. Different cheese blends can change the taste. Try mixing in smoked gouda or pepper jack cheese. These cheeses add depth and a unique twist to the classic flavor. For a Mediterranean flair, add sun-dried tomatoes and olives. This twist gives a fresh taste that surprises your guests. You can also sprinkle in fresh herbs like basil or oregano. During the holidays, consider adding festive ingredients. Cranberries or nuts can create a unique dip. These additions make it perfect for holiday gatherings. Check the full recipe for more ideas! To keep your creamy spinach artichoke dip fresh, store it in an airtight container. Place it in the fridge within two hours of cooking. This helps keep the dip tasty and safe. You can freeze the dip too. Just use a freezer-safe container and leave some space at the top. The dip can last up to three months in the freezer. When you want to eat it, thaw it in the fridge overnight before reheating. Reheating the dip is easy. The best method is in the oven. Preheat your oven to 350°F (175°C). Place the dip in an oven-safe dish. Heat it for about 20 minutes, or until it’s warm. You can also use the microwave for quick reheating. Heat it in short bursts, around 30 seconds, stirring in between. This keeps the dip smooth and creamy. Your creamy spinach artichoke dip lasts about three to four days in the fridge. Always check for signs of spoilage. If you see any mold or if it has an off smell, it’s best to throw it away. Keeping track of how long it’s been in the fridge helps ensure you enjoy every bite of this delicious dip. Yes, you can prepare this dip in advance. Make it up to a day before your event. Store it in an airtight container in the fridge. When ready to serve, simply bake it as directed. This saves you time and lets the flavors meld. You have many options for dippers. Try these: - Tortilla chips - Sliced carrots - Cucumber rounds - Toasted baguette slices - Pita chips Pairing it with a fresh salad or veggie platter adds a nice touch. Absolutely! You can make this dip fit various diets: - For gluten-free, use gluten-free dippers. - For vegan, swap cream cheese with cashew cheese and sour cream with coconut yogurt. - For low-carb, serve with veggies instead of chips. These changes keep the dip tasty while meeting your needs. For the complete recipe and details, check the Full Recipe above. In this blog, I shared a simple recipe for creamy spinach artichoke dip. You learned about the key ingredients, how to prepare them, and baking instructions. I also included tips for perfecting texture and flavor. The variations offer different twists and healthy options. If you follow the storage tips, you can enjoy leftovers later. Keep this recipe handy for gatherings or a cozy night in. Experiment and make it your own! Enjoy your delicious dip!

Creamy Spinach Artichoke Dip Irresistible Delight

Are you ready to dive into the world of creamy, cheesy goodness? This Creamy Spinach Artichoke Dip is your answer

- 1 cup dried green or brown lentils, rinsed - 1 medium onion, finely chopped - 1 red bell pepper, finely diced - 1 carrot, grated - 4 whole wheat burger buns - Fresh parsley, for garnish (optional) These fresh ingredients bring color and taste to your vegan lentil sloppy joes. The lentils are the heart of the dish. They pack protein and fiber. The onion, bell pepper, and carrot add sweetness and crunch. - 2 tablespoons olive oil - 2 cloves garlic, minced - 2 tablespoons tomato paste - 1 cup vegetable broth - 2 tablespoons maple syrup - 1 tablespoon apple cider vinegar - 1 tablespoon Dijon mustard - 1 teaspoon smoked paprika - 1/2 teaspoon chili powder - Salt and pepper to taste These pantry staples create a rich and tasty sauce. Olive oil helps cook the veggies. Garlic adds a wonderful aroma. Tomato paste gives depth, while the broth keeps everything moist. - Sliced jalapeños for heat - Avocado slices for creaminess - Pickles for tang - Vegan cheese for extra richness Feel free to mix and match with these garnishes. They let you customize your sloppy joes. You can adjust the flavors to your liking. For the full recipe, visit the link provided. First, rinse 1 cup of dried green or brown lentils in water. This step helps remove any dirt. Next, place the lentils in a medium saucepan. Add 3 cups of water to the pan. Bring the water to a boil. Once boiling, reduce the heat to low. Let the lentils simmer uncovered for 15 to 20 minutes. You want them tender but not mushy. After cooking, drain any excess water and set the lentils aside. While the lentils cook, heat 2 tablespoons of olive oil in a large skillet over medium heat. Add 1 medium chopped onion. Sauté the onion for about 3 to 4 minutes. You want it to become soft and clear. Then, add 2 minced garlic cloves, 1 finely diced red bell pepper, and 1 grated carrot. Cook these vegetables together for another 5 minutes. Stir them so they don’t stick. They should be soft and fragrant. After the vegetables soften, add the cooked lentils to the skillet. Then, mix in 2 tablespoons of tomato paste. Pour in 1 cup of vegetable broth. Add 2 tablespoons of maple syrup for sweetness. Next, add 1 tablespoon of apple cider vinegar and 1 tablespoon of Dijon mustard for tang. Sprinkle in 1 teaspoon of smoked paprika and 1/2 teaspoon of chili powder. Season with salt and pepper to taste. Stir everything well to combine. Bring the mixture to a gentle simmer. Let it cook for about 10 minutes, stirring occasionally. If the mix gets too thick, add a little more vegetable broth. Taste it and adjust the seasoning if needed. While it simmers, toast the whole wheat burger buns to your liking. To serve, spoon the lentil mix onto the bottom half of each bun. If you like, top with fresh parsley. Cover with the other half of the bun. Enjoy! For the full recipe, check the details above. When making vegan lentil sloppy joes, avoid overcooking the lentils. They should be tender but not mushy. Use fresh vegetables for the best flavor. Don't skip the onion and garlic; they add depth. If your mixture is too thick, add more vegetable broth. Taste as you go, adjusting salt and spices as needed. To boost the flavor, try adding smoked paprika. It gives a nice smoky touch. A splash of soy sauce can also add umami. For a sweet twist, use a little more maple syrup. Fresh herbs like cilantro or parsley can brighten the dish. Serve with pickles on the side for extra crunch. For a great texture, mash some lentils slightly. This adds creaminess without losing the bite. If you prefer a chunkier mix, keep some lentils whole. Don't forget to toast the buns! A crispy bun holds the filling better. For a fun twist, try using lettuce wraps instead of buns. Check out the Full Recipe for more details. {{image_2}} To add some heat, use cayenne pepper or hot sauce. Start with a pinch, then taste. You can always add more if you like it spicy. I often mix in chopped jalapeños for extra flavor. The heat pairs well with the sweet maple syrup in the recipe. If you need a gluten-free meal, swap out the whole wheat buns. Look for gluten-free burger buns at your local store. You can also serve the lentil mixture over rice or quinoa. Both options taste great and still give you that hearty feel. You can sneak in more veggies for added nutrition. Try diced zucchini or mushrooms. They blend well with the lentils and add more texture. Spinach is another great choice; add it at the end to wilt it down. These additions make the dish even more colorful and tasty. For the full recipe, check out the link above. Store any leftover lentil sloppy joe mixture in an airtight container. Keep it in the fridge for up to four days. Make sure to let the mixture cool before sealing. This helps to avoid steam build-up, which can lead to sogginess. To reheat, simply place the lentil mixture in a skillet over medium heat. Stir occasionally until it warms through. You can add a splash of vegetable broth if it seems dry. Alternatively, you can microwave it in a bowl. Heat in 30-second bursts, stirring in between, until hot. You can freeze the lentil mixture for later use. Let it cool completely, then transfer it to a freezer-safe container. It’s best to store it in single portions for easy use. The mixture can last up to three months in the freezer. When ready to eat, thaw it in the fridge overnight before reheating. For the full recipe, check out the details above. Yes, you can use other lentils like red or black. Green or brown lentils hold their shape well. Red lentils cook faster and become softer. Black lentils add a nice color and texture. Each type will change the dish slightly. These Sloppy Joes last in the fridge for about 4 days. Store them in an airtight container. The flavors improve after a day or two. If you want to keep them longer, freeze the lentil mixture. It can last for up to 3 months in the freezer. You can serve Sloppy Joes with many sides. I love pairing them with sweet potato fries. You can also try a fresh salad or coleslaw. Pickles add a nice crunch and tang. Enjoy them with your favorite chips for a fun meal. Yes, this recipe is very kid-friendly. Kids love the sweet and savory flavors. The lentils provide great nutrition without being hard to eat. You can adjust the spice level to suit their taste. Serve them on whole wheat buns for a healthy twist. You can find the full recipe above. In this post, we covered how to make Vegan Lentil Sloppy Joes. We discussed fresh ingredients, pantry staples, and optional garnishes. You learned step-by-step cooking instructions and tips for better flavor and texture. We also shared variations to suit different diets. Finally, we provided storage info and answers to common questions. These Sloppy Joes are not just tasty; they are easy and fun to make. Enjoy your cooking!

Easy Vegan Lentil Sloppy Joes Flavorful and Quick Meal

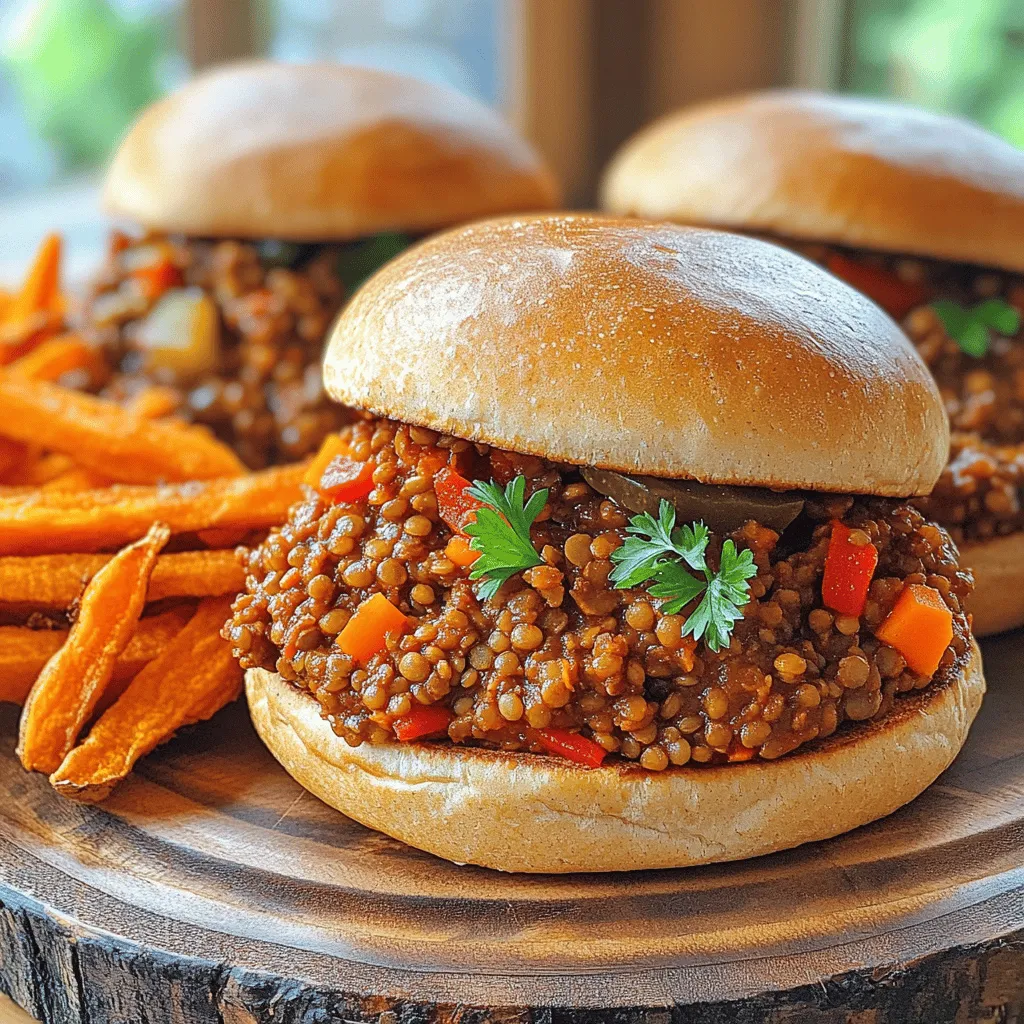
Looking for a quick and tasty meal? You’re in the right spot! My Easy Vegan Lentil Sloppy Joes are perfect

Older posts
Newer posts
← Previous Page1 … Page68 Page69 Page70 … Page84 Next →

dsad

© 2026 juliesdish • Built with GeneratePress

Our Policies

  • Copyright Policy
  • Cookie Policy
  • GDPR Policy
  • Privacy Policy
  • Disclaimer
  • Terms Of Use

More Information

  • Home
  • About
  • Contact
  • Appetizers
  • Dessert
  • Dinner
  • Drinks
©2026, juliesdish About Back To Top