Skip to content
DisclaimerTerms Of UseGDPR PolicyCookie Policy

juliesdish

  • Home
  • Drinks
  • Appetizers
  • Dinner
  • Dessert
  • About
  • Contact
  • Privacy Policy
DisclaimerTerms Of UseGDPR PolicyCookie Policy

NO-ING-IMG

- Ripe mangoes: You need 2 ripe mangoes. Look for mangoes that feel soft when you squeeze them gently. Dice them into small cubes to make them easy to eat. - Fresh blackberries: Use 1 cup of fresh blackberries. Choose plump, shiny blackberries. Store them in the fridge. Do not wash them until you are ready to use them. - Additional fruits: Add 1 cup of strawberries, hulled and sliced. You can also include 1 cup of blueberries. These fruits add great color and taste to your salad. - Dressing ingredients: For the dressing, gather 2 tablespoons of honey and 2 tablespoons of fresh lime juice. You will need 1 tablespoon of fresh mint, finely chopped, and a pinch of sea salt. This mix brings out the flavors of the fruit. For the full recipe, check out the earlier section. Start by combining the fruits. In a large mixing bowl, add diced mangoes, fresh blackberries, sliced strawberries, and blueberries. Make sure to use ripe mangoes for the best taste. They should feel slightly soft but not mushy. Next, prepare the dressing. In a small bowl, whisk together honey, fresh lime juice, chopped mint, and a pinch of sea salt. This dressing adds a sweet and tangy flavor. You want it to blend well, so whisk until smooth. Now, toss the salad gently. Drizzle the honey-lime mixture over the fruit. Mix gently with a spatula or wooden spoon. Be careful not to mash the blackberries. Let the fruit salad sit for about 10 minutes. This resting time lets the flavors blend together. The honey-lime dressing soaks into the fruits, making each bite tastier. When ready to serve, consider presentation. A large, colorful bowl works well. You can also use individual mason jars for a fun twist. Garnish with extra mint leaves on top. This adds a nice pop of color and freshness. You can find the full recipe for more details. To make a great mango blackberry fruit salad, picking ripe fruits is key. Look for mangoes that have a slight give when you press them. They should smell sweet and fragrant. The skin can have a mix of green and yellow. Avoid mangoes with dark spots or wrinkles. For blackberries, choose plump, shiny berries that are deep black. They should not be squished or moldy. Fresh blackberries keep well in the fridge for a few days. To boost the flavor of your salad, think about adding more fruits. Sliced strawberries or blueberries add a nice touch. You can mix in a splash of orange juice for a tropical flair. For a zesty kick, try adding a bit of grated ginger. This will make your fruit salad pop with flavor. If you want a sweeter taste, drizzle a bit more honey over the top. For a fun twist, serve the fruit salad in individual mason jars. This makes it easy to grab for picnics or parties. You can also layer the fruits in a clear bowl to show off the colors. Top it with extra mint leaves for a fresh look. Another idea is to serve the salad on a large platter with lime wedges on the side. This way, guests can add lime juice to their taste. For the full recipe, check out the details above. {{image_2}} You can add a tropical twist to your mango blackberry fruit salad. Pineapple and kiwi work great here. They bring a fresh taste and extra sweetness. Just chop the pineapple and kiwi into small pieces. Toss them in with the mangoes and blackberries. The bright colors make the salad even prettier! For a berry medley, try adding raspberries or cranberries. Raspberries are soft and sweet, while cranberries add a tart bite. Both berries mix well with mangoes and blackberries. Just be sure to rinse them before adding. This mix brings a variety of flavors to your bowl! Want some crunch? Incorporate nuts or seeds into your fruit salad. Sliced almonds or chopped walnuts add texture and flavor. You can also use sunflower seeds for a nut-free option. Sprinkle them on top right before serving. This gives your salad a delightful crunch! Try out these variations to keep your salad exciting. You can find the full recipe to enjoy all the flavors! To keep your mango blackberry fruit salad fresh, store it in an airtight container. This helps seal in moisture and keep out air. Place it in the fridge right after you make it. Avoid leaving it at room temperature for too long. The cold will help maintain the fruit’s bright colors and crisp texture. If you have leftovers, they can last in the fridge for about two days. After that, the fruit may start to get mushy. Make sure to cover the container tightly. If the salad looks or smells off, it’s best to toss it. Remember, freshness is key to enjoying this tasty salad! Can you freeze fruit salad? I don’t recommend freezing it. The texture of the fruit changes when frozen and thawed. If you really want to freeze it, do so without the dressing. Pack the fruits in a freezer bag, and squeeze out the air. When ready to eat, thaw in the fridge overnight. Use it quickly, as it won't taste the same as fresh. For the best experience, enjoy your mango blackberry bliss salad right after making it. For the full recipe, check out the details above! Yes, you can use frozen fruits in this salad. Frozen fruits work well when fresh fruits are not available. They are picked at their peak ripeness and frozen quickly. This locks in flavor and nutrients. However, be aware that frozen fruits can release water as they thaw. To avoid a watery salad, drain excess liquid before mixing. For best results, let the fruits thaw in the fridge overnight. This keeps them firm and tasty. To prevent mango from browning, use lime juice. Lime juice acts as a natural preservative. It slows down the oxidation process. Simply squeeze fresh lime juice over the diced mango right after cutting. This keeps the fruit looking fresh and bright. Remember to mix it well with other fruits. This will help coat all the pieces evenly. While honey-lime is a classic dressing, you can try other options too. Here are some ideas: - Coconut yogurt: Adds creaminess and a hint of coconut flavor. - Orange juice: Brightens the salad with a citrusy twist. - Maple syrup: Offers a rich sweetness that pairs well with berries. - Balsamic glaze: Drizzle for a unique and tangy contrast. Yes, this salad is great for meal prep. You can prepare it a day ahead. Just store it in an airtight container. Keep the dressing separate until ready to serve. This helps the fruits stay fresh and not soggy. You can also portion it into smaller containers for easy grab-and-go snacks. It’s a healthy option to have ready for busy days! For the full recipe, check out the Mango Blackberry Bliss Salad. This blog post covered how to make a fresh fruit salad with ripe mangoes, blackberries, and other fruits. You learned to prepare the dressing and combine the ingredients simply. I shared tips for selecting the best fruits and creative serving ideas. Remember, you can customize your salad with variations like tropical twists or nutty additions. Store your salad for freshness and enjoy it anytime. With these steps, you can make a delicious fruit salad that impresses at any gathering. Enjoy making your next fruit salad!

Mango Blackberry Fruit Salad Refreshing and Healthy Treat

Looking for a refreshing and healthy treat? This Mango Blackberry Fruit Salad is just what you need! Bursting with juicy

To make a tasty no-bake key lime pie, gather these ingredients: - 1 ½ cups graham cracker crumbs - ⅓ cup granulated sugar - ⅓ cup melted butter - 1 (14-ounce) can sweetened condensed milk - ½ cup key lime juice (freshly squeezed if possible) - 1 tablespoon lime zest - 1 cup heavy whipping cream - 2 tablespoons powdered sugar - Lime slices and zest for garnish These ingredients blend to create a zesty and creamy dessert. The key lime juice adds that perfect tang, while the crust gives a nice crunch. Garnishes can make your pie look even better. Here are some options: - Lime slices - Fresh lime zest - Whipped cream dollops - Fresh mint leaves These add color and extra flavor. You can mix and match for a pretty presentation. If you don’t have a few ingredients, don’t worry! Here are some swaps you can try: - Graham cracker crumbs: Use crushed digestive biscuits or vanilla wafers. - Sweetened condensed milk: Try using coconut cream for a dairy-free option. - Heavy cream: Whip coconut cream as a substitute for a lighter version. - Key lime juice: Regular lime juice works in a pinch, but it will change the flavor slightly. These swaps can help you make the pie with what you have on hand. Remember, cooking is about being creative! For the full recipe, check out the details above. Start by gathering your ingredients for the crust. You will need: - 1 ½ cups graham cracker crumbs - ⅓ cup granulated sugar - ⅓ cup melted butter In a mixing bowl, combine the graham cracker crumbs and sugar. Stir them together until mixed well. Next, pour in the melted butter. Mix until the crumbs look like wet sand. This helps form a nice, sturdy crust. Now, take a 9-inch pie pan. Press the crumb mixture firmly into the bottom and up the sides. Use the back of a measuring cup to pack it down well. This step is important for a good texture. Once you finish, refrigerate the crust while you make the filling. For the filling, gather these ingredients: - 1 (14-ounce) can sweetened condensed milk - ½ cup key lime juice (freshly squeezed if possible) - 1 tablespoon lime zest - 1 cup heavy whipping cream - 2 tablespoons powdered sugar In a separate bowl, whisk together the sweetened condensed milk, key lime juice, and lime zest. Mix until smooth and well-combined. This mixture is what gives the pie its tangy flavor. Now, take another bowl and whip the heavy cream with an electric mixer. Beat until soft peaks form. Gradually add powdered sugar while mixing. Continue until stiff peaks form. This will make the filling light and airy. Gently fold the whipped cream into the lime mixture. Do this slowly to avoid deflating the whipped cream. The filling should be smooth and fluffy. Next, pour the key lime filling into your prepared crust. Use a spatula to smooth the top. This creates an even and nice finish. Cover the pie with plastic wrap. Refrigerate it for at least 4 hours or overnight. This waiting time helps the pie set. It also deepens the flavors. Before serving, add lime slices and zest on top for a fresh look. This gives the pie a pop of color and extra zest. Enjoy your zesty no-bake key lime pie! You can find the full recipe for more details. To get the right texture for your no-bake key lime pie, focus on the filling. The sweetened condensed milk and key lime juice create a creamy base. Make sure your heavy cream is cold. This helps it whip up nicely. Whip the cream until stiff peaks form but don’t overbeat it. Gently fold it into the lime mixture. This keeps the filling light and airy. If you’re looking for a firmer texture, let the pie chill overnight. This extra time helps it set perfectly. Making whipped cream from scratch is simple and rewarding. Start with cold heavy cream for the best results. Use a clean bowl and beaters to avoid any issues. Whip the cream on medium speed until soft peaks form. Add powdered sugar gradually. This sweetens the cream and helps it hold its shape. If you want a hint of flavor, add a splash of vanilla extract. Use this whipped cream to top your pie for a fresh touch. It’s the perfect finish that complements the tangy lime. When serving your no-bake key lime pie, think about presentation. Slice it into wedges and place each slice on a plate. A dollop of whipped cream on each slice adds creaminess. For a pop of color, top it with lime slices and zest. You can also add a sprig of mint for a fresh look. If you want to make it more fun, serve it with a scoop of vanilla ice cream. This pairs well with the tart flavor of the pie. Enjoy your refreshing dessert! For more details, check the Full Recipe. {{image_2}} You can change the flavor of your no-bake key lime pie easily. Try using coconut for a tropical twist. Simply replace some of the key lime juice with coconut cream. This change adds a creamy texture and a sweet taste. Strawberry is another great option. Blend fresh strawberries into the lime filling for a fruity flavor. This adds a bright color and a pop of sweetness. The crust can change the whole pie vibe. Instead of a graham cracker crust, try an Oreo crust. Crush Oreos and mix them with melted butter, just like the graham cracker version. This will give you a rich chocolatey taste. If you want something nutty, use ground almonds or walnuts. Mix them with a bit of butter for a crunchy crust. You can make this pie a bit healthier with simple swaps. Use Greek yogurt instead of sweetened condensed milk for a tangy twist. This swap lowers the sugar and adds protein. You can also use honey or maple syrup instead of granulated sugar. It will still taste great but with fewer refined sugars. For a low-calorie option, use light whipped cream to keep that fluffy texture. For the full recipe, check out the Zesty No-Bake Key Lime Pie recipe. To store leftover pie, cover it tightly with plastic wrap. Place it in the fridge. This keeps the pie fresh and tasty for days. You can also use an airtight container. Just make sure it seals well. Enjoy your pie within three days for the best flavor. You can freeze your no-bake key lime pie, but it’s best to slice it first. Wrap each slice in plastic wrap. Then place them in a freezer-safe bag. This helps prevent freezer burn. The pie can stay frozen for up to three months. When ready to eat, thaw it in the fridge overnight. It will taste great! The key ingredients have different shelf lives. Here are some quick notes: - Graham cracker crumbs: They last for about six months when stored in a cool, dry place. - Granulated sugar: Sugar does not spoil and can last for years if kept dry. - Sweetened condensed milk: Unopened cans can last for a year. Once opened, use it within seven days. - Key lime juice: Fresh juice lasts about a week in the fridge. Bottled juice can last longer, but check the label. - Heavy whipping cream: It lasts about a week past its sell-by date if unopened. Once opened, use it within four days. For the best results, always check dates and store items properly. Enjoy your no-bake key lime pie fresh and flavorful! The best way to squeeze key limes is by using a citrus juicer. First, roll the limes on the counter. This helps to break down the cells inside. Then cut each lime in half and press it down in the juicer. This method gives you the most juice. You can also use your hands. Just be careful not to get any seeds in your juice. Fresh key lime juice makes a big difference in flavor! Yes, you can use bottled lime juice if you need to. However, fresh key lime juice tastes better. Bottled juice lacks the bright flavor that fresh juice has. If you use bottled juice, choose a brand with no additives. This way, you can get a more natural taste. The pie will last about 3 to 5 days in the fridge. Make sure to cover it well with plastic wrap. This keeps the pie fresh and prevents it from drying out. If you add toppings like whipped cream, it may not last as long. Always check for any changes in smell or texture before eating. Enjoy your pie while it's fresh for the best taste! This blog post covered everything you need for the perfect key lime pie. We went over the key ingredients, optional garnishes, and how to find substitutes. I gave you step-by-step instructions to make the crust, filling, and assemble the pie. We explored tips for texture and serving ideas. You learned about variations like different flavors and crusts. Finally, we discussed how to store leftovers and answered common questions. Now, you have the tools to impress anyone with your key lime pie! Enjoy the process and have fun experimenting.

No-Bake Key Lime Pie Tangy and Refreshing Dessert

Are you ready to whip up a dessert that packs a tangy punch? This No-Bake Key Lime Pie is the

For the best Chocolate Hazelnut Swirl Brownies, gather these essential ingredients: - 1 cup unsalted butter - 2 cups granulated sugar - 1 teaspoon vanilla extract - 4 large eggs - 1 cup all-purpose flour - 1 cup unsweetened cocoa powder - 1/2 teaspoon baking powder - 1/2 teaspoon salt - 1/2 cup chocolate hazelnut spread - 1/2 cup chopped hazelnuts (optional) - A pinch of sea salt for sprinkling These ingredients create a rich and gooey brownie base that pairs perfectly with the creamy hazelnut spread. Optional ingredients can enhance flavor and texture. Consider adding: - Chopped chocolate or chocolate chips for extra richness - A splash of coffee to deepen the chocolate flavor - A sprinkle of cinnamon for a warm spice note If you have dietary restrictions, here are some ingredient substitutions: - Use coconut oil instead of butter for a dairy-free option. - Swap out all-purpose flour with almond flour for a gluten-free version. - Replace eggs with mashed bananas or unsweetened applesauce for vegan brownies. These swaps allow everyone to enjoy a slice of decadent delight! For the full recipe, please refer to the complete instructions above. 1. Preheat your oven to 350°F (175°C). Grease a 9x13 inch baking pan or line it with parchment paper. This helps the brownies come out easily. 2. Melt the butter in a medium saucepan over low heat. Once fully melted, remove it from heat. Stir in the granulated sugar. Mix well until smooth. 3. Add the vanilla extract and eggs to the butter mixture. Do this one egg at a time. Whisk after each addition to keep it smooth. 4. In a separate bowl, sift together the flour, cocoa powder, baking powder, and salt. Gradually mix this dry mixture into the wet mixture. Stir gently until just combined. Do not overmix. 1. Pour half of the brownie batter into the prepared baking pan. Spread it out evenly. 2. Drizzle dollops of chocolate hazelnut spread over the brownie base. Make sure to space them out for easy swirling. 3. Use a knife or skewer to create a swirl. Gently move the knife through the batter to mix the spread in. Be careful not to overmix; you want to see the layers. 4. Pour the rest of the brownie batter over the hazelnut spread layer. Repeat the swirling process with any remaining spread on top. This adds the beautiful marbled effect. 5. If you like, sprinkle chopped hazelnuts over the top. Add a pinch of sea salt for a flavor boost. 6. Bake in the preheated oven for about 25-30 minutes. Check with a toothpick; it should come out with a few moist crumbs, not wet batter. 7. Let the brownies cool in the pan for at least 10 minutes before moving them to a wire rack. This helps them firm up and makes them easier to cut. For a full guide on making these treats, refer to the Full Recipe. - To ensure moist brownies, do not overmix the batter. Mix just until combined. - To tell when brownies are done baking, insert a toothpick in the center. If it comes out with a few moist crumbs, they are ready. - For optimal texture, cool brownies in the pan for about 10 minutes. Then transfer them to a wire rack to cool completely. - For garnishing, sprinkle chopped hazelnuts on top for crunch. A light drizzle of chocolate adds a nice touch. - Serve the brownies on a white plate to enhance their rich color. Pair them with a scoop of vanilla ice cream for a delightful treat. Explore more ideas in the Full Recipe for a fun baking experience! {{image_2}} You can change the nut spread in your brownies. Almond or peanut butter works well. Each spread gives a unique taste. If you want extra sweetness, add chocolate chips or caramel swirls to the batter. These additions create a rich, decadent treat. You can mix and match to find your favorite flavor. For a gluten-free version, swap all-purpose flour for almond flour or oat flour. These flours work great and keep your brownies soft. If you want a vegan option, use flax eggs instead of real eggs. Replace the butter with coconut oil and use a non-dairy milk. These simple swaps let everyone enjoy these brownies. For the full recipe, check the details above. To keep your Chocolate Hazelnut Swirl Brownies fresh, store them in an airtight container. This will help prevent them from drying out. Place a piece of parchment paper between layers to avoid sticking. If you want to keep them longer, you can freeze the brownies. Just wrap them well in plastic wrap and then in foil. This keeps them safe from freezer burn. When freezing, cut the brownies into squares first. This way, you can take out just what you need. Label the wrap with the date. They can stay good for up to three months in the freezer. For the best taste, eat them within a month. To restore texture, reheat brownies in the oven. Preheat it to 350°F (175°C). Place the brownies in an oven-safe dish. Cover them with foil to keep moisture in. Heat for about 10 minutes until warm. If you want a quick method, use the microwave. Heat them for 10-15 seconds at a time. Check often to avoid overheating. When ready to serve, let the brownies cool slightly. This makes them easier to cut. You can also add a drizzle of chocolate or a scoop of ice cream on top. These simple touches make your brownies even more special. For the full recipe, check out the instructions above. What makes brownies fudgy vs. cakey? Brownies can be fudgy or cakey based on the ingredients and ratios. Fudgy brownies have more fat and less flour. They use more butter and chocolate. Cakey brownies have more flour and less fat. They often include baking powder to help them rise. Can I use cocoa powder instead of chocolate bars? Yes, you can use cocoa powder instead of chocolate bars. Cocoa powder will still give you rich chocolate flavor. Just remember to add some extra fat. You can add a bit more butter or oil to balance it out. Is it necessary to use unsalted butter? Using unsalted butter is best for brownies. It allows you to control the salt level. If you only have salted butter, reduce the added salt in the recipe. Can I skip the hazelnuts if I have nut allergies? Absolutely! You can skip the hazelnuts if you have nut allergies. The brownies will still taste great without them. You can also replace them with a different ingredient. Try chocolate chips or even dried fruit for added flavor. How to fix dry brownies? If your brownies turn out dry, you can fix them. Try adding a bit of melted butter or rich frosting on top. You can also serve them with ice cream or whipped cream to add moisture. What should I do if my brownies overflow in the pan? If your brownies overflow, don’t panic! Place a baking sheet under your pan to catch spills. Next time, check your pan size. Make sure to use the right size for the recipe. These Chocolate Hazelnut Swirl Brownies are a treat worth making. From choosing your ingredients to perfecting the swirl, each step matters. Remember to check doneness and cool them properly for the best texture. You can also try different nut spreads or adapt for dietary needs. With these tips, your brownies will impress everyone. Get baking and enjoy every bite!

Chocolate Hazelnut Swirl Brownies Decadent Delight

Craving a sweet treat that’s both rich and delightful? Look no further! These Chocolate Hazelnut Swirl Brownies are the perfect

Here’s what you need to make this Easy Chicken Alfredo Bake: - 2 cups cooked rotini pasta - 2 cups cooked chicken breast, diced - 1 cup broccoli florets (fresh or frozen) - 1 cup Alfredo sauce (store-bought or homemade) - 1 cup shredded mozzarella cheese - ½ cup grated Parmesan cheese - 1 teaspoon garlic powder - 1 teaspoon Italian seasoning - Salt and pepper to taste - Fresh parsley for garnish (optional) Gather these ingredients, and you are ready to start cooking. The rotini pasta gives a nice bite, while the chicken adds protein. Broccoli brings color and a hint of freshness. You can use store-bought Alfredo sauce for ease or make your own if you have time. The cheeses melt beautifully, making each bite creamy and rich. Don't forget the garlic powder and Italian seasoning; they enhance all the flavors. You can adjust the salt and pepper to fit your taste. If you want, sprinkle fresh parsley on top for a pop of green. This recipe is simple and perfect for a family meal. For the full recipe, check the details above. - Preheat oven to 375°F (190°C). - In a large mixing bowl, combine 2 cups cooked rotini pasta, 2 cups diced chicken, and 1 cup broccoli florets. This step sets the stage for your dish. Make sure your pasta is cooked but firm. This will help keep its shape when baked. You can use fresh or frozen broccoli. Both work well. - Add 1 cup Alfredo sauce, 1 teaspoon garlic powder, 1 teaspoon Italian seasoning, and salt and pepper to taste. Stir until coated. Mix everything well. You want the sauce to cover all pasta, chicken, and broccoli. This will ensure a creamy texture throughout the bake. Feel free to adjust the seasonings. Personal taste is key here! - Transfer mixture to a greased 9x13 inch baking dish. Layer 1 cup shredded mozzarella cheese and ½ cup grated Parmesan cheese on top. - Cover with foil and bake for 20 minutes. After that, remove the foil and bake for an additional 10-15 minutes, or until the cheese is bubbly and golden. Baking with foil helps cook everything through without drying it out. Uncovering it at the end gives you that beautiful golden cheese layer. Trust me, it’s worth the wait! Don’t forget to check the dish before serving. Let it cool for a few minutes. This makes it easier to serve and eat. Enjoy your Easy Chicken Alfredo Bake! For the full recipe, be sure to check the earlier section. To make the best Easy Chicken Alfredo Bake, start with your pasta. Ensure it is al dente. This means it should be firm but not hard. This gives the dish a great texture. Next, use freshly grated cheese. It melts better than pre-shredded cheese. Fresh cheese adds a creamier taste and makes the dish shine. Many people make the mistake of not pre-cooking chicken and pasta. Pre-cooking helps them blend well. It also saves time when baking. Another common mistake is overbaking. This can dry out your dish. Keep a close eye on the bake. Remove it from the oven when the cheese is bubbly and golden. Using these tips will help you create a tasty Chicken Alfredo Bake. For the full recipe, check out the [Full Recipe]. Enjoy your cooking! {{image_2}} You can change the pasta for different shapes. Swap rotini for penne or any pasta you like. Each type brings a new twist. You can also add more veggies. Try spinach or bell peppers for color and taste. These swaps keep the dish fresh and fun. Want more flavor? Spice it up! Add paprika for warmth or red pepper flakes for heat. Both will make your meal pop. You can also use sun-dried tomatoes. They add a tangy taste that pairs well with creamy sauce. These enhancements can turn a simple bake into a gourmet dish. To keep your Easy Chicken Alfredo Bake fresh, use an airtight container. Place any leftovers in the container and store them in the refrigerator. It tastes best if you eat it within 3-4 days. This way, you will enjoy the creamy goodness at its best. When it's time to enjoy your leftovers, reheat them in the oven. This method helps keep the texture nice and creamy. If you prefer the microwave, add a splash of milk. This extra moisture will help bring back the creamy texture. Enjoy your meal just like when it was fresh! Yes, you can freeze Easy Chicken Alfredo Bake for up to 2 months. Make sure it cools completely before you put it in a freezer-safe container. This way, you keep the flavor and texture. When you’re ready to eat, just thaw it in the fridge overnight. Then, bake it until warm. Yes, you can prepare this recipe ahead of time. Just mix all the ingredients and place them in a baking dish. Cover it and refrigerate before baking. This makes dinner easy after a busy day. You can bake it straight from the fridge; just add a few extra minutes to the cooking time. You can pair Chicken Alfredo Bake with a side salad or garlic bread. A fresh salad adds crispness and balances the creamy dish. Garlic bread brings extra flavor and is great for dipping. Both options make your meal more complete and satisfying. You now have a simple and tasty Chicken Alfredo Bake recipe. We covered the key ingredients, step-by-step instructions, and useful tips. You learned how to avoid common mistakes and explore fun variations. Don't hesitate to make this dish your own with different veggies and spices. With easy storage options and reheating tips, this meal is great for leftovers too. Enjoy cooking and sharing this delightful dish!

Easy Chicken Alfredo Bake Delicious and Quick Meal

Looking for a quick and easy dinner that everyone will love? Try this Easy Chicken Alfredo Bake! Combining tender pasta,

To make spicy black bean tacos, gather these main ingredients: - 1 can (15 oz) black beans, drained and rinsed - 1 tablespoon olive oil - 1 small onion, diced - 2 cloves garlic, minced - 1 jalapeño, deseeded and minced - 1 teaspoon ground cumin - 1 teaspoon smoked paprika - 1/2 teaspoon cayenne pepper (adjust for spice level) - Salt and pepper to taste - 8 small corn tortillas - 1 cup fresh spinach, chopped - 1 avocado, sliced - 1/2 cup crumbled feta cheese - Fresh cilantro for garnish - Lime wedges for serving These ingredients create a mix of flavors. The black beans give protein and texture. The spices add warmth and depth. The fresh toppings bring brightness. You can customize your tacos with these optional toppings: - Diced tomatoes - Shredded lettuce - Sliced radishes - Sour cream or yogurt - Hot sauce for extra heat Adding these toppings makes the tacos more fun and flavorful. Mix and match to find your favorite blend. If you lack some ingredients, here are easy substitutions: - Use canned chickpeas instead of black beans for a different bean option. - Swap olive oil for any cooking oil you have on hand. - Use red onion instead of yellow for a milder taste. - No jalapeño? Try a pinch of red pepper flakes for some heat. - For a dairy-free option, skip the feta cheese or use a plant-based alternative. These substitutions keep the dish tasty while allowing flexibility. You can still enjoy delicious spicy black bean tacos! Check out the Full Recipe for detailed cooking steps. Start by gathering all your ingredients. This makes cooking easier. You’ll need: - 1 can (15 oz) black beans, drained and rinsed - 1 tablespoon olive oil - 1 small onion, diced - 2 cloves garlic, minced - 1 jalapeño, deseeded and minced - 1 teaspoon ground cumin - 1 teaspoon smoked paprika - 1/2 teaspoon cayenne pepper (adjust for spice level) - Salt and pepper to taste - 8 small corn tortillas - 1 cup fresh spinach, chopped - 1 avocado, sliced - 1/2 cup crumbled feta cheese - Fresh cilantro for garnish - Lime wedges for serving Chop the onion, garlic, and jalapeño finely. This helps them mix well. Rinsing the black beans is key. It removes extra salt and makes them fresh. Heat a medium pan over medium heat and add the olive oil. Wait until it shimmers. Then, add the diced onion. Cook for about 3-4 minutes until it becomes soft. Next, add the minced garlic and jalapeño. Sauté for another 1-2 minutes. The kitchen will smell great! Once fragrant, stir in the black beans, ground cumin, smoked paprika, cayenne, salt, and pepper. Mix this well. Cook for 5-7 minutes, stirring often. You want the beans to warm up and soak in the spices. While the filling cooks, warm the corn tortillas. You can use a pan or heat them over low flame. A few seconds on each side is enough. This makes them soft and easy to fold. Now, it’s time to build your tacos. Take a warm tortilla and add a generous spoonful of the black bean filling. On top, layer the chopped spinach, sliced avocado, and crumbled feta cheese. Finally, garnish with fresh cilantro. Serve with lime wedges on the side for added zest. Enjoy these tasty spicy black bean tacos! For the full recipe, check the details above. To boost the flavor of your spicy black bean tacos, try adding lime juice. A squeeze of fresh lime brightens up the dish. You can also add fresh herbs like cilantro or parsley for a fresh taste. If you like extra heat, consider adding diced chipotle peppers in adobo sauce. They add a smoky flavor that pairs well with the beans. To get the best texture for your tacos, warm the tortillas properly. Heat them in a dry pan over medium heat for about 30 seconds per side. This step makes them soft and pliable. You can also place them in a clean kitchen towel to keep them warm while you cook. For an extra touch, try toasting them until slightly crispy for added crunch. When serving your spicy black bean tacos, think about sides that complement them. A simple salad with mixed greens works well. You could also serve some fresh guacamole or a zesty salsa on the side. For a drink, a cool lemonade or a light beer pairs nicely. Finally, don’t forget to offer lime wedges for squeezing over the tacos. For the complete process, check the Full Recipe. {{image_2}} You can easily make these tacos vegetarian or vegan. Simply skip the feta cheese and use a plant-based cheese. This keeps the dish creamy and rich without dairy. You might also add more veggies, like bell peppers or zucchini, for extra flavor. Consider using cashew cream as a topping for a vegan twist. To make these tacos gluten-free, choose corn tortillas. Many brands are naturally gluten-free. Always check the label to be sure. You can also use lettuce leaves instead of tortillas for a fresh, crunchy wrap. This option is light and very low in carbs. Adjusting spice is simple. If you like heat, keep the jalapeño and cayenne pepper as is. For milder tacos, remove the seeds from the jalapeño. You can also reduce or skip the cayenne pepper. Another option is to add a dollop of sour cream or yogurt to cool things down. To keep leftover tacos fresh, store them in an airtight container. Place the taco filling and tortillas in separate containers. This helps prevent sogginess. Let the filling cool before sealing. You can store it in the fridge for up to three days. Reheat the taco filling in a pan over medium heat. Stir it often to warm it evenly. This should take about five minutes. For tortillas, warm them in a dry pan for about 30 seconds on each side. This will make them soft again. If you want to freeze the filling, let it cool completely first. Then, put it in a freezer-safe bag or container. It can last up to three months in the freezer. When you are ready to eat, thaw it in the fridge overnight and reheat as mentioned. Enjoy these tasty tacos later with ease! For the full recipe, check the details provided above. You can pair these tacos with various sides for a full meal. Here are some tasty options: - Mexican rice for a filling side. - Simple corn salad to add freshness. - Chips and salsa for a crunchy snack. - A green salad to balance flavors. - Guacamole for extra creaminess. These sides will enhance your taco experience and satisfy your guests. Yes, you can prepare parts of these tacos ahead of time. Cook the black bean filling in advance. Store it in an airtight container in the fridge for up to three days. You can also warm the tortillas just before serving. This way, you save time and can enjoy the meal with friends or family. To tone down the heat in your tacos, try these tips: - Use less jalapeño or leave it out. - Reduce cayenne pepper to a pinch or skip it. - Add more avocado or sour cream for cooling effects. - Serve with lime wedges on the side to balance the heat. These adjustments make the dish friendlier for those who prefer milder flavors. Enjoy your meal! For the full recipe, check the section above. Spicy black bean tacos are easy and fun to make. We’ve covered the main ingredients, tasty toppings, and swaps you can try. I shared step-by-step cooking tips and ways to enhance flavor. You learned different variations to fit your diet and storage tips to keep leftovers fresh. Remember, cooking is all about enjoying the process. Experiment and find what you love. Enjoy these tacos, and share them with friends!

Spicy Black Bean Tacos Flavorful and Easy Recipe

Are you ready to spice up your taco night? My Spicy Black Bean Tacos are quick, tasty, and packed with

- 2 cups cooked jasmine rice - 1 cup fresh pineapple, diced - 1/2 cup red bell pepper, diced - 1/2 cup green peas - 1/2 cup carrots, diced - 3 green onions, chopped - 2 cloves garlic, minced - 2 tablespoons soy sauce - 1 tablespoon sesame oil - 1 tablespoon olive oil - 1 teaspoon curry powder (optional) - Salt and pepper to taste - Fresh cilantro for garnish When making pineapple fried rice, I love using fresh and vibrant ingredients. The jasmine rice gives it a light, fluffy base. Using day-old rice works best. It helps keep the dish from getting mushy. Fresh pineapple adds a sweet and tangy burst of flavor. I dice it into small pieces to mix well with the rice. For the vegetables, I prefer a mix of colors. The red bell pepper brings a sweet crunch. Green peas add a pop of color and a slight sweetness. Diced carrots add a nice texture. I chop green onions for a fresh finish. Now, let’s talk about flavor enhancers. Garlic is a must for that rich aroma. Soy sauce gives the rice a savory depth. I use sesame oil for a nutty flavor that ties everything together. If you like a hint of spice, add curry powder. Finally, I season with salt and pepper. Fresh cilantro brightens the dish as a topping. This recipe is all about balance, flavor, and fun! Check out the Full Recipe to get started. - Cook jasmine rice (preferably day-old) - Dice and chop all vegetables and pineapple Start by cooking the jasmine rice. Day-old rice works best. It is dryer and helps the fried rice stay fluffy. If you don’t have day-old rice, make some and let it cool. While the rice cooks, dice the fresh pineapple into small pieces. Also, chop the red bell pepper, green peas, and carrots. Keep them all ready for the next steps. - Heat olive oil and sauté garlic - Add vegetables and cook until tender - Incorporate pineapple and stir-fry Next, heat olive oil in a large wok or frying pan over medium heat. Add the minced garlic and sauté it for about 30 seconds. This makes your kitchen smell great! Then, toss in the diced red bell pepper, carrots, and green peas. Cook them for about 3-4 minutes. You want them to be tender but still colorful. After that, add the diced pineapple. Stir-fry it for another 2 minutes. This step caramelizes the pineapple and brings out its sweetness. - Add rice and mix thoroughly - Drizzle with soy sauce and season - Finish with green onions and garnish Now, turn up the heat to medium-high. Add the day-old rice into the pan. Break apart any clumps and mix it well with the vegetables and pineapple. Drizzle soy sauce and sesame oil over the rice. If you want a spicy kick, sprinkle in some curry powder. Toss everything together until the rice is hot and evenly coated. Finally, fold in the chopped green onions. Season with salt and pepper to taste. Your dish is now ready to serve! For a lovely touch, garnish with fresh cilantro. Enjoy this colorful, tasty meal! Using day-old rice makes a big difference. It dries out a bit in the fridge. This gives it a better texture for frying. Fresh rice can be too sticky and mushy. If you don’t have jasmine rice, try basmati rice or long-grain rice. These options work well too. To keep your vegetables crisp, cook them quickly over high heat. This way, they stay bright and firm. Stir them often, so they cook evenly. When you add pineapple, let it sit for a moment before stirring. This helps caramelize the sugar in the fruit, giving it a sweet flavor. You can change the spice levels to fit your taste. If you like it spicy, add chili flakes or fresh peppers. For a deeper umami flavor, include a splash of fish sauce or oyster sauce. These ingredients can really boost the taste of your dish. {{image_2}} You can easily add protein to pineapple fried rice. Shrimp, chicken, and tofu work great. If you like seafood, shrimp adds a nice touch. Just sauté it until pink before adding other ingredients. Chicken is another popular choice. Cut it into small pieces and cook until golden. For a plant-based option, use tofu. Firm tofu absorbs flavors well. If you prefer vegetarian meals, tofu is a fantastic choice. It adds protein and texture. You can also use chickpeas for more fiber. Both options blend well with the rice and veggies. Want to switch up the flavor? Try adding mango or coconut. These fruits give a tropical twist to your dish. Fresh mango adds sweetness and bright color. Shredded coconut can enhance the tropical vibe, too. Soy sauce is classic, but you can experiment. Teriyaki or sweet chili sauce adds a unique taste. Just use them in place of soy sauce for a fun change. Need a gluten-free meal? Use tamari instead of soy sauce. It offers the same flavor without gluten. For a vegan dish, stick to plant-based proteins like tofu or chickpeas. Ensure that your sauces are vegan-friendly, too. Most soy sauces are vegan, but always check the label. These variations let you customize your pineapple fried rice. The full recipe gives you a solid base to start from. To store leftover pineapple fried rice, let it cool first. Place it in an airtight container. This helps keep the rice fresh and stops it from drying out. You can store it in the fridge for up to three days. Make sure to label your container with the date. This way, you can track how long it has been stored. Use glass or plastic containers that seal tightly. These are the best containers for storage, as they prevent air from getting in. If you want to save your pineapple fried rice for later, freezing is a great option. First, let it cool completely. Then, pack it in freezer-safe bags or containers. Squeeze out as much air as you can before sealing. This helps prevent freezer burn. You can freeze it for up to three months. When you’re ready to eat it, take it out and thaw it in the fridge overnight. This method keeps the texture nice. When reheating pineapple fried rice, you want it warm but not dry. The best method is to use a skillet. Heat a little oil in the pan over medium heat. Add your rice and stir it often. You can add a splash of water or broth to keep it moist. Another option is to use the microwave. Place the rice in a bowl and cover it with a damp paper towel. This helps trap steam and keeps the rice soft. Heat it in short bursts, stirring in between. Aim for about one to two minutes on high. You can replace soy sauce with coconut aminos. This gives a similar flavor but is gluten-free. You can also use salt or tamari for more options. Just make sure to balance the flavors. Add a splash of lime juice for a zesty kick. Yes, you can use canned pineapple. Just drain it well and chop it. Canned pineapple can save time and still taste great. However, fresh pineapple adds a nice texture and flavor. If you use canned, skip adding extra liquid to the dish. Pineapple fried rice pairs well with grilled chicken or shrimp. You can also serve it with a fresh salad or spring rolls. For a vegetarian option, add tofu or extra veggies. The sweet and savory flavors complement many dishes. Yes, pineapple fried rice is great for meal prep! It stores well in the fridge for up to four days. Use airtight containers to keep it fresh. You can reheat it easily in the microwave or on the stove. This makes it a perfect choice for busy days. - Full Recipe: Tropical Delight Pineapple Fried Rice This blog post covered how to make delicious pineapple fried rice. You learned about the main ingredients, from jasmine rice to fresh veggies and pineapple. I shared step-by-step instructions for a tasty meal. Plus, I included tips for the best rice and ways to add protein. Remember to adjust flavors to your taste and store leftovers well. Pineapple fried rice is versatile and easy to meal prep, making it a perfect choice for busy days. Enjoy crafting your own version!

Pineapple Fried Rice Flavorful and Easy Recipe Guide

Pineapple Fried Rice is a fun and tasty dish you can whip up in no time. This easy recipe guide

- 4 salmon fillets - 1/4 cup honey - 1/4 cup soy sauce - 4 cloves garlic, minced - 1 teaspoon fresh ginger, grated - 1 tablespoon olive oil - 1 tablespoon sesame seeds - 2 green onions, chopped - Salt and pepper to taste When I make honey garlic glazed salmon, I focus on fresh flavors and easy prep. Each ingredient plays a key role in making this dish shine. The salmon fillets are the star. They should be thick and fresh. Honey adds sweetness, while soy sauce brings depth. Minced garlic makes everything pop with flavor. Fresh ginger adds a hint of spice, making the glaze bright and zesty. I use olive oil to cook the salmon. It helps achieve a golden-brown crust. The sesame seeds and green onions add a lovely crunch and color when serving. Don't forget to season with salt and pepper to enhance all the flavors. This recipe is simple, yet the taste is complex. You can find the full recipe to create this delightful dish. Enjoy cooking! - Whisk together honey, soy sauce, garlic, and ginger. - Season salmon fillets with salt and pepper. Start by mixing the honey, soy sauce, minced garlic, and grated ginger in a bowl. Make sure you blend them well. This mixture makes the glaze sweet and savory. Next, sprinkle salt and pepper on both sides of the salmon fillets. This step adds flavor and helps the salmon taste great. - Heat olive oil and cook salmon skin-side down. - Flip the salmon and add the honey-garlic mixture. Heat olive oil in a large skillet over medium-high heat. When the oil is hot, place the salmon fillets skin-side down in the skillet. Cook them for about 4-5 minutes until the skin gets crispy. This gives the fish a nice texture. Carefully flip the salmon over. Lower the heat to medium and pour the honey-garlic mix over the salmon. Cook for another 4-5 minutes while spooning the sauce over the top. This step allows the flavors to soak into the fish. - Let salmon rest and thicken sauce in the skillet. - Serve with sesame seeds and chopped green onions. After cooking, remove the salmon from the skillet and let it rest for a minute. This helps keep it moist. In the same skillet, let the sauce simmer for 2-3 minutes to thicken. This makes the sauce even more delicious. Finally, serve the salmon topped with the thickened sauce, sesame seeds, and chopped green onions. This recipe is great for a quick and tasty dinner. For the full recipe, check the section above. The best cooking temperature for salmon is around 125°F for medium-rare. To check for doneness, use a fork to gently flake the thickest part. If it flakes easily and is opaque, it's ready. Salmon cooks quickly, so watch it closely. To boost the flavor, try adding spices like paprika, black pepper, or cayenne. Fresh herbs like cilantro or basil can also add a nice touch. For honey, use a light floral variety like clover or wildflower. These honey types add sweetness without overpowering the dish. For a beautiful plate, garnish with sesame seeds and chopped green onions. A drizzle of the honey garlic sauce adds shine. Pair the salmon with steamed broccoli and jasmine rice for color and balance. The white plate makes the vibrant salmon stand out beautifully. {{image_2}} You can swap salmon for other fish like trout or tilapia. These fish also soak up the honey garlic glaze well. If you prefer meat, try chicken. The glaze gives chicken a sweet and savory kick. For a plant-based option, use firm tofu. Just press the tofu to remove water, then cut it into slices. The glaze will stick nicely to tofu, and it will taste fantastic. Adding citrus can brighten the dish. Mix in some fresh lemon or lime juice to the honey garlic sauce. This adds a zesty touch that pairs well with the rich salmon. If you want some heat, sprinkle chili flakes over the salmon. Sriracha is another great option. Just a dash adds a nice spicy zing without overpowering the dish. For a gluten-free version, simply use tamari instead of soy sauce. Tamari gives the same umami flavor without gluten. If you’re watching carbs, reduce the amount of honey. You can also use a sugar substitute that fits your diet. This keeps the dish tasty while making it low-carb. For the full recipe, check out the detailed steps provided earlier! To store leftover salmon, first let it cool down. Place the salmon in an airtight container. Make sure to seal the lid tightly. Store it in the fridge for up to three days. If you want to keep it longer, freeze the salmon. Use freezer-safe bags or containers. This way, it can last for up to three months. Reheating salmon can be tricky. You want to keep it moist. The best way is to use the oven. Preheat it to 275°F (135°C). Put the salmon on a baking dish and cover it with foil. Heat for about 15 minutes. This method keeps the salmon juicy. You can also use the microwave. Place the salmon on a plate and cover it with a damp paper towel. Heat in short bursts of 30 seconds. This helps keep the glaze and flavor intact. Check often to avoid drying it out. Following these tips will help you enjoy your honey garlic glazed salmon even after the first meal. How long can honey garlic glazed salmon be stored in the refrigerator? You can store honey garlic glazed salmon in the fridge for about three days. Place it in an airtight container to keep it fresh. If you want it to last longer, consider freezing it. Can I make honey garlic glaze ahead of time? Yes, you can prepare the honey garlic glaze ahead of time. Just mix the honey, soy sauce, garlic, and ginger in a bowl. Store it in the fridge for up to a week. Is it necessary to marinate salmon before cooking? No, marinating salmon is not required. The honey garlic glaze adds plenty of flavor during cooking. However, if you have time, a short marinade can enhance the taste. What side dishes pair well with honey garlic glazed salmon? Honey garlic glazed salmon goes well with many sides. I recommend steamed broccoli, jasmine rice, or a light salad. These dishes balance the rich flavor of the salmon and add freshness. Can I cook honey garlic glazed salmon on the grill? Absolutely! Grilling honey garlic glazed salmon adds a delicious smoky flavor. Just make sure to use a grill mat or foil to prevent sticking. Can I use maple syrup instead of honey? Yes, maple syrup can work as a substitute for honey. It gives a different taste but still adds sweetness. Just use the same amount as honey in the recipe. What is a good substitute for soy sauce? If you need a soy sauce alternative, use tamari or coconut aminos. Both options offer a similar flavor without gluten, making them great substitutes for those with dietary needs. Honey garlic glazed salmon is simple and tasty. We covered key ingredients, like salmon, honey, and garlic. I shared step-by-step instructions for cooking and tips for perfecting the dish. You can adapt the recipe with different proteins and flavors, too. Remember, quality ingredients make a big difference in taste. Store leftovers properly, and you can enjoy this dish later. With these tips, you'll create a meal that impresses. Enjoy your cooking and keep experimenting!

Honey Garlic Glazed Salmon Tasty and Quick Dinner

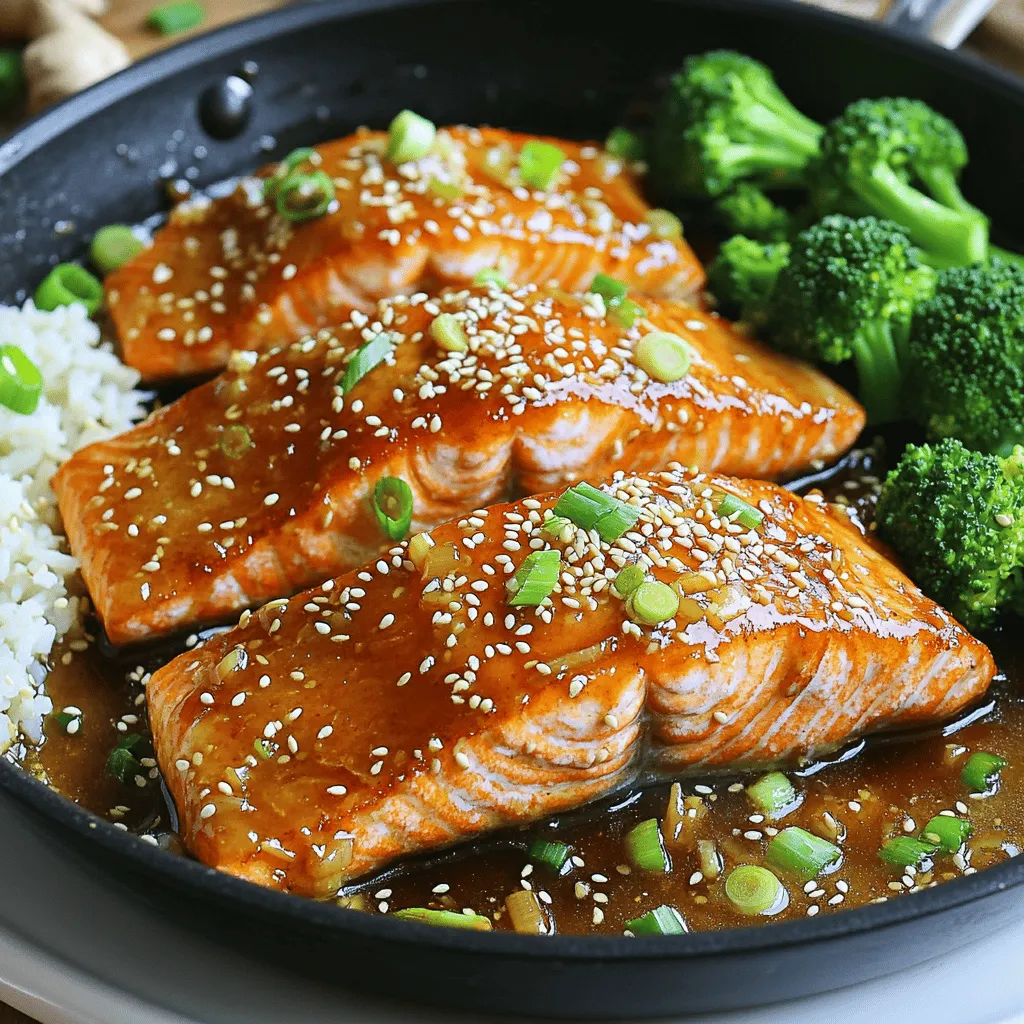
Are you looking for a quick and tasty dinner? I’ve got just the thing for you: Honey Garlic Glazed Salmon!

- 4 large hard-boiled eggs - 1 ripe avocado - 2 tablespoons Greek yogurt - 1 teaspoon Dijon mustard - 1 tablespoon fresh lemon juice - 2 tablespoons green onion, finely chopped - 1 tablespoon fresh dill or cilantro, chopped - Salt and pepper to taste - Optional: Red chili flakes For this avocado egg salad, you need a few key ingredients. Start with hard-boiled eggs. They give the salad its base and protein. I love using ripe avocados for creaminess. They add healthy fats and a smooth texture. Greek yogurt is my secret for extra creaminess. It enhances the flavor and keeps things light. Next, we need flavor enhancers. Dijon mustard adds a zesty kick. Fresh lemon juice brightens the dish. It’s a must for balancing flavors. Green onions give a little crunch and fresh flavor. Don’t skip them! Finally, we have seasonings and garnishes. Fresh dill or cilantro adds a pop of color and freshness. Salt and pepper bring everything together. If you want heat, sprinkle in some red chili flakes. You can find the full recipe for this creamy avocado egg delight at the end of this section. Try to use fresh ingredients. They make a big difference in taste. Enjoy making this salad your own with fun twists! To hard-boil eggs perfectly, start by placing them in a pot. Cover them with cold water, about an inch above the eggs. Bring the water to a boil, then cover the pot and remove it from heat. Let the eggs sit for 9 to 12 minutes, depending on how firm you like the yolks. After that, cool them in ice water. This stops the cooking and makes peeling easier. When peeling eggs, start at the wider end where there's usually an air pocket. Gently tap the egg on the counter, then roll it to crack the shell. Peel under cold running water for best results. Now, mash the hard-boiled eggs in a bowl. Use a fork to break them into small pieces. Next, cut the ripe avocado in half. Remove the pit and scoop the flesh into the bowl with the eggs. Mash the avocado until it’s creamy but still has some chunks. This adds great texture to the salad. Add Greek yogurt, Dijon mustard, and lemon juice to the bowl. Mix everything well until combined. The yogurt makes the salad creamy, while the mustard adds a nice kick. Taste the mixture and adjust the flavors. You can add more salt, pepper, or lemon juice to suit your taste. For those who love a bit of spice, sprinkle in red chili flakes for a kick. Serve your avocado egg salad on toasted bread, in a wrap, or on a bed of greens. For a fun twist, serve it in a hollowed avocado shell. This adds flair and makes for a beautiful presentation. Enjoy this creamy and flavorful dish! For the full recipe, check out the details provided above. To make your avocado egg salad shine, try adding spices or herbs. For a twist, you can use: - Garlic powder - Paprika - Cumin These spices bring out the taste. You can also add fresh herbs like basil or parsley for more flavor. If you want crunch, mix in some bell peppers or celery. They add texture and freshness. Pair your avocado egg salad with tasty sides. Some good matches include: - Crispy toast - Whole-grain crackers - Leafy greens For a creative touch, serve the salad in a hollow avocado shell. It looks fun and keeps the dish fresh. You can also garnish with fresh dill or a sprinkle of red chili flakes for a splash of color. Avocados and eggs are packed with nutrition. Avocados provide healthy fats and fiber. They help keep your heart strong. Eggs are full of protein and vitamins. They give you energy and help build muscle. Adding Greek yogurt boosts the health factor. It has probiotics that aid digestion. Plus, it adds creaminess without too many calories. Enjoy this dish knowing it’s both tasty and good for you! For the full recipe, check out the Creamy Avocado Egg Delight 🥑🥚. {{image_2}} You can make your avocado egg salad even heartier. Adding canned tuna or chicken boosts protein. Both options blend well with the creamy texture. For a vegan twist, use chickpeas instead of eggs. Mash them lightly, and mix with avocado for a similar vibe. To change up the taste, try different dressings or sauces. A splash of sriracha adds heat, while ranch dressing gives creaminess. You can also mix in some curry powder for an exotic flavor. For a spicy avocado egg salad, add jalapeños or red chili flakes. This gives it a nice kick! Fresh herbs can change your salad with each season. In spring, use chives for a mild onion flavor. Summer is perfect for basil, adding a sweet touch. In fall, try thyme for warmth. You can also customize with seasonal veggies. Diced tomatoes or cucumbers add crunch and freshness. Each variation makes the dish unique! Feel free to explore these ideas. The full recipe is a great starting point. To keep your avocado egg salad fresh, store it in an airtight container. Make sure it seals well to limit air exposure. You can refrigerate it for up to three days. If you plan to eat it later, cover the surface with plastic wrap to prevent browning. Freezing avocado egg salad is not the best idea. Avocado does not freeze well, and the texture changes. If you must freeze it, use a freezer-safe container. When you thaw, mix it well to bring back some creaminess. Reheat gently in a pan on low heat or in the microwave at a low setting. To tell if your salad has spoiled, look for discoloration or off smells. If it looks brown or has a sour scent, it’s time to toss it. To maximize shelf life, keep it tightly sealed and only scoop out what you need. This way, the remaining salad stays fresh longer. To make your avocado egg salad creamy, start with ripe avocados. Ripe avocados mash easily and provide a smooth texture. Use a fork to blend them with the hard-boiled eggs. I like to leave some chunks for added texture. Adding Greek yogurt helps too. It not only adds creaminess but also boosts the protein content. Use about two tablespoons for a rich taste. Mixing in Dijon mustard also enhances the flavor while keeping the salad smooth. Yes, this avocado egg salad fits a keto diet well. It has low carbs, thanks to the eggs and avocado. Eggs are high in protein and healthy fats. Avocados provide fiber and good fats, making them perfect for keto. The Greek yogurt adds creaminess and protein without many carbs. Just keep track of your serving sizes to stay within your daily carb limit. For serving, many bread options work great. Whole grain or sourdough bread brings a nice flavor. You can also use wraps for a lighter touch. Lettuce wraps offer a low-carb option too. If you want something crunchy, use crackers. They add a nice texture balance to the creamy salad. Feel free to explore different options for a fun twist! In this article, we explored how to make a tasty avocado egg salad. We covered key ingredients like hard-boiled eggs, avocado, and Greek yogurt. You learned the steps to prepare, combine, and adjust flavors to match your taste. We also discussed tips for enhancing flavor and serving ideas. Lastly, we reviewed storage methods for leftovers. Experiment with variations to keep your salad fresh and exciting. Enjoy making this dish as a healthy meal or snack!

Avocado Egg Salad Creamy and Flavorful Dish

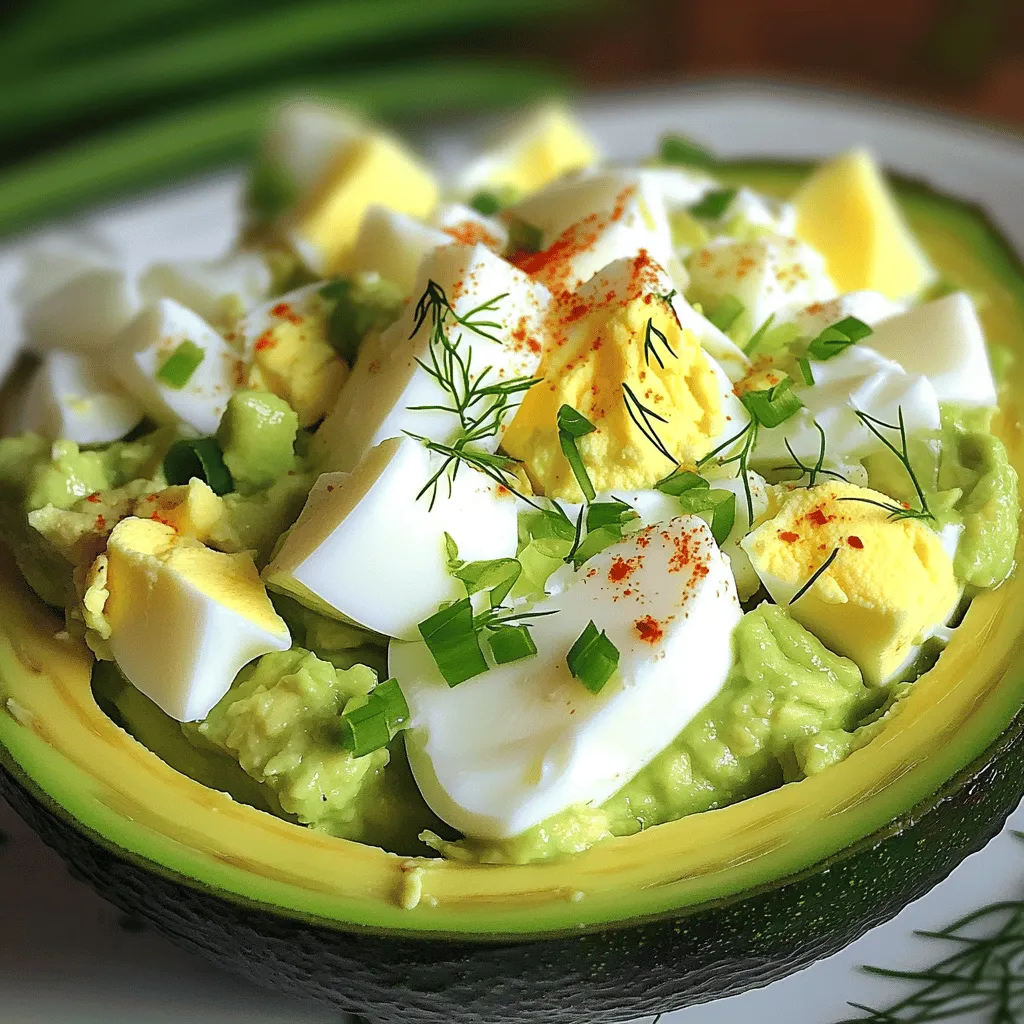
Are you ready for a dish that’s both creamy and packed with flavor? My Avocado Egg Salad recipe is just

To make a great avocado mango salsa, you need: - 2 ripe avocados, diced - 1 ripe mango, diced - 1 small red onion, finely chopped - 1 jalapeño, deseeded and minced - 1/4 cup fresh cilantro, chopped - Juice of 2 limes - Salt and pepper to taste - 1 teaspoon cumin (optional for extra warmth) These ingredients create a fresh, vibrant flavor. Each one adds something special. You can change the recipe to fit your taste. Here are some ideas: - Add diced bell peppers for crunch. - Swap lime juice with lemon juice for a new twist. - Mix in diced tomatoes for extra color. - Use garlic for a bold flavor. - Try different herbs like mint or parsley. These options let you explore and make it your own. Each serving of avocado mango salsa is not only tasty but healthy too. Here’s what you get per serving: - Calories: 150 - Total fat: 10g - Saturated fat: 1.5g - Carbohydrates: 15g - Fiber: 6g - Protein: 2g This salsa is full of nutrients, and it’s a great snack or side dish. Check out the Full Recipe for more details! To make this salsa, start by gathering your ingredients. You need ripe avocados, a ripe mango, red onion, jalapeño, cilantro, lime juice, salt, and pepper. Here’s how to prepare it: 1. Dice the ripe avocados and mango. 2. Finely chop the red onion. 3. Deseed and mince the jalapeño. 4. In a medium mixing bowl, combine the diced avocados and mango. 5. Add the chopped red onion and minced jalapeño. 6. Gently mix in the chopped cilantro and lime juice. 7. Season with salt, pepper, and cumin if you like. 8. Stir gently until everything is well combined. 9. Taste and adjust the seasoning as needed. This entire process takes just ten minutes. You can find the full recipe for more details. When you mix your salsa, do it gently. You want to keep the avocado chunks intact. This way, each bite has a nice texture. If you mix too hard, you might end up with guacamole instead. Also, taste your salsa as you go. Adjust the lime juice, salt, or pepper to fit your taste. Everyone likes it a bit different! Serve this salsa in a bright bowl for a pop of color. You can top it with extra cilantro for a beautiful finish. It pairs well with tortilla chips for a snack or appetizer. You can also use it as a topping for grilled fish or chicken. The fresh flavors brighten up any meal. Enjoy this fresh salsa at your next gathering! To make great avocado mango salsa, you need ripe fruits. Look for avocados that feel slightly soft when you press them. They should not feel mushy. For mangos, choose ones with a slight give when you squeeze. Their color may vary, but a sweet smell is a good sign. If you have extra salsa, store it in an airtight container. This keeps it fresh. Place a piece of plastic wrap directly on the surface of the salsa. This helps prevent browning. Use the salsa within two days for the best taste. You can boost the flavor of your salsa easily. Try adding chopped garlic for a punch. A dash of chili powder adds warmth without heat. Fresh herbs like mint or basil give a unique twist. Experiment with these ideas to find your favorite mix. For the full recipe, check out the Tropical Avocado Mango Salsa. {{image_2}} You can change the taste of avocado mango salsa easily. Try adding diced pineapple for extra sweetness. If you like heat, toss in more jalapeño or a dash of hot sauce. For a twist, mix in black beans or corn. These add-ins give your salsa a fresh flavor. This salsa is super versatile. You can enjoy it with tortilla chips for a snack. It also pairs great with grilled chicken or fish. Use it as a topping for tacos or quesadillas. For a light meal, serve it over a bed of greens. Avocado mango salsa is already vegan and gluten-free. It works for many diets. If you want to add protein, consider mixing in chickpeas. Always check labels when using packaged ingredients. This way, you ensure everything stays true to your dietary needs. For the full recipe, check out the Tropical Avocado Mango Salsa section. To keep your avocado mango salsa fresh, store it in an airtight container. Make sure the lid seals tightly. If you're worried about browning, press plastic wrap directly onto the salsa before sealing. This reduces air exposure and keeps it vibrant. When stored correctly, avocado mango salsa lasts about 1 to 2 days in the fridge. After that, the avocados may turn brown, and the flavors can fade. Always check for signs of spoilage before using. If it looks or smells off, it’s best to discard it. Freezing salsa can change the texture. However, if you want to save it longer, it can last up to 3 months in the freezer. Use freezer-safe bags or containers. Leave some space for expansion as it freezes. Thaw it in the fridge overnight before using. Enjoy your tropical avocado mango salsa whenever you like with these storage tips! You can find the full recipe for making this delightful dish above. You can serve Avocado Mango Salsa with many tasty options. It pairs well with tortilla chips. You can also use it as a topping on grilled fish or chicken. This salsa adds a fresh taste to tacos and burritos. For a light meal, try it on a salad. The mix of avocado and mango adds a sweet touch. Yes, you can make this salsa ahead of time. I recommend preparing it a few hours before serving. This allows the flavors to blend well. However, avoid making it too far in advance. Freshness is key to keeping the taste bright and vibrant. To keep avocados from browning, use lime juice. The acid in lime juice slows down the browning process. You can also store the salsa in an airtight container. Press plastic wrap directly onto the surface of the salsa. This helps limit air exposure. If you have leftovers, enjoy them within a day for the best taste. Avocado mango salsa combines fresh ingredients for a tasty twist. We've covered how to choose ripe fruits, tips for preparing your salsa, and creative variations. Proper storage keeps the salsa fresh for longer, and I've shared answers to common questions. Think about how you can make this dish your own with added flavors. Enjoy experimenting and delighting your taste buds with this refreshing salsa!

Avocado Mango Salsa Fresh and Flavorful Delight

Craving a vibrant and zesty dip that brightens any meal? Look no further! My Avocado Mango Salsa combines creamy avocado

To make Garlic Parmesan Brussels Sprouts, you need just a few simple items. Here is what you will need: - 1 lb Brussels sprouts, trimmed and halved - 3 tablespoons olive oil - 4 cloves garlic, minced - 1/2 teaspoon red pepper flakes (optional) - 1/2 cup grated Parmesan cheese - Salt and pepper to taste These ingredients create a tasty base for a dish that is both easy and delicious. The Brussels sprouts are key. Their natural sweetness pairs well with the garlic and cheese. You can add a few extra items to kick up the flavor. Consider these: - 1 tablespoon balsamic vinegar (for extra tang) - Fresh parsley, chopped (for garnish) The balsamic vinegar adds a lovely depth. It brightens the dish and gives it a bit of zing. Fresh parsley adds color and a hint of freshness. This dish is not only tasty but also healthy. Here’s a quick look at the nutrition per serving: - Calories: Approximately 220 - Protein: 6g - Fat: 16g - Carbohydrates: 14g - Fiber: 5g Brussels sprouts are high in fiber and vitamins. They make this dish a great choice for a healthy side. You can enjoy these Garlic Parmesan Brussels Sprouts guilt-free! For the complete recipe, check out the [Full Recipe]. First, gather your ingredients. You need: - 1 lb Brussels sprouts, trimmed and halved - 3 tablespoons olive oil - 4 cloves garlic, minced - 1/2 teaspoon red pepper flakes (optional) - 1/2 cup grated Parmesan cheese - Salt and pepper to taste - 1 tablespoon balsamic vinegar (optional) - Fresh parsley, chopped Next, preheat the oven to 425°F (220°C). This step is key for a great roast. In a large bowl, mix the halved Brussels sprouts with olive oil, minced garlic, red pepper flakes, salt, and pepper. Stir until all sprouts are coated. This helps them roast well. Now, spread the Brussels sprouts on a baking sheet. Place them cut side down. This helps them caramelize and become crispy. Roast them for 20-25 minutes. Halfway through, give them a stir for even cooking. Keep an eye on them. You want them golden brown and crunchy. Once they are roasted, take them out of the oven. Sprinkle the grated Parmesan cheese all over the sprouts. If you like, drizzle balsamic vinegar on top for more flavor. Place them back in the oven for another 5 minutes. This melts the cheese and adds a nice touch. Finally, garnish with chopped fresh parsley. Serve warm and enjoy! For the complete recipe, check out the Full Recipe. To get those Brussels sprouts crispy, start with dry sprouts. After washing, pat them dry with a towel. Toss them well in olive oil. Make sure each sprout is coated but not swimming in oil. Place them cut side down on a baking sheet. This helps them caramelize better. Roast at 425°F for 20 to 25 minutes. Stir halfway through for even cooking. For extra crispiness, return them to the oven after adding cheese. Just five more minutes does the trick! If you're dairy-free, swap the Parmesan with nutritional yeast. It gives a cheesy flavor without the dairy. For a low-carb option, you can use cauliflower instead of Brussels sprouts. Just follow the same steps. If you want it spicy, add more red pepper flakes or chili powder. For a nutty taste, try adding some toasted nuts like almonds or pine nuts. To boost the flavor, add balsamic vinegar. It adds a sweet tang that pairs well with garlic. You can also mix in lemon zest for a bright note. Fresh herbs like thyme or rosemary can enhance the taste too. If you want more umami, try adding a splash of soy sauce. These little tweaks can make your dish stand out. For the full recipe, be sure to check the complete list of ingredients and steps! {{image_2}} You can switch up the cheese to change the taste. Try using shredded mozzarella for a gooey, melty texture. Feta brings a tangy flavor that pairs well with Brussels sprouts. Goat cheese adds creaminess, making each bite rich and tasty. For a sharper taste, use aged cheddar. Each cheese adds its own flair to the dish. To make this dish more filling, add proteins. Cooked bacon bits give a smoky crunch that contrasts with the sprouts' texture. Grilled chicken adds lean protein and works well with garlic and cheese. For a vegetarian option, add chickpeas for protein and fiber. This makes the dish heartier while keeping it delicious. You can play with many seasonings to boost flavors. A sprinkle of lemon zest adds brightness and freshness. For a spicy kick, add cayenne pepper or smoked paprika. Experiment with Italian herbs like oregano and thyme for a fresh twist. You can even mix in a pinch of curry powder for a bold flavor. For the full recipe and detailed instructions, check out the [Full Recipe]. You can store leftover Brussels sprouts in an airtight container. Keep them in the fridge. They stay fresh for up to three days. Allow them to cool before storing. This helps keep their texture. To reheat, use the oven for best results. Preheat your oven to 350°F. Place the Brussels sprouts on a baking sheet. Heat them for about 10-15 minutes. This helps regain their crispiness. You can also use a microwave if you're short on time. Just heat them in 30-second intervals. If you want to freeze Brussels sprouts, first cool them completely. Place them in a freezer-safe bag or container. They will last up to three months in the freezer. When ready to eat, thaw them overnight in the fridge. Reheat them in the oven to keep them crispy. For the full recipe, check the earlier section. Yes, you can use frozen Brussels sprouts. They work in a pinch. However, fresh sprouts taste better. Frozen sprouts may need longer cooking time. Make sure to thaw and drain them first. This helps avoid sogginess. For best results, follow the same steps in the Full Recipe. Roasted Brussels sprouts last about 3 to 5 days in the fridge. Store them in an airtight container. Reheat them in the oven for better crispness. Avoid using the microwave as it can make them soft. Garlic Parmesan Brussels sprouts pair well with many dishes. Try them with roasted chicken or grilled steak. They also complement pasta and quinoa bowls. For a light meal, serve them on a salad. Enjoy your culinary creations! Garlic Parmesan Brussels sprouts are a tasty side dish you can enjoy anytime. We covered the key ingredients, preparation steps, and roasting tips to make them crispy. I shared ideas for variations and how to store leftovers. Remember, you can mix in different cheeses or proteins for excitement. Try it out and customize it to your taste. Follow these steps, and you’ll have a dish everyone loves. Happy cooking!

Garlic Parmesan Brussels Sprouts Tasty and Simple Dish

Looking to add a tasty twist to your meals? Garlic Parmesan Brussels Sprouts are simple to make and bursting with

Older posts
Newer posts
← Previous Page1 … Page64 Page65 Page66 … Page84 Next →

dsad

© 2026 juliesdish • Built with GeneratePress

Our Policies

  • Copyright Policy
  • Cookie Policy
  • GDPR Policy
  • Privacy Policy
  • Disclaimer
  • Terms Of Use

More Information

  • Home
  • About
  • Contact
  • Appetizers
  • Dessert
  • Dinner
  • Drinks
©2026, juliesdish About Back To Top