Skip to content
DisclaimerTerms Of UseGDPR PolicyCookie Policy

juliesdish

  • Home
  • Drinks
  • Appetizers
  • Dinner
  • Dessert
  • About
  • Contact
  • Privacy Policy
DisclaimerTerms Of UseGDPR PolicyCookie Policy

NO-ING-IMG

- 2 cups cooked brown rice - 1 lb boneless, skinless chicken breasts - 1 tablespoon olive oil - 1 teaspoon cumin - 1 teaspoon chili powder - 1 teaspoon paprika - Salt and pepper to taste You need cooked brown rice as a strong base for your bowl. The chicken breasts give it a hearty touch. The olive oil and spices, like cumin and chili powder, add great flavor. Don’t forget the salt and pepper. They make everything taste better. - 1 can (15 oz) black beans, rinsed and drained - 1 cup corn (fresh or frozen) - 1 cup cherry tomatoes, halved - 1 avocado, diced - 1 cup shredded lettuce - 1/2 cup shredded cheddar cheese - Fresh cilantro, chopped, for garnish - 1 lime, cut into wedges Toppings can make your bowl pop with color and taste. Black beans and corn add protein and sweetness. Fresh veggies like cherry tomatoes and avocado bring crunch. Shredded lettuce keeps it light, while cheddar cheese adds creaminess. A sprinkle of cilantro gives a fresh touch. Lime wedges add zest. - Alternate proteins (tofu, shrimp) - Additional toppings (sour cream, salsa, jalapeños) Want to switch things up? You can use tofu or shrimp instead of chicken. These options are tasty and can cater to different diets. Sour cream, salsa, or jalapeños can spice up your bowl. These add flavor and a bit of heat, making every bite exciting. For a complete guide to making these tasty bowls, check the Full Recipe. To start, you will need to marinate the chicken. In a bowl, combine 1 tablespoon of olive oil with 1 teaspoon each of cumin, chili powder, and paprika. Add salt and pepper to taste. Next, take your chicken breasts and coat them well in this spice mix. Let your chicken sit in the fridge for at least 30 minutes. This step packs in flavor and makes the chicken juicy. Once your chicken has marinated, it’s time to cook it. Preheat a large skillet over medium heat. Add the marinated chicken breasts and cook for about 6 to 7 minutes on each side. You want the chicken to reach an internal temperature of 165°F. After cooking, remove the chicken from the skillet. Let it rest for 5 minutes before slicing it into strips. This resting time keeps the juices inside. Next, we will heat the bean and corn mixture. Use the same skillet for added flavor. Add 1 can of rinsed black beans and 1 cup of corn to the skillet. Cook over medium heat for about 3 to 4 minutes. Stir occasionally until everything is heated through and mixed well. This adds a nice texture and taste to your burrito bowls. Now, it's time to assemble your burrito bowls. Start by layering 2 cups of cooked brown rice in each serving bowl as the base. On top of the rice, add the heated bean and corn mixture. Next, arrange the sliced chicken over the mixture. Add halved cherry tomatoes, diced avocado, and shredded lettuce for freshness. Finally, sprinkle shredded cheddar cheese on top. This layering not only looks great but also enhances the flavor with each bite. For the complete recipe, check out the [Full Recipe]. Using a meat thermometer helps ensure your chicken is safe to eat. The chicken should reach 165°F. This tool removes guesswork. You get juicy, tender chicken every time. Let the chicken rest before slicing. Resting for five minutes keeps it moist. If you cut too soon, the juices run out. Patience pays off with this simple step. Squeeze fresh lime juice over your chicken. This adds a bright, zesty kick. Lime juice enhances all the flavors and makes the dish pop. Try different seasonings to mix things up. Chili powder, garlic powder, or even smoked paprika can change the taste. Experimenting keeps your meals fun and fresh. Pre-cook your chicken, beans, and rice for quick assembly. This saves time during busy days. It also makes it easy to grab a meal on the go. Store ingredients separately for freshness. Keep the rice, chicken, and toppings in different containers. This way, everything stays crisp and tasty when you're ready to eat. Want to try this recipe? Check out the Full Recipe for all the details! {{image_2}} You can easily switch things up by making vegetarian or vegan burrito bowls. For a meatless option, try using plant-based proteins like tofu or tempeh. They soak up flavors well and add great texture. Another fun twist is to use quinoa instead of rice. Quinoa is high in protein and gives a nice crunch. It also adds a unique flavor that pairs well with your toppings. If you crave a kick, add chipotle peppers to your burrito bowl. They bring a smoky heat that enhances the dish. You can also incorporate sweet potatoes or roasted veggies. Roasting brings out their natural sweetness and makes them super tasty. Just toss them with some olive oil and spices before baking for a delightful crunch. For something different, think about Thai-inspired chicken flavors. Use coconut milk and curry paste to marinate your chicken. This gives a creamy, spicy twist to your bowl. You can also try Mediterranean toppings. Add olives, feta cheese, or a drizzle of tahini. These ingredients bring fresh, bold flavors that will surprise your taste buds. Don't forget to check the Full Recipe for the perfect base to work with! I recommend using airtight containers for storing your Chicken Burrito Bowls. This keeps the flavors fresh and prevents moisture loss. For best results, store your bowls in the fridge if you plan to eat them within three days. If you want to save them longer, freezing is a great option. Just remember to label the containers with the date. When reheating, do it slowly. Use the microwave or stovetop to warm your burrito bowls. If using a microwave, heat in short bursts for even warming. For stovetop reheating, add a splash of water to keep the rice from drying out. This way, your ingredients will maintain their texture and flavor. Each ingredient in your burrito bowl has a different shelf life. Cooked brown rice lasts about four to six days in the fridge. Cooked chicken stays good for three to four days. Black beans and corn can last up to five days. To keep everything fresh, store ingredients separately. This also lets you mix and match for future meals. It takes about one hour to make Chicken Burrito Bowls. Here’s the breakdown: - Prep Time: 30 minutes - Cook Time: 20 minutes - Total Time: 1 hour Planning your time helps keep everything on track. Yes, you can use leftover chicken. It cuts down on cooking time. Just shred or chop it into bite-sized pieces. Mix it with spices before adding it to your bowl. This way, you get great flavor without a lot of work. Some tasty sides include: - Tortilla chips and salsa - A fresh garden salad - Grilled corn on the cob - A cool drink like iced tea or lemonade These sides complement the flavors in the burrito bowl well. Yes, Chicken Burrito Bowls can be healthy. They are full of nutrients. Here’s a quick overview: - Protein: Chicken and beans provide good protein. - Fiber: Brown rice and beans add fiber for digestion. - Vitamins: Fresh veggies like tomatoes and avocado offer vitamins. When you use fresh ingredients, they can fit well into a balanced diet. To add heat, try these methods: - Use cayenne pepper or hot sauce in the spice mix. - Add sliced jalapeños as a topping. - Mix in a dash of chipotle powder for smoky heat. Adjust the spice based on your taste. Enjoy experimenting! In summary, chicken burrito bowls are simple and tasty. You learned about key ingredients like brown rice, chicken, and spices. The steps to marinate and cook the chicken are easy to follow. We also explored storage tips and variations to keep meals fun and fresh. Remember, you can customize your bowl to fit your taste. Try different proteins and toppings for new flavors. Enjoy making and sharing these delicious bowls with family and friends.

Savory Chicken Burrito Bowls Quick and Easy Recipe

Looking for a quick and tasty meal? This Savory Chicken Burrito Bowl recipe is perfect for you! Packed with flavor,

To make creamy mushroom orzo, you need a few key ingredients. Here’s what you’ll gather: - 1 cup orzo pasta - 2 cups vegetable broth - 1 cup sliced mushrooms (button or cremini) - 1 small onion, diced - 2 cloves garlic, minced - 1 tablespoon olive oil - 1 cup heavy cream (or coconut cream for a vegan option) - 1/2 cup grated Parmesan cheese (or nutritional yeast for vegan) - 2 tablespoons fresh thyme leaves (or 1 tablespoon dried thyme) - Salt and pepper to taste - Fresh parsley, chopped (for garnish) These items create a rich and creamy base that warms the soul. The combination of fresh mushrooms and thyme makes each bite special. You can tweak this recipe to fit your taste. Here are some optional ingredients you might want to add: - Spinach or kale for extra greens - Peas for a pop of color - Chicken or shrimp for added protein - Different herbs like basil or oregano Feel free to mix and match! Each option can give your dish a new twist. This recipe can fit many diets. For a vegan version, use coconut cream and nutritional yeast. Both work great! If you want a gluten-free dish, swap the orzo for gluten-free pasta. Remember, customizing your meals helps you enjoy them more. Check the [Full Recipe](#) for details, and make it your own! Start by heating the vegetable broth in a medium saucepan. Use medium heat and keep it warm. This step is key for cooking the orzo evenly. Warm broth blends better with the pasta, creating a creamy texture. In a large skillet, heat olive oil on medium heat. Once hot, add the diced onion. Sauté for about 3-4 minutes until the onion looks soft and clear. Next, stir in minced garlic and sliced mushrooms. Cook for another 5-7 minutes until the mushrooms become soft and brown. This step adds deep flavor to your dish. Add the orzo pasta to the skillet. Stir for 1-2 minutes to let the pasta soak in the flavors. Gradually pour in the warm vegetable broth, one ladle at a time. Stir often and wait for most of the broth to absorb before adding more. This takes about 10 minutes. When the orzo is al dente and creamy, lower the heat. Mix in the heavy cream and Parmesan cheese, stirring until everything melts together. Finally, add fresh thyme, salt, and pepper to taste. Let it simmer for 2-3 minutes, then take off the heat. Serve hot, garnished with fresh parsley. For the full recipe, check the section above. To get that rich, creamy texture in your creamy mushroom orzo, focus on two things: the cream and the broth. Start with warm broth to help the orzo cook evenly. Stir in the cream slowly and let it blend well. This way, the orzo absorbs all the flavors. If you want an even creamier dish, add a bit more cream at the end. This will make every bite smooth and flavorful. Choosing the right mushrooms is key. I love using button or cremini mushrooms because they add a nice earthiness. Shiitake or portobello mushrooms are great too. They bring a deeper flavor. Slice them thin so they cook evenly. The more mushrooms you add, the more savory your dish will be. Feel free to mix different types for a unique taste! You can change the flavor of your creamy mushroom orzo easily. Want a richer taste? Add more garlic or a splash of white wine. Try different herbs like rosemary or sage for a twist. If you like a kick, add some crushed red pepper flakes. You can also swap out the Parmesan for a sharp cheese like aged cheddar. Let your taste buds guide you! For the complete recipe, check out the Full Recipe. {{image_2}} You can make creamy mushroom orzo even better by adding more veggies. Spinach, peas, or zucchini bring color and nutrients. They also add great taste. You can also mix in proteins for a hearty meal. Grilled chicken or shrimp works well. If you want a plant-based option, try chickpeas or lentils. These not only add protein but also fiber, making your dish filling. If you need a dairy-free dish, use coconut cream instead of heavy cream. It gives a nice flavor and keeps it creamy. For cheese, nutritional yeast is a good choice. It has a cheesy taste but is vegan. If you need a gluten-free version, swap the orzo for gluten-free pasta. There are many great options available now that cook up nicely without losing taste. This dish can change with the seasons! In spring, try adding asparagus or fresh peas. For summer, use ripe tomatoes or fresh corn. In fall, consider adding pumpkin or butternut squash. Winter calls for root veggies like carrots or parsnips. Each season brings new flavors that keep this dish fresh and exciting. For the full recipe, check out the [Full Recipe]. To store your creamy mushroom orzo, cool it to room temperature first. Use an airtight container to keep it fresh. This helps keep out moisture and air. Place the container in the fridge. It will stay good for about 3 to 4 days. Reheat your orzo on the stove or in the microwave. If using the stove, add a splash of vegetable broth. This helps to restore the creaminess. Heat it over low heat, stirring often. In the microwave, use a microwave-safe bowl. Cover it loosely and heat in 30-second intervals. Stir between intervals to heat evenly. If you want to freeze creamy mushroom orzo, first let it cool completely. Use freezer-safe containers or bags. It can last up to 2 months in the freezer. When ready to eat, thaw it in the fridge overnight. Reheat it gently, adding a little vegetable broth if needed. For the complete recipe, check out the Full Recipe section. You can use several options instead of heavy cream. Coconut cream works well for a vegan dish. Silken tofu blended until smooth can also give a creamy texture. If you want a lighter option, try whole milk or half-and-half. These choices keep the dish rich but adjust the calories. Creamy mushroom orzo can last about 3 to 5 days in the fridge. Store it in an airtight container to keep it fresh. Before eating, check for any off smells or changes in texture. Reheat it gently on the stove or in the microwave. Yes, you can use other pasta shapes! Penne, fusilli, or even spaghetti can work. Just keep an eye on the cooking time, as different pastas may cook faster or slower than orzo. Adjust the liquid as needed to keep it creamy. You can find the full recipe for creamy mushroom orzo at the beginning of this article. In this blog post, we covered the key ingredients for creamy mushroom orzo and how to prepare it. I shared tips for achieving the right texture and flavor. You learned how to add nutrition and customize the dish to your needs. Remember to store leftovers well and enjoy seasonal variations. Creamy mushroom orzo can easily fit into your diet and satisfy your taste buds. Get creative with your ingredients and make this dish your own!

Creamy Mushroom Orzo Rich and Savory Comfort Food

Craving a dish that warms your heart and fills your belly? Look no further! Creamy Mushroom Orzo is the perfect

When I make Honey Lime Fruit Salad, I love to use fresh, vibrant fruits. Here’s what you’ll need: - Strawberries - Blueberries - Pineapple - Kiwi - Watermelon - Banana These fruits mix well together. They bring different colors and flavors to the dish. Strawberries and blueberries add sweetness. Pineapple gives it a tropical twist, while kiwi and watermelon add a juicy crunch. Finally, banana adds a creamy texture. For the dressing, you will need three simple ingredients: - Honey - Fresh lime juice - Lime zest I mix honey with lime juice and zest. This dressing adds a bright, tangy flavor. It balances the sweetness of the fruits. You can adjust the honey for your taste. For a special touch, consider adding: - Fresh mint leaves Mint leaves bring a fresh aroma. They also make the salad look beautiful. You can sprinkle them on top right before serving. For the full recipe, check out the detailed instructions. Enjoy making this refreshing salad! To start, wash your fruits well. Clean strawberries, blueberries, pineapple, kiwi, watermelon, and banana. Use a gentle touch with berries to avoid bruising. For the strawberries, hull them and cut them in half. Dice the pineapple into small pieces. Peel and slice the kiwi. Cube the watermelon and slice the banana. Once your fruits are ready, combine them in a large bowl. Make sure to mix them gently to keep the shapes intact. Next, we will make the honey lime dressing. In a small bowl, whisk together three tablespoons of honey, two tablespoons of fresh lime juice, and the zest of one lime. Whisk until the mixture is smooth and well combined. This step adds a bright, sweet flavor to the salad. Now, it’s time to bring it all together. Drizzle the honey lime dressing over your mixed fruit. Use a spatula to gently toss the fruit. Ensure each piece gets coated with the dressing. Let the salad sit for about ten minutes. This allows the flavors to meld and creates a refreshing dish. Serve the fruit salad in individual bowls or on a large platter. Don't forget to garnish it with fresh mint leaves for an extra pop of color and flavor. Enjoy your delicious creation! When choosing fruit for your salad, look for ripe and seasonal options. Ripe fruit tastes better and has more flavor. Seasonal fruit is often fresher and cheaper, too. I like to use a variety of colors in my salad. Bright red strawberries, deep blue blueberries, and sunny yellow pineapple create a feast for the eyes. This mix makes the dish fun and inviting. To adjust the sweetness, you can add more honey if you prefer. If it’s too sweet, squeeze in more lime juice for a nice balance. If you want a honey alternative, try maple syrup or agave nectar. These options work well and still taste great in your fruit salad. Serve your fruit salad cold for the best taste. Chill it in the fridge for a bit before serving. For a fun presentation, use clear cups or jars. Layer the fruit and dressing for a colorful look. Add fresh mint leaves on top for a pop of color and a hint of flavor. For the full recipe, check out the Honey Lime Fruit Salad! {{image_2}} You can swap out fruits in this salad. If you don't like a fruit, try a different one. Seasonal fruits can also be a great choice. For example, add peaches in summer or apples in fall. This keeps your salad fresh and fun. Always pick ripe fruits for the best taste. To make your salad more filling, add nuts or seeds. Chopped almonds or walnuts work great. They add crunch and nutrition. Another tasty option is yogurt. Pair your fruit salad with a scoop of Greek yogurt. It adds creaminess and extra protein. Add herbs or spices for a twist. Fresh mint or basil gives a nice flavor boost. A pinch of cinnamon can also add warmth. If you want to change the citrus, try orange juice instead of lime. This gives a sweet and tangy taste. You can mix and match to find your favorite flavors! For the full recipe, check out [Full Recipe]. To keep your honey lime fruit salad fresh, use airtight containers. Glass or plastic containers work well. Store the salad in the fridge right after serving. This keeps the fruit crisp and juicy. The salad lasts about 2 to 3 days in the fridge. After that, the fruit may get mushy. Freezing fruit salad isn't the best idea. The texture changes when fruit thaws. However, if you want to freeze it, prepare the salad without the honey-lime dressing. Place the fruit in a freezer-safe bag. Remove as much air as possible before sealing. To serve, thaw in the fridge overnight. Serve it fresh with the honey-lime dressing. You can make the fruit salad ahead of time. Prepare the fruit and place it in the fridge. This keeps it cool and fresh. Just add the honey-lime dressing right before serving. This way, the flavors stay bright. It’s a great way to save time. Enjoy a refreshing treat whenever you want! For the complete recipe, check out the Full Recipe. Yes, you can use different fruits in this salad. This recipe is very flexible. You can swap out strawberries for raspberries or blueberries for blackberries. Use your favorite fruits to create a mix you love. Seasonal fruits also work well. Try adding mango or peaches for extra sweetness. The salad lasts about 2 to 3 days in the fridge. To keep it fresh, store it in an airtight container. The fruits may start to lose their crunch after a day. So, enjoy it fresh for the best taste. If you need a honey substitute, try maple syrup or agave nectar. Both will add sweetness and work well with lime. If you want a sugar-free option, try stevia or monk fruit. Each option changes the flavor a bit, so choose what fits your taste. Yes, this fruit salad is very healthy. It is packed with vitamins and fiber from the fresh fruits. Strawberries and blueberries are great for your heart. Kiwi helps with digestion, while watermelon hydrates you. Plus, honey adds natural sweetness without refined sugar. Enjoy this salad as a snack or dessert! In this post, I shared a simple fruit salad recipe that dazzles any table. We explored fresh fruits, a tasty honey lime dressing, and tips to make your dish shine. You can mix up the ingredients based on what's in season or your preferences. The salad is easy to store and delightful to enjoy later. With these ideas, you can create a fresh, nutritious treat anytime. Dive in and enjoy your colorful creation!

Honey Lime Fruit Salad Refreshing and Simple Recipe

Looking for a light and tasty treat? This Honey Lime Fruit Salad is simple to make and bursting with flavor.

- 1 cup cornmeal - 1 cup all-purpose flour - 1 tablespoon baking powder - 1/2 teaspoon salt - 1/4 teaspoon cayenne pepper - 1 cup buttermilk (or milk with a splash of vinegar) - 1/2 cup unsalted butter, melted - 2 large eggs - 1 cup shredded sharp cheddar cheese - 1/2 cup diced fresh jalapenos (seeds removed for less heat) - 1/4 cup honey (optional for sweetness) You need simple ingredients for this cheesy jalapeno cornbread. Cornmeal gives that classic texture. All-purpose flour adds lightness. Baking powder makes it rise. Salt and cayenne pepper bring flavor and a little heat. Buttermilk keeps it moist and adds a tangy taste. Melted unsalted butter adds richness, while eggs bind it all together. The star here is sharp cheddar cheese, which melts beautifully. Diced jalapenos give it a spicy kick. If you like a touch of sweetness, honey is a nice addition. Gather all these ingredients for the full recipe to enjoy this tasty treat! - Preheat your oven to 400°F (200°C). - Grease an 8-inch square or round baking dish with butter or non-stick spray. - In a large mixing bowl, combine: - 1 cup cornmeal - 1 cup all-purpose flour - 1 tablespoon baking powder - 1/2 teaspoon salt - 1/4 teaspoon cayenne pepper - Whisk together until fully mixed. This helps your cornbread rise well. - In another bowl, whisk together: - 1 cup buttermilk (or milk with a splash of vinegar) - 1/2 cup unsalted butter, melted - 2 large eggs - If you want a slightly sweet taste, add 1/4 cup honey at this stage. - Pour the wet ingredients into the dry ones and stir gently. - Fold in: - 1 cup shredded sharp cheddar cheese - 1/2 cup diced fresh jalapenos (seeds removed for less heat) - Be careful not to overmix! A few lumps are okay. - Pour the batter into your prepared baking dish. - Smooth the top with a spatula. - Bake for 20-25 minutes. Check for doneness by inserting a toothpick in the center. It should come out clean. This recipe is simple and brings a burst of flavor to your table. Check out the Full Recipe for more details. To get the best texture, avoid overmixing the batter. Mixing too much makes the cornbread dense. Just mix until the dry ingredients and wet ingredients come together. A few lumps are okay. Also, keep an eye on your oven's baking time. Ovens can vary, so check your cornbread a few minutes early. It should be golden brown on top. Want to kick up the flavor? Add spices like cumin or garlic powder. These spices can make your cornbread more exciting. You can also try different cheese varieties. Pepper jack brings heat, while mozzarella adds a creamy touch. Mix and match to find your favorite flavor. Serve your cornbread warm, cut into squares or wedges. This makes it easy to share. For a fun touch, garnish with jalapeno slices or a sprinkle of cheese on top. You can also serve with honey butter or sour cream. These additions enhance the taste and look of your dish. For the full recipe, check the link above. {{image_2}} If you want a touch of sweetness, add honey or sugar. This small change makes a big difference. Just mix in an extra 1/4 cup of honey or sugar when you add the wet ingredients. This sweet cornbread pairs well with savory dishes. It also makes a great snack on its own. To kick up the heat, swap jalapenos for other peppers. Try serrano or poblano peppers for a different flavor. You can also add diced onion for extra spice and flavor. Just be sure to adjust the amount based on your heat level preference. This adds a fresh twist to your cornbread. If you're avoiding gluten, use a gluten-free flour blend. Many options work well in this recipe. Just ensure you use a blend meant for baking. This way, your cornbread stays fluffy and tender. Enjoy the same great taste with a gluten-free twist! Store your cheesy jalapeno cornbread in an airtight container. It can last at room temperature for up to 3 days. This keeps it fresh and moist, perfect for snacking or meal pairing. If you want to save some for later, freeze it. Wrap the cornbread tightly in plastic wrap or foil. It can stay good for up to 3 months. Just make sure it’s sealed well to avoid freezer burn. When you’re ready to enjoy it again, you can reheat your cornbread. Use the oven or microwave until it’s warmed through. The oven gives it a nice crisp, while the microwave is quick and easy. Yes, you can use regular milk with a splash of vinegar as a substitute. This mix mimics buttermilk's tangy taste. Just let the milk and vinegar sit for a few minutes before using. It works great in this recipe. To reduce the heat, remove the seeds from the jalapenos or cut back on the amount you use. You can also substitute with milder peppers like green bell peppers. This way, everyone can enjoy the cornbread without the spice. This cornbread pairs well with many dishes. Great options include chili, soups, or barbecue meals. It adds a fun twist to your dinner table. You can also enjoy it with a side of honey butter for a sweet touch. This cornbread recipe combines simple ingredients for a tasty dish. You learned how to prepare the batter, bake it, and store it. With tips on texture and flavor, you can create a dish that fits any meal. Don't forget to explore variations like sweet cornbread or gluten-free options. Enjoy serving it with chili or your favorite barbecue. Cornbread is versatile, and now you have the tools to make it your own. Happy baking!

Cheesy Jalapeno Cornbread Flavorful and Simple Recipe

Are you craving a warm, cheesy treat that will light up your taste buds? This Cheesy Jalapeno Cornbread recipe is

To make a Spinach Berry Protein Smoothie, you need fresh and tasty ingredients. Here’s what you will need: - 2 cups fresh spinach, washed - 1 cup mixed berries (strawberries, blueberries, raspberries) - 1 ripe banana - 1 cup almond milk (or any plant-based milk) - 1 tablespoon chia seeds - 1 scoop vanilla or berry-flavored protein powder - 1 tablespoon honey or maple syrup (optional) - Ice cubes (as needed) Each ingredient adds flavor and nutrition. Spinach packs vitamins and minerals. Berries give sweetness and antioxidants. The banana adds creaminess and helps bind the flavors. Almond milk provides a smooth base that is dairy-free. Chia seeds boost fiber and omega-3s. The protein powder adds a healthy punch, making this smoothie filling. You can adjust sweetness with honey or maple syrup, depending on your taste. Ice cubes help make the smoothie cold and refreshing. Using these ingredients, you can blend a quick and healthy boost. For the full recipe, check the section that follows. Start by gathering your ingredients. You will need: - 2 cups fresh spinach, washed - 1 cup mixed berries (strawberries, blueberries, raspberries) - 1 ripe banana - 1 cup almond milk (or any plant-based milk) - 1 tablespoon chia seeds - 1 scoop vanilla or berry-flavored protein powder - 1 tablespoon honey or maple syrup (optional, for sweetness) - Ice cubes (as needed for consistency) Wash the spinach well; this keeps dirt out. Measure out the berries and slice the banana. Having everything ready makes blending easier and faster. Now it’s time to blend! In your blender, add the spinach, mixed berries, and banana first. Next, pour in the almond milk. This helps break down the spinach and fruit. After that, toss in the chia seeds and protein powder. If you want it sweeter, add honey or maple syrup. Blend on high until smooth. Stop to scrape down the sides if needed. Once the smoothie is blended, check its texture. If it’s too thick, add more almond milk. Blend again until you reach your desired consistency. If you love cold smoothies, add ice cubes and blend again. After blending, taste your smoothie. If it needs more sweetness, add a little more honey or syrup. Blend again for a few seconds. Your Spinach Berry Protein Smoothie is now ready to pour and enjoy! For the full recipe, check the section above. To make the best spinach berry protein smoothie, start with fresh ingredients. Use ripe bananas and vibrant berries for great taste. Always wash your spinach well to remove dirt. Blend the soft fruits first for smoother results. The order of ingredients matters! Add liquids before solids to help the blender work better. One mistake is using too much liquid. This can make your smoothie too runny. Another mistake is not blending long enough. A chunky smoothie is not as nice. Don't skip the protein powder; it adds nutrition and keeps you full. Lastly, avoid adding too much sweetener. You want to taste the berries, not just sugar. To boost flavor, try adding a splash of vanilla extract. You can also mix in spices like cinnamon or ginger. For extra nutrition, consider adding nuts or seeds. They give a nice crunch and healthy fats. If you want more greens, toss in some kale or avocado. These options will enhance your smoothie without losing its great taste. For the full recipe, check out the Spinach Berry Protein Smoothie 🥬 section. {{image_2}} You can use many types of protein powder for your smoothie. Whey protein is popular and mixes well. Plant-based options like pea or hemp protein work great, too. Each type offers unique flavors and benefits. Choose one that suits your taste and diet. If you want a creamy texture, try a casein protein. This makes your smoothie thicker and richer. While mixed berries are tasty, you can swap them out. Try mango, peach, or pineapple for a fruity twist. Each fruit brings different vitamins and flavors. If you want a tart taste, use cranberries. For a sweeter option, go with ripe peaches. You can even try a mix of fruits. This helps you keep your smoothie fresh and exciting. Adding more greens can boost your smoothie’s health. Kale, Swiss chard, or even avocado blend well. They add nutrients without changing the taste much. You can also try adding nut butter for healthy fats. A tablespoon of almond or peanut butter makes it creamier. For a bit of crunch, add some nuts or seeds. These changes keep your smoothie fun and packed with nutrition. For the full recipe, check the previous section. After you enjoy your spinach berry protein smoothie, you may have some left. Store it in a sealed jar. A glass jar works best. Keep it in the fridge for up to 24 hours. Make sure to shake it well before drinking again. The colors may change, but it will still taste great. You can save time by freezing smoothie ingredients. Wash and chop your spinach and berries first. Then, place them in freezer bags. Lay them flat to save space. When you want a smoothie, just grab a bag. This keeps your ingredients fresh and ready to blend. If your smoothie has been in the fridge, it may separate. This is normal! Just pour it back into the blender. Add a splash of almond milk to help it blend smoothly. Blend until it is creamy again. You can also add ice if you like it colder. This way, you can enjoy your smoothie just like new! Yes, you can use frozen berries. They add great flavor and chill the drink. Just blend them straight from the freezer. You may need less ice if you use frozen berries. This smoothie recipe makes two servings. You can easily double the recipe for more. Share with a friend or enjoy one for later! Spinach is packed with vitamins A and C. It helps your skin and immune system. Berries are rich in antioxidants. They support heart health and help with digestion. Together, they make a powerful duo! Yes, you can skip the protein powder. Your smoothie will still be tasty and healthy. Add more spinach or banana for extra nutrients. You can also try nut butter for added protein. To make your smoothie thicker, add more banana or chia seeds. You can also use less almond milk. For a thinner smoothie, add more almond milk or water. Adjust until you reach your desired texture. For the complete recipe, check out the Spinach Berry Protein Smoothie. This blog post covers everything you need for a tasty smoothie. We explored the ingredients, from fresh spinach to mixed berries, and how to blend them perfectly. I shared tips to avoid mistakes and ways to boost flavor. I also gave ideas for variations and storing your smoothie. Remember, smoothies can be flexible. Experiment with ingredients to find your favorite mix. Enjoy your healthy drink, and make it your own!

Spinach Berry Protein Smoothie Quick and Healthy Boost

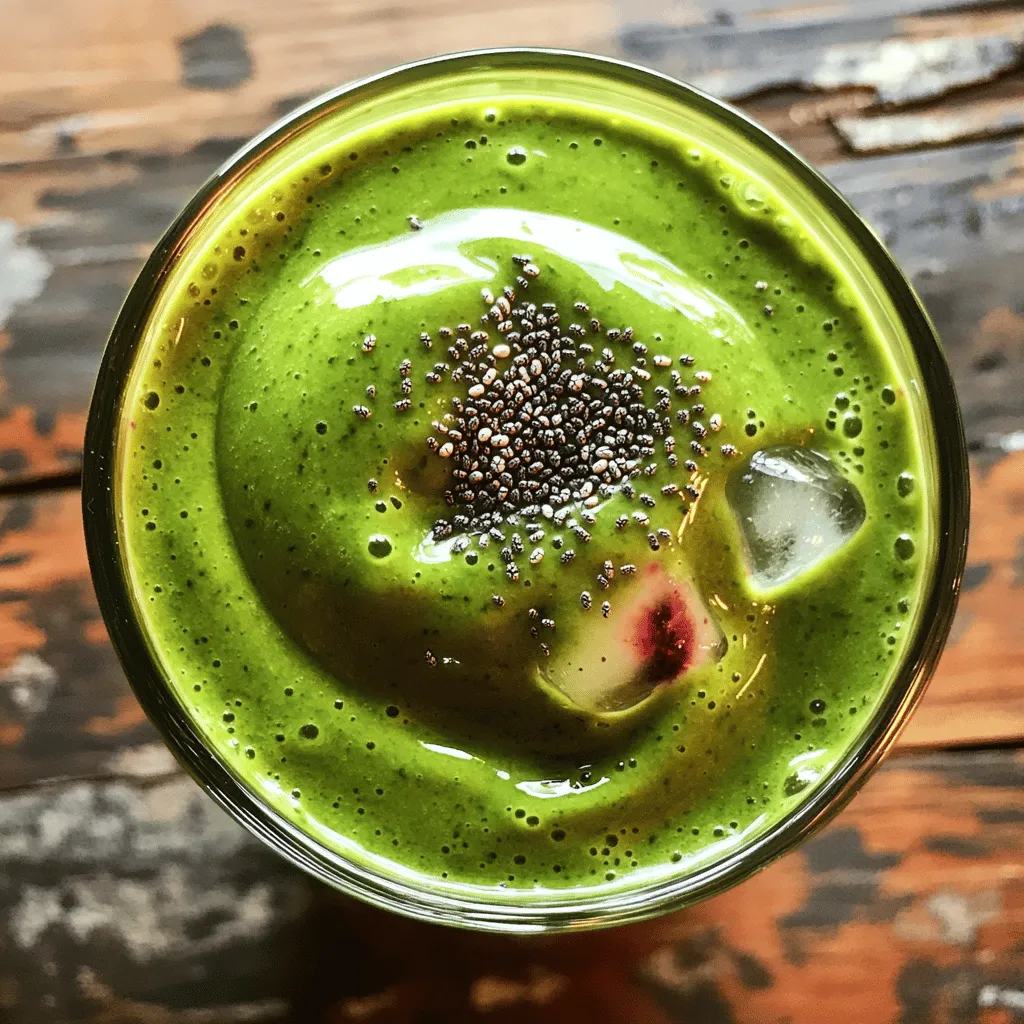
Looking for a quick and healthy boost? Try my Spinach Berry Protein Smoothie! Packed with fresh spinach, mixed berries, and

- 1 cup quinoa - 2 cups vegetable broth - 1 bell pepper (any color), diced - 1 zucchini, diced - 1 cup cherry tomatoes, halved - 1 red onion, cut into wedges - 2 tablespoons olive oil - 1 teaspoon garlic powder - 1 teaspoon smoked paprika - Salt and pepper to taste - 1/4 cup fresh parsley, chopped - 1/4 cup feta cheese, crumbled (optional) - 2 tablespoons balsamic vinegar This salad combines fresh veggies with quinoa for a healthy meal. The main ingredients form a colorful base. Quinoa adds protein and fiber, making it filling. Using vegetable broth gives it a rich flavor. The seasoning enhances the dish's taste. Olive oil helps the veggies roast well, making them tender and sweet. Garlic powder and smoked paprika add depth. You can adjust the salt and pepper to suit your taste. Fresh parsley brings a lively touch. If you like, sprinkle feta cheese for creaminess. Balsamic vinegar adds a tangy kick. This is a great way to enjoy a healthy, fresh meal. For the full recipe, check back to get the step-by-step guide! - Rinse quinoa thoroughly under cold water. This step removes any bitterness. - Combine the rinsed quinoa with 2 cups of vegetable broth in a medium saucepan. - Bring the mix to a boil over medium heat. Once boiling, reduce the heat to low. Cover and let it simmer for about 15 minutes. The quinoa should absorb all the broth and look fluffy. Remove from heat and let it sit covered for 5 minutes. Fluff it gently with a fork. - Chop your bell pepper, zucchini, cherry tomatoes, and red onion into bite-sized pieces. - In a large bowl, mix the chopped veggies with 2 tablespoons of olive oil. Season with 1 teaspoon of garlic powder, 1 teaspoon of smoked paprika, and salt and pepper to taste. Toss everything until the vegetables are well coated. - Spread the seasoned veggies evenly on a baking sheet lined with parchment paper. Roast them in your preheated oven at 425°F (220°C) for 20 to 25 minutes. Stir halfway through to ensure they roast evenly. They are ready when tender and slightly caramelized. - In a large mixing bowl, add the cooked quinoa and the roasted vegetables together. - If you like, toss in 1/4 cup of fresh parsley and, for extra flavor, 1/4 cup of crumbled feta cheese. - Drizzle 2 tablespoons of balsamic vinegar over the mix. Toss gently to combine all the ingredients. Taste your salad and adjust the seasoning with more salt and pepper if needed. For the complete recipe, check out the Full Recipe. Enjoy your fresh and colorful Roasted Vegetable Quinoa Salad! To get a great roast, set your oven to 425°F (220°C). This high heat makes the veggies crisp and tasty. Roast them for 20-25 minutes. Stir the veggies halfway through to cook them evenly. This keeps them from burning on one side. To make your salad pop, add spices like garlic powder and smoked paprika. These spices give depth and warmth. Fresh herbs, like parsley, also brighten the dish. For a zing, drizzle some balsamic vinegar on top. This adds a nice acidity to balance the flavors. You can serve this salad warm or chilled. It tastes great at any temperature! Pair it with grilled chicken or bake tofu for protein. A light dressing can also elevate the meal. Try a simple olive oil and lemon mix for a fresh taste. For the full recipe, check the section above! {{image_2}} You can change the veggies to suit your taste or the season. Try using sweet potatoes in the fall or asparagus in the spring. Seasonal vegetables are fresh and full of flavor. You can also use leftover veggies from other meals to mix things up. Toss in any roasted or raw vegetables you have on hand. This makes your salad unique and keeps it exciting. Adding protein boosts the salad's nutrition. You can use chickpeas or black beans for a vegetarian option. If you want a vegan choice, add nuts or seeds. For meat lovers, grilled chicken or shrimp fits well. These add-ins make your meal more filling and satisfying. Choose what you love most to make it your own. If you need a gluten-free option, quinoa is a great choice. It is naturally gluten-free and tasty. To create a low-carb version, skip the quinoa and focus on the vegetables. You can add more leafy greens instead. This keeps your meal light and healthy. Adapt the recipe based on your dietary needs and enjoy the flavors. For the full recipe, check the details above. To keep your roasted vegetable quinoa salad fresh, use airtight containers. Glass containers work best, as they do not absorb odors. Store the salad in the fridge right after it cools. If you plan to eat it later, you can freeze it. Divide it into portions before freezing. This makes it easy to grab what you need. In the fridge, this salad lasts about 3 to 5 days. It is best to eat it within this time frame for optimal taste. Check for signs of spoilage like a bad smell or mold. If it looks off or smells funky, throw it away. Reheat the salad gently. Use the microwave on low power to avoid mushy veggies. You can also warm it on the stove over low heat. If you prefer, serve it chilled or at room temperature. Both options are tasty and keep the flavors bright. For the full recipe, visit the provided link. To make this salad vegan, you can simply skip the feta cheese. You can also use a vegan-friendly balsamic vinegar. If you want to add creaminess, consider mashed avocado or a vegan yogurt. Yes, you can make this salad in advance. Cook the quinoa and roast the veggies ahead of time. Store them in separate containers in the fridge. Mix them together just before serving. This helps keep the salad fresh and tasty. If you don't have quinoa, you can use couscous or brown rice. Both are easy to cook and work well with roasted veggies. If you're looking for a low-carb option, consider using cauliflower rice. It adds a nice texture. Yes, this salad is gluten-free. Quinoa is naturally gluten-free. Just make sure your vegetable broth does not contain gluten. All other ingredients listed are also gluten-free, so you can enjoy this meal without worry. Roasted Vegetable Quinoa Salad is a simple and healthy dish. You need quinoa, veggies, and seasonings. Cooking the quinoa and roasting the veggies creates great flavor. You can adjust ingredients to fit your taste and needs. This salad is perfect for meal prep or a quick lunch. With tips on storage and variations, the options are endless. Enjoy this nutritious meal with friends or family. It makes eating healthy easy and delicious.

Roasted Vegetable Quinoa Salad Fresh and Flavorful Meal

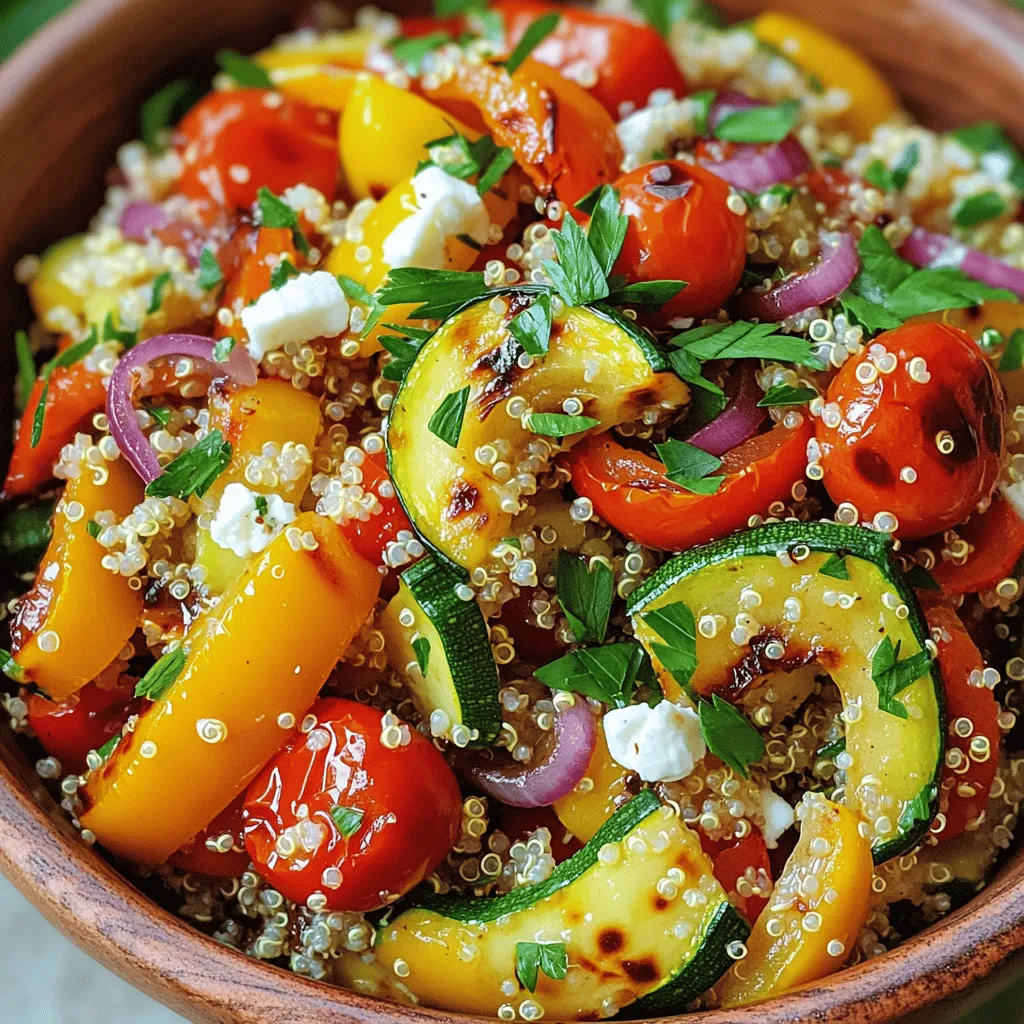
Are you looking for a fresh and tasty meal? My Roasted Vegetable Quinoa Salad is packed with vibrant colors and

To make chocolate dipped coconut macaroons, you need fresh ingredients that create a sweet and chewy treat. Here’s what you’ll need: - 3 cups shredded coconut (unsweetened) - 1 cup sweetened condensed milk - 1 teaspoon vanilla extract - 1/4 teaspoon salt - 2 large egg whites - 1/4 teaspoon cream of tartar - 8 ounces dark chocolate, chopped - 1 tablespoon coconut oil Each ingredient plays a key role in the texture and flavor. The shredded coconut gives that lovely chewiness, while the sweetened condensed milk adds a rich sweetness. The vanilla extract enhances the overall flavor, making each bite delightful. Egg whites, when whipped, provide a light and airy texture, while cream of tartar helps stabilize them. The dark chocolate adds a rich finish, and the coconut oil helps it melt smoothly for dipping. This simple list ensures you have everything you need for a delicious batch. For the full recipe, refer back to the section above. 1. Preheat your oven to 325°F (163°C). Line a baking sheet with parchment paper. 2. In a large bowl, mix 3 cups of shredded coconut, 1 cup of sweetened condensed milk, 1 teaspoon of vanilla extract, and 1/4 teaspoon of salt. Stir well until everything combines. 3. In another bowl, whisk 2 large egg whites and 1/4 teaspoon of cream of tartar until stiff peaks form. This takes about 3 to 5 minutes. 4. Gently fold the egg whites into the coconut mixture. Be careful not to deflate the egg whites. This keeps the macaroons light and fluffy. 1. Use a small cookie scoop or your hands to form small mounds of the mixture. Place them on the prepared baking sheet, keeping about 2 inches between each. 2. Bake the macaroons for 15 to 20 minutes. You want them golden brown on the edges. Let them cool completely on the baking sheet. 1. While the macaroons cool, melt 8 ounces of dark chocolate and 1 tablespoon of coconut oil. Use a microwave-safe bowl, heating in 30-second intervals and stirring until smooth. 2. Dip the bottom of each macaroon into the melted chocolate. Tap off any extra chocolate and place them back on the parchment-lined sheet. 3. If you have leftover chocolate, drizzle it on top of each macaroon for decoration. 4. Refrigerate the dipped macaroons for about 30 minutes. This helps the chocolate set firmly. For the full recipe, check out the previous section for all the details! To get the best texture in your chocolate dipped coconut macaroons, focus on the egg whites. They help create a light and airy treat. When you whisk the egg whites, aim for stiff peaks. This means the egg whites hold their shape and do not fall. Use a hand mixer or stand mixer for about 3 to 5 minutes. Folding is just as important. Gently mix the egg whites into the coconut mix. Do this slowly so the air stays in the egg whites. If you mix too hard, your macaroons will be dense. Baking time and temperature also matter. Preheat your oven to 325°F (163°C). Bake the macaroons for 15 to 20 minutes. Watch for a golden edge. If they brown too fast, lower the oven temperature slightly. To make your macaroons pop with flavor, consider adding almond extract. Just a teaspoon can give a nice twist. You can also try other extracts, like coconut or lemon. Each adds its own unique taste. For toppings and drizzles, think outside the box. After dipping the macaroons in chocolate, drizzle more chocolate on top. You can also sprinkle toasted coconut over them. This gives both texture and a fun look. For the full recipe, check out the detailed instructions. Enjoy crafting your delightful treats! {{image_2}} You can choose different types of chocolate for dipping. Dark chocolate gives a rich taste. It pairs well with the sweet coconut. Milk chocolate adds creaminess and a sweeter flavor. Many prefer it for its smoothness. White chocolate is another fun option. It adds a sweet and creamy layer. Each chocolate brings its own unique taste to the macaroons. Coconut can vary in sweetness. You can use sweetened coconut for a richer flavor. Unsweetened coconut gives a more natural taste. It allows the chocolate to shine through. Toasting coconut adds a delightful crunch. It also deepens the flavor, making it more complex. To toast, bake it in the oven for a few minutes. Keep an eye on it so it doesn’t burn. If you want an egg-free version, use aquafaba. It’s the liquid from canned chickpeas. Whip it up until it forms stiff peaks, just like egg whites. For gluten-free options, you can add gluten-free flour. It helps bind the mixture without changing the taste. This adds a slight texture that can be really nice. These substitutions keep the spirit of the macaroon while adding more options. For the full recipe, check the section above. Store your chocolate dipped coconut macaroons at room temperature. They taste best this way. Place them in an airtight container. This keeps them fresh and moist. If you want to store them longer, consider the refrigerator. They can last up to a week when stored properly. Just remember, they may lose some texture in the fridge. If you want to keep macaroons for months, freezing is a good option. To prepare them for freezing, let them cool completely first. Then, place the macaroons in a single layer on a baking sheet. Freeze them for about two hours. Once frozen, transfer them to a freezer-safe bag or container. Be sure to remove as much air as possible. When you’re ready to enjoy, take them out and let them thaw in the fridge. This helps them keep their texture. You can also let them sit at room temperature for about 30 minutes. Enjoy these delightful treats anytime! For the full recipe, check out the detailed guide above. To keep your macaroons from falling apart, follow these tips: - Mix Carefully: When you combine the egg whites and coconut mixture, fold gently. This keeps the egg whites airy, giving your macaroons a light texture. - Stiff Peaks: Whip egg whites until they form stiff peaks. This adds structure to your macaroons. - Proper Baking: Bake at 325°F (163°C) until they are golden brown. This helps them hold their shape. By ensuring these steps, your macaroons will stay intact and look great. Yes, you can use sweetened shredded coconut. It changes the taste and texture: - Taste: Sweetened coconut adds more sweetness, which can make your macaroons richer and more dessert-like. - Texture: Using sweetened coconut may make them slightly denser than with unsweetened coconut. If you prefer a sweeter treat, sweetened coconut works well for this recipe. These macaroons last about one week at room temperature. For best storage: - Airtight Container: Store them in an airtight container to keep them fresh. - Refrigeration: You can also store them in the fridge for up to two weeks. Feel free to enjoy them over several days! For the full recipe, check out the details above. You now have the tools to make delicious macaroons. We covered the key ingredients, steps, and tips for perfecting your treats. You can explore various chocolate options and substitute ingredients to suit your taste. Remember to store your macaroons properly for the best results. Baking can be fun and rewarding. Get creative and enjoy the process! Your homemade macaroons will impress everyone. Happy baking!

Chocolate Dipped Coconut Macaroons Delightful Treat

Welcome to the sweet world of Chocolate Dipped Coconut Macaroons! If you love coconut and chocolate, this treat is for

For this tasty dish, you will need: - 2 cups shredded cooked chicken - 1 can (15 oz) black beans, drained and rinsed - 1 can (10 oz) enchilada sauce (red or green) - 1 cup corn (frozen or canned) - 2 cups shredded cheddar cheese - 8 corn tortillas, cut into strips - 1 teaspoon cumin - 1 teaspoon chili powder - 1/2 teaspoon garlic powder - Salt and pepper to taste These ingredients combine to make a hearty casserole. The shredded chicken gives great flavor. Black beans add protein and fiber. Corn adds sweetness and texture. The spices enhance each bite with warmth. If you need substitutes, here are some good options: - Use rotisserie chicken for quick prep. - Swap black beans for pinto beans or kidney beans. - Use salsa instead of enchilada sauce for a fresh taste. - Try different cheese, like Monterey Jack, for a unique twist. - Use flour tortillas if gluten-free options are not a concern. These swaps can help you fit your taste and pantry needs. Garnishes can make your casserole pop. You can add: - Fresh cilantro for a burst of color and flavor. - Diced avocado for a creamy texture. - Sour cream for a rich and tangy finish. - Sliced jalapeños for a spicy kick. These garnishes can elevate your dish and impress your guests. For the full recipe, check out the complete steps and instructions. First, let's gather all the ingredients. You need shredded chicken, black beans, corn, and enchilada sauce. I like to use either red or green sauce. You will also need cheese, tortillas, and spices. 1. Preheat your oven to 350°F (175°C). This step is key for even cooking. 2. In a large bowl, mix the chicken, black beans, corn, and enchilada sauce. 3. Add cumin, chili powder, garlic powder, and some salt and pepper. Stir until well combined. 4. Grease a baking dish to prevent sticking. A 9x13 inch dish works great. Now it’s time to layer the casserole. This part is fun and easy! 1. Start with a layer of tortilla strips at the bottom. 2. Spread half of your chicken mixture over the tortillas. 3. Sprinkle 1 cup of cheddar cheese on top. 4. Add another layer of tortilla strips. 5. Spread the rest of the chicken mixture, then top with the last cup of cheese. Baking is where the magic happens. Here’s how to get perfect results: 1. Cover your dish with aluminum foil. This helps keep the moisture in. 2. Bake for 25 minutes, then take off the foil. 3. Bake for another 10-15 minutes. You want the cheese to be melted and bubbly. 4. Let it cool for a few minutes before serving. This makes slicing easier. 5. If you like, add fresh cilantro for color and flavor. Make sure to check out the Full Recipe for more details. Enjoy your cooking! To boost flavor, try adding some fresh lime juice. A squeeze can wake up the dish. You can also add diced jalapeños for heat. If you love smoky flavors, throw in some chipotle in adobo sauce. Fresh herbs like cilantro or parsley can add a burst of freshness. For a cheesy delight, mix in different cheeses. Use Monterey Jack or pepper jack for a fun twist. Layer cheese between the tortillas and on top. Make sure to use shredded cheese for the best melt. If you want a golden crust, broil the casserole for a few minutes after baking. To save time, use rotisserie chicken. It cuts down on prep time and adds flavor. You can also use canned beans and corn to speed things up. Prepare the casserole a day before and bake it when ready. This method makes dinner a breeze, especially on busy nights. For a quick cleanup, line your baking dish with parchment paper. For the full recipe, check out the details above! {{image_2}} You can easily make a vegetarian version. Simply swap the chicken for black beans or lentils. This option is hearty and tasty. You can keep all other ingredients the same. Use the same spices to ensure a burst of flavor. This dish remains filling without meat. To spice things up, add chopped jalapeños or hot sauce. Mix these in with your chicken. You can also use a spicy enchilada sauce. This version adds a kick that many love. Adjust the spices to your taste for the right heat level. For a gluten-free dish, use corn tortillas instead of flour. Ensure your enchilada sauce is gluten-free too. There are many brands available that fit this need. This way, everyone can enjoy a delicious meal. You won’t lose any flavor by making these swaps. Feel free to mix and match these ideas. Each variation offers a unique twist on the classic Easy Chicken Enchilada Casserole. For the full recipe, check out the complete instructions above. After you enjoy your Easy Chicken Enchilada Casserole, let it cool. Once cool, cover it with plastic wrap or transfer it to an airtight container. Store it in the fridge for up to four days. Keeping the dish sealed helps it stay fresh and tasty. If you want to save some for later, this casserole freezes well. Let it cool completely before freezing. Wrap it tightly in plastic wrap, then foil. You can also use a freezer-safe container. This way, it can last for up to three months. Label it with the date so you know when to use it. To reheat, you have a few options. The best way is to use the oven. Preheat it to 350°F (175°C). Place the casserole in an oven-safe dish. Cover it with foil to keep it moist. Heat for about 20 to 30 minutes until hot. You can also use the microwave for quick heating. Just cover it to avoid drying out. If using the microwave, check every few minutes to make sure it heats evenly. Enjoy your leftovers just as much as the first time! For the full recipe, check out the entire article. You can prepare the Easy Chicken Enchilada Casserole a day before. First, follow all steps up to baking. Instead of baking, cover the dish and store it in the fridge. When you're ready, preheat your oven and bake it as the recipe states. This method saves time and makes dinner easy. Yes, you can use different proteins in this casserole. Ground turkey or beef works well. You can also use shredded pork for a nice twist. If you want a lighter option, try using tofu. Just make sure to season your protein well to keep the flavor rich. Several sides go great with this dish. Here are some ideas: - Spanish rice - Refried beans - A fresh green salad - Guacamole and tortilla chips - Corn on the cob These sides add variety and make the meal more filling. Enjoy your cooking! This chicken enchilada casserole is simple and fun to make. You learned about the key ingredients, along with substitutes and tasty garnishes. The step-by-step guide helps you prepare, layer, and bake it perfectly. Use my tips for extra flavor and quick prep. I also shared tasty variations and ways to store leftovers. Enjoy creating your own version of this dish. You’ll impress family and friends with your skills. Happy cooking!

Easy Chicken Enchilada Casserole Quick and Tasty Dish

Looking for a quick and tasty dinner? You’re in the right spot! My Easy Chicken Enchilada Casserole packs delicious flavors

- 1 loaf of brioche or challah bread, cut into 1-inch cubes - 6 large eggs - 2 cups milk (whole or dairy-free) - 1/2 cup heavy cream (or replace with additional milk for a lighter option) - 1/2 cup granulated sugar - 1 tablespoon vanilla extract - 1 teaspoon ground cinnamon - 1/4 teaspoon nutmeg (optional) - 1 cup blueberries (fresh or frozen) - 1/2 cup maple syrup (for drizzling) - Powdered sugar (for dusting) For this recipe, the bread choice is key. I love using brioche or challah bread because they are soft and sweet. They soak up the egg mixture well and create a rich texture. Using eggs and milk makes the base creamy and delicious. The sugar adds sweetness, while cinnamon and nutmeg give it a warm touch. Blueberries add a fruity burst, making every bite special. - Maple syrup and powdered sugar - Fresh fruits and whipped cream Toppings can elevate your dish. I suggest drizzling warm maple syrup over the bake. It adds sweetness and flavor. A light dusting of powdered sugar gives a nice finish. You can also add fresh fruits, like strawberries or bananas, for color and taste. Whipped cream can make it feel like dessert. - Dairy-free options - Sugar replacements If you want dairy-free, use almond milk or oat milk instead of regular milk. You can skip heavy cream entirely or swap it with more milk. For sugar, try honey or a sugar substitute, like stevia. These changes keep the taste great while meeting dietary needs. 1. First, preheat your oven to 350°F (175°C). This helps the dish cook evenly. 2. Next, grease a 9x13-inch baking dish with butter or non-stick spray. This keeps the bake from sticking. 3. Now, take your loaf of brioche or challah bread and cut it into 1-inch cubes. 4. Place the bread cubes evenly in the baking dish. Make sure they fit snugly together. 5. Sprinkle 1 cup of blueberries over the bread cubes. You can use fresh or frozen blueberries. 1. In a large mixing bowl, crack 6 large eggs. 2. Add 2 cups of milk, along with 1/2 cup of heavy cream. This adds a rich taste. 3. Next, incorporate 1/2 cup of granulated sugar, 1 tablespoon of vanilla extract, 1 teaspoon of ground cinnamon, and 1/4 teaspoon of nutmeg (if you want). 4. Whisk everything together until smooth. Make sure there are no lumps. 1. Pour the custard mixture evenly over the bread and blueberries. 2. Gently press down on the bread. This helps it soak up the custard. 3. Cover the dish with aluminum foil and let it rest in the fridge for at least 30 minutes. If you can, let it sit overnight for the best flavor. 4. When you are ready to bake, remove the foil. 5. Place the dish in the preheated oven and bake for 30 minutes. It should look golden brown and puffed. 6. When it's done, take it out and let it cool for 5-10 minutes. You can find the full recipe [here](#). Soaking your bread is key for great texture. Aim for a soak time of at least 30 minutes. This allows the bread cubes to absorb the custard fully. For even better flavor, try using almond milk or coconut milk instead of regular milk. You can also add a splash of orange juice for a citrus twist. To ensure even baking, cover the dish with foil for the first half of baking. This keeps moisture in and helps the bread cook through. After 15 minutes, remove the foil to let the top get golden brown. Check for doneness by inserting a knife in the center. If it comes out clean, you’re ready to serve. When serving, drizzle with warm maple syrup for added sweetness. You can dust with powdered sugar for a fancy touch. Arrange fresh berries on the side to make the plate pop. For a fun twist, add some whipped cream on top right before serving. This adds both flavor and a nice look. {{image_2}} You can make your classic French toast bake even better with fun flavors. Adding fresh fruits like strawberries or bananas brings bright taste and color. You can also use flavored extracts. Almond or orange extracts can add a nice twist to your dish. Want to try something new? Make it savory! You can mix in cheese and herbs like thyme or chives for a unique flavor. Adding bacon or sausage gives it a hearty touch. These changes make the dish perfect for brunch or a cozy dinner. Switching up the bread can change the whole dish. You can use sourdough or whole-grain bread for a different texture and taste. Artisan breads like focaccia also work well. Each type of bread adds its own charm to your bake. For the full recipe, check out the Classic French Toast Bake section. After cooking, let your French toast bake cool. Place leftovers in an airtight container. It keeps well in the fridge. Store it for up to three days. This way, you can enjoy it later without losing flavor. You can freeze your French toast bake before or after baking. If you freeze before, wrap it tightly in plastic wrap. Then put it in a freezer-safe bag. It can last up to two months. If you freeze after baking, let it cool first. Wrap it well and store it. To thaw, move it to the fridge overnight. This helps keep the texture nice. You can also thaw it in the microwave on low. Reheat leftovers in the oven for the best taste. Preheat the oven to 350°F (175°C). Place the French toast bake in a baking dish. Cover it with foil to keep moisture in. Heat for about 15-20 minutes. If you’re short on time, use the microwave. Heat in short bursts of 30 seconds. Check if it's warm enough before serving. This method works but may not keep the crust crispy. Enjoy your Classic French Toast Bake again! For the full recipe, check out the recipe section. You can tell the French toast bake is done when it turns golden brown on top. The edges should look puffy and firm. If the center jiggles too much, it needs more time. A toothpick inserted in the center should come out clean. Yes, you can prepare this dish in advance. I recommend soaking it overnight for the best flavor. To do this, mix the bread and custard, then cover and refrigerate. This allows the bread to soak up all the tasty flavors. If you do not have time for overnight soaking, aim for at least 30 minutes. Each serving of Classic French Toast Bake has about 300-350 calories. It contains around 10 grams of protein and 15 grams of fat. The sugar content is about 20 grams per serving. For lighter options, you can use dairy-free milk and reduce the sugar. Always check the exact values based on the ingredients you use. For the full recipe, refer to the earlier section. This blog post covered how to make a tasty French toast bake. We discussed key ingredients like brioche, eggs, and sugar, plus great toppings and dietary swaps. You learned simple steps for preparation and baking, along with tips for even cooking and presenting your dish. Variations can add variety, from sweet fruit to savory options. In conclusion, a classic French toast bake is fun and flexible. Enjoy making it your way, and savor each bite!

Classic French Toast Bake Delightful and Easy Recipe

Looking for a breakfast treat that’s both easy and delicious? My Classic French Toast Bake recipe is just what you

For the best Tropical Mango Pineapple Smoothie, gather these key ingredients: - 1 ripe mango, peeled and diced - 1 cup fresh pineapple chunks - 1 banana, peeled - 1 cup coconut milk - 1/2 cup Greek yogurt - 1 tablespoon honey or agave syrup (optional) - 1/2 teaspoon grated fresh ginger - 1 cup ice cubes Each ingredient adds a special touch. The mango gives sweetness and a smooth texture. Pineapple brings brightness and a tropical flair. The banana adds creaminess and makes it filling. Coconut milk makes it rich and tropical. Greek yogurt boosts protein and adds creaminess. Ginger offers a zing that wakes up your taste buds. You can sweeten it with honey or agave syrup if you like. And don’t forget the ice; it keeps your smoothie cold and refreshing. For the full recipe, be sure to check out the instructions after this section! Making a Tropical Mango Pineapple Smoothie is easy and fun! Follow these simple steps to create a refreshing drink that bursts with flavor. 1. Combine fresh fruits in a blender Start by adding the ripe mango, fresh pineapple chunks, and banana into your blender. Make sure to peel and chop the fruits for a smooth blend. 2. Add coconut milk and Greek yogurt Next, pour in the coconut milk and scoop in the Greek yogurt. This will give your smoothie a creamy texture. 3. Sweeten with honey or agave syrup If you prefer a sweeter drink, add honey or agave syrup. Just one tablespoon should do. You can always taste it later to see if you want more. 4. Incorporate grated ginger For a zesty kick, add the grated ginger. This spice adds warmth and a hint of spice to your smoothie. 5. Add ice and blend until smooth Toss in the ice cubes to make your smoothie cold and refreshing. Blend on high speed until everything is smooth and creamy. 6. Taste and adjust sweetness if necessary Once blended, taste your smoothie. If it needs more sweetness, add a bit more honey or agave, and blend again briefly. 7. Serve and enjoy! Pour your smoothie into tall glasses. You can garnish with a slice of fresh mango and a sprig of mint for a lovely finish. Enjoy your Tropical Mango Pineapple Smoothie! These steps will guide you to a delicious drink in just about 10 minutes. For the complete recipe, check the [Full Recipe]. Choosing the right mango and pineapple is key. A ripe mango should feel slightly soft when you press it. It should smell sweet at the stem end. For pineapple, look for a sweet smell and a golden color. The fruit should have some give when squeezed gently. To achieve the right consistency and thickness, balance is vital. Use coconut milk for creaminess and Greek yogurt for a thicker texture. Adjust the amount of coconut milk to get your desired thickness. You may want it thin for sipping or thick for a spoonable treat. Using frozen fruit can add extra coldness. Frozen mango or pineapple keeps your smoothie icy and refreshing. If you use fresh fruit, add more ice cubes to chill it down. This step is great for hot days when you want a cool drink. Experimenting with ingredient ratios can lead to new flavors. You can start with the basic recipe and adjust it to your taste. Add more mango for sweetness or more ginger for zing. Do not hesitate to try different fruits or liquids. Each tweak can make your tropical smoothie unique and fun. For the full recipe, check the section above. Enjoy blending! {{image_2}} You can make your Tropical Mango Pineapple Smoothie even more fun with a few easy tweaks. Here are some great ideas: - Adding spinach or kale for a green boost: Tossing in some spinach or kale adds vibrant color and nutrients. You won't taste them much, but your smoothie gets a healthy kick. - Using different non-dairy milk options: If you want to change things up, try almond, oat, or soy milk. Each milk brings a unique flavor and texture to your drink. - Incorporating other fruits like papaya or passion fruit: You can mix in papaya or passion fruit for extra tropical flair. These fruits add new tastes and make the smoothie even more exciting. - Creating a protein-packed version with protein powder: For a protein boost, add some protein powder. This makes the smoothie great for a post-workout treat or a filling breakfast. These variations keep your Tropical Mango Pineapple Smoothie fresh and fun! For the full recipe, follow the detailed steps above. You might have some smoothie left after making your Tropical Mango Pineapple Smoothie. To keep it fresh, store it in a glass jar or airtight container. Try to leave some space at the top. This way, the smoothie doesn't expand and spill. It will stay good in the fridge for up to 24 hours. If you want to save it for a longer time, freeze your smoothie. Pour it into ice cube trays or freezer bags. This method helps you make single servings later. When you're ready to enjoy, just blend the frozen cubes with a little coconut milk or water. Sometimes, you may find a smoothie that has sat in the fridge. It might separate a bit. No worries! Just give it a quick shake or stir. You can also blend it again for a smooth texture. Enjoying your smoothie later is just as good as when you first made it! Can I make this smoothie ahead of time? Yes, you can make this smoothie ahead of time. Blend your ingredients and store them in the fridge for up to 24 hours. Just remember to shake or stir it well before serving. What is the best way to blend a smoothie? To blend a smoothie well, add liquids first. This helps the blades move freely. Next, add soft fruits, then hard ones like ice. Blend on high until smooth. Stop to scrape the sides if needed. How can I make it vegan-friendly? To make this smoothie vegan, simply replace Greek yogurt with a plant-based yogurt. Also, use agave syrup instead of honey. Coconut milk is already vegan, so you are good there! Can I add supplements like protein or fiber? Yes, you can add protein powder or fiber to your smoothie. Just mix in a scoop of your favorite protein powder or a tablespoon of chia seeds. This boosts nutrition and keeps you full longer. For the full recipe, check out the Tropical Mango Pineapple Smoothie section above. This article shared the key ingredients and steps to create a tasty Tropical Mango Pineapple Smoothie. You learned how to pick fresh fruits, blend them well, and store your creations. Remember, experimenting with ingredients can lead to your perfect drink. Enjoy the cooling, yummy refreshment. It's easy to make and offers great flavor. Use these tips to spark your creativity in the kitchen. Make this smoothie your own!

Tropical Mango Pineapple Smoothie Refreshing and Easy

Craving a burst of sunshine? You’ve come to the right place! This Tropical Mango Pineapple Smoothie will transport your taste

Older posts
Newer posts
← Previous Page1 … Page62 Page63 Page64 … Page84 Next →

dsad

© 2026 juliesdish • Built with GeneratePress

Our Policies

  • Copyright Policy
  • Cookie Policy
  • GDPR Policy
  • Privacy Policy
  • Disclaimer
  • Terms Of Use

More Information

  • Home
  • About
  • Contact
  • Appetizers
  • Dessert
  • Dinner
  • Drinks
©2026, juliesdish About Back To Top