Skip to content
DisclaimerTerms Of UseGDPR PolicyCookie Policy

juliesdish

  • Home
  • Drinks
  • Appetizers
  • Dinner
  • Dessert
  • About
  • Contact
  • Privacy Policy
DisclaimerTerms Of UseGDPR PolicyCookie Policy

NO-ING-IMG

- 1 cup unsalted butter, softened - 1 cup brown sugar, packed - 1/2 cup granulated sugar - 2 large eggs - 2 teaspoons vanilla extract - 2 1/2 cups all-purpose flour - 1 teaspoon baking soda - 1/2 teaspoon salt - 1 cup graham cracker crumbs (about 8 full sheets) - 1 cup semi-sweet chocolate chips - 1 cup mini marshmallows - Extra chocolate chips and mini marshmallows for topping When baking, precise measurements matter. I recommend using measuring cups and spoons for accuracy. Level off dry ingredients with a knife for best results. For butter, let it soften at room temperature for about 30 minutes. This helps it mix well with sugars. If you are unsure about the amount, it’s always smart to weigh your ingredients. A kitchen scale can be a great help. You can switch things up with a few simple additions. Consider adding crushed nuts, like walnuts or pecans, for crunch. You can also use different types of chocolate, such as dark or white chocolate. Want a little spice? Try adding a pinch of cinnamon or a splash of almond extract. For a fruity twist, toss in some dried cherries or cranberries. These changes keep the recipe fun and allow you to enjoy it in new ways. Check out the Full Recipe for more ideas! First, you need to preheat your oven to 350°F (175°C). This heat will help your cookie bars bake evenly. Grease a 9x13 inch baking pan or line it with parchment paper. Lining the pan makes it easy to lift out the bars later. In a large bowl, cream together 1 cup of softened unsalted butter, 1 cup of packed brown sugar, and 1/2 cup of granulated sugar. Mix for about 2-3 minutes until it feels light and fluffy. Then, beat in 2 large eggs one at a time. Add 2 teaspoons of vanilla extract and mix until everything combines well. In another bowl, whisk together 2 1/2 cups of all-purpose flour, 1 teaspoon of baking soda, 1/2 teaspoon of salt, and 1 cup of graham cracker crumbs. Make sure all the dry ingredients blend evenly. This step adds flavor and helps your bars hold their shape. Gradually add the dry mixture to the wet mixture. Stir gently until just combined, being careful not to overmix. Fold in 1 cup of semi-sweet chocolate chips and 1 cup of mini marshmallows. Reserve some for topping. Spread the cookie dough into the prepared pan. Smooth the top. Sprinkle the reserved chocolate chips and marshmallows evenly on top. Bake for 25-30 minutes. The edges should turn golden and a toothpick should come out clean or with a few moist crumbs. Let the cookie bars cool completely in the pan on a wire rack. Once cool, cut them into squares. For a fun twist, serve them warm with extra chocolate chips and toasted marshmallows on top. You can also add graham crackers for that classic S'mores experience. For the complete recipe, check the Full Recipe section. To make your S'mores cookie bars soft and chewy, start with softened butter. This helps the sugar mix well. Cream the butter with the sugars until it is light and fluffy. Mix all the dry ingredients well to avoid clumps. When you combine wet and dry ingredients, stir until just mixed. Overmixing can make the bars tough, so be gentle. The perfect bake time is key. Bake until the edges are golden, but not too much in the center. One common mistake is using cold butter. It won't cream well and affects the texture. Another mistake is not measuring flour correctly. Too much flour can make the bars dry. Also, avoid opening the oven while baking. This can lower the temperature and affect how they rise. Lastly, don’t skip letting them cool in the pan. Cutting them too soon leads to a messy outcome. You can make S'mores cookie bars even better! Add a pinch of sea salt on top before baking. It enhances the sweet flavor. Use mini chocolate chips for a more chocolatey bite. You can also mix in peanut butter chips for a twist. For extra crunch, try adding chopped nuts. Experiment with different flavors, like using caramel bits or toffee pieces. You can find the Full Recipe on my website for more fun ideas! {{image_2}} You can make these bars gluten-free with a few easy swaps. Use gluten-free flour instead of all-purpose flour. Many brands offer great blends that work well in baking. Just make sure to check the label. Also, use gluten-free graham cracker crumbs. Some brands sell them, or you can crush gluten-free cookies. This way, you keep the s'mores taste while making it safe for everyone. To create vegan S'mores cookie bars, substitute dairy ingredients with plant-based options. Use a vegan butter or coconut oil in place of unsalted butter. For eggs, try using flaxseed meal or applesauce. Mix 1 tablespoon of flaxseed meal with 2.5 tablespoons of water for each egg. This creates a thick gel that works great in baking. Use dairy-free chocolate chips and check your marshmallows for gelatin-free options. Want to get creative? You can add different flavors to your cookie bars. Try adding peanut butter chips for a nutty taste. You could also mix in crushed nuts like pecans or walnuts for added crunch. For a fruity twist, add dried fruits like cherries or cranberries. A sprinkle of sea salt on top can also enhance the sweetness. These changes keep the treat fun and exciting! For the full recipe, check the earlier section! To keep your S'mores cookie bars fresh, store them in an airtight container. Make sure they cool completely before sealing. If you want to retain that gooey texture, place parchment paper between layers. This helps prevent sticking and keeps them soft. You can freeze these bars for up to three months. Cut them into squares and wrap each piece in plastic wrap. Place the wrapped bars in a freezer-safe bag. Label the bag with the date. When you want to enjoy one, just take it out and let it thaw at room temperature. For a warm treat, you can reheat S'mores cookie bars. Place them in the microwave for about 10 to 15 seconds. This will make the chocolate and marshmallows gooey again. If you want them crispy, heat your oven to 350°F (175°C) and warm them for about 5 minutes. This way, they taste fresh-baked! S'mores Cookie Bars can last about 4 to 5 days at room temperature. Store them in an airtight container. This helps keep them fresh and soft. If you want them to last longer, you can refrigerate them. They will stay good for up to a week in the fridge. Yes, you can make S'mores Cookie Bars ahead of time. Bake them and let them cool completely. Then, store them covered at room temperature. You can make them a day or two in advance. This way, they are ready for any gathering or snack time. If you don’t have chocolate chips, try using chopped chocolate bars or cocoa nibs. You can also use white chocolate chips or butterscotch chips. For a fruity twist, consider adding dried fruit or nuts. These options give new flavors to your cookie bars. To make S'mores Cookie Bars without eggs, use a flaxseed meal substitute. Mix 1 tablespoon of flaxseed meal with 2.5 tablespoons of water. Let it sit for 5 minutes until it thickens. You can also use unsweetened applesauce, using 1/4 cup for each egg. This keeps the texture soft and moist. The Full Recipe for S'mores Cookie Bars includes simple ingredients to create this treat. You need butter, sugars, eggs, vanilla, flour, baking soda, salt, graham cracker crumbs, chocolate chips, and mini marshmallows. Follow the steps to mix and bake for a delicious dessert. S'mores cookie bars are easy and fun to make. We covered all the key steps, from gathering the ingredients to baking and cooling. I shared tips to get the right texture and avoid mistakes. You can even modify the recipe for gluten-free or vegan options. Remember to store them properly or freeze for later. Enjoying these treats is simple with the right prep. Trust me, with these guidelines, you’ll impress everyone with your baking skills!

S’mores Cookie Bars Irresistible and Easy Treat

Are you craving a sweet treat that’s both fun and easy to make? Look no further! These S’mores Cookie Bars

For the main part of the salad, you will need: - 4 medium-sized beets, tops trimmed - 2 cups arugula or mixed greens - 1/2 cup goat cheese, crumbled - 1/4 cup walnuts, toasted and roughly chopped - 1/4 red onion, thinly sliced These ingredients bring a mix of flavors. The beets are sweet and earthy. The arugula adds a peppery bite. Goat cheese gives a creamy texture, while walnuts add crunch. Red onion provides a sharp taste that balances the sweetness. For the dressing, gather: - 3 tablespoons olive oil - 2 tablespoons balsamic vinegar - 1 tablespoon honey - Salt and pepper to taste This honey vinaigrette adds a nice balance of sweet and tangy. The olive oil makes it rich and smooth. Balsamic vinegar brings a deep flavor that pairs well with beets. To make this salad, you will need: - Aluminum foil - Baking sheet - Mixing bowl - Whisk Using aluminum foil helps roast the beets without making a mess. A baking sheet catches any drips while roasting. A mixing bowl is great for tossing the salad, and a whisk helps mix the dressing smoothly. For the full recipe, you can refer to the section above. Enjoy creating this bright and flavorful roasted beet and goat cheese salad! First, preheat your oven to 400°F (200°C). This step helps roast the beets evenly. Next, take each beet and wrap it in aluminum foil. Before sealing, drizzle a little olive oil over them and sprinkle with salt. This will enhance the flavor. Place all the wrapped beets on a baking sheet. Roast them in the oven for about 45 to 60 minutes. You know they are done when you can easily pierce them with a fork. After roasting, let them cool before peeling. Once cool, slice the beets into wedges. In a small bowl, mix together the dressing ingredients. You need 3 tablespoons of olive oil, 2 tablespoons of balsamic vinegar, and 1 tablespoon of honey. Add salt and pepper to taste. Whisk these together until they blend well. This vinaigrette adds a sweet and tangy boost to your salad. Set this aside while you prepare the salad. In a large mixing bowl, combine the arugula or mixed greens with the roasted beet wedges. Add the thinly sliced red onion and the toasted walnuts for crunch. Drizzle the honey vinaigrette over the salad. Toss gently to coat all the ingredients well. For a lovely presentation, transfer the salad to a serving platter or individual plates. Finally, sprinkle the crumbled goat cheese on top. Enjoy the vibrant colors and flavors of this delightful salad! For the full recipe, see the above section. To get the best roasted beets, follow these simple steps. Preheat your oven to 400°F (200°C). Wrap each beet in aluminum foil. Drizzle it with a little olive oil and sprinkle some salt on top. Place the wrapped beets on a baking sheet. Roast them for about 45-60 minutes. Check them with a fork; they should be tender. Once done, let them cool, peel, and slice into wedges. When making the vinaigrette, balance acidity and sweetness for the best taste. Use equal parts balsamic vinegar and olive oil as your base. Add honey to give a sweet note. A pinch of salt and pepper will round it out. Taste the dressing and adjust as needed. If it’s too tangy, add more honey. If it’s too sweet, add more vinegar. Let’s make your salad shine! Toss arugula or mixed greens with the roasted beet wedges. Add thinly sliced red onion and chopped walnuts for crunch. Once dressed, top the salad with crumbled goat cheese. For a nice touch, garnish with fresh herbs like mint or parsley. Serve it in a shallow bowl for a beautiful display. Check out the Full Recipe to get all the details! {{image_2}} You can swap arugula for spinach or kale. Spinach gives a soft, mild flavor. Kale adds a crunchy texture. Both greens work well with the sweet beets and tangy cheese. For a twist, try mixing different greens. Each choice adds a new taste to your salad. If you want variety, use feta or blue cheese instead of goat cheese. Feta gives a creamy, salty bite that pairs nicely with beets. Blue cheese adds a bold, sharp flavor that some love. Experiment with these cheeses to see which one you enjoy most. Looking to boost your salad? Consider adding avocado, apples, or pears. Avocado brings creaminess and healthy fats. Thin apple slices add a crisp sweetness. Pears can add a juicy, soft texture. These add-ins enhance the overall flavor and make the salad even more exciting. For the complete recipe, check out the [Full Recipe]. To keep your leftover salad fresh, store the salad and dressing separately. Use an airtight container for the salad. Place the dressing in a small jar or bowl with a lid. This keeps the greens crisp and prevents them from wilting. When you are ready to eat, mix the salad with the dressing just before serving. If you have leftover roasted beets, they can be enjoyed warm or cold. To reheat, place the beets in a microwave-safe dish. Heat them for 30-second intervals until warm. Avoid overcooking, as this can make them mushy. You can also serve them cold in your salad for a refreshing taste. The roasted beets can stay fresh in the fridge for up to five days. The mixed salad will last for about three days. Always check for any signs of spoilage, like off smells or slimy greens. These simple checks help ensure you enjoy your delicious roasted beet and goat cheese salad at its best. For the full recipe, refer to the earlier section. Yes, you can prepare this salad ahead of time. I suggest roasting the beets a day before. Once cooled, store them in the fridge. You can mix the greens and other ingredients a few hours before serving. Drizzle the vinaigrette just before you serve. This keeps the salad fresh and crisp. To test if the beets are done, poke them with a fork. If the fork slides in easily, they are ready. This should take about 45-60 minutes. The skin will also look wrinkled, which shows they are cooked well. Let them cool before peeling. This salad is not vegan due to the goat cheese. For a vegan version, you can replace the goat cheese with mashed avocado or a nut-based cheese. This swap keeps the creamy texture while making it plant-based. Enjoy the fresh flavors without losing the taste! This blog post covered how to make a delicious beet salad. We went through the key ingredients like beets, arugula, and goat cheese. I also provided a step-by-step guide to roasting beets and making a tasty dressing. Remember, you can customize your salad with different greens or cheeses. In conclusion, this salad is easy to prepare and full of flavor. You can impress anyone with this dish while enjoying its health benefits. Explore variations and find what you love best!

Roasted Beet and Goat Cheese Salad Flavor Boost Recipe

If you crave a burst of flavor, the Roasted Beet and Goat Cheese Salad is your answer! This dish combines

To make easy roasted chickpeas, you need a few simple items. Here’s what you will need: - 1 can (15 oz) chickpeas, drained and rinsed - 2 tablespoons olive oil - 1 teaspoon garlic powder - 1 teaspoon smoked paprika - ½ teaspoon cumin - ½ teaspoon chili powder - Salt to taste These ingredients create the base for a crunchy, tasty snack. The chickpeas provide protein and fiber, making them a healthy choice. Olive oil helps them crisp up nicely in the oven. For great flavor, use the seasonings listed above. Garlic powder adds a nice savory taste. Smoked paprika gives it a rich, smoky element. Cumin and chili powder add warmth and depth. You can adjust the amounts based on your preference. If you like heat, add more chili powder. If you prefer a milder flavor, reduce the amount of cumin. To make your roasted chickpeas look even better, consider adding fresh parsley. Just chop some and sprinkle it on top after roasting. This adds a pop of color and a fresh taste. You can also serve them in a bowl or on a nice plate for a fun snack. If you want to impress guests, this small touch makes a big difference. For the full recipe, check out the details above! First, take a can of chickpeas. You need 15 ounces for this recipe. Drain the chickpeas and rinse them under cold water. This step removes extra salt and helps them taste fresh. Next, spread the chickpeas on a clean towel or paper towels. Pat them dry gently. This is key to getting crispy chickpeas. If they are moist, they won’t crisp up well. Now, it’s time to add flavor. In a large bowl, combine the dry chickpeas with 2 tablespoons of olive oil. The oil helps the spices stick. Add 1 teaspoon of garlic powder, 1 teaspoon of smoked paprika, and ½ teaspoon each of cumin and chili powder. Don’t forget to sprinkle in some salt to taste. Toss everything together until the chickpeas are well-coated. Each chickpea should be covered in spices for the best flavor. Preheat your oven to 400°F (200°C). Line a baking sheet with parchment paper. This makes cleanup easy. Spread the seasoned chickpeas in a single layer on the sheet. Make sure they are not crowded. Roast them in the oven for 25 to 30 minutes. Shake the baking sheet halfway through. This step helps them cook evenly. Watch closely so they don’t burn. Once they turn golden brown and crispy, take them out. Let them cool a bit before serving. Toss with extra salt and garnish with fresh parsley if you like. Enjoy your crunchy snack! For the full recipe, check the previous section. To get perfectly crispy roasted chickpeas, start with dry chickpeas. After rinsing, pat them dry. Any moisture will make them soggy. Use enough olive oil to coat them well. The oil helps them crisp up in the oven. Bake at 400°F for 25 to 30 minutes. Shake the pan halfway through for even cooking. Watch them closely to avoid burning. One big mistake is not drying the chickpeas enough. Moisture will ruin the crunch. Another mistake is overcrowding the baking sheet. If they are too close, they will steam instead of roast. Always use a single layer on the sheet. Lastly, don’t skip the seasoning. It adds great flavor that makes them tasty. For even cooking, shake the baking sheet halfway through. This ensures all sides get heat. Also, make sure your oven is preheated. A hot oven helps with crispiness. Rotate the baking sheet if your oven has hot spots. This way, every chickpea gets a fair chance to roast well. Following these tips will give you the best crunchy snack. For the complete process, check the Full Recipe. {{image_2}} You can change the flavor of your roasted chickpeas easily. Here are some ideas: - Sweet: Use cinnamon and brown sugar for a sweet snack. - Savory: Try adding onion powder or Italian herbs. - Spicy: Use cayenne pepper or hot sauce for heat. - Tangy: Add lemon zest or a splash of vinegar for a fresh kick. These changes let you enjoy different tastes each time you make them. You can make roasted chickpeas in different ways. Here are two methods: - Air Fryer: Preheat your air fryer to 390°F (200°C). Toss the chickpeas with oil and spices. Cook for about 15 to 20 minutes. Shake the basket halfway through for even cooking. - Stovetop: Heat a pan over medium heat. Add oil, then toss in the seasoned chickpeas. Stir often for 10 to 15 minutes until they are golden and crispy. Both methods give you a tasty crunch without the oven. Roasted chickpeas work well with many foods. Here are a few ideas: - Salads: Add crunchy chickpeas to salads for extra texture. - Bowls: Use them in grain bowls with rice or quinoa. - Snacks: Mix with nuts and dried fruit for a perfect trail mix. Combining them with other ingredients makes your meals more exciting. Check the Full Recipe for great ideas on how to prepare these tasty chickpeas! To store leftover roasted chickpeas, let them cool completely. Place them in an airtight container. This helps keep them fresh and crunchy. You can store them at room temperature for up to three days. If you want them to last longer, store them in the fridge for up to a week. The best containers for storing roasted chickpeas are glass or plastic containers with tight lids. You can also use resealable bags. Just make sure to squeeze out extra air before sealing. This helps prevent moisture, which can make them soft. To reheat roasted chickpeas, spread them in a single layer on a baking sheet. Preheat your oven to 350°F (175°C). Bake them for about 10 minutes. This will help them regain their crispiness. You can also use an air fryer. Set it to 350°F (175°C) and heat for about 5 minutes. Enjoy them warm and crunchy. For the full recipe, check out the details above! It takes about 25 to 30 minutes to roast chickpeas. You should preheat your oven to 400°F (200°C) first. Spread the chickpeas in a single layer on a baking sheet. Shake the sheet halfway through to help them cook evenly. Keep an eye on them as they roast. You want them golden brown and crispy. Yes, you can use dried chickpeas, but they need a little extra work. First, soak them overnight in water. This softens them and helps with cooking. After soaking, boil them until they are tender. Drain and dry them well before roasting. This extra step ensures they get crispy in the oven. You can use many seasonings for roasted chickpeas. My favorites are garlic powder, smoked paprika, and cumin. These give a nice flavor that pairs well with chickpeas. If you like heat, add chili powder. You can also try different spices like curry powder or Italian herbs. Mix and match to find your favorite combo! For the full recipe, check out the Crispy Spiced Roasted Chickpeas section. In this post, we covered how to make roasted chickpeas easy and tasty. We explored essential ingredients, step-by-step instructions, and tips for crispiness. We also discussed variations and how to store leftovers properly. Roasted chickpeas are healthy and versatile snacks. You can play with flavors and cooking methods to suit your taste. Enjoy experimenting and making your perfect batch!

Easy Roasted Chickpeas for Perfect Snack Crunch

Looking for a snack that’s packed with crunch and flavor? In this guide, I’ll show you how to make easy

- 9 lasagna noodles - 2 cups cooked chicken breast, shredded - 2 cups ricotta cheese - 2 cups Alfredo sauce (store-bought or homemade) - 2 cups mozzarella cheese, shredded - 1 cup grated Parmesan cheese - 1 cup fresh spinach, chopped - 2 cloves garlic, minced - 1 teaspoon Italian seasoning - Salt and pepper to taste - Fresh basil leaves for garnish (optional) In this creamy Chicken Alfredo lasagna, the main ingredients work together to create a rich flavor. First, the lasagna noodles form the base of your dish. I recommend using regular noodles for the best texture. Next, shredded chicken adds protein and heartiness. Cooked chicken breast is perfect as it stays moist and tender. Ricotta cheese brings creaminess and a soft texture that balances the dish. Now, for the additional ingredients. I love using Alfredo sauce, either store-bought or homemade, for its rich, buttery taste. Mozzarella cheese is essential for that gooey, stretchiness you crave in lasagna. Lastly, Parmesan adds a sharp, salty note that elevates the overall flavor. For seasoning, fresh spinach gives a pop of color and nutrition. Garlic adds a savory kick, while Italian seasoning brings warmth and depth. Don’t forget salt and pepper to really bring all the flavors together. If you want to make your dish look beautiful, fresh basil leaves are a nice touch on top. This combination of ingredients makes Chicken Alfredo lasagna a tasty meal for family and friends. For the complete recipe, check the Full Recipe section. - First, preheat your oven to 375°F (190°C). - Next, cook the lasagna noodles according to package instructions. Drain them and set aside. - In a medium bowl, mix the ricotta cheese with minced garlic, Italian seasoning, salt, and pepper. Stir until well combined. - Spread about ½ cup of Alfredo sauce on the bottom of a 9x13-inch baking dish. - Place three noodles over the sauce. Add half of the chicken mixture, half of the ricotta mixture, and one third of the shredded mozzarella. - Repeat this process. Add three more noodles, the remaining chicken mixture, the remaining ricotta mixture, and another third of the mozzarella. - For the final layer, place the last three noodles on top. Spread the remaining Alfredo sauce over the noodles. Sprinkle the rest of the mozzarella and Parmesan cheese. - Cover the dish with aluminum foil and bake in the preheated oven for 25 minutes. - After 25 minutes, remove the foil. Bake for an additional 15-20 minutes. This helps the cheese become bubbly and golden brown. - After baking, let the lasagna rest for about 10 minutes before slicing. Enjoy your creamy Chicken Alfredo Lasagna! For the complete details, check out the Full Recipe. To prevent noodles from sticking, add a bit of oil to the water when boiling. Stir the noodles well while cooking. After cooking, rinse them under cold water. This helps stop the cooking process and keeps them from sticking together. For even cooking, ensure you layer the ingredients evenly. Spread the chicken and ricotta mixtures flat. This way, every bite gets the same great flavor. Use a spatula to gently press down on the layers. It helps them bind together during baking. To boost flavor, consider adding fresh herbs like basil or parsley. They add a nice touch and freshness. You can also sprinkle some red pepper flakes for a little heat. If you like a zesty taste, try adding lemon zest to your Alfredo sauce. For homemade Alfredo sauce, use butter, cream, and Parmesan cheese. Melt the butter, then add cream. Stir in the cheese until it melts. You can add garlic or nutmeg for extra depth. This simple sauce is rich and creamy, perfect for your lasagna. Serve Chicken Alfredo Lasagna with a light side salad. A mix of greens with a tangy vinaigrette works well. Breadsticks or garlic bread also make a great pair. They help soak up that creamy sauce. When it comes to drinks, a crisp white wine like Pinot Grigio pairs nicely. If you prefer non-alcoholic options, try sparkling water with lemon. It refreshes your palate after each cheesy bite. {{image_2}} You can switch proteins in this dish. Try turkey or sausage instead of chicken. If you want a veggie option, use mushrooms or spinach as the main ingredient. You can also make a dairy-free version. Just use plant-based cheese instead of ricotta and mozzarella. This makes the dish creamy without dairy. The sauce can change the flavor. You can use different white sauces, like bechamel or even pesto. Each sauce brings a new taste. If you love tomato, try a tomato-based version. It offers a fresh twist on the classic recipe. Want a lighter meal? You can make a low-carb lasagna. Instead of noodles, slice zucchini or eggplant. This keeps the dish hearty without all the carbs. You can also reduce the cheese to make it lighter. Less cheese still tastes great, but cuts down on calories. To keep your Chicken Alfredo Lasagna fresh, store leftovers in an airtight container. Make sure the lasagna cools down before covering it. This helps prevent moisture build-up and sogginess. You can also wrap it tightly with plastic wrap or aluminum foil. If you want to freeze it, cut the lasagna into portions. Place each piece in a freezer-safe bag or container. This makes it easy to grab just the right amount later. The best way to reheat lasagna is in the oven. Preheat your oven to 350°F (175°C). Place the lasagna in an oven-safe dish. Cover it with foil to keep it moist. Bake for about 20-25 minutes or until heated through. You can also reheat it in the microwave. Use a microwave-safe plate and cover it with a lid. Heat in 1-minute increments until warm. This keeps the cheese from getting too rubbery. Chicken Alfredo Lasagna lasts about 3-5 days in the fridge. If you freeze it, it can last up to 3 months. Check for signs of spoilage. Look for an off smell or mold on the surface. If the cheese is dry or hard, it may not taste good. Always trust your senses when checking food freshness. For the full recipe, refer to the section above. Can I make Chicken Alfredo Lasagna ahead of time? Yes, you can prepare Chicken Alfredo Lasagna ahead of time. Assemble it and cover it well. Store it in the fridge for up to 24 hours. When ready to bake, you may need to add extra time to the cooking. How do I know when the lasagna is done? You can tell when the lasagna is done by checking the cheese. It should be bubbly and golden brown. Use a knife to cut into the lasagna. The filling should be hot and not cold. Can I use no-boil lasagna noodles? Yes, no-boil lasagna noodles work great in this recipe. Just layer them like regular noodles. The sauce will cook them as the lasagna bakes. How can I make this recipe gluten-free? To make this dish gluten-free, use gluten-free lasagna noodles. Many brands offer tasty options that fit well. Always check the labels to ensure they meet your needs. What is the calorie count per serving? Each serving of Chicken Alfredo Lasagna has about 450 calories. This can vary based on the brands of ingredients used. For exact numbers, check your specific brands. Does this dish have a lot of protein? Yes, this dish is high in protein. Each serving contains around 30 grams of protein. The chicken and cheese add a great protein boost to your meal. For the full recipe, please refer to the section above. In this guide, we explored the tasty world of Chicken Alfredo Lasagna. I shared essential ingredients and step-by-step instructions for making this dish. You learned tips for enhancing flavors and variations to suit your taste. Proper storage and reheating methods were also covered to help you enjoy leftovers. Now, you can create this meal with confidence. It's easy, delicious, and sure to impress! Enjoy your cooking adventure.

Chicken Alfredo Lasagna Creamy and Flavorful Dish

Looking for a creamy, rich dish to impress your family? Chicken Alfredo Lasagna is the answer! This easy recipe layers

To make Pumpkin Cream Cheese Muffins, gather these items: - 1 cup pumpkin puree - 1/2 cup cream cheese, softened - 1/2 cup vegetable oil - 1 cup brown sugar - 1/2 cup granulated sugar - 2 large eggs - 2 cups all-purpose flour - 1 teaspoon baking soda - 1 teaspoon baking powder - 1 teaspoon ground cinnamon - 1/2 teaspoon ground nutmeg - 1/2 teaspoon salt - 1 teaspoon vanilla extract - 1/2 cup chopped nuts (optional, such as walnuts or pecans) You can swap some ingredients if you need. For a healthier option, use applesauce instead of oil. If you want to avoid dairy, use a vegan cream cheese. Fresh pumpkin is great, but canned pumpkin works well too. Just make sure it’s pure pumpkin, not pie filling. Measuring ingredients accurately is key. Use dry measuring cups for flour and sugar. For liquids, use liquid measuring cups. Remember, weight can be more precise than volume. This helps ensure your muffins rise and turn out right. Accurate measurements can make a big difference in your baking! Start by preheating your oven to 350°F (175°C). This ensures even baking for your muffins. While the oven warms up, take your muffin tin and prepare it. You can either line each cup with paper liners or lightly grease them with cooking spray. This step helps the muffins come out easily after baking. In a large mixing bowl, grab your softened cream cheese. Beat it until it is smooth. Next, add in the pumpkin puree, vegetable oil, brown sugar, granulated sugar, eggs, and vanilla extract. Mix these ingredients together until they are well combined. In another bowl, whisk together the dry ingredients. This includes all-purpose flour, baking soda, baking powder, ground cinnamon, nutmeg, and salt. Mixing the dry ingredients separately helps avoid lumps. Once mixed, gradually add the dry ingredients to your wet mixture. Stir just until it is moistened. If you want to add nuts, now is the time to fold them in gently. Now, it’s time to fill your muffin tin with the batter. Spoon the batter into each cup, filling them about two-thirds full. This gives the muffins room to rise without overflowing. Place your muffin tin in the preheated oven. Bake for 18-22 minutes. To check for doneness, stick a toothpick into the center of a muffin. If it comes out clean, your muffins are ready. Let them cool in the tin for about five minutes. Then, transfer them to a wire rack to cool completely. For the full recipe, please look at the instructions above. To make fluffy muffins, you must avoid overmixing. When you mix too much, the muffins can turn out dense and tough. Mix the batter just until the dry ingredients blend in. This will keep the muffins light and airy. Using room temperature ingredients is also key. It helps the batter mix well and rise properly. Take out your eggs and cream cheese ahead of time. This small step makes a big difference in texture. You can add spices for extra flavor. Cinnamon and nutmeg give a warm taste. If you want a kick, try adding ginger or cloves. Each spice will change the muffin’s flavor in fun ways. Using different fillings like chocolate chips or dried fruits can make your muffins unique. Chocolate gives a sweet touch, while dried fruits add chewiness. You can experiment with nuts too, like walnuts or pecans, to give extra crunch. Serve your muffins on a pretty platter. A light dusting of powdered sugar on top looks nice. You can also drizzle a cream cheese glaze for extra sweetness. For storing leftovers, place the muffins in an airtight container. This keeps them fresh and moist. If you have a lot, freeze them. Just make sure to wrap them well so they don’t get freezer burn. {{image_2}} You can easily make pumpkin cream cheese muffins gluten-free. Simply swap the all-purpose flour with a gluten-free blend. Look for a brand that includes xanthan gum to help with the texture. You can also use almond flour or oat flour. Just remember, the cooking time may change slightly, so keep an eye on them while baking. If you want a vegan version, replace the eggs with flaxseed meal or chia seeds. Mix one tablespoon of either with three tablespoons of water. Let it sit for a few minutes to thicken. For the cream cheese, use a plant-based alternative. Coconut cream or a nut-based cream cheese works great too. Keep the rest of the recipe the same for delicious results. For extra flavor, add pumpkin pie spice to your muffins. You can mix in one to two teaspoons, depending on your taste. This spice blend usually contains cinnamon, nutmeg, ginger, and allspice. You can also add a pinch of ground cloves for more warmth. These spices will enhance the pumpkin flavor and give your muffins a cozy aroma. For the full recipe, check out the provided cooking instructions. To keep your pumpkin cream cheese muffins fresh, store them in an airtight container. Place a paper towel in the bottom of the container. This helps absorb extra moisture. You can also wrap each muffin in plastic wrap. This method keeps them soft and moist. Store them at room temperature for up to three days. If you want them to last longer, consider freezing them. To freeze muffins, first let them cool completely. Wrap each muffin in plastic wrap, then place them in a freezer bag. Remove as much air as possible from the bag. This helps prevent freezer burn. You can freeze muffins for up to three months. To thaw, take a muffin out and leave it at room temperature for about an hour. You can also thaw them in the microwave for about 20 seconds if you want them quick. When reheating muffins, you have two main choices: microwave or oven. If using the microwave, place a muffin on a plate. Heat it for about 10-15 seconds. Check if it’s warm enough for you. If you prefer the oven, preheat it to 350°F (175°C). Place the muffins on a baking sheet and heat them for about 5-10 minutes. This method keeps the muffins crispy on the outside. Enjoy your muffins warm for the best flavor! To help your muffins rise well, use room temperature ingredients. Cold eggs or cream cheese can slow the rise. Preheat your oven to 350°F (175°C) before mixing. This ensures it is ready when you bake. Use fresh baking powder and baking soda. Old leavening agents can make your muffins flat. No, pumpkin pie filling and pumpkin puree are not the same. Pumpkin puree is pure pumpkin with no added spices or sugar. Pumpkin pie filling contains spices and sweeteners. If you use pie filling, it will change the flavor and sweetness of your muffins. Stick with pumpkin puree for the best results. You can check if your muffins are done with a toothpick. Insert a toothpick into the center of a muffin. If it comes out clean, the muffins are done. If it has wet batter, bake them a bit longer. Also, look for a golden brown color on top. The muffins should spring back when touched lightly. This blog post covered how to bake delicious pumpkin muffins. We explored ingredients like pumpkin puree, cream cheese, and spices. You learned about ingredient swaps and measurement tips. We provided step-by-step instructions for mixing and baking. I shared best practices for fluffy muffins, including room temperature ingredients. You discovered ways to customize and store your muffins. With these tips, you can bake great muffins every time. Enjoy the process and your tasty creations!

Pumpkin Cream Cheese Muffins Tasty and Easy Recipe

Do you crave the perfect fall treat? These Pumpkin Cream Cheese Muffins are simple to make and packed with flavor.

To make these tasty muffins, you need a few simple ingredients. Here’s what you will need: - 1 ½ cups all-purpose flour - ½ cup granulated sugar - 2 tablespoons poppy seeds - 1 tablespoon baking powder - ½ teaspoon salt - 1 large egg - ½ cup whole milk - ⅓ cup vegetable oil - Zest of 1 lemon - 2 tablespoons fresh lemon juice - 1 teaspoon vanilla extract These ingredients create a soft, fluffy muffin with a bright lemon flavor. The poppy seeds add a nice crunch and a unique touch. You can enhance the flavor of your muffins with a glaze. Here’s how to make it: - 1 cup powdered sugar - 2 tablespoons lemon juice Drizzling this glaze on top adds sweetness and a burst of citrus. If you have dietary restrictions, here are some easy swaps: - Use gluten-free flour instead of all-purpose flour for a gluten-free option. - Swap the egg for a flaxseed meal mixed with water for a vegan version. - Replace whole milk with almond milk or oat milk for a dairy-free choice. These substitutions help you enjoy these muffins while meeting your needs. For the full recipe, check out the link. Start by preheating your oven to 350°F (175°C). This ensures even baking. Next, line your muffin tin with paper liners. This step keeps the muffins from sticking. It also makes clean-up easier. You can skip the liners, but I find they help keep the muffins moist. In a large bowl, add the following dry ingredients: - 1 ½ cups all-purpose flour - ½ cup granulated sugar - 2 tablespoons poppy seeds - 1 tablespoon baking powder - ½ teaspoon salt Whisk these ingredients together until they blend well. This mix creates the base for your muffins. Make sure there are no clumps in the flour. This step is key for a light texture. In another bowl, crack 1 large egg. Beat it lightly before adding the other wet items: - ½ cup whole milk - ⅓ cup vegetable oil - Zest of 1 lemon - 2 tablespoons fresh lemon juice - 1 teaspoon vanilla extract Mix these until they combine well. You want a smooth texture. The lemon zest gives a nice punch of flavor. This step adds moisture and richness to the muffins. Now, pour the wet mixture into the dry ingredients. Stir gently until just combined. Do not overmix; some lumps are okay! This keeps the muffins fluffy. If you mix too much, your muffins could turn out dense. Fill each muffin cup about ⅔ full with the batter. This allows room for rising. Bake your muffins in the preheated oven for 18-20 minutes. To check if they are done, insert a toothpick into the center. If it comes out clean, they are ready! Let them cool in the tin for 5 minutes. After that, transfer them to a wire rack to cool fully. If you want a glaze, mix 1 cup of powdered sugar with 2 tablespoons of lemon juice and drizzle it over the cooled muffins. For the full recipe, check out the earlier section! To get the best texture, do not overmix your batter. When you combine the wet and dry ingredients, mix just until you see no more flour. Lumps are okay! This keeps the muffins light and fluffy. Also, make sure your oven is preheated. A hot oven helps the muffins rise nicely. One big mistake is using cold ingredients. Always use room temperature eggs and milk. This helps the batter mix better. Another mistake is filling the muffin cups too full. Fill them about two-thirds full for a nice rise. Lastly, avoid opening the oven door too soon. This can cause the muffins to sink. For a stronger lemon taste, add more lemon zest. You can even double the zest for a bold punch. If you love tang, try adding a bit more lemon juice too. A glaze made from powdered sugar and lemon juice adds a sweet finish. Drizzle it over the muffins after they cool for extra zing. For the complete recipe, check out the Full Recipe. {{image_2}} You can make gluten-free lemon poppy seed muffins easily. Use gluten-free all-purpose flour instead of regular flour. Make sure the blend has xanthan gum for better texture. The rest of the recipe stays the same. This way, everyone can enjoy these tasty treats! To create vegan lemon poppy seed muffins, swap the egg for a flaxseed egg. Mix one tablespoon of ground flaxseed with three tablespoons of water. Let it sit for five minutes to thicken. Use plant-based milk instead of whole milk. You can also use coconut oil instead of vegetable oil. These changes make the muffins just as yummy! You can add blueberries for a fruity twist. They pair well with lemon and add a burst of flavor. Just fold in one cup of fresh or frozen blueberries into the batter. You can also try raspberries or chopped strawberries. This adds color and taste to your muffins, making them even more special. For the full recipe, check out the detailed steps above. Enjoy baking! To keep your lemon poppy seed muffins fresh, store them in an airtight container. This helps prevent them from drying out. I recommend placing the muffins in a single layer. If you stack them, use parchment paper between layers. This keeps the tops from sticking together. You can store them at room temperature for up to three days. For longer storage, consider freezing. Freezing muffins is easy and works well. First, let your muffins cool completely. Once cool, wrap each muffin tightly in plastic wrap. After wrapping, place them in a freezer bag or container. Make sure to label the bag with the date. You can freeze them for up to three months. When you want to eat one, thaw it at room temperature or microwave it for 15-20 seconds. For storing your muffins, I suggest using airtight containers. Glass or plastic containers work well. Look for ones with a secure lid. You can also use resealable bags for freezing. Just remember to squeeze out excess air before sealing. This helps keep your muffins moist and delicious! Lemon poppy seed muffins stay fresh for about three days at room temperature. Store them in an airtight container to keep them moist. If you want them to last longer, move them to the fridge. In the fridge, they can last up to a week. Yes, you can make these muffins ahead of time. They freeze well too. Just bake, cool, and wrap them tightly. Place them in a freezer-safe bag. When you want to enjoy them, let them thaw at room temperature or warm them in the oven. You can find lemon poppy seed muffins at many bakeries and cafes. Some grocery stores also sell them in the bakery section. If you want a special treat, check local bakeries that focus on fresh, homemade goods. Lemon poppy seeds offer several health benefits. They are a good source of fiber and healthy fats. Poppy seeds can aid digestion and support heart health. The lemon adds vitamin C, which boosts your immune system and enhances skin health. For the complete guide to making these tasty treats, see the Full Recipe. Making lemon poppy seed muffins is easy and fun. We covered key ingredients, tips, and variations. You can enhance flavors, substitute allergens, and store muffins properly. Remember to avoid common mistakes for the best texture. These muffins can be gluten-free or vegan too! In conclusion, enjoy experimenting with your own twist on this classic treat. You'll be proud of your delicious results. Happy baking!

Lemon Poppy Seed Muffins Flavorful and Easy Recipe

If you’re craving a bright and zesty treat, look no further! Lemon poppy seed muffins bring a burst of flavor

- 500g fresh button mushrooms - 4 tablespoons unsalted butter - 6 cloves garlic, minced - 1 tablespoon fresh thyme leaves - 1 tablespoon soy sauce - Salt and pepper to taste - 2 tablespoons fresh parsley, chopped - Zest of 1 lemon The main ingredients set the stage for flavor. Fresh button mushrooms give a nice texture. The unsalted butter provides a rich base for the garlic. Minced garlic adds that strong, beautiful aroma. For flavor enhancers, fresh thyme leaves bring a lovely earthiness. Soy sauce adds a savory depth, while salt and pepper balance the taste. Garnishing with fresh parsley brightens the dish. The lemon zest gives a pop of freshness, making every bite exciting. If you want to see the full recipe, check out Garlic Butter Mushrooms Delight. - Clean and halve the mushrooms. - Mince the garlic. Cleaning mushrooms is easy. Just rinse them under cold water. Pat them dry with a towel. Then, slice them in half. This helps them cook evenly. Mincing garlic is simple, too. Peel the cloves first. Then, chop them finely. The more you mince, the stronger the flavor. - Melt butter and sauté garlic. - Add mushrooms and seasonings. - Cook until golden brown and tender. Start by melting the butter in a large skillet. Use medium heat. Wait until it foams but does not brown. Then, add the minced garlic. Sauté for about one minute. The smell will be amazing. Just be careful not to burn it. Next, toss in the halved mushrooms. Add thyme, soy sauce, salt, and pepper. Stir well to coat the mushrooms in that rich garlic butter. Let them cook for about 8 to 10 minutes. Stir occasionally. You want them golden brown and tender. - Stir in lemon zest. - Transfer to serving dish and garnish. Once the mushrooms are cooked, take the skillet off the heat. Add the lemon zest now. This gives a bright finish. Finally, transfer the mushrooms to a serving dish. Sprinkle chopped parsley on top for a pop of color. Enjoy your garlic butter mushrooms! You can find the full recipe above for all the details. To sauté mushrooms well, use a large skillet. This lets the mushrooms cook evenly. Heat the pan before adding oil or butter. This helps create a nice brown color. When adding garlic, keep the heat low. Garlic burns fast, so pay close attention. Stir it often to avoid scorching. Fresh herbs bring more taste than dried ones. They give a bright flavor that makes the dish pop. You can try adding rosemary or basil for a twist. For extra spice, consider red pepper flakes or smoked paprika. These spices boost the dish's warmth and depth. Serving garlic butter mushrooms can be fun. Use a rustic bowl or wooden board for a cozy look. Drizzle some leftover garlic butter on top. This adds shine and makes it look inviting. For color, sprinkle fresh parsley over the dish. It brightens the meal and adds a fresh touch. For the complete cooking process, check the Full Recipe. {{image_2}} You can make a vegan version of garlic butter mushrooms. Use olive oil instead of butter. Choose your favorite mushrooms. This version is just as tasty! If you need gluten-free options, replace soy sauce with tamari. Tamari gives a similar flavor without gluten. Want to add richness? Consider adding cream or cheese. A splash of heavy cream makes the dish smooth and creamy. If you like cheese, sprinkle some grated Parmesan on top. You can also mix in other vegetables or proteins. Spinach, bell peppers, or chicken work well. Each addition brings a unique taste. Using seasonal mushrooms brings diverse flavors to your dish. For example, try shiitake or oyster mushrooms in spring. Each type has its own special taste. You can also add seasonal herbs and spices. Fresh basil in summer or sage in fall can enhance the flavor. This keeps your dish fresh and exciting all year long. To store leftover garlic butter mushrooms, let them cool. Place them in an airtight container. Glass or plastic containers work well. Make sure to seal them tightly. This keeps them fresh longer. Yes, you can freeze garlic butter mushrooms. To freeze, first, let them cool completely. Then, transfer them to a freezer-safe bag. Remove as much air as you can. When you want to eat them, thaw them in the fridge overnight. Reheat in a skillet over low heat until warm. Garlic butter mushrooms last about 3 to 5 days in the fridge. Look for signs of spoilage. If they smell bad or look slimy, it’s best to throw them out. Trust your senses; they guide you well. Enjoy your garlic butter mushrooms fresh for the best taste! How long do garlic butter mushrooms last in the fridge? Garlic butter mushrooms last about 3 days in the fridge. Store them in an airtight container to keep them fresh. Can I use dried mushrooms in this recipe? Yes, you can use dried mushrooms. Just soak them in warm water for about 30 minutes before cooking. This helps them regain their texture. What goes well with garlic butter mushrooms? Garlic butter mushrooms pair well with steak, chicken, or pasta. They also taste great on pizza or as a topping for bread. What is the best type of mushroom for this dish? Fresh button mushrooms are best for this recipe. They have a mild flavor and cook quickly. You can also use cremini mushrooms for a deeper taste. How do I make the garlic butter sauce richer? To make the sauce richer, add a splash of cream or a bit of cheese. This will enhance the flavor and make it more decadent. Are mushrooms healthy? Yes, mushrooms are healthy. They are low in calories and high in nutrients. They provide fiber, vitamins, and minerals. What are the nutritional benefits of garlic? Garlic has many benefits. It can boost your immune system and lower blood pressure. Garlic also has antioxidants that help fight disease. You learned about cooking garlic butter mushrooms, from ingredients to storage tips. Use fresh mushrooms, garlic, and herbs for the best flavor. Don't forget to play with variations and creative servings. This dish is fun to make and sure to impress. Remember, cooking is all about trying new things and enjoying your food. Now, get in the kitchen and enjoy this tasty recipe!

Garlic Butter Mushrooms Savory and Quick Recipe

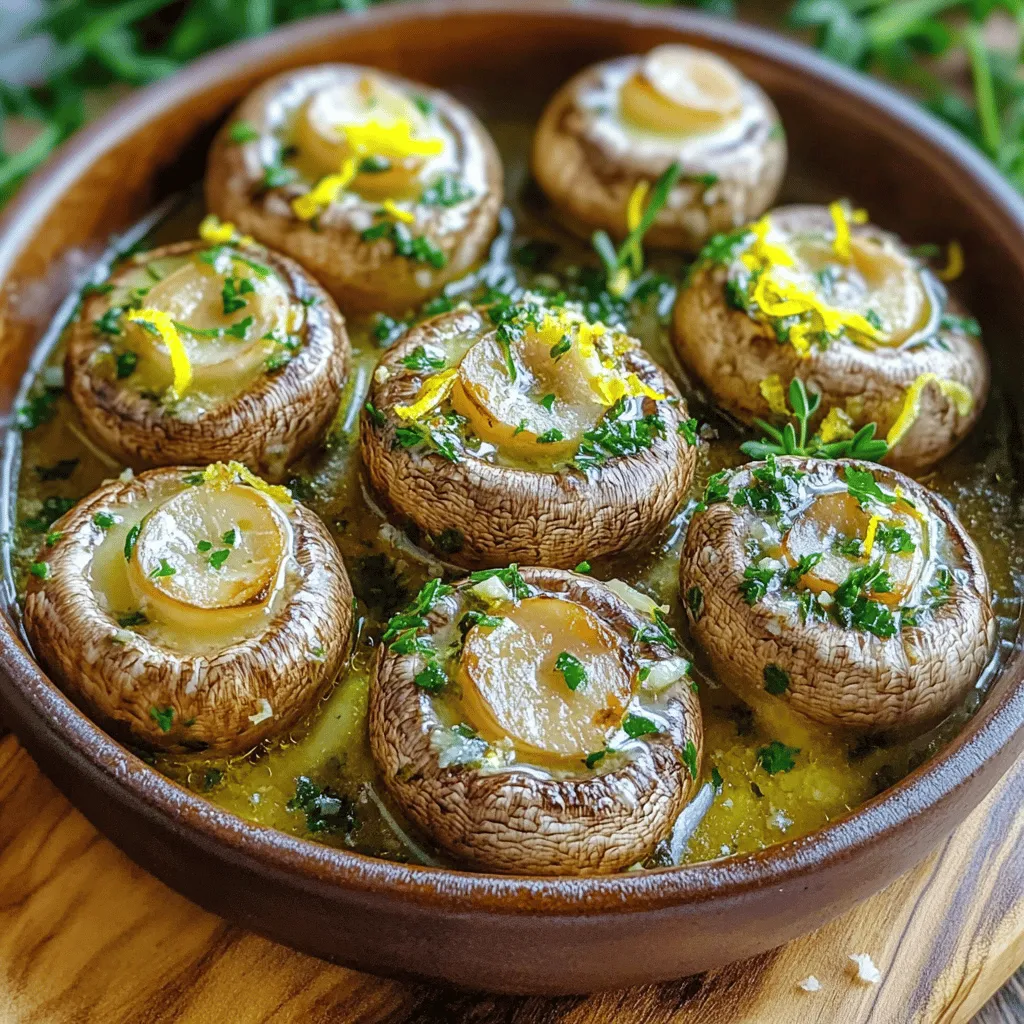
Are you ready for a dish that’s both savory and quick? My Garlic Butter Mushrooms will delight your taste buds

To make soft pretzels, you need some simple ingredients. Here’s what you will need: - 4 cups all-purpose flour - 1 packet (2 ¼ teaspoons) active dry yeast - 1 ½ cups warm water (110°F/43°C) - 1 tablespoon granulated sugar - 1 teaspoon salt - ⅓ cup baking soda - 1 large egg, beaten (for egg wash) - Coarse sea salt (for topping) These ingredients create a soft, chewy pretzel with a golden crust. The yeast helps the dough rise, making it fluffy. The sugar activates the yeast, while the salt adds flavor. You can make your pretzels even tastier with some fun toppings. Here are some options: - Melted butter (for brushing after baking) - Garlic powder - Sesame seeds - Cheese powder These toppings add a unique twist. Brush your pretzels with melted butter after baking for a rich taste. Try mixing different toppings for your own flavor blend. You don't need fancy tools to make soft pretzels. Here’s what you will need: - Large mixing bowl - Measuring cups and spoons - Stand mixer (optional) - Clean surface for kneading - Baking sheet - Parchment paper - Large pot for boiling Using the right tools helps make the process easier. A stand mixer can save time, but it’s not a must. Just make sure to knead well for the best texture. For the full recipe, check out the section above. Enjoy making your delicious homemade soft pretzels! To start, you need to wake up the yeast. In a mixing bowl, combine warm water, sugar, and yeast. Make sure the water is about 110°F. This warmth helps the yeast grow. Let it sit for about 5-10 minutes. You’ll notice bubbles forming. That means it's ready! Next, grab a large mixing bowl. Combine 4 cups of all-purpose flour and 1 teaspoon of salt. Make a well in the center. Pour in your bubbly yeast mixture. Mix it well until you see a rough dough form. I often use a wooden spoon for this part. Now it’s time to knead the dough. Sprinkle some flour on your surface. Place the dough on it. Knead for 5-7 minutes until it feels smooth and elastic. If you have a stand mixer, you can use the dough hook. Mix on low speed for about 5 minutes until it gets smooth. Once kneaded, place your dough in a greased bowl. Cover it with a damp cloth. Let it rise in a warm spot for about 1 hour. It should double in size. This step adds air to your pretzels. After rising, preheat your oven to 450°F. Line a baking sheet with parchment paper. Punch down the risen dough gently. Divide it into 8 equal pieces. Roll each piece into a long rope, about 24 inches. Shape each rope into a pretzel. It can be a fun twist to try! In a large pot, bring 10 cups of water to a boil. Carefully add ⅓ cup of baking soda. This helps give your pretzels that classic flavor. One by one, dip each pretzel into the boiling water for about 30 seconds. Remove them and place them on the baking sheet. Brush each pretzel with a beaten egg and sprinkle coarse sea salt on top. Bake for 12-15 minutes until golden brown. If you want, brush melted butter on top after baking for extra flavor. You now have delicious homemade soft pretzels! For more details, check the Full Recipe. To make soft pretzels that are chewy and tasty, focus on a few key steps: - Kneading: Knead your dough well for about 5-7 minutes. This builds gluten, giving pretzels their texture. - Boiling: Always boil your pretzels in the baking soda water. This step gives them their unique crust. - Baking: Bake your pretzels until they turn a rich golden color. This adds flavor and crunch. Avoid these common pitfalls when making pretzels: - Under-kneading: Not kneading enough can lead to dense pretzels. Always knead until smooth. - Incorrect water temp: If your water is too hot or cold, the yeast won't activate well. Aim for 110°F (43°C). - Skipping the boil: Don’t skip boiling your pretzels. It’s essential for that classic texture. Serve your pretzels warm for the best taste. Here are some great ideas: - Dips: Pair them with cheese sauce, mustard, or a spicy dip. - Toppings: Brush with melted butter and sprinkle with garlic powder or cheese powder after baking. - Snack board: Add them to a snack board with fresh fruits and cured meats for a fun treat. These tips will help you create perfect soft pretzels. For the full recipe, check out the detailed instructions above. {{image_2}} You can make soft pretzels fun by adding flavors. Try mixing in seasonings or herbs. Here are a few ideas: - Garlic Powder: Add a teaspoon to the dough for a savory twist. - Cheese Powder: Mix in two tablespoons for a cheesy flavor. - Cinnamon Sugar: Brush with melted butter and sprinkle sugar and cinnamon after baking. Experiment with toppings too. You can use everything bagel seasoning or even ranch powder. Don’t feel limited to just the classic pretzel shape. Here are some fun ideas: - Pretzel Bites: Roll smaller pieces of dough into bite-sized balls. - Sticks: Shape the dough into long, thin sticks for dipping. - Twists: Create a spiral shape for a unique look. You can also use cookie cutters for themed shapes, like hearts or stars. You can enjoy pretzels even if you have dietary needs. For gluten-free pretzels, use a gluten-free flour blend. Follow the same recipe steps but ensure your yeast is gluten-free. For a vegan version, skip the egg wash. Instead, brush with a mixture of almond milk and a bit of maple syrup. This gives a nice shine. Remember, both options may change the taste slightly, but they are still tasty! For the complete recipe, check out the Full Recipe above. To keep your soft pretzels fresh, place them in a paper bag. This method allows them to breathe and retains their softness. If you want to store them longer, wrap each pretzel in plastic wrap. Then, place them in an airtight container. This helps keep them moist and tasty. When you want to enjoy your leftover pretzels, reheating them correctly is key. Preheat your oven to 350°F (175°C). Place the pretzels on a baking sheet. Heat them for about 5-10 minutes. This method brings back their crispness. Avoid using a microwave, as it can make them chewy and tough. If you want to save pretzels for later, freezing works great. First, cool the baked pretzels completely. Then, wrap each one in plastic wrap tightly. Place them in a freezer bag. Make sure to remove as much air as possible. When ready to eat, thaw them in the fridge overnight. Reheat them in the oven for the best results. This method keeps their flavor and texture intact. For the full recipe, check the earlier sections of this article. You can make soft pretzels with simple ingredients. You need: - 4 cups all-purpose flour - 1 packet (2 ¼ teaspoons) active dry yeast - 1 ½ cups warm water (110°F/43°C) - 1 tablespoon granulated sugar - 1 teaspoon salt - ⅓ cup baking soda - 1 large egg, beaten (for egg wash) - Coarse sea salt (for topping) - Optional: melted butter (for brushing after baking) - Optional: toppings like garlic powder, sesame seeds, or cheese powder Start by activating the yeast. Mix warm water, sugar, and yeast. Let it sit until frothy. Then, mix the flour and salt in another bowl. Add the yeast mixture and mix to form a dough. Knead the dough, let it rise, shape it, and boil it before baking. To keep pretzels soft, store them in an airtight container. This keeps moisture in and prevents them from drying out. You can also wrap them in plastic wrap. If you want to enjoy them later, warm them briefly in the oven. This helps restore their soft texture. Homemade soft pretzels last about 2-3 days at room temperature. After that, they may become tough. If you want to keep them longer, freeze them. They can last up to 3 months in the freezer. Just wrap them tightly before freezing. Yes, you can use bread flour instead of all-purpose flour. Bread flour has more protein, which can give your pretzels a chewier texture. This can enhance the overall experience. Just remember, the dough may need a little extra water due to the higher protein content. Making homemade soft pretzels is easy and fun. You learned about key ingredients, tools, and steps to create soft pretzels. We talked about tips, common errors, and serving ideas. You also saw various flavors and storage methods, ensuring pretzels stay fresh. Whether you stick with the classic recipe or try new twists, enjoy the process. Trust your skills, and have fun in the kitchen. Your homemade pretzels can be a tasty treat for everyone.

Homemade Soft Pretzels Perfectly Crafted Snack

There’s nothing quite like the warm, chewy goodness of homemade soft pretzels. In this guide, I’ll show you how to

- 1 pound Brussels sprouts, trimmed and halved - 4 cloves garlic, minced - 3 tablespoons olive oil - 1/2 cup grated Parmesan cheese - 1 teaspoon salt - 1/2 teaspoon black pepper - 1/2 teaspoon red pepper flakes (optional) - Fresh parsley, chopped (for garnish) To get the best Brussels sprouts, start by trimming their ends. This helps remove any brown spots. Then, slice each sprout in half. This makes them cook evenly and get crispy. Look for bright green sprouts with tight leaves. Fresh garlic can turn a good dish into a great one. For the garlic, use fresh cloves. Mince them finely for a strong flavor. You will need a baking sheet for roasting. A rimmed sheet works great to catch any drips. Use a mixing bowl to combine your ingredients. A good knife and cutting board are also important for prep. A spatula can help you toss the Brussels sprouts well. First, you need to preheat your oven to 400°F (200°C). This step is very important. A hot oven helps the Brussels sprouts get crispy. Next, take 1 pound of trimmed and halved Brussels sprouts. Place them in a large mixing bowl. Add 4 cloves of minced garlic, 3 tablespoons of olive oil, 1 teaspoon of salt, and 1/2 teaspoon of black pepper. If you like some heat, you can add 1/2 teaspoon of red pepper flakes. Toss everything well. Make sure the Brussels sprouts are fully coated with the oil and spices. Now, spread the Brussels sprouts out on a baking sheet. It’s best to put them in a single layer. This way, they cook evenly. Place the baking sheet in your preheated oven. Roast them for about 20 minutes. Halfway through, stir the sprouts. This helps them brown nicely and get tender. You want them to caramelize and be soft inside. After 20 minutes, take the baking sheet out. Now, it’s time to add the cheese. Sprinkle 1/2 cup of grated Parmesan cheese evenly over the Brussels sprouts. This cheese will melt and add great flavor. Put the baking sheet back in the oven for another 5-7 minutes. Look for the cheese to be melted and golden. When they are done, remove the baking sheet and let them cool a bit. Garnish with fresh chopped parsley before serving. Enjoy your Garlic Parmesan Roasted Brussels Sprouts! For the full recipe, check out the link. To get great Brussels sprouts, space them evenly on the baking sheet. If they crowd each other, they steam instead of roast. Aim for about an inch apart. This helps them brown and crisp up nicely. For tender, caramelized sprouts, roast them for 20 minutes. If you like them extra crispy, add 5 more minutes. You can play with the flavors! Try adding lemon zest or smoked paprika for a twist. If you love garlic, feel free to add more. For a cheesier taste, increase the Parmesan. Adjust these to your liking to make the dish your own. Garnish with fresh parsley for a pop of color. It adds a nice touch and a hint of freshness. Serve them in a shallow bowl or on a wooden platter to impress guests. These simple tips can elevate your dish and wow everyone at the table! {{image_2}} You can swap Parmesan for other cheeses. Try Pecorino Romano for a sharper taste. If you want creaminess, add goat cheese or cream cheese. These options give new flavors to your dish. Feel free to mix in other veggies. Carrots and sweet potatoes pair well with Brussels sprouts. You can also try cauliflower or broccoli. For gluten-free meals, ensure your cheese is gluten-free. This makes your dish safe for everyone. Pair your Brussels sprouts with protein. They go well with chicken, fish, or steak. For a fun twist, serve them in a wrap or on a bed of rice. You can also top pasta with these sprouts for a tasty side. For the full recipe, check the [Full Recipe]. To store leftover Garlic Parmesan Roasted Brussels Sprouts, place them in an airtight container. Make sure they cool to room temperature first to avoid steam. You can keep them in the fridge for up to 3 days. After this time, they may lose their flavor and texture. The best way to reheat Brussels sprouts is in the oven. Preheat it to 350°F (175°C). Spread your sprouts on a baking sheet and heat for about 10 minutes. This method keeps them crispy. If you choose the microwave, use a damp paper towel. Heat for 1-2 minutes, but expect some sogginess. Yes, you can freeze roasted Brussels sprouts. First, let them cool completely. Place them in a single layer on a baking sheet and freeze for 1-2 hours. Once frozen, transfer them to a freezer bag. They can last for up to 3 months. To thaw, leave them in the fridge overnight, then reheat in the oven. Choose fresh, firm Brussels sprouts. Look for bright green color and tight leaves. Avoid any with yellow or brown spots. A good size is about 1 to 1.5 inches wide. Smaller ones roast faster and taste sweeter. Start with dry Brussels sprouts. After washing, pat them dry with a towel. Use enough oil to coat them lightly. Spread them out in a single layer on the baking sheet. Stir them halfway through cooking to promote even roasting. Yes, you can prep the Brussels sprouts in advance. Toss them with oil, garlic, and seasonings. Store them in the fridge for up to a day. When ready, roast them as the recipe states. For a quick reheat, use the oven at 350°F (175°C) for about 10 minutes. These Brussels sprouts pair well with chicken, steak, or fish. They also go great with grains like quinoa or rice. For a veggie option, serve them with a hearty salad or roasted sweet potatoes. You can check the Full Recipe for all the details and tips to make this dish perfect. You learned how to make Garlic Parmesan Roasted Brussels sprouts with simple steps. Start with fresh ingredients and the right tools. Preheat the oven and combine your veggies well. Roasting leads to a delicious, crunchy dish. Don’t forget to garnish for added flair. You can adjust flavors and pair them with your favorite foods. With tips on storage and reheating, enjoy these sprouts anytime. Try it out and impress everyone with your cooking!

Garlic Parmesan Roasted Brussels Sprouts Simple Recipe

If you’re looking for a simple but delicious side dish, you’ve found it! My Garlic Parmesan Roasted Brussels Sprouts recipe

- 2 large sweet potatoes, peeled and cubed - 1 whole garlic bulb - 2 tablespoons olive oil - ¼ cup unsweetened almond milk (or milk of choice) - 2 tablespoons unsalted butter or vegan butter - Salt and pepper to taste - 1 tablespoon fresh rosemary or parsley, chopped (for garnish) - Nutmeg for flavor - Parmesan cheese or nutritional yeast for a cheesy taste Roasted garlic sweet potato mash is not just tasty; it's also good for you. Each serving has about 200 calories. You get around 40 grams of carbs, 7 grams of fat, and about 4 grams of protein. This mash is a great way to enjoy comfort food while keeping it healthy. When you make this dish, you blend sweet potatoes and garlic, which are packed with nutrients. Sweet potatoes give you fiber and vitamins. Garlic adds flavor and health benefits too. You can find the full recipe at the end of this article. Enjoy making your own roasted garlic sweet potato mash! - Preheat the oven to 400°F (200°C). - Peel and cube the sweet potatoes into even pieces. To roast garlic, cut the top off the garlic bulb to expose the cloves. Drizzle with 1 tablespoon of olive oil. Wrap it in aluminum foil. Place it in the oven with the sweet potatoes. Roast for about 30 minutes. The garlic is done when it turns soft and golden. Once the sweet potatoes are fork-tender, it’s time to mash. In a large bowl, combine the roasted sweet potatoes and the garlic. Squeeze the soft garlic cloves directly into the bowl. Use a potato masher or fork to mix everything until creamy. Add almond milk and butter for a rich texture. Adjust the flavor by adding salt and pepper as needed. For a bright finish, sprinkle with fresh rosemary or parsley. For the full recipe, check out the details above. For a smooth, creamy mash, use a potato masher. A food processor can make it too fluffy. If you want to avoid lumps, ensure your sweet potatoes are fully cooked. Check them with a fork. If they slide off easily, they are ready to mash. For extra flavor, add fresh herbs like rosemary or parsley. They bring a bright taste to your dish. You can also try spices like nutmeg or cinnamon for a warm touch. If you like cheese, sprinkle some grated Parmesan on top or use nutritional yeast for a cheesy flavor. Presentation matters! Serve the mash in a deep dish. Drizzle some olive oil on top. Add a sprinkle of fresh herbs for color. For pairing, this mash goes well with roasted chicken or grilled fish. It also complements greens like sautéed spinach or steamed broccoli. For a wow factor, consider serving it alongside a tangy sauce or rich gravy. You can find the full recipe to guide you through the steps for making this delicious dish. {{image_2}} To make this dish vegan, swap out the butter and milk. Use vegan butter instead of regular butter. For milk, almond milk works great, but any plant-based milk is fine. You can also add flavor boosters like nutritional yeast or miso paste. These add a savory taste that enhances the mash. Want a kick? Add cayenne or smoked paprika to your mash. A little goes a long way, so start small and taste as you go. You can also mix in other roasted veggies. Carrots or butternut squash blend well and add more depth to the flavor. For a fall twist, sprinkle in some cinnamon or a hint of maple syrup. These flavors make the mash warm and cozy. During the holidays, you can add chopped cranberries or pecans. They give a festive crunch and a pop of color. This dish can evolve with the seasons, making it a year-round favorite. For the full recipe, check out the detailed instructions above. Store your leftover roasted garlic sweet potato mash in an airtight container. This will keep it fresh. Use glass or plastic containers that seal well. Glass containers are great for keeping flavors intact. Make sure to let the mash cool before sealing it. This helps avoid excess moisture that can spoil the mash. To freeze your mash, place it in a freezer-safe container. Leave some space at the top for expansion. You can also use freezer bags, which save space. When you're ready to use it, take it out and thaw it in the fridge overnight. For quick thawing, place the bag in warm water. Reheat the mash in a pot over low heat. Stir often to keep it smooth. In the fridge, your sweet potato mash lasts about 3 to 5 days. If you freeze it, it can stay good for up to 3 months. Always check for any off smells or changes in color before using. This ensures you enjoy it at its best. Yes, you can use other potatoes, but sweet potatoes stand out. They are sweeter and creamier than regular potatoes. Sweet potatoes have more vitamins and fiber, making them healthier. Regular potatoes are starchy and can be fluffier. However, they won’t give you the same flavor depth as sweet potatoes. If you want to try other types, consider Yukon Gold or red potatoes. They will give a different texture and taste to your mash. To check if sweet potatoes are done, use the fork test. Stick a fork into the sweet potatoes. If the fork goes in easily, they are ready. You can also look for visual signs. The sweet potatoes should look soft and slightly caramelized on the edges. If they are not tender, roast them a little longer. Keep an eye on them to avoid burning. You can prepare this dish ahead of time with a few easy steps. First, roast the sweet potatoes and garlic as instructed. After mashing, let the mix cool down. Then, store the mash in an airtight container. You can keep it in the fridge for up to three days. To reheat, place it in a pan over low heat or use the microwave. Stir in a splash of almond milk or butter for creaminess. Enjoy the full recipe for more details! This blog post shared easy steps to make creamy mashed sweet potatoes. You learned about the right ingredients, optional add-ins, and nutritious details. I also gave tips for perfect texture and serving ideas. You can adapt the recipe to fit your diet, adding different flavors or seasonal touches. Lastly, storing tips ensure your leftovers stay fresh. Enjoy creating this dish, whether for a family meal or a festive gathering. Your kitchen adventure awaits!

Roasted Garlic Sweet Potato Mash Savory and Smooth Dish

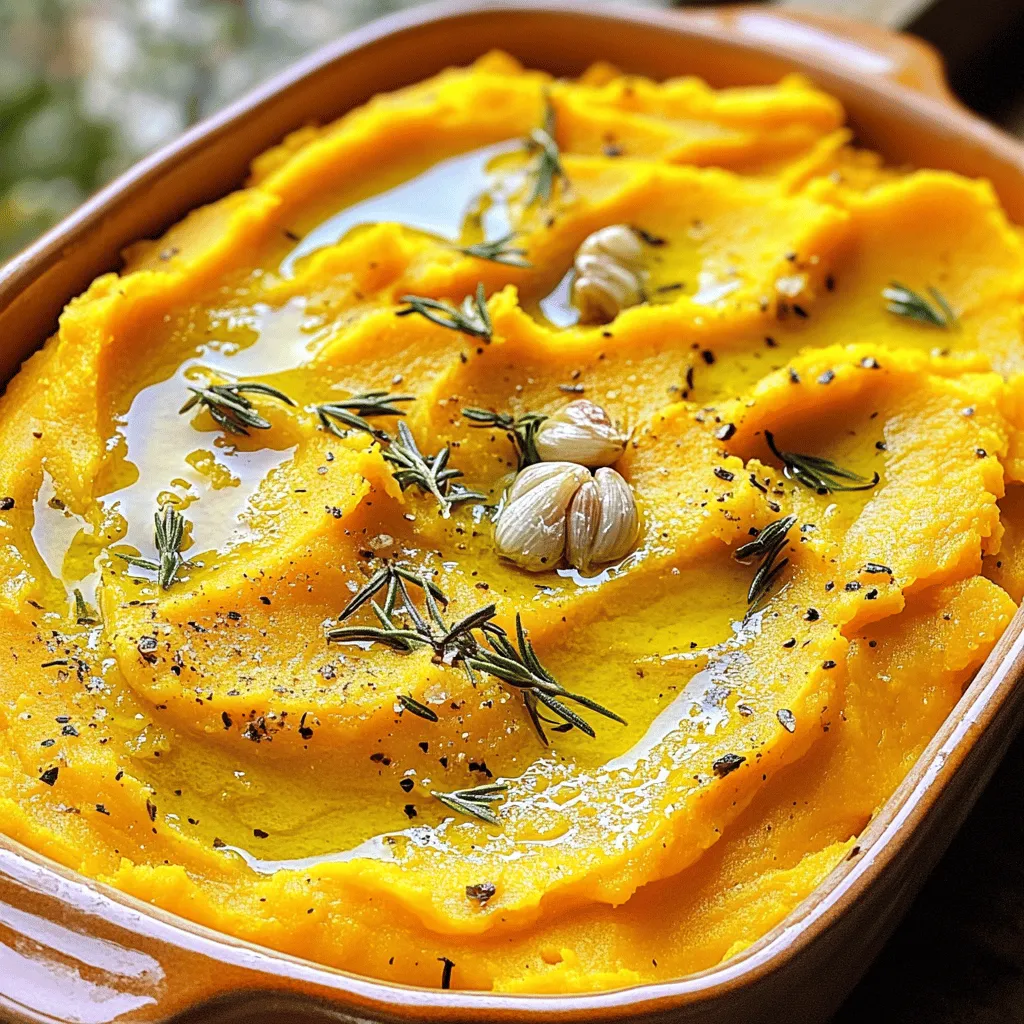
Are you ready to transform your holiday meals with a dish that’s both savory and smooth? My Roasted Garlic Sweet

Older posts
Newer posts
← Previous Page1 … Page56 Page57 Page58 … Page84 Next →

dsad

© 2026 juliesdish • Built with GeneratePress

Our Policies

  • Copyright Policy
  • Cookie Policy
  • GDPR Policy
  • Privacy Policy
  • Disclaimer
  • Terms Of Use

More Information

  • Home
  • About
  • Contact
  • Appetizers
  • Dessert
  • Dinner
  • Drinks
©2026, juliesdish About Back To Top