Skip to content
DisclaimerTerms Of UseGDPR PolicyCookie Policy

juliesdish

  • Home
  • Drinks
  • Appetizers
  • Dinner
  • Dessert
  • About
  • Contact
  • Privacy Policy
DisclaimerTerms Of UseGDPR PolicyCookie Policy

NO-ING-IMG

This Lemon Herb Roasted Potatoes recipe is simple and rewarding. You only need a few key ingredients to bring out the bright flavors of lemon and herbs. - 2 lbs baby potatoes, halved - 3 tablespoons olive oil - 1 tablespoon fresh lemon juice - Zest of 1 lemon - 2 teaspoons garlic powder - 1 teaspoon dried thyme - 1 teaspoon dried rosemary - Salt and pepper to taste - Fresh parsley for garnish Using baby potatoes gives this dish a creamy texture. They roast well and have a delightful bite. Olive oil helps the potatoes crisp up nicely. The fresh lemon juice and zest add a zesty kick that brightens the dish. Garlic powder, thyme, and rosemary round out the flavor profile, making every bite delicious. - Alternative herbs like oregano or basil - Additional seasoning options such as paprika or cayenne Feel free to swap herbs based on your taste. You can add a little heat with cayenne or a smoky flavor with paprika. Mixing up the herbs keeps this dish fresh and exciting! For the full recipe, check out the details above. 1. Preheat the oven. Set your oven to 425°F (220°C). This high heat helps the potatoes get crispy. 2. Prepare and season the potatoes. Take 2 lbs of baby potatoes and cut them in half. In a large bowl, mix the halved potatoes with 3 tablespoons of olive oil, 1 tablespoon of fresh lemon juice, and the zest of 1 lemon. Add 2 teaspoons of garlic powder, 1 teaspoon of dried thyme, 1 teaspoon of dried rosemary, and salt and pepper to taste. Toss everything together well. 1. Roasting the potatoes in the oven. Spread the seasoned potatoes on a baking sheet. Make sure they lie flat and have space. This helps them roast evenly. 2. Important cooking tips (flipping, timing). Roast the potatoes for about 25-30 minutes. Flip them halfway through. This will ensure they brown nicely on all sides. Use a fork to check if they are tender. 1. Garnishing tips and serving suggestions. Once the potatoes are done, take them out of the oven. Let them cool for a couple of minutes. Garnish with fresh parsley to add color and flavor. Serve them warm alongside your favorite main dish. For more details, check the Full Recipe. To achieve the perfect texture, choose small baby potatoes. They roast faster and become crispy. Cut them in half to help them cook evenly. Make sure to use enough olive oil. It prevents sticking and adds flavor. Avoid common mistakes like overcrowding the baking sheet. Space the potatoes apart to help them roast well. Also, remember to flip them halfway through cooking. This step ensures they brown evenly. You can enhance the flavor by adding cheese or veggies. Try mixing in some grated parmesan for extra richness. You can also toss in cherry tomatoes or bell peppers for more color and taste. Adjust seasoning to your taste. If you love garlic, add more garlic powder. For a bit of heat, sprinkle in some red pepper flakes. Always taste before serving to make sure it's just right. When plating the dish, arrange the potatoes in a circle or a pile. This makes them look appealing. Use a large white plate to highlight the golden-brown color. Garnish effectively with fresh parsley. Chop it finely and sprinkle it on top for a pop of color. You can also add lemon wedges on the side for a fresh touch. For the full recipe, refer to the earlier section. Enjoy your cooking! {{image_2}} You can switch things up by making lemon herb roasted sweet potatoes instead. Just swap the baby potatoes with sweet potatoes. Use the same herbs and lemon zest to keep the flavor bright. The sweet taste of the potatoes adds a nice twist. If you want a vegan version, use the same recipe. Just make sure the olive oil is pure. This dish is naturally vegan, so you’re all set! If you want to save time, try making these potatoes in an air fryer. Set the air fryer to 400°F (200°C). Cook for about 15-20 minutes, shaking the basket halfway. You’ll get crispy potatoes with less oil. You can also grill these potatoes. Parboil them for 10 minutes first. Then toss them in olive oil and seasonings. Grill them on medium heat for about 15 minutes, turning often. This gives them a smoky flavor that's hard to resist. You can change the herbs based on the season. In spring, add fresh dill or chives for a light taste. Summer is great for basil or oregano, which adds warmth. In fall, use sage or rosemary for a cozy feel. Winter calls for thyme or parsley for freshness. Mixing in seasonal flavors keeps your dish exciting and tasty. For the full recipe, check out the Lemon Herb Roasted Potatoes section. To keep your Lemon Herb Roasted Potatoes fresh, store them in an airtight container. Place them in the fridge right after they cool down. This helps them stay tasty. You can keep them for up to four days. If you want to store them longer, consider freezing. For freezing, use a freezer-safe bag or container. Make sure to remove as much air as you can. Label it with the date. These potatoes can last up to three months in the freezer. When you’re ready to eat them, thaw in the fridge overnight. You can reheat your potatoes in the microwave or the oven. The microwave is quick, but it may make the potatoes soft. To heat in the microwave, place them in a bowl and cover with a damp paper towel. Heat for one to two minutes or until hot. For the oven, preheat it to 375°F (190°C). Spread the potatoes on a baking sheet and heat for about 10-15 minutes. This method keeps them crispy and tasty. Whichever method you choose, check if they are warm all the way through. In the fridge, Lemon Herb Roasted Potatoes last about four days. If you notice any off smell or mold, it’s best to throw them out. This is a sign they have spoiled. Trust your senses. Enjoy your delicious dish while it’s fresh! For the full recipe, check out the earlier section. I recommend using baby potatoes for this recipe. They have a creamy texture and cook evenly. You can also use Yukon Gold or red potatoes. These types hold their shape well and get crispy on the outside. Yes, you can use pre-cooked potatoes. Just cut them in half and reduce the roasting time. Cook them until they are crispy, about 10-15 minutes. This will give you great flavor without overcooking. To keep it dairy-free, simply skip any cheese. The lemon juice and herbs provide plenty of flavor. You won't miss the dairy at all. Use olive oil as it is naturally dairy-free and adds a nice richness. These roasted potatoes pair well with many dishes. Try serving them with grilled chicken or fish. They also go great with a fresh salad. For a vegetarian option, serve them with roasted veggies or a hearty grain dish. Check out the Full Recipe for more ideas! This guide presented key points for making Lemon Herb Roasted Potatoes. We covered ingredients, both main and optional. The step-by-step instructions detailed preparation, cooking, and serving tips. Tips and tricks gave insight into flavor and presentation. Variations allowed for creativity while storing tips ensured leftovers stay fresh. Now you can cook delicious potatoes that impress anyone. Enjoy experimenting with flavors and methods. Happy cooking!

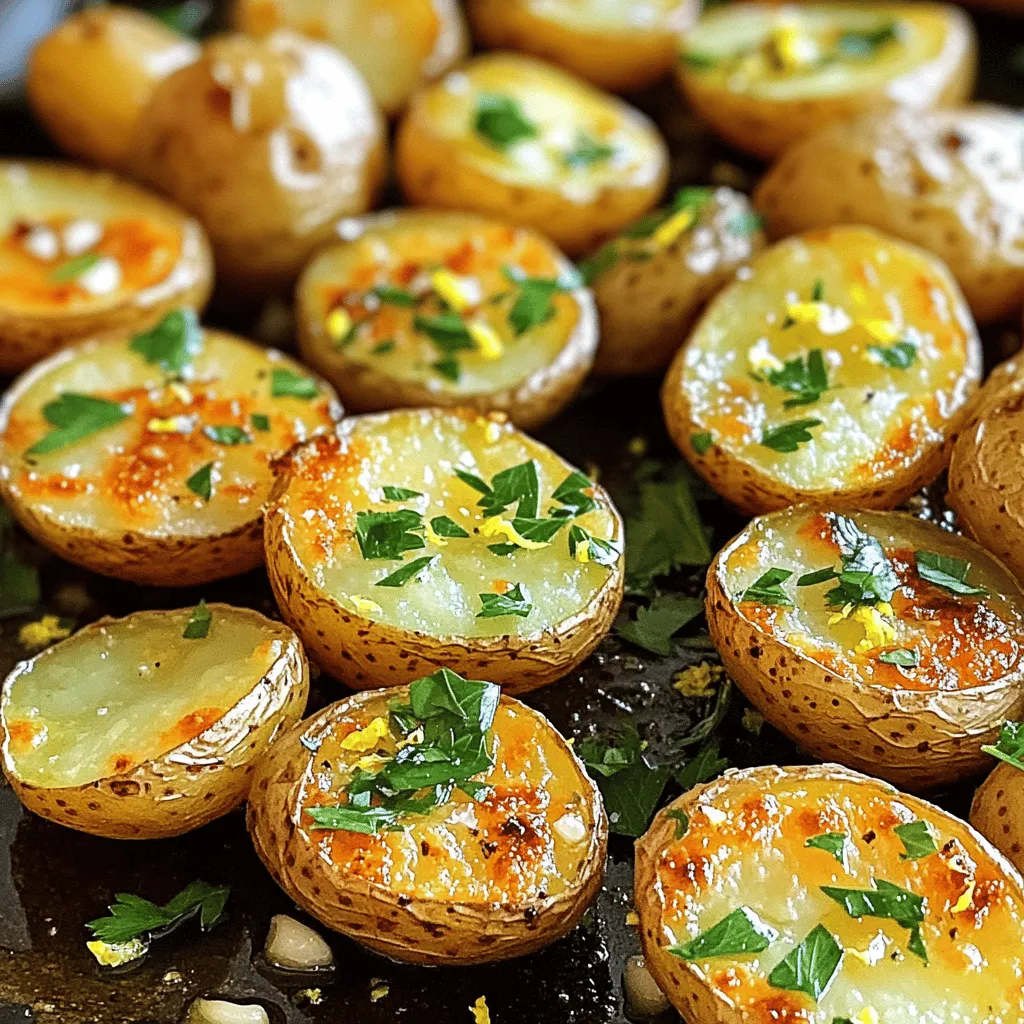
Lemon Herb Roasted Potatoes Simple Side Dish Delight

Looking for a simple side dish that packs a punch? You’re in the right place! My Lemon Herb Roasted Potatoes

Creating the perfect pumpkin chocolate chip muffins starts with gathering the right ingredients. Here’s what you need: - 1 cup pure pumpkin puree - 1/2 cup brown sugar - 1/2 cup granulated sugar - 1/3 cup vegetable oil - 2 large eggs - 1 teaspoon vanilla extract - 1 1/2 cups all-purpose flour - 1 teaspoon baking soda - 1/2 teaspoon baking powder - 1 teaspoon ground cinnamon - 1/2 teaspoon ground nutmeg - 1/4 teaspoon allspice - 1/2 teaspoon salt - 1 cup semi-sweet chocolate chips - Optional: 1/4 cup chopped walnuts or pecans These ingredients blend perfectly to create a warm, comforting flavor. The pumpkin adds moisture and richness, while the chocolate chips bring sweetness. Brown sugar gives a deep, caramel-like taste. Don’t skip the spices! They give the muffins their cozy aroma. Using fresh pumpkin puree makes a big difference in flavor. If you use canned, check for pure pumpkin, not pie filling. You can easily find most of these items in your pantry or local store. If you want to add a nutty crunch, toss in the walnuts or pecans. For the full recipe, just follow the instructions after gathering these tasty ingredients! - Preheat your oven to 350°F (175°C). Line a muffin tin with paper liners or grease it. - In a large bowl, mix 1 cup of pumpkin puree, 1/2 cup brown sugar, 1/2 cup granulated sugar, 1/3 cup vegetable oil, 2 large eggs, and 1 teaspoon vanilla extract. Whisk until smooth. - In another bowl, combine 1 1/2 cups all-purpose flour, 1 teaspoon baking soda, 1/2 teaspoon baking powder, 1 teaspoon ground cinnamon, 1/2 teaspoon ground nutmeg, 1/4 teaspoon allspice, and 1/2 teaspoon salt. - Gradually add the dry mix to the wet mix. Stir gently until just combined. - Fold in 1 cup of semi-sweet chocolate chips. Add 1/4 cup of chopped walnuts or pecans if you like. - Spoon the batter into the muffin tin, filling each cup about 2/3 full. Bake for 18-22 minutes. Check with a toothpick; it should come out clean. - Let the muffins cool in the tin for about 5 minutes. Then, move them to a wire rack to cool completely. - For a nice touch, dust the cooled muffins with powdered sugar. Serve them on a wooden platter for a rustic look. You can even add a few chocolate chips on top for decoration. Don't forget, you can find the full recipe for these delightful Pumpkin Chocolate Chip Muffins in the earlier sections! Do not overmix the batter. This keeps your muffins light and fluffy. When you combine the wet and dry ingredients, stir gently. You want to mix until just combined. A few lumps are okay! This will help your muffins rise nicely. For even baking, use an oven thermometer. Sometimes, oven temperatures can be off. Preheat your oven to 350°F (175°C). This ensures your muffins bake evenly. Place the muffin tin in the center of the oven. This helps with consistent heat all around. Spices can boost pumpkin flavor. Ground cinnamon is a must. It adds warmth and sweetness. Nutmeg and allspice also work well with pumpkin. They bring out its natural richness. You can even add a pinch of ginger for extra kick. Choose high-quality chocolate. Semi-sweet chocolate chips are great, but you can use dark chocolate too. Look for brands with high cocoa content. This gives a deeper flavor. Always check the ingredients to avoid additives. A little powdered sugar can make a big difference. Dust it over the cooled muffins for a pretty look. Use a small sieve for an even coating. This adds a touch of elegance. For creative plating, use a wooden platter. It gives a rustic feel. You can also add a few chocolate chips on top of each muffin. This makes them more inviting. Arrange them in a circle or stack them for an eye-catching display. {{image_2}} You can swap out regular sugar for healthier options. Try using maple syrup or honey. These natural sweeteners add a touch of flavor. They also bring moisture to your muffins. You can use less sugar this way, too. Choosing whole grain flour is another smart move. It gives you more fiber and nutrients. Whole wheat flour works well in this recipe. You can replace all-purpose flour with it. Just remember, the muffins may turn darker and denser. Want to mix things up? Adding spices can make your muffins shine! Try ginger or cloves for an extra kick. They pair nicely with the pumpkin. You can also play with different chocolates. Dark chocolate chips add richness. White chocolate can bring a sweet twist. You can add fruits like cranberries or apples. They add a pop of color and flavor. Just chop them small so they mix well. Think about fun add-ins for your muffins. Nuts like walnuts or pecans add crunch. Just chop them up and fold them in. You can also use dried fruits like raisins or apricots. They add sweetness and texture. For toppings, you can get creative! Try a sprinkle of oats or a drizzle of honey. A dusting of powdered sugar makes them look great, too. Check out the Full Recipe for more tips on how to make these muffins your own! To keep your pumpkin chocolate chip muffins fresh, store them in an airtight container. This helps seal in moisture. At room temperature, they last for about 2 to 3 days. If your kitchen is warm and humid, you might want to refrigerate them. Muffins can dry out quickly, so be mindful. For long-term storage, freezing is a great option. Wrap each muffin tightly in plastic wrap and place them in a freezer bag. This keeps them safe from freezer burn. You can freeze them for up to 3 months. To thaw, leave them at room temperature for about 1 hour. If you need them warm, pop them in the microwave for 15-20 seconds. Check your muffins before eating. If they smell off or show mold, it's time to toss them. A good muffin should feel moist but not wet. If they feel dry or crumbly, they might not taste great. To maintain freshness, always store them in a cool, dry place. You can use applesauce, mashed banana, or butternut squash. Each option adds moisture and sweetness. Applesauce works well for a lighter taste. Mashed banana gives a unique flavor, while butternut squash is very similar to pumpkin. Yes, you can! Make the batter a day ahead and store it in the fridge. This helps the flavors blend better. You can also bake the muffins and store them in an airtight container. They stay fresh for about three days at room temperature. Use a gluten-free all-purpose flour blend. These blends often include rice flour, tapioca flour, and potato starch. Make sure the blend contains xanthan gum for added structure. This way, you keep the same fluffy texture without gluten. This recipe balances pumpkin flavor with sweet chocolate. The spices like cinnamon and nutmeg bring warmth and depth. I also use a mix of sugars, which adds richness. The muffins stay moist and fluffy, making them truly special. Key factors include not overmixing the batter. Mix until just combined for fluffiness. Use fresh baking powder and soda for rise. Proper measuring of flour is crucial, too. Spoon flour into your measuring cup rather than scooping it straight from the bag. This keeps the muffins light and airy. These Pumpkin Chocolate Chip Muffins are a delightful treat made with simple ingredients. You mixed wet and dry items separately, added chocolate chips, and baked them to perfection. Remember, don’t overmix; it keeps muffins light. Feel free to make variations with spices or different add-ins. Storing them right helps maintain freshness. Enjoy your baking journey, and share these tasty muffins with friends! They will love them just as much as you do.

Pumpkin Chocolate Chip Muffins Cozy and Tasty Treat

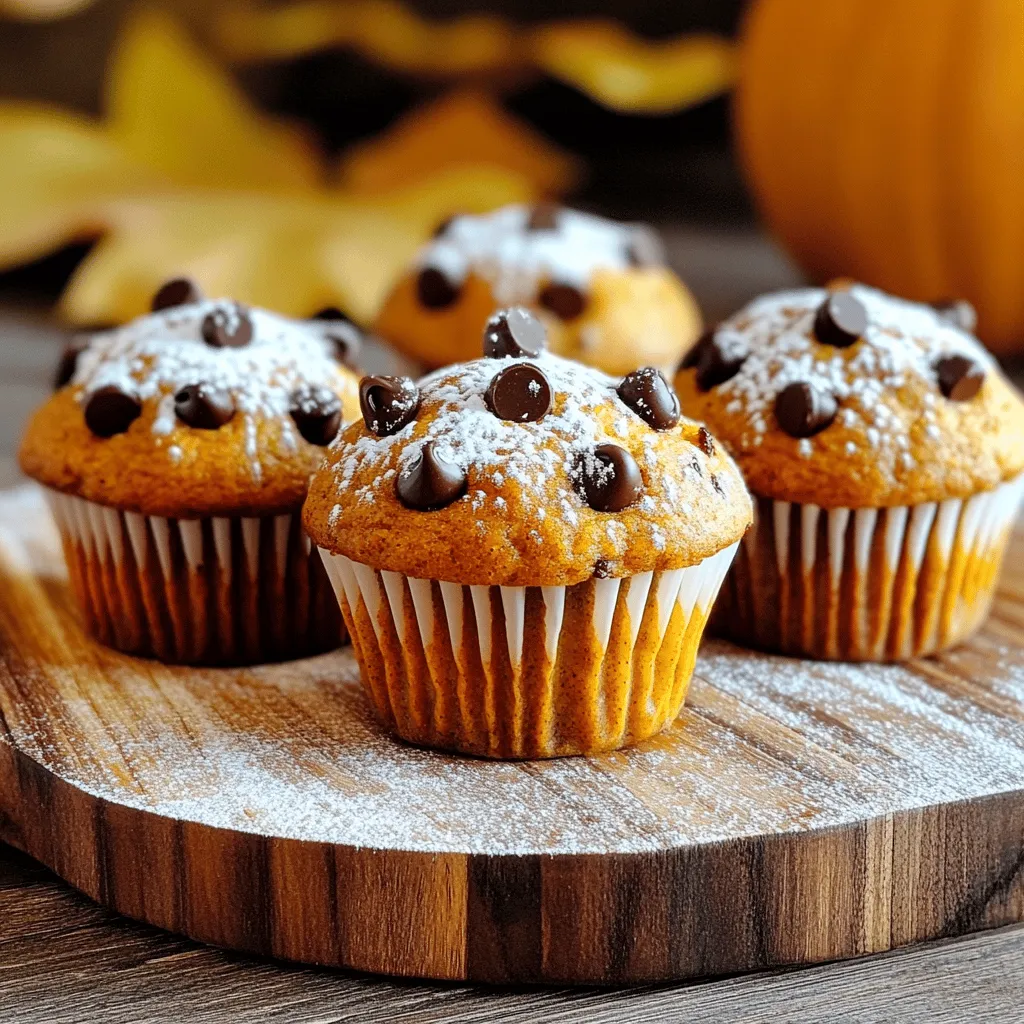
Do you crave a warm, cozy treat that combines the rich flavors of fall? These Pumpkin Chocolate Chip Muffins are

- 2 cups cooked chicken, shredded - 1/2 cup buffalo sauce - 1/4 cup cream cheese, softened - 1/4 cup ranch dressing - 1 celery stalk, finely chopped - 1 carrot, shredded - 1/4 cup green onions, chopped - 1 head of Romaine lettuce, leaves separated - Optional: crumbled blue cheese for garnish These ingredients create a bold flavor and satisfying crunch. The cooked chicken gives protein, while the buffalo sauce adds heat. Cream cheese gives a smooth texture, balancing the spice. Ranch dressing cools the dish down. Celery adds crunch, and carrots bring sweetness. Green onions give freshness and color. - Mixing bowl - Spoon - Knife and cutting board You need basic kitchen tools to make these wraps. A mixing bowl helps combine the ingredients. Use a spoon to mix evenly. A knife and cutting board help chop veggies quickly and safely. - Calories per serving: Approximately 250 - Macronutrient breakdown: - Protein: 20g - Carbohydrates: 8g - Fat: 16g These wraps are a great choice for a healthy meal. They pack protein without too many carbs. The fat comes from cream cheese and dressing, adding flavor without too much guilt. You can find the full recipe in this article to get started! 1. First, take your cooked chicken and shred it. 2. In a medium bowl, mix the shredded chicken with the buffalo sauce. 3. Make sure the chicken is well coated in the sauce. 4. Next, add the softened cream cheese to the bowl. 5. Mix until the cream cheese blends into the chicken. 1. Now, add the ranch dressing to the chicken mixture. 2. Chop the celery and add it to the bowl. 3. Shred the carrot and mix it in as well. 4. Finally, add the chopped green onions and stir well. 1. Take a Romaine lettuce leaf and place it on a plate. 2. Spoon a generous amount of the buffalo chicken mixture into the center. 3. If you like blue cheese, sprinkle it on top for extra flavor. 4. Wrap the sides of the lettuce leaf around the filling like a taco. 5. Enjoy your tasty Buffalo Chicken Lettuce Wraps right away! For a complete list of ingredients and steps, check out the Full Recipe. You can use rotisserie chicken or poached chicken for this recipe. Rotisserie chicken saves time. It adds a nice flavor and is easy to shred. Just pull off the meat and toss it in your bowl. Poached chicken offers a fresh taste. Simply boil chicken breasts until done, then shred. Both options work well, so choose what you like best. Buffalo sauce can be very spicy. If you prefer milder flavors, use less sauce. You can also mix in more cream cheese or ranch dressing. This helps tone down the heat. For a spicier kick, add more buffalo sauce. You can even sprinkle in some cayenne pepper or hot sauce if you dare! These wraps are great on their own, but sides can enhance your meal. Try serving with celery sticks or carrot sticks for crunch. Hummus or a creamy dip pairs well too. You can also add a fresh salad for balance. This makes your meal colorful and tasty. {{image_2}} You can switch up the flavor with different sauces. BBQ sauce gives a smoky taste. Teriyaki sauce adds a sweet twist. Just replace the buffalo sauce in the recipe with your choice. This change keeps things fresh and exciting. If you want to change the protein, turkey works well. It has a mild flavor that takes on sauce nicely. Tofu is another great option for a vegetarian choice. Just use firm tofu and crumble it. This makes the dish lighter and still packed with flavor. Toppings can elevate your wraps. Slices of avocado add creaminess. Jalapeños bring heat if you like spice. Chopped bell peppers add crunch and color. Feel free to mix and match these toppings to make your wraps unique and tasty. To keep your buffalo chicken filling fresh, place it in an airtight container. Store it in the fridge for up to three days. Make sure the filling cools before sealing it. If it is warm, moisture builds up inside the container. This can spoil the filling quickly. You can freeze the chicken mixture for up to three months. First, let it cool completely. Then, portion it into freezer bags or airtight containers. Remove as much air as you can before sealing. Label the bags with the date to keep track. To reheat, place the chicken mixture in a microwave-safe bowl. Heat it in short bursts, stirring in between. This helps it warm evenly. You can also use a pan on low heat. Stir often until it is heated through. Enjoy it fresh on your lettuce wraps! For the full recipe, check out the details above. Yes, you can! While Romaine lettuce works well, you have other options. Butter lettuce offers a soft, tender leaf. Iceberg lettuce provides a nice crunch. You could also try green leaf or red leaf lettuce for a pop of color. Each type adds a unique texture and flavor to your wraps. Just ensure the leaves are large enough to hold the filling. To make Buffalo Chicken Lettuce Wraps dairy-free, swap out the cream cheese and ranch dressing. Use a dairy-free cream cheese made from nuts or soy. For ranch dressing, you can use a vegan version or mix olive oil, vinegar, and herbs. These swaps keep the flavors vibrant and rich without dairy. These wraps pair well with many sides. Try carrot sticks or celery for a crunchy complement. You can also serve them with a light salad or fruit. If you want something warm, a bowl of soup works nicely. These options balance the spice and add variety to your meal. This blog post covered everything you need to make tasty Buffalo Chicken Lettuce Wraps. We discussed key ingredients, tools, and step-by-step tips to help you succeed. I also shared ways to customize your wraps and how to store the leftovers. These wraps are fun, healthy, and versatile. They fit many tastes and meal plans. With the right mix of flavors, your wraps will impress everyone. Enjoy making and sharing this easy dish!

Buffalo Chicken Lettuce Wraps Tasty and Simple Recipe

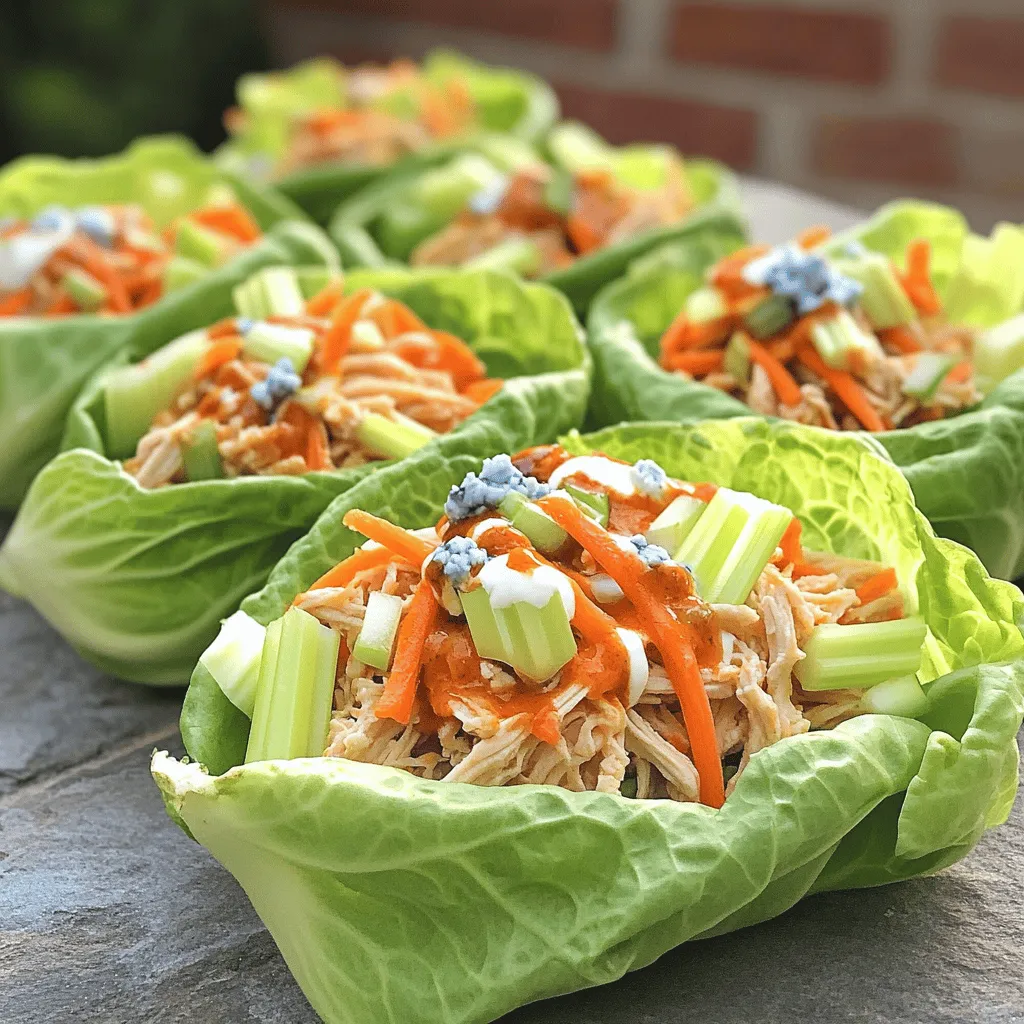
Looking for a fun and tasty meal? Buffalo Chicken Lettuce Wraps are your answer! This easy recipe packs bold flavor

- 1 cup white rice (jasmine or basmati) - 2 cups vegetable broth (or water) - 1 ripe avocado, diced - 1/4 cup fresh cilantro, chopped - 2 tablespoons lime juice (freshly squeezed) In this recipe, the base is white rice, which cooks well and absorbs flavors nicely. I prefer jasmine or basmati for their aroma and texture. The vegetable broth adds depth to the rice, making it richer and tastier. A ripe avocado brings creaminess, while fresh cilantro adds a bright touch. Finally, a splash of lime juice gives that zesty kick. - 1 tablespoon olive oil - 1/2 teaspoon garlic powder - Salt and pepper to taste - Zest of 1 lime These optional ingredients can take your dish to the next level. Olive oil adds a smooth finish and richness. Garlic powder gives a savory note, enhancing the overall taste. Salt and pepper are key for balance. Lime zest adds an extra burst of lime flavor, making each bite more vibrant. Using these ingredients, you can create a dish full of flavor and freshness. For the complete recipe, check out the full recipe section. To start, rinse the rice under cold water. This step helps clean the rice and remove extra starch. It makes the rice fluffier and less sticky. Once rinsed, take a medium saucepan. Combine the rinsed rice with vegetable broth or water. Bring this mixture to a boil. When it reaches a boil, lower the heat to low. Cover the pot and let it simmer for 15 to 18 minutes. The rice will become tender, and the liquid will be absorbed. After cooking, remove the pot from heat and let it sit covered for 5 more minutes. While the rice cooks, you can prepare the dressing. In a small bowl, whisk together olive oil, lime juice, garlic powder, salt, and pepper. Mix until it is well combined. This dressing adds a zesty flavor to the rice. Taste the dressing and adjust the seasoning if needed. You can add more salt or lime juice based on your preference. After the rice is done cooking, fluff it with a fork to separate the grains. Transfer the fluffy rice to a large serving bowl. Pour the dressing over the rice and stir it well. This helps coat the rice evenly. Next, gently fold in the diced avocado, chopped cilantro, and lime zest. Be careful not to mash the avocado. It should stay in nice chunks. Taste the final dish and adjust the seasoning if necessary. Enjoy preparing this bright and tasty avocado cilantro lime rice! For more details, check the Full Recipe. Using fresh lime juice makes a big difference in taste. Fresh lime juice has a bright, zesty flavor. Bottled lime juice can taste flat and less vibrant. Always squeeze your limes right before using them for the best results. When working with fresh herbs like cilantro, it’s key to treat them with care. Store cilantro in a glass of water in the fridge. Just like flowers, they’ll stay fresh longer that way. Rinse the leaves gently before chopping. This step helps keep their flavor strong. To keep your rice fluffy, rinse it under cold water. This step washes away excess starch. If you skip this, your rice may clump together. After cooking, let the rice sit covered for five minutes. This helps it firm up and prevents mushiness. When adding avocado, be gentle. Diced avocado can break apart easily. Fold it into the rice just before serving. This keeps the chunks intact and adds a nice creaminess to each bite. Avocado cilantro lime rice pairs well with many dishes. It complements grilled chicken, fish, or shrimp nicely. You can also serve it with black beans for a vegetarian option. To make your dish pop, present it well. Serve the rice in a large bowl. Garnish with extra lime wedges and a sprinkle of cilantro on top. This adds color and invites guests to dig in. For more ideas, check the Full Recipe for inspiration! {{image_2}} You can switch rice for quinoa or cauliflower rice. Quinoa adds a nice nutty flavor, while cauliflower rice keeps it light. If you want a fresh twist, try using parsley or mint instead of cilantro. Each herb gives a different taste, so feel free to experiment! Want to make this dish heartier? Add grilled chicken or shrimp. They pair well with the creamy avocado. For a vegan option, black beans or chickpeas work great too. They boost protein while keeping the dish healthy and filling. If you like heat, add diced jalapeños or red pepper flakes. They’ll give your rice a nice kick! You can also make a spicy dressing. Just mix lime juice with a bit of hot sauce. It’s an easy way to elevate the flavor of your Avocado Cilantro Lime Rice. Store your Avocado Cilantro Lime Rice in an airtight container. This helps keep it fresh. If you have leftovers with avocado, add a bit more lime juice. Lime juice slows down browning. You can also cover the surface of the rice with plastic wrap. Press it gently to remove air pockets. This will help keep the avocado from browning as fast. When reheating, use the stove or microwave. For the stove, add a splash of water. Heat on low until warm. Stir often to keep the rice fluffy. In the microwave, cover the bowl with a damp paper towel. Heat in short bursts. Check and stir every 30 seconds. You can serve this rice cold too. It makes a great base for bowls or salads. You can store this rice in the fridge for about 3 days. If you want to store it longer, freeze it for up to a month. To know if it’s bad, check for off smells or a slimy texture. If the avocado has turned brown, that’s normal. Just remove the brown parts before enjoying. Make sure to check for any signs of spoilage before eating. Yes, you can use brown rice. It has a nuttier taste. Brown rice takes longer to cook, about 40-45 minutes. You will need more water too. Use 2 1/2 cups of water for 1 cup of brown rice. To make it vegan, simply skip the butter or any animal products. The recipe is already dairy-free. The flavors come from the avocado, lime, and herbs. Yes, this dish is gluten-free. Rice does not contain gluten. Just check the broth label to ensure it is gluten-free. Most vegetable broths are safe to use. This rice pairs well with many dishes. Try serving it with grilled chicken or fish. It goes great with tacos or burritos too. Add black beans for a hearty meal. Yes, you can make this dish ahead. Cook the rice and store it in the fridge. Mix in the avocado and dressing just before serving. This keeps the avocado fresh and green. To keep avocado fresh, use lime juice. The acid slows down browning. You can also cover the dish tightly with plastic wrap. Store it in the fridge until ready to serve. Avocado Cilantro Lime Rice is a simple yet tasty dish. We covered the key ingredients, like rice, avocado, and lime. You learned how to prepare, dress, and enhance your rice. We discussed variations and how to store leftovers properly. Use fresh ingredients for the best flavor. This dish pairs well with many proteins and sides. Experiment with flavors to find your favorite twist. Enjoy making and sharing this vibrant dish with loved ones.

Avocado Cilantro Lime Rice Flavorful and Easy Recipe

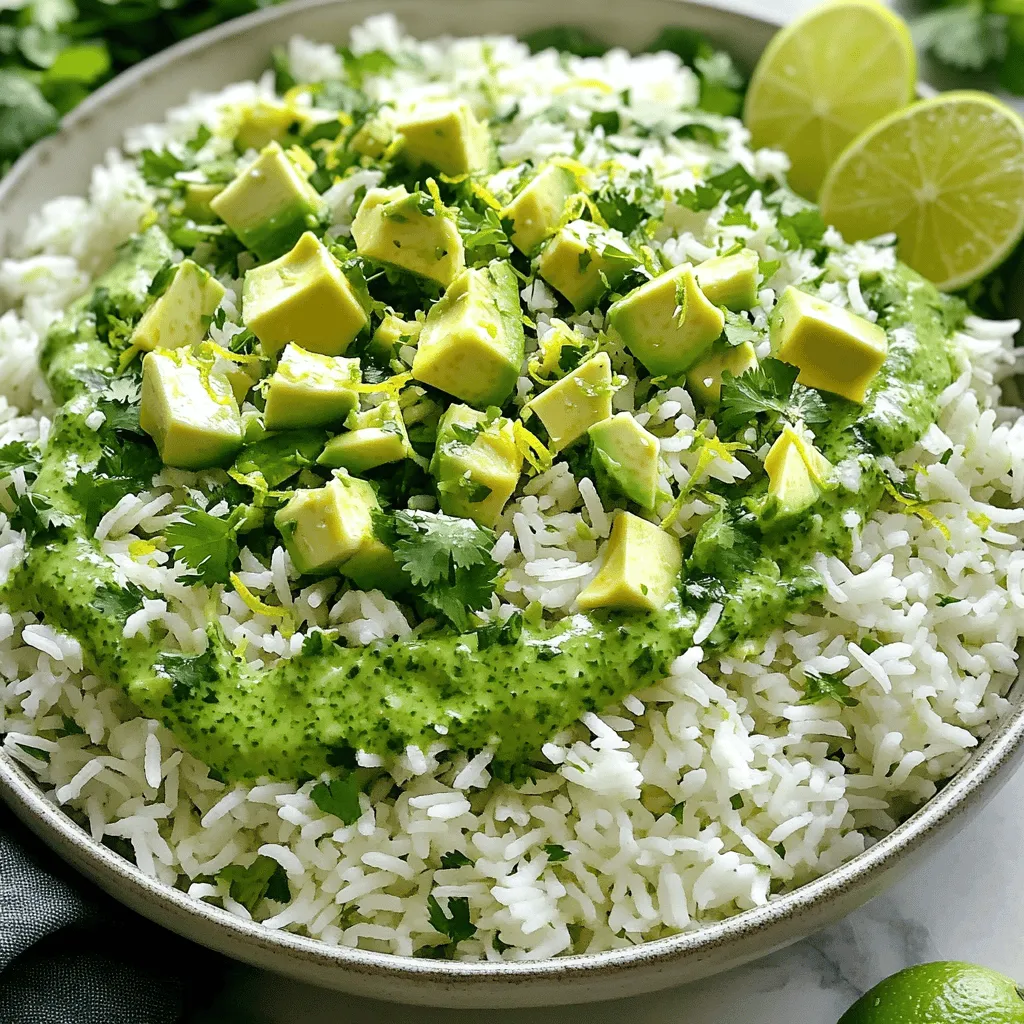
Welcome to a flavorful journey with Avocado Cilantro Lime Rice! This dish is not only easy to make, but it

- 1 lb broccoli florets - 3 tablespoons olive oil - 4 cloves garlic, minced - ½ cup grated Parmesan cheese - ½ teaspoon red pepper flakes - Zest of 1 lemon - Fresh parsley, chopped for garnish - Salt and pepper to taste Garlic Parmesan Roasted Broccoli is a simple yet tasty side dish. The main ingredients are easy to find. Broccoli florets bring a nice crunch and bright green color. Olive oil gives the broccoli flavor and helps it roast well. Garlic adds a wonderful aroma and taste. The Parmesan cheese melts beautifully, making every bite rich and savory. You can add optional ingredients for extra flair. Red pepper flakes give the dish a spicy kick. Lemon zest brightens the flavor and adds freshness. Chopped parsley is great for a pop of color and taste. Season with salt and pepper to make the flavors shine. Remember to adjust these to your liking. You can follow the [Full Recipe] for easy steps to make this dish. - Preheat your oven to 425°F (220°C). - Prepare 1 pound of broccoli florets. In a large bowl, combine the florets with 3 tablespoons of olive oil and 4 minced garlic cloves. - Spread the broccoli mixture evenly on a baking sheet. Make sure the florets are in a single layer. - Roast the broccoli for 15 minutes until it is tender and has a nice brown color. - After roasting, remove the baking sheet from the oven. Sprinkle ½ cup of grated Parmesan cheese over the broccoli. - Return the baking sheet to the oven for 5 more minutes. This helps the cheese melt and become golden. - Once done, zest a lemon over the broccoli for a fresh burst of flavor. - Finally, garnish the dish with chopped parsley before serving. This adds color and brightness to your meal. For the complete recipe, check the Full Recipe section. - Ensure the broccoli is evenly coated in olive oil for even roasting. This helps the broccoli cook nicely and brown well. - Use fresh garlic for the best flavor profile. Fresh garlic gives a strong, tasty kick that dried garlic cannot match. - Pair with grilled meats or serve as a side dish. This dish complements proteins like chicken or steak. - Serve with a squeeze of lemon for added freshness. The lemon brightens the flavors and balances the richness. - Avoid overcrowding the baking sheet, which can lead to steaming instead of roasting. Give each piece space to crisp up. - Do not rush the melting of the cheese. Allow it enough time to melt properly, ensuring a rich, gooey topping. For the complete Garlic Parmesan Roasted Broccoli recipe, check out the Full Recipe. {{image_2}} You can mix things up with different cheeses. Substitute Parmesan with Asiago or Pecorino Romano. Both add a nice twist. If you want something tangy, try a sprinkle of feta cheese. It gives a fresh burst that works well with broccoli. If you like heat, increase the red pepper flakes. This adds a nice kick to your dish. You can also add a dash of smoked paprika. This brings a smoky flavor that enhances the roasted taste. Roasting other vegetables with the broccoli is a fun idea. You can mix in carrots or bell peppers. They add color and sweetness. Chopped onions are another great addition. They caramelize as they roast, giving a sweet touch to your dish. For the full recipe, you can check out the complete details. Store any leftovers in an airtight container for up to 3 days. This keeps the broccoli fresh and tasty. Make sure the container seals well to avoid moisture loss. Reheat your broccoli in the oven or air fryer to keep it crispy. Set the oven to 350°F (175°C) for about 10 minutes. If you use a microwave, it will heat faster but may make the texture softer. Freezing is not the best choice for this dish. Broccoli can lose its crispness when frozen. If you must freeze it, keep it in a freezer-safe bag for up to a month. When you thaw it, the texture may change. For the best flavor and crunch, enjoy it fresh. The total time is approximately 25 minutes, including prep and cooking. This quick dish makes it easy to enjoy gourmet flavors without spending hours in the kitchen. Fresh broccoli is recommended for the best texture and flavor, but frozen can be used with adjustments. If using frozen, thaw it and pat it dry to avoid excess moisture. This helps keep the broccoli crisp during roasting. It pairs well with various proteins like chicken, fish, or tofu. The rich cheese and garlic flavor complement many meals. You can also serve it alongside pasta or grains for a hearty dish. For more ideas, check out the Full Recipe for Garlic Parmesan Roasted Broccoli. This blog post showed you how to make Garlic Parmesan Roasted Broccoli. You learned about key ingredients, instructions, and tips to ensure success. We discussed options for spicing it up and serving it well. Remember to choose fresh broccoli for the best taste. Keep leftovers in the fridge and reheat for crispiness. With these steps, you can enjoy a savory side dish that adds flavor to any meal. Enjoy creating this easy and delicious recipe!

Garlic Parmesan Roasted Broccoli Flavorful Side Dish

Want to wow your dinner guests or make a quick side dish? Garlic Parmesan Roasted Broccoli is the perfect choice!

To make Jalapeño Popper Stuffed Mushrooms, gather these tasty ingredients: - 12 large cremini or portobello mushrooms, stems removed - 4 oz cream cheese, softened - 1/2 cup shredded cheddar cheese - 1/4 cup shredded mozzarella cheese - 2 fresh jalapeños, finely chopped (seeds removed for less heat) - 1/4 cup breadcrumbs - 2 tablespoons fresh chives, chopped - 1 tablespoon garlic powder - 1 teaspoon smoked paprika - Salt and pepper to taste - Olive oil for drizzling This mix creates a creamy and spicy filling that makes each bite a delight. If you need to swap some ingredients, here are some great ideas: - Use ricotta cheese instead of cream cheese for a lighter filling. - Swap out cheddar for pepper jack cheese for an extra kick. - Try gluten-free breadcrumbs if you need a gluten-free option. - Use green onions instead of chives for a different flavor. These substitutions keep the dish tasty while fitting your needs. Enhance your Jalapeño Popper Stuffed Mushrooms with these fun garnishes: - Chopped fresh cilantro adds a fresh touch. - A drizzle of balsamic glaze gives a sweet flavor. - Serve with a side of ranch dressing for dipping. - Add crispy bacon bits for extra crunch and flavor. These garnishes can elevate your dish and impress your guests. For the full recipe, you can check the details above. First, start with your mushrooms. You want to use large cremini or portobello mushrooms. Remove the stems carefully. This makes space for the filling. Next, take a mixing bowl and combine the soft cream cheese, shredded cheddar, and mozzarella. Now, chop the fresh jalapeños. Remove the seeds if you want less heat. Add them to the cheese mix. Then, stir in the breadcrumbs, chives, garlic powder, smoked paprika, and a pinch of salt and pepper. Mix until everything is creamy and well blended. Spoon the cheese mixture into each mushroom cap. Press down slightly to pack it in. Arrange the stuffed mushrooms on a greased baking sheet. Drizzle a little olive oil on top for added flavor. Preheat your oven to 375°F (190°C). Bake the mushrooms for 20 to 25 minutes. They are done when the tops are golden and bubbly. Remove them from the oven and let them cool for a few minutes. To serve, use a rustic wooden board. This adds charm to your dish. Sprinkle some extra chopped chives on top for color. A drizzle of balsamic glaze can enhance the look and taste. These tips make your Jalapeño Popper Stuffed Mushrooms eye-catching and delicious. For the full recipe, check the details above. When making Jalapeño Popper Stuffed Mushrooms, keep a few things in mind. First, choose fresh mushrooms. Old mushrooms can be tough and dry. Also, don’t overstuff the caps. Leave a little room for the filling to bubble up while baking. Check your oven temperature. An oven that is too hot can burn the tops. Use a thermometer to keep it right at 375°F (190°C). Lastly, let the mushrooms cool slightly before serving. This helps the filling set and makes them easier to eat. To make your stuffed mushrooms pop, balance the flavors. Add a squeeze of fresh lime juice to your filling for a bright zing. This cuts through the creaminess of the cheeses. Consider mixing in some crispy bacon bits for a smoky touch. If you want more heat, keep some jalapeño seeds in your filling. Also, sprinkle some extra cheese on top before baking. This gives a nice golden crust and adds more flavor. Want to impress guests without stress? Prepare your stuffed mushrooms ahead of time. You can fill the mushroom caps and store them in the fridge for up to 24 hours. Just cover them tightly with plastic wrap. When you are ready to bake, let them sit at room temperature for about 15 minutes. This helps them cook evenly. If you want to freeze them, do so before baking. Just thaw overnight in the fridge before cooking. For the full recipe, check out the details above and enjoy creating these tasty bites! {{image_2}} You can easily make this dish vegetarian. Just skip the cream cheese and use a plant-based option. Vegan cheese works well too. For the filling, add more veggies like spinach or bell peppers. These add color and flavor. You can also use nuts like cashews for a creamy texture. Feel free to switch up the cheeses. Try pepper jack for more spice or feta for a tangy twist. You can replace jalapeños with roasted red peppers for a milder taste. If you want a crunch, add chopped nuts to the filling. They give a nice bite. Serve these stuffed mushrooms on a platter with fresh herbs. They look great and taste amazing. Pair them with a spicy dipping sauce for extra flavor. You can also serve them alongside a crisp salad or grilled veggies. These options balance the richness of the dish. For a fun twist, add a drizzle of sriracha on top before serving. You can find the full recipe above. To keep your Jalapeño Popper Stuffed Mushrooms fresh, let them cool first. Place them in an airtight container. Make sure to store them in the fridge. They will last for about 3 to 5 days. If you want to keep them longer, freezing is a good option. For reheating, the oven works best. Preheat your oven to 350°F (175°C). Place the stuffed mushrooms on a baking sheet. Heat them for about 10 to 15 minutes. This keeps the mushrooms crispy. You can also use a microwave, but it may make them a bit soggy. You can freeze these stuffed mushrooms before baking them. After filling the mushrooms, place them on a tray. Put the tray in the freezer until they are solid. Then, transfer them to a freezer-safe bag. They can stay frozen for up to 2 months. When ready to eat, bake them straight from the freezer. Just add a few extra minutes to the baking time. This way, you always have a tasty dish on hand! For the full recipe, check out my complete guide. Yes, you can prepare Jalapeño Popper Stuffed Mushrooms ahead of time. Just follow these steps: - Prepare the filling and stuff the mushrooms. - Place the stuffed mushrooms on a baking sheet. - Cover with plastic wrap and store in the fridge. You can keep them in the fridge for up to 24 hours before baking. When ready, simply bake them as instructed in the Full Recipe. This saves time and makes hosting easier! You can control the heat of the stuffed mushrooms by adjusting the jalapeños. Here’s how: - For a milder taste, remove all seeds and membranes from the jalapeños. - Use only one jalapeño or replace it with a bell pepper for no heat. - For extra spice, add more jalapeños or include a pinch of cayenne pepper. These options let you customize the heat to suit your taste. Stuffed mushrooms pair well with many sides. Here are a few ideas: - A fresh garden salad with light dressing. - Crispy garlic bread for a tasty crunch. - Creamy coleslaw for a cool contrast. - Roasted vegetables to add more color and flavor. These sides balance the richness of the stuffed mushrooms and make your meal more complete. The Jalapeño Popper Stuffed Mushrooms are easy to make and delicious. You learned about key ingredients and tasty variations. I shared tips to help you avoid common mistakes. We also covered storage options for leftovers and answered FAQs. In the end, these stuffed mushrooms are a fun and flexible dish. Enjoy making them your own!

Jalapeño Popper Stuffed Mushrooms Savory Delight

Get ready for a taste sensation with my Jalapeño Popper Stuffed Mushrooms! These tasty bites combine the smoky heat of

To make a chocolate peanut butter mug cake, you need simple ingredients. Here’s what you will gather: - 4 tablespoons all-purpose flour - 4 tablespoons granulated sugar - 2 tablespoons unsweetened cocoa powder - 1/8 teaspoon baking powder - 1/8 teaspoon salt - 3 tablespoons milk (or dairy-free alternative) - 2 tablespoons creamy peanut butter - 1 tablespoon vegetable oil - 1/4 teaspoon vanilla extract - Optional toppings: Chopped peanuts and chocolate chips These ingredients blend to create a rich and tasty treat. The flour gives structure, while sugar adds sweetness. Cocoa powder brings that deep chocolate flavor we all love. Baking powder helps it rise, and salt enhances the taste. Milk adds moisture, and peanut butter gives it that creamy texture. The vegetable oil keeps the cake tender, while vanilla extract adds warmth. Feel free to add chopped peanuts or chocolate chips on top. They make the cake even more delightful! For the full recipe, check the section above to see how these ingredients come together. In a large microwave-safe mug, add the following dry ingredients: - 4 tablespoons all-purpose flour - 4 tablespoons granulated sugar - 2 tablespoons unsweetened cocoa powder - 1/8 teaspoon baking powder - 1/8 teaspoon salt Whisk these together. This mix forms the base of your cake. It’s key to blend well. You want every bite to be sweet and chocolatey! Next, pour in your wet ingredients: - 3 tablespoons milk (or dairy-free alternative) - 2 tablespoons creamy peanut butter - 1 tablespoon vegetable oil - 1/4 teaspoon vanilla extract Stir until you get a smooth batter. Make sure to scrape the sides and bottom of the mug. This step is crucial for a uniform mix. If you want, fold in some chocolate chips for more flavor! Now, it’s time to cook! Microwave the mug on high for 1 minute and 30 seconds. Check if it’s done by looking at the center. If it’s still wet, microwave in 15-20 second intervals. It may take up to 2 minutes total, depending on your microwave. Carefully remove the mug from the microwave; it will be hot! Let it cool for a minute. Top with chopped peanuts or extra chocolate chips if you like. This will make your mug cake even better! For the complete recipe, check the Full Recipe. Microwave wattage can change your cooking time. Most microwaves are between 600 to 1200 watts. If yours is less than 800 watts, you may need to add more time. For a 1000-watt microwave, start with 1 minute and 30 seconds. Always check the center to see if it is firm. If it’s still wet, microwave in 15-second bursts. This helps you avoid a soggy mug cake. Overcooking is a common issue. It can make your mug cake dry and tough. To prevent this, always use a large mug, at least 12 oz. This gives the cake room to rise. Also, do not stir too much. Mixing lightly keeps air in the batter. This air creates a fluffy texture. If your cake is gummy, it may need more cooking time. Check often and adjust as needed. You can make your mug cake your own! Add chocolate chips for extra sweetness. Nuts can add a nice crunch. Want something different? Try a pinch of cinnamon or a drop of coffee. These flavors can boost the cake’s richness. You can also add toppings like whipped cream or extra peanut butter. The choices are endless! For more ideas, check out the Full Recipe. {{image_2}} You can easily change the taste of your mug cake. Adding chocolate chips gives it more richness. A sprinkle of cinnamon or a dash of espresso powder can add depth. If you love nuts, try adding chopped peanuts or walnuts. They add crunch and flavor. Just mix them into the batter before microwaving. Want a gluten-free version? Swap the all-purpose flour with almond flour or a gluten-free blend. For a dairy-free option, use almond milk or oat milk instead of regular milk. Make sure to check that your peanut butter is also dairy-free. These swaps keep the cake tasty without losing its charm. Serving your mug cake can be fun! You can leave it in the mug for a cozy look. For a fancier touch, tip it out onto a plate. Drizzle some warm peanut butter or chocolate sauce on top. Add whipped cream or a scoop of ice cream for a special treat. These options make every bite exciting and delicious. For the full recipe, check out the Chocolate Peanut Butter Mug Cake section. To store your uneaten cake, let it cool completely first. Place the mug cake in an airtight container. This keeps moisture in and helps maintain freshness. If you use a plate, cover it with plastic wrap. Store it in the fridge for up to three days. If you want to enjoy it later, you can freeze it. When reheating your mug cake, use the microwave. Place it back in the mug or on a plate. Heat it for 15 to 20 seconds at a time. Check after each interval to avoid overheating. You want it warm and soft, not dry. If it feels cold in the center, continue reheating in small bursts. If you want to freeze your mug cake, let it cool fully first. Wrap it tightly in plastic wrap and then in foil. This keeps air out and prevents freezer burn. You can freeze it for up to a month. To reheat, thaw it in the fridge overnight. Then heat it in the microwave as mentioned above. This keeps the chocolate and peanut butter flavors intact. Making a chocolate peanut butter mug cake is quick and easy! It takes about 5 minutes to prep and 1 minute and 30 seconds to cook in the microwave. Depending on your microwave, it might take up to 2 minutes total. This means you can enjoy a warm treat in no time! Yes, you can use different types of flour! If you want to try whole wheat flour or almond flour, these can work well. Just remember that each type of flour may change the texture. Whole wheat can make the cake denser, while almond flour may make it more moist. Experimenting with different flours adds fun to your baking. This mug cake is perfect for one person, but you can easily scale it up. To share, just double the recipe and use two mugs. You can also make a larger batch in a bowl. This way, everyone gets to enjoy their own serving. Adding extra toppings like nuts makes it even more fun! To stop your mug cake from overflowing, don’t fill the mug too full. Leave some space at the top, about one inch. Also, cook it on medium power if your microwave allows. This helps it rise slowly. Lastly, keep an eye on it while it cooks. If it looks like it might overflow, stop the microwave and let it settle before cooking more. This blog post shared an easy recipe for a chocolate peanut butter mug cake. You learned about the key ingredients, step-by-step instructions, and tips for success. I covered personalizing your cake and storing leftovers, too. Mug cakes are quick and fun. They allow you to experiment in the kitchen. Enjoy making this treat your own! It’s a simple way to satisfy your sweet tooth anytime.

Chocolate Peanut Butter Mug Cake Simple and Tasty Treat

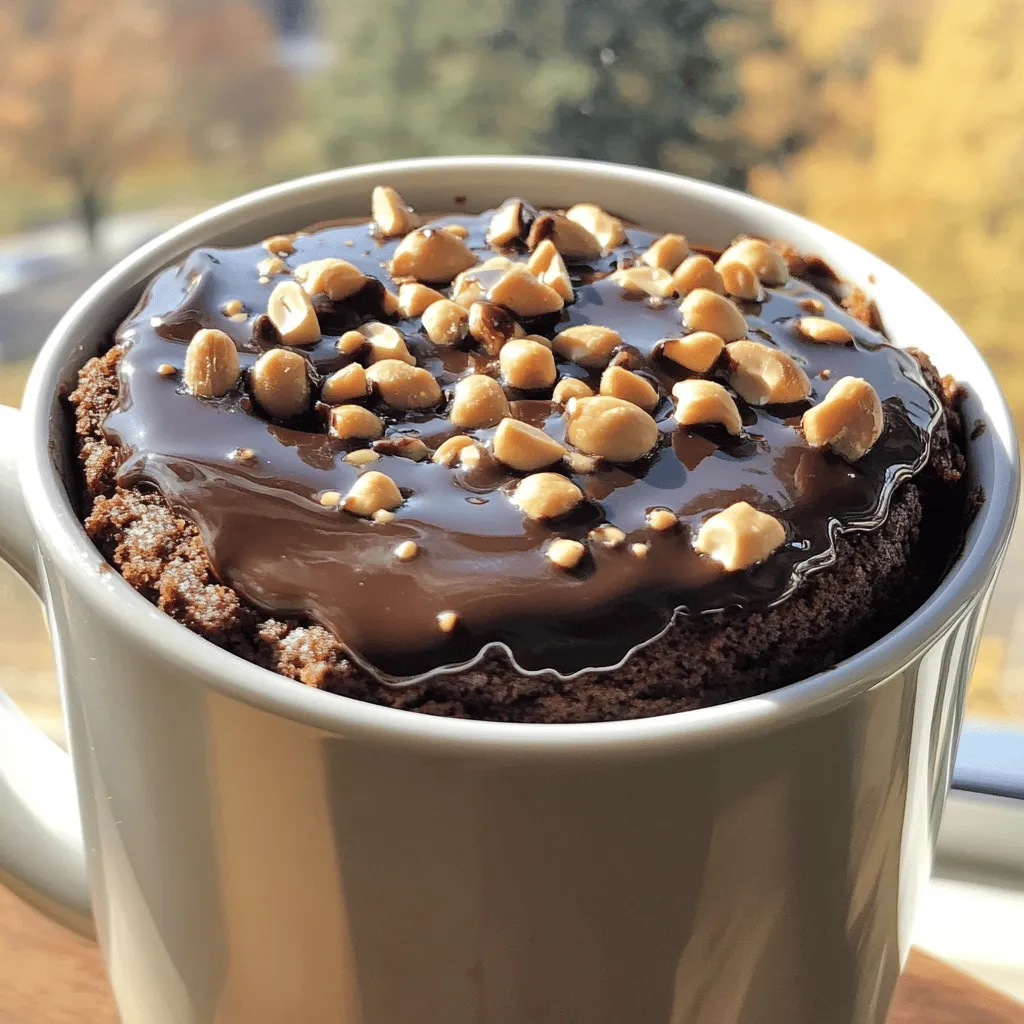
If you’re craving a sweet, indulgent treat but want it fast, look no further! This Chocolate Peanut Butter Mug Cake

- 1 can (15 oz) chickpeas, drained and rinsed - 2 tablespoons olive oil - 1 teaspoon smoked paprika - 1 teaspoon garlic powder - ½ teaspoon cayenne pepper - ½ teaspoon ground cumin - Salt to taste - 1 tablespoon fresh lemon juice - Fresh parsley for garnish - Additional spices (e.g., chili powder, curry powder) - Nutritional yeast for a cheesy flavor - Variety of herbs for garnish - Baking sheet - Parchment paper - Mixing bowl - Kitchen towel When I create spicy roasted chickpeas, I always start with the main ingredients. The chickpeas are the stars here. They soak up flavors and get so crunchy. You want to rinse and drain them well. This helps remove any canning liquid that can make them soggy. Next, I add olive oil. It helps the spices stick and makes the chickpeas crispy. Smoked paprika gives a nice depth of flavor. Garlic powder adds a savory touch, while cayenne pepper brings the heat. You can adjust the cayenne if you prefer less spice. Ground cumin adds warmth. A pinch of salt enhances all these flavors. Lastly, I squeeze fresh lemon juice over the hot chickpeas. It brightens the flavors and adds a nice tang. For garnish, I like to add fresh parsley. It not only looks pretty but also gives a fresh taste. If you want to mix things up, consider the optional ingredients. You can add more spices like chili powder for extra kick or nutritional yeast for a cheesy flavor. Fresh herbs like thyme or rosemary can also elevate the dish. Gather these tools to make your cooking easy. A baking sheet lined with parchment paper helps with cleanup and ensures even roasting. A mixing bowl will be handy for combining the chickpeas and spices. And don't forget a kitchen towel to dry the chickpeas before you start. You can find the full recipe in the main article, where I guide you through the steps to make these crunchy snacks perfect for any time! - Preheat your oven to 400°F (200°C). - Line a baking sheet with parchment paper. - Rinse and dry the chickpeas thoroughly. - Combine chickpeas with olive oil and spices. To prepare the chickpeas, start by rinsing them under cold water. This removes any excess sodium from the can. Next, use a kitchen towel to dry them well. Drying the chickpeas is crucial. If they are wet, they will not get crunchy. Once dry, place the chickpeas in a mixing bowl. Add olive oil, smoked paprika, garlic powder, cayenne pepper, ground cumin, and salt. Mix everything together. Each chickpea should be coated with the spices. - Spread the chickpeas in a single layer on the baking sheet. - Roast for 25-30 minutes, shaking the pan halfway. When you spread the chickpeas on the baking sheet, make sure they are in a single layer. This helps them roast evenly. Place the baking sheet in the oven and set a timer for 15 minutes. At the halfway mark, shake the pan. This helps them cook well on all sides. Keep an eye on them so they don’t burn. - Drizzle lemon juice over hot chickpeas. - Garnish with chopped parsley before serving. Once the chickpeas are golden brown, take them out of the oven. Drizzle fresh lemon juice over the hot chickpeas. This adds a nice zing! Then, toss them gently to coat. Let them cool for a few minutes. They will keep getting crunchier. Finally, garnish with finely chopped parsley. This adds color and freshness to your dish. For the full recipe, check out the [Full Recipe]. To make your spicy roasted chickpeas super crunchy, start by drying them well. After rinsing, pat them with a kitchen towel. This removes moisture, which helps them crisp up in the oven. If your oven runs hot or cold, adjust the roasting time. Check them at 20 minutes. You want them golden and crunchy, not burnt. You can adjust the spice level to fit your taste. If you like it hot, add more cayenne pepper. For a milder flavor, reduce the amount. Use fresh spices when possible for the best taste. Dried spices work well too, but fresh ones give a bolder kick! Serve your chickpeas with a yogurt dip or hummus. These pairings add creaminess that contrasts nicely with the crunch. You can also sprinkle them on salads for added texture and flavor. They make a great topping that will impress your family and friends. {{image_2}} You can get creative with spicy roasted chickpeas! Try a sweet and spicy twist. Just add brown sugar or maple syrup to the mix. The sugar caramelizes while roasting, giving your chickpeas a crunchy sweetness. Another option is to use fresh herbs. Mix in rosemary or thyme for a fragrant flavor. These herbs pair well with the spices, giving you a unique snack. If you’re looking for gluten-free options, you’re in luck! Most spices are gluten-free. Just check the labels to be safe. Chickpeas are also vegan-friendly, so you can enjoy them without worry. This recipe fits into many diets, making it great for sharing. Want a quicker version? Use an air fryer! Set it to 400°F (200°C) and cook for about 15-20 minutes. Shake the basket halfway through for even cooking. You’ll get a crispy texture with less oil. If you prefer a different texture, try the stovetop method. Heat a pan over medium heat and add the chickpeas. Stir often until they are golden brown. This method gives them a slightly softer bite while still retaining some crunch. For the full recipe, refer to the section above! Store your spicy roasted chickpeas in an airtight container. This keeps them fresh and crunchy. Choose a cool, dry place for storage. Avoid humid areas, as moisture can ruin their texture. At room temperature, these chickpeas stay fresh for about three days. If you want to keep them longer, store them in the fridge. However, they may lose some crunchiness when refrigerated. To reheat, place them in the oven at a low temperature. This helps regain their crunch. You can also toss them into salads or soups for added flavor. Use them as a topping for yogurt or hummus for a tasty twist. For the full recipe, check out the link provided! You can use an air fryer or stovetop. For air frying, set it to 400°F. Cook the chickpeas for 15-20 minutes, shaking the basket halfway. On the stovetop, heat oil in a pan over medium heat. Add the chickpeas and cook until crispy, stirring often. Yes, but you need to cook them first. Soak dried chickpeas overnight. Then, boil them until soft, about 1-2 hours. After draining, you can season and roast them just like canned chickpeas. Chickpeas are high in protein and fiber. They help keep you full and aid digestion. They also provide vitamins and minerals, such as iron and folate. Eating chickpeas can support heart health and may lower cholesterol. To serve more people, simply double or triple the ingredients. If you want to make a big batch, use two or more baking sheets. Make sure to spread the chickpeas out so they can roast evenly. Yes, you can prepare them in advance. Make sure to let them cool completely before storing. Keep them in an airtight container at room temperature. They will stay crunchy for a few days, but best within 2-3 days for optimal texture. For the full recipe, check out my detailed guide! In this blog post, we covered how to make crunchy roasted chickpeas. We explored the key ingredients, tools needed, and detailed step-by-step instructions. You learned tips for flavor and crunchiness, along with storage advice and FAQs. Roasted chickpeas are easy and fun to make. They offer a delicious snack or topping for meals. Experiment with different spices and herbs to make them your own. Enjoy the health benefits and taste of this simple recipe!

Spicy Roasted Chickpeas Crunchy and Flavorful Snack

Looking for a crunchy, flavor-packed snack? You’re in the right place! My Spicy Roasted Chickpeas recipe combines simple ingredients like

- 1 cup rolled oats - 1/2 cup natural peanut butter - 1/4 cup honey or maple syrup - 1/2 cup mashed banana (about 1 medium banana) - 1/4 cup chia seeds - 1/4 cup mini chocolate chips (optional) - 1/4 teaspoon salt - 1 teaspoon vanilla extract - 1/2 teaspoon cinnamon These ingredients come together to create a tasty and healthy snack. Rolled oats form the base, giving the bars structure. Natural peanut butter adds creaminess and protein. Honey or maple syrup sweetens the mix and binds everything together. Mashed banana contributes moisture and natural sweetness. Chia seeds are great for fiber and omega-3s. Optional mini chocolate chips can add a fun twist. Salt enhances all the flavors, while vanilla and cinnamon provide warmth and depth. - Calories per bar: Each bar has about 150 calories. - Macronutrient breakdown: Bars contain approximately 20g carbs, 5g protein, and 6g fats. - Fiber and sugar content: Each bar has around 3g fiber and 6g sugar. These bars pack a nutritious punch. They are perfect for a quick energy boost or a snack on the go. The fiber keeps you full, while the carbs provide lasting energy. You can feel good about reaching for these bars when hunger strikes. For the complete recipe, check out the Full Recipe section. 1. Preheating the oven Start by preheating your oven to 350°F (175°C). This ensures even cooking. 2. Preparing the baking dish Line an 8x8 inch baking dish with parchment paper. Leave some paper hanging over the edges. This helps with easy removal later. 1. Combining dry and wet ingredients In a large bowl, mix the rolled oats, chia seeds, cinnamon, and salt. Stir them well. In another bowl, blend the peanut butter, honey or maple syrup, mashed banana, and vanilla extract. Mix until it is smooth and creamy. 2. Adding optional components like chocolate chips Pour the peanut butter mixture into the dry ingredients. Stir until everything is well combined. If you want extra sweetness, fold in the mini chocolate chips. 1. Baking time and doneness indicators Transfer the mixture to the prepared baking dish. Press it down evenly. Bake in the oven for about 20-25 minutes. Look for golden brown edges as a sign of doneness. 2. Cooling process before cutting Remove the dish from the oven and let it cool for about 10 minutes. Lift it out using the parchment paper. Allow it to cool completely on a wire rack before cutting it into bars. To get the best texture in your peanut butter oatmeal energy bars, press the mixture firmly into your pan. This helps the bars hold together. Use a flat spatula or your hands to press down. For cooling, let the bars sit in the pan for 10 minutes after baking. Then, lift them out using the parchment paper. Place them on a wire rack to cool completely. This step is key to getting that perfect chewy bite. You can make these energy bars your own! Try adding nuts or seeds for extra crunch. Almonds, walnuts, or pumpkin seeds work great. You can also swap honey for maple syrup or agave for a different taste. If you want a sweeter bar, add mini chocolate chips or dried fruits like cranberries. This gives a nice twist and adds more flavor. Peanut butter oatmeal energy bars are great for snacks or breakfast. Pair them with yogurt or fruit for a balanced meal. You can also enjoy them with a glass of milk or a smoothie. For storage, keep the bars in an airtight container. They stay fresh in the fridge for up to a week. You can freeze them for longer storage. Just wrap each bar in plastic wrap and place them in a freezer bag. Enjoy them cold or warm them up for a cozy snack! {{image_2}} To make these energy bars gluten-free, you can use gluten-free oats. These oats are processed in a way that prevents cross-contamination with gluten grains. You can also try alternative binding agents, like mashed sweet potato or almond butter. These options will keep your bars together while adding flavor and nutrients. If you want a vegan version, substitute honey with agave syrup or maple syrup. Both options work well and keep the sweetness. You can also add plant-based protein like pea protein powder or hemp seeds. This helps boost the protein content while keeping it vegan-friendly. For flavor twists, add spices like nutmeg or ginger. These spices will give your bars a warm, cozy taste. You can also incorporate fruits like dried cranberries or raisins. These fruits add natural sweetness and chewy texture. Mixing and matching flavors can make each batch unique and exciting. Feel free to explore these variations in the Full Recipe to find your favorite combination! After making your peanut butter oatmeal energy bars, storage is key. You can keep them in the fridge, where they last longer. Wrap the bars in plastic wrap or foil. An airtight container is best for storage too. If you want to keep them fresh for longer, try freezing them. Just place them in a freezer-safe bag with as much air removed as possible. This way, they can stay good for up to three months. Homemade energy bars can last about one week in the fridge. You will know they are going bad if they smell off or look moldy. If you see any discoloration, it's best to toss them. Proper storage helps keep them tasty and safe to eat! To enjoy your bars warm, the oven is a great option. Preheat it to 350°F (175°C). Place the bars on a baking sheet and warm them for about five minutes. You can also use the microwave. Heat them for 10 to 15 seconds. This method gives them a nice, soft texture. Enjoy them warm for a cozy snack! Yes, you can make these bars nut-free! Instead of peanut butter, you can use sunflower seed butter or soy nut butter. These options provide a similar texture and taste. Just ensure you check for allergies if you are sharing with others. You can tell they are baked properly by looking at the edges. They should turn golden brown, and the center should feel firm to the touch. If you insert a toothpick, it should come out clean or with a few crumbs. Yes, you can replace oats with other grains. Quinoa, rice flakes, or even ground oats work well. If you use a different grain, check the cooking time as it may vary slightly. Adjust the liquid in the recipe if needed. Absolutely! Kids love these bars. You can make them more fun by adding mini chocolate chips or dried fruits. Let the kids help mix the ingredients. This way, they will feel proud to eat their homemade snack! This blog post gave you a simple recipe for energy bars. You learned about key ingredients and their nutritional value. I shared clear steps for preparation, mixing, baking, and cooling. Tips for texture and customization were included for your convenience. Variations for gluten-free and vegan diets are accessible, too. Lastly, you now know how to store and reheat your homemade bars. Enjoy making these delicious, healthy treats your way!

Peanut Butter Oatmeal Energy Bars Nutritious and Easy

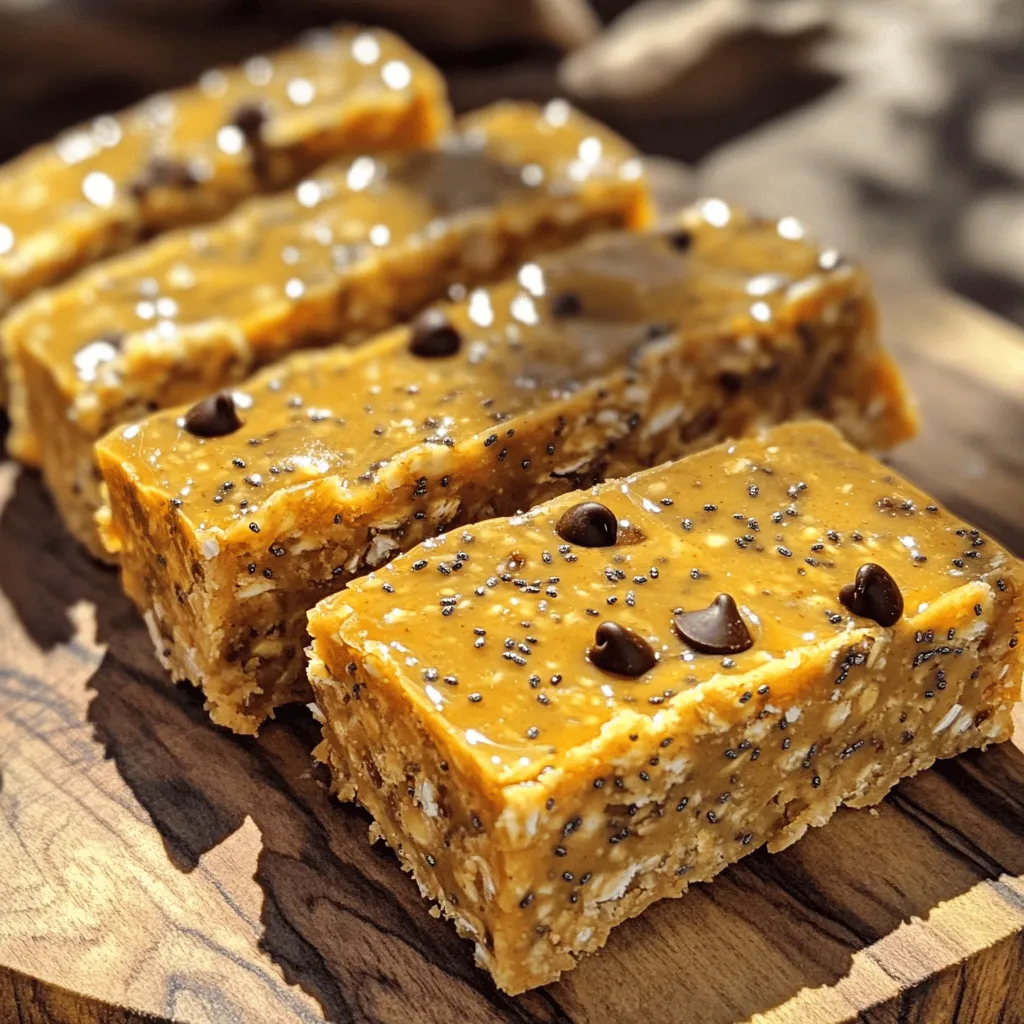
Looking for a quick and tasty snack that fuels your day? Try these Peanut Butter Oatmeal Energy Bars! Packed with

To make delicious Sheet Pan Chicken Nachos, you need some key items. Here’s what you’ll need: - 2 cups cooked chicken, shredded - 1 bag (12 oz) tortilla chips - 1 cup black beans, rinsed and drained - 1 cup corn, frozen or fresh - 1 cup jalapeños, sliced (fresh or pickled) - 2 cups shredded cheddar cheese - 1 cup diced tomatoes - 1 cup avocado, diced - ½ cup sour cream - ¼ cup fresh cilantro, chopped - 1 tablespoon olive oil - 1 teaspoon chili powder - Salt and pepper to taste These ingredients create a balance of flavors and textures in your nachos. The chicken gives the dish protein, while the cheese adds creaminess. You can get creative with toppings. Here are some fun options to try: - Sliced olives - Green onions, chopped - Salsa or pico de gallo - Hot sauce for an extra kick - Lime wedges for squeezing Feel free to mix and match these toppings. They can add new flavors and colors to your nachos. Using fresh ingredients can make a big difference. Here are some tips: - Choose ripe avocados for the best taste. - Use high-quality cheese for a richer flavor. - Try to find organic or locally sourced chicken. This can improve your dish's overall taste and nutrition. Good ingredients lead to great meals. Trust me, your nachos will shine when you use fresh and quality items. For the complete recipe, check out the Full Recipe. First, gather all your ingredients. You will need cooked chicken, tortilla chips, black beans, corn, jalapeños, cheddar cheese, tomatoes, avocado, sour cream, cilantro, olive oil, chili powder, salt, and pepper. Next, preheat your oven to 375°F (190°C). In a mixing bowl, combine the shredded chicken, black beans, corn, chili powder, olive oil, salt, and pepper. Mix well until everything is combined. This step adds great flavor to the chicken. Now, grab a large baking sheet. Spread the tortilla chips evenly across the sheet. It is key to cover the entire surface. Evenly distribute the chicken and bean mixture over the chips. This way, every bite gets tasty chicken. Next, sprinkle the sliced jalapeños on top. Don’t hold back on the cheese! Generously layer the shredded cheddar cheese over the entire sheet pan. Bake in the preheated oven for about 10-12 minutes. Look for the cheese to melt and bubble nicely. Carefully remove the sheet pan from the oven. It will be hot! Top the nachos with diced tomatoes and avocado. This adds freshness and color. Finish with dollops of sour cream and a sprinkle of fresh cilantro for garnish. For fun, serve the nachos directly on the sheet pan. You can also use a large platter. Add lime wedges and extra chopped cilantro on the side. This adds an extra burst of flavor. Enjoy your delicious Sheet Pan Chicken Nachos! For the full recipe, check the section above. To make great nachos, layer your ingredients well. Start with a solid base of tortilla chips. Use a mix of toppings to add flavor and texture. Shredded chicken adds protein, while black beans and corn give it a fresh taste. Always cover the chips evenly with toppings. This helps prevent sogginess. Preheat your oven to 375°F (190°C). Bake your nachos for about 10-12 minutes. Keep an eye on the cheese. It should melt and bubble without burning. If you want a crispy finish, bake a little longer but watch closely. One common mistake is using too many toppings. This can make your nachos soggy. Stick to a balance of toppings. Another mistake is not warming your chicken. Cold chicken can cool your nachos down fast. Finally, be careful with the cheese. Use enough to cover but not so much that it overpowers the other flavors. For the complete guide to making these delicious nachos, check out the Full Recipe. {{image_2}} To make vegetarian sheet pan nachos, swap the chicken for extra black beans or lentils. Use the same cheese and toppings for great flavor. You can add veggies like bell peppers, zucchini, or mushrooms. These add color and crunch. This option is perfect for meatless meals or when you want a lighter dish. For spicy chicken nachos, use spicy shredded chicken. You can mix in hot sauce or add diced serrano peppers for extra heat. Consider using pepper jack cheese instead of cheddar. This cheese gives a nice kick. Top with fresh salsa or spicy pickled jalapeños. These nachos will wake up your taste buds! To make low-carb nachos, replace tortilla chips with sliced bell peppers or zucchini. You can also use cheese crisps as a base. Keep the toppings similar, focusing on proteins like chicken and beans. Use full-fat cheese to stay on track with keto goals. These nachos still taste great while being healthy! For a complete guide, check out the Full Recipe. To keep your nachos fresh, store them in an airtight container. Let them cool before sealing. Place a paper towel inside to absorb moisture. This helps prevent sogginess. Store nachos in the fridge for up to three days. To reheat your nachos, preheat the oven to 350°F (175°C). Spread the nachos on a baking sheet. Heat for about 10 minutes or until warm. This restores the crispiness of the chips. You can also microwave them. Use a microwave-safe plate and heat for 30 seconds at a time. Freezing nachos is not the best option. Chips may become soggy when thawed. However, you can freeze the chicken and bean mixture. Store it in a freezer-safe container for up to three months. When ready, thaw it in the fridge overnight. Then, assemble and bake fresh nachos using the Full Recipe. Yes, you can prep your nachos ahead of time. Cook the chicken and mix it with beans and spices. Store this mix in the fridge. You can also slice your veggies. Keep the chips separate until you bake. This way, they stay crunchy. The best chips for nachos are thick tortilla chips. Look for sturdy ones that won’t break easily. Brands like Tostitos or Mission are popular choices. You want chips that hold up under the weight of toppings. Avoid thin chips, as they can get soggy. To add heat, use fresh jalapeños or spicy pickled ones. You can also try adding hot sauce or chili powder. For a smoky flavor, use chipotle peppers. Mixing in diced green chiles can also bring a nice kick. Adjust the spice to your taste. To keep nachos crispy, add toppings after baking. Avoid wet toppings until serving. Use thick dips, like guacamole, on the side. If you want to add beans or meat, drain them well. Baking the nachos at high heat helps them stay crunchy. This article covered how to make delicious sheet pan chicken nachos. We discussed key ingredients, optional toppings, and why quality matters. I shared a step-by-step guide for perfect preparation and baking. Tips and tricks helped you avoid common mistakes and master timing. Variations for different diets opened new flavor possibilities. In my experience, nachos can be fun and easy. Use fresh ingredients and keep it simple. Enjoy your tasty nachos!

Sheet Pan Chicken Nachos Tasty and Easy Recipe

If you crave a fun and tasty meal, look no further! This Sheet Pan Chicken Nachos recipe is easy to

Older posts
Newer posts
← Previous Page1 … Page55 Page56 Page57 … Page84 Next →

dsad

© 2026 juliesdish • Built with GeneratePress

Our Policies

  • Copyright Policy
  • Cookie Policy
  • GDPR Policy
  • Privacy Policy
  • Disclaimer
  • Terms Of Use

More Information

  • Home
  • About
  • Contact
  • Appetizers
  • Dessert
  • Dinner
  • Drinks
©2026, juliesdish About Back To Top