![To make a tasty Apple Cinnamon Breakfast Smoothie, gather these key items: - 1 large apple, cored and chopped (preferably a sweet variety like Fuji or Honeycrisp) - 1 banana, frozen - 1 cup rolled oats - 1 cup unsweetened almond milk (or any milk of choice) - 1 teaspoon ground cinnamon - 1 tablespoon honey or maple syrup (adjust to taste) These ingredients blend well together. The apple gives a fresh taste. The banana adds natural sweetness. Oats give it a creamy texture and keep you full. For extra flavor or nutrition, consider these options: - 1 tablespoon chia seeds (for added nutrition) - A pinch of nutmeg (for a warm flavor) - Ice cubes (for desired thickness) Chia seeds boost fiber and protein. Nutmeg adds warmth, while ice cubes make your smoothie extra cold. Choosing the right ingredients matters. Pick a ripe apple for the best flavor. If you like sweetness, use a Fuji or Honeycrisp apple. For the banana, a frozen one makes the smoothie creamy. Use unsweetened almond milk to keep it healthy. Always check the date on rolled oats; fresh oats taste better. Make your smoothie fun and tasty with these choices! For the full recipe, check out the [Full Recipe]. To start, gather your ingredients. You need: - 1 large apple, cored and chopped - 1 frozen banana - 1 cup rolled oats - 1 cup almond milk - 1 teaspoon ground cinnamon - 1 tablespoon honey or maple syrup - 1 tablespoon chia seeds (optional) - A pinch of nutmeg - Ice cubes (optional) First, wash your apple well. Then, core it and chop it into small pieces. This helps it blend smoothly. Next, take a banana from the freezer. A frozen banana makes your smoothie creamy and cold. Now, it’s time to blend! In your blender, add all the prepared ingredients. Place the chopped apple, frozen banana, rolled oats, and almond milk in first. Then, add the ground cinnamon, honey or maple syrup, chia seeds, and nutmeg. Blend on high speed until the mix is smooth and creamy. If you want a thicker smoothie, add a few ice cubes and blend again. Taste your smoothie. If it needs more sweetness, feel free to add more honey or maple syrup. Pour your smoothie into a glass. If you’re in a hurry, use a portable travel cup. For a fun touch, sprinkle some extra cinnamon on top. You can also add granola for crunch or serve with apple slices on the side for extra freshness. Enjoy your Apple Cinnamon Breakfast Smoothie! For the complete details, check [Full Recipe]. This smoothie is not just tasty; it packs some great health perks. Apples are rich in fiber, which helps with digestion. They also have vitamin C, which keeps your immune system strong. Bananas add potassium, great for heart health. Oats provide energy and help keep you full. Chia seeds boost omega-3s and add extra fiber, making this drink a powerhouse. You can easily make this smoothie your own. Want a creamier texture? Use Greek yogurt instead of almond milk. If you like nuts, add a spoonful of almond or peanut butter. For extra sweetness, toss in a date or two. Want more spice? Try adding cardamom or ginger. The options are endless! To get the right texture, start with the frozen banana. It makes your smoothie thick and cold. If it’s too thick, add more almond milk a little at a time. If you want it thicker, just blend in some ice cubes. Always taste before you pour. Adjust the sweetness or spice as needed. This way, you’ll always have a smoothie that feels just right. For the full recipe, check out the details above! {{image_2}} You can mix up your apple cinnamon breakfast smoothie with different fruits. Try adding a pear for a fresh twist. You can also use a handful of spinach for extra greens. If you want a nutty taste, add some almond butter or peanut butter. These options give your smoothie a new flavor and keep it fun! This smoothie is easy to make dairy-free and vegan. Just use almond milk or oat milk instead of cow's milk. Maple syrup can replace honey for sweetness. This way, you keep the taste while sticking to your diet. It’s a great way to enjoy a healthy breakfast without any animal products. As the seasons change, so can your smoothie! In fall, add pumpkin puree and a little ginger for warmth. In winter, use a frozen berry mix for a fruity kick. In spring and summer, fresh berries or peaches can add a bright taste. These swaps keep your smoothie exciting year-round! You can find the full recipe for this delicious apple cinnamon breakfast smoothie above. If you have leftover smoothie, pour it into a clean jar. Seal it tightly and store it in the fridge. It will stay fresh for up to 24 hours. When you are ready to drink it, give it a good shake. The ingredients may separate, so mixing helps. You can freeze ingredients for your smoothie. Chop and place your apples and bananas in freezer bags. Lay the bags flat in your freezer. When you want to make the smoothie, just take out what you need. Frozen fruit makes your smoothie cold and thick. To keep your ingredients fresh, store them properly. Keep apples in a cool place away from sunlight. Place bananas on the counter but use them before they get too ripe. Store rolled oats in an airtight container. This way, you can enjoy your smoothie with fresh-tasting flavors every time. This smoothie packs a punch of good nutrition. It has fiber from oats and apples. Fiber helps with digestion and keeps you full. The banana adds potassium, which is great for your heart. Almond milk provides a low-calorie base, and chia seeds are full of omega-3s. Honey or maple syrup gives a touch of sweetness without too many calories. Overall, this smoothie is a tasty way to start your day with healthy energy. Yes, you can make this smoothie ahead of time. Blend it the night before and store it in the fridge. Just keep it in a sealed container. When you're ready to drink it, shake it up or give it a quick blend to mix it again. If you want to keep it fresh for longer, you can freeze it in ice cube trays. Just pop out a few cubes when you want a quick smoothie. If your smoothie is too runny, there are easy ways to thicken it. You can add more oats or a handful of ice cubes. Frozen fruits, like more banana, will also help. If you like, add a tablespoon of chia seeds. They soak up liquid and make the smoothie thicker. Blend again until you reach your desired thickness. Each method adds nutrition while giving you that creamy texture you want. This blog post explored essential and optional ingredients for smoothies. I shared tips for choosing the best options and offered helpful preparation steps. You learned about blending and serving, along with tricks for health benefits and customization. Variations, storage info, and answers to common questions round out the guide. Creating the perfect smoothie can be simple and fun. Enjoy experimenting with flavors, textures, and nutrients to suit your taste and health needs. Your journey to smoothie mastery starts now!](https://juliesdish.com/wp-content/uploads/2025/07/691770a0-5cdc-4424-917c-c8a7395834c5.webp)
Apple Cinnamon Breakfast Smoothie Quick and Tasty Recipe
Looking for a quick and tasty breakfast? This Apple Cinnamon Breakfast Smoothie hits the spot! Packed with nutrients and big
Looking for a quick and tasty breakfast? This Apple Cinnamon Breakfast Smoothie hits the spot! Packed with nutrients and big
![- 2 cups fresh blueberries - 1 tablespoon lemon juice - 1 tablespoon cornstarch Fresh blueberries give a sweet and tangy taste. I love using ripe ones for the best flavor. Lemon juice adds brightness, cutting through sweetness. Cornstarch helps thicken the blueberry filling. It keeps the bars from being too runny. - 1 cup all-purpose flour - 1 cup rolled oats - 1 cup brown sugar - ½ teaspoon baking powder - ½ teaspoon baking soda - ½ teaspoon salt All-purpose flour makes the crumble base sturdy. Rolled oats add a nice texture. Brown sugar gives a rich, caramel-like taste. Baking powder and soda help the bars rise. Salt balances the sweetness. - 1 teaspoon vanilla extract - 1 teaspoon cinnamon - ½ cup unsalted butter, melted Vanilla extract adds depth to the bars. Cinnamon brings warmth and spice. For butter, unsalted is best to control salt levels. You can switch to salted if that's what you have. For the full recipe, click here. First, set your oven to 350°F (175°C). This temperature helps the bars bake evenly. You can either grease your 9x9 inch baking pan, or use parchment paper. I prefer parchment paper. It makes it easy to lift the bars out later. In a bowl, mix 2 cups of fresh blueberries with 1 tablespoon of lemon juice and 1 tablespoon of cornstarch. The lemon juice adds a nice zing, while the cornstarch helps thicken the filling. Gently fold the blueberries to coat them well. Set this mixture aside for a few minutes. This lets the flavors develop. In a separate large bowl, combine 1 cup of all-purpose flour, 1 cup of rolled oats, 1 cup of brown sugar, ½ teaspoon of baking powder, ½ teaspoon of baking soda, ½ teaspoon of salt, and 1 teaspoon of cinnamon. Mix these dry ingredients well. Then, pour in ½ cup of melted unsalted butter. Stir until the mixture looks crumbly. Reserve about 1 cup of this crumble for the topping. Now, press the remaining crumble mixture firmly into the bottom of your prepared pan. This forms a solid base layer. Next, spread the blueberry mixture evenly on top of the crumble base. Finally, sprinkle the reserved crumble mixture over the blueberries, covering them completely. Place the pan in the oven and bake for 30-35 minutes. Look for a golden brown top and bubbling blueberries. This means they are done! Once baked, remove the pan from the oven. Let the bars cool in the pan for at least 15 minutes before slicing them into squares. Enjoy your delicious blueberry crumble bars! For the complete recipe, check out the Full Recipe. To get the best crumble texture, focus on how you mix. Use your hands to combine the butter with dry ingredients. This method helps create a flaky and chunky crumble. Avoid over-mixing, as it can lead to a tough texture. Butter temperature plays a key role. Cold butter works best for a crumbly topping. If it’s too warm, it mixes too easily, leading to a dense texture. Aim for softened butter, but not melted. You can easily change the flavor of your bars. Try adding nuts or seeds for extra crunch. Chopped walnuts or sunflower seeds work great. Just mix them into the crumble. Experiment with different berries too. Raspberries or blackberries can give a unique twist. You can even mix berries for a fun flavor blend. Presentation matters, even for a simple dessert. Garnish your bars with powdered sugar. A light dusting adds a nice touch. You can also serve them with whipped cream on top. To showcase your dessert, slice the bars neatly. Arrange them on a colorful plate for a beautiful display. Pair with fresh berries or mint leaves for extra flair. This adds color and freshness to the table. For the full recipe, check out the [Full Recipe]. {{image_2}} To make gluten-free blueberry crumble bars, start by swapping out regular flour. You can use almond flour or a gluten-free all-purpose blend. These options work well without losing taste. For oats, make sure they are certified gluten-free. You can also adapt other ingredients like baking powder. Ensure it’s gluten-free too. Creating vegan blueberry crumble bars is easy. Replace butter with coconut oil or a vegan butter substitute. For eggs, use flaxseed meal or applesauce. These swaps help keep the bars moist and delicious. When it comes to sweeteners, consider maple syrup or agave nectar. These options add sweetness without eggs. You can also try other fruits in your crumble bars. Raspberries, strawberries, or peaches work well. If you switch fruits, adjust the sugar levels. Some fruits are sweeter than blueberries, so you might need less sugar. This keeps the bars tasty and balanced. Feel free to get creative with whatever fruit is in season! Store your blueberry crumble bars in the fridge for best taste. You can keep them at room temperature, but they may not last as long. Always use airtight containers or wrap them tightly. This helps keep the bars fresh and moist. If you choose to keep them out, place them in a cool, dry spot. To freeze your bars for later, cut them into squares first. Wrap each square in plastic wrap, then place them in a freezer bag. This way, they last longer, and you can grab one anytime. When you’re ready to eat, take a bar out and let it thaw in the fridge. For a quick treat, you can also microwave it for about 20 seconds. This warms it up nicely. You can store these bars in the fridge for up to a week. In the freezer, they can last for about three months. Look for signs like mold or an off smell to know if your dessert has gone bad. If the texture becomes dry or hard, it’s best to toss it. Enjoy your blueberry crumble bars fresh to savor their full flavor! Yes, you can use frozen blueberries. They are convenient and save time. However, they can make the mixture watery. This may change the texture of your bars. If you use frozen berries, do not thaw them first. Also, add a little extra cornstarch to help absorb the moisture. This way, you still get a great flavor and texture. You can tell the bars are done when the top turns golden brown. The blueberries should bubble around the edges. A toothpick inserted in the center should come out clean or with a few crumbs. Set a timer for 30 to 35 minutes. Keep an eye on them as they bake. Blueberry crumble bars taste great with vanilla ice cream. You can also serve them with whipped cream. They go well with a fruit salad or yogurt too. For drinks, pair them with lemonade or iced tea. These options will balance the sweetness and enhance your dessert experience. For the complete recipe and details on Blueberry Crumble Bars, check out the [Full Recipe]. Blueberry crumble bars combine fresh blueberries and simple ingredients. I covered essential baking staples and optional flavor enhancers to enrich your bars. Follow the detailed steps for prepping, mixing, and baking, while using my tips and tricks for the perfect texture. Remember, you can switch things up with gluten-free or vegan options. Store them right to keep them fresh. Now, enjoy your delicious blueberry crumble bars or share them with friends. Your baking journey is just beginning!](https://juliesdish.com/wp-content/uploads/2025/07/6dcb4998-7872-42e1-8295-6e6e1d3d147c.webp)
Looking for a sweet treat that’s both easy and delicious? You’ll love these Blueberry Crumble Bars! With fresh blueberries and
![- 1 pound large shrimp, peeled and deveined - 12 ounces fettuccine pasta - 2 tablespoons Cajun seasoning - 2 tablespoons olive oil - 3 cloves garlic, minced - 1 cup heavy cream - 1 cup grated Parmesan cheese - 1 cup shredded mozzarella cheese - 1/2 cup chopped green onions - Salt and pepper to taste - Optional: Fresh parsley for garnish When making Cajun Shrimp Alfredo Bake, fresh ingredients make a big difference. The shrimp adds a juicy flavor, and the cream gives it a rich taste. I love using fettuccine for its wide shape, which holds the sauce well. If you don't have shrimp, you can use chicken or scallops. For a gluten-free option, try rice noodles or gluten-free pasta. If you want a dairy-free version, use coconut cream or almond milk as a substitute for heavy cream. Fresh shrimp is best for flavor and texture. It cooks quickly and stays tender. Frozen shrimp can work if you're in a hurry, but it may lack some taste. If you choose frozen, make sure to thaw it properly before cooking. Prepping the shrimp and vegetables Start by peeling and deveining 1 pound of large shrimp. Rinse them under cold water and pat them dry. Chop 1/2 cup of green onions. Set these aside for later. Cooking the pasta instructions Next, boil water in a large pot. Add 12 ounces of fettuccine pasta and cook according to the package instructions. Aim for al dente, which means it should still have a slight bite. Once done, drain the pasta and set it aside. Sautéing shrimp and adding Cajun seasoning In a large skillet, heat 2 tablespoons of olive oil over medium heat. Add the shrimp, then sprinkle 2 tablespoons of Cajun seasoning, along with salt and pepper. Sauté for about 3 to 4 minutes. The shrimp should turn pink and be cooked through. Remove them from the heat. Making the Alfredo sauce In the same skillet, add 3 cloves of minced garlic. Cook for about 30 seconds until you smell the garlic. Then, pour in 1 cup of heavy cream and bring it to a simmer. Stir in 1 cup of grated Parmesan cheese until it melts and blends into a creamy sauce. If the sauce seems too thick, add a splash of water or more cream. Transferring to a baking dish Combine the cooked fettuccine, sautéed shrimp, and half of the chopped green onions into the skillet with the Alfredo sauce. Mix well to coat everything evenly. Transfer this mixture into a greased baking dish. Top it with 1 cup of shredded mozzarella cheese and the remaining green onions. Baking time and temperature specifics Preheat your oven to 375°F (190°C). Bake the dish for 20 to 25 minutes. Look for the cheese to be bubbly and golden brown. After baking, let it cool for a few minutes before serving. For a great Cajun shrimp Alfredo bake, you need to cook the shrimp just right. Cook them until they turn pink, about 3-4 minutes. Overcooking makes shrimp rubbery. Once they’re done, take them off the heat quickly. Next, focus on your Alfredo sauce. You want it creamy and smooth. Start by simmering the heavy cream gently. When it bubbles, stir in the Parmesan cheese. If it gets too thick, add a splash of water or more cream. This keeps it just the right consistency. To make a complete meal, serve this dish with a simple side salad. A fresh Caesar salad pairs well with the creamy pasta. You can also serve garlic bread for a nice touch. When it comes to drinks, a chilled white wine works best. A Sauvignon Blanc or Chardonnay complements the flavors. If you prefer something non-alcoholic, try a sparkling lemonade. You will need some basic cookware for this recipe. A large skillet is essential for cooking the shrimp and making the sauce. You also need a pot for boiling the fettuccine. A baking dish is key for the final bake. Make sure it’s greased well to avoid sticking. Don’t forget measuring cups and spoons for accuracy. Lastly, a good spatula helps mix everything evenly. For the full recipe, check the [Full Recipe]. {{image_2}} You can easily change the Cajun Shrimp Alfredo Bake to fit your taste. Adding vegetables is a great way to boost flavor and nutrition. Spinach adds a nice color and texture. Bell peppers can give a sweet crunch. You can mix them in when you combine the pasta and sauce. Want some heat? You can add extra spices. Try cayenne pepper or red pepper flakes. Just a little can make a big difference. Adjust to your liking so you get the right kick. If you want to make this dish low-carb, swap out the fettuccine for zucchini noodles or spaghetti squash. Both options keep the flavor while cutting carbs. Pair them with the shrimp and sauce for a tasty meal. For vegetarian or vegan diets, you can replace the shrimp with mushrooms or tofu. Use coconut cream instead of heavy cream. Nutritional yeast can give a cheesy flavor as a substitute for Parmesan cheese. These changes keep the dish hearty and satisfying. Cajun cuisine has many flavors to explore. For an Italian twist, consider using Italian seasoning with the Cajun spices. This mix can create a unique flavor profile that surprises your taste buds. You can also play around with other Cajun influences. Try adding andouille sausage for more depth. A touch of Cajun hot sauce can also enhance the dish. These adjustments bring a fresh take to the classic recipe. For the full recipe, refer to the section above. To keep your Cajun Shrimp Alfredo Bake fresh, store it in the fridge. Use an airtight container to prevent moisture loss. It is best to refrigerate it within two hours of cooking. This helps keep flavors intact and stops bacteria from growing. If you want to freeze it, wait for it to cool down. Then, place portions in freezer-safe bags or containers. Remove as much air as possible. This helps avoid freezer burn. When it’s time to enjoy leftovers, you can reheat them in the oven or microwave. The oven gives the best results. Preheat it to 350°F (175°C). Place the dish in a baking pan with a bit of water. Cover it with foil to keep it moist. Bake for about 20 minutes or until hot. If you use the microwave, put the food in a microwave-safe bowl. Heat it in 30-second bursts, stirring in between. This helps keep the texture creamy. In the fridge, the Cajun Shrimp Alfredo Bake lasts about three days. After that, the quality drops. Look for signs of spoilage. If it smells off or has changed color, it’s best to toss it. When frozen, it can last up to three months. Just be sure to check for freezer burn before cooking. Always trust your senses; if it seems off, don’t eat it. Enjoy your meal safely! What can I use instead of heavy cream? If you want to skip heavy cream, use half-and-half. It works well for a lighter sauce. You can also use coconut milk for a dairy-free option. This will add a nice flavor twist. How do I make the dish spicier? To add more heat, mix in extra Cajun seasoning. You can also add diced jalapeños or crushed red pepper flakes. Just be careful not to overdo it! Sauce turned out too thick; what to do? If your sauce is too thick, simply add a splash of water or more cream. Stir it in until you reach the right consistency. It should be creamy but not gluey. Shrimp became rubbery during cooking; how to avoid it? To keep shrimp tender, don’t cook them too long. They need only a few minutes until pink. Also, remove them from heat right away to prevent overcooking. How many servings does this recipe yield? This recipe yields about four servings. It’s perfect for a small family dinner or a cozy gathering. Can I double the recipe for larger gatherings? Yes, you can easily double the recipe. Just make sure to use a larger baking dish. This way, everyone can enjoy a hearty serving of Cajun Shrimp Alfredo Bake. This post shared a tasty Cajun shrimp fettuccine recipe. You learned about the key ingredients, how to prepare and cook them, and tips for best results. Substitutions and variations make the dish fit many diets and preferences. Remember to store leftovers properly and reheat them with care. Enjoy creating this dish and impress your friends and family. With practice, you will master it in no time. Happy cooking!](https://juliesdish.com/wp-content/uploads/2025/07/d0761b3a-3595-40bd-9815-b11f5f7cb23e.webp)
Are you ready for a dish that packs a punch? My Cajun Shrimp Alfredo Bake combines the bold flavors of
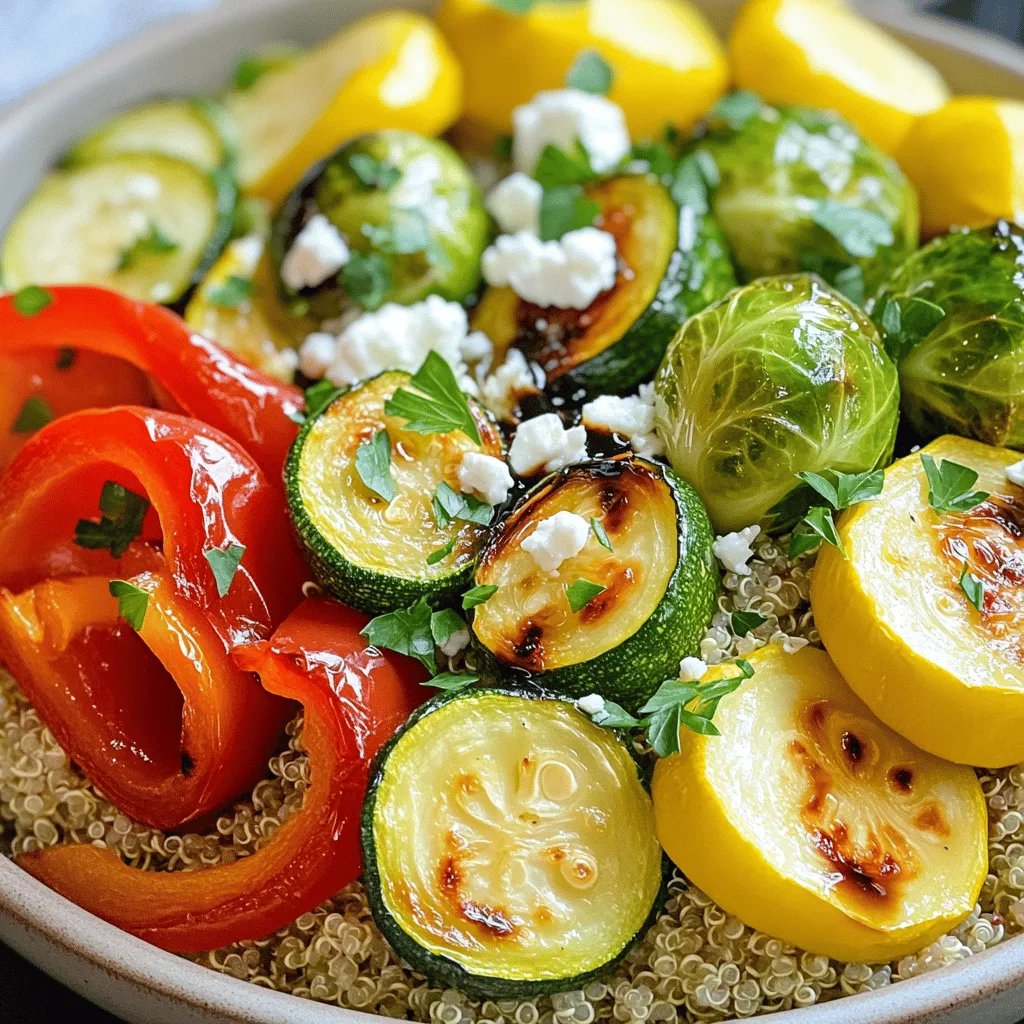
Looking for a quick and healthy meal? Balsamic Roasted Veggie Bowls are packed with fresh veggies and bold flavors. You
![To make these tasty baked pumpkin spice donuts, you will need: - 1 cup pumpkin puree (canned or freshly made) - 2 cups all-purpose flour - 1/2 cup granulated sugar - 1/2 cup brown sugar, packed - 2 teaspoons baking powder - 1 teaspoon baking soda - 1 teaspoon ground cinnamon - 1/2 teaspoon ground nutmeg - 1/2 teaspoon ground ginger - 1/4 teaspoon ground cloves - 1/2 teaspoon salt - 2 large eggs - 1/4 cup vegetable oil - 1/4 cup milk - 1 teaspoon vanilla extract These ingredients create a warm, cozy flavor that defines fall. Pumpkin puree adds moisture and a rich taste. The mix of spices brings out the best in every bite. If you do not have an ingredient, here are some easy swaps: - Replace pumpkin puree with applesauce for a different flavor. - Use whole wheat flour instead of all-purpose for added fiber. - Swap granulated sugar with coconut sugar for a lower glycemic index. - Use almond milk or oat milk instead of regular milk for a dairy-free option. - Apples can replace eggs if you want a vegan version. These swaps make the recipe flexible for different diets and tastes. Toppings can elevate your donuts even more. Here are some ideas: - Dust with powdered sugar for a sweet finish. - Coat in cinnamon sugar for a classic touch. - Drizzle with maple syrup for a rich flavor. - Top with a chocolate glaze for a sweet twist. - Add chopped nuts for crunch and texture. Try different toppings to find your favorite way to enjoy these donuts! For the full recipe, look at the main recipe section. Start by preheating your oven to 350°F (175°C). This step is key for even baking. Next, grab your donut pan. Lightly grease it with cooking spray or brush it with oil. This will help the donuts slide out easily once they are done. In a medium bowl, mix together the pumpkin puree, eggs, vegetable oil, milk, and vanilla extract. Stir until all the ingredients blend well. This mixture brings moisture and flavor to the donuts. Use a whisk or a fork for this task. In a separate large bowl, whisk together the all-purpose flour, granulated sugar, brown sugar, baking powder, baking soda, cinnamon, nutmeg, ginger, cloves, and salt. This step ensures the dry ingredients are evenly mixed. The spices add warmth and that classic pumpkin spice flavor. Now, pour the wet mixture into the dry bowl. Mix gently until just combined. A few lumps are fine; do not overmix. Using a piping bag or a resealable plastic bag with one corner snipped off, pipe the batter into the prepared donut pan. Fill each cavity about 2/3 full for the best rise. Place the filled donut pan in the preheated oven. Bake for 12-15 minutes. Check doneness by inserting a toothpick into the center of a donut. If it comes out clean, they are ready. Allow the donuts to cool in the pan for about 5 minutes. Then, transfer them to a wire rack to cool completely. This cooling step keeps them fluffy and prevents sogginess. To get soft and fluffy donuts, use pumpkin puree. It adds moisture and flavor. Mix wet and dry ingredients just until combined. Overmixing leads to tough donuts. Fill the donut pan only two-thirds full, allowing space for rising. Bake until golden and a toothpick comes out clean. One common mistake is overbaking. Keep an eye on the time. Donuts can dry out quickly. Another mistake is measuring flour incorrectly. Use the spoon-and-level method for best results. Don’t skip greasing the pan, or your donuts may stick. Finally, remember, let them cool before frosting. For a fun touch, dust your donuts with powdered sugar or cinnamon sugar. You can also dip them in a simple glaze made from powdered sugar and milk. Serve on a wooden platter with mini pumpkins for a festive look. Enjoy with a hot drink for the perfect fall treat. For the complete recipe, visit the [Full Recipe]. {{image_2}} You can take your pumpkin spice donuts to a new level with a chocolate glaze. Just melt some chocolate chips with a splash of cream. Dip each cooled donut into the warm chocolate. Let the excess drip off, then place them on a rack to set. The rich chocolate flavor pairs well with the warm spices. It adds a sweet touch that kids and adults love. If you need gluten-free donuts, swap the all-purpose flour for a gluten-free blend. Look for a blend that contains xanthan gum. This helps the donuts rise and stay fluffy. Follow the same steps as in the full recipe. You won't miss the gluten; these donuts will still be light and tasty. To make these donuts vegan, replace the eggs with flax eggs. Mix one tablespoon of flaxseed meal with three tablespoons of water for each egg. Allow it to sit until it thickens. Use plant-based milk instead of regular milk. And opt for a vegetable oil that is labeled vegan. These adjustments keep the donuts delicious and friendly for a vegan diet. To keep your baked pumpkin spice donuts fresh, store them in an airtight container. This helps keep them soft. You can leave them at room temperature for up to two days. If you want them to last longer, store them in the fridge. They can stay fresh for about a week when chilled. If you want to save donuts for later, freezing is a great option. First, let the donuts cool completely. Then, wrap each donut in plastic wrap or foil. Place the wrapped donuts in a freezer bag. Squeeze out the air and seal it tight. You can freeze them for up to three months. When you're ready to enjoy, just take out the number you need. To enjoy warm donuts, reheating is easy. You can use a microwave or an oven. For the microwave, heat each donut for about 10-15 seconds. In the oven, preheat it to 350°F (175°C). Place the donuts on a baking sheet and heat for about 5 minutes. This will help them regain their fluffy texture. For a special touch, add a sprinkle of cinnamon sugar after reheating. Baked pumpkin spice donuts stay fresh for about three days. Store them in an airtight container. You can also place a paper towel at the bottom to absorb moisture. This keeps the donuts soft and tasty. Yes, you can use homemade pumpkin puree in this recipe. Just make sure to drain any excess water. This helps maintain the right texture in your donuts. Fresh puree adds a rich flavor that enhances the pumpkin taste. To make donuts crispy, bake them until they are golden brown. Avoid overfilling the donut pan, as this can lead to sogginess. Let them cool on a wire rack to allow steam to escape. You can also dust them with sugar for added crunch. You can find the full recipe for baked pumpkin spice donuts right here. Just check the recipe section above for all the details you need to create these delicious treats! Baked pumpkin spice donuts are delicious and fun to make. We covered the main ingredients, tips for perfect texture, and even variations for different diets. Remember to store leftovers properly to keep them fresh. I hope you feel ready to try these donuts at home. Enjoy the process and the tasty results. Don’t forget to share your creations!](https://juliesdish.com/wp-content/uploads/2025/07/d8567a0a-1a48-4980-b407-0b687591d4ca.webp)
Get ready to enjoy the warm flavors of fall with my Baked Pumpkin Spice Donuts! These tasty treats combine pumpkin,

Are you ready for a crispy, healthy treat? These Easy Air Fryer Veggie Egg Rolls are a game changer for
. 1. First, preheat your oven to 400°F (200°C). This step is key for even cooking. 2. In a large bowl, mix the sweet chili sauce, soy sauce, sesame oil, minced garlic, and grated ginger. This sauce will be the marinade. 3. Add the chicken thighs to the bowl. Make sure they are well-coated in the marinade. Let them sit for at least 15 minutes. For more flavor, you can refrigerate them for up to an hour. 1. Line a large sheet pan with parchment paper. This makes cleanup super easy. 2. Once the chicken has marinated, place the thighs on one side of the sheet pan. 3. On the other side, arrange the sliced bell peppers, zucchini, and broccoli florets. Toss them in a little olive oil and season with salt and pepper for added taste. 4. Pour any leftover marinade over everything to enhance the flavor. 1. Bake in your preheated oven for 25 to 30 minutes. The chicken should reach an internal temperature of 165°F (74°C). 2. For a caramelized finish, switch the oven to broil for the last 3 to 5 minutes. This will give the chicken a lovely golden crust. 3. After cooking, let the dish rest for a few minutes. Garnish with sesame seeds and fresh cilantro before serving. This method ensures a meal that is both easy and packed with flavor. You can find the full details in the Full Recipe. For the best flavor, marinate the chicken for at least 15 minutes. This time allows the chicken to soak in the sweet chili sauce and spices. If you have more time, let it sit for up to an hour. This extra time gives the chicken a richer taste. To make the marinade richer, add a touch of lime juice or honey. These additions bring a depth of flavor that brightens the dish. To ensure the chicken is cooked perfectly, use a meat thermometer. The chicken should reach an internal temperature of 165°F (74°C). This step guarantees juicy, safe-to-eat chicken. For roasting vegetables, cut them into even pieces. This helps them cook uniformly. Toss them in olive oil, salt, and pepper before placing them on the pan. This method enhances their natural flavors. Serve this dish with steamed rice or quinoa. These sides soak up the sweet chili sauce well. You can also add a fresh salad for a crunchy contrast. If you have leftovers, store them in an airtight container in the fridge for up to three days. For a quick meal, reheat the chicken and veggies in a pan. This method keeps them moist and tasty. {{image_2}} You can easily switch out the chicken for other proteins. Tofu works great for a vegetarian option. Shrimp also cooks fast and adds a nice flavor. For vegetables, think about what’s in season. Try asparagus in spring or squash in fall. Mix and match to keep meals exciting. Want to spice things up? Add red pepper flakes for heat. Honey can make the dish sweeter and richer. You can also use other sauces, like teriyaki or hoisin, for a fun twist. Each sauce brings its own flavor profile, making this dish versatile. If you are busy, prep this meal ahead. Marinate the chicken and chop the veggies the night before. Store them in the fridge for quick cooking. You can also freeze the marinated chicken for future meals. Just thaw it overnight in the fridge before cooking. This way, you have an easy, tasty dinner ready to go. To store leftovers, let your chicken cool first. Then, place it in an airtight container. Make sure to seal it well to keep out air. You can store it in the fridge for up to four days. The chicken and veggies will stay fresh if stored properly. For reheating, the best method is the oven. Preheat it to 350°F (175°C). Place the chicken on a baking sheet. Heat for about 15-20 minutes. This keeps the chicken juicy and the veggies crisp. If you use a microwave, cover the dish with a damp paper towel. This helps to keep moisture in and prevents dryness. To freeze the dish, let it cool completely. Then, wrap the chicken and veggies tightly in plastic wrap. Place it in a freezer-safe bag or container. It can last up to three months in the freezer. For defrosting, move it to the fridge overnight. You can also use the microwave on the defrost setting. This way, you’ll get the best results when you reheat it later. Can I use bone-in chicken thighs? Yes, you can use bone-in chicken thighs. They add great flavor. Just cook them a bit longer. Check for doneness with a meat thermometer. What can I substitute for sweet chili sauce? You can use honey mixed with soy sauce. Another option is a homemade sauce with sugar, garlic, and vinegar. Both give a sweet and tangy taste. How can I make this recipe gluten-free? To make it gluten-free, use gluten-free soy sauce. Also, ensure your sweet chili sauce is gluten-free. This way, you keep all the great flavor without gluten. Can I add different spices or flavors? Absolutely! You can add chili powder for heat or lime juice for zest. Experiment with your favorites to make it your own. What should I do if the chicken isn’t cooking evenly? If the chicken cooks unevenly, check your oven temperature. You can also rearrange the pan halfway through cooking. This helps with even heat distribution. How do I know when my chicken is fully cooked? Use a meat thermometer. The chicken should reach 165°F (74°C). If you don’t have a thermometer, cut into the thickest part. The meat should be white, not pink. This blog post shows you how to prepare a tasty sheet pan chicken dish. We covered the main ingredients, optional extras, and how to make it healthy. You learned about the prep steps, cooking process, and helpful tips for great results. In the end, experiment and have fun with your ingredients. Use new flavors and swaps to keep it exciting. Enjoy creating delicious meals that fit your taste and needs. Happy cooking!](https://juliesdish.com/wp-content/uploads/2025/07/62de884d-73e7-46a5-88ec-8238e5862a0b.webp)
Looking for a simple, tasty meal? Sheet Pan Sweet Chili Chicken is your answer! With juicy chicken and colorful veggies,

Are you craving a warm, cheesy treat? Look no further! This Cheesy Garlic Pull Apart Bread recipe is simple and
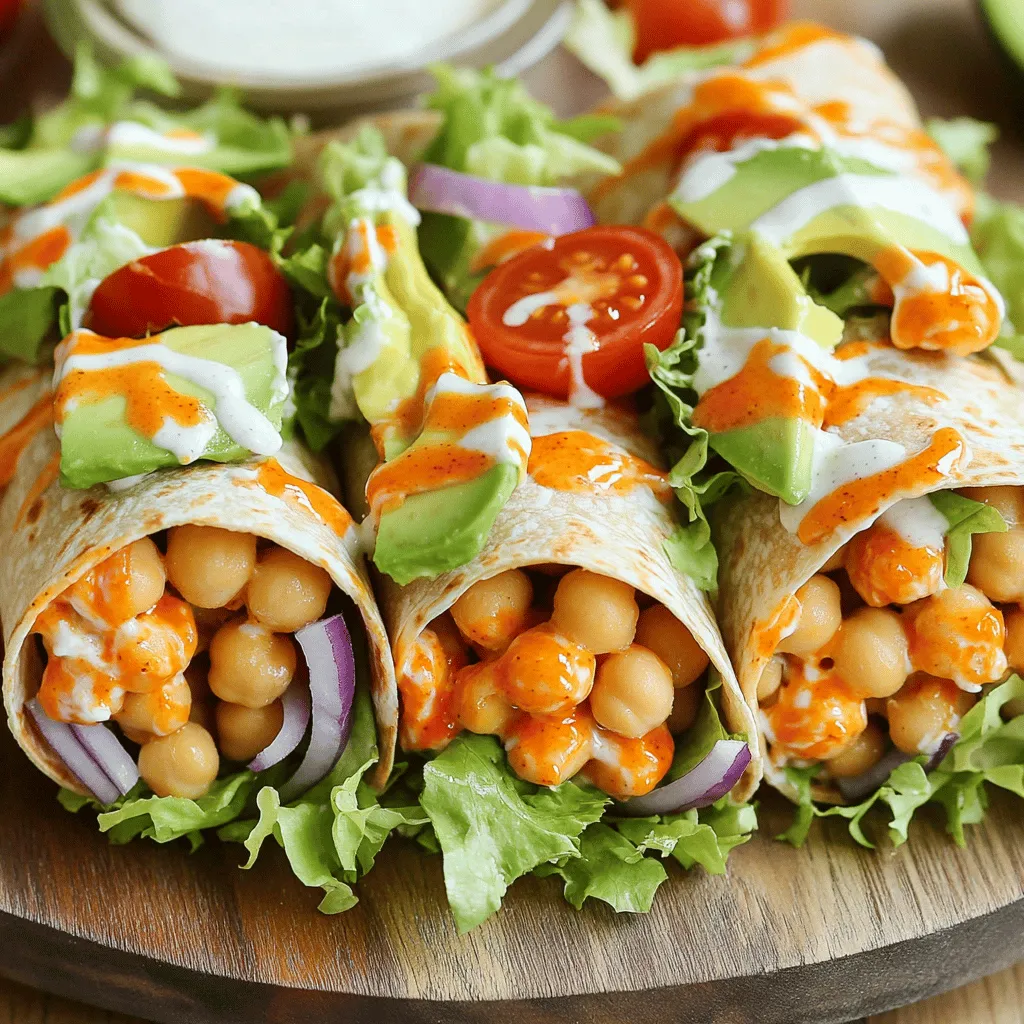
Get ready to spice up your meal prep with my Vegan Buffalo Chickpea Wraps! This tasty and simple dish brings

Looking for a tasty snack that’s both crispy and healthy? You’re in the right place! These Crispy Parmesan Zucchini Chips
