Skip to content
DisclaimerTerms Of UseGDPR PolicyCookie Policy

juliesdish

  • Home
  • Drinks
  • Appetizers
  • Dinner
  • Dessert
  • About
  • Contact
  • Privacy Policy
DisclaimerTerms Of UseGDPR PolicyCookie Policy

NO-ING-IMG

- 1 cup all-purpose flour - 1/4 cup granulated sugar - 1 teaspoon baking powder - 1/2 teaspoon baking soda - 1/2 teaspoon salt - 1/2 teaspoon ground cinnamon - 1/4 cup milk - 1 large egg - 2 tablespoons unsalted butter, melted - 1 teaspoon vanilla extract - 1/4 cup granulated sugar (for coating) - 2 teaspoons ground cinnamon (for coating) Each ingredient plays a key role in making these donut holes tasty. The all-purpose flour gives them structure. Granulated sugar adds sweetness, while baking powder and baking soda help them rise. Salt balances the flavors. Ground cinnamon adds that warm, cozy taste we love. Milk makes the dough soft and moist. The large egg is a binder, helping the dough hold together. Unsalted butter adds richness. Finally, vanilla extract gives a lovely aroma and flavor. For the coating, we mix more granulated sugar with ground cinnamon. This gives the donut holes a sweet and spicy finish. When you toss the warm donut holes in this mix, they become irresistible. Enjoy each bite of these delightful treats! First, grab a large mixing bowl. Add the all-purpose flour, granulated sugar, baking powder, baking soda, salt, and ground cinnamon. Use a whisk to mix these dry ingredients well. This step ensures that each ingredient blends evenly. You want a uniform mix for the best flavor in every bite. Now, in another bowl, pour in the milk, crack the egg, add melted butter, and pour in the vanilla extract. Mix these wet ingredients until they become smooth. This mixture is crucial as it brings moisture to your donut holes. A smooth texture helps the dough combine better later on. Next, it’s time to combine the wet and dry mixtures. Gradually add the wet mix to the dry mix. Stir gently until just combined; don’t overmix. You want the dough to be thick but soft. Lightly flour your hands and take small bits of dough, about one tablespoon each. Roll them into balls. Place these on a parchment-lined plate while you shape them all. Before you start cooking, preheat your air fryer to 350°F (175°C). Once it's ready, arrange the donut holes in the air fryer basket. Make sure they are spaced out and not touching. This helps them cook evenly. Air fry for 5-6 minutes. Check if they are golden brown and cooked through. Depending on your air fryer size, you may need to cook in batches. While the donut holes cook, prepare the cinnamon sugar mix. In a small bowl, mix the granulated sugar and ground cinnamon. Once the donut holes are done, take them out carefully. Place them in the bowl with the cinnamon sugar. Toss them gently until every donut hole is well-coated. Enjoy the sweet, warm goodness! To get the best texture in your donut holes, do not overmix the dough. Overmixing can make your donuts tough. You want a thick yet soft dough. When you mix the wet and dry ingredients, stop as soon as they combine. A few lumps are okay; they will disappear during cooking. When you place the donut holes in your air fryer basket, leave space between them. This helps them cook evenly. If they touch, they might stick together. Every air fryer is different. If your model cooks hot, check the donut holes a minute early. If they are not done, add extra time in small increments. For the best taste, serve your donut holes warm. The cinnamon sugar coating shines when they are hot. You can pair these treats with milk, coffee, or hot chocolate. For a fun twist, try drizzling melted chocolate on top or adding sprinkles for color. Enjoy the deliciousness! {{image_2}} You can make these donut holes even more fun by adding different spices. Try nutmeg or allspice for a warm flavor. You can also mix in chocolate chips or chopped nuts for extra texture. These small changes can create unique tastes. Your family and friends will love the surprises in each bite. If you need a gluten-free version, swap all-purpose flour for a gluten-free blend. This keeps the texture soft and fluffy. For a vegan option, replace the egg with a flax egg and use a non-dairy butter substitute. These changes let everyone enjoy the treat without worry. Want a little extra sweetness? Try a quick glaze made from powdered sugar and milk. Just mix until smooth and drizzle it over the warm donut holes. You can also create fun dips like chocolate or caramel. These toppings add a tasty twist and make the donut holes even more delightful! To keep your donut holes fresh, store them in an airtight container. This helps maintain their softness. Use a container that fits the number of donut holes you have. If they are stacked, place parchment paper between layers to avoid sticking. When you're ready to enjoy leftover donut holes, reheat them in the air fryer. Set the temperature to 300°F (150°C). Heat for about 3-4 minutes. This keeps them warm and crispy. Avoid using the microwave, as it makes them chewy. You can freeze donut holes before or after cooking. If freezing before cooking, shape them and place them on a tray. Freeze until firm, then transfer to a bag. For cooked donut holes, let them cool completely before freezing in a single layer. To thaw, leave them in the fridge overnight or at room temperature for 1-2 hours. Yes, you can make these donut holes ahead of time. Prepare the dough and shape the holes. Then, store them in the fridge for up to one day. When ready, just air fry them fresh. They taste best warm and crispy. You can tell they are done when they turn golden brown. Check by inserting a toothpick; it should come out clean. If it comes out wet, they need more time. The best air fryer temperature is 350°F (175°C). This temperature cooks the donut holes evenly without burning them. It gives that perfect golden finish. You can use almond flour or coconut flour, but the texture may change. Almond flour will make them denser. Coconut flour absorbs more moisture, so adjust the liquid in the recipe. If your dough is too sticky, add a little more flour. Do this gradually, mixing until the dough feels soft but not too wet. Avoid adding too much flour at once. You can keep these donut holes in the fridge for about two days. Store them in an airtight container. Reheat them in the air fryer for a few minutes to regain their crispiness. You learned about making delicious air fryer donut holes. We covered key ingredients and their roles. I shared simple steps, tips for the best texture, and fun variations. You can also store and reheat your treats with ease. The best part? You can customize these donut holes to fit your taste. So, gather your ingredients and try this recipe. Enjoy making, sharing, and eating these tasty bites!

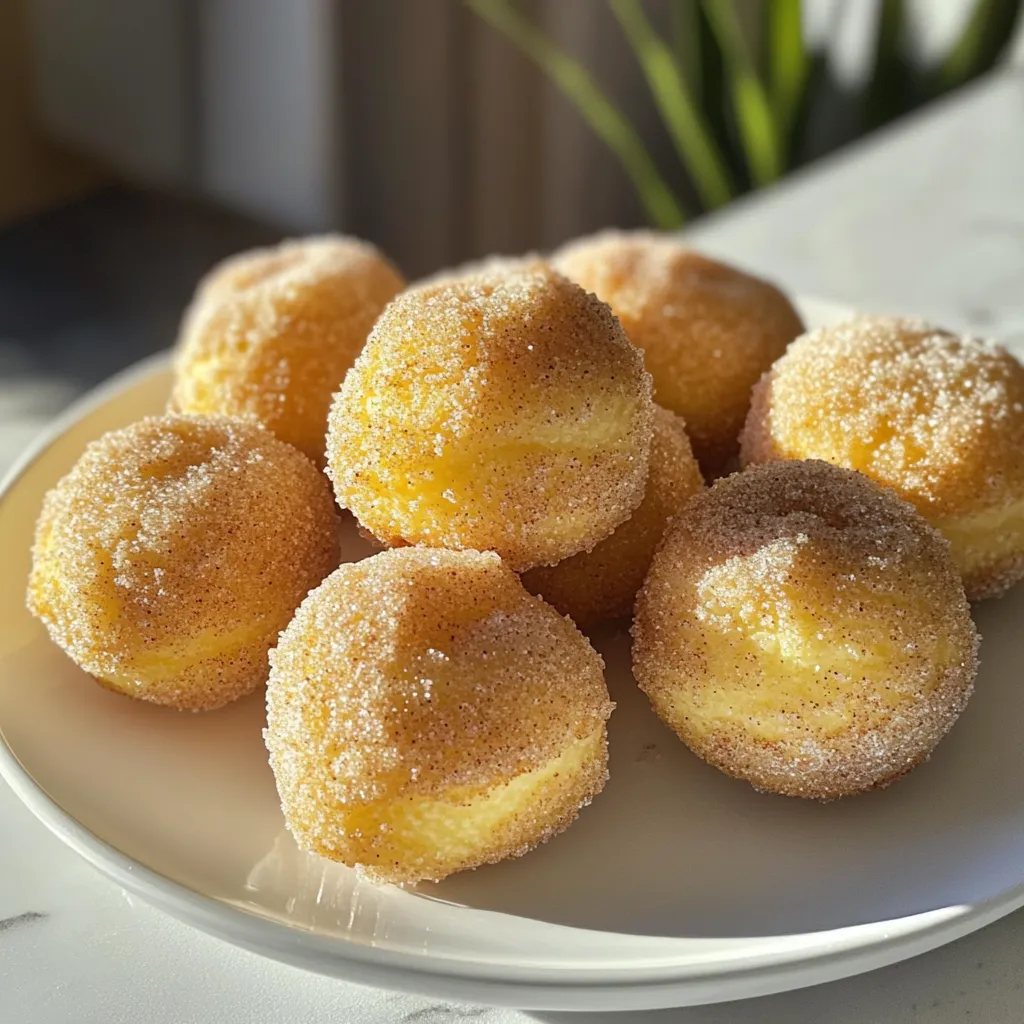
Air Fryer Cinnamon Sugar Donut Holes Delight

Ready to treat yourself? These Air Fryer Cinnamon Sugar Donut Holes are a game-changer! You’ll love how easy they are

- 2 cups all-purpose flour - 1/2 cup brown sugar, packed - 1 tablespoon baking powder - 1/2 teaspoon salt - 1 tablespoon ground cinnamon - 1/2 teaspoon ground nutmeg - 1/4 teaspoon ground ginger - 1/2 cup unsalted butter, cold and cubed - 1/2 cup pumpkin puree - 1/4 cup heavy cream - 1 large egg - 1 teaspoon vanilla extract - 1/2 cup powdered sugar (for glaze) - 2 tablespoons maple syrup (for glaze) - 1-2 tablespoons milk (for glaze) Using high-quality ingredients makes a big difference. Choose fresh, organic pumpkin puree for the best flavor. Fresh spices enhance aroma and taste. Use unsalted butter for control over salt levels. The right flour, like all-purpose, ensures a nice texture. For the best glaze, use pure maple syrup. It adds depth and sweetness. You can swap brown sugar for white sugar if needed. Coconut oil can replace unsalted butter for a dairy-free option. For a gluten-free scone, try almond or oat flour. Use a plant-based cream for a dairy-free glaze. Applesauce can replace heavy cream to lighten the recipe. Make sure your substitutions suit your taste and dietary needs. 1. Start by preheating your oven to 400°F (200°C). This gives the scones a nice rise. 2. Line a baking sheet with parchment paper. This helps with cleanup and prevents sticking. 3. In a large bowl, whisk together these dry ingredients: - 2 cups all-purpose flour - 1/2 cup brown sugar, packed - 1 tablespoon baking powder - 1/2 teaspoon salt - 1 tablespoon ground cinnamon - 1/2 teaspoon ground nutmeg - 1/4 teaspoon ground ginger 4. Now, take your cold butter. Cut it into the flour mix using a pastry cutter or your fingers. You want it to look like coarse crumbs. 5. In another bowl, mix together the wet ingredients: - 1/2 cup pumpkin puree - 1/4 cup heavy cream - 1 large egg - 1 teaspoon vanilla extract Stir until it is smooth. 6. Pour the pumpkin mix into the flour mixture. Gently stir until just combined. Be careful not to overmix. 7. Turn your dough onto a lightly floured surface. Pat it into a circle about 1 inch thick. 8. Cut the dough into wedges, like a pizza, or use a biscuit cutter for round shapes. 9. Place the scones on the prepared baking sheet. Bake for 15-18 minutes. They should be lightly golden brown on the edges. - Use cold butter for flakiness. It keeps the scones light and airy. - Don't overmix the dough. Overworking can make the scones dense. - If you want more flavor, add a pinch of salt to the glaze. It enhances the sweetness. - For a shiny glaze, drizzle it on while the scones are still warm. When making maple glazed pumpkin scones, avoid these common issues: - Overmixing the dough: This can lead to tough scones. Mix until just combined. - Using warm butter: Cold butter makes the scones flaky. Keep it chilled. - Not measuring flour correctly: Too much flour can make scones dry. Use a scale for accuracy. - Skipping the glaze: The glaze adds sweet flavor. Don’t skip it! To enhance the flavor of your scones, try these tips: - Use fresh spices: Freshly ground spices have more flavor. Always check your pantry. - Quality pumpkin puree: Choose pure pumpkin, not pumpkin pie filling. It’s smoother and richer. - Chill dough before cutting: This helps the scones keep their shape while baking. - Add a pinch of salt: It brightens the overall taste. A small amount goes a long way. Serve your scones with these ideas: - Pair with coffee or tea: The warm drinks balance the sweet glaze. - Top with whipped cream: A dollop adds creaminess and richness. - Add nuts or seeds: Chopped pecans or pumpkin seeds give a nice crunch. - Serve with butter: Spread a little butter on warm scones for extra flavor. Enjoy your baking adventure with these tips! They will help you create perfect maple glazed pumpkin scones every time. {{image_2}} You can jazz up your maple glazed pumpkin scones with fun add-ins. Try adding chocolate chips for a sweet touch. Dried cranberries or raisins can add a chewy bite. For a nutty flavor, consider chopped pecans or walnuts. You can also mix in some orange zest for a fresh twist. These add-ins make each bite special. To make these scones gluten-free, swap all-purpose flour with almond flour or a gluten-free blend. Ensure your baking powder is gluten-free too. For a dairy-free option, use coconut oil instead of butter. You can also replace heavy cream with coconut cream or a nut milk. These swaps keep the scones delicious and inclusive. Change your scones with the seasons! In fall, add apple chunks or caramel bits for a cozy vibe. In winter, try spicing them up with peppermint extract. For spring, mix in fresh berries like blueberries or strawberries. In summer, a hint of lemon zest can brighten the flavors. Adapting your scones makes them fun all year round. To keep your scones fresh, place them in an airtight container. You can store them at room temperature for up to two days. If you want them to last longer, refrigerate them. Just remember that refrigeration can make them a bit dry. Freezing is a great way to save your scones. First, let them cool completely. Wrap each scone tightly in plastic wrap. Then, place them in a freezer bag. They can stay frozen for up to three months. When you're ready to eat them, just thaw at room temperature. To reheat, preheat your oven to 350°F (175°C). Place the scones on a baking sheet. Heat them for about 10 minutes. This warms them up and brings back the nice texture. You can also use a microwave for quick reheating. Just heat for about 15-20 seconds, but this may make them a bit soft. Enjoy your scones fresh and warm! Yes, you can make these scones ahead of time. You can prepare the dough and shape it. Wrap it tightly in plastic wrap and freeze it. When you're ready to bake, just thaw the dough in the fridge overnight. Bake as directed, and enjoy fresh scones. If you don't have heavy cream, you can use milk or a non-dairy milk. Almond milk or oat milk works well. You may need to adjust the amount a little for the right taste and texture. The glaze should still be smooth and easy to drizzle. You can tell the scones are done when they are lightly golden brown on the edges. A toothpick inserted into the center should come out clean. If you gently press on the tops, they should feel firm and not doughy. This blog post covered all you need to make perfect maple glazed pumpkin scones. We explored the right ingredients, their quality, and possible substitutions. I provided step-by-step baking instructions and tips for the best texture. You learned common mistakes to avoid, flavor tips, and how to serve these treats. I also shared variations and storage tips to keep your scones fresh. Remember, practice makes perfect! With these tips, you can impress anyone with your baking skills. Enjoy making your scones and experimenting along the way!

Maple Glazed Pumpkin Scones Delightful and Easy Recipe

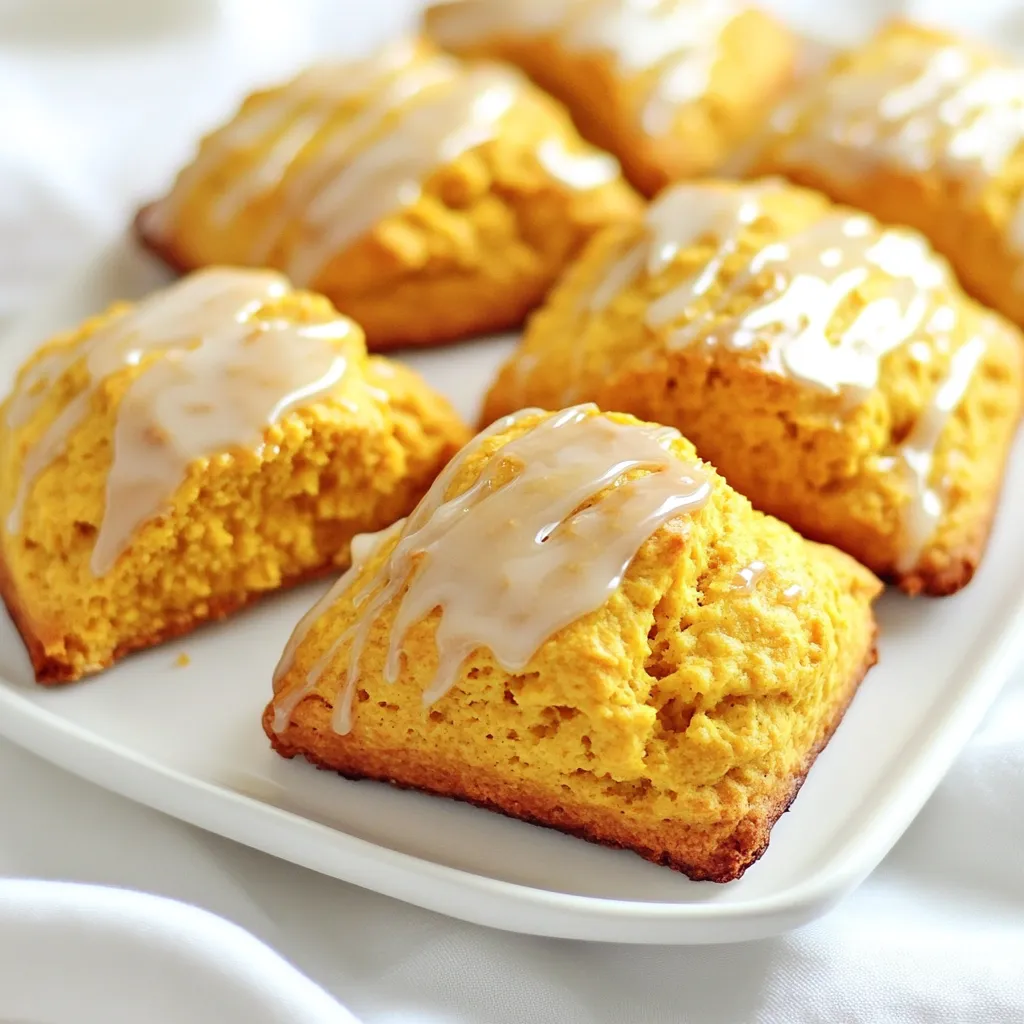
Are you ready to boost your baking skills with a delightful treat? My Maple Glazed Pumpkin Scones recipe is not

- 4 large russet potatoes, peeled and diced - 1 medium onion, chopped - 3 cloves garlic, minced - 4 cups vegetable broth - 1 cup heavy cream (or coconut milk for a dairy-free option) - 1 cup shredded cheddar cheese (optional) - 1 teaspoon dried thyme - Salt and pepper to taste - 2 tablespoons olive oil - Fresh chives for garnish The main ingredients create the soup's base. Russet potatoes give it that creamy texture. The onion and garlic add depth to the flavor. The vegetable broth brings everything together, making every bite comforting. For a rich, creamy taste, heavy cream is your best friend. If you prefer a lighter option, coconut milk works great too. The cheese adds a nice touch, but it's optional. The thyme, salt, and pepper season the dish perfectly. To cook, don't forget the olive oil. It helps to sauté the veggies and adds flavor. Finish with fresh chives on top for a bright, fresh pop. These ingredients together make a warm bowl of creamy potato soup that feels like a hug on a chilly day. - Combine diced potatoes, chopped onion, and minced garlic in your slow cooker. - Drizzle olive oil over the mix and season with salt and pepper. Stir well. - Pour vegetable broth over the mixture. Make sure the veggies are submerged. - Cover the slow cooker and set it to low for 6-8 hours or high for 3-4 hours. The potatoes should be tender when done. - Once cooked, use a potato masher or an immersion blender to get your desired soup texture. I like to leave some chunks for fun. - Stir in heavy cream or coconut milk, plus cheddar cheese if you want. Mix until it's smooth and creamy. To make your soup creamy, use an immersion blender. It helps you blend the potatoes well for a smooth texture. You can also use a regular blender, but be careful with hot soup. Adjust the heavy cream to your taste. If you want it richer, add more cream. If you want a lighter soup, use less. Fresh herbs can boost your soup's aroma. Try adding parsley or dill. They add great taste. Using homemade vegetable broth also makes a big difference. It adds depth and natural flavor to your dish, making it taste fresh and vibrant. Pair your creamy potato soup with crusty bread. A side salad also works well. It adds crunch and freshness. For garnishing, use fresh chives or a sprinkle of cheese. This adds color and fun to your dish. Make it your own with creative garnishes! {{image_2}} If you want a dairy-free creamy potato soup, you can use coconut milk or almond milk. Coconut milk gives a nice, rich flavor. Almond milk is lighter but still creamy. Both options work great! You can also add nutritional yeast to give a cheesy taste without dairy. It adds depth and a unique flavor to the soup. To make your soup even better, try adding bacon bits. They give a nice smoky flavor that pairs well with the potatoes. You can also mix in some vegetables like carrots or peas. This adds color and nutrition to your dish. Feel free to get creative and add any veggies you like! Want to heat things up? Just add a pinch of cayenne pepper. It gives the soup a nice kick! If you prefer a smoky taste, try paprika. It adds warmth and flavor without overpowering the dish. These spices can take your creamy potato soup to a whole new level! Store your creamy potato soup in airtight containers. This keeps it fresh and tasty. It can last in the fridge for about 3 to 5 days. Make sure to cool it first before sealing it up. To freeze your creamy potato soup, let it cool completely. Then, pour it into freezer-safe bags or containers. Leave some space at the top for expansion. It stays good for about 2 to 3 months in the freezer. To thaw, place it in the fridge overnight. Reheat it on the stove or in the microwave until hot. Check for signs of spoilage before eating. If the soup has an off smell or looks strange, toss it out. To keep it fresh, store it properly and avoid leaving it out for long periods. Always use clean utensils to scoop out the soup. This helps to avoid contamination and keeps your soup delicious! To thicken your soup, you can use a few simple methods: - Mashed Potatoes: Mash some of the potatoes in the soup. - Cornstarch Slurry: Mix cornstarch with water, then stir it in. - Flour: Add a small amount of flour and stir well. If you want to avoid heavy cream, try these alternatives: - Coconut Milk: It adds creaminess without dairy. - Cashew Cream: Blend soaked cashews with water for a rich texture. Yes, you can use different potatoes! Here's a quick comparison: - Russet Potatoes: These are starchy and create a fluffy soup. - Yukon Gold Potatoes: They are creamy and add a nice flavor. For the best texture, I recommend russets if you want a light soup or Yukon Golds for a richer taste. To make your soup vegetarian or vegan, follow these tips: - Broth: Use vegetable broth instead of chicken broth. - Cream: Replace heavy cream with coconut milk or cashew cream. You can also add protein-rich ingredients like: - Lentils: They add heartiness and nutrition. - Chickpeas: They boost protein and fiber. This creamy potato soup uses simple ingredients for a comforting dish. Start with potatoes, onion, and garlic, then add broth and cream for richness. You can customize the flavor with herbs and spices. Storage options ensure you can enjoy leftovers later. Experiment with variations to match your tastes. Creating this soup is easy and fun, making it a great meal for any day. Enjoy your cooking and the delicious results!

Creamy Potato Soup Slow Cooker Easy and Comforting Dish

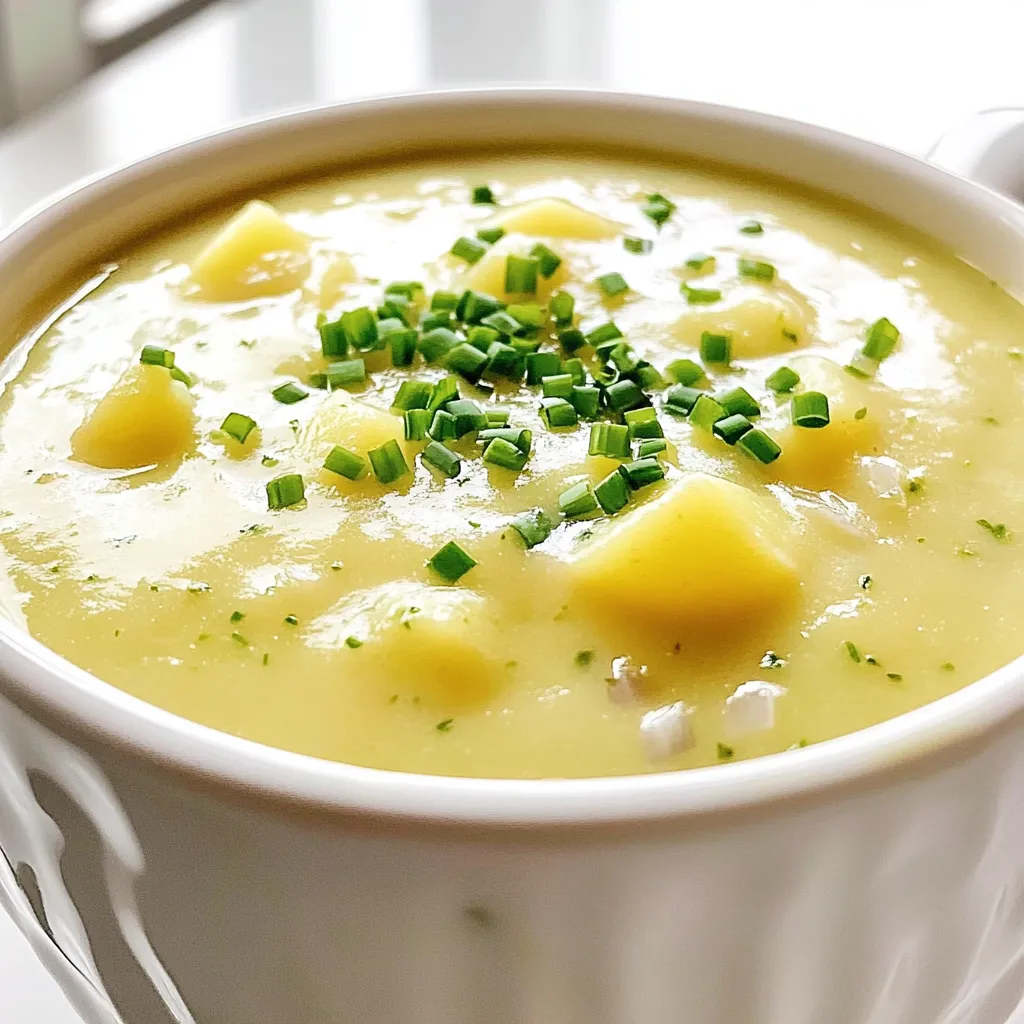
Looking for a warm, soothing meal? This Creamy Potato Soup made in a slow cooker is the answer! With simple

- 2 lbs chicken wings - 1/4 cup honey - 1/4 cup soy sauce - 4 cloves garlic, minced - 1 tablespoon fresh ginger, grated - 2 tablespoons sriracha - 1 teaspoon crushed red pepper flakes - 1 tablespoon sesame oil - 1 tablespoon green onions, chopped - Sesame seeds - Salt and pepper to taste The main ingredients set the stage for your dish. The chicken wings give you a great base, while honey and soy sauce add a sweet and salty touch. You want to use good quality honey and soy sauce for the best flavor. Next come the additional flavorings. Garlic and ginger bring warmth and depth. Sriracha adds the heat, so feel free to adjust it based on your taste. The crushed red pepper flakes kick it up a notch. You can use more or less depending on how spicy you want it. Finally, the garnishing components finish your wings. Sesame oil gives a rich flavor. Green onions and sesame seeds add a fresh and crunchy note. Don’t forget to season with salt and pepper. Each ingredient plays a role to make these wings a rich flavor dish. First, pat the chicken wings dry with paper towels. Dry wings help achieve crispy skin. Next, place the wings in a large bowl. Season them with salt and pepper to taste. This simple step brings out the natural flavor of the chicken. In a separate bowl, mix together honey, soy sauce, minced garlic, grated ginger, sriracha, crushed red pepper flakes, and sesame oil. This mix creates a sweet and spicy marinade. You can adjust the sriracha for more or less heat. The beauty of this recipe is that you control the spice level. Pour the marinade over the chicken wings and toss well to coat. Let the wings marinate for at least 30 minutes at room temperature. For more flavor, marinate them for up to 2 hours in the fridge. The longer they sit, the more the flavors soak in. This process makes the chicken wings tender and tasty. Preheat your oven to 400°F (200°C). Line a baking sheet with aluminum foil for easy cleanup. Place the marinated wings in a single layer on the baking sheet. Bake them for 25–30 minutes. Flip the wings halfway through for even cooking. You want them golden brown and crispy. In the last 5 minutes of baking, brush any remaining marinade over the wings. This adds an extra layer of flavor and creates a sticky glaze. It’s an important step that makes the wings shine and taste even better. Enjoy the rich flavors of your honey garlic chicken wings! To get the right kick in your honey garlic chicken wings, you can adjust the sriracha. If you like it hotter, add more sriracha. For a milder taste, reduce it. Red pepper flakes also add heat. Start with one teaspoon and add more if needed. You can try other spicy options like cayenne pepper or hot sauce too. Each will change the flavor, so have fun with it. Both baking and frying have their perks. Baking is easier and healthier. It cuts down on extra oil. Frying gives wings a crispier texture but adds more fat. If you choose to fry, make sure to monitor the temperature. It helps to avoid greasy wings. Baking is perfect for making a big batch. Choose what fits your style or diet best. To make your wings crispy, pat them dry before seasoning. This removes moisture. A dry surface helps them crisp up nicely in the oven. You can use aluminum foil for easy cleanup. However, parchment paper can also work well. It prevents sticking and keeps the wings from getting soggy. Flip the wings halfway through baking for even crispiness. {{image_2}} For a new taste, try different sauces. You can use teriyaki or barbecue sauce instead of soy sauce. This change adds a sweet note. You can also mix them. If you want more sweetness, add fruit juices. Pineapple or orange juice works great. They will give a fresh twist to your wings. You can grill your wings for a smoky flavor. Preheat your grill and cook them for about 20 minutes. Flip them often to avoid burning. Baking is easier and keeps wings crispy. Follow the recipe's oven method. If you want a slow-cooked option, use a slow cooker. Cook on low for 4-6 hours. This method makes the wings tender and juicy. Pair your wings with tasty dips like ranch or blue cheese. They add creaminess that balances the spice. Serve with veggie sticks like carrots and celery for crunch. For drinks, try a light beer or a refreshing soda. These drinks complement the wings well and enhance the meal experience. After enjoying your spicy honey garlic chicken wings, you might have some left. Store them in airtight containers. This keeps the wings fresh and tasty. In the fridge, they last about 3 to 4 days. Always let them cool before sealing. This helps prevent moisture build-up. When you want to eat your wings again, reheating is key. The best methods are in the oven or air fryer. Set the oven to 350°F (175°C) for 10 to 15 minutes. This keeps the wings crispy. If using an air fryer, cook at 350°F for about 5 to 7 minutes. Avoid the microwave, as it makes wings soggy. If you want to save wings for later, freezing works well. Place them in a freezer-safe bag or container. Make sure to remove excess air to avoid freezer burn. They can stay frozen for up to 3 months. When you're ready to eat, thaw them in the fridge overnight. Reheat as mentioned above for the best results. These honey garlic chicken wings can pack a punch. The heat comes from sriracha and crushed red pepper flakes. You can adjust the spice level easily. If you want it milder, cut back on the sriracha. For more heat, add extra red pepper flakes. This way, you control the spice to match your taste. Yes, you can make these wings ahead. Marinate them for up to two hours in the fridge. This allows the flavors to soak in well. After marinating, you can bake them when you’re ready to eat. If you need to reheat them, just pop them back in the oven for about 10 minutes at 350°F (175°C). This keeps them crispy and tasty. There are many great dipping sauces for honey garlic wings. Here are a few popular choices: - Ranch dressing for a cool contrast - Blue cheese for a rich flavor - Spicy mayo for an extra kick These sauces enhance the flavors and add fun to your meal. Yes, baked chicken wings are generally healthier than fried ones. Baking uses less oil, which reduces fat and calories. It also helps keep the skin crispy while making it lighter. You get all the flavor without the extra grease. This makes baked wings a smart choice for your next gathering. You can use frozen chicken wings! Just make sure to thaw them first. The best way is to leave them in the fridge overnight. If you're short on time, you can use cold water to thaw them quickly. Dry them well before marinating and cooking. This helps the wings get crispy and delicious. This guide walks you through making tasty honey garlic chicken wings. You learned about the main ingredients, key steps, and tips for crispiness. Plus, you found ideas for storing and reheating your wings. Whether you bake or grill, these wings are fun to make and even more fun to eat. Enjoy experimenting with flavors and impress your friends at your next gathering! Your perfect chicken wings await!

Honey Garlic Chicken Wings Spicy Rich Flavor Dish

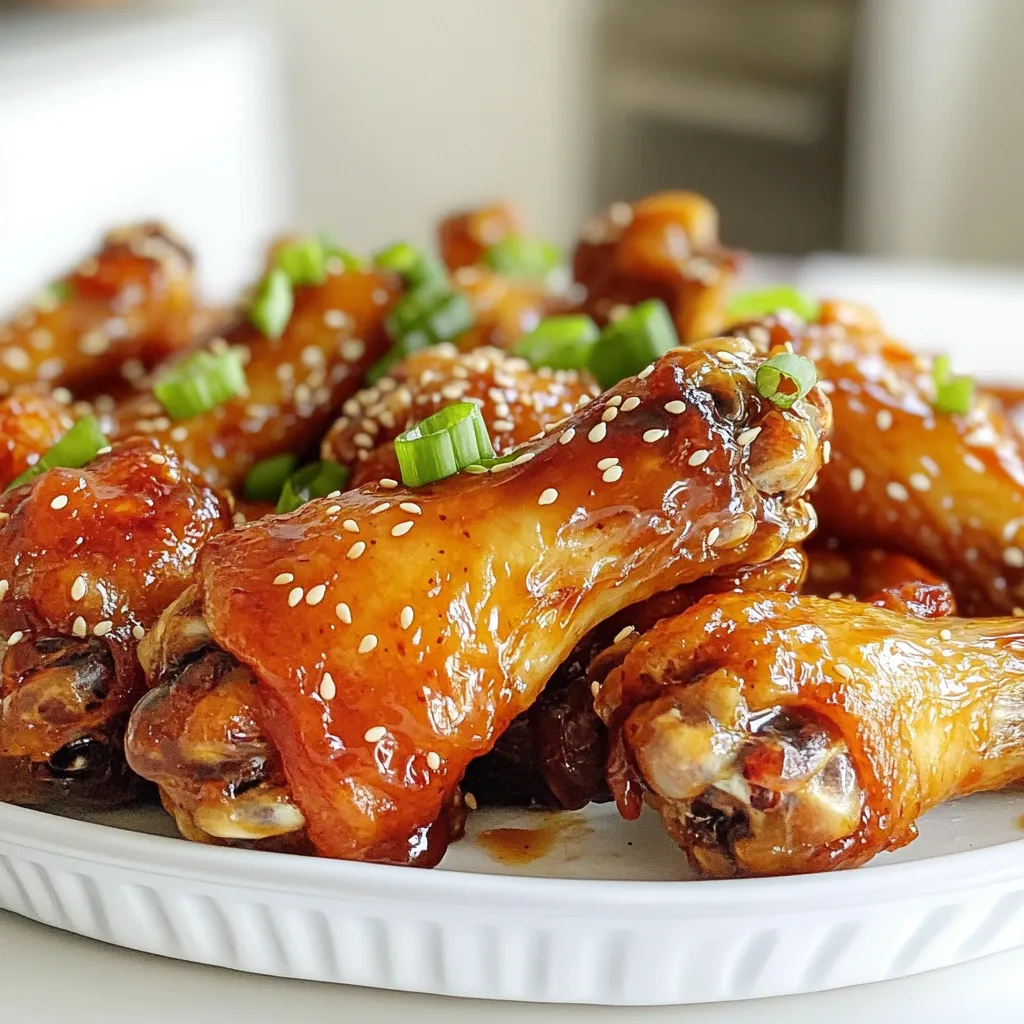
Are you ready to elevate your game day snacks? Honey Garlic Chicken Wings Spicy are a rich, flavorful dish that

- 2 cups all-purpose flour - 1 cup granulated sugar - 1 tablespoon baking powder - 1/2 teaspoon baking soda - 1/2 teaspoon salt - 1/2 cup unsalted butter, melted - 1 cup buttermilk (or 1 cup milk mixed with 1 tablespoon lemon juice) - 2 large eggs - 1 teaspoon vanilla extract - 2 cups fresh blueberries (or frozen, thawed and drained) - Streusel Topping: - 1/2 cup all-purpose flour - 1/3 cup brown sugar, packed - 1/4 cup unsalted butter, softened - 1 teaspoon cinnamon Each ingredient plays a key role in making the muffins perfect. The all-purpose flour gives structure. Sugar adds sweetness and helps with browning. Baking powder and baking soda create lift for a fluffy muffin. Salt enhances all the flavors and balances the sweetness. Butter adds richness and moisture. Buttermilk makes the muffins tender and adds a slight tang. Eggs bind everything and add more moisture. Lastly, vanilla extract gives a warm flavor that rounds it out. Fresh blueberries burst with flavor and provide a juicy texture. They brighten the muffins with their vibrant color. Frozen blueberries are a great option too. They work well if you don’t have fresh ones. Just make sure to thaw and drain them first. This avoids extra moisture in the batter. Both types of blueberries will give you a delicious muffin, but fresh ones are my favorite for that extra pop! First, gather all your ingredients. You need flour, sugar, baking powder, baking soda, salt, and butter. You also need buttermilk, eggs, vanilla, and, of course, blueberries. For the streusel, grab more flour, brown sugar, butter, and cinnamon. Preheat your oven to 375°F (190°C). Line your muffin pan with paper liners or spray it with nonstick spray. In a large bowl, whisk together the dry ingredients: flour, granulated sugar, baking powder, baking soda, and salt. Mix them until they blend well. In a separate bowl, combine melted butter, buttermilk, eggs, and vanilla. Stir this mix until smooth. Now, pour the wet ingredients into the dry mix. Gently fold them together until just combined. Be careful not to overmix; this keeps your muffins light. Next, fold in the blueberries carefully to avoid crushing them. Prepare the streusel topping. In a small bowl, mix flour, brown sugar, softened butter, and cinnamon. Use your fingers to crumble this mixture until it looks like coarse crumbs. Now, take an ice cream scoop or a spoon. Fill each muffin cup about three-quarters full with batter. Sprinkle a good amount of streusel on top of each muffin. Mixing batter is simple but important. Always start with dry ingredients first. Whisk them well to remove lumps. When you add wet ingredients, pour them into the center of the dry mix. Use a spatula or wooden spoon to fold. Stir gently, and stop mixing as soon as you see no dry flour. The batter should look lumpy but well-combined. This method helps make your muffins soft and fluffy. Many people make mistakes when baking muffins. Here are some tips to help you: - Overmixing the batter: This makes muffins tough. Mix just until combined. - Skipping the flour sifting: Sifting gives a lighter texture. It mixes air into the flour. - Not measuring ingredients correctly: Use a kitchen scale or measuring cups for accuracy. These tips help you create perfect blueberry streusel muffins every time. A great streusel topping makes your muffins shine. To get it right, follow these steps: - Use cold butter: Cold butter makes the topping crumbly. Softened butter can make it too smooth. - Mix with your fingers: This helps break the butter into small pieces. You want a coarse crumb texture. - Add cinnamon for flavor: A teaspoon adds warmth and depth to the topping. These techniques ensure your streusel is crunchy and full of flavor. Keeping your muffins fresh is simple. Use these storage tips: - Cool completely before storing: This prevents sogginess. Place them on a wire rack. - Store in an airtight container: This keeps moisture in but prevents drying out. - Freeze for long-term storage: Wrap muffins in plastic wrap, then in foil. They last up to three months. With these tips, you can enjoy your blueberry streusel muffins fresh anytime. {{image_2}} You can change the flavor of your muffins easily. Want a lemon twist? Add zest from one lemon to the batter. If you're a fan of nuts, try adding 1/2 cup of walnuts or pecans. For a sweeter touch, mix in some chocolate chips. Dark chocolate pairs well with blueberries. You can make these muffins gluten-free. Use a gluten-free all-purpose flour blend instead of regular flour. Check that it has xanthan gum in it. This helps the muffins rise and keeps them fluffy. You can also add 1 tablespoon of cornstarch to improve the texture. Boost the nutrition with simple swaps. Replace half of the all-purpose flour with oat flour or almond flour. This adds fiber and healthy fats. You can also add chia seeds or flaxseeds for extra omega-3s. Another option is to mix in some spinach or zucchini for hidden veggies. Yes, you can use other fruits. Raspberries, strawberries, or blackberries work well. Just make sure the fruit is not too watery. Drain any extra juice if using frozen fruit. This helps keep your muffins from getting soggy. To make muffins moist, use buttermilk or sour cream. Adding an extra egg can also help. Don’t overmix your batter when combining wet and dry ingredients. Fold gently to keep the air in. This keeps your muffins fluffy and tender. Muffins are less sweet than cupcakes. They have a denser texture and often contain fruit. Cupcakes are sweeter, lighter, and usually have frosting. Muffins can be a breakfast treat or snack, while cupcakes are for dessert. Blueberry muffins have a rich history. They date back to the early 1900s in America. People loved using fresh blueberries from the wild. These muffins became a popular breakfast treat. They are loved for their sweet, fruity flavor. Over time, recipes changed, but the love for them stayed strong. Today, they are a staple in bakeries and homes alike. Streusel toppings have German roots. The word "streusel" means "to sprinkle." This topping adds a crunchy, sweet layer to baked goods. It often includes butter, sugar, and flour. The classic streusel came to America with German immigrants. Now, we enjoy it on many desserts, especially muffins. It makes blueberry muffins even more delightful with its texture. When buying blueberries, look for firm, plump berries. They should be deep blue in color. Avoid any with green or red spots. Those might not be ripe. Store fresh blueberries in the fridge. Keep them in a breathable container. Rinse them just before you eat or bake. This helps keep them fresh longer. If you use frozen blueberries, thaw them first. Pat them dry to avoid extra moisture in your muffins. This guide covered everything you need for blueberry streusel muffins. You learned the key ingredients, preparation steps, and helpful tips. Fresh blueberries make a big difference in flavor. I shared variations and answered common questions. Baking is fun and rewarding. With these tips, you can avoid mistakes and impress your family and friends. Remember, practice makes perfect! Enjoy every bite of your delicious muffins. Happy baking!

Blueberry Streusel Muffins Bakery Style Delight

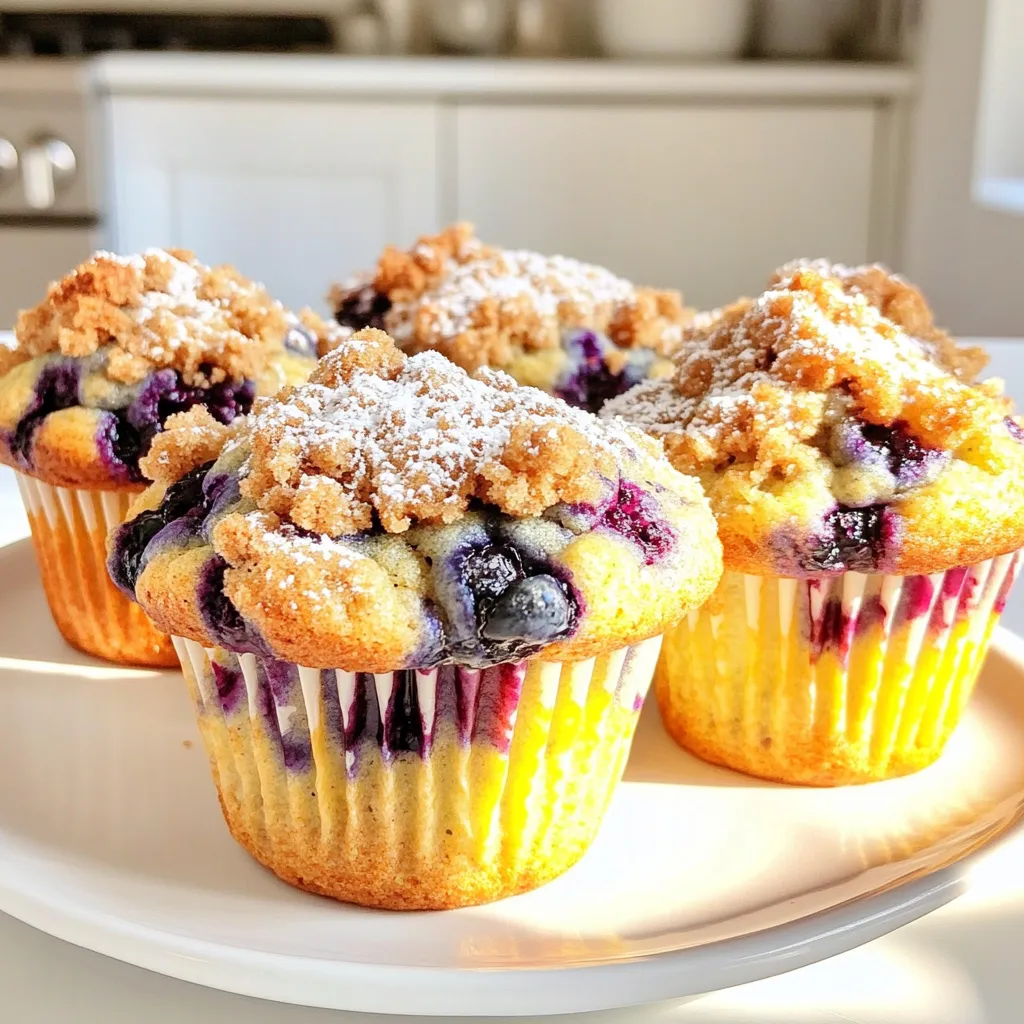
Are you ready to whip up a batch of delicious Blueberry Streusel Muffins? If you love bakery-style treats, I have

To make Creamy Cajun Sausage Pasta One Pot, you need these ingredients: - 12 oz (340g) penne pasta - 1 lb (450g) smoked sausage, sliced - 1 medium onion, chopped - 3 cloves garlic, minced - 1 bell pepper (red or green), diced - 1 can (14.5 oz) diced tomatoes, undrained - 2 cups chicken broth - 1 cup heavy cream - 2 tablespoons Cajun seasoning - 1 cup shredded cheddar cheese - 2 tablespoons olive oil - Salt and pepper to taste - Fresh parsley, chopped (for garnish) Each ingredient plays a key role. The penne pasta absorbs the sauce well. Smoked sausage adds rich flavor. Fresh vegetables, like onion and bell pepper, bring color and crunch. Diced tomatoes add moisture and acidity. Chicken broth gives depth. Heavy cream creates that lovely creaminess. Cajun seasoning spices things up. Cheddar cheese provides a melty finish. Olive oil is essential for cooking. Salt and pepper enhance all the flavors. Lastly, fresh parsley adds a bright touch. Enjoy gathering these ingredients! Start by slicing the smoked sausage into thin rounds. This helps the sausage cook evenly. Next, chop one medium onion and mince three cloves of garlic. Dice one bell pepper, either red or green. These veggies add flavor and color to the dish. In a large pot, heat two tablespoons of olive oil over medium heat. Once hot, add the sliced sausage. Cook for about 5-7 minutes until it browns. This step gives the sausage a rich flavor. Next, add the chopped onion, minced garlic, and diced bell pepper. Sauté these for 3-5 minutes until the onion turns soft and clear. Then, stir in two tablespoons of Cajun seasoning. Cook for one more minute to bring out the spice flavors. Now it’s time to add the fun part! Toss in one can of diced tomatoes, along with 2 cups of chicken broth, and 12 oz of uncooked penne pasta. Stir everything well to mix. Bring it to a boil. Once boiling, reduce the heat and cover the pot. Let it simmer for about 15 minutes. Stir occasionally to prevent sticking. After 15 minutes, check if the pasta is cooked. If the liquid is mostly absorbed, pour in one cup of heavy cream. Mix it in until everything is creamy and smooth. Let it cook for another 2-3 minutes to thicken up a bit. Finally, stir in one cup of shredded cheddar cheese. Keep mixing until the cheese melts completely. Taste your dish and adjust the seasoning with salt and pepper as you like. This step is key to making sure your dish shines with flavor. How to avoid overcooking pasta To keep your pasta firm, watch the time closely. Start checking the penne pasta a few minutes before the package time ends. The pasta should be al dente, which means it has a slight bite. Drain it right away to stop the cooking. Importance of seasoning Seasoning makes your dish shine. Add salt to the water when cooking pasta. It helps bring out the flavors. Don’t forget to taste your dish before serving. Adjust the salt and pepper as needed to get the right balance. Best sides to accompany the dish Creamy Cajun sausage pasta pairs well with garlic bread or a fresh salad. Garlic bread adds a nice crunch and flavor. A simple green salad can balance the richness of the pasta. Presentation tips for an appealing dish Serve the pasta in deep bowls. Sprinkle fresh parsley on top for color. A dash of extra Cajun seasoning also looks nice. This makes your dish more inviting and tasty. {{image_2}} You can easily change the sausage in this dish. Try using Italian sausage for a milder taste. Chicken sausage is a great option for a lighter meal. If you want to go meatless, use a plant-based sausage. Each type brings its own flavor. You can also switch up the pasta. While penne works well, you can use rotini or fusilli for fun shapes. Bowtie pasta adds a nice twist too. Whole wheat pasta can make it healthier. Just keep an eye on the cooking time, as different pastas cook at different rates. To manage the heat, you can adjust the spice level. For a milder dish, use less Cajun seasoning. Adding more cream can also cool down the heat. If you love spice, feel free to add extra seasoning or even some crushed red pepper flakes. You can make your own Cajun seasoning at home. Combine paprika, cayenne pepper, garlic powder, onion powder, thyme, and oregano. Mix to your taste. This way, you can control the spice and make it fresh. To keep your Creamy Cajun Sausage Pasta fresh, follow these steps: - Refrigeration: Let the pasta cool to room temperature. Place it in an airtight container. Store it in the fridge for up to 3 days. - Freezing: If you want to freeze it, use a freezer-safe container. This pasta can last for about 2 months in the freezer. When ready to eat, thaw it overnight in the fridge before reheating. To enjoy your leftovers, reheating is key. Here’s how: - Avoid Drying Out: Add a splash of chicken broth or cream before reheating. This keeps the pasta moist. Stir well to mix the liquid. - Microwaving vs. Stovetop: Microwaving is quick, but stovetop reheating gives better results. For stovetop, heat over low heat. Stir often until warmed. This helps blend the flavors again and keeps it creamy. Can I make this recipe ahead of time? Yes, you can make this creamy Cajun sausage pasta ahead of time. Cook it, let it cool, and store it in the fridge. It’s best eaten within three days. When you're ready, just reheat it on the stove or in the microwave. Can I use whole wheat or gluten-free pasta? Absolutely! You can swap regular penne pasta with whole wheat or gluten-free options. Just keep an eye on the cooking time, as these may vary. Follow package instructions for best results. My pasta came out mushy. What went wrong? If your pasta is mushy, you might have overcooked it. Make sure to check it a minute or two before the time is up. Also, stirring occasionally helps keep the pasta from sticking and cooking unevenly. The sauce is too thick. How can I fix it? If your sauce is too thick, add a splash of chicken broth or water. Stir it in and heat it through. This will help loosen the sauce without losing its creamy texture. You learned about the key ingredients for a tasty pasta dish, from penne to smoked sausage. We covered the preparation methods and cooking steps to make it easy. Useful tips helped you avoid common mistakes while cooking. You also discovered ways to customize the dish with ingredient swaps and different spice levels. Finally, I shared advice on storing and reheating. Remember, cooking is fun and creative. Enjoy making this dish your own, and share it with those you love!

Creamy Cajun Sausage Pasta One Pot Easy Dinner

Looking for a quick and tasty dinner? You’ve come to the right place! My Creamy Cajun Sausage Pasta One Pot

- 2 medium sweet potatoes - 2 tablespoons olive oil - 1 teaspoon smoked paprika - 1/2 teaspoon garlic powder - 1/2 teaspoon onion powder - 1/2 teaspoon sea salt - 1/4 teaspoon black pepper - 1/4 teaspoon cayenne pepper (optional for heat) Gather these items before you begin. The sweet potatoes are the star of this dish. Choose medium-sized ones for even cooking. The olive oil helps to crisp them up nicely. The spices add flavor and warmth. Smoked paprika gives a nice, smoky touch. Garlic powder and onion powder make them savory. Sea salt and black pepper bring out the natural taste. If you want a kick, add cayenne pepper. - Fresh parsley Fresh parsley adds a pop of color and freshness. It makes your dish look great. You can chop it finely and sprinkle it on top. This step is simple but makes a big difference! These ingredients are key to making crispy and delicious air fryer sweet potato cubes. They are easy to find and make your cooking fun. Enjoy the process! Start by peeling the sweet potatoes. Use a good peeler for this task. Cut the sweet potatoes into 1-inch cubes. Uniformity is key to ensure even cooking. If the pieces are too big or small, they won’t cook the same. Aim for a nice, even size. In a large bowl, combine the sweet potato cubes with 2 tablespoons of olive oil. Add the spices: 1 teaspoon of smoked paprika, 1/2 teaspoon of garlic powder, 1/2 teaspoon of onion powder, 1/2 teaspoon of sea salt, 1/4 teaspoon of black pepper, and 1/4 teaspoon of cayenne pepper if you want heat. Toss everything together. Make sure each cube is well-coated. This step adds flavor and helps with crispiness. Preheat your air fryer to 400°F (200°C) for about 5 minutes. This step helps the sweet potatoes cook faster and crisp up. Place the sweet potato cubes in the air fryer basket. Keep them in a single layer. Avoid overcrowding the basket to get the best results. Cook the cubes for 15 to 18 minutes. Be sure to shake the basket halfway through. This action promotes even cooking. Once they look golden brown and crispy, you can take them out. Let them cool for a couple of minutes before serving. To get crispy sweet potato cubes, avoid overcrowding the air fryer basket. When you pack too many in, they steam instead of fry. This makes them soft instead of crisp. Cook in batches if needed. Each cube needs space for hot air to circulate. It’s key for a great texture. Shaking the basket is also important. Halfway through cooking, pull the basket out and shake it well. This helps the cubes turn evenly. I do this at around 8 or 9 minutes into cooking. It makes a big difference in crispiness. You can enhance the flavor of sweet potato cubes with many spices. Besides the basics, try adding some cinnamon for a touch of sweetness. This works well if you want a sweeter dish. For a savory twist, consider adding cumin or chili powder. These spices bring a nice kick. You can also mix sweet and savory. A dash of brown sugar can balance out the spices nicely. Experimenting with flavors keeps things fun. Feel free to get creative with your spice mix! {{image_2}} You can make sweet potato cubes in the oven or on the stovetop if you want. Oven-roasted sweet potato cubes: Preheat your oven to 425°F (220°C). Toss your sweet potato cubes with olive oil and spices. Spread them on a baking sheet in a single layer. Bake for 25-30 minutes, flipping halfway for even cooking. They will turn golden and crispy. Stovetop alternatives: Heat a skillet over medium heat. Add olive oil and sweet potato cubes. Cook for about 15-20 minutes, stirring often. This method gives a nice caramelized texture, but they may not be as crispy as air-fried cubes. You can mix flavors to make your sweet potato cubes more interesting. Sweet vs. savory variations: For a sweet twist, add cinnamon and honey before cooking. If you prefer savory, garlic and herbs work great. You can even try a mix of both for a unique taste. Adding other vegetables: Toss in carrots, bell peppers, or even zucchini. Just make sure to cut them to a similar size for even cooking. This adds color and nutrients to your dish. After enjoying your air fryer sweet potato cubes, let any leftovers cool. Place the cubes in an airtight container. Store them in the fridge for up to three days. This keeps them fresh and tasty. If you want to keep them longer, consider freezing. Use a freezer-safe bag and remove as much air as possible. This way, your cubes stay good for about three months. To reheat sweet potato cubes, the air fryer is your best friend. Set it to 350°F (175°C). Heat them for about 5 to 8 minutes. This restores their crispiness. You can also use the oven. Spread them on a baking sheet and bake at 350°F for 10 to 15 minutes. Avoid using the microwave, as it can make them soggy. Enjoy those crispy bites again! Cooking times can change based on sweet potato type. For regular orange sweet potatoes, 15-18 minutes works well. For white sweet potatoes, you may need 18-20 minutes. Purple sweet potatoes often take a bit longer, around 20-23 minutes. Always check for doneness by looking for a crispy outside and a tender inside. Yes, you can make sweet potato cubes without oil. Skip the oil and coat the cubes with spices directly. They may not get as crispy, but they will be healthier. You can also use a light spray of cooking oil if you want some crispiness without much fat. You know the sweet potato cubes are done when they look golden brown and crispy. To check, pierce a cube with a fork. If it goes in easily, they are ready! Shaking the basket halfway through cooking helps ensure even doneness. Yes, you can freeze the sweet potato cubes. Allow them to cool first, then place them in a freezer-safe bag. They can last for up to three months. When ready to eat, reheat them in the air fryer until warm and crispy. In this blog post, we covered how to make air fryer sweet potato cubes. You learned about the key ingredients, preparation steps, and cooking tips. I shared ways to achieve crispy cubes and gave storage advice, too. Remember, you can experiment with flavors and cooking methods. These sweet potato cubes are simple and tasty. Enjoy your cooking adventure!

Air Fryer Sweet Potato Cubes Crispy and Delicious

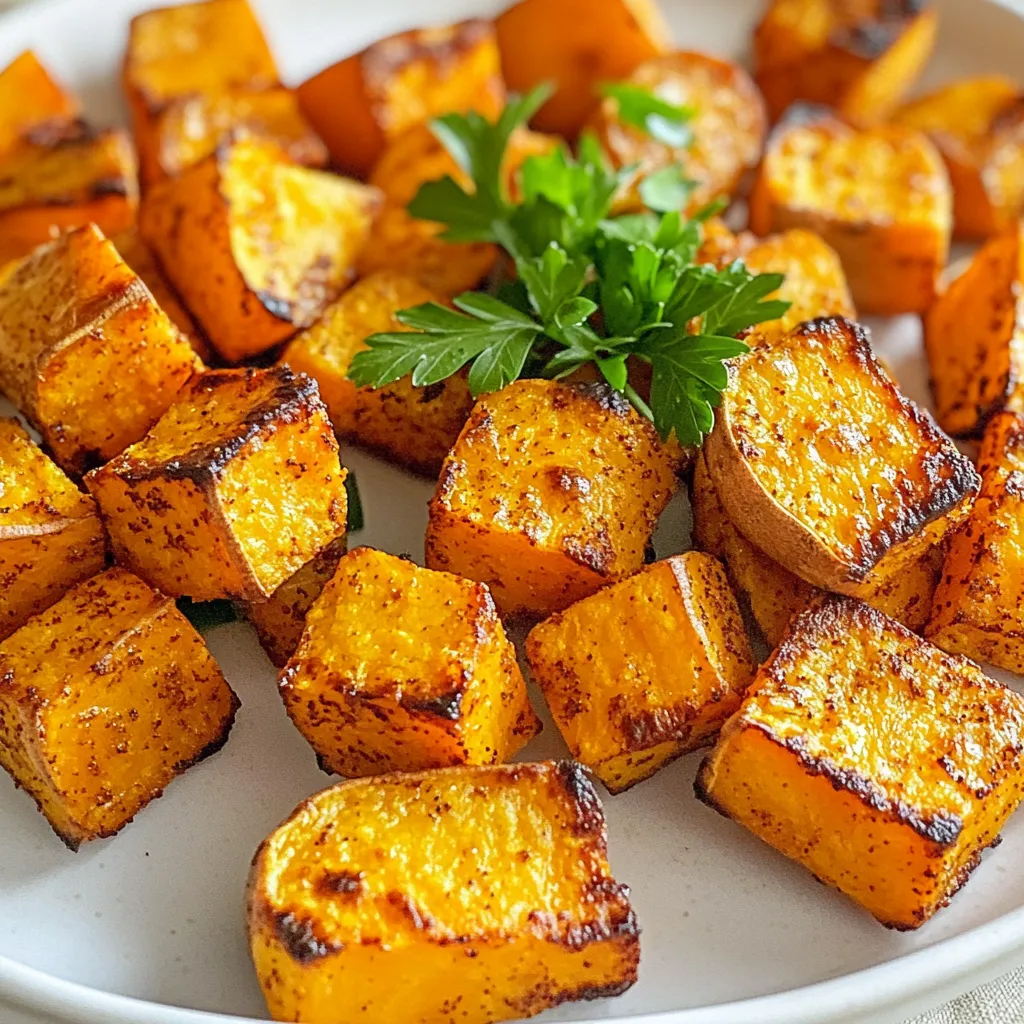
If you’re looking for a tasty and easy side dish, you’ll love these Air Fryer Sweet Potato Cubes! With just

To make pumpkin protein energy balls, you will need: - 1 cup pumpkin puree - 1 cup rolled oats - 1/2 cup almond butter (or peanut butter) - 1/4 cup honey or maple syrup - 1/4 cup vanilla protein powder - 1/2 teaspoon cinnamon - 1/4 teaspoon nutmeg - 1/4 cup chocolate chips (dark or dairy-free) - Pinch of salt If you need substitutes, here are some good options: - Pumpkin puree: Use butternut squash puree if you can't find pumpkin. - Almond butter: Peanut butter works well if you have a nut allergy. - Honey: Maple syrup is a great vegan option. - Rolled oats: Use gluten-free oats for a gluten-free snack. - Protein powder: Try a plant-based protein powder for a vegan option. - Chocolate chips: Use dried fruit or seeds if you want a healthier mix. Each ingredient brings unique benefits to your energy balls: - Pumpkin puree: This is rich in vitamins A and C. It helps your immune system. - Rolled oats: Oats provide fiber, which keeps you full longer. - Almond butter: This nut butter gives healthy fats and protein, boosting energy. - Honey or maple syrup: Natural sweeteners add energy without refined sugar. - Vanilla protein powder: Adds protein for muscle repair and growth. - Cinnamon: This spice can help control blood sugar. - Nutmeg: It aids digestion and adds a warm flavor. - Chocolate chips: They add a touch of sweetness and antioxidants. - Salt: A pinch enhances flavor and helps balance electrolytes. Start by gathering your ingredients. You need: - 1 cup pumpkin puree - 1 cup rolled oats - 1/2 cup almond or peanut butter - 1/4 cup honey or maple syrup - 1/4 cup vanilla protein powder - 1/2 teaspoon cinnamon - 1/4 teaspoon nutmeg - 1/4 cup chocolate chips - Pinch of salt In a large bowl, combine the pumpkin puree, almond butter, and honey or maple syrup. Mix until smooth and blended well. Next, add the rolled oats, vanilla protein powder, cinnamon, nutmeg, and salt. Stir until all ingredients are mixed together. You want a thick, sticky mixture. Gently fold in the chocolate chips to add some sweetness. Now comes the fun part! With clean hands, scoop out about one tablespoon of the mixture. Roll it into a ball. Place each ball on a lined baking sheet. Make sure to leave space between each ball. Once you finish rolling all the mixture, place the baking sheet in the fridge. Chill the energy balls for at least 30 minutes. This step helps them firm up nicely. After chilling, your energy balls are ready to enjoy! They make a great snack, breakfast, or post-workout treat. You can grab one quickly when you’re in a hurry. If you have leftovers, store them in an airtight container in the fridge. They stay fresh for up to a week. Try them with a glass of milk or a piece of fruit for a balanced snack. To make your pumpkin protein energy balls just right, focus on the balance of wet and dry ingredients. The pumpkin puree adds moisture. Use just enough oats to help bind everything together. If the mixture is too dry, add a bit more almond butter. If it's too wet, add more oats. The spices, like cinnamon and nutmeg, give a warm flavor. Adjust these to fit your taste. A little more cinnamon can make a big difference. One common mistake is not mixing well. If you don’t blend the ingredients fully, some bites might taste bland. Make sure to mix until everything is well combined. Another mistake is not chilling the balls enough. Chilling helps them firm up, making them easier to handle. If you skip this step, they may fall apart. Finally, don’t skip the chocolate chips! They add sweetness and make the snack enjoyable. Use a large bowl for mixing. This gives you space to stir without making a mess. I find it best to use my hands to roll the balls. This way, you can feel the texture. Aim for about one tablespoon for each ball. This size is perfect for a quick snack. After rolling, place the balls on a lined baking sheet. Make sure they are not touching. This keeps them from sticking together while they chill. {{image_2}} You can change the taste of your energy balls easily. For a chocolate twist, use cocoa powder instead of some of the protein powder. If you want a fruity kick, add mashed ripe bananas or applesauce. Try using different nut butters like cashew or sunflower seed butter for unique flavors. You can also swap the pumpkin puree for sweet potato for a different taste. Making these energy balls fit your diet is simple. To make them vegan, swap honey for maple syrup. Check that your protein powder is plant-based. For gluten-free options, use gluten-free rolled oats. This way, everyone can enjoy these tasty snacks without worry. Adding seeds or dried fruits can boost nutrition and flavor. Consider mixing in chia seeds, flaxseeds, or sunflower seeds for crunch. Dried cranberries, raisins, or chopped apricots can add sweetness. These extras not only enhance taste but also add more fiber and healthy fats. Feel free to get creative and make these energy balls your own! To keep your pumpkin protein energy balls fresh, store them in an airtight container. This prevents air and moisture from spoiling them. Make sure the container is clean and dry before adding the energy balls. Place a piece of parchment paper between layers if you stack them. This helps avoid sticking. In the fridge, these energy balls last up to a week. They stay tasty and firm during this time. If you want to keep them longer, freeze them. In the freezer, they can last for about three months. Just remember to thaw them in the fridge before eating. Glass jars work well for storing energy balls. They are sturdy and do not absorb smells. Plastic containers are another option, but make sure they are BPA-free. Whichever container you choose, keep it sealed tight. This keeps your energy balls fresh and tasty for longer. Pumpkin protein energy balls stay fresh for about one week in the fridge. They need to be in an airtight container to keep them moist. If you want them longer, freeze them for up to three months. Just thaw them overnight before you eat. Yes, you can easily make these energy balls vegan. Just replace honey with maple syrup. Also, choose a plant-based protein powder. Use almond or peanut butter, as both are vegan-friendly. If you don’t have protein powder, you can use ground flaxseed or chia seeds. These add healthy fats and fiber. You might want to add a bit more almond butter to keep the texture right. Yes, you can freeze these energy balls. After rolling them, place them on a baking sheet. Freeze them for about one hour, then move them to a freezer bag. This keeps them from sticking together. Each energy ball contains about 100 calories. They have around 4 grams of protein and 5 grams of healthy fats. With pumpkin and oats, they are rich in fiber too. This makes them a great snack for energy and fullness. In this article, we explored pumpkin protein energy balls. We detailed ingredients, substitutes, and their health benefits. You learned step-by-step instructions for making and serving them. We also shared tips for perfecting texture and avoiding common mistakes. Variations allow you to customize these snacks for any diet. Lastly, we covered storage options to keep them fresh longer. Enjoy making these tasty, healthy treats. They are easy and fun to create!

Pumpkin Protein Energy Balls Nutritious Snack Idea

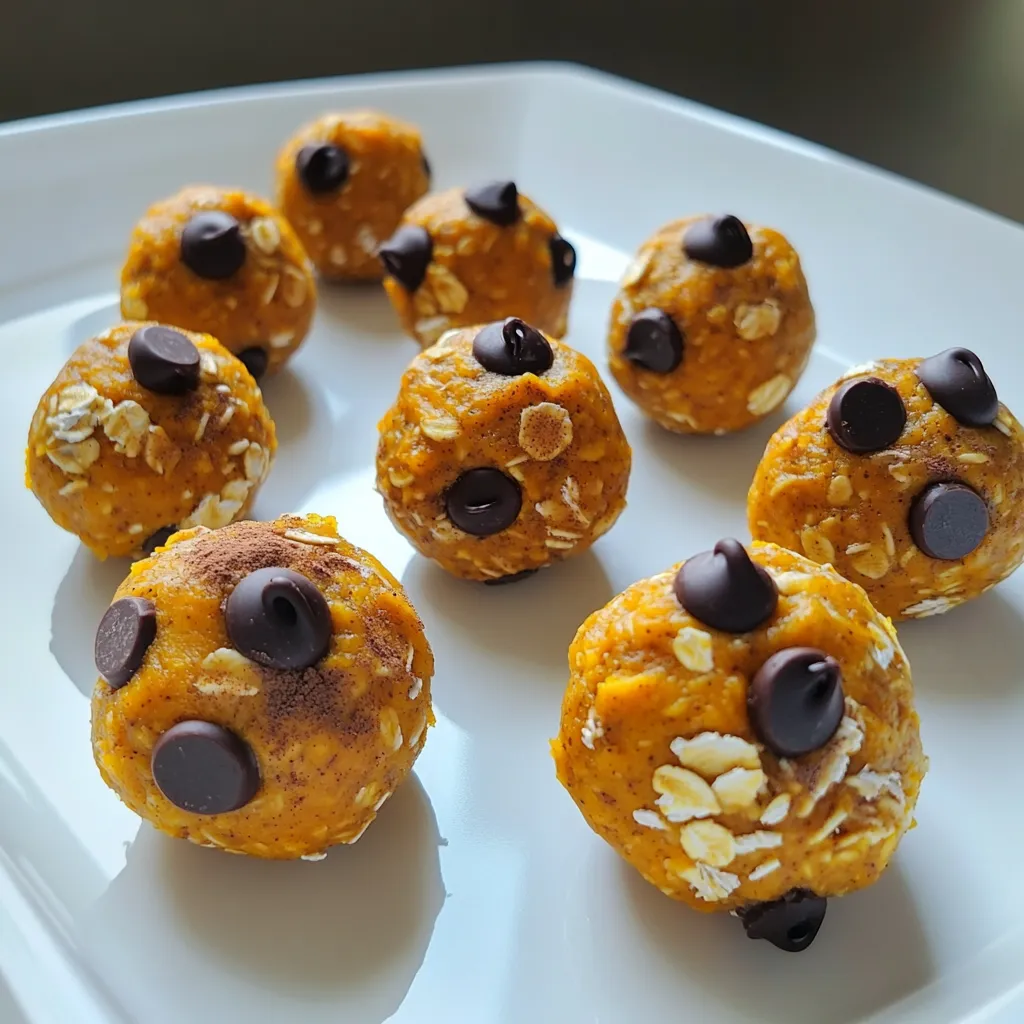
Looking for a simple and tasty snack? Let me introduce you to pumpkin protein energy balls! These little bites are

To make the best Caramel Pecan Cheesecake Bars, you need fresh ingredients. Here’s what you’ll need: - 1 ½ cups graham cracker crumbs - ½ cup unsalted butter, melted - 2 tablespoons granulated sugar - 1 (8-ounce) package cream cheese, softened - 1 cup powdered sugar - 1 teaspoon vanilla extract - 2 large eggs - 1 cup sour cream - ½ cup chopped pecans - ½ cup caramel sauce - Sea salt, for garnish Using quality ingredients is key. The graham cracker crumbs form a tasty base. The butter adds richness and helps bind the crust. Granulated sugar sweetens it all perfectly. Cream cheese gives the bars a creamy texture. Powdered sugar mixes in smoothly and adds sweetness. The vanilla extract brings out the flavors. Eggs help set the cheesecake filling. Sour cream adds a nice tang and creaminess. Chopped pecans give a lovely crunch and nutty flavor. Finally, caramel sauce drizzled on top creates a sweet finish. A pinch of sea salt balances the sweetness. Enjoy these simple yet delicious treats! - Preheat your oven to 325°F (160°C). Prepare an 8x8-inch baking dish by greasing it or lining it with parchment paper. - In a medium bowl, mix the graham cracker crumbs, melted butter, and granulated sugar. Stir until all the crumbs are moistened. - Press this mixture evenly into the bottom of your prepared dish. Bake for 10 minutes, then let it cool slightly. - In a large bowl, beat the softened cream cheese with an electric mixer until it is creamy. - Slowly add the powdered sugar while mixing until smooth. Then, mix in the vanilla extract. - Add the eggs one at a time, mixing well after each one. Finally, stir in the sour cream until everything is combined. - Pour the cheesecake filling over the cooled crust. Use a spatula to smooth the top. - Drizzle the caramel sauce over the filling. Use a knife or skewer to create swirls but don’t overmix. - Bake in the oven for 30-35 minutes. The center should be set but still slightly jiggly. Once done, cool it at room temperature for about an hour. - Refrigerate for at least 4 hours or overnight before cutting into bars. Before serving, sprinkle a pinch of sea salt on top for a sweet and salty finish. To get the best texture, start with room temperature cream cheese. Cold cream cheese will not mix well. It can leave lumps in your filling. Softening it a bit makes for a smooth batter. Also, beat the eggs one at a time. This helps blend them evenly into the mix. If you add them all at once, you might get uneven texture. To make these bars even more delicious, think about extra toppings. You can add chocolate chips or a sprinkle of cinnamon. Both options boost flavor nicely. Pair your bars with whipped cream or fresh fruit for a tasty combo. Berries add a refreshing touch. This balance of sweet and tart will wow your guests. Check your oven temperature for accuracy. An oven thermometer can help with this. If the heat is too high, the bars may bake too fast. Keep an eye on them. To check for doneness, look for a slight jiggle in the center. This means they are done, but do not overbake them. They should be set but still soft. {{image_2}} You can change the nuts in this recipe. Walnuts work great if you want a milder taste. Almonds add a nice crunch and a hint of sweetness. Just chop them up like the pecans. This small change can give your bars a new twist. Want to mix it up? Add chocolate chips to your cheesecake filling. They melt nicely and give a rich flavor. You can also try a splash of espresso. It gives a deep taste that pairs well with caramel. Using flavored extracts like almond or hazelnut can add fun twists too. Just a teaspoon can make a big difference! If you need a gluten-free option, swap the graham cracker crumbs with gluten-free ones. Look for brands that fit your needs. For a vegan version, use dairy-free cream cheese and a flax egg instead of regular eggs. You can blend 1 tablespoon of ground flaxseed with 3 tablespoons of water to create a flax egg. These adjustments let everyone enjoy this treat! To keep your caramel pecan cheesecake bars fresh, store them in the refrigerator. After cutting the bars, place them in an airtight container. This will help keep them moist and tasty. If you don’t have a container, you can cover the bars tightly with plastic wrap. This protects them from absorbing other smells in the fridge. You can freeze caramel pecan cheesecake bars for later. First, cut the bars into squares. Then, wrap each square in plastic wrap. Place the wrapped bars in a freezer-safe bag or container. This keeps them safe from freezer burn. To enjoy them later, simply take out a bar and let it thaw in the fridge overnight. For best results, eat the bars within three months. Caramel pecan cheesecake bars last about 5 days in the fridge. Store them in an airtight container. You can enjoy them cold or at room temperature. The flavors may even get better after a day or two! Yes, you can make these bars a day or two ahead of time. After baking, let them cool completely. Then, refrigerate them until you're ready to serve. This makes them perfect for parties or gatherings! Several issues can cause cheesecake not to set. Here are some common problems and tips to fix them: - Underbaking: If you take them out too soon, the center may be too jiggly. Bake until the edges are set but the center has a slight jiggle. - Too much liquid: If you add too much sour cream or eggs, it may not firm up. Stick to the recipe amounts. - Cold ingredients: Using cold cream cheese or eggs can affect the mix. Make sure they are at room temperature for a smooth filling. If you follow these tips, your cheesecake will be a hit! This blog post walked you through making delicious caramel pecan cheesecake bars. We covered the ingredients, step-by-step instructions, and helpful tips. You learned how to achieve the perfect texture and enhance flavors. Plus, we offered variations and storage tips to keep your bars fresh. You can now enjoy this rich dessert and share it with friends. Don’t hesitate to try out different nut options or flavor twists. Happy baking!

Caramel Pecan Cheesecake Bars Simple and Sweet Treat

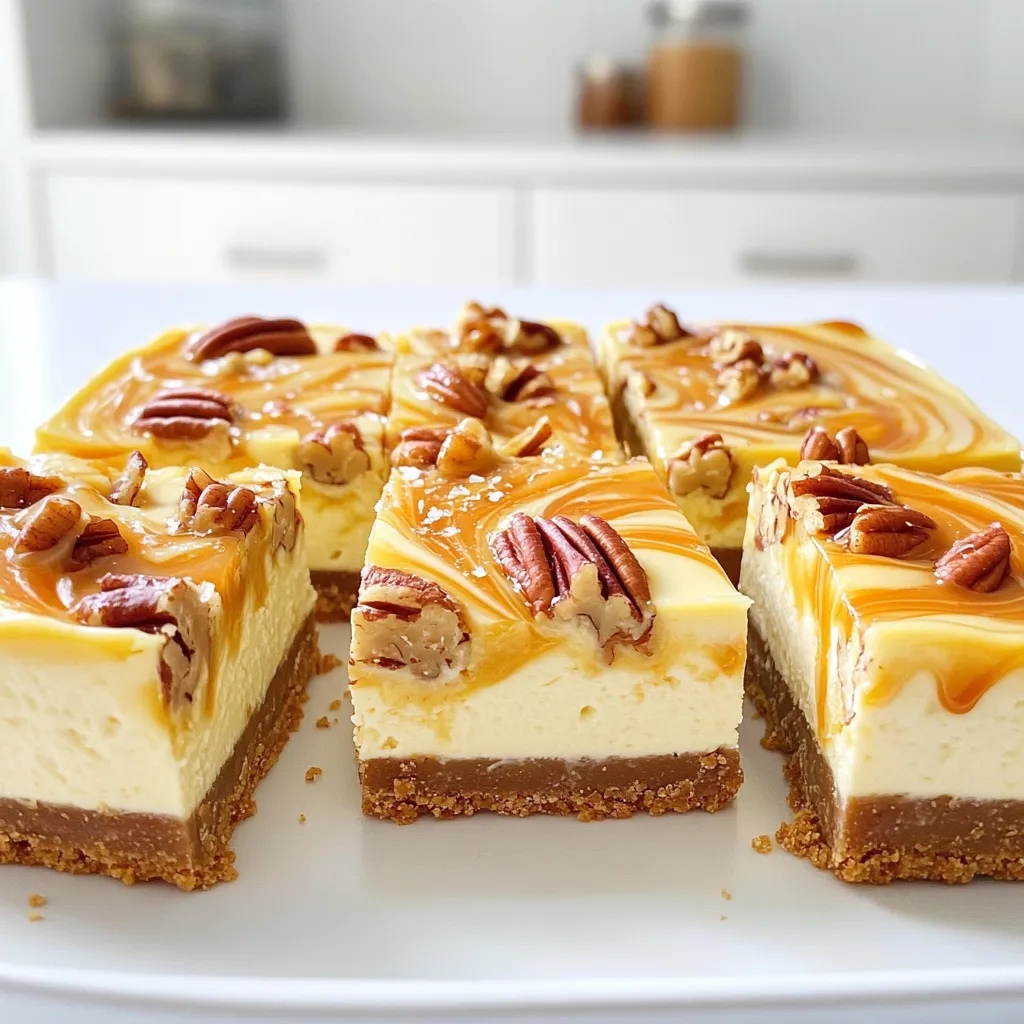
Looking for a sweet treat that’s easy to make? Caramel Pecan Cheesecake Bars might be just what you need! With

- 1 cup unsalted butter - 1 cup packed light brown sugar - 1/2 cup granulated sugar - 2 large eggs - 2 teaspoons vanilla extract - 2 cups all-purpose flour - 1 teaspoon baking powder - 1/2 teaspoon baking soda - 1/4 teaspoon salt - 2 tablespoons ground cinnamon - 1/4 cup granulated sugar (for coating) The measurements are key to making the blondies right. If you need to make swaps, here are some ideas: - Unsalted butter can be replaced with salted butter. Just skip adding extra salt. - For eggs, you can use flax eggs if you want a vegan option. Mix 1 tablespoon of ground flaxseed with 2.5 tablespoons of water for each egg. - All-purpose flour can be swapped with a gluten-free blend for a gluten-free treat. - Light brown sugar gives a nice flavor, but you can use dark brown sugar for a deeper taste. Using fresh ingredients makes a big difference. Here are a few tips: - Always use fresh eggs. Crack them open to check for any off smells. - Check your baking powder and baking soda for freshness. They should bubble when mixed with water. - For butter, choose high-quality unsalted butter. It helps the flavor shine through. - Use fresh ground cinnamon for the best taste. Old spices can lose their punch. With the right ingredients, your Brown Butter Snickerdoodle Blondies will taste amazing! Enjoy the sweet and nutty flavors in each bite. First, you need to preheat your oven to 350°F (175°C). This ensures even baking. While it heats up, grab a 9x13 inch baking dish. You can grease it lightly or use parchment paper. Using parchment makes removing the blondies much easier. Next, it’s time for the star of our recipe: brown butter! In a medium saucepan, melt the unsalted butter over medium heat. Stir it often. Keep an eye on it for about 5-7 minutes. You want it to turn a nice golden color and smell nutty. This step adds deep flavor. Be careful not to burn it! Once done, set it aside to cool slightly. In a large mixing bowl, combine the brown butter with both sugars: light brown and granulated. Whisk them until smooth. Then, add the eggs, one at a time. Make sure to whisk well after each egg. Stir in the vanilla extract next. In another bowl, mix the all-purpose flour, baking powder, baking soda, salt, and one tablespoon of ground cinnamon. Gradually add this dry mix to the wet mix. Stir just until combined. Avoid overmixing to keep the blondies soft. Now, pour the batter into your prepared baking dish. Spread it evenly. In a small bowl, mix the remaining tablespoon of cinnamon with 1/4 cup of granulated sugar. Sprinkle this blend over the batter. Bake the blondies in the oven for 20-25 minutes. They are ready when a toothpick inserted in the center comes out clean. Once baked, let them cool in the pan for about 10 minutes. Then, transfer them to a wire rack to cool completely. After cooling, cut into squares and enjoy! To get great brown butter, use unsalted butter. Heat it in a medium saucepan over medium heat. Stir it often to avoid burning. Watch for the color change. After about 5 to 7 minutes, it should turn golden brown. You will smell a nutty aroma. Once ready, let it cool slightly before using. Many bakers make common mistakes. One mistake is overmixing the batter. Mix just until the dry and wet ingredients blend. This keeps your blondies soft. Another mistake is not measuring ingredients correctly. Use dry measuring cups for flour and sugar. Level off the tops for accuracy. Finally, make sure your oven is fully preheated. This helps your blondies bake evenly. To test if your blondies are done, insert a toothpick into the center. If it comes out clean or with a few crumbs, they are ready. If the toothpick has wet batter, bake them a bit longer. Keep an eye on the color; they should be golden brown but not too dark. Let them cool for about 10 minutes before moving them. This helps them set properly. {{image_2}} You can play with flavors in your Brown Butter Snickerdoodle Blondies. Here are some ideas: - Chocolate Chips: Add 1 cup of semi-sweet or dark chocolate chips. They melt into gooey pockets of flavor. - Butterscotch Chips: Mix in 1 cup of butterscotch chips for a sweet twist. - Nutmeg: Swap out some cinnamon for nutmeg. This gives your blondies a warm, cozy taste. - Maple Syrup: Replace half of the granulated sugar with maple syrup. This adds a lovely, rich flavor. If you want to make these blondies gluten-free, it’s easy! Here’s how: - Gluten-Free Flour: Use a 1:1 gluten-free flour blend. Make sure it has xanthan gum. This will help with texture. - Baking Powder: Check that your baking powder is gluten-free. Many brands are, but it's good to confirm. - Oats: You can add oats if you like. Just ensure they are gluten-free oats. Adding extra ingredients can make your blondies even better! Here are some fun ideas: - Nuts: Chopped pecans or walnuts add a nice crunch. Use about 1 cup. - Dried Fruit: Try adding dried cranberries or cherries. They bring a chewy texture. - Coconut Flakes: Unsweetened coconut flakes can add a tropical flavor. About 1 cup works well. - Sea Salt: A sprinkle of sea salt on top enhances sweetness and adds depth. Just a pinch will do! These variations can make your Brown Butter Snickerdoodle Blondies unique and fun! To keep your Brown Butter Snickerdoodle Blondies fresh, use an airtight container. Place a layer of parchment paper between layers of blondies. This keeps them from sticking together. Store them at room temperature for up to three days. If you want to keep them longer, move them to the fridge. They can last for up to a week when chilled. Freezing blondies is easy and great for later enjoyment. First, let your blondies cool completely. Then, cut them into squares. Wrap each square in plastic wrap. Place the wrapped squares in a freezer-safe bag or container. They can stay in the freezer for up to three months. When you want one, you can pull it out and thaw it. To enjoy your blondies warm, preheat your oven to 350°F (175°C). Place the blondies on a baking sheet. Heat them for about 5 to 10 minutes. You can also use the microwave. Heat each blondie for about 10 to 15 seconds. This will bring back their soft, gooey texture. Enjoy them warm, either plain or with a scoop of ice cream! Brown butter has a rich, nutty flavor. You make it by cooking butter until it turns golden brown. The heat changes the milk solids, which creates a deep flavor. This extra taste makes the blondies special. The aroma alone can make your kitchen feel warm and inviting. Yes, you can make these blondies in advance. They keep well for a few days. Just store them in an airtight container. This helps keep them fresh and chewy. You can also freeze them. Wrap each piece tightly and place them in a freezer bag. They can last for up to three months in the freezer. To check if the blondies are done, use a toothpick. Insert it into the center of the pan. If it comes out clean, they are ready. The edges will look golden, and the center should not jiggle. Keep an eye on them while they bake. Overbaking can make them dry. No, these blondies are not gluten-free. They use all-purpose flour, which has gluten. If you want a gluten-free option, substitute the flour with a gluten-free blend. Make sure the blend contains xanthan gum for the right texture. This way, you can enjoy the same delicious flavors without gluten. You learned how to make amazing brown butter blondies. We covered key ingredients, measurements, and essential tips. The step-by-step guide will help you bake with ease. Plus, you now have tips to avoid common mistakes. Don't forget the fun variations and good storage practices to keep them fresh. Baking is about trying new things and enjoying the process. So, roll up your sleeves, start baking, and enjoy your delicious creation!

Brown Butter Snickerdoodle Blondies Deliciously Sweet

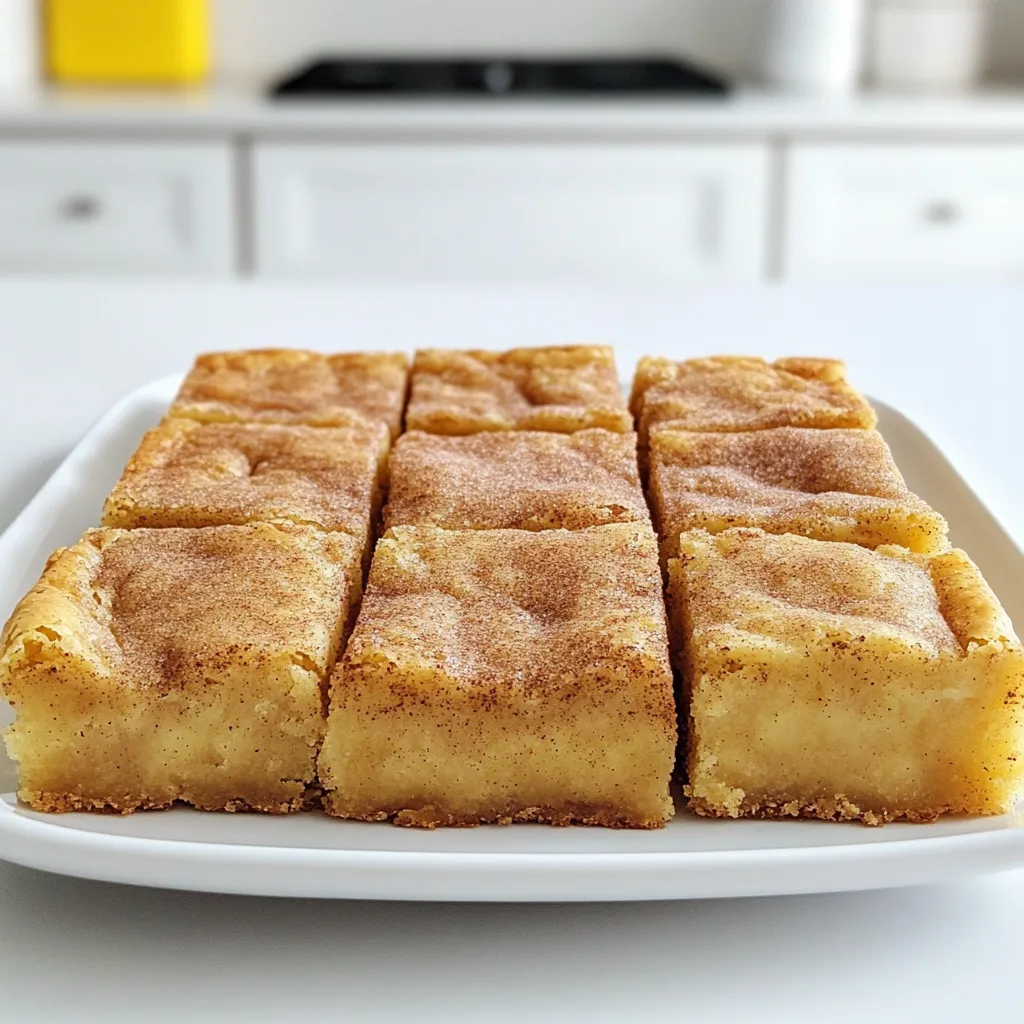
Are you ready to delight your taste buds? Brown Butter Snickerdoodle Blondies are a sweet twist on a classic treat.

Older posts
Newer posts
← Previous Page1 … Page4 Page5 Page6 … Page84 Next →

dsad

© 2026 juliesdish • Built with GeneratePress

Our Policies

  • Copyright Policy
  • Cookie Policy
  • GDPR Policy
  • Privacy Policy
  • Disclaimer
  • Terms Of Use

More Information

  • Home
  • About
  • Contact
  • Appetizers
  • Dessert
  • Dinner
  • Drinks
©2026, juliesdish About Back To Top