Skip to content
DisclaimerTerms Of UseGDPR PolicyCookie Policy

juliesdish

  • Home
  • Drinks
  • Appetizers
  • Dinner
  • Dessert
  • About
  • Contact
  • Privacy Policy
DisclaimerTerms Of UseGDPR PolicyCookie Policy

NO-ING-IMG

- Puff pastry details and preparation You need one package of frozen puff pastry, about 1 pound. Make sure it is thawed before use. This pastry gives a light and flaky texture. Roll it out to about 1/8 inch thick on a floured surface. - Fresh spinach and recommendations Use 2 cups of fresh spinach, chopped finely. Fresh spinach offers a bright flavor and vibrant color. If you can’t find fresh, you can use frozen spinach. Just thaw and drain it well. - Feta cheese and alternatives You will need 1 cup of crumbled feta cheese. Feta adds a salty and creamy taste. If you want a milder flavor, try goat cheese or ricotta. These can work well in this recipe. - Cream cheese and adjustments Add 1/2 cup of softened cream cheese to the mixture. Cream cheese helps bind the filling and adds richness. For a lighter option, use Greek yogurt or cottage cheese instead. 1. Start by preheating your oven to 400°F (200°C). This ensures even baking and a golden crust. 2. Line a baking sheet with parchment paper. This helps the bites not stick and makes cleanup easy. 1. In a skillet, heat 1 tablespoon of olive oil over medium heat. 2. Add 1/4 cup of diced onion. Sauté until it turns translucent, about 3-4 minutes. 3. Next, add 1 clove of minced garlic. Stir it for about 30 seconds until fragrant. 4. Toss in 2 cups of chopped fresh spinach. Cook until it wilts, around 2-3 minutes. 5. Remove the skillet from heat and let it cool slightly. 1. On a lightly floured surface, roll out the thawed puff pastry sheets. Aim for 1/8 inch thickness. 2. Cut the pastry into 3-inch squares. You should get about 12 squares. 3. Place a teaspoon of the spinach mixture in the center of each square. 4. Fold the corners of each square toward the center. Pinch them to seal tightly, forming little pockets. 5. Arrange the bites on the prepared baking sheet. 6. Brush the tops with 1 beaten egg for a golden finish. Optional: sprinkle sesame seeds on top for extra crunch. 7. Bake in the preheated oven for 15-20 minutes. They should be puffed and golden brown. To get that golden finish, start with a hot oven. Preheat your oven to 400°F (200°C) before baking. The heat helps the pastry puff up and brown nicely. Brush the tops with beaten egg for a shiny, golden look. Keep an eye on them; bake for about 15 to 20 minutes. You want them puffed and golden brown, not burnt! Spices can take your filling to the next level. Try adding a pinch of nutmeg or some red pepper flakes for warmth. Fresh herbs like dill or parsley can also brighten the flavor. For a creamier filling, mix in a bit more cream cheese. This makes each bite smooth and rich. Presentation is key! Serve these bites warm on a nice platter. Garnish with fresh parsley for color. You can also add a small bowl of tzatziki or a yogurt dip on the side. This adds a cool contrast to the warm bites. Your guests will love it and be impressed! {{image_2}} If you want to try different flavors, you can swap out the cheese. Instead of feta, use goat cheese or ricotta for a creamier bite. Both options add a nice twist. You can also mix in some shredded mozzarella for a milder taste. For vegetables, you can change things up too. Add in cooked mushrooms or artichokes for extra depth. You can also mix in roasted red peppers for a sweet touch. Just make sure to chop them small so they fit well in the pastry. If you need to make these bites gluten-free, use gluten-free puff pastry. Many brands offer good options that taste great. Just check the package for cooking instructions, as they may vary. For a vegetarian option, you are already set since the recipe is meat-free. If you want it dairy-free, use plant-based cream cheese and dairy-free feta. These swaps keep the flavor while meeting your needs. To store your Spinach Feta Puff Pastry Bites, let them cool first. Cooling helps keep them fresh. Once cooled, place them in an airtight container. This prevents moisture from getting in. You can keep them in the fridge for up to three days. If you want to store them longer, consider freezing. Just make sure they are well wrapped to avoid freezer burn. When you're ready to enjoy your bites again, you have two good options: the oven or the microwave. For the best taste, I recommend using the oven. Preheat it to 350°F (175°C). Place the bites on a baking sheet and heat for about 10-15 minutes. This keeps the puff pastry nice and crispy. If you choose the microwave, place a damp paper towel over the bites. This helps keep them from drying out. Heat them for about 30 seconds to 1 minute. Remember, they won’t be as crispy, but still tasty! Yes, you can use fresh spinach. Just wash it well and chop it. You will need about 2 cups of fresh spinach. Sauté it until wilted. This will give a brighter taste. You can prepare these bites a day in advance. Just follow the steps up to sealing the bites. Store them in the fridge. Bake them right before serving for best results. Yes, you can freeze the assembled bites. Place them on a baking sheet in a single layer. Once frozen, transfer them to a freezer bag. Bake from frozen, adding a few extra minutes to the cooking time. These bites pair well with a nice dip. Try tzatziki, hummus, or even marinara sauce. You can also serve them with a fresh salad for a light meal. In this post, we explored how to make delicious Spinach Feta Puff Pastry Bites. We covered ingredient details, from puff pastry to flavor ideas. The step-by-step guide ensures you get the cooking right. We also shared helpful tips for perfecting your pastry and storing leftovers. Remember, cooking is about creativity and joy. Use this recipe as a base and make it your own. Enjoy every bite!

Savory Spinach Feta Puff Pastry Bites Recipe

Love savory snacks? You’re in for a treat with these Spinach Feta Puff Pastry Bites! They’re easy to make and

- 2 cups rolled oats - 1 cup chopped nuts (almonds, pecans, or walnuts) - 1/2 cup sunflower seeds - 1/2 cup unsweetened shredded coconut - 1/2 cup maple syrup - 1/4 cup melted coconut oil - 1 teaspoon vanilla extract - 1 teaspoon ground cinnamon - 1/2 teaspoon sea salt - 1/2 cup dried cranberries or raisins The main ingredients form the heart of your granola clusters. Rolled oats give it that classic chewy texture. You can choose your favorite nuts for taste and crunch. I love using almonds, but pecans or walnuts work well too. Sunflower seeds add extra nutrition and a nice bite. The additional ingredients make your granola sweet and flavorful. Unsweetened shredded coconut brings a bit of tropical flair. Maple syrup is my go-to sweetener for a rich taste, while melted coconut oil helps bind it all together. Vanilla extract and cinnamon add warmth and depth, making each bite feel like a cozy hug. If you want to add a fruity touch, consider the optional ingredients. Dried cranberries or raisins can bring natural sweetness and color. They can also make your granola even more enjoyable. You can mix and match these ingredients to fit your taste! Start by preheating your oven to 350°F (175°C). This temperature helps the granola cook evenly. While the oven warms up, grab a baking sheet and line it with parchment paper. This step makes cleanup easy and helps prevent sticking. In a large mixing bowl, combine these base ingredients: - 2 cups rolled oats - 1 cup chopped nuts (like almonds, pecans, or walnuts) - 1/2 cup sunflower seeds - 1/2 cup shredded coconut (unsweetened) Then, add the spices and salt: - 1 teaspoon ground cinnamon - 1/2 teaspoon sea salt Stir the mixture well to ensure all the dry ingredients are blended together. In a separate bowl, whisk together the wet ingredients. You’ll need: - 1/4 cup melted coconut oil - 1/2 cup maple syrup - 1 teaspoon vanilla extract Mix until it’s smooth and combined. Pour this wet mixture over the dry ingredients in your large bowl. Stir everything together until all dry ingredients are well-coated. This step is key for flavor. Now, transfer the mixture onto your prepared baking sheet. Spread it out evenly and press down firmly to form clusters. Bake it in the preheated oven for 20-25 minutes. Stir the granola halfway through. Look for a golden brown color; this means it's almost done. Keep an eye on it to avoid burning. After baking, remove the pan from the oven and let the granola cool completely. Cooling is crucial because it helps form crunchy clusters. Once cool, break it into clusters of your desired size. If you want, mix in some dried cranberries or raisins for extra flavor and texture. Enjoy your tasty snack! To make perfect granola clusters, you need to press down the mixture firmly before baking. This helps the granola stick together. Use a spatula or your hands to pack it tightly on the baking sheet. For even baking, spread the mixture in a thin layer. This way, each piece gets the right amount of heat. Stir halfway through the baking time to ensure all parts get golden brown. You can change the flavor of your granola easily. For spice variations, try adding nutmeg or ginger. These spices give a warm kick. If you want it sweeter, add a little more maple syrup. Just remember, too much sweetness can make it sticky. Granola clusters pair well with yogurt or fresh fruits. Serve it in a mason jar for a fun look. You can layer yogurt, granola, and fruits for a tasty treat. Or, sprinkle it on top of smoothie bowls for extra crunch. Get creative with your presentations to make your snack fun! {{image_2}} If you want to make nut-free granola, you have great options. You can use seeds instead of nuts. Sunflower seeds are a fantastic choice. They add crunch and nutrients. Pump up the texture with pumpkin seeds too. You can also add crispy rice for more crunch. If you prefer, you can swap maple syrup for honey or agave syrup. Just keep in mind that honey is sweeter. You might want to reduce the amount a bit. Agave syrup has a milder taste and works well too. Test different sweeteners to find your favorite level of sweetness. For a fun twist, add chocolate chips to your granola. They melt slightly and make it extra enjoyable. You can also play with spices. Try adding nutmeg or ginger for a different flavor. In the fall, pumpkin spice is a hit. It gives a warm, cozy taste to the granola. To keep your granola fresh, use airtight containers. Glass jars or plastic bins work well. These containers block air and moisture. This helps maintain crunchiness. Always store your granola in a cool, dry place. Granola lasts about two weeks in the pantry. If you notice it smells off or tastes stale, it’s best to toss it. Check for any signs of mold or odd colors as well. Yes, you can freeze granola! It stays fresh for up to three months in the freezer. To defrost, move it to the fridge overnight. This keeps the texture nice and crunchy. You can also leave it out at room temperature for a few hours before enjoying. Using quick oats can change your granola's texture. Quick oats are thinner and cook faster. They absorb moisture differently than rolled oats. This can lead to a softer granola instead of the crunchy clusters you want. Rolled oats give a nice chew and hold the clusters better. If you only have quick oats, use them. Just know the final result will be different. To help your granola clusters stick, press the mixture firmly on the baking sheet. This creates a stronger bond as it bakes. Use a spatula to flatten it evenly. Don't stir it too much while baking. Let it bake undisturbed until golden brown. Once it cools, it will harden and form nice clusters. This granola packs a punch of nutrients. Rolled oats are great for fiber and help with digestion. Nuts add healthy fats and protein, which keep you full. Sunflower seeds are rich in vitamins and minerals like vitamin E. Maple syrup gives natural sweetness without refined sugars. Each ingredient adds its own health benefits, making this snack both tasty and good for you. Yes, you can add protein powder! It boosts the protein content, making your snack more filling. However, be careful with the amount. Too much protein powder can affect the texture. It may make your granola dry or crumbly. Start with a small scoop and mix it well with the dry ingredients. Adjust the wet ingredients if needed for balance. You now know how to make tasty granola. We discussed the main ingredients like rolled oats, nuts, and seeds. I shared steps for mixing and baking. You also learned tips for perfect clusters and flavor twists. Remember to store your granola well to keep it fresh. Enjoy serving it with yogurt or fruit. Feel free to experiment with different flavors or add-ins. Making granola is an easy fun way to enjoy a healthy snack. Now, go try making your own!

Maple Cinnamon Granola Clusters Tasty and Crunchy Snack

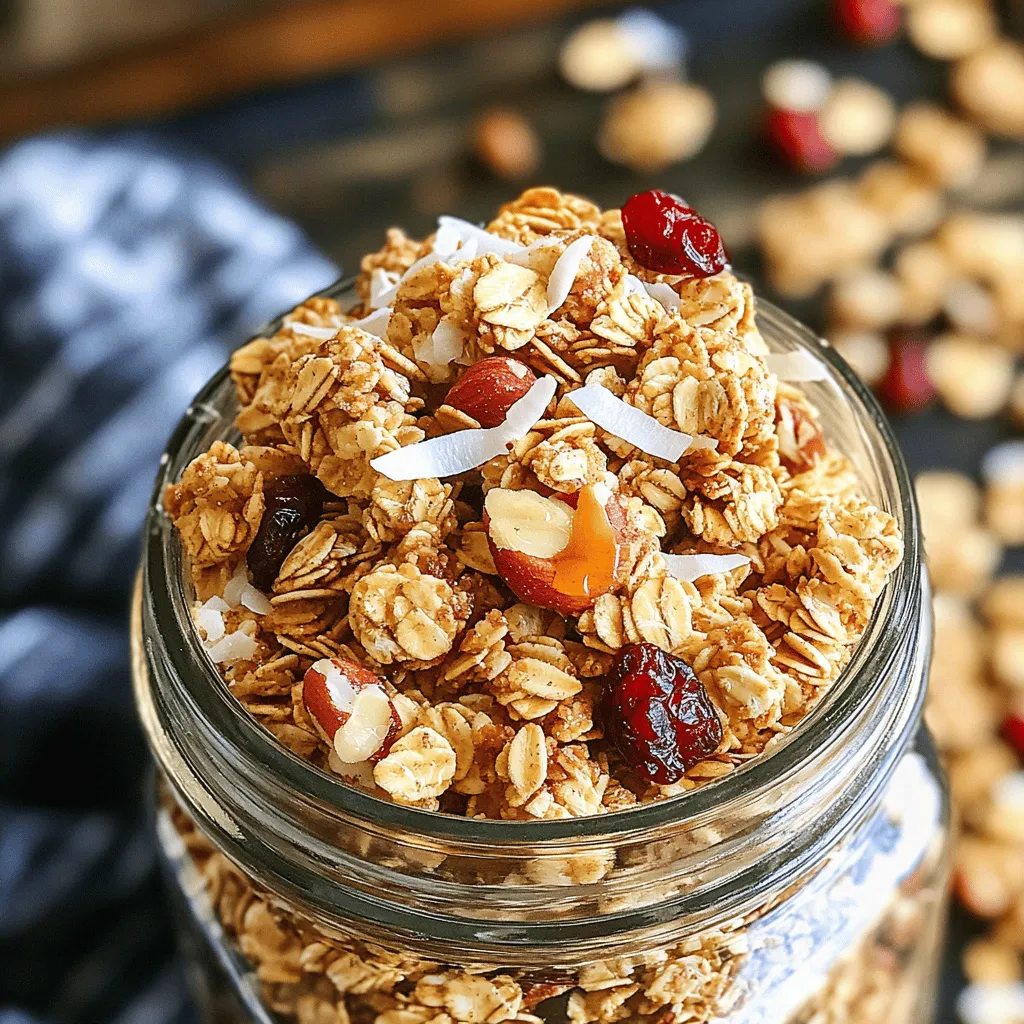
Looking for a tasty, crunchy snack that’s both simple to make and packed with flavor? You’re in the right place!

To make this tasty soup, gather the following ingredients: - 4 large red bell peppers, roasted and peeled - 1 medium onion, diced - 3 cloves garlic, minced - 1 medium potato, peeled and cubed - 4 cups vegetable broth - 1 cup coconut milk (or heavy cream) - 1 teaspoon smoked paprika - 1 teaspoon dried basil - Salt and pepper to taste - 2 tablespoons olive oil - Fresh basil leaves for garnish You can enhance the flavor with these optional ingredients: - A pinch of red pepper flakes for heat - A squeeze of fresh lemon juice for brightness - Some croutons for a crunchy texture - A dollop of yogurt for creaminess To make this soup, you will need: - A large pot for cooking - A sharp knife for chopping - A cutting board for prep - An immersion blender or regular blender for pureeing - Measuring cups and spoons for accuracy To roast the red peppers, you can use an open flame or an oven. If using an oven, place the peppers on a baking sheet. Roast them until they turn dark and charred. This may take about 20-30 minutes at 450°F. Once charred, place them in a bowl and cover with plastic wrap. Let them steam for around 10 minutes. This helps loosen the skins. When cooled, peel off the skins and remove the seeds. Now, you have sweet and smoky peppers for your soup. In a large pot, heat 2 tablespoons of olive oil over medium heat. Add 1 medium diced onion. Cook for about 5 minutes until it turns soft and translucent. Next, add 3 minced garlic cloves. Cook for another 1-2 minutes. The smell will be amazing! This step builds a great base for your soup. Add 1 medium cubed potato to the pot. Stir it for 3 minutes. Then, toss in the roasted red peppers you prepared earlier. Pour in 4 cups of vegetable broth. This will give your soup depth and flavor. Stir well to combine all the ingredients. Bring your mixture to a boil. Once boiling, reduce the heat to a simmer. Add 1 teaspoon of smoked paprika, 1 teaspoon of dried basil, and salt and pepper to taste. Cover the pot and let it simmer for 20 minutes. This allows the potatoes to become tender and the flavors to meld together nicely. After simmering, check if the potatoes are soft. If they are, use an immersion blender to puree the soup until smooth. If you don’t have an immersion blender, carefully transfer the soup in batches to a regular blender. Blend until smooth, then return the soup to the pot. Stir in 1 cup of coconut milk or heavy cream. This adds a rich creaminess to your soup. Let it warm through for another 5 minutes. Taste the soup and adjust the seasoning if needed. Now, your soup is ready to serve! Ladle it into bowls and garnish with fresh basil leaves for a lovely finish. Roasting peppers is key to great flavor. Use fresh, ripe red bell peppers for the best taste. You can roast them over an open flame or in the oven. If using the oven, set it to broil. Place the peppers on a baking sheet and turn them every few minutes. You want them to char on all sides. Once charred, put them in a bowl and cover with plastic wrap. This makes peeling easier. Let them sit for about 10 minutes, then peel off the skins and remove the seeds. Taste is vital in cooking. The balance of flavors makes your soup shine. Start with a pinch of salt and pepper. After blending, taste the soup again. If it seems bland, add more salt or a squeeze of lemon juice. For a kick, add a dash of hot sauce or red pepper flakes. Remember, you can always add more, but you can’t take it out! For a creamier texture, use coconut milk or heavy cream. Coconut milk adds a nice sweetness. Make sure to stir it in after blending the soup. If you want it super smooth, blend longer. If you prefer a chunkier soup, blend only half of it. You can also add cooked potatoes for extra creaminess. Presentation matters! Use shallow bowls for serving. Ladle the soup in the center, leaving some space around it. Top with fresh basil leaves for a pop of color. You can drizzle some olive oil on top for a nice finish. For extra flair, add a sprinkle of smoked paprika or some croutons. This makes your dish look and taste gourmet! {{image_2}} You can easily make this soup vegan. Simply replace the coconut milk with almond or cashew milk. Both options give a nice creamy texture. You can also skip the heavy cream for a lighter touch. The rest of the soup stays the same. This keeps it rich in flavor and full of nutrients. Spices change the soup's flavor a lot. For a kick, try adding cayenne pepper or red pepper flakes. You can also use Italian herbs like oregano or thyme for a different twist. If you want a smoky flavor, add more smoked paprika. It makes the soup even better! If you don't have coconut milk, use heavy cream or Greek yogurt. These options keep the soup creamy. You can also try silken tofu blended until smooth for a dairy-free choice. Each option brings a unique taste and texture to the soup. Adjust the seasoning to fit your choice, and enjoy! To keep your one-pot roasted red pepper soup fresh, let it cool first. Pour it into airtight containers. Make sure to leave some space at the top. This allows for expansion if you freeze it. Store it in the fridge for up to three days. Always check for signs of spoilage before reheating. You can freeze this soup for longer storage. Use freezer-safe containers or bags. Label them with the date and contents. The soup can last for about three months in the freezer. To prevent ice crystals, remove as much air as possible from bags. When you’re ready to enjoy it, thaw overnight in the fridge. Reheat the soup on the stove over low heat. Stir it occasionally to keep it from sticking. You can also use a microwave. Pour it into a microwave-safe bowl and cover it loosely. Heat in short intervals, stirring in between. Make sure it's hot throughout before serving. If needed, add a splash of coconut milk for extra creaminess. Yes, you can use store-bought roasted red peppers. They save time and are easy to find. Just rinse and chop them before adding to your pot. This keeps the flavor strong and rich. To add spice, try adding a pinch of cayenne pepper or red pepper flakes. You can also mix in diced jalapeños for a fresh kick. Adjust the heat to match your taste. Roasted red pepper soup pairs well with crusty bread or grilled cheese. You may also serve it with a fresh salad for a balanced meal. These sides complement the soup's rich flavor. This recipe is already gluten-free! The main ingredients, like peppers and broth, do not contain gluten. Just check your vegetable broth for any added gluten. Absolutely! You can use yellow or orange bell peppers for a different flavor. For a smoky taste, try using poblano peppers. Each type will give the soup a unique twist. This article covered how to make a tasty one-pot roasted red pepper soup. You learned the key ingredients, steps for prep, and cooking methods. I shared tips on seasoning and making it creamy. You also discovered some fun variations and storage methods. In the end, this soup is simple, versatile, and rewarding to make. Dive in and enjoy your flavorful, homemade creation!

One-Pot Roasted Red Pepper Soup Simple and Tasty Recipe

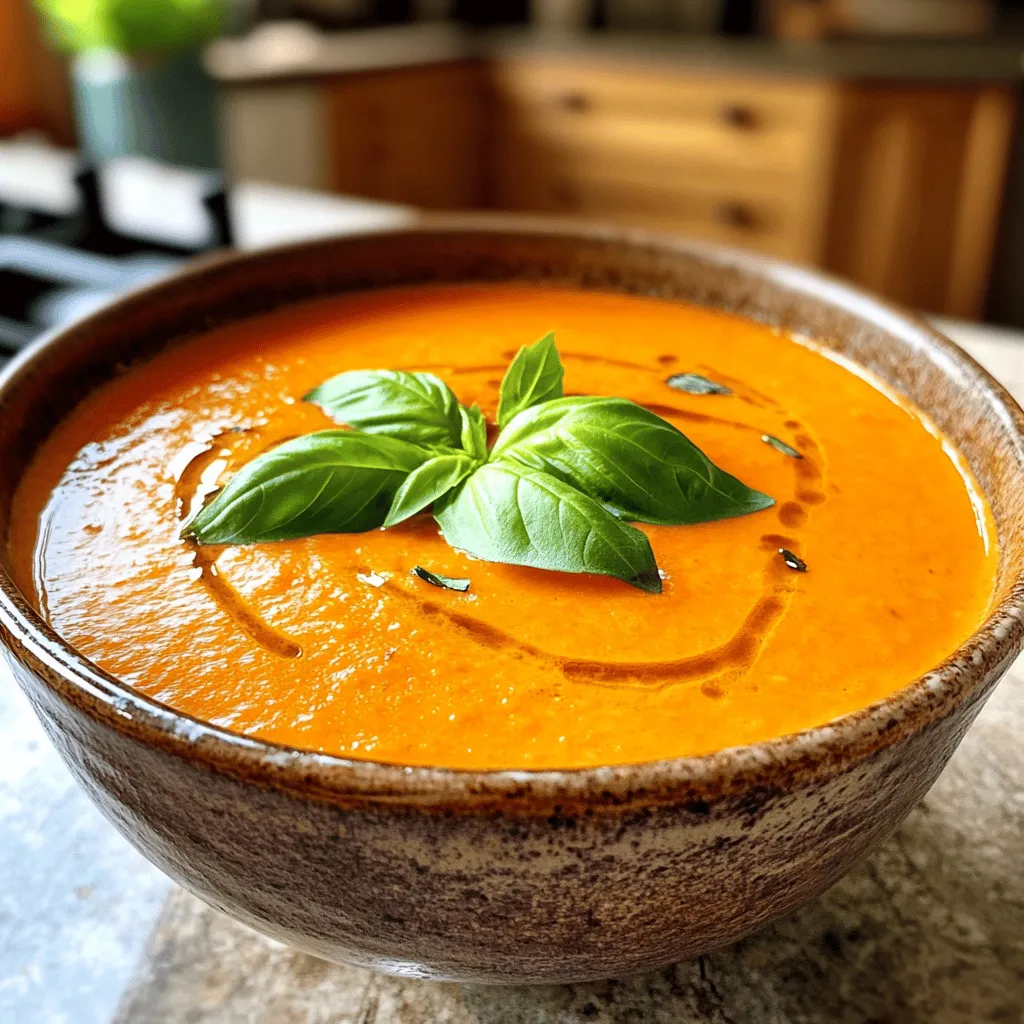
Welcome to my kitchen! Today, I’ll show you how to make a simple and tasty One-Pot Roasted Red Pepper Soup.

- 8 oz rice noodles - 3 tablespoons sesame oil - 2 tablespoons soy sauce (or tamari for gluten-free) - 2 tablespoons sriracha (adjust to taste) - 1 tablespoon rice vinegar - 2 teaspoons honey or maple syrup - 1 clove garlic, minced - 1 teaspoon fresh ginger, grated - 1 red bell pepper, julienned - 1 cup shredded carrots - 1 cup snap peas, trimmed - 4 green onions, chopped - 2 tablespoons sesame seeds - Fresh cilantro for garnish (optional) Sesame oil is key for that rich taste. It brings warmth and depth. Sriracha adds heat and a hint of sweetness. Rice vinegar offers a nice tang. Honey or maple syrup balances the flavors. Fresh ginger and garlic give a lively kick. Each ingredient works together to create a bold dish. If you can't find rice noodles, use spaghetti or another type. Soy sauce can be swapped with coconut aminos for a lighter taste. For a vegan option, replace honey with agave syrup. You can change the veggies too! Try broccoli, bell peppers, or even zucchini. These swaps keep the dish fresh and fun. First, bring a large pot of water to a boil. Add 8 ounces of rice noodles to the water. Cook them based on the package instructions until they are tender. After cooking, drain the noodles and rinse them with cold water. This stops the cooking and keeps them from getting mushy. Set the noodles aside for later. In a small bowl, mix together the sauce. You need 3 tablespoons of sesame oil, 2 tablespoons of soy sauce, and 2 tablespoons of sriracha. Add 1 tablespoon of rice vinegar, 2 teaspoons of honey or maple syrup, 1 minced clove of garlic, and 1 teaspoon of grated fresh ginger. Whisk everything together until well combined. If you like it spicier, add more sriracha. Heat a large skillet or wok over medium-high heat. Pour in a tablespoon of sesame oil. Add the julienned red bell pepper, 1 cup of shredded carrots, and 1 cup of trimmed snap peas. Stir-fry the vegetables for about 3 to 5 minutes. They should be tender but still crisp, keeping that nice crunch. Once the vegetables are ready, add the cooked rice noodles to the skillet. Pour the prepared sauce over the noodles and vegetables. Gently toss everything together for about 2 minutes. Make sure all the noodles are coated well with the sauce and heated through. Take the skillet off the heat. Stir in 4 chopped green onions and 2 tablespoons of sesame seeds. For a fresh touch, you can add some cilantro on top if you like. Serve your spicy sesame noodles warm and enjoy the tasty flavors! To get the best taste, mix your sauce well. The sauce has sesame oil, soy sauce, and sriracha. Each ingredient plays a role. The sesame oil adds richness, while soy sauce gives saltiness. Sriracha adds heat. Adjust the sriracha for your spice level. If you want more heat, add more sriracha. For less heat, dial it back. Texture makes a big difference in this dish. Cook the rice noodles until tender but not mushy. Rinse them with cold water to stop the cooking. This keeps them firm. When stir-frying, use high heat. This way, the vegetables cook quickly while staying crisp. Stir-fry just until they are tender. You can easily change this dish for special diets. For a gluten-free option, use tamari instead of soy sauce. If you're vegan, swap honey for maple syrup. You can also add or change veggies based on what you have. Try using broccoli, bell peppers, or zucchini. This makes it fun and different each time. {{image_2}} To make this dish vegetarian or vegan, swap out the honey for maple syrup. This keeps the sweetness without using animal products. You can also add extra veggies like bell peppers, mushrooms, or broccoli. They add great flavor and texture. Use tamari instead of soy sauce for a gluten-free option. For added protein, consider chicken or tofu. If using chicken, sauté bite-sized pieces until golden. Add them to the noodles when mixing. For tofu, press it first to remove excess water. Then cube it and fry until crisp. Toss it in with the noodles and sauce. Both choices make this meal heartier and more filling. Adjust the spice level to fit your taste. Want it milder? Use less sriracha. Start with one tablespoon and taste as you go. For more heat, add more sriracha or even some chili flakes. This dish can be as spicy as you like! Enjoy finding the right balance for your palate. To keep your spicy sesame noodles fresh, let them cool first. Place them in an airtight container. You can store them in the fridge for up to three days. If you want to keep them longer, consider freezing them. When you're ready to eat your leftovers, there are easy ways to reheat them. You can use a microwave or a skillet. If using a microwave, heat in 30-second bursts, stirring in between. For a skillet, add a splash of water or oil and warm over medium heat. Stir until heated through. Freezing is a great way to save your spicy sesame noodles. Divide them into small portions. Use freezer-safe bags or containers. They can last up to three months in the freezer. When you want to eat them, thaw overnight in the fridge and reheat as mentioned. Enjoy your meal whenever you like! Yes, you can use other noodles. Try wheat noodles, udon, or soba. Each type brings a unique taste and texture. Just cook them according to the package. Remember to adjust the sauce if you change the noodle type. To lower the spice, reduce the sriracha. You can start with one teaspoon instead of two. Adding more honey or maple syrup also helps balance the heat. Another option is to serve it with a side of plain yogurt. Feel free to mix in your favorite veggies! Broccoli, bell peppers, and zucchini work well. You can also try adding bok choy or baby corn. Be creative! Just make sure to cut them small for even cooking. Yes, this recipe can be gluten-free! Use tamari instead of soy sauce. Rice noodles are naturally gluten-free, making this dish safe for those with gluten allergies. Always check labels to ensure you use gluten-free products. To sum up, we covered the key ingredients, cooking steps, and helpful tips for your dish. Authentic flavors come from using the right ingredients and techniques. You can also make variations to fit your tastes or needs. Remember, storing leftovers properly can save you time and waste. Enjoy experimenting with this recipe to make it your own. Cooking can be fun and rewarding, so dive in and savor your creation!

Spicy Sesame Noodles Takeout Fakeout Delight

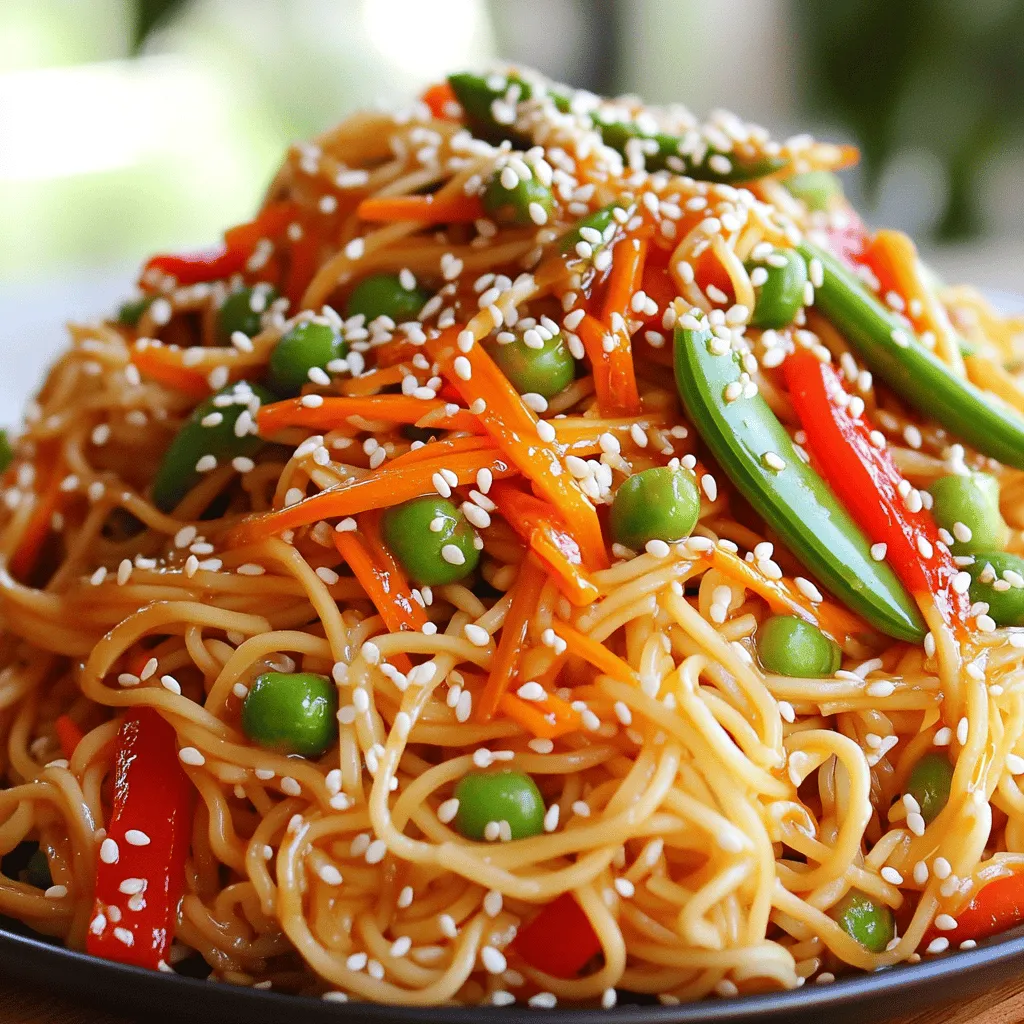
Craving takeout but want to stay in? You’re in luck! My Spicy Sesame Noodles Takeout Fakeout Delight gives you all

- 1 cup rolled oats - 1 cup natural peanut butter - 1/2 cup honey or maple syrup - 1/2 cup dark chocolate chips - 1/4 cup unsweetened cocoa powder - 1/4 teaspoon salt - 1/2 teaspoon vanilla extract - Optional: 1/4 cup chopped nuts or seeds To make No-Bake Chocolate Peanut Butter Oatmeal Bars, gather these key ingredients. Rolled oats form the base of the bars. They add texture and fiber. Natural peanut butter gives a rich, nutty flavor and protein. Honey or maple syrup offers sweetness and binds everything together. Next, dark chocolate chips bring a touch of decadence. They melt beautifully when drizzled on top. Unsweetened cocoa powder enhances the chocolate flavor without extra sugar. A pinch of salt balances the sweetness and brings out the flavors. Vanilla extract adds warmth and depth to the bars. You can also add chopped nuts or seeds. They give an extra crunch and boost the nutrition. Feel free to mix and match based on what you enjoy! - Mixing the dry ingredients: Take a large bowl. Add 1 cup rolled oats, 1/4 cup cocoa powder, and 1/4 teaspoon salt. Stir well until mixed. - Warming the peanut butter and sweetener: In a small pot, heat 1 cup peanut butter and 1/2 cup honey over low heat. Stir until smooth, then add 1/2 teaspoon vanilla extract. - Combining wet and dry mixtures: Pour the warm peanut butter mix into the dry bowl. Mix until everything is coated. If you want, add 1/4 cup chopped nuts or seeds. - Preparing the baking pan: Line an 8x8-inch pan with parchment paper. Leave some paper over the edges for easy removal. - Instructions for melting dark chocolate: In a microwave-safe bowl, add 1/2 cup dark chocolate chips. Heat in 20-second bursts, stirring in between. Stop when the chocolate is smooth and melted. - Timeframe for refrigeration: Place the pan in the fridge for 1 to 2 hours. This helps the bars to set properly. - Cutting and serving options: Once set, lift the bars out using the parchment. Cut them into squares or rectangles. Serve them on a wooden board for a nice touch. You can sprinkle a bit of cocoa powder or add extra nuts for flair. To get the best texture for your bars, follow these tips: - Mix dry ingredients well: Make sure the oats, cocoa powder, and salt are evenly combined. This helps every bite taste great. - Warm the peanut butter mixture: Heating the peanut butter and sweetener makes them easier to mix. Stir them until smooth. - Press firmly: When you place the mixture in the pan, press down hard. This helps the bars hold together better. You can switch out some ingredients to fit your taste: - Alternative sweeteners: Use agave syrup or brown rice syrup instead of honey or maple syrup. These add different flavors. - Flavor options: Try adding a teaspoon of cinnamon or a pinch of sea salt for extra taste. - Adjust the chocolate layer: If you want a thicker chocolate layer, add more chocolate chips. Melt them just like before and spread it on top. How you serve your bars can make a big difference: - Presentation tips: Place the bars on a wooden cutting board. Sprinkle with cocoa powder and chopped nuts for a nice look. - On-the-go snacks: These bars are great for packing in lunches. Cut them into small squares for easy snacking. - Serve with a dip: Pair them with a side of yogurt or melted chocolate for extra fun! {{image_2}} You can switch up the nut butter in this recipe. Try almond butter or cashew butter. This small change gives your bars a new taste. You can also add dried fruits like raisins or cranberries. Spices such as cinnamon or nutmeg can add warmth and depth. Mix and match to find your favorite flavor! To make your bars healthier, cut down on added sugar. Use less honey or maple syrup. You can also use organic ingredients. Look for gluten-free oats if you need a gluten-free option. These changes help keep flavors rich while being better for you. You can adapt this recipe for different seasons. In fall, add pumpkin spice for a cozy flavor. In summer, toss in some fresh berries or coconut flakes. You could even make festive bars for holidays by adding colored sprinkles or themed toppings. Each season brings a chance to create something new! To keep your no-bake chocolate peanut butter oatmeal bars fresh, wrap them well. Use plastic wrap or foil for each bar. This prevents them from drying out and keeps them tasty. You can also place the bars in an airtight container. This method makes it easy to grab a bar for a quick snack. In the refrigerator, these bars stay fresh for about one week. Make sure to check them for any signs of spoilage. If you want long-term storage, freeze the bars. They can last up to three months in the freezer. Just wrap them tightly in plastic wrap and place them in a freezer-safe bag. Thaw them in the fridge before enjoying. Can I use quick oats instead of rolled oats? Yes, you can use quick oats. They will change the texture a bit. Quick oats make the bars softer. Rolled oats give a chewier bite. How do I know when the bars are set? The bars need at least 1-2 hours in the fridge. They should feel firm to the touch. If they seem soft, give them more time. Can I make these bars nut-free? Yes, you can use sunbutter or soy nut butter. These options work well. Just make sure they are safe for your needs. What’s the best way to cut the bars? Lift the bars out using the parchment paper. Use a sharp knife to cut them. If they are cold, they will cut better. How do I store leftovers? Store leftovers in an airtight container. Keep them in the fridge. They will stay fresh for about a week. You can also freeze them for longer storage. You can create delicious no-bake bars with simple ingredients like oats, peanut butter, and chocolate. Follow the easy steps to mix, melt, and set your bars. Use the tips for perfect texture and make adjustments to suit your taste. Explore variations and be creative! Remember to store them correctly to keep them fresh. This recipe gives you a healthy treat that you can customize. Enjoy making and sharing your own creations with friends and family!

No-Bake Chocolate Peanut Butter Oatmeal Bars Delight

If you love tasty treats that require zero baking, you’re in for a real treat! These No-Bake Chocolate Peanut Butter

To make this warm caramel pecan sticky toffee pudding, you will need: - 1 cup pitted dates, chopped - 1 cup boiling water - 1 teaspoon vanilla extract - 1 teaspoon baking soda - 1/2 cup unsalted butter, softened - 3/4 cup brown sugar, packed - 2 large eggs - 1 cup all-purpose flour - 1 teaspoon baking powder - 1/4 teaspoon salt - 1/2 cup pecans, chopped - 1 cup caramel sauce (store-bought or homemade) If you need substitutes, here are some good options: - Pitted dates: Use dried figs or prunes for a similar texture and flavor. - Unsalted butter: You can use coconut oil or margarine if you want a dairy-free option. - Brown sugar: White sugar mixed with molasses can work in a pinch. - All-purpose flour: Use almond flour or oat flour for a gluten-free version. Choosing fresh ingredients is key for the best flavor. Here are my tips: - Dates: Look for soft, pliable dates. Avoid hard or dried-out ones. - Pecans: Check for a nutty smell and a crisp texture. Fresh pecans make a big difference. - Butter: Always choose unsalted butter for better control of salt in your dish. - Caramel sauce: If buying, check the ingredient list. A short list means better quality. By ensuring you have the right ingredients, your warm caramel pecan sticky toffee pudding will shine! Start by gathering your chopped dates and boiling water. In a bowl, combine one cup of chopped dates with one cup of boiling water. Add one teaspoon of vanilla extract and one teaspoon of baking soda. This mixture will soften the dates. Let it sit for about ten minutes. The dates will absorb the water and become soft and sweet. In a large mixing bowl, cream together half a cup of softened unsalted butter and three-quarters of a cup of packed brown sugar. Beat them until the mix is light and fluffy. Next, add two large eggs, one at a time. Make sure to mix well after adding each egg. Gradually fold in one cup of all-purpose flour, one teaspoon of baking powder, and a quarter teaspoon of salt. The batter should be smooth. Now, stir in the date mixture and the chopped pecans, which is half a cup. Mix until everything is well combined. Preheat your oven to 350°F (175°C). Grease an 8-inch square baking dish or a similar-sized oven-proof dish. Pour the batter into the prepared dish, spreading it evenly. Bake for 30 to 35 minutes. To check if it’s done, insert a toothpick into the center. If it comes out clean, the pudding is ready. While the pudding bakes, warm one cup of caramel sauce in a small saucepan over low heat. Once the pudding is done, cool it for ten minutes. Cut it into squares and serve warm, drizzling the caramel sauce over each piece. Enjoy the delight of this warm caramel pecan sticky toffee pudding! To make a great warm caramel pecan sticky toffee pudding, follow these tips: - Use fresh dates. They add rich flavor and moisture. - Let the date mixture sit. This helps soften the dates for a smoother texture. - Cream butter and sugar well. Aim for a light and fluffy mix for the best rise. - Fold gently. When adding flour, mix just until combined to keep it airy. - Check baking time. Use a toothpick to test doneness; it should come out clean. Serving matters just as much as taste. Here are some fun ideas: - Plate with ice cream. A scoop of vanilla ice cream pairs well with warm pudding. - Add whipped cream. It adds a light touch to the rich dessert. - Garnish with pecans. Sprinkle some extra chopped pecans on top for crunch. - Drizzle caramel sauce. Pour warm caramel sauce over each piece for extra sweetness. - Use pretty plates. Bright, colorful plates make your dessert stand out. Avoid these common pitfalls to ensure success: - Overmixing the batter. This can lead to dense pudding. Mix just enough. - Not checking the oven temperature. An oven that's too hot can burn the edges. - Skipping the cooling step. Letting it cool helps maintain the right texture. - Serving too cold. Warm pudding enhances flavors, so serve it hot. - Using low-quality caramel sauce. A good sauce makes a big difference in flavor. {{image_2}} You can change the flavor of your pudding for fun. To make a chocolate version, add 1/2 cup of cocoa powder when mixing the flour. This gives a rich, chocolatey taste. For a spiced pudding, add 1 teaspoon of cinnamon or nutmeg. This will warm up the flavor and make it cozy. Want a gluten-free pudding? You can swap the all-purpose flour for a gluten-free blend. Just use a cup for cup gluten-free flour mix. This will keep the texture light and fluffy. Make sure to check that your baking powder is gluten-free as well. If you’re not a fan of pecans, you have options! Try walnuts for a different crunch. Almonds also work well, adding a nice flavor. You could also skip nuts entirely for a smooth pudding. Just remember to reduce the amount of chopped ingredients for the best texture. To keep your Warm Caramel Pecan Sticky Toffee Pudding fresh, store it in an airtight container. Make sure it cools to room temperature before sealing it. Place it in the fridge. It will stay good for up to three days. If you want to save it for later, follow the freezing tips below. You can freeze this pudding for up to three months. First, let the pudding cool completely. Then, cut it into squares. Wrap each piece tightly in plastic wrap. Place the wrapped pieces in a freezer-safe bag. Remember to label the bag with the date. When you’re ready to enjoy it, you can thaw it overnight in the fridge. To reheat the pudding, use your microwave or oven. If using a microwave, place a piece on a plate and cover it with a damp paper towel. Heat it for about 20 to 30 seconds. For the oven, preheat it to 350°F (175°C). Place the pudding squares in an oven-safe dish. Heat for about 10 minutes. Drizzle some warm caramel sauce on top before serving. Enjoy the rich, gooey taste! Sticky toffee pudding is a warm, moist cake made with dates. It has a rich, sweet flavor. The pudding is often served with a smooth caramel sauce. The cake is usually soft and gooey, making it a favorite dessert. Yes, you can make sticky toffee pudding ahead of time. Bake it and let it cool. Store it in the fridge for up to three days. When ready to serve, warm it in the oven. Drizzle fresh caramel sauce on top for extra flavor. Making homemade caramel sauce is simple. You need sugar, butter, and cream. 1. Ingredients: - 1 cup sugar - 6 tablespoons butter - 1/2 cup heavy cream 2. Instructions: - In a saucepan, heat sugar over medium heat. Stir constantly until it melts and turns amber. - Add butter and mix until melted. - Slowly pour in cream while stirring. Be careful, as it may bubble. - Remove from heat and let it cool. This sauce is perfect for drizzling over your warm pudding. Enjoy the sweet, rich flavor! We covered all you need for a great sticky toffee pudding. You learned about choosing fresh ingredients, mixing the batter, and baking it to perfection. I shared tips for serving and avoiding common mistakes. You can explore fun flavor variations and gluten-free options too. Finally, we discussed how to store leftovers for later enjoyment. Enjoy making this dessert and impressing your friends and family!

Warm Caramel Pecan Sticky Toffee Pudding Delight

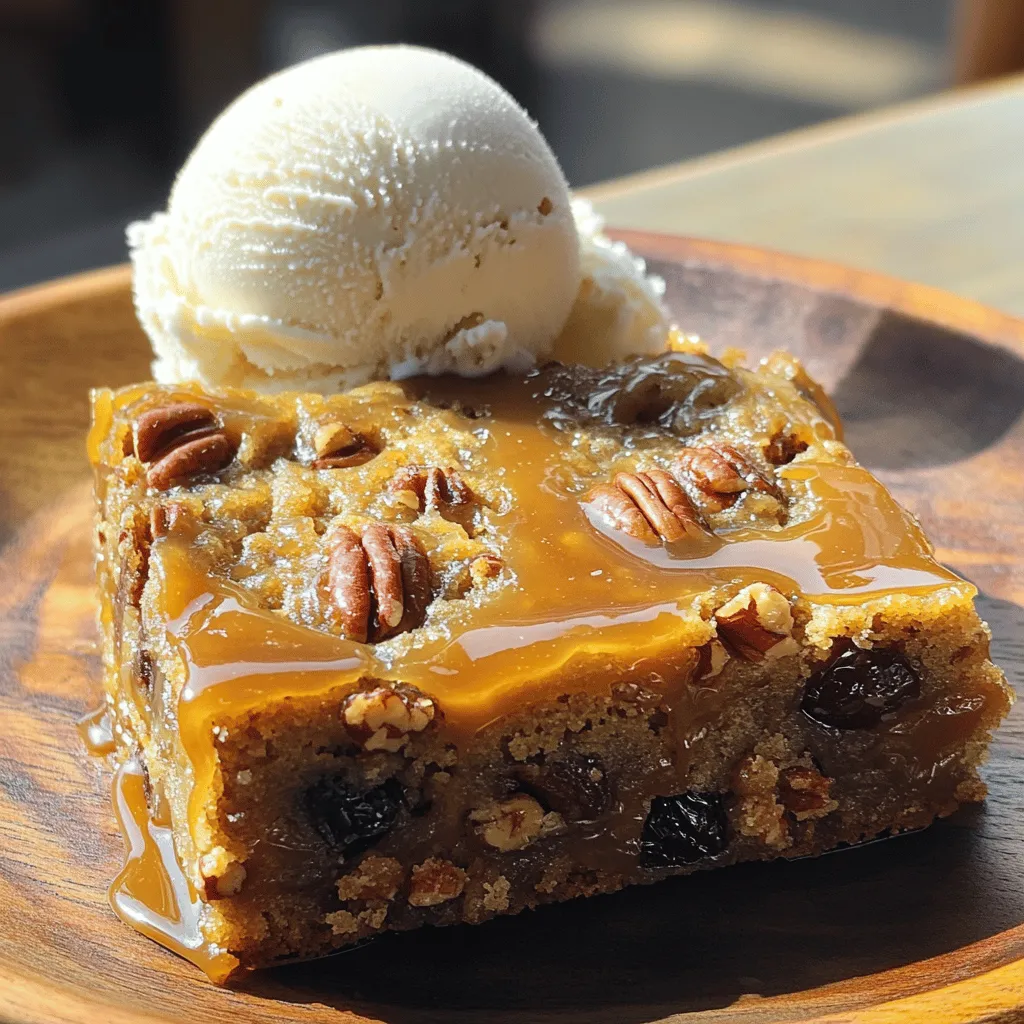
Are you ready to indulge in a warm, gooey dessert that will impress your taste buds? My Warm Caramel Pecan

- 1 cup cottage cheese (preferably low-fat) - 1/2 cup unsweetened cocoa powder - 1/4 cup honey or maple syrup Cottage cheese is the star here. It gives our dip a creamy base and packs in protein. I prefer using low-fat cottage cheese for a lighter taste. Next, we add unsweetened cocoa powder. This ingredient brings the rich chocolate flavor we all love. Lastly, we need sweeteners. Honey or maple syrup will make our dip taste sweet and delicious. - 1/4 cup peanut butter or almond butter - 1 teaspoon vanilla extract - 1/2 teaspoon almond extract (optional) - A pinch of salt - 1/4 cup dark chocolate chips (dairy-free if needed) For a twist, you can add peanut butter or almond butter. This adds a nutty flavor and extra creaminess. Vanilla extract enhances the sweetness and rounds out the flavors. Almond extract is optional, but it gives a lovely hint of flavor. A pinch of salt helps balance the sweetness. Dark chocolate chips add a delightful crunch to the dip. - Fresh fruits (like strawberries or bananas) - Graham crackers Now for the fun part: dipping! Fresh fruits like strawberries and bananas are perfect. They add a burst of freshness. Graham crackers are another great choice. Their crunch pairs well with the smooth dip. You can even mix and match for a fun snack. Enjoy! To start, you need to create a creamy base. Take 1 cup of low-fat cottage cheese and add it to a mixing bowl. Use a hand mixer or food processor to blend until smooth. This step is key for a rich dip. A smooth texture makes it easier to blend with other ingredients. Now, it's time to add flavor. Add 1/2 cup of unsweetened cocoa powder to the cottage cheese. Next, pour in 1/4 cup of honey or maple syrup for sweetness. Then, add 1/4 cup of peanut butter or almond butter for creaminess. Don’t forget 1 teaspoon of vanilla extract and a pinch of salt. If you want extra flavor, you can add 1/2 teaspoon of almond extract. Blend everything on medium speed until it’s all well mixed and smooth. Remember to stop to scrape down the sides of the bowl, so nothing gets left behind. Once your batter is smooth, it’s time to fold in the fun part—1/4 cup of dark chocolate chips. Use a spatula to mix them evenly into the batter. After mixing, taste the dip to see if it needs more sweetness. If it does, simply add a bit more honey or syrup. Transfer the dip to a serving bowl and chill it in the fridge for at least 30 minutes. This helps the flavors meld and the dip thicken. Serve it cold with fresh fruits and graham crackers for dipping. Enjoy your delicious creation! To get a smooth dip, blend the cottage cheese well. I recommend using a hand mixer or a food processor. Start on low speed to avoid splatter, then increase to medium. Scrape down the sides of the bowl often. This helps mix everything evenly. You want a creamy base that feels rich and thick. Taste your dip before serving. If you want it sweeter, add more honey or maple syrup. Start with a teaspoon at a time. Mix well after each addition. This way, you can control the flavor to match your preference. Everyone has different taste buds, so make it yours! Want to change it up? Add spices or different nut butters. A pinch of cinnamon gives a warm touch. For a nutty flavor, try using almond butter instead of peanut butter. You can even add a bit of vanilla extract for extra depth. Mix these in before chilling your dip to keep flavors bright. {{image_2}} Cottage cheese is a star ingredient in this dip. It is packed with protein. Just one cup gives you about 28 grams of protein. This helps build muscle and keep you full. Eating protein can also help with weight loss. When you enjoy this dip, you get great taste and healthy protein. Each serving of this dip has around 150 calories. This makes it a smart choice for a snack. The low calorie count helps you enjoy dessert without guilt. The ingredients balance out to keep the calories lower. You can enjoy this dip without worrying too much about calories. Every ingredient in this dip offers health perks. Cottage cheese provides calcium for strong bones. Cocoa powder is rich in antioxidants. Honey or maple syrup sweetens your dip with natural sugars. Peanut butter adds healthy fats and more protein. Dark chocolate chips give a tasty touch with added benefits. Fresh fruits and graham crackers enhance nutrition and flavor. Together, these ingredients make a wholesome treat that is both good and good for you! To make a vegan version of the High-Protein Cottage Cheese Brownie Batter Dip, I suggest a few simple swaps. Use silken tofu instead of cottage cheese. It gives a smooth texture and packs protein. For sweeteners, opt for maple syrup or agave instead of honey. Choose almond or sunflower seed butter in place of peanut butter. Lastly, ensure your dark chocolate chips are dairy-free to keep it vegan-friendly. Want to mix things up? You can add fun flavors to your dip. For a cool twist, try adding a few drops of peppermint extract. This gives a refreshing taste. If you love coffee, mixing in a teaspoon of instant espresso powder works wonders. It enhances the chocolate flavor without making it bitter. Just remember to blend well so that the flavors combine! How you serve the dip can change the vibe of your gathering. For a cozy feel, use a rustic ceramic bowl. Top it with a sprinkle of chocolate chips and fruit pieces. If you want individual servings, scoop the dip into small cups. This makes it easy for guests to grab and enjoy. Arrange fresh fruits and graham crackers around the dip for a fun and inviting presentation. Yes, you can use non-fat cottage cheese. However, it may change the texture and flavor. Non-fat cottage cheese can make the dip a bit less creamy. If you prefer a richer taste, low-fat or regular cottage cheese works best. The dip can last in the fridge for about three to five days. Store it in an airtight container to keep it fresh. Just give it a stir before serving, as it may thicken a bit after chilling. You can freeze the brownie batter dip, but it's best to eat it fresh. Freezing may change the texture. If you decide to freeze it, use a freezer-safe container. Thaw it in the fridge overnight before serving again. This blog post covered how to make a delicious brownie batter dip. You learned about key ingredients like cottage cheese and cocoa powder, plus fun options like nut butter and chocolate chips. We explored steps for blending and mixing, ensuring a smooth texture. I shared nutritional benefits and variations, including vegan options. Remember, you can customize this dip to fit your taste. Enjoy experimenting with flavors and serving styles. Dive in, and let each bite delight you!

High-Protein Cottage Cheese Brownie Batter Dip Delight

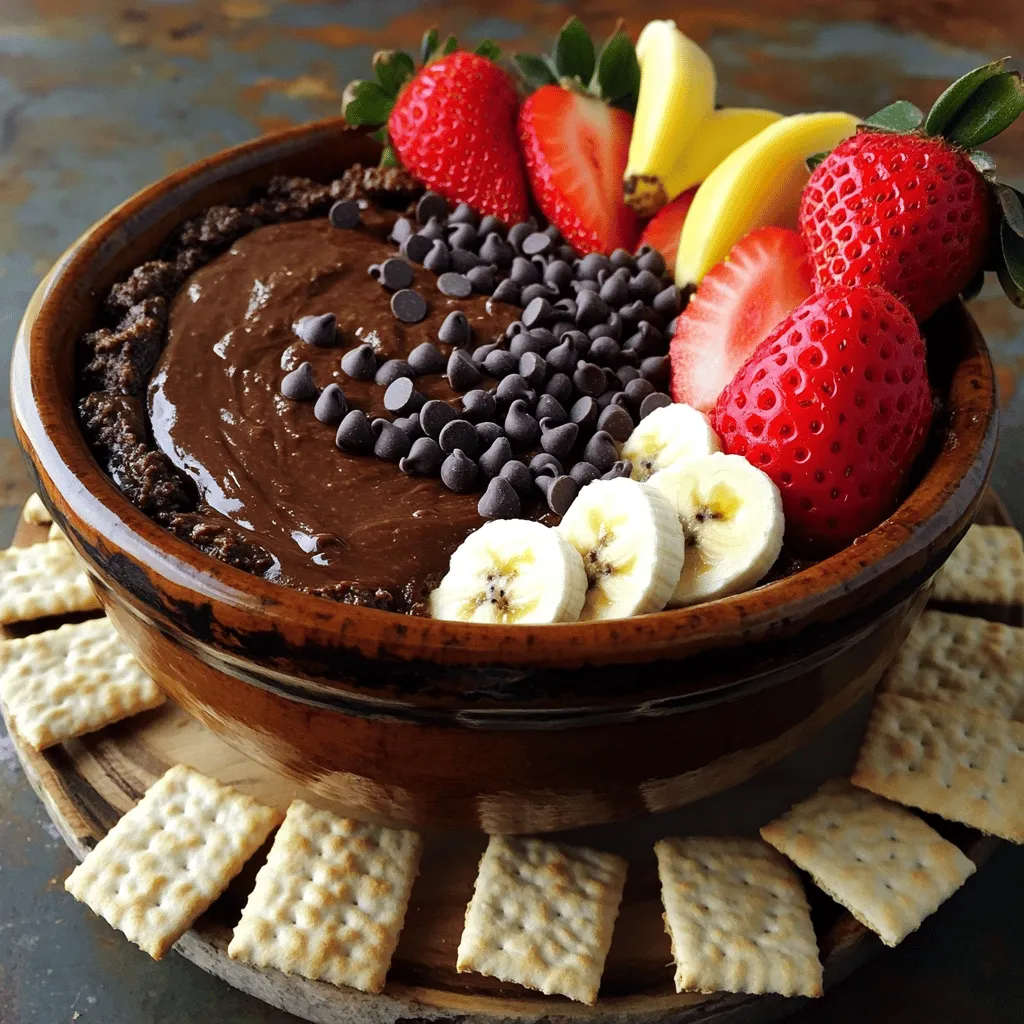
Craving a sweet treat that won’t derail your health goals? Meet the High-Protein Cottage Cheese Brownie Batter Dip Delight! This

- 4 boneless, skinless chicken thighs - 1 tablespoon olive oil - 1 medium onion, finely chopped - 3 cloves garlic, minced - 8 oz (225 g) mushrooms, sliced (button or cremini) - 1 cup chicken broth - 1 cup heavy cream - 1 teaspoon dried thyme - 1 teaspoon dried Italian herbs - Salt and pepper to taste - Fresh parsley, chopped (for garnish) - 1 cup spinach (optional) - 1 cup cooked pasta or rice (optional, for serving) - Large pot or Dutch oven - Wooden spoon or spatula - Knife and cutting board - Measuring cups and spoons - Serving plates The key to this dish lies in the ingredients. Chicken thighs give you juicy meat, while garlic and mushrooms add rich flavors. Don't skip the heavy cream; it makes the sauce creamy and smooth. You can add cooked pasta or rice for a complete meal. If you want to boost nutrition, toss in spinach. The right equipment ensures a smooth cooking process. A large pot or Dutch oven helps you cook everything in one place. Keep a wooden spoon handy to stir and mix your ingredients well. Gather all your ingredients to make cooking easy. You need chicken thighs, olive oil, onion, garlic, mushrooms, chicken broth, heavy cream, thyme, Italian herbs, salt, and pepper. You can also use spinach and cooked pasta or rice for a complete meal. 1. Heat one tablespoon of olive oil in a large pot over medium-high heat. 2. Season four boneless, skinless chicken thighs with salt and pepper. 3. Add the chicken to the pot. Brown the chicken for about five to seven minutes. 4. Remove the chicken and set it aside on a plate. 5. In the same pot, add one finely chopped onion. Sauté for three to four minutes until soft. 6. Stir in three minced garlic cloves and eight ounces of sliced mushrooms. Cook for five minutes. 7. Pour in one cup of chicken broth, scraping the bottom for flavor. Bring to a simmer. 8. Lower the heat and add one cup of heavy cream, one teaspoon of dried thyme, and one teaspoon of Italian herbs. Mix well. 9. Return the chicken to the pot. Nestle it into the creamy sauce. 10. Cover the pot and cook for 15 to 20 minutes. The chicken should reach 165°F. 11. If desired, add one cup of spinach during the last five minutes. Stir until wilted. 12. Taste your dish and add more salt and pepper if needed. 13. Serve the creamy sauce over pasta or rice, and sprinkle fresh parsley on top. To check if the chicken is done, use a meat thermometer. Insert it into the thickest part of the thigh. The temperature should read 165°F. If you don’t have a thermometer, cut the chicken. The juices should run clear, and the meat should not be pink. Always make sure to check! To cook chicken thighs well, start by patting them dry. This helps them brown nicely. Season both sides with salt and pepper. Heat olive oil in your pot over medium-high heat. Add the chicken and let it sear for about 5-7 minutes. You want a golden color. Don’t rush this step; it builds flavor. Once done, set the chicken aside to keep it juicy. For a rich and creamy sauce, use heavy cream. After cooking the onions, garlic, and mushrooms, pour in the chicken broth. This adds depth. Then, lower the heat and add the cream slowly. Stir to mix well. Let it simmer for a few minutes. This helps the flavors blend and thicken. If you want an extra creamy texture, add more cream. To enhance flavor, try adding fresh herbs. Thyme and Italian herbs work great. Fresh parsley at the end adds color and brightness. You can also toss in some spinach for a pop of green. If you like heat, add a pinch of red pepper flakes. For a tangy twist, a squeeze of lemon juice brightens the dish. {{image_2}} You can switch the chicken for other meats. Try using boneless turkey thighs or chicken breasts. Both options cook well in this creamy sauce. If you prefer red meat, beef or pork can work too. Just remember to adjust cooking times to ensure all proteins reach the right temperature. For a vegetarian dish, replace the chicken with tofu or tempeh. Both absorb flavors well and add protein. You can also use chickpeas for a hearty option. For vegan, replace heavy cream with coconut milk or a nut-based cream. This will still give you that rich, creamy texture without dairy. While button and cremini mushrooms are great choices, feel free to experiment. Shiitake mushrooms add a unique, rich flavor. Portobello mushrooms give a meaty texture. You can even mix different types for a more complex taste. Just make sure to slice them evenly for consistent cooking. To keep your One-Pot Creamy Garlic Mushroom Chicken fresh, let it cool first. Place the chicken and sauce in an airtight container. You can store it in the fridge for up to three days. This way, it stays tasty and safe to eat. When you’re ready to enjoy leftovers, reheat them gently. You can use a microwave or a stovetop. If using a microwave, cover the dish and heat for 2-3 minutes. Stir halfway through to warm it evenly. For stovetop reheating, place the chicken in a skillet over low heat. Add a splash of chicken broth or cream to keep it creamy. Heat until it reaches your desired temperature. If you want to save some for later, freezing is a great option. Cool the chicken completely and place it in a freezer-safe container. It can last for up to two months in the freezer. When ready to eat, thaw it in the fridge overnight. Reheat as mentioned above. Avoid refreezing after thawing for the best taste and texture. Yes, you can use frozen chicken thighs. Just remember to thaw them first. Thawing helps cook them evenly. If you add them frozen, cooking time will increase. You might need an extra 10-15 minutes to ensure they cook through. You can use fresh herbs for a stronger flavor. Fresh thyme or rosemary work well. Basil and oregano also add a nice touch. If you don’t have dried Italian herbs, mix in your favorite spices. Think about adding paprika or dill for a twist. To make this dish gluten-free, use gluten-free chicken broth. Make sure your cream is also gluten-free. If you serve it with pasta, choose gluten-free pasta or use rice. Always check labels to ensure all ingredients are safe for your needs. The blog explains how to make a tasty dish using various ingredients and steps. You learned about essential items and optional choices, plus tips for cooking chicken perfectly. I shared ideas for flavor and variations to keep it interesting. Finally, you found storage tips and answers to common questions. Cooking should be fun and easy. Now, you have the tools to create your own delicious meals!

One-Pot Creamy Garlic Mushroom Chicken Delight

Welcome to One-Pot Creamy Garlic Mushroom Chicken Delight! If you crave a creamy, flavorful meal without the mess, you’re in

- 1 cup all-purpose flour - 1 cup pumpkin puree - 1/2 cup brown sugar - 1/2 cup granulated sugar - 1/2 cup vegetable oil - 2 large eggs - 1 teaspoon vanilla extract - 1 teaspoon baking powder - 1/2 teaspoon baking soda - 1 teaspoon cinnamon - 1/2 teaspoon nutmeg - 1/2 teaspoon ginger powder - 1/4 teaspoon salt - 8 oz cream cheese, softened - 1/4 cup powdered sugar - 1 teaspoon vanilla extract (for filling) - Optional: crushed pecans or walnuts for garnish Gathering these ingredients is the first step to making pumpkin spice cream cheese whoopie pies. Each item plays a key role in creating the right flavor and texture. Pumpkin puree gives these treats their delightful taste and moistness. The sugars add sweetness and help create a lovely texture. Vegetable oil keeps the cookies soft and tender. Eggs bind everything together and add richness. Vanilla extract enhances the flavor, making it more inviting. The baking powder and soda help the cookies rise, keeping them fluffy. Cinnamon, nutmeg, and ginger bring warmth to the dish. Salt balances the sweetness and enhances the overall taste. Cream cheese filling adds a creamy texture that pairs perfectly with the spicy cookies. You can also choose to add crushed pecans or walnuts for a little crunch. These ingredients make each bite a wonderful experience. - Preheat the oven to 350°F (175°C). - Line baking sheets with parchment paper. - Mix pumpkin puree, brown sugar, granulated sugar, and vegetable oil until smooth. - Incorporate eggs and vanilla extract. - Whisk together flour, baking powder, baking soda, spices, and salt. - Gradually mix dry ingredients into the wet mixture until just combined. - Scoop batter onto baking sheets and bake for 12-15 minutes. - Allow to cool on baking sheets, then transfer to wire rack. - Beat cream cheese, powdered sugar, and vanilla extract until fluffy. - Spread cream cheese filling between two cookies and optionally garnish. To bake perfect whoopie pies, start with room-temperature ingredients. This helps them mix better. Preheat your oven to 350°F (175°C). Line your baking sheets with parchment paper to prevent sticking. When mixing the wet ingredients, ensure the sugars dissolve fully. This creates a smooth batter. Avoid overmixing when adding the dry ingredients. Overmixing can make the pies tough instead of tender. Common mistakes include not spacing the batter properly. Leave about 2 inches between each scoop. This allows room for spreading. Another mistake is not checking for doneness. Insert a toothpick; it should come out clean. If you see batter on the toothpick, bake a bit longer. You can enhance the cream cheese filling easily. Consider adding a splash of maple syrup for a cozy twist. A pinch of cinnamon or nutmeg can boost the flavor too. For a chocolate touch, mix in cocoa powder. If you want a lighter filling, use Greek yogurt instead of cream cheese. It adds tang and cuts calories. For those with dietary restrictions, there are options. Use dairy-free cream cheese for a vegan version. For a lower-sugar option, replace powdered sugar with a sugar substitute. Just ensure it measures the same as sugar. To prepare components in advance, make the whoopie pie cookies a day ahead. Once they cool, store them in an airtight container. This keeps them fresh. You can make the cream cheese filling a day ahead too. Just store it in the fridge. For cooling, let the cookies sit on the baking sheet for a few minutes first. Then, transfer them to a wire rack to cool completely. This helps them firm up. When ready to assemble, spread the filling between the cooled cookies. Enjoy a delightful treat anytime! {{image_2}} For a gluten-free version, use a 1:1 gluten-free flour blend. This blend often works well in baking. It keeps the texture soft and the taste great. You may also want to add a bit of xanthan gum to help with structure. This helps bind the ingredients and gives a better rise. Try adding a touch more pumpkin puree to keep the cookies moist. If the batter seems too thick, a splash of milk can help. Be careful not to overmix. This can lead to tough cookies. You can mix in chocolate chips or caramel bits for a sweet surprise. This twist adds a rich flavor to each bite. For a different spice blend, try adding allspice or cloves. This gives the whoopie pies a fun seasonal flair. For a festive touch, consider using maple syrup instead of some sugar. It adds a nice depth of flavor that pairs well with pumpkin. You can even mix in some orange zest for brightness. To make mini whoopie pies, scoop smaller amounts of batter. Use about one tablespoon per cookie. This makes perfect bite-sized treats. Bake them for 10-12 minutes instead of the full time. Check them early to avoid overbaking. They should be soft and spring back when touched. Mini whoopie pies are great for parties or snack time. They are just the right size to enjoy without feeling too full. To keep your pumpkin spice cream cheese whoopie pies fresh, use airtight containers. Glass or plastic containers work well. Place a piece of wax paper between layers to avoid sticking. Store them in the fridge. This helps the filling stay creamy and the cookies soft. You can freeze your whoopie pies for later. First, let them cool completely. Wrap each pie in plastic wrap or foil. Then, place them in a freezer bag. To enjoy later, take them out and thaw in the fridge overnight. This keeps their taste and texture nice. At room temperature, whoopie pies last about 2 days. If you store them in the fridge, they can last up to a week. Check for signs of spoilage, like an off smell or a change in texture. If they feel hard or dry, it’s best to toss them. To prevent sticking, grease your baking pans lightly. You can also use parchment paper. This will help the pies slide right off. Make sure to let them cool on the pan for a few minutes before moving them. This helps them set. Yes, you can make whoopie pies ahead of time. Bake the cookies and let them cool. Store them in an airtight container at room temperature. You can fill them with cream cheese later. This keeps them fresh and soft. If you need a pumpkin substitute, try using applesauce or mashed bananas. These options add moisture and sweetness. You can also use sweet potato puree for a similar flavor. Each choice gives a unique taste to your whoopie pies. To fix dry whoopie pies, ensure you don’t overbake them. Check for doneness a minute early. If they are already dry, you can add a little cream cheese filling to them. This will add moisture and make them softer. This blog post shared a clear guide on making delicious pumpkin whoopie pies. You learned about the essential ingredients and easy steps to bake them. I also provided tips for perfecting the pies and creative variations. In the end, these whoopie pies are fun to make and enjoy. With storage tips and helpful FAQs, you can bake confidently. Keep experimenting with flavors and have fun with this treat. Happy baking!

Pumpkin Spice Cream Cheese Whoopie Pies Delightful Treat

Get ready to dive into the comforting flavor of fall with my Pumpkin Spice Cream Cheese Whoopie Pies! These soft,

- 4 cups apple cider - 1 cup sparkling water - 1 orange, sliced - 1 lemon, sliced - 1 pear, diced - 1 teaspoon ground cinnamon - 2 cinnamon sticks - 1 tablespoon honey (optional) - Fresh cranberries for garnish (optional) For this Apple Cider Sangria, we start with fresh apple cider. It gives a sweet and tart base. You can find it at most grocery stores, especially in fall. Next, add sparkling water. It adds a nice fizz and balance to the drink. The fruits are essential. Sliced orange and lemon bring brightness. Diced pear adds a soft texture. These fruits mix well with the spices. Speaking of spices, ground cinnamon adds warmth and depth. The two cinnamon sticks give even more flavor as they soak. Honey is optional. If you like your drink sweeter, add it in. Lastly, fresh cranberries make a lovely garnish. They look pretty and add a hint of tartness. This combination of ingredients makes a refreshing drink perfect for any gathering. - Combine apple cider and sparkling water: Start by pouring 4 cups of apple cider into a large pitcher. Then, add 1 cup of sparkling water. If you want it a bit sweeter, mix in 1 tablespoon of honey. Stir gently to blend the flavors. - Add fruits and spices: Next, slice 1 orange and 1 lemon. Dice 1 pear. Toss all the fruit into the pitcher. Then, sprinkle in 1 teaspoon of ground cinnamon. Finally, add 2 cinnamon sticks for that warm spice taste. - Chill the sangria: Cover the pitcher and place it in the fridge. Let it chill for at least 1 hour. Chilling helps the flavors mix and taste better. - Pour over ice: When you're ready, fill glasses with ice. Pour the chilled sangria over the ice until each glass is full. - Garnish options: For a pretty touch, you can add a few fresh cranberries to each glass. You can also add a cinnamon stick as a fun garnish. Enjoy your refreshing drink! To make your Apple Cider Sangria really pop, use fresh ingredients. Fresh fruits add bright flavors that dried ones just can't match. For the best taste, let the sangria chill for at least one hour. This time allows the flavors to mix well. If you can, chill it for a few hours. The longer it sits, the better the taste gets! When serving your sangria, choose tall glasses. These glasses help show off the colorful fruits and spices. You can also use clear pitchers to make a lovely display. Pair this sangria with light snacks. Cheese platters and fruit salads work great! A light salad or roasted chicken also complements this drink well. Enjoy the mix of flavors in every sip! {{image_2}} You can change up the fruits in your apple cider sangria. Try adding fresh berries like strawberries or blueberries. These fruits add a burst of color and flavor. You can also use peaches or plums for a juicy twist. Seasonal variations bring fun too! In the fall, add sliced apples or figs. In winter, pomegranate seeds add a pop of flavor. For spring, think about fresh cherries or apricots. Each fruit adds its own taste, making the drink unique. When choosing wine for your sangria, a dry white wine works best. Look for a Sauvignon Blanc or Pinot Grigio. These wines mix well with apple cider and fruits. If you prefer red, try a light Merlot or Pinot Noir. For a non-alcoholic version, use grape juice or more apple cider. Sparkling grape juice adds fizz without the alcohol. This way, everyone can enjoy the drink, no matter their age. To store leftovers, place the sangria in a pitcher with a tight lid. This keeps it fresh. If you have a glass jar, that works great too. You want to avoid air getting in. Always put it in the fridge. For best taste, drink it within two days. To reuse the sangria, try adding more fresh fruit. Fresh orange slices or extra cranberries can refresh the drink. You can also mix in more sparkling water. This adds fizz and brightens the flavor. In the fridge, your apple cider sangria lasts about two days. After that, the taste fades. If you see fruit that looks mushy, it's time to toss it. Also, if the sangria smells off, do not drink it. Trust your senses! Enjoy it while it's fresh for the best taste. Can I make this sangria in advance? Yes, you can make apple cider sangria in advance. I recommend making it at least one hour before you serve it. This time allows the flavors to blend well. You can even chill it overnight. Just remember to add the sparkling water right before serving. This keeps the drink bubbly and fresh. What types of wine work best? For this sangria, you should use a light or fruity wine. A dry white wine, like Sauvignon Blanc, works great. You can also try a sweet white wine, like Moscato, if you prefer a sweeter drink. The goal is to find a wine that complements the apple cider without overpowering it. How to adjust sweetness? To adjust the sweetness, you can add honey. Start with one tablespoon. Mix it in with the apple cider and sparkling water. If you want it sweeter, add a bit more honey. You can also use fresh fruit to add natural sweetness. Apples or peaches can enhance the flavor. Just slice them and toss them in! This blog post shared a fun and easy sangria recipe with apple cider. You learned about ingredients, step-by-step prep, and serving tips. We explored flavor tricks and fruity variations. Lastly, I covered storage info and common FAQs. Enjoy mixing your sangria, and don't hesitate to get creative. Experiment with new fruits and drinks. With the right ingredients and care, your next gathering will shine!

Apple Cider Sangria with Cinnamon Sticks Refreshing Drink

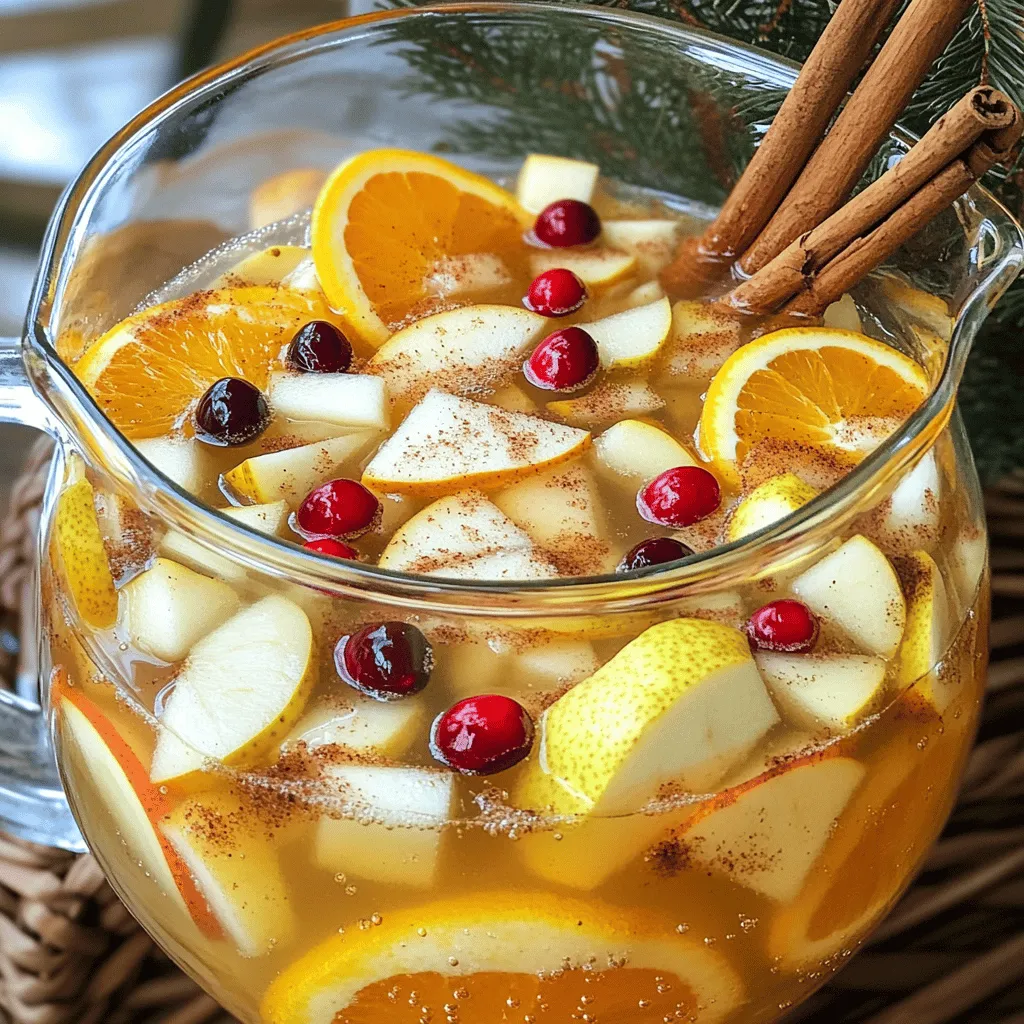
Are you looking for a fun drink to brighten up your gathering? Apple cider sangria with cinnamon sticks is the

Older posts
Newer posts
← Previous Page1 … Page26 Page27 Page28 … Page84 Next →

dsad

© 2026 juliesdish • Built with GeneratePress

Our Policies

  • Copyright Policy
  • Cookie Policy
  • GDPR Policy
  • Privacy Policy
  • Disclaimer
  • Terms Of Use

More Information

  • Home
  • About
  • Contact
  • Appetizers
  • Dessert
  • Dinner
  • Drinks
©2026, juliesdish About Back To Top