Skip to content
DisclaimerTerms Of UseGDPR PolicyCookie Policy

juliesdish

  • Home
  • Drinks
  • Appetizers
  • Dinner
  • Dessert
  • About
  • Contact
  • Privacy Policy
DisclaimerTerms Of UseGDPR PolicyCookie Policy

NO-ING-IMG

To make Air Fryer Buffalo Cauliflower Bites, you need these main items: - 1 large head of cauliflower, cut into bite-sized florets - 1 cup all-purpose flour (or gluten-free flour) - 1 cup water or plant-based milk - 1 teaspoon garlic powder - 1 teaspoon onion powder - ¾ teaspoon smoked paprika - Salt and pepper, to taste - ½ cup buffalo sauce (store-bought or homemade) - 1 tablespoon olive oil - Fresh parsley, chopped (for garnish) These ingredients create a tasty batter and a flavorful sauce. The cauliflower gives a great texture. The buffalo sauce adds a spicy kick. You can adjust this recipe to fit your needs. If you want a gluten-free option, use gluten-free flour. For a dairy-free version, choose plant-based milk. You can also add different spices to the batter like cumin or cayenne for more heat. If you like a little sweetness, mix in a dash of maple syrup into the buffalo sauce. Using fresh, high-quality ingredients matters. Fresh cauliflower will taste better and have a nice crunch. High-quality flour will create a smoother batter. The buffalo sauce should be flavorful and spicy to enhance the dish. When you choose quality, you ensure a better meal. Good ingredients lead to good food! To start, grab a large head of cauliflower. Cut it into small florets. This size helps them cook fast and evenly. In a big bowl, mix together one cup of flour and one cup of water or plant-based milk. Add one teaspoon of garlic powder, one teaspoon of onion powder, and three-quarters of a teaspoon of smoked paprika. Don't forget to add salt and pepper to taste. Whisk everything until it is smooth. Now, dip each cauliflower floret into the batter. Make sure each piece is fully coated. Let any extra batter drip off before moving on. Next, preheat your air fryer to 400°F (200°C). While it heats, lightly spray the air fryer basket with cooking spray. This step helps prevent sticking. Place the battered cauliflower florets in a single layer in the basket. Avoid crowding them, as this can lead to uneven cooking. Air fry the florets for 12 to 15 minutes. Be sure to shake the basket halfway through. This action helps them brown nicely. You want them to be golden and crispy when done. Once the cauliflower is crispy, take them out. In a separate bowl, mix the cooked cauliflower with half a cup of buffalo sauce and one tablespoon of olive oil. Toss gently to coat each floret evenly. Return the sauced cauliflower to the air fryer. Cook for an extra 2 to 3 minutes at 400°F (200°C). This step crisps up the sauce and adds flavor. Finally, remove the bites and garnish them with freshly chopped parsley before serving. Enjoy your tasty treat! To get your cauliflower bites extra crispy, use a few simple tricks. First, make sure to cut the cauliflower into small, even florets. This helps them cook evenly. Next, let the batter sit for a few minutes. This allows it to thicken slightly, which helps it stick better. When placing the florets in the air fryer, give them space. Crowding the basket leads to soggy bites. Lastly, spray a light coat of cooking oil on the florets before air frying. This boosts the crunch factor. Watch out for these common mistakes that can affect your cauliflower. First, don't skip the preheating step. If your air fryer isn’t hot enough, the bites won't crisp up. Second, avoid using too much batter. The coating should be light for the best texture. If you coat too heavily, it can become gummy. Lastly, remember to shake the basket halfway through cooking. This ensures that all sides get that golden brown finish. Choosing the right cooking spray matters for air frying. Look for sprays that are specifically made for high-heat cooking. These sprays can withstand the heat without breaking down. Olive oil spray works well for flavor and health. Avocado oil spray is another great option, as it has a high smoke point. Avoid using non-stick sprays that contain additives, as they can leave a sticky residue on your air fryer. {{image_2}} You can change the heat of your air fryer buffalo cauliflower bites by choosing the right sauce. If you like it hot, go for a spicy buffalo sauce. Look for sauces labeled as "extra hot" or "fiery." For a milder taste, choose a classic buffalo sauce. You can also mix sauces to find your perfect heat level. Adding honey or maple syrup can balance the spice if it's too hot. If you want a gluten-free version, swap the all-purpose flour for gluten-free flour. Many brands offer great options that work well in this recipe. You can also use chickpea flour for added protein and flavor. Always read labels to ensure your sauces and other ingredients are gluten-free. You can get creative with the batter for your cauliflower bites. Instead of flour, try using cornstarch for a crispy texture. You can also mix in spices like cumin or chili powder for added flavor. If you want to skip the batter, toss the florets in olive oil and spices before air frying. This method gives a lighter, yet still tasty, alternative. To keep your leftover buffalo cauliflower bites fresh, place them in an airtight container. Make sure they cool down first. Store them in the fridge for up to three days. If you want to extend their life, consider freezing them. To reheat, use your air fryer for best results. Heat it to 350°F (175°C). Place the bites in the basket and cook for about 5-7 minutes. This keeps them crispy. You can also use a microwave if you're in a hurry, but they may lose some crunch. If you freeze buffalo cauliflower bites, put them in a single layer on a baking sheet first. Freeze them for 1-2 hours until solid, then transfer to a freezer bag. When ready to eat, thaw them in the fridge overnight. Reheat directly from the fridge or freezer in your air fryer. Yes, you can use frozen cauliflower. Just thaw it first. After thawing, pat it dry. This helps the batter stick better. Frozen florets may take a bit longer to cook. Keep an eye on them during air frying. Buffalo cauliflower bites pair well with several sides. Try celery sticks for crunch. They also go great with ranch or blue cheese dressing. You can serve them as a snack or appetizer. They also fit well in a game day spread. Making buffalo sauce at home is easy. Start with melted butter or olive oil. Add hot sauce, like Frank's RedHot. Mix in a splash of vinegar for tang. You can balance the heat with a pinch of sugar. Adjust the spice level to your liking. Give it a mix until smooth and enjoy! In this article, we covered the essential ingredients, cooking methods, and storage tips for Air Fryer Buffalo Cauliflower Bites. We explored how to make these bites crispy and delicious while offering options for all dietary needs. Remember to choose fresh ingredients and follow the steps closely for the best results. Whether you go with spicy or mild, these bites can fit any preference. Now, it’s time to enjoy your tasty creation!

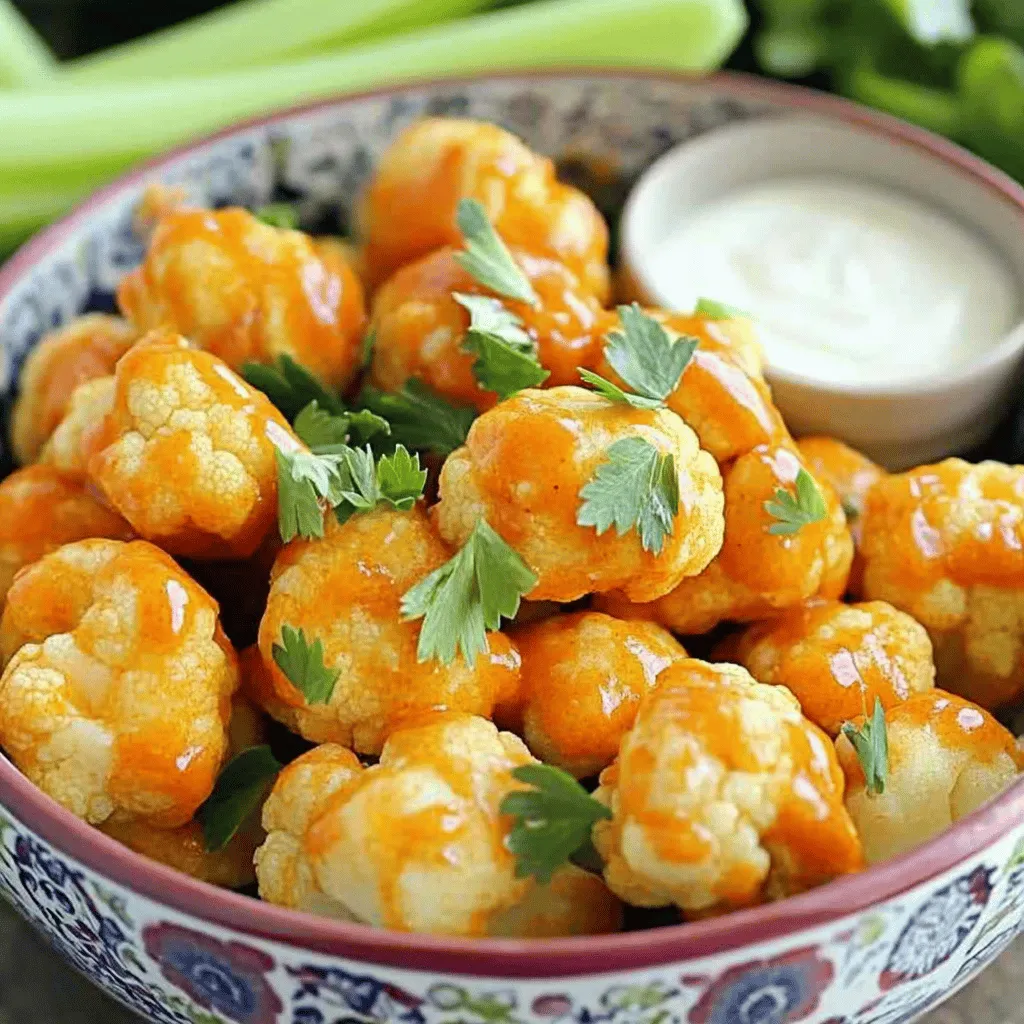
Air Fryer Buffalo Cauliflower Bites Tasty and Simple

Are you ready to spice up your snack game? In this post, I’ll show you how to make Air Fryer

To make this loaf, you need simple yet tasty ingredients. Here’s what you will need: - 1 cup pumpkin puree (canned or homemade) - 1/2 cup apple cider - 1/2 cup vegetable oil - 3/4 cup brown sugar - 1/4 cup granulated sugar - 2 large eggs - 2 cups all-purpose flour - 1 teaspoon baking soda - 1/2 teaspoon baking powder - 1/2 teaspoon salt - 1 teaspoon ground cinnamon - 1/2 teaspoon ground nutmeg - 1/4 teaspoon ground ginger - 1/4 cup chopped walnuts or pecans (optional) Each ingredient brings its own flavor. The pumpkin puree adds moisture, while the apple cider offers a sweet tang. The sugars help create that nice, golden crust. You can make this loaf even better with some optional add-ins. Here are some great ideas: - 1/4 cup chopped walnuts or pecans for crunch - 1/2 cup chocolate chips for a sweet twist - 1/2 cup dried cranberries for a fruity touch These add-ins can enhance the flavor and add different textures to your loaf. If you need to swap out some ingredients, here are some easy replacements: - Use coconut oil instead of vegetable oil for a tropical flavor. - Replace brown sugar with coconut sugar for a healthier option. - For a gluten-free version, use a gluten-free flour blend. These substitutions can help you adapt the recipe to your needs while keeping the taste delicious. First, preheat the oven to 350°F (175°C). This step is key. Grease a 9x5-inch loaf pan. You can also line it with parchment paper for easy removal. In a large bowl, whisk together the pumpkin puree, apple cider, vegetable oil, brown sugar, granulated sugar, and eggs. Mix these well until they blend smoothly. In another bowl, sift the all-purpose flour, baking soda, baking powder, salt, cinnamon, nutmeg, and ginger. This helps to get rid of lumps. Now, slowly add the dry mix to the wet mix. Stir gently until just combined. Avoid overmixing, as it may change the texture of the loaf. If you like nuts, fold in the chopped walnuts or pecans now. Pour the batter into the prepared loaf pan. Smooth the top with a spatula for even baking. Place the pan in the preheated oven. Bake for 55 to 65 minutes. Use a toothpick to check if it's done. Insert it into the center of the loaf. If it comes out clean, your loaf is ready! Once baked, let the loaf cool in the pan for 10 minutes. After that, transfer it to a wire rack. Let it cool completely before slicing. For a lovely presentation, serve the slices on a wooden cutting board. You can dust the top with powdered sugar for a festive look. Pair it with apple butter or cream cheese spread for a tasty treat! To get the best texture for your loaf, use room-temperature ingredients. Cold items can make the batter dense. Pumpkin puree should be smooth and not watery. If it's too watery, your loaf may turn out soggy. Mix the wet and dry ingredients gently. Overmixing can make the loaf tough. You want a soft, moist crumb that melts in your mouth. Always preheat your oven to 350°F (175°C). This step ensures even baking. Use a 9x5-inch loaf pan. Greasing it or lining it with parchment paper helps with easy removal. Place the loaf in the center of the oven for even heat. Avoid opening the oven door too early. This can cause your loaf to sink. Check for doneness with a toothpick. It should come out clean when your loaf is ready. If your loaf sinks in the middle, it may be underbaked. Always check the baking time. If it’s too dry, you may have overbaked it. Keep an eye on the time and do the toothpick test. If you see cracks on top, it might be due to high oven heat. Lower the temperature if this happens. Lastly, if your loaf sticks to the pan, make sure you greased it well or used parchment paper. {{image_2}} You can make Apple Cider Pumpkin Loaf healthier. Try using whole wheat flour instead of all-purpose flour. This adds fiber, which is good for digestion. You can also replace some oil with applesauce. This keeps the loaf moist while cutting calories. For sugar, use coconut sugar or honey. These options are less processed and have a lower glycemic index. To boost flavor, add spices like clove or allspice. They give the loaf a warm, cozy taste. You can also mix in dried fruits like cranberries or raisins. They add sweetness and a chewy texture. For a nutty flavor, try toasting the walnuts or pecans before adding them. Toasting brings out their natural oils and deepens the taste. If you need a gluten-free loaf, swap all-purpose flour for a gluten-free blend. Look for blends that contain xanthan gum for better texture. You can also use almond flour or oat flour. Keep in mind that these may change the loaf's texture. If you use almond flour, reduce the amount slightly. Always check labels for gluten-free certification to avoid cross-contamination. To keep your Apple Cider Pumpkin Loaf fresh, wrap it in plastic wrap. Place it in an airtight container. This method helps retain moisture and flavor. Store it at room temperature for up to three days. If you want to keep it longer, consider freezing it. To freeze the loaf, first, let it cool completely. Wrap it tightly in plastic wrap. Then, place it in a freezer-safe bag or container. This way, you can store it for up to three months. When you are ready to enjoy it, just thaw it overnight in the fridge. To reheat the loaf, preheat your oven to 350°F (175°C). Remove any plastic wrap before placing it in the oven. Heat for about 10 to 15 minutes. Check if it is warm enough before serving. You can also microwave individual slices for about 20 seconds. Enjoy your warm loaf with a spread or topping! Yes, you can use homemade pumpkin puree. It adds a fresh taste to your loaf. To make it, cook pumpkin chunks until soft. Then, blend or mash them until smooth. Make sure to drain any extra water. This helps keep your loaf from getting too wet. You can tell your loaf is done by using a toothpick. Insert it into the center of the loaf. If it comes out clean, your loaf is ready. If it has batter on it, bake for a few more minutes. The top should be golden brown and firm to the touch. There are many great options to pair with your loaf. You can serve it with apple butter or cream cheese spread. These add a nice touch and enhance the flavor. You can also enjoy it with a warm cup of cider or tea. These drinks complement the spices in the loaf perfectly. In this blog post, we explored how to make a delicious Apple Cider Pumpkin Loaf. We covered key ingredients, steps for preparation, and baking techniques. I shared tips for achieving the perfect texture and helpful storage information. Remember, using substitutions and variations can make this loaf your own. Enjoy this treat fresh or reheated. You can create a loaf that fits your taste perfectly. Happy baking!

Apple Cider Pumpkin Loaf Flavorful Fall Delight

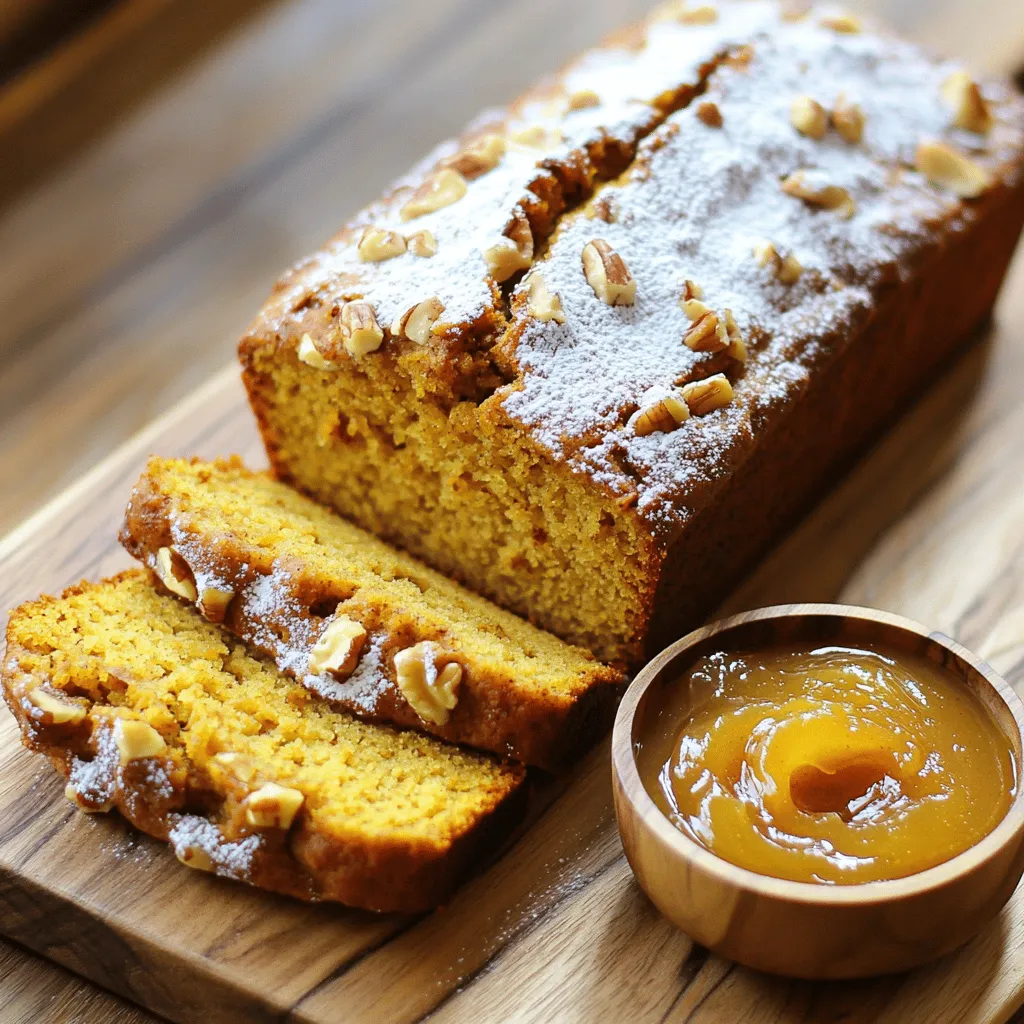
Fall aromas fill the air, and there’s no better treat than an Apple Cider Pumpkin Loaf. This warm, spiced loaf

To make Air Fryer Garlic Parmesan Eggplant Fries, you will need some simple, fresh ingredients. Here’s what you’ll need: - Large eggplant - Breadcrumbs (Panko for extra crunch) - Grated Parmesan cheese - Minced garlic - Smoked paprika - Italian seasoning - Salt and black pepper - Beaten egg - Olive oil spray Each ingredient plays a crucial role in making these fries delicious. The eggplant serves as the base, giving a tender bite. Panko breadcrumbs add a crunchy texture that complements the soft eggplant. Parmesan cheese brings a savory, umami flavor that pairs well with garlic and spices. Minced garlic adds depth with its rich aroma. Smoked paprika gives a subtle smokiness. Italian seasoning enhances the overall flavor profile. Salt and pepper balance everything out. The beaten egg acts as glue to hold the coating on the fries. Finally, olive oil spray helps them crisp up in the air fryer. When you gather these items, you set the stage for a tasty snack or side dish. Enjoy the process of preparing these eggplant fries. It’s all about the fresh, quality ingredients that make your dish shine! First, set your air fryer to 400°F (200°C). This temperature works best for crispy fries. Preheat it for about 5 minutes. This step helps cook the fries evenly. Grab a bowl and mix the following dry ingredients: - 1 cup breadcrumbs (Panko for extra crunch) - 1/2 cup grated Parmesan cheese - 2 cloves garlic, minced - 1 teaspoon smoked paprika - 1 teaspoon Italian seasoning - 1/2 teaspoon salt - 1/4 teaspoon black pepper Mix these well. This creates a tasty coating for your eggplant fries. Now, set up your breading station. Place the beaten egg in one bowl. Put the breadcrumb mixture in another bowl. Finally, have your cut eggplant fries in a third bowl. Dip each fry into the beaten egg. Make sure it’s fully coated. Then roll it in the breadcrumb mix, pressing lightly. This helps the coating stick. Arrange the coated fries in a single layer in the air fryer basket. Do not let them touch. This ensures they cook evenly. Lightly spray the fries with olive oil spray. This adds crispiness. Cook the eggplant fries for 15-18 minutes. Flip them halfway through for even browning. They should turn golden and crispy. Once cooked, take them out and serve right away. Enjoy with your favorite dip or more Parmesan on top. To achieve that perfect crispy texture, olive oil spray is key. A light coat helps the fries crisp up in the air fryer. It also adds flavor without excess oil. Adjust the cooking time based on how crispy you want your fries. For softer fries, air fry them for 12-15 minutes. For extra crunch, go for 15-18 minutes. Just flip them halfway to ensure even cooking. Eggplant fries pair well with various dips. Marinara sauce gives a classic touch. You can also try garlic aioli or a spicy ranch for extra flavor. For a fun presentation, serve the fries in a stylish cone or a small basket. Line it with parchment paper for a nice touch. Garnish with fresh parsley to add color and make it pop! {{image_2}} You can spice up your eggplant fries easily. For a kick, add cayenne or chili powder to the breadcrumb mix. This change gives the fries a nice heat. If you love herbs, try using fresh ones like basil, thyme, or rosemary. These herbs add a fresh taste and aroma. You can even mix and match spices to find your favorite flavor. If you need gluten-free options, use crushed nuts or gluten-free breadcrumbs. Both work well and give a crunchy texture. For those avoiding dairy, look for dairy-free Parmesan. It melts nicely and keeps the cheesy flavor. You can find it in most grocery stores or make your own at home. Feel free to experiment! Making these swaps can lead to tasty new versions of the classic recipe. To keep your eggplant fries fresh, store them in an airtight container. Place a paper towel inside to absorb moisture. This helps maintain crispness. You can store them in the fridge for up to three days. If you want to keep them longer, consider freezing. Freeze them in a single layer on a baking sheet. Once frozen, transfer to a freezer bag. They can last up to two months in the freezer. The best way to reheat your eggplant fries is in the air fryer. Set it to 350°F (175°C) and heat for about 5-7 minutes. This restores their crispiness. You can also use your oven. Preheat it to 375°F (190°C) and place the fries on a baking sheet. Heat for 10-12 minutes, flipping them halfway. If you prefer a microwave, use it only for a quick warm-up. The fries may become soggy this way, so it’s best to avoid it when possible. Yes, you can. If you lack an air fryer, use your oven. Preheat the oven to 425°F (220°C). Arrange the breaded eggplant fries on a baking sheet. Spray them with olive oil to help them crisp up. Bake for about 25-30 minutes, flipping halfway through. This method gives you a nice crunch too. Pick a large eggplant that feels heavy for its size. Look for smooth skin with no blemishes or soft spots. A fresh eggplant will have a shiny surface. Try to avoid overly ripe ones, as they can taste bitter. Japanese or Italian eggplants also work well for fries; they are tender and have fewer seeds. Yes, you can prep them ahead of time. Cut the eggplant fries and store them in a bowl of water to prevent browning. You can also bread them a few hours before cooking. Just keep them in the fridge until you're ready to air fry. For longer storage, place them in an airtight container for up to a day. You’ve learned how to make crispy eggplant fries. We covered all key steps: gathering ingredients, breading, cooking, and storage. Remember to use olive oil spray for that perfect crunch. Don't hesitate to experiment with seasonings or swaps. Your preferences will shape this dish. Whether you're serving them as snacks or sides, these fries will impress. Enjoy your delicious, homemade eggplant fries any way you like!

Air Fryer Garlic Parmesan Eggplant Fries Delight

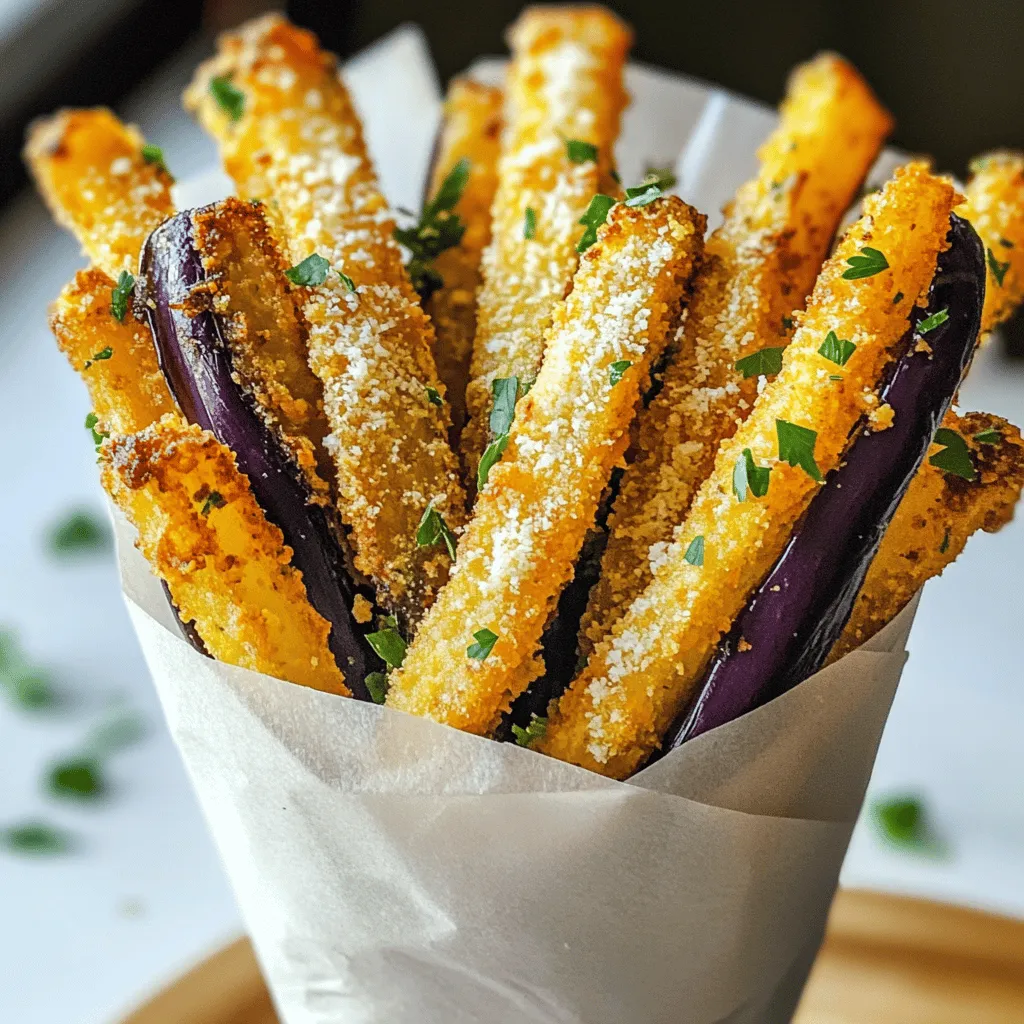
Are you ready to elevate your snack game? These Air Fryer Garlic Parmesan Eggplant Fries are crispy, flavorful, and way

- 1 cup all-purpose flour - 1/2 cup granulated sugar - 1/2 teaspoon baking powder - 1/2 teaspoon baking soda - 1/4 teaspoon salt - 1/4 cup unsalted butter, softened - 1 large egg - 1/4 cup buttermilk - Zest of 1 lemon - 2 tablespoons fresh lemon juice - 1 cup fresh raspberries - 1/4 cup powdered sugar (for topping) For those using metric measurements, here are some quick conversions: - 1 cup all-purpose flour = 125 grams - 1/2 cup granulated sugar = 100 grams - 1/4 cup unsalted butter = 57 grams - 1/4 cup buttermilk = 60 milliliters - 1 large egg = about 50 grams To measure accurately, always level off dry ingredients with a straight edge. Use a liquid measuring cup for wet ingredients. This way, you ensure your cake will rise just right. These ingredients combine to create a moist and flavorful coffee cake. The tart raspberries and bright lemon zest make it a delightful treat. Enjoy the process of gathering your ingredients. It sets the stage for a wonderful baking experience! Start by preheating your oven to 350°F (175°C). This is key for even baking. Next, take an 8-inch square baking pan. You can grease it or line it with parchment paper to prevent sticking. For ingredient prep, measure your items carefully. Use the right cups for dry and wet ingredients. This helps your cake rise well. Always fluff the flour with a spoon before measuring. This ensures you don’t pack it down. In a mixing bowl, whisk together the flour, baking powder, baking soda, and salt. This helps the dry ingredients mix well. In another bowl, cream the softened butter and granulated sugar until light and fluffy. You can use a hand mixer or a stand mixer for this part. Next, add the egg, buttermilk, lemon juice, and lemon zest to the butter-sugar mix. Stir until combined. Gradually add the dry mix to the wet mix. Be sure to mix gently. Overmixing can make your cake tough. Once combined, gently fold in the fresh raspberries. This keeps them whole and juicy in the batter. Pour the batter into the prepared pan. Spread it evenly for uniform baking. Bake your coffee cake for 25 to 30 minutes. A toothpick test is a great way to check if it’s done. Insert it into the center; it should come out clean. When baked, take the cake out of the oven. Let it cool in the pan for about 10 minutes. Then, transfer it to a wire rack to cool completely. After it cools, dust the top with powdered sugar for that sweet touch. To make a light and fluffy cake, use softened butter. Cream it well with sugar. This adds air, which helps the cake rise. Make sure your egg and buttermilk are at room temperature. Cold ingredients can make your cake dense. This coffee cake goes great with coffee or tea. The tartness of the raspberries pairs well with these drinks. For a pretty presentation, serve warm with a dusting of powdered sugar. Add some fresh raspberries on the side for color and charm. After baking, wash your mixing bowls and spatulas right away. This makes cleanup easy. For your baking pans, soak them in warm soapy water. Scrub gently if needed, but avoid harsh tools. Keeping your gear clean helps them last longer. {{image_2}} You can switch up the fruit in this cake. Try blueberries, blackberries, or diced peaches. Each fruit brings its unique taste. Mixing flavors can add a fun twist to your coffee cake. Adding spices can also enhance flavor. Consider cinnamon or nutmeg for warmth. A dash of ginger gives a nice zing. You can even add a bit of vanilla for extra depth. If you need a gluten-free option, use gluten-free flour. Almond flour or coconut flour works well too. Just remember to adjust the liquid in the recipe. For a vegan version, replace the egg with a flaxseed egg. Mix one tablespoon of flaxseed meal with three tablespoons of water. Let it sit for a few minutes to thicken. You can also use almond milk instead of buttermilk for a creamy texture. To keep your Lemon Raspberry Coffee Cake fresh, store it in an airtight container. This helps prevent it from drying out. You can also wrap it tightly in plastic wrap. If you have a slice or two left, place them in a small container. Make sure the lid seals well. Store the cake at room temperature for up to two days. If you need to keep it longer, refrigerate it for about a week. To reheat the cake, preheat your oven to 350°F (175°C). Place the cake on a baking sheet. Cover it with aluminum foil to keep moisture in. Heat for about 10-15 minutes. You can also use the microwave. Heat a slice for 15-20 seconds. Check if it’s warm enough. Avoid overheating, as this can dry it out. To freeze your coffee cake, first let it cool completely. Then, wrap it tightly in plastic wrap. After that, place it in a freezer bag. Be sure to remove as much air as you can. Label the bag with the date. You can freeze it for up to three months. When you're ready to enjoy it, thaw it in the fridge overnight. For best taste, reheat it before serving. Yes, you can use frozen raspberries. They work well in this recipe. Just be sure to add them while still frozen. This way, they won't turn mushy in the batter. Gently fold the frozen raspberries into the batter with care. You might want to reduce the baking time by a few minutes. Check the cake for doneness as it cooks. Look for a few key signs. The edges should pull away from the sides of the pan. The top will be golden brown and firm to the touch. Insert a toothpick into the center. If it comes out clean or with a few moist crumbs, your cake is ready. Baking usually takes about 25-30 minutes. Pair this cake with a warm cup of coffee or tea. The bright lemon and sweet raspberry flavors complement each other nicely. A dollop of whipped cream adds creaminess. You can also serve it with fresh raspberries on the side for a pop of color. Enjoying it warm makes the flavors shine even more! This recipe for Lemon Raspberry Coffee Cake is a delicious treat to enjoy. You learned the ingredients, how to prepare and bake it, and tips for great results. Remember, using fresh ingredients and following the steps closely will give you the best flavor and texture. Don’t forget to explore variations and storage tips for lasting enjoyment. Baking is fun and rewarding, so dive in and enjoy every bite of your cake!

Lemon Raspberry Coffee Cake Delightful Sweet Treat

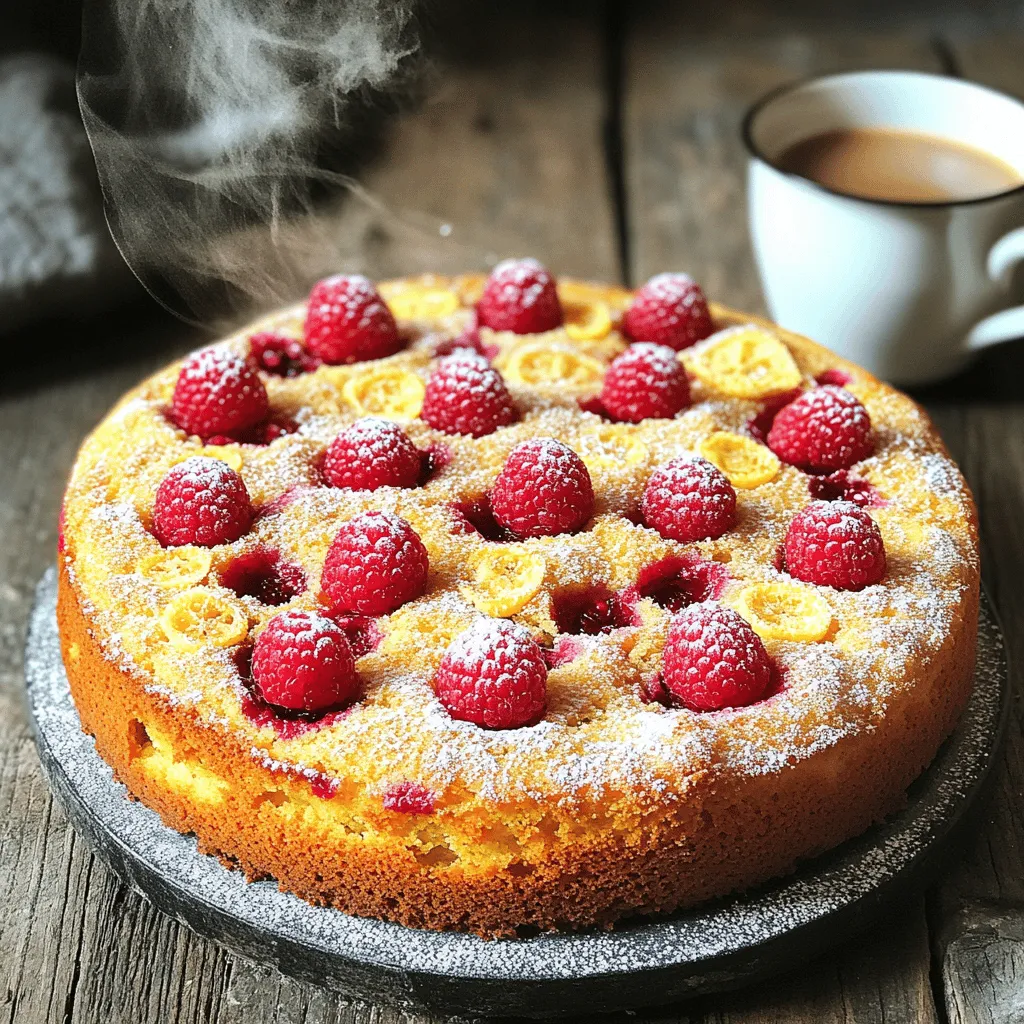
Are you ready to elevate your baking game? Lemon Raspberry Coffee Cake offers a perfect blend of tart and sweet.

- 1 pound cheese tortellini (fresh or frozen) - 1 can (28 oz) crushed tomatoes - 4 cups vegetable broth - 1 cup carrots, diced - 1 cup celery, diced - 1 medium onion, chopped - 2 cloves garlic, minced - 1 teaspoon dried basil - 1 teaspoon dried oregano - 1 teaspoon sugar - 1 cup heavy cream (or coconut milk) - Salt and pepper to taste In this soup, cheese tortellini acts as the main star. It brings a nice, cheesy flavor that pairs well with the rich tomato base. I love using crushed tomatoes because they add depth. The vegetable broth gives the soup a hearty feel. Next, the vegetables add both flavor and texture. Carrots bring a bit of sweetness. Celery adds crunch, while onion and garlic offer a savory kick. Seasonings are key! Dried basil and oregano give a warm, herbal taste. A touch of sugar helps balance the acidity of the tomatoes. Finally, the heavy cream or coconut milk makes the soup creamy and rich. You can adjust salt and pepper to fit your taste. Gather these ingredients, and you’re on your way to a cozy bowl of soup! Start by gathering your ingredients. You will need: - 1 pound cheese tortellini (fresh or frozen) - 1 can (28 oz) crushed tomatoes - 4 cups vegetable broth - 1 cup carrots, diced - 1 cup celery, diced - 1 medium onion, chopped - 2 cloves garlic, minced - 1 teaspoon dried basil - 1 teaspoon dried oregano - 1 teaspoon sugar - Salt and pepper to taste - 1 cup heavy cream (or coconut milk) - Fresh basil leaves for garnish - Grated Parmesan cheese for serving (optional) In your slow cooker, add the crushed tomatoes, vegetable broth, diced carrots, diced celery, chopped onion, and minced garlic. Next, sprinkle in the dried basil, dried oregano, and sugar. This sugar helps to balance the acidity of the tomatoes. Season with salt and pepper to taste. Stir to combine all the ingredients well. Now, cover your slow cooker. You can set it to cook on low for 6-8 hours or on high for 3-4 hours. I usually prefer the low setting for a deeper flavor. Check the vegetables after the cooking time. They should be tender when done. About 30 minutes before you plan to serve, stir in the cheese tortellini. Make sure to cover the slow cooker again. This helps the tortellini cook evenly. Once the tortellini is cooked, which takes about 25-30 minutes, stir in the heavy cream or coconut milk. This will give your soup a rich and creamy texture. Finally, taste your soup. Adjust the seasoning with more salt and pepper if needed. For a nice touch, serve it hot, garnished with fresh basil leaves and a sprinkling of grated Parmesan cheese, if you like. To make the best soup, check your veggies for tenderness. When you can easily pierce the carrots and celery with a fork, they are ready. This usually happens after 6-8 hours on low heat or 3-4 hours on high. Add the heavy cream about 30 minutes before serving. This timing helps keep the cream smooth and rich. If you add it too early, it may separate and lose its creamy texture. Choose the right settings for your slow cooker. If you have time, cook on low for a deep flavor. For a quicker meal, use high heat. Both settings work well, but low heat gives the best taste. For busy days, prep your ingredients in advance. Chop veggies and store them in the fridge. You can also measure out spices and keep them in a small container. This way, your cooking time is quick and easy. Garnish your soup with fresh basil leaves. They add color and a burst of flavor. You can also sprinkle grated Parmesan cheese on top for extra richness. Pair the soup with a side salad or crusty bread. These sides complement the soup well and make the meal more filling. Enjoy your hearty soup with family or friends! {{image_2}} You can easily change the flavor of your soup. Adding spinach or kale gives it a fresh taste. Just toss in a handful of fresh greens about 20 minutes before serving. They will cook down nicely and add color. Using different cheeses can also change the soup's flavor. Try mixing in some ricotta or mozzarella. Each cheese adds a unique touch. If you want a stronger bite, add some feta. For those who need dairy-free options, use coconut milk instead of heavy cream. It makes the soup creamy without dairy. You can also skip the cheese on top or use a dairy-free cheese. This keeps the dish tasty for everyone. If you need a gluten-free option, look for gluten-free tortellini. Many brands offer this. You can also make your own from rice flour or other gluten-free flours. Just ensure your other ingredients are also gluten-free. Incorporating fresh herbs can elevate your soup. Basil and parsley are great options. Add them right before serving to keep their flavor bright. Using seasonal vegetables can also make your soup special. For example, in the fall, add butternut squash or zucchini in the summer. This keeps your dish fresh and exciting through the year. To store leftovers, let the soup cool first. Place it in a sealed container. You can keep it in the fridge for up to five days. When you want to reheat, pour the soup into a pot. Heat it slowly over medium heat. Stir often to ensure even warming. You can also microwave it in a safe bowl. Heat it in short bursts, stirring in between. If you want to save the soup for later, freezing is a great option. Let it cool completely before freezing. Use airtight containers or freezer bags. Leave some space at the top, as soup expands when frozen. You can store it in the freezer for up to three months. To thaw, place the soup in the fridge overnight. If you need it fast, you can also thaw it in the microwave. Reheat it on the stove or microwave after thawing. Stir well to ensure it heats evenly. In the fridge, your soup lasts around five days. If you freeze it, it can stay fresh for three months. However, for best taste, try to eat it sooner. Always check for any off smells or changes in texture before eating. This way, you can enjoy your soup at its best! Can I use frozen tortellini? Yes, you can use frozen tortellini in this soup. Just add it to the slow cooker 30 minutes before serving. Frozen tortellini cooks well and saves you time. What can I substitute for vegetable broth? If you don't have vegetable broth, you can use chicken broth. You can also make your own broth at home with water and herbs. This will still give your soup great flavor. How to avoid overcooking tortellini? To avoid overcooking tortellini, add it to the slow cooker about 30 minutes before you plan to serve the soup. This way, it cooks just right, staying firm and tasty. Best slow cooker for this recipe? A 6-quart slow cooker is best for this recipe. It holds all ingredients well, letting them cook evenly. If you have a larger family, you might want a bigger one. Caloric content per serving One serving of this soup has about 300 calories. This can vary based on the exact ingredients you use. Nutritional benefits of ingredients This soup packs many nutrients. The vegetables provide vitamins and fiber. Cheese tortellini adds protein and calcium. Heavy cream adds richness, but you can swap it for coconut milk for a lighter option. This recipe blends cheese tortellini, fresh veggies, and tasty spices for a rich soup. You learned to prepare, cook, and serve it with helpful tips. Remember, you can adjust flavors and ingredients for your taste. Store any leftovers wisely, and enjoy them later. With these ideas, you can create a warm dish that's perfect for any day. Happy cooking!

Slow Cooker Tomato Tortellini Soup Hearty and Easy Dish

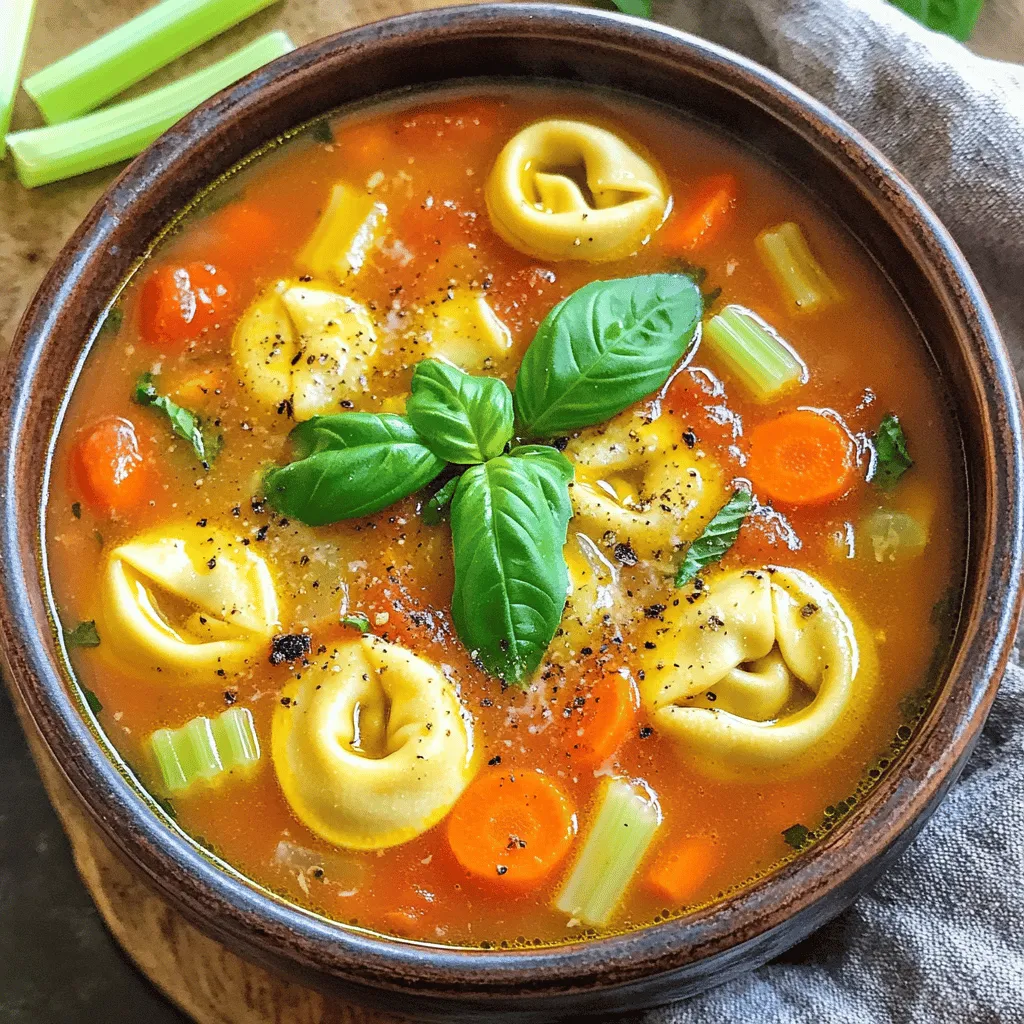
Looking for a warm and tasty meal that’s super easy to make? You’re in the right place! My Slow Cooker

- 4 bone-in, skin-on chicken thighs - 1 medium butternut squash, peeled and cubed - 2 tablespoons olive oil - 1/4 cup pure maple syrup - 1 teaspoon cinnamon - 1/2 teaspoon nutmeg - Salt and pepper to taste - 2 cups fresh kale, stems removed and roughly chopped - 2 tablespoons apple cider vinegar - Optional: Chopped pecans for garnish Gathering the right ingredients is key to a great meal. I love using bone-in, skin-on chicken thighs. They stay juicy and full of flavor. Butternut squash adds a sweet, nutty taste that pairs well with the chicken. Olive oil helps everything roast nicely. Pure maple syrup is a must for that sweet glaze. Spices play a big role, too. Cinnamon brings warmth, while nutmeg adds depth. Don’t forget salt and pepper; they enhance all the flavors. For a twist, I often add kale, which cooks down nicely. A splash of apple cider vinegar brightens the dish. If you want a crunch, sprinkle chopped pecans on top. With these ingredients, you set the stage for a delightful meal that shines in taste and presentation. First, preheat your oven to 425°F (220°C). This helps the chicken and squash cook evenly. Next, take your medium butternut squash and peel it. Cut it into small cubes. Aim for pieces about an inch in size. This ensures they roast well and get tender. In a large bowl, toss the butternut squash cubes with 1 tablespoon of olive oil. Add 1 teaspoon of cinnamon, 1/2 teaspoon of nutmeg, and a pinch of salt and pepper. Mix well so all pieces are coated. This blend of spices adds warmth and flavor. Now, take your chicken thighs and add them to the same bowl. Pour in 1/4 cup of pure maple syrup and the remaining tablespoon of olive oil. Sprinkle more salt and pepper. Mix until the chicken is well coated. The maple syrup gives a sweet glaze that pairs nicely with the squash. Arrange the seasoned butternut squash on one side of a large sheet pan. Place the chicken thighs on the other side, skin-side up. This setup allows everything to cook evenly. Roast them in the preheated oven for about 25 minutes. After 25 minutes, remove the pan from the oven. Scatter 2 cups of fresh, chopped kale over the chicken and squash. Drizzle 2 tablespoons of apple cider vinegar over the kale. Return the pan to the oven and roast for an additional 10-15 minutes. The chicken should reach an internal temperature of 165°F (74°C), and the squash should be tender. Once done, take the pan out of the oven. Let it cool for a few minutes before serving. For an extra crunch, sprinkle chopped pecans on top. Enjoy this delightful dish! To get the best roast, aim for 425°F (220°C). This heat cooks the chicken well and makes the squash tender. After 25 minutes, check if the chicken is ready. Use a meat thermometer to see if it hits 165°F (74°C). This ensures it is safe to eat. Want more flavor? You can add spices like garlic powder or smoked paprika. These will give a new taste. Fresh herbs like thyme or rosemary can also boost flavor. Just toss them in with the chicken and squash before roasting. Serve straight from the pan for a cozy look. This makes it easy and fun for everyone. For a fancier touch, plate the chicken and squash on separate dishes. Drizzle with extra maple syrup for a shiny finish. You could also sprinkle chopped pecans on top for a crunchy texture. {{image_2}} You can switch the chicken thighs with chicken breasts. Chicken breasts cook faster and stay juicy if not overcooked. If you prefer turkey, use turkey thighs. They have a rich flavor and pair well with maple syrup. Seasonal veggies can add a twist. Try sweet potatoes or carrots for a different taste. You can also use Brussels sprouts for a hearty side. If you want greens other than kale, try spinach or Swiss chard. Both add great color and nutrients. To change the flavor, add different syrups. Try honey for a floral note or agave for a milder sweetness. You can also use balsamic vinegar instead of apple cider vinegar for a tangy kick. Adding citrus, like orange or lemon zest, can brighten the dish. Fresh fruit, such as apples or pears, can also boost sweetness. To store your sheet pan maple roasted butternut squash and chicken, let it cool first. Cooling helps prevent sogginess. Place leftover food in an airtight container. Glass containers work best but plastic is fine too. Label the container with the date to keep track of freshness. When reheating, use the oven for best results. Preheat your oven to 350°F (175°C). Place the chicken and squash on a baking sheet. Heat for about 15-20 minutes until warmed through. This method keeps the chicken skin crispy and the squash tender. You can also use a microwave, but it may lose some texture. To freeze, let the dish cool completely. Divide it into single portions for easy use. Use freezer-safe containers or bags. Squeeze out air before sealing. For thawing, move the portions to the fridge overnight. Reheat in the oven or microwave when ready to eat. This keeps the flavors and texture intact. Cook bone-in, skin-on chicken thighs at 425°F (220°C) for 25 to 30 minutes. Use a meat thermometer to check for doneness. The internal temperature should reach 165°F (74°C). This ensures the chicken is safe to eat and juicy. Yes, you can prep this dish ahead. Cut the butternut squash and store it in the fridge. You can also marinate the chicken with maple syrup and spices a day before. Keep the chicken covered in the fridge. Pair this dish with a fresh salad or roasted vegetables. A simple green salad with vinaigrette works well. You could also add grains like quinoa or brown rice for extra texture. Consider serving it with crusty bread for a hearty meal. This article guided you through creating a delicious maple roasted chicken and butternut squash dish. We covered key ingredients, step-by-step instructions, and tips for perfect roasting. You can have fun with variations and storage ideas, making your meal prep easier. Embrace this recipe’s flexibility and make it your own. Enjoy the warmth and flavors that come from this dish. Cooking should be simple and enjoyable for everyone. Happy roasting!

Sheet Pan Maple Roasted Butternut Squash & Chicken Delight

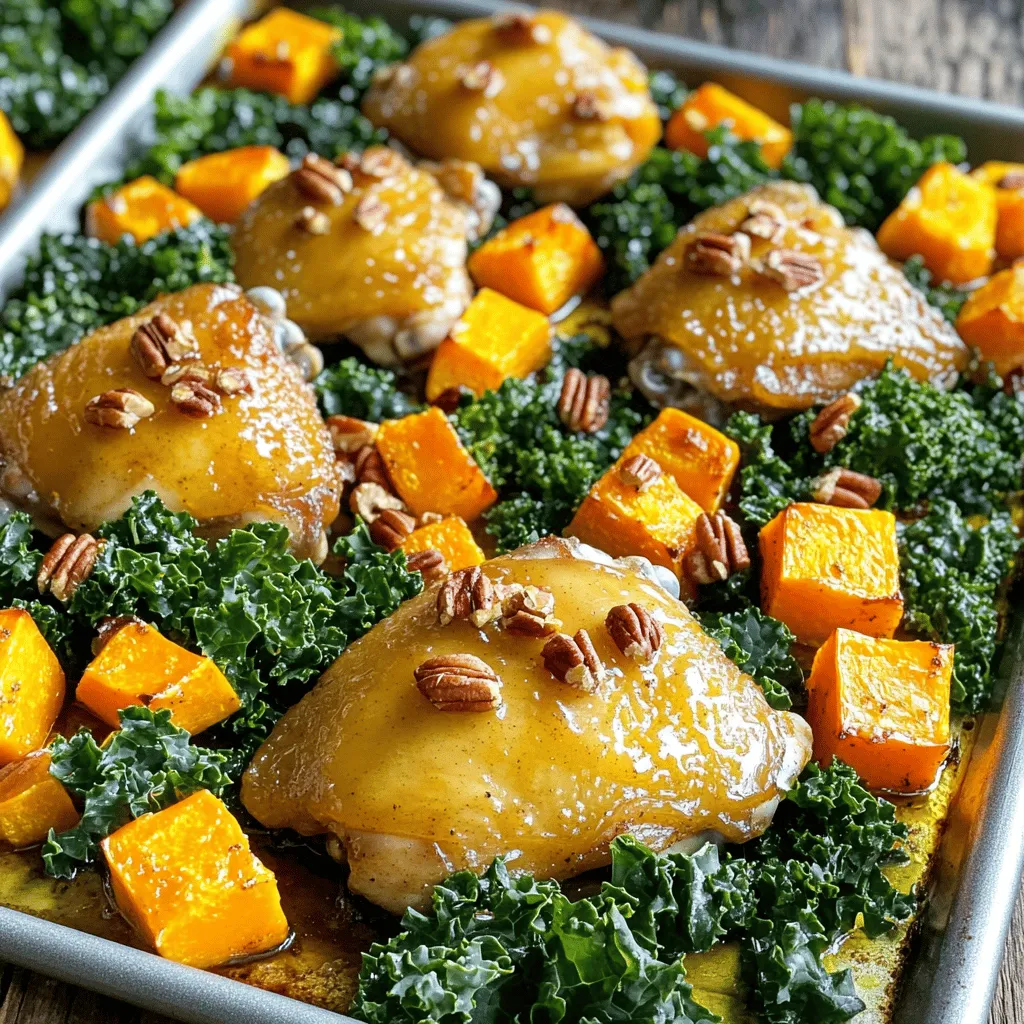
If you’re craving a simple, tasty meal, you’ll love my Sheet Pan Maple Roasted Butternut Squash & Chicken Delight. This

- 1 lb beef sirloin, thinly sliced - 4 cloves garlic, minced - 2 tablespoons fresh ginger, grated - 1 bell pepper, sliced - 1 cup broccoli florets - 2 carrots, julienned - 2 green onions, chopped The star of our dish is beef sirloin. It is tender and full of flavor. Thinly slicing it helps it cook fast and evenly. Garlic and ginger add a bright, zesty taste that wakes up the palate. You can’t go wrong with fresh garlic and ginger. For vegetables, I like bell peppers, broccoli, and carrots. They bring color and crunch to the dish. - 1 tablespoon soy sauce - 1 tablespoon oyster sauce - 1 teaspoon sesame oil For sauces, I use soy sauce and oyster sauce. These give the dish umami flavor. They also add a savory depth that makes your taste buds dance. Sesame oil adds a nutty aroma that makes everything better. Just a little goes a long way. - Salt and black pepper to taste - Additional garnishes like chopped green onions Seasoning is key to any stir fry. A sprinkle of salt and black pepper brightens flavors. You can adjust these to your taste. I like to garnish with green onions for a fresh finish. They add a pop of color and a mild onion taste. Using these ingredients makes Garlic Ginger Beef Stir Fry a true delight. Each part plays a role in crafting a flavorful dinner. Remember, fresh makes a big difference, so choose the best you can find. First, take the beef sirloin. Slice it thinly against the grain. This helps make it tender. Next, prepare the vegetables. Slice the bell pepper, julienne the carrots, and cut the broccoli into small florets. Set these aside for later. In a bowl, mix the sliced beef with soy sauce, oyster sauce, salt, and black pepper. Make sure each piece is well coated. Let the beef marinate for about 15 minutes. This step is key for flavor. Now, heat the vegetable oil in a large skillet or wok. Turn the heat to medium-high. Wait until the oil shimmers. Add the marinated beef to the skillet in a single layer. Sear it for 2-3 minutes without stirring. This browning adds great taste. After that, stir-fry for another 2-3 minutes until the beef is cooked through. Remove the beef and set it aside. In the same skillet, add minced garlic and grated ginger. Stir-fry for about 30 seconds. The aroma will fill your kitchen! Then, add the sliced bell pepper, broccoli, and carrots. Stir-fry for 4-5 minutes. You want the veggies to be tender but still crisp. Return the cooked beef to the skillet with the veggies. Drizzle sesame oil over the stir-fry. Toss everything together for another minute. This helps blend all the flavors. Serve your garlic ginger beef stir fry over cooked jasmine rice. Garnish with chopped green onions for a fresh touch. Enjoy your colorful and tasty meal! To enhance flavor, use a mix of soy sauce and oyster sauce. This combo gives the beef a deep and rich taste. Add a sprinkle of salt and black pepper for extra zing. Let the beef marinate for about 15 minutes. This short time helps the beef soak up the flavors without getting mushy. For stir-frying, use medium-high heat. This helps the beef sear quickly and keeps it juicy. When you add the beef, do not stir for the first 2-3 minutes. This helps it brown nicely. After browning, stir-fry for another 2-3 minutes. You want the beef to be fully cooked but not overdone. If you want to switch up the protein, try chicken or pork. Both work well in this dish. For a vegetarian option, use tofu instead of beef. When using sauces, you can replace oyster sauce with hoisin sauce. This keeps the dish rich and tasty without meat. {{image_2}} You do not have to stick to beef. You can use chicken instead. Thinly slice chicken breast, and marinate it just like the beef. Pork is another great option. Use pork tenderloin for tender bites. For a vegetarian twist, try tofu. Press and cube firm tofu. Marinate it as you would the beef. Then, stir-fry until golden brown for a tasty, plant-based meal. Feel free to mix up the veggies! Seasonal vegetables work best. In spring, use snap peas or asparagus. In winter, try Brussels sprouts or cauliflower. You can also get creative with mushrooms or zucchini. These choices add flavor and texture. The more colorful your plate, the more fun it is to eat! Want to amp up the taste? Add spices like crushed red pepper for heat. You can also try fresh herbs like cilantro or basil for a pop of flavor. Extra sauces can take your dish to new heights. Try adding teriyaki sauce or chili sauce for a different flavor. These simple tweaks can make your stir fry unforgettable! To store your garlic ginger beef stir fry, use airtight containers. This keeps the flavors fresh. You can keep it in the fridge for up to three days. If you want to save it longer, freeze it. In the freezer, it lasts up to three months. Make sure to label the containers with the date. This helps you track how long it's been stored. When it’s time to eat your leftovers, reheating is key. The best way to reheat stir fry is on the stove. Heat a non-stick skillet over medium heat. Add a splash of water or broth to keep it moist. Stir gently to warm it evenly. Avoid the microwave if you can. It may make the beef tough and the veggies soggy. To keep the flavor and texture, add a bit of fresh ginger or garlic while reheating. This boosts the taste and makes it feel fresh. Enjoy your tasty meal again! To add heat to your stir fry, you can use a few easy ingredients. Consider adding: - Red pepper flakes - Sliced fresh chili peppers - Sriracha sauce - Chili paste Start with a small amount. You can always add more heat if needed. The red pepper flakes give a nice kick. Fresh chili peppers add a crisp bite. Sriracha brings both spice and flavor. Just mix any of these into the stir fry while cooking for best results. Yes, you can make this stir fry in advance. Here are some meal prep tips: - Cook the beef and vegetables ahead of time. - Let them cool before storing. - Keep them in an airtight container in the fridge for up to three days. - Reheat on the stove or in the microwave before serving. You can also chop the vegetables and marinate the beef a day earlier. This saves time on busy days. This dish pairs well with several sides. Here are some recommended options: - Steamed jasmine rice - Fried rice with eggs and peas - Noodles tossed in soy sauce For drinks, consider serving: - Iced green tea - Light beer - Crisp white wine For appetizers, spring rolls or dumplings make great choices. They add a nice touch to your meal. This blog post guided you through making a tasty Garlic Ginger Beef Stir Fry. We covered the main ingredients, sauces, seasonings, and step-by-step cooking instructions. Remember the best practices for marinating and cooking to enhance flavors. Don’t hesitate to try different proteins and vegetables for unique variations. Proper storage keeps your leftovers fresh. Use these tips to impress your family and friends. With practice, this dish can become a favorite on your table. Enjoy exploring new flavors and perfecting your stir fry skills!

Garlic Ginger Beef Stir Fry Flavorful Dinner Delight

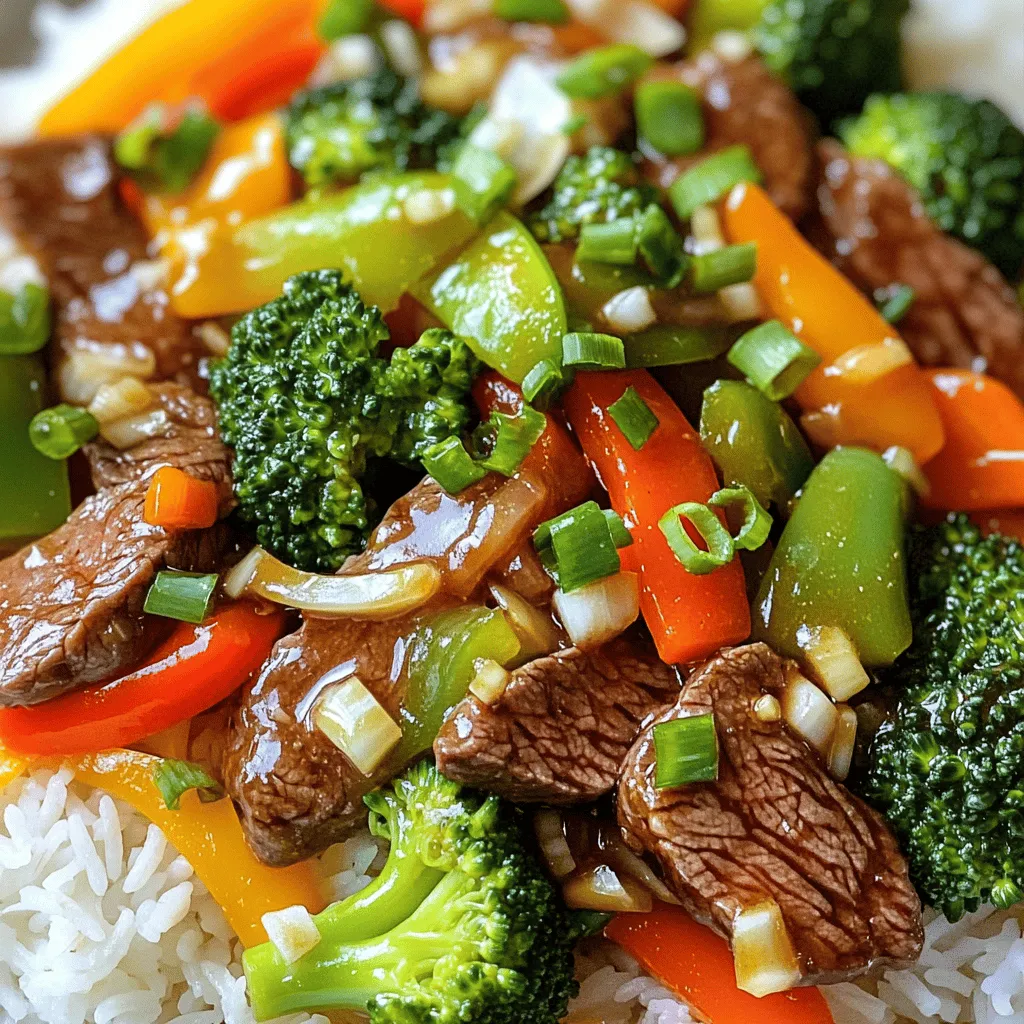
Welcome to the world of bold flavors with my Garlic Ginger Beef Stir Fry! This dish is a quick, tasty

For a tasty Greek Orzo Salad, gather these main ingredients: - 1 cup orzo pasta - 1 cup cherry tomatoes, halved - 1 cucumber, diced - ½ red onion, finely chopped - ½ cup Kalamata olives, pitted and sliced - 1 cup feta cheese, crumbled - ¼ cup fresh parsley, chopped - ¼ cup olive oil - 2 tablespoons lemon juice - 1 teaspoon dried oregano - Salt and pepper to taste These ingredients create a vibrant mix of flavors and textures. The orzo serves as a hearty base, while the veggies add crunch and color. Feta cheese brings a creamy tang, and Kalamata olives add a salty bite. You can customize your Greek Orzo Salad with these optional add-ins: - Bell peppers for extra crunch - Artichoke hearts for a unique twist - Chickpeas for added protein - Red wine vinegar for extra tang - Fresh mint or dill for a refreshing taste Feel free to mix and match based on your taste. Each added ingredient can change the salad's character and make it your own. Here’s a quick look at the nutritional benefits of the Greek Orzo Salad: - Orzo Pasta: Provides carbs for energy. - Tomatoes: Rich in vitamins and antioxidants. - Cucumber: Hydrating and low in calories. - Red Onion: Contains antioxidants and boosts flavor. - Olives: Offer healthy fats and enhance taste. - Feta Cheese: Adds calcium and protein. - Parsley: Packed with vitamins and adds freshness. - Olive Oil: A heart-healthy fat source. - Lemon Juice: High in vitamin C and brightens flavors. This salad is nutritious and offers a balanced meal. Each ingredient adds health benefits while keeping it delicious. Enjoy this dish knowing it’s good for you! {{ingredient_image_1}} To start, bring a large pot of salted water to a boil. Add 1 cup of orzo pasta. Cook it according to the package directions, usually about 8 to 10 minutes. You want the orzo to be al dente, not too soft. Once it's done, drain it in a colander. Rinse the orzo under cold water to cool it down quickly. This step helps prevent it from sticking together. While the orzo cooks, you can prepare the vegetables. Grab a large mixing bowl. Add 1 cup of halved cherry tomatoes, 1 diced cucumber, and ½ finely chopped red onion. Next, toss in ½ cup of sliced Kalamata olives and ¼ cup of chopped fresh parsley. These veggies add color and crunch to your salad. Now, let’s make the dressing. In a small bowl, whisk together ¼ cup of olive oil, 2 tablespoons of lemon juice, and 1 teaspoon of dried oregano. Season with salt and pepper to taste. This dressing brings bright flavors to the dish. Once the orzo is cool, add it to the mixing bowl with the veggies. Pour the dressing over the top. Toss everything together gently. You want all the ingredients to mix well but be careful not to break the orzo. After mixing, add 1 cup of crumbled feta cheese on top. Fold it in lightly to keep the feta intact. Taste your salad. Adjust seasoning if needed, with more salt, pepper, or lemon juice. Chill the salad in the fridge for at least 30 minutes. This allows the flavors to meld together. For serving, use a large shallow bowl. You can also serve it in individual portions. Garnish with extra parsley and a few olives for color. A wedge of lemon on the side adds a nice touch too. Enjoy your fresh and flavorful Greek Orzo Salad! To cook orzo, start with a large pot of salted water. Bring it to a boil. Add 1 cup of orzo pasta and cook it as the package says. This usually takes about 8 to 10 minutes. Stir it often to keep it from sticking. When the orzo is al dente, drain it well. Rinse it under cold water to stop the cooking. This keeps your orzo firm and tasty. To boost flavors in your salad, add fresh herbs. I love using parsley. It adds a bright taste. You can also mix in fresh mint or dill for a twist. For a zesty kick, try adding a pinch of red pepper flakes. A bit more lemon juice can freshen up the dressing too. Taste as you go to find your perfect balance. To serve your Greek Orzo Salad, use a large, shallow bowl. This gives a nice family-style look. For individual servings, use smaller bowls. Top each with extra parsley and a few olives for color. A wedge of lemon on the side adds a pop and lets guests squeeze fresh juice on their salad. It looks great and makes every bite more fun! Pro Tips Use Fresh Ingredients: Opt for fresh cherry tomatoes and cucumbers for the best flavor and texture in your salad. Customize Your Dressing: Feel free to adjust the lemon juice and olive oil to suit your taste; add more lemon for brightness or olive oil for richness. Add Protein: For a heartier dish, consider adding grilled chicken or chickpeas to the salad for extra protein. Garnish for Presentation: A sprinkle of additional parsley or a few extra olives on top can enhance both the look and flavor of your dish. {{image_2}} You can make this Greek orzo salad vegetarian-friendly. Skip the feta cheese or use a plant-based cheese. You can also add more veggies. Try bell peppers, artichokes, or spinach. These swaps keep the dish fresh and tasty. Want to add protein? Grilled chicken or shrimp works great. Cook the chicken with olive oil and spices. For shrimp, sauté with garlic and lemon. Add these to your salad after the orzo cools. This way, you get a filling meal that's still light. Feel free to swap ingredients based on what you have. If you don’t like Kalamata olives, use black olives. You can also change the cheese. Try goat cheese for a tangy twist. Change up the veggies too! Add roasted zucchini or fresh arugula for extra flavor. To keep your Greek orzo salad fresh, store it in an airtight container. Place it in the fridge. This helps keep the flavors bright and the vegetables crisp. Avoid adding the feta cheese until you serve it. This keeps the cheese from getting soggy. I do not recommend freezing Greek orzo salad. The texture of the orzo and veggies can change. If you freeze it, the salad may become mushy when thawed. Instead, make only what you can enjoy fresh. Greek orzo salad lasts about 3 to 5 days in the fridge. Make sure to check for any signs of spoilage before eating. If the vegetables look wilted or the salad smells off, it's best to throw it away. To enjoy it at its best, eat the salad within this time frame. Yes, you can make Greek Orzo Salad ahead of time. I often prepare it a day before. This lets the flavors mix well. Just keep it in the fridge. Before serving, give it a quick toss. You may want to add a bit more lemon juice for freshness. If you don't have feta cheese, try using goat cheese. It gives a similar creamy taste. You can also use ricotta cheese for a milder flavor. For dairy-free options, try crumbled tofu or vegan feta. These substitutes work well in the salad. No, this salad is not gluten-free. Orzo pasta is made from wheat. If you need a gluten-free option, use gluten-free pasta. Many brands offer orzo made from rice or corn. It tastes great and keeps the salad's texture. Greek Orzo Salad can last about 3 to 5 days in the fridge. Make sure to store it in an airtight container. The veggies might soften over time, but the taste stays good. If you notice any change in smell or color, it's best to toss it. Greek Orzo Salad is fresh, tasty, and easy to make. We looked at key ingredients, cooking steps, and helpful tips. You can customize it with fun add-ins or swap ingredients for your taste. Storing it correctly keeps it fresh longer. I hope you feel ready to try making this salad. Enjoy each bite, knowing it’s good for you too!

Greek Orzo Salad Fresh and Flavorful Recipe Guide

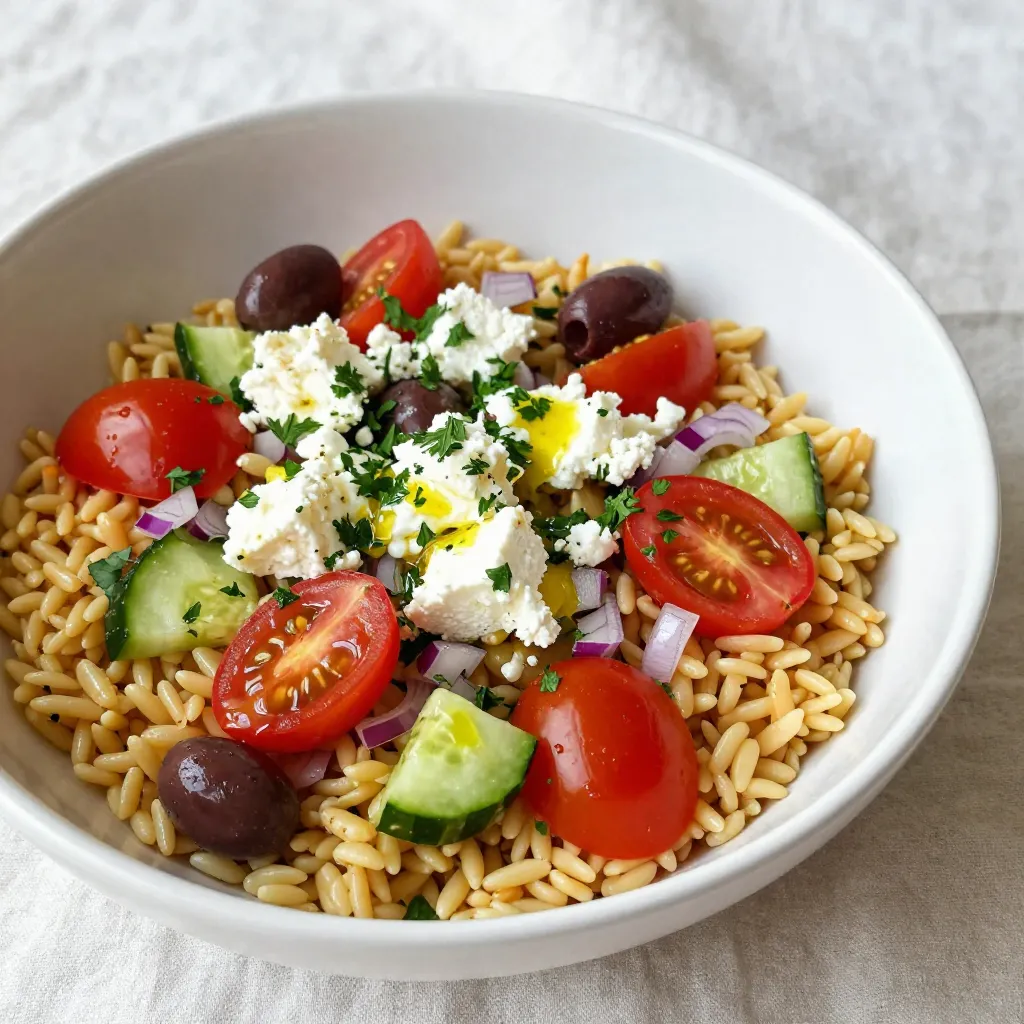
Are you ready for a dish that bursts with flavor and freshness? Greek Orzo Salad is your next go-to recipe!

- 1 pound boneless, skinless chicken thighs, cut into bite-sized pieces - 1/4 cup low-sodium soy sauce - 2 tablespoons honey - 2 tablespoons rice vinegar - 1 tablespoon sesame oil - 2 cloves garlic, minced - 1 teaspoon fresh ginger, grated The key to great Air Fryer Teriyaki Chicken Bites is in the main ingredients. I love using boneless, skinless chicken thighs because they stay juicy and tender. The marinade adds so much flavor. Soy sauce gives it a salty taste. Honey adds sweetness, while rice vinegar brings a slight tang. Sesame oil gives a rich depth, and garlic and ginger add a lovely kick. Mixing these ingredients creates a delicious base for our chicken. - 1 tablespoon cornstarch - 1 tablespoon sesame seeds - 2 green onions, sliced (for garnish) After marinating, we coat the chicken with cornstarch. This step gives it a nice crunch when cooked. Sesame seeds add a nutty flavor and a beautiful look. Finally, sliced green onions bring freshness and color to the dish. Together, these ingredients complete our tasty meal. First, gather your ingredients for the marinade. In a medium bowl, mix together: - 1/4 cup low-sodium soy sauce - 2 tablespoons honey - 2 tablespoons rice vinegar - 1 tablespoon sesame oil - 2 cloves garlic, minced - 1 teaspoon fresh ginger, grated Stir well to blend all the flavors. This step is key to making your chicken tasty. Next, add the chicken thighs cut into bite-sized pieces. Make sure every piece is covered in the marinade. Cover the bowl and place it in the fridge. Let it sit for at least 30 minutes. You can also let it marinate for up to 2 hours for more flavor. After marinating, take the chicken out of the fridge. Let any extra marinade drip off. Now, sprinkle 1 tablespoon of cornstarch over the chicken. Toss the chicken gently to coat it well. This will help give your chicken a nice crunch. Next, preheat your air fryer to 400°F (200°C). It usually takes about 5 minutes. Once preheated, place the chicken bites in a single layer in the air fryer basket. If your basket is small, cook in batches. Air fry the chicken for 12-15 minutes. Halfway through, shake the basket to ensure even cooking. The chicken should be golden brown and fully cooked when done. Now, remove the chicken from the air fryer carefully. To make it extra special, drizzle the reserved marinade over the chicken. Make sure to cook this marinade in a pan first to ensure it is safe to eat. Finally, sprinkle sesame seeds on top and add sliced green onions for a fresh touch. This adds a nice pop of color and flavor, making your dish look beautiful! Enjoy your Air Fryer Teriyaki Chicken Bites! To make your teriyaki chicken bites even tastier, let them marinate longer. If you keep them in the marinade for up to two hours, they soak up more flavor. This makes each bite more delicious. You can also adjust the honey for sweetness. If you like it sweeter, add an extra teaspoon. For a less sweet flavor, reduce the honey by a teaspoon. Getting that perfect crispy texture is key. Here are some tips for achieving crispy bites. First, coat the chicken with cornstarch evenly. This helps create that nice crunch. Also, be careful with the air fryer capacity. If you crowd the basket, the chicken won’t cook evenly. Air fry in small batches if needed. This way, each piece gets the heat it needs to be golden brown. {{image_2}} You can change the protein in this dish. While chicken thighs are great, chicken breast works too. For a plant-based option, try tofu. Just cut it into bite-sized pieces like the chicken. You can also swap out the teriyaki sauce. Store-bought brands vary in taste. You can mix up your own sauce at home. Simply use soy sauce, honey, and a bit of rice vinegar. Adjust the ingredients to suit your taste. Pair your teriyaki chicken bites with tasty sides. Rice is a classic choice. You can use white rice, brown rice, or even cauliflower rice for a low-carb option. Steamed or roasted vegetables add color and nutrition. Broccoli or snap peas work well here. Garnishes can elevate your dish. Fresh cilantro adds a zesty touch. Squeezing lime juice on top gives a nice brightness. You can also use sesame seeds for extra crunch. These small changes can make your meal even more delightful. To keep your Air Fryer Teriyaki Chicken Bites fresh, store them properly. Place the cooled chicken in an airtight container. This helps lock in flavor and moisture. You can refrigerate it for up to three days. For longer storage, freeze the chicken bites. Use a freezer-safe bag or container. Make sure to remove as much air as possible. Label the container with the date. The chicken will stay fresh for about three months in the freezer. When reheating, your goal is to keep that crispy texture. The air fryer is your best friend here. Preheat it to 375°F (190°C). Place the chicken bites in a single layer. Heat them for about 5-7 minutes. Shake the basket halfway through for even heating. If you use a microwave, the chicken may lose its crispiness. If you must use it, place a paper towel under the chicken. This helps absorb some moisture. Enjoy your tasty chicken bites like they are fresh from the fryer! You should marinate the chicken for at least 30 minutes. This helps the meat soak up the flavors. For a stronger taste, marinate for up to 2 hours. The longer the chicken sits, the more delicious it becomes. Yes, you can! If you don’t have an air fryer, use a conventional oven. Preheat your oven to 400°F (200°C). Place the chicken bites on a baking sheet lined with parchment paper. Bake for about 20-25 minutes, flipping halfway through. This method also gives you tasty chicken bites, just with a different texture. These chicken bites pair well with steamed rice or quinoa. You can also add some stir-fried vegetables for a healthy side. A fresh salad or a light cucumber salad offers a great balance. The sweet and savory flavors of the chicken shine through with these options. This blog post covered how to make delicious Air Fryer Teriyaki Chicken Bites. We explored the key ingredients like chicken thighs and a tasty marinade. I shared easy steps for marinating and cooking, plus tips for perfecting flavor and texture. You can try variations with different proteins and sauces. Don't forget to store leftovers properly for later enjoyment. With these insights, you can create tasty meals with confidence. Enjoy cooking and experimenting with your own twists!

Air Fryer Teriyaki Chicken Bites Simple and Tasty Meal

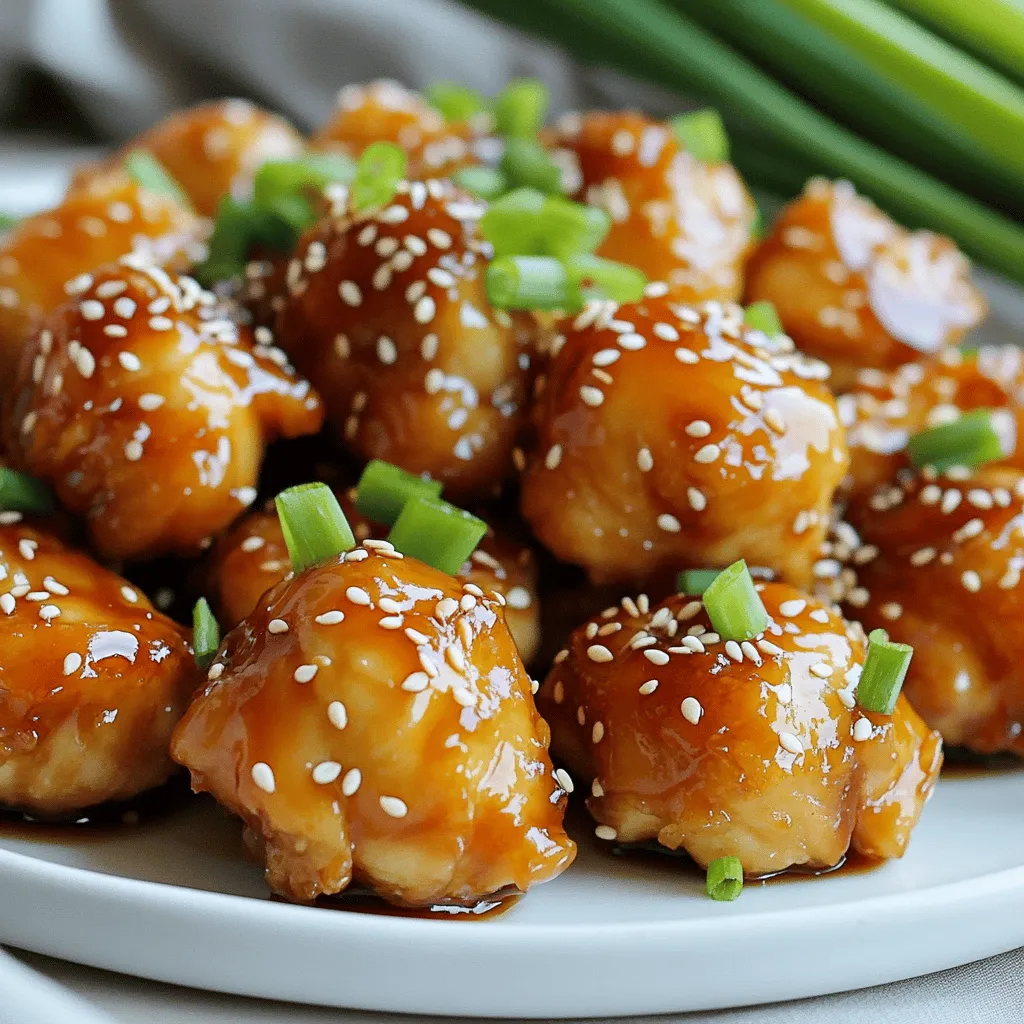
Craving a quick and tasty meal? Let me show you how to make Air Fryer Teriyaki Chicken Bites! This dish

For this dish, you need 1 pound of large shrimp. Make sure they are peeled and deveined. Fresh shrimp works best, but frozen shrimp is fine if you thaw it first. Rinse the shrimp under cold water and pat them dry. This helps the seasoning stick better. You will need 2 medium zucchinis. You can spiralize them into noodles or grate them. Both methods work well in adding texture. You also need ¼ cup of chicken or vegetable broth. This adds moisture and flavor to the dish. For flavor, use 4 tablespoons of unsalted butter and 4 cloves of minced garlic. The garlic gives a nice aroma. Add 1 teaspoon of red pepper flakes for some heat. You can adjust this to your taste. Don’t forget salt and pepper to season. Finish with 2 tablespoons of fresh parsley and 2 tablespoons of lemon juice. The lemon juice adds brightness, while the parsley gives a fresh touch. First, rinse the shrimp in cold water. This helps to clean them. Next, pat them dry using paper towels. Dry shrimp cook better and absorb flavors well. Lightly season your shrimp with salt and pepper. This step is crucial for flavor. Now, heat four tablespoons of unsalted butter in a large skillet. Set the heat to medium. Once the butter melts, add four minced garlic cloves and one teaspoon of red pepper flakes. Stir this mixture for about 1-2 minutes. You want it to smell great but not brown. Next, gently add the shrimp in a single layer. Cook them for about 2-3 minutes on each side. They should turn pink and opaque. Be careful not to overcook them, or they will become tough. Add the spiralized or grated zucchini to the skillet. Pour in a quarter cup of chicken or vegetable broth. Stir everything together. Cook for another 2-3 minutes until the zucchini is slightly tender. This keeps the dish fresh and light. Finally, squeeze two tablespoons of lemon juice over the mixture. Stir in two tablespoons of chopped parsley. Taste your dish and adjust salt or pepper if needed. Your meal is ready to serve hot! Transfer to plates and garnish with extra parsley for a lovely touch. When picking shrimp, look for a few key signs. Fresh shrimp should smell like the ocean, not fishy. The shells should be shiny and wet, not dry or discolored. If possible, buy shrimp that are still in their shells. This keeps them fresher longer. Always check the eyes, too. They should be clear, not cloudy. If you find shrimp that are frozen, they can still be great! Just make sure they are not freezer burnt. You can make this dish truly yours by playing with seasonings. I love adding lemon juice for a fresh zing. Red pepper flakes bring just the right amount of heat. If you want more flavor, consider adding herbs like thyme or basil. For a twist, try a splash of soy sauce or Worcestershire sauce. Always taste your dish as you cook. This way, you can adjust the salt and pepper to your liking. Cooking zucchini just right keeps it tender yet firm. Spiralized zucchini cooks quickly, so avoid overcooking. In this recipe, add it to the pan with the shrimp. Cook for just 2-3 minutes. You want it to soften slightly but still have a bite. If you prefer grated zucchini, squeeze out excess water before adding it. This keeps your dish from getting too watery. Enjoy the fresh taste and texture that zucchini brings to your meal! {{image_2}} This Minute Garlic Butter Shrimp Zucchini Rice is a great gluten-free meal. All the main ingredients are gluten-free. Just make sure your broth is gluten-free. You can also add rice instead of zucchini for a heartier dish. Want to boost the nutrition? Add more veggies! You can mix in bell peppers, carrots, or spinach. These will add color and flavor. Just chop them small. Sauté them with the garlic for about a minute before adding the shrimp. Like it spicy? You can change the heat level. Use more red pepper flakes for a stronger kick. If you prefer mild, reduce or skip the flakes. You can also add a touch of cayenne pepper for an extra zing. Adjust to your taste and enjoy! Store any leftover Minute Garlic Butter Shrimp Zucchini Rice in an airtight container. Keep it in the fridge for up to three days. Make sure to cool it before sealing the container. This helps keep the shrimp and zucchini fresh. You can freeze this dish if you want to save it for later. Place the cooled shrimp and zucchini rice in a freezer-safe bag. Remove as much air as possible. It can last up to three months in the freezer. When you're ready to eat, let it thaw in the fridge overnight. To reheat, you can use the microwave or stovetop. If using a microwave, put it in a bowl and cover it. Heat in short bursts, stirring in between. If using the stovetop, add a splash of broth or water to a pan. Heat it over low until warm. Stir often to avoid burning. Enjoy your meal just like it was made fresh! It takes about 15 minutes to make this dish. You spend 10 minutes prepping the shrimp and zucchini. Cooking takes around 5 minutes. This quick time makes it perfect for busy nights. Yes, you can use frozen shrimp. Just thaw them before cooking. To thaw, place shrimp in cold water for 15-20 minutes. Drain and pat dry after thawing. This helps cook them evenly and keeps them tasty. You can use other veggies like yellow squash or cauliflower rice. Both options add a nice texture. If you prefer grains, try quinoa or rice. Each choice brings a unique flavor and fits well with the shrimp. This blog post covered how to make Minute Garlic Butter Shrimp Zucchini Rice. We discussed the main ingredients, like shrimp, zucchini, and spices. You learned how to prepare the shrimp and cook it perfectly with garlic. We shared tips on choosing fresh shrimp and adjusting flavors. You can also explore fun variations, storage options, and answers to common questions. Now you have all the tools to create this tasty dish easily. Enjoy cooking!

Minute Garlic Butter Shrimp Zucchini Rice Delight

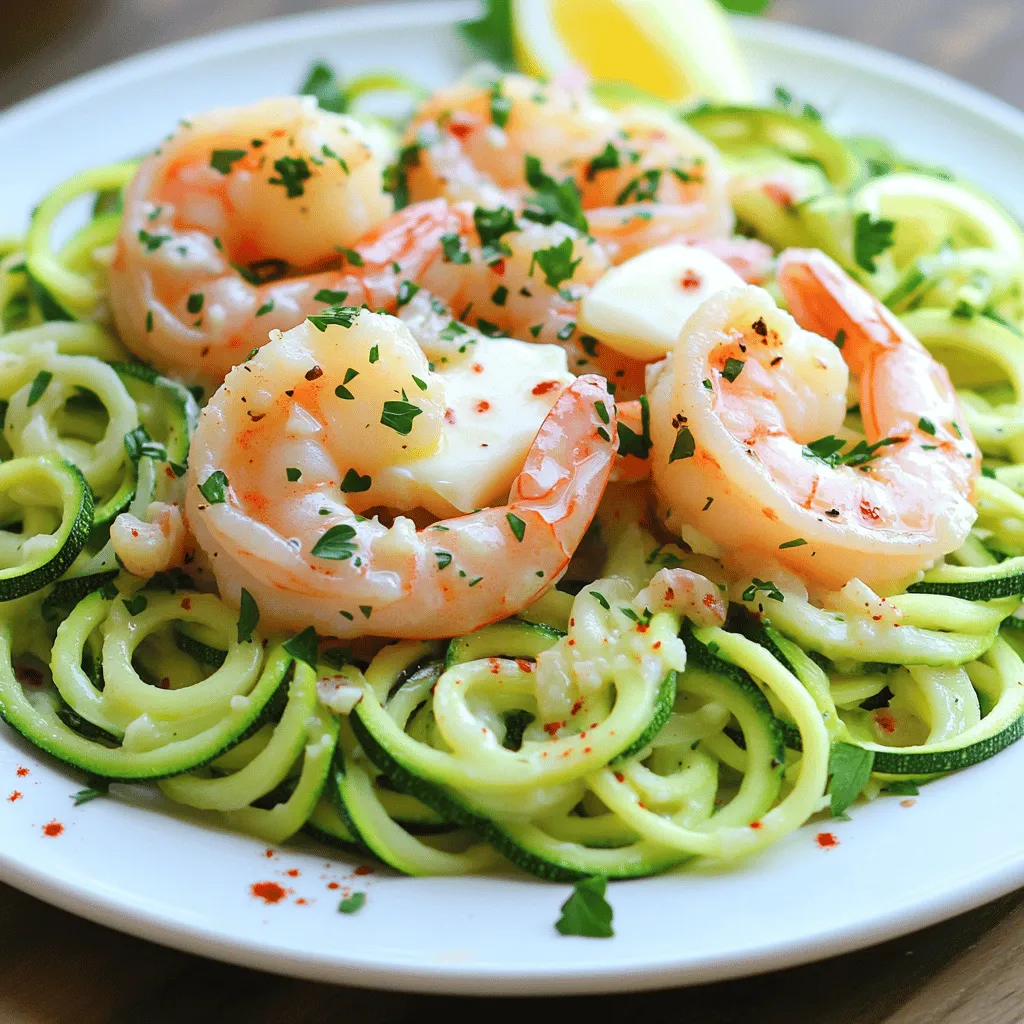
Welcome to my kitchen! Today, I’ll show you how to make Minute Garlic Butter Shrimp Zucchini Rice Delight. This dish

Older posts
Newer posts
← Previous Page1 … Page23 Page24 Page25 … Page84 Next →

dsad

© 2026 juliesdish • Built with GeneratePress

Our Policies

  • Copyright Policy
  • Cookie Policy
  • GDPR Policy
  • Privacy Policy
  • Disclaimer
  • Terms Of Use

More Information

  • Home
  • About
  • Contact
  • Appetizers
  • Dessert
  • Dinner
  • Drinks
©2026, juliesdish About Back To Top