Skip to content
DisclaimerTerms Of UseGDPR PolicyCookie Policy

juliesdish

  • Home
  • Drinks
  • Appetizers
  • Dinner
  • Dessert
  • About
  • Contact
  • Privacy Policy
DisclaimerTerms Of UseGDPR PolicyCookie Policy

NO-ING-IMG

- 1 cup graham cracker crumbs - 4 tablespoons unsalted butter, melted - 2 cups cream cheese, softened - 1 cup powdered sugar - 1 teaspoon vanilla extract - 1 tablespoon lemon zest - 2 tablespoons lemon juice - 1 cup heavy whipping cream - 1 cup fresh blueberries - Mint leaves for garnish Measuring ingredients correctly is key to great cheesecake cups. Use dry measuring cups for crumb and sugar. For melted butter, use a liquid measuring cup. To measure cream cheese, pack it tightly into the cup. Use a spoon for lemon zest and juice. This gives you the best flavor. For fun and color, you can add some optional garnishes. Try using extra blueberries on top. A sprinkle of lemon zest adds brightness. Fresh mint leaves give a nice touch and flavor. You can also drizzle honey or a berry sauce on top for sweetness. To start, grab a medium bowl. In this bowl, mix one cup of graham cracker crumbs with four tablespoons of melted unsalted butter. Make sure the crumbs get fully coated in the butter. This mix should feel a bit wet. Next, take about six small serving cups. Divide the crumb mix among them. Press it down firmly at the bottom to create a nice crust layer. This step sets the base for your cheesecake cups. Now, let’s make the creamy filling. Use a large mixing bowl and add two cups of softened cream cheese. Beat it until smooth. Then, slowly add one cup of powdered sugar, one teaspoon of vanilla extract, one tablespoon of lemon zest, and two tablespoons of lemon juice. Keep mixing until everything blends together well. In a separate bowl, whip one cup of heavy cream until it forms stiff peaks. Gently fold this whipped cream into your cream cheese mix. This step adds lightness to the filling. With your crust ready and the filling made, it’s time to assemble. Spoon the cheesecake filling into each cup, filling them to the top. Now, take one cup of fresh blueberries and place them on top of the filling. Press them down gently so they nestle into the cream. After that, cover your cups and place them in the fridge for at least two hours. This helps them set nicely. Before you serve, add a few mint leaves on top for color and freshness. Enjoy your delicious lemon blueberry cheesecake cups! When making Lemon Blueberry Cheesecake Cups, watch out for a few key mistakes: - Not softening cream cheese: If it’s cold, it won’t mix well. - Overmixing: Mixing too long can make the filling too runny. - Skipping the chill time: Letting the cups set is crucial for the right texture. - Using stale crumbs: Fresh crumbs ensure a tasty crust. For great whipped cream, follow these steps: - Start with cold heavy cream. Cold cream whips better. - Use a clean bowl and beaters. This helps the cream whip up faster. - Beat on medium speed until stiff peaks form. Stop when it looks fluffy. - Fold gently into the cheesecake mix. This keeps it light and airy. Serve your cheesecake cups in fun ways: - Place them on a bright platter for a pop of color. - Drizzle extra lemon zest around the cups for a fun look. - Add more blueberries on top for extra flavor. - Garnish with mint leaves for a fresh touch. Enjoy these sweet treats chilled! {{image_2}} You can change the flavor of your cheesecake cups. Instead of lemon, try lime for a zesty twist. You can also use orange zest and juice for a sweet citrus flavor. For a berry burst, mix in raspberry or strawberry puree. Each flavor gives a new taste, keeping your dessert fresh and exciting. If you need a dairy-free option, use vegan cream cheese and coconut cream. You can also swap the graham crackers for gluten-free crumbs. If you want a lower-sugar treat, use a sugar substitute in place of powdered sugar. These choices let everyone enjoy the dessert without worry. You can serve these cheesecake cups in various ways. Use small mason jars for a rustic look. Try glass dishes to show off the beautiful layers. For a fun twist, layer the crust and filling in parfait cups. You can also make mini versions in shot glasses for a party treat. Each style makes your dessert unique and fun to eat. To keep your lemon blueberry cheesecake cups fresh, cover them tightly with plastic wrap. You can also use an airtight container. This helps prevent them from drying out or absorbing other smells in the fridge. Store the cups in the fridge for up to three days. Remember, they taste best when eaten fresh! You can freeze these cheesecake cups, but it's best to freeze them without the blueberries. Place the cups in a single layer in a freezer-safe container. They can stay frozen for up to two months. When you're ready to enjoy them, thaw in the fridge overnight. Add fresh blueberries just before serving. Lemon blueberry cheesecake cups last for about three days in the fridge. If you freeze them, they will be good for about two months. Always check for any signs of spoilage before you eat. Enjoy your delightful treat while it's fresh! Yes, you can use other berries. Strawberries, raspberries, and blackberries all work well. Each berry gives a unique flavor. You can mix berries for a colorful twist too. Just make sure they are fresh and ripe for the best taste. If you lack heavy cream, you can use whipped topping instead. Cream cheese can also be mixed with milk to create a creamy texture. For a lighter option, use yogurt. It will change the flavor a bit but still taste good. To make this dessert gluten-free, use gluten-free graham crackers or crushed nuts. Almonds or pecans are great options for the crust. Check that all other ingredients are gluten-free. This way, you can enjoy the cheesecake cups without worry. In this post, I outlined the ingredients and steps to make delicious cheesecake cups. You learned about measuring tips, preparing the crust, and making the filling. I shared common mistakes to avoid and tasty flavor variations. Proper storage info helps keep your treats fresh. In closing, these cheesecake cups are simple and fun to make. Enjoy experimenting with flavors and sharing with friends!

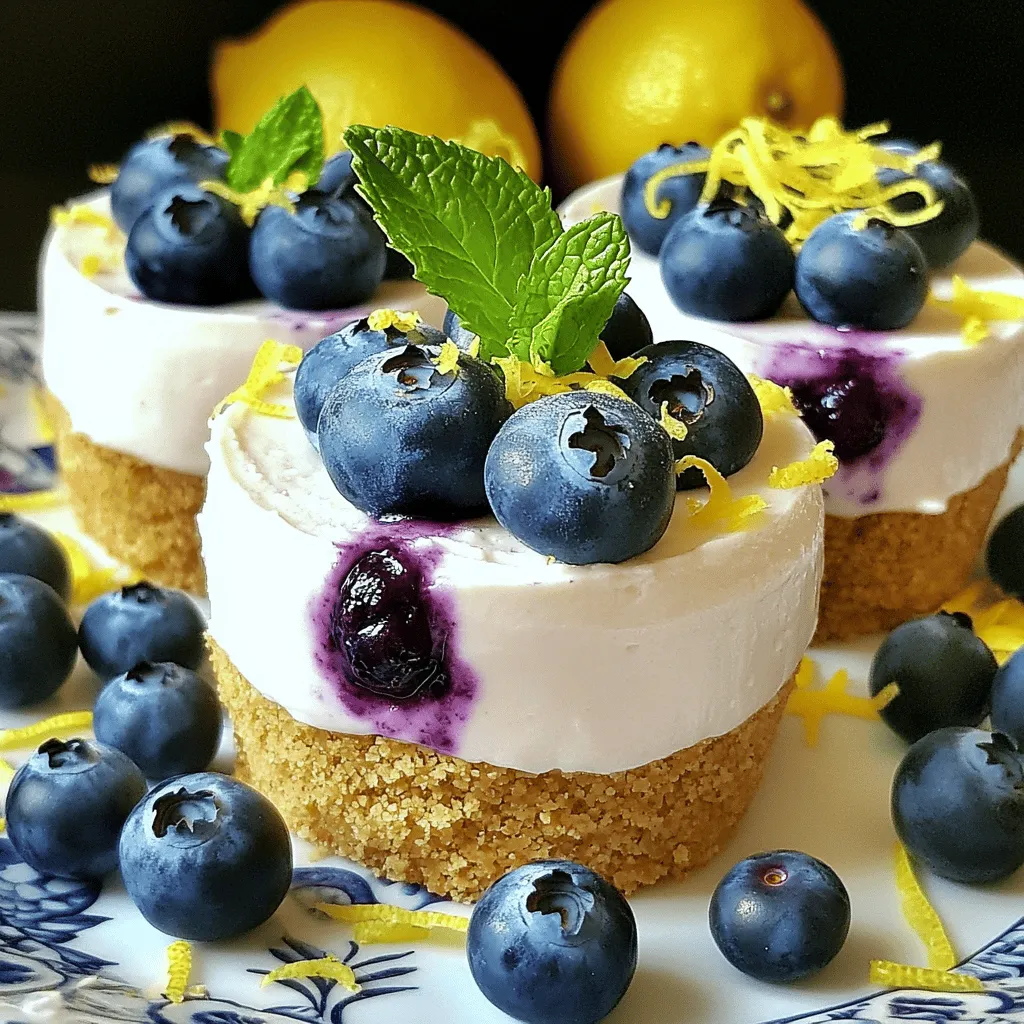
Lemon Blueberry Cheesecake Cups Delightful and Easy

If you love the bright taste of lemon and blueberries, you’re in for a treat! These Lemon Blueberry Cheesecake Cups

To make Cheddar Garlic Biscuit Twists, you need a few key ingredients. Here is a list to get you started: - 2 cups all-purpose flour - 1 tablespoon baking powder - 1/2 teaspoon salt - 1/4 teaspoon black pepper - 1/2 cup unsalted butter, cold and cubed - 1 cup shredded sharp cheddar cheese - 3/4 cup buttermilk - 2 tablespoons garlic powder These ingredients work together to create a rich, savory flavor. The sharp cheddar gives a nice kick, while the garlic powder adds a delightful aroma. Adding some optional ingredients can take your biscuit twists to the next level. Consider these: - 1/4 cup fresh parsley, chopped Fresh parsley not only brightens the flavor but also adds a pop of color. You can mix it into the dough or sprinkle it on top before baking. Having the right tools makes cooking easier. For this recipe, you will need: - A large mixing bowl - A pastry cutter or your fingers for mixing - A baking sheet lined with parchment paper - A rolling pin (optional, for shaping the dough) These tools will help you mix, shape, and bake your biscuit twists with ease. Happy cooking! Start by preheating your oven to 425°F (220°C). Line a baking sheet with parchment paper. In a large bowl, mix 2 cups of flour, 1 tablespoon of baking powder, 1/2 teaspoon of salt, and 1/4 teaspoon of black pepper. Make sure to mix these well. Next, add 1/2 cup of cold, cubed butter to your dry mix. Use your fingers or a pastry cutter to blend until it looks like coarse crumbs. This step makes your biscuits flaky. Now, stir in 1 cup of shredded sharp cheddar cheese and 2 tablespoons of garlic powder. Mix until evenly combined. Then, pour in 3/4 cup of buttermilk. Stir gently until just mixed. Be careful not to overwork the dough. Turn your dough onto a lightly floured surface. Pat it into a rectangle about 1 inch thick. Use a knife to cut the rectangle into strips, about 1 inch wide. Twist each strip several times to create a fun spiral shape. Lay them on your prepared baking sheet, leaving space between each twist. This allows them to puff up nicely. Brush the tops of your twists with 1/4 cup of melted butter. If you like, sprinkle some chopped fresh parsley on top for color and flavor. Bake in your preheated oven for 12-15 minutes. Watch for them to turn golden brown. Once done, take them out and let them cool for a few minutes. Serve these biscuit twists warm. They look great on a wooden board or in a rustic basket. You can drizzle more melted butter over the top for extra flavor. Enjoy! When making biscuit twists, avoid overworking the dough. This action makes the biscuits tough. Don't skip the cold butter. It is key for flaky layers. Also, ensure your baking powder is fresh. Old powder can lead to flat biscuits. Remember to cut the dough into even strips. This helps them bake evenly. To get fluffy biscuits, use cold ingredients. Keep your butter and buttermilk cold until you mix them in. Mix the dry ingredients well before adding the wet ones. This ensures even flavor throughout. When you shape the dough, handle it gently. Pat it out instead of rolling it to keep air pockets. For great color, brush the tops with melted butter before baking. This gives a golden finish. Bake at a high temperature, 425°F (220°C), for a nice rise. Keep an eye on them at the 12-minute mark. Remove them when they turn golden brown. Let them cool slightly before serving to enhance the texture. {{image_2}} If you want to change things up, swapping ingredients is easy. You can use gluten-free flour instead of all-purpose flour. This helps those with gluten issues enjoy the biscuit twists. If you want a vegan option, replace the butter with plant-based butter. For the buttermilk, mix one cup of plant milk with one tablespoon of vinegar. Let it sit for a few minutes to thicken. You can get creative and add fun flavors! Try mixing in some cooked bacon bits for a savory twist. Adding jalapeños gives a spicy kick. For a sweet touch, consider adding honey or a dash of cinnamon to the dough. You can also use different herbs, like rosemary or thyme, to change the taste. These biscuit twists are great alone, but they shine with the right pairings. Serve them with a bowl of warm soup, like tomato or potato leek, for a cozy meal. They also work well with dips, such as garlic aioli or creamy ranch. For a fun snack, try them with a side of marinara sauce. You can even enjoy them with a fresh salad to balance the richness. To keep your leftover biscuit twists fresh, place them in a sealed container. You can also wrap them in plastic wrap. Storing them this way helps maintain their softness. It’s best to keep them at room temperature for up to two days. If you need them to last longer, the fridge is a good option. To reheat your biscuit twists, preheat your oven to 350°F (175°C). Place the twists on a baking sheet. Heat them for about 5-7 minutes. This will make them warm and crispy again. If you like, brush a little melted butter on top for extra flavor. When stored properly, these biscuit twists last for about 2 days at room temperature. In the fridge, they can last up to a week. If you freeze them, they can stay good for about a month. Just remember to wrap them tightly to avoid freezer burn. Yes, you can use other cheeses! Try mozzarella or gouda for a milder taste. If you want a stronger flavor, use pepper jack or parmesan. Mixing cheeses can also add depth. Just make sure to keep the total cheese amount the same. To make these biscuit twists gluten-free, swap the all-purpose flour for a gluten-free blend. Look for one that works well for baking. You can also add a bit of xanthan gum to help with texture. Follow the same steps in the recipe for the best results. These biscuit twists go well with many dishes. Serve them alongside soups, like tomato or chicken noodle. They also pair nicely with salads or as a side to grilled meats. For a snack, enjoy them with dips or spreads like hummus or ranch. You learned how to make delicious cheddar garlic biscuit twists. We covered the key ingredients, steps, and useful tips for success. You can adjust this recipe to fit your needs, whether you want it gluten-free or have other flavors in mind. Remember, baking is all about practice. With each attempt, your biscuit twists will improve. Enjoy making and sharing them with friends and family!

Cheddar Garlic Biscuit Twists Flavorful and Easy Recipe

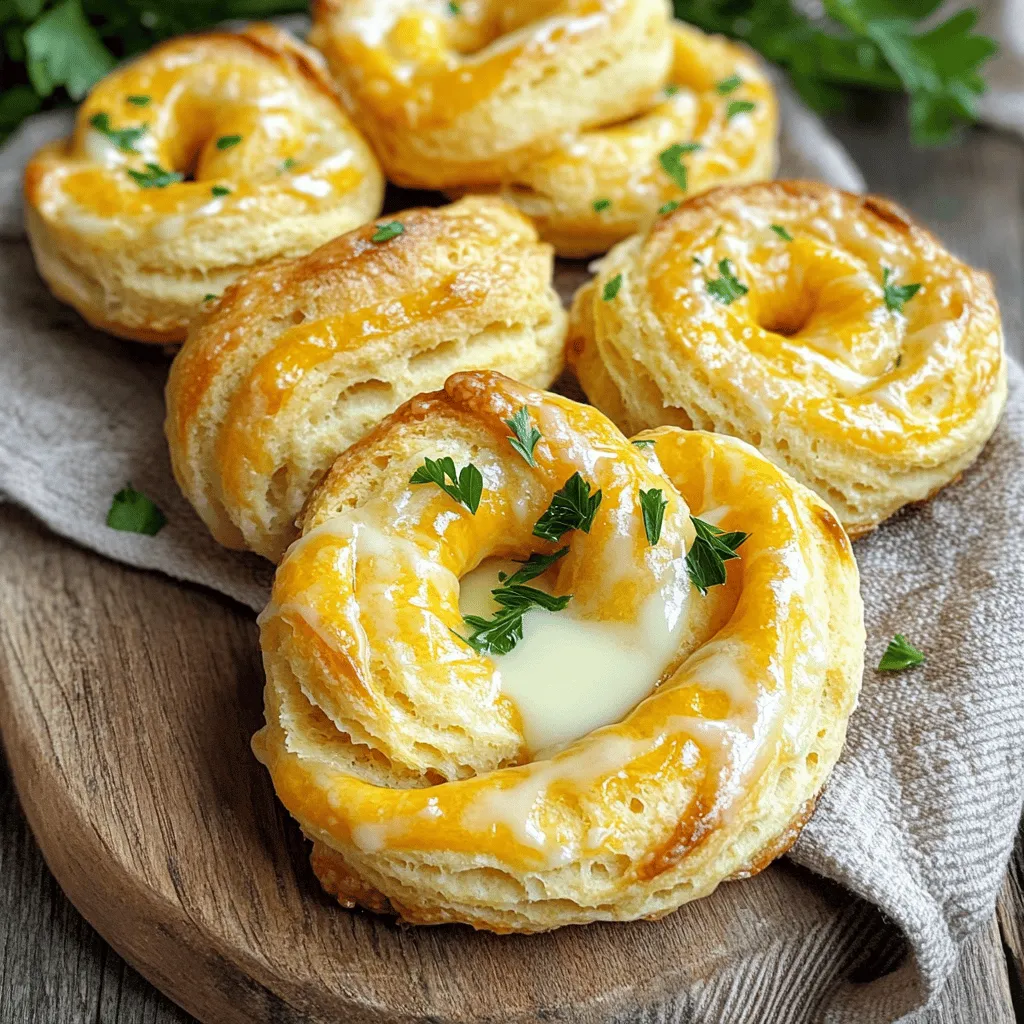
Looking to elevate your snack game? My Cheddar Garlic Biscuit Twists are a must-try! They’re quick to make and packed

- 2 cups all-purpose flour - 2 cups granulated sugar - ¾ cup unsweetened cocoa powder - 1 ½ teaspoons baking powder - 1 ½ teaspoons baking soda - 1 teaspoon salt - 2 large eggs - 1 cup whole milk - ½ cup vegetable oil - 2 teaspoons vanilla extract - 1 cup boiling water - 1 cup caramel sauce (store-bought or homemade) - 1 cup heavy whipping cream - 2 tablespoons powdered sugar - Flaky sea salt for garnish The ingredients for this cake create a perfect balance of rich chocolate and sweet caramel. The all-purpose flour gives the cake structure. The granulated sugar adds sweetness, while cocoa powder brings that deep chocolate flavor. Baking powder and baking soda help the cake rise, making it fluffy and light. The eggs provide moisture and richness. Whole milk adds creaminess, and vegetable oil keeps the cake moist. Vanilla extract enhances the flavor, while boiling water helps to dissolve the cocoa, making the batter smooth. The caramel sauce brings that irresistible sweetness, and heavy whipping cream makes the frosting light and airy. Lastly, flaky sea salt adds a nice touch of contrast. - Suggestions for gluten-free flour: Use a gluten-free all-purpose flour blend. - Alternatives for eggs: You can use unsweetened applesauce or mashed banana as egg replacements. - Dairy-free options for milk and cream: Swap whole milk with almond or oat milk. Use coconut cream instead of heavy cream. These substitutions allow more people to enjoy this cake. You can still have a moist and tasty dessert, no matter your dietary needs. 1. Preheat your oven to 350°F (175°C). Grease and flour three 9-inch round cake pans. This step helps the cakes come out easily. 2. Mix dry ingredients. In a large bowl, combine: - 2 cups all-purpose flour - 2 cups granulated sugar - ¾ cup unsweetened cocoa powder - 1 ½ teaspoons baking powder - 1 ½ teaspoons baking soda - 1 teaspoon salt Whisk them together until they are well blended. 3. Combine wet ingredients. Add to your dry mix: - 2 large eggs - 1 cup whole milk - ½ cup vegetable oil - 2 teaspoons vanilla extract Beat on medium speed for 2 minutes. 4. Add boiling water. Stir in 1 cup of boiling water. The batter will be thin, which is okay. Pour it evenly into the prepared pans. 5. Bake the cakes. Place in the oven for 30-35 minutes. Check doneness with a toothpick. If it comes out clean, your cakes are ready. 6. Cool the cakes. Once baked, let the cakes cool in the pans for 10 minutes. Then, transfer them to wire racks to cool completely. 1. Layer the cakes. Start by placing one layer of cake on a serving plate. Drizzle half of the caramel sauce over this layer. 2. Add whipped cream. Spread a portion of whipped cream on top of the caramel. 3. Repeat for the second layer. Place the second layer on top. Add the remaining caramel sauce, followed by another layer of whipped cream. 4. Finish with the final layer. Place the last cake layer on top. Use the remaining whipped cream to frost the top and sides. 5. Add final touches. Drizzle more caramel over the top. Sprinkle flaky sea salt for a beautiful finish. To make your cake layers moist, use the right amount of oil and milk. These ingredients keep the cake soft. Also, do not open the oven door too early. This can let heat escape and mess with your bake. Preventing overmixing is key. Once you add the wet ingredients to the dry ones, mix gently. Too much stirring can make the cake dense. Stop mixing when you see no dry flour left. Checking for doneness is simple. Use a toothpick and insert it into the center of the cake. If it comes out clean, the cake is ready. If you see batter on the toothpick, bake for a few more minutes. Get creative when you garnish your cake! You can drizzle extra caramel on top. This adds flavor and makes it look fancy. Using chocolate shavings or nuts can also add a nice touch. Sprinkle these on top for a crunchy bite. You can even mix in some sea salt to enhance the flavors. Customizing with different flavors makes your cake special. Try adding a hint of coffee for a mocha taste. You can also switch the caramel sauce for chocolate or fruit sauces. Each choice gives you a whole new dessert experience. {{image_2}} You can make your Chocolate Salted Caramel Layer Cake even more special. Here are some fun ways to switch up the flavor: - Adding espresso for a mocha flavor: Just add 1 tablespoon of espresso powder to the dry mix. This gives your cake a rich, coffee taste that pairs well with chocolate. - Incorporating chocolate chips or chunks: Mix in 1 cup of chocolate chips to the batter. This adds little bursts of chocolate in every bite. You can use dark, milk, or even white chocolate chips. - Swapping caramel for other sauces: Try using chocolate sauce or fruit sauce instead of caramel. A raspberry or strawberry sauce can add a nice fruity twist. Get creative and see what you like best! You can also make this cake fit different diets. Here are some ideas: - Options for vegan Chocolate Salted Caramel Layer Cake: Use flax eggs instead of regular eggs. Combine 1 tablespoon of ground flaxseed with 2.5 tablespoons of water for each egg. Swap the milk for almond or oat milk. Use coconut cream instead of heavy cream for the frosting. - Low-sugar alternatives and adjustments: You can use a sugar substitute like erythritol or stevia. Adjust the amount based on the sweetness you prefer. You can also cut the sugar in the cake mix by half for a less sweet flavor. To keep your Chocolate Salted Caramel Layer Cake fresh, store it properly. After cutting, place leftover cake in an airtight container. This helps keep the cake moist and tasty. If you don’t have a container, cover the cake loosely with plastic wrap. Try to eat the cake within three days for the best flavor. If you want to save it longer, freezing is a great option. You can freeze individual slices of your cake for easy treats later. Wrap each slice tightly in plastic wrap. Then, place the wrapped slices in a freezer bag or a safe container. This prevents freezer burn. When you’re ready to enjoy a slice, take it out of the freezer. Let it thaw in the fridge for a few hours. You can also leave it at room temperature for about 30 minutes. Once thawed, you can drizzle more caramel on top if you like. Enjoy your treat! How long does the cake last at room temperature? The cake lasts about three days at room temperature. Keep it covered to stay fresh. If you have leftover cake, store it in a cool, dry place. Can I make this cake ahead of time? Yes, you can make this cake one or two days in advance. Just store the layers separately. Wrap them in plastic wrap to keep them fresh. Assemble the cake on the day you plan to serve it. What is the best way to serve Chocolate Salted Caramel Layer Cake? Serve the cake chilled or at room temperature. Cut it into slices. Drizzle with extra caramel and sprinkle flaky salt on top for a nice touch. Why is my cake dry? Your cake may be dry if you overbake it. Check for doneness with a toothpick. Insert it into the center. If it comes out clean, remove the cake from the oven. Also, measuring your ingredients correctly helps keep it moist. How do I fix a cake that has sunk in the middle? A sunken cake often means it has too much liquid or not enough leavening. To fix it, ensure you measure your ingredients right. If your cake sinks, you can use whipped cream to fill the center. This makes it look great and adds flavor. Now you know how to make a delicious Chocolate Salted Caramel Layer Cake. We covered all the key ingredients, easy steps, and helpful tips to ensure your cake turns out great. Remember, you can customize the flavors and make it suit your needs. Baking can be fun and simple! Enjoy your delicious creation and share it with loved ones for smiles all around. Happy baking!

Chocolate Salted Caramel Layer Cake Divine Delight

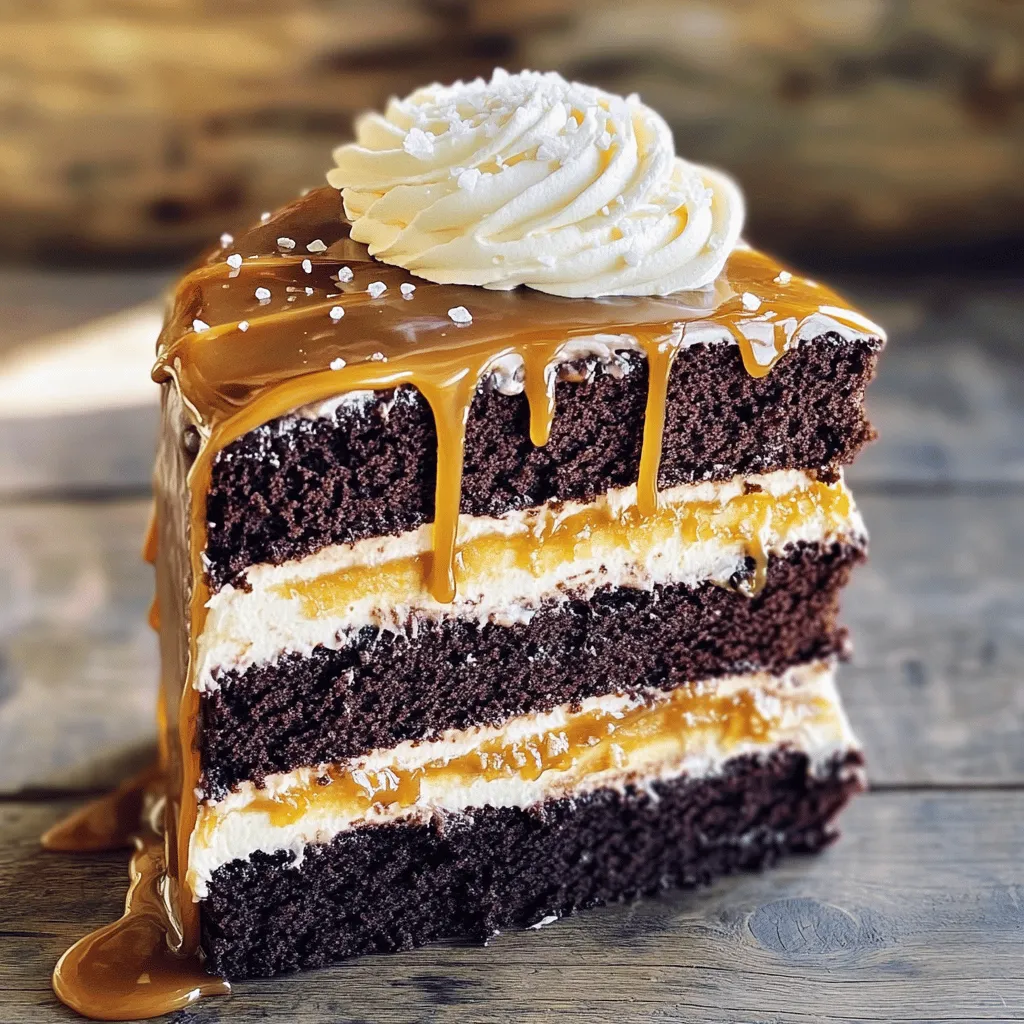
Indulge your sweet tooth with my Chocolate Salted Caramel Layer Cake Divine Delight! This cake is rich, moist, and bursting

- 1 cup all-purpose flour - 1 cup whole wheat flour - 1 cup brown sugar, packed - 1 tablespoon baking powder - ½ teaspoon baking soda - ½ teaspoon salt - 1 teaspoon ground cinnamon - 1 cup milk - ½ cup unsalted butter, melted - 2 large eggs - 1 teaspoon vanilla extract - 1 cup chopped pecans - ½ cup pecan praline syrup To make delicious pecan praline muffins, gather these simple ingredients. Using both all-purpose and whole wheat flour gives a nice texture. The brown sugar adds sweetness and a lovely caramel flavor. Baking powder helps the muffins rise, while baking soda and salt balance the sweetness. Cinnamon adds warmth to the flavor. Milk makes the batter moist, and melted butter gives richness. Eggs help bind everything together, and vanilla adds depth. Chopped pecans provide a crunchy bite, and pecan praline syrup brings a sweet drizzle on top. These ingredients make the muffins simple yet tasty. You can find them all at your local store. Enjoy the process of mixing and baking! It’s all about creating joy in the kitchen. 1. Preheat your oven. Set it to 375°F (190°C) to get it hot. 2. Prepare the muffin tin. Line it with paper liners or spray it with non-stick spray. 3. Whisk dry ingredients. In a large bowl, mix the all-purpose flour, whole wheat flour, brown sugar, baking powder, baking soda, salt, and ground cinnamon. 1. Mix wet ingredients together. In another bowl, whisk the milk, melted butter, eggs, and vanilla extract until smooth. 2. Combine wet and dry ingredients. Pour the wet mixture into the dry mixture. Stir gently until just combined. Don’t overmix; it’s okay if there are some lumps. 1. Fold in pecans and praline syrup. Gently mix in the chopped pecans and half of the pecan praline syrup. Save the rest for later. 2. Distribute batter and bake. Fill each muffin liner about ¾ full with batter. Bake for 18-22 minutes. The muffins should turn golden brown. 3. Cooling the muffins. After baking, let the muffins cool in the tin for about 5 minutes. Then, move them to a wire rack to cool completely. Drizzle the remaining pecan praline syrup over the muffins once cooled for added sweetness. Avoiding overmixing: Mixing your batter too much can lead to tough muffins. Stir gently until just combined. A few lumps are okay! How to check for doneness: Insert a toothpick into the center of a muffin. If it comes out clean, they are done. If it has wet batter, bake a few more minutes. Presentation ideas: Serve muffins warm on a nice platter. Add a sprinkle of chopped pecans on top for a nice touch. Dust with powdered sugar for extra flair. Best accompaniments: Pair these muffins with coffee or tea. They also go well with a dollop of whipped cream or cream cheese. Adding spices or extras: Try adding a pinch of nutmeg or ginger for a warm spice kick. You can also mix in chocolate chips or dried fruits. Substitutions for dietary needs: For a gluten-free option, use almond flour or a gluten-free blend. You can swap milk for almond milk for a dairy-free version. {{image_2}} You can easily make these muffins fit your needs. If you want a gluten-free option, use gluten-free flour blends. Look for ones that measure cup-for-cup. This method keeps the texture nice and fluffy. For a dairy-free alternative, swap out milk for almond or oat milk. Use coconut oil instead of butter for a creamy texture. To add some fun, try mixing in chocolate chips. They melt and create a sweet surprise. You can also add fruits like blueberries or bananas. These fruits bring extra moisture and flavor. Just make sure to adjust the sugar if you use sweet fruits. Make these muffins special for the holidays. Add spices like nutmeg or ginger for a festive taste. You can even decorate with holiday sprinkles. Consider using local ingredients too. For example, try maple syrup instead of praline syrup. It gives a unique twist and supports local farmers. Store your pecan praline muffins at room temperature. Use an airtight container to keep them fresh. They stay good for about 2 to 3 days this way. If you live in a humid area, refrigeration may be necessary. The cold can help prevent mold from forming. However, it might change the texture slightly. For long-term storage, freezing is your best bet. Wrap each muffin in plastic wrap, then place them in a freezer bag. This will keep them fresh for up to three months. When you’re ready to eat, simply thaw them at room temperature. To reheat muffins, use your oven. Preheat it to 350°F (175°C). Place the muffins on a baking sheet. Heat them for about 10 minutes. This method revives their soft texture and warms them nicely. You can also use the microwave for quick reheating. Place a muffin on a microwave-safe plate. Heat it for about 15-20 seconds. If you want to keep them fresh, cover with a damp paper towel. This helps avoid drying out the muffins. Enjoy your warm pecan praline muffins with a drizzle of syrup! How do I know when the muffins are done? You can check if the muffins are done by inserting a toothpick into the center. If it comes out clean, the muffins are ready. They should also be golden brown on top. Can I make the batter ahead of time? Yes, you can make the batter ahead of time. Mix the dry and wet ingredients separately. Combine them just before baking for the best texture. What can I substitute for pecans? You can use walnuts or almonds instead of pecans. Both nuts will add a nice crunch and flavor. How long do the muffins stay fresh? These muffins stay fresh for about three days at room temperature. You can also freeze them for up to three months. Just make sure to store them in an airtight container. You learned how to make delicious pecan praline muffins in this post. We covered ingredients, step-by-step instructions, and useful tips. Remember to watch your mixing and check for doneness. You can also swap ingredients to fit your needs and experiment with flavors. Store them properly, and you’ll enjoy fresh muffins for days. Baking should be fun and creative. Go ahead, try out these recipes, and impress your family and friends with your new baking skills!

Pecan Praline Muffins Simply Delicious and Easy Recipe

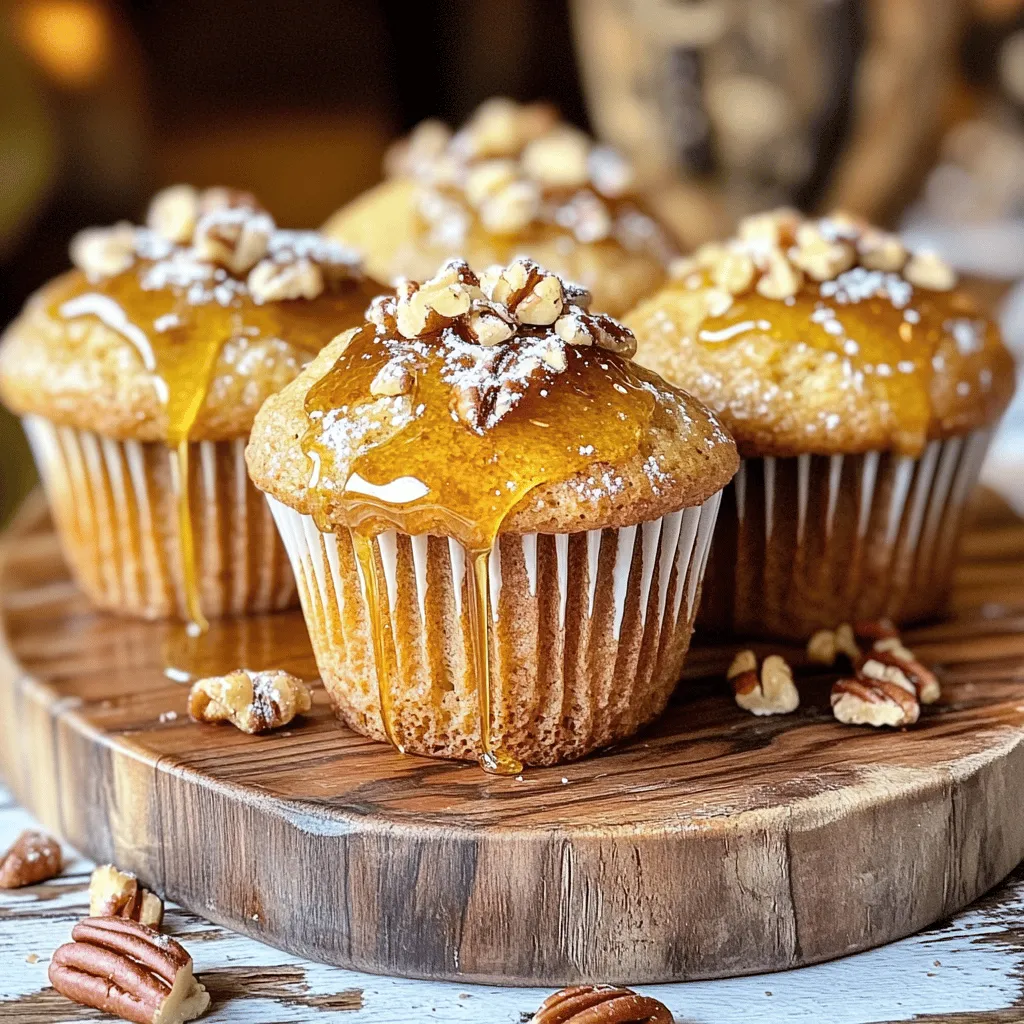
Are you ready to enjoy a warm, sweet delight? Pecan praline muffins are just the treat you need! These muffins

To make Italian Meatball Soup, you need: - 1 pound ground beef - 1/2 pound ground pork - 1/2 cup breadcrumbs - 1/4 cup grated Parmesan cheese - 1 large egg - 2 cloves garlic, minced - 1 teaspoon dried oregano - 1 teaspoon dried basil - 1 teaspoon salt - 1/2 teaspoon black pepper - 4 cups beef broth - 1 can (14 oz) diced tomatoes - 1 cup carrots, diced - 1 cup celery, diced - 1 cup zucchini, diced - 1 cup spinach or kale, chopped - Fresh basil for garnish These ingredients combine to create a rich and hearty soup. The mix of ground beef and pork gives the meatballs great flavor. The vegetables add color and nutrition. You can add some optional ingredients to boost the flavor: - Red pepper flakes for a spicy kick - Fresh parsley for a bright touch - A splash of red wine for depth - Lemon zest for a fresh note These extras can make your soup unique and cater to your taste. Don’t be afraid to experiment with what you have! You will need a few tools to make this soup: - Large mixing bowl for the meat mixture - Baking sheet for meatballs - Large pot for cooking the soup - Wooden spoon or spatula for stirring - Ladle for serving Having the right tools makes the process much easier. Gather everything before you start cooking, and you’ll find it more fun! Start by gathering your ingredients. You will need ground beef, ground pork, breadcrumbs, Parmesan cheese, an egg, minced garlic, oregano, basil, salt, and black pepper. In a large bowl, mix these items well. I like to use my hands for this step. It helps blend everything evenly. You want a consistent texture for the meatballs. Once mixed, roll the mixture into small balls, about one inch wide. Place them on a plate and set them aside. Heat a splash of olive oil in a large pot over medium heat. Once the oil is hot, add the meatballs in batches. Don’t crowd the pot! Cook each batch for about five to seven minutes. You want them browned on all sides. After cooking, remove the meatballs and set them aside. This step builds flavor in your soup. In the same pot, add diced carrots, celery, and zucchini. Sauté these vegetables for about five to seven minutes. You want them to soften but not turn mushy. Next, pour in the beef broth and add the can of diced tomatoes, including their juices. Bring this to a simmer. Once simmering, return the browned meatballs to the pot. Cover it and let it cook for about twenty minutes. Finally, add chopped spinach or kale and cook for another five minutes. This adds freshness and color to your soup. Taste and adjust the seasonings if needed. Your hearty Italian meatball soup is now ready to serve! To make great meatballs, use a mix of ground beef and pork. The pork adds flavor and moisture. Combine the meats with breadcrumbs and grated Parmesan cheese. This mix helps the meatballs stay juicy. Use one large egg to bind everything together. Don't forget garlic, oregano, and basil for extra taste. Roll the meatballs to about one inch wide. This size helps them cook evenly. Brown them in a pot with olive oil. This step gives them a nice crust and boosts the flavor. To make your soup more flavorful, start with good beef broth. The broth is the base of the soup. Add diced tomatoes with their juices for a rich taste. Use fresh veggies like carrots, celery, and zucchini. These add sweetness and color. After the meatballs cook, let them simmer in the broth. This allows their juices to flavor the soup. Finally, toss in some chopped spinach or kale. This adds nutrition and a fresh taste. Season with salt and pepper to taste for the perfect finish. When serving, ladle the soup into bowls and add meatballs on top. Garnish with fresh basil for a pop of color. You can serve Italian bread on the side for dipping. For a fun twist, try adding a sprinkle of extra Parmesan cheese. This makes it look fancy and adds flavor. You can also serve the soup with a salad for a complete meal. Enjoying this soup warm is the best way to savor its flavors. {{image_2}} You can use different meats for meatballs. Ground turkey or chicken works well. They offer a lighter taste. If you want more flavor, you can mix in some sausage. This adds a nice spice and depth. Just remember to adjust your salt to taste. You can also use ground lamb for a unique twist. Each option gives your soup a new flavor. For a vegetarian version, skip the meat entirely. Use lentils or chickpeas instead of meat. They add protein and texture. Mix them with breadcrumbs, spices, and egg substitute for binding. You can also use tofu or tempeh. For a vegan soup, use vegetable broth and skip the cheese. This keeps the soup rich and tasty. You can boost nutrition by adding more veggies. Try bell peppers, green beans, or peas for color and taste. Just chop them small so they cook evenly. Grains like quinoa or barley can make the soup heartier. Add them during the simmering stage. This way, they soak up flavor and add bulk. Feel free to get creative with what you have! After enjoying your Italian meatball soup, store any leftovers. Use an airtight container. Let the soup cool first. Place in the fridge. It stays fresh for about three days. If you want to enjoy it later, freezing is best. When you’re ready to eat your soup again, heat it up. Use a pot on the stove for the best flavor. Pour the soup into the pot over medium heat. Stir often until it reaches the right temperature. If it’s too thick, add a splash of water or broth to thin it out. To freeze Italian meatball soup, pack it in freezer-safe bags or containers. Leave some space at the top for expansion. This soup can last up to three months in the freezer. When you want to eat it, thaw it overnight in the fridge. Then, reheat as mentioned above. Enjoy your delicious soup anytime! You can serve Italian Meatball Soup with many sides. A warm loaf of crusty bread is a great choice. Garlic bread adds a nice twist and is easy to make. A fresh green salad pairs well too. You can use mixed greens with a light vinaigrette. For a heartier meal, serve it with pasta on the side. Small pasta shapes like ditalini or orzo work best. These options complement the soup and add to the comfort. Yes, you can make Italian Meatball Soup in a slow cooker. Start by mixing the meatball ingredients as usual. Roll the mixture into meatballs and set them aside. In your slow cooker, add the diced veggies, broth, and tomatoes. Then, place the meatballs on top. Cook on low for 6-8 hours or on high for 3-4 hours. This method allows the flavors to deepen and meld together beautifully. To make meatballs more tender, use fresh bread instead of dried breadcrumbs. You can soak the breadcrumbs in milk before mixing them in. Adding an extra egg can also help. Be careful not to overmix the meat. Overworking the meat can make it tough. Lastly, cooking the meatballs gently in broth helps keep them moist. These tips will give you soft, tender meatballs every time. This article covered how to make Italian Meatball Soup from start to finish. We looked at the main and optional ingredients, the tools you'll need, and the step-by-step cooking process. I shared tips for perfect meatballs, ways to enhance flavor, and some great serving ideas. Plus, we explored variations for dietary needs and how to properly store leftovers. Making this soup is simple and fun. Enjoy every bowl with friends or family!

Italian Meatball Soup Hearty and Flavorful Comfort Food

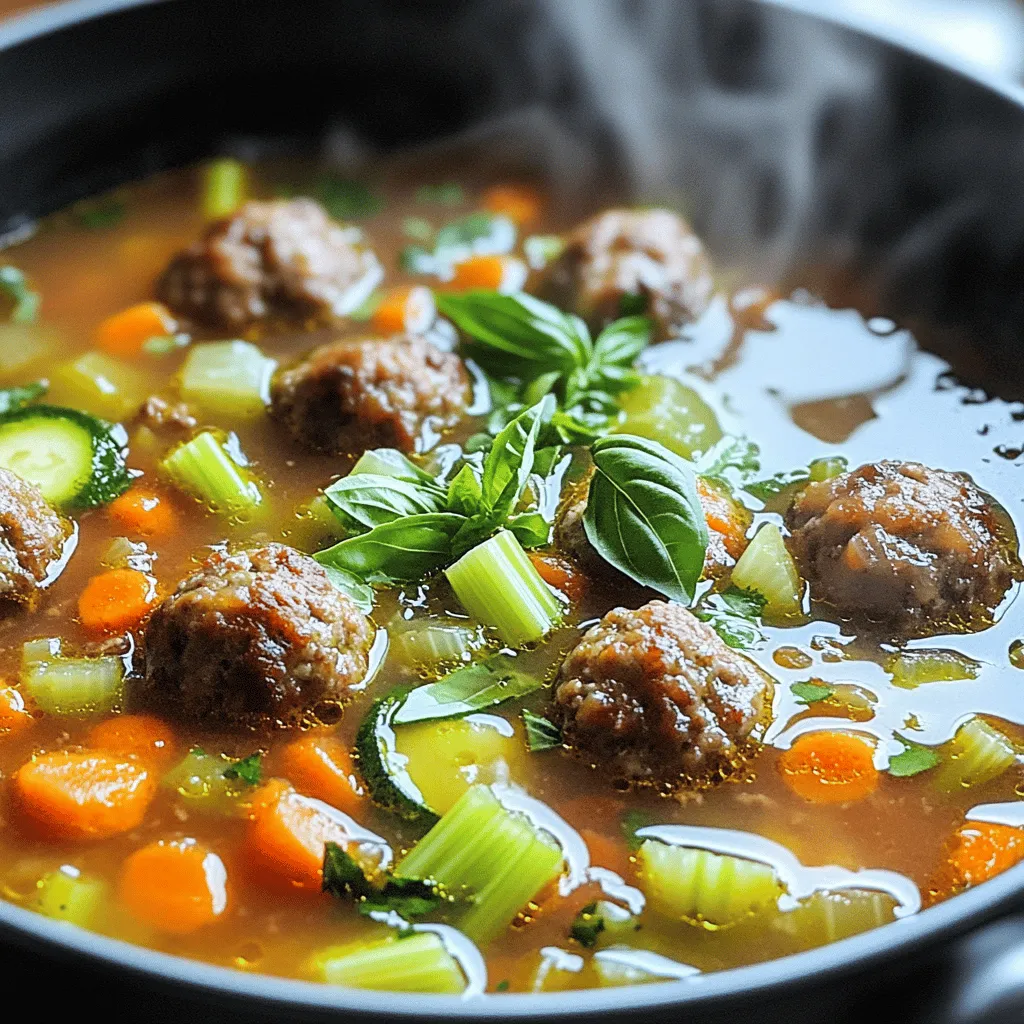
Craving comfort food? Italian Meatball Soup is your answer! This hearty dish wraps you in warmth with every spoonful. Imagine

- 1 pound large shrimp, peeled and deveined - 4 tablespoons unsalted butter - 4 cloves garlic, minced - 1 tablespoon fresh lemon juice - 1 teaspoon paprika - 1 teaspoon dried oregano - Salt and pepper to taste - Fresh parsley, chopped (for garnish) - Skewers (soaked in water if wooden) To make garlic butter shrimp skewers, you need a few simple ingredients. The shrimp are the star of the dish. Choose large shrimp, peeled and deveined for easy eating. Unsalted butter provides a rich base for the sauce. Fresh garlic adds that lovely aroma and taste. You also need lemon juice to brighten the dish. Paprika gives it a hint of spice and color. Dried oregano adds a touch of earthiness. Don’t forget salt and pepper to enhance all the flavors. Finally, fresh parsley makes a beautiful garnish. If you use wooden skewers, soak them in water. This step helps prevent burning on the grill. Enjoy the process of gathering these fresh ingredients. Each one plays a vital role in creating a tasty meal! To start, melt the butter in a small pan over low heat. Add the minced garlic and sauté for 1-2 minutes. You want the garlic to smell great but not brown. Burning garlic makes it bitter. Next, take the pan off the heat. Stir in the lemon juice, paprika, oregano, salt, and pepper. Mix it all well and let it cool a bit. In a mixing bowl, put the shrimp and pour in half of the garlic butter mix. Toss the shrimp until they coat evenly. Let the shrimp marinate for 15-20 minutes. This step is key as it helps the shrimp absorb all the great flavors. While the shrimp marinates, preheat your grill to medium-high heat. If you use wooden skewers, soak them in water for at least 30 minutes. This helps stop them from burning. Now, thread the marinated shrimp onto the skewers. Aim for 4-5 shrimp per skewer, based on their size. Once ready, place the skewers on the grill. Cook for 2-3 minutes on each side. The shrimp should turn opaque and cook through. Brush the remaining garlic butter over the shrimp while grilling. This adds even more flavor. When done, take the skewers off the grill. Garnish with fresh parsley before serving. Enjoy this dish with a side of vegetables or salad for a tasty meal! To avoid burning garlic, always cook it on low heat. Garlic can turn bitter if it browns. Stir it frequently and watch for a fragrant aroma. This means it’s ready. When adjusting seasoning, taste as you go. Start with a pinch of salt and pepper. You can always add more later. For even cooking, place shrimp on skewers in a single layer. This helps them cook well. Use 4-5 shrimp per skewer. Make sure they fit snugly but not too tight. This allows heat to circulate. If shrimp are large, cut them in half for easier threading. Adding herbs like fresh parsley boosts flavor. Sprinkle it on just before serving for a fresh look. For presentation, place the skewers on a large platter. Drizzle extra garlic butter on top for a shiny finish. Add lemon wedges around the skewers. This adds color and a zesty touch. {{image_2}} You can make garlic butter shrimp skewers more exciting by adding heat. Try adding chili flakes or your favorite hot sauce. A pinch of chili flakes in the marinade gives a nice kick. If you prefer, drizzle hot sauce over the cooked skewers. This will make each bite pop with flavor. Want to change things up? You can use scallops or chicken instead of shrimp. Scallops cook quickly and have a sweet taste that pairs well with garlic butter. For chicken, cut it into bite-sized pieces to ensure even cooking. Both options work great on skewers and keep the dish fun. Feel free to experiment with your marinade. Try using citrus juices like lime or orange instead of lemon. You can also mix in fresh herbs like basil or cilantro. Each option adds a unique twist, making the skewers your own. Explore different flavors and discover new favorites. To keep your garlic butter shrimp skewers fresh, store them in the fridge. Place the skewers in an airtight container. This helps to keep the shrimp moist. They should last for about 2-3 days. If you plan to eat them later, do not add any sauce. The sauce can make the shrimp soggy. If you want to save the skewers for later, freezing is a great option. First, let the skewers cool completely. Then, wrap them tightly in plastic wrap. After that, place the wrapped skewers in a freezer bag. Remove as much air as you can from the bag. This helps prevent freezer burn. The skewers can last up to 3 months in the freezer. When you are ready to eat the shrimp, there are a few good ways to heat them. You can use a microwave, but be careful not to overcook them. Heat them in short bursts of 30 seconds. Another method is to use an oven. Preheat the oven to 350°F (175°C) and place the skewers on a baking sheet. Heat for about 10 minutes, or until warm. Grilling them again is also a tasty option. Just make sure to keep an eye on them to avoid overcooking. Grill shrimp skewers for about 2-3 minutes on each side. The time may change based on shrimp size. Large shrimp need a bit more time than small ones. You want them to turn opaque and firm. This means they are done! Keep an eye on them to avoid overcooking. Yes, you can use frozen shrimp for this recipe. First, thaw the shrimp safely. Place them in the fridge overnight or run them under cold water for quick thawing. Once thawed, pat them dry before marinating. This helps the flavors soak in better. These skewers pair well with many dishes. Here are some tasty suggestions: - Grilled vegetables for a fresh side - A light salad with lemon vinaigrette - Rice or quinoa to soak up the garlic butter - Garlic bread for a fun twist Serve the skewers on a big platter. Drizzle extra garlic butter on top for added flavor! You’ve learned how to make tasty garlic butter shrimp skewers. We covered key ingredients, from shrimp to spices. I shared step-by-step instructions on marinating and grilling. Tips helped you perfect the flavor and presentation. Remember, you can customize this dish with spices or different proteins. Store leftovers properly and reheat them right for the best taste. Now, grab your grill and enjoy a delicious meal!

Garlic Butter Shrimp Skewers Delightfully Tasty Dish

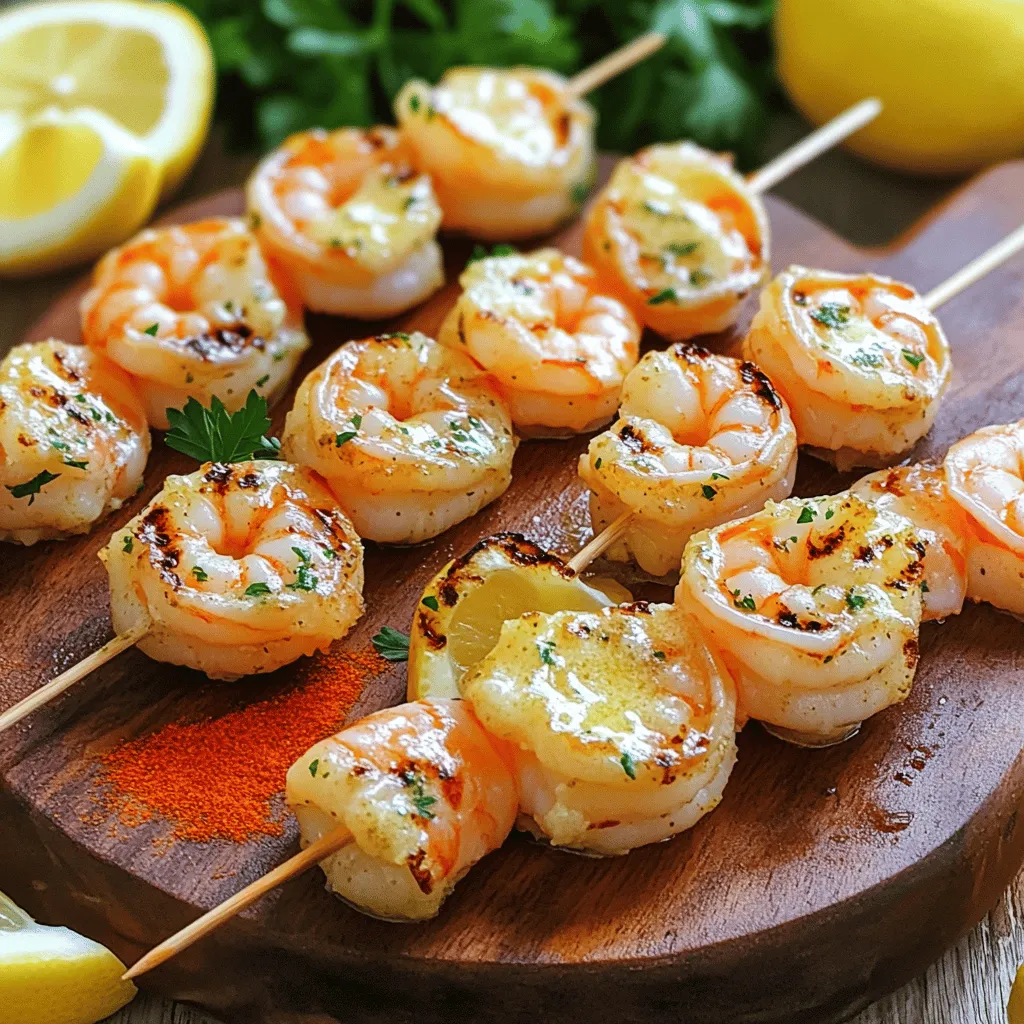
Are you ready to elevate your culinary skills? Garlic Butter Shrimp Skewers are a quick and flavorful dish, perfect for

To make a delightful Spiced Apple Cider Sangria, you will need the following ingredients: - 4 cups apple cider - 1 cup pomegranate juice - 1 cup sparkling water - 1 medium apple, thinly sliced - 1 orange, thinly sliced - 1/2 cup fresh cranberries - 2 cinnamon sticks - 3-4 whole cloves - 1 star anise - 2 tablespoons honey or maple syrup (optional) These ingredients work together to create a tasty drink. The apple cider gives it sweetness and warmth. Pomegranate juice adds a lovely tartness and color. Fresh fruits like apple and orange bring bright flavors and make it look pretty. The spices, like cinnamon and cloves, add a comforting aroma. You can choose to sweeten it with honey or maple syrup if you like. This drink is perfect for fall and winter gatherings. It is refreshing and warm, making you feel cozy. 1. Start by taking a large pitcher. In it, combine 4 cups of apple cider and 1 cup of pomegranate juice. Stir it well until mixed. This blend gives a sweet and tart base. 2. Next, add the sliced fruit. Use 1 medium apple and 1 orange, both thinly sliced. Toss in 1/2 cup of fresh cranberries too. These fruits add a nice pop of color and flavor. 3. Now, it’s time for the spices. Drop in 2 cinnamon sticks, 3 to 4 whole cloves, and 1 star anise. These spices give warmth and aroma to the drink. 4. If you like it sweeter, this is the moment to add 2 tablespoons of honey or maple syrup. Stir until it dissolves well. This step is optional, but it can enhance the overall taste. 1. Cover the pitcher and chill the mixture in the refrigerator for at least 1 hour. This chilling time helps all the flavors meld together. 2. When you’re ready to serve, take the pitcher out. Add 1 cup of sparkling water to give your sangria a refreshing fizz. Stir gently to mix it well. 3. Pour the sangria into glasses filled with ice. For a nice touch, garnish each glass with extra slices of apple and orange. This makes it look lovely and inviting. - Adjust sweetness to taste: You can control the sweetness. If you like it sweeter, add honey or maple syrup. Start with a little, then taste. Add more if needed. - Substitute seasonal fruits: Use any fruit you like. Pears, berries, or even peaches work well. They add a nice twist to the drink. - Experiment with different spices: Don't just stick to the classic spices. Try nutmeg or cardamom for new flavors. Each spice gives a unique taste to your sangria. - Best occasions to serve: This drink shines at fall parties, Thanksgiving, or cozy nights in. It’s perfect for gatherings with friends and family. - Ideal glassware and garnishes: Serve in clear glasses to show off the colors. Garnish with extra fruit slices. A cinnamon stick also makes a great touch. {{image_2}} You can add wine or spirits to the Spiced Apple Cider Sangria for a kick. A good choice is dry white wine, like Sauvignon Blanc. This wine pairs well with the sweet apple cider. You can also use red wine, like Merlot, if you want a bolder taste. For a fun twist, try adding spiced rum. It enhances the warm flavors of the spices. If you want a family-friendly drink, you can make a mocktail version. Just skip the wine and enjoy the fruity flavors of the cider and juice. You can use sparkling grape juice instead of sparkling water for extra sweetness. You can also add more fresh fruit, like pears or berries, for color and fun. This way, everyone can enjoy a delicious drink! To keep your spiced apple cider sangria fresh, pour leftovers into a clean pitcher. Cover it with a lid or plastic wrap. Place it in the fridge right away. This drink stays tasty for up to three days. After that, the fruits may lose their crunch. You can freeze sangria, but it’s not the best choice. The fruits may become mushy. If you want to freeze it, strain out the solids first. Pour the liquid into a freezer-safe container. Leave some space at the top for expansion. To thaw, move the container to the fridge overnight. When ready, stir well and serve it chilled. The flavors will still be good, but the texture might not be the same. Yes, you can use other juices. For example, apple juice or cranberry juice works well. Each juice brings its own unique flavor. Feel free to mix and match based on your taste. You should let the sangria sit for at least 1 hour. This time helps the flavors blend nicely. If you can wait longer, even better! Letting it sit for a few hours makes it even tastier. Absolutely! You can make this sangria a day in advance. Just skip adding the sparkling water until ready to serve. This keeps it bubbly and fresh for your guests. This blog post explored a refreshing sangria recipe. You learned about the key ingredients, like apple cider and pomegranate juice, and how to prepare them. We discussed tips for personalizing your drink and suggested serving occasions. In closing, making sangria is fun and easy. It fits many tastes and events, from family gatherings to parties. By trying out different flavors and spices, you can create your own special version. Enjoy crafting your perfect drink!

Spiced Apple Cider Sangria Flavorful Fall Drink

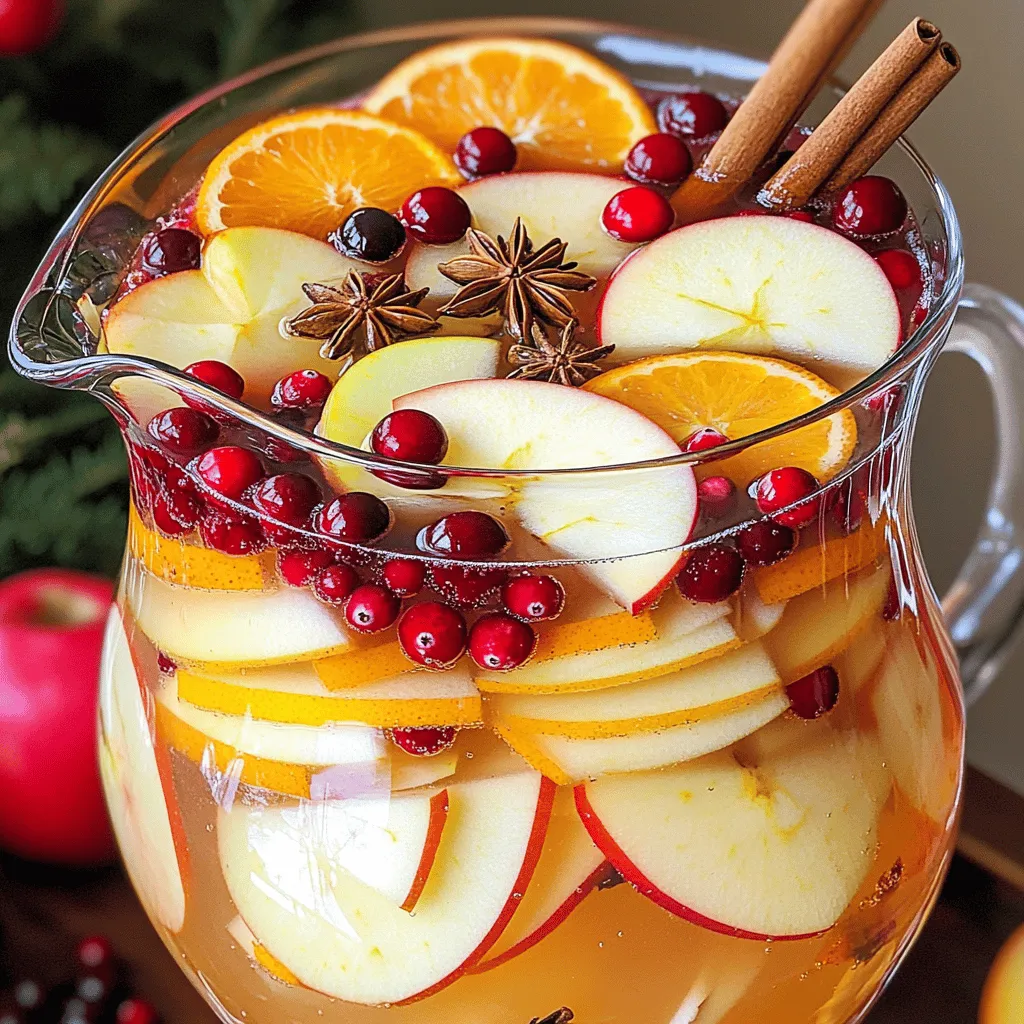
As autumn sets in, there’s no better way to celebrate the season than with a warm, cozy drink. Introducing Spiced

To make Air Fryer Garlic Parmesan Tofu, you need these key ingredients: - 1 block (14 oz) firm tofu, pressed and drained - 3 tablespoons olive oil - 4 cloves garlic, minced - 1 teaspoon onion powder - 1 teaspoon smoked paprika - ½ cup grated Parmesan cheese (or nutritional yeast for a vegan option) - Salt and pepper to taste - Fresh parsley, chopped (for garnish) These ingredients work together to create a crispy and flavorful dish. Firm tofu holds its shape well and absorbs the marinade. The garlic and spices add depth, while the Parmesan gives a rich, savory finish. Feel free to get creative with your Air Fryer Garlic Parmesan Tofu. You can add: - A splash of lemon juice for brightness - Chili flakes for heat - Other herbs like thyme or oregano for extra flavor These optional ingredients can enhance your dish and reflect your taste. Adjust the flavors to make it your own. If you have dietary needs, here are some easy swaps: - Use nutritional yeast instead of Parmesan for a vegan option. - Swap olive oil for avocado oil for a different flavor. - For a gluten-free option, ensure your spices are gluten-free. These substitutions maintain the taste and texture of the dish while catering to various diets. Enjoy creating a meal that suits your needs! Start with a block of firm tofu, about 14 ounces. Press it to remove extra water. This step helps the tofu absorb flavors better. Once pressed, cut the tofu into bite-sized cubes. Place the cubes in a medium bowl. They should be about one inch each for even cooking. In a small bowl, whisk together three tablespoons of olive oil, four minced garlic cloves, one teaspoon of onion powder, and one teaspoon of smoked paprika. Add salt and pepper to taste. Mix until everything combines well. This mixture gives the tofu a tasty garlic flavor. Pour this marinade over the tofu cubes. Toss gently until all the cubes get coated. Let the tofu marinate for about 15 minutes. This allows the flavors to soak in. Preheat your air fryer to 375°F (190°C) for five minutes. After marinating, sprinkle ½ cup of grated Parmesan cheese over the tofu. Toss the tofu cubes again to coat them with cheese. Place the tofu in the air fryer basket in a single layer. Make sure not to overcrowd the basket. Air fry the tofu for 15 minutes. Shake the basket halfway through to ensure even cooking. When the tofu turns golden and crispy, it’s done. Remove it from the air fryer and serve it hot. Garnish with fresh chopped parsley for a nice touch. To get crispy tofu, start with firm tofu. Firm tofu holds its shape well. Press the tofu to remove excess water. I use a clean kitchen towel or paper towels. Cut the tofu into small cubes. The smaller the cubes, the crispier they get. When you marinate the tofu, let it sit for at least 15 minutes. This helps the flavors soak in. Air fry them at a high temperature, like 375°F. Shaking the basket halfway through cooking helps get an even crunch. For this recipe, I recommend firm or extra-firm tofu. These types hold their shape and crisp well. Soft tofu may crumble during cooking. The right tofu gives you that perfect crunch and texture. You can find firm tofu at most grocery stores. Check the packaging to ensure it’s labeled as firm or extra-firm. Marinating the tofu is key to great taste. Use olive oil, garlic, onion powder, and smoked paprika. You can adjust the spices to fit your taste. Mix these well before adding them to the tofu. Toss the tofu cubes gently to coat them fully. Let the tofu sit and soak up the flavors for at least 15 minutes. If you have time, marinate it longer for a bolder taste. Adding salt and pepper enhances the overall flavor. Don’t skip this step! {{image_2}} To make this dish vegan, swap the Parmesan cheese with nutritional yeast. Nutritional yeast adds a cheesy flavor without dairy. Use about half a cup to get that rich taste. This change keeps the dish light and still packed with flavor. It also boosts your B-vitamin intake. You can sprinkle it on the tofu right before you air fry it. You can play with spices to change the taste. Want a kick? Add cayenne pepper or red pepper flakes. For a smoky flavor, increase the smoked paprika. You can also try adding Italian herbs like oregano or basil. These spices make the dish exciting and unique. Adjust the amounts based on your taste. Don’t be afraid to experiment and find your favorite blend! Serve your Air Fryer Garlic Parmesan Tofu in many fun ways. Try it on a bed of mixed greens for a fresh salad. You can add cherry tomatoes and avocado for more flavor. Another great option is to serve it with rice or quinoa. This makes a filling meal. You can also pair it with a dipping sauce, like a tangy tahini or a spicy sriracha. Get creative and enjoy every bite! After enjoying your Air Fryer Garlic Parmesan Tofu, let any leftovers cool. Place the tofu in an airtight container. This keeps the tofu fresh and tasty. Store it in the fridge for up to three days. To reheat, an air fryer works best. Preheat the air fryer to 350°F (175°C). Place the tofu in the basket. Heat it for about 5-7 minutes until crispy again. This method keeps the tofu's texture nice and crunchy. You can also use a microwave, but the tofu may lose some crispness. Heat on medium for about 1-2 minutes. Check to make sure it’s warm throughout. If you want to save tofu for later, freezing works. Place the cooled tofu in a freezer-safe bag. Squeeze out as much air as you can. This prevents freezer burn. Store it in the freezer for up to two months. To use frozen tofu, thaw it in the fridge overnight. After thawing, reheat it in the air fryer to restore its crunch. Enjoy your delicious leftovers! No, soft tofu will not work well here. It has a high water content. Soft tofu breaks apart easily when you cook it. Firm tofu holds its shape better. It absorbs the flavors well and becomes crispy. To prevent sticking, coat the tofu with oil. Use three tablespoons of olive oil to cover all sides. Placing the tofu in a single layer helps too. Avoid overcrowding the basket. You can also use parchment paper to make cleanup easier. This dish pairs well with many sides. Try serving it on a bed of mixed greens. You can also add a drizzle of olive oil and more Parmesan on top. Another option is to serve it with rice or quinoa. It goes great with steamed veggies too! This blog post detailed how to make Air Fryer Garlic Parmesan Tofu. We covered key ingredients, step-by-step instructions, and valuable tips. You learned about variations to make the recipe your own and how to store leftovers properly. Remember, crispy tofu comes from using firm tofu and the right marinade. With these insights, you can enjoy a tasty and healthy dish anytime. Try it out, and you may discover a new favorite!

Air Fryer Garlic Parmesan Tofu Crispy and Flavorful Treat

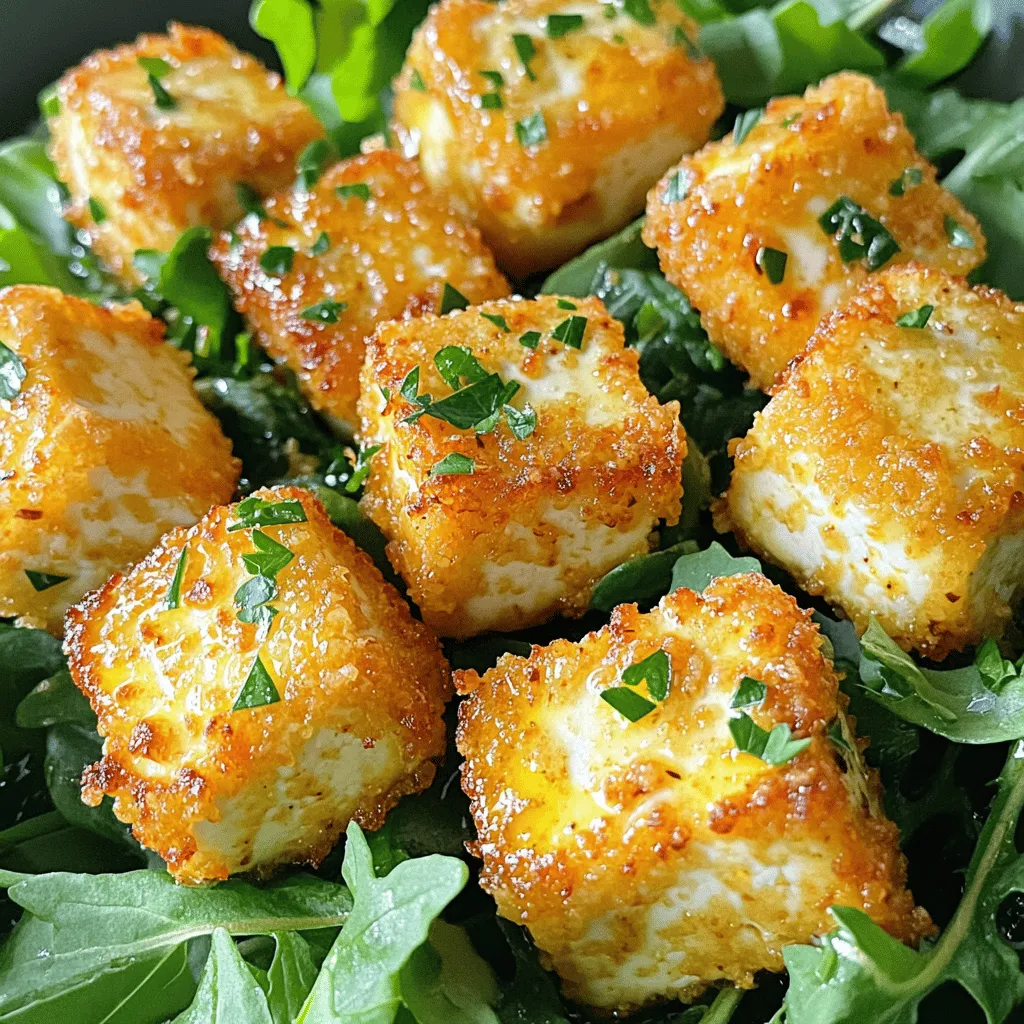
If you’re searching for a crispy, flavorful treat, you’ve found it! Air Fryer Garlic Parmesan Tofu is a simple dish

For this creamy garlic shrimp pasta, you'll need some simple yet tasty ingredients. Each one plays a key role in making this dish rich and delightful. - 8 oz fettuccine pasta - 1 lb shrimp (peeled and deveined) - 4 cloves garlic (minced) - 1 cup heavy cream - 1 cup chicken broth - 1/2 cup grated Parmesan cheese - 2 tablespoons olive oil - 1 tablespoon butter - 1 teaspoon dried Italian herbs (oregano, basil, thyme) - Salt and pepper to taste - Fresh parsley (chopped for garnish) Let's dive deeper into each ingredient. Fettuccine pasta gives the dish a nice, thick texture. You can use any pasta you like, but fettuccine holds the sauce well. Shrimp adds a rich flavor and is quick to cook. Make sure it's fresh or thawed if frozen. Garlic is the star here. It adds a strong, aromatic taste that pairs well with the cream. Heavy cream gives the sauce its rich, smooth texture. You can substitute it with half-and-half for a lighter option, but it won’t be as creamy. Chicken broth adds depth to the sauce. It enhances the flavor and makes it more savory. Parmesan cheese adds a salty, nutty taste. Freshly grated cheese melts better than pre-grated. Olive oil and butter create a flavorful base. They help cook the garlic and shrimp perfectly. Dried Italian herbs bring warmth and a bit of earthiness to the dish. You can use fresh herbs if you have them. Finally, salt and pepper enhance all the flavors. Taste as you go to get the seasoning just right. Fresh parsley adds color and freshness when you serve the dish. It makes everything look more inviting! With these ingredients, you’re all set to create a creamy garlic shrimp pasta that tastes amazing. Cooking the Shrimp First, heat 2 tablespoons of olive oil and 1 tablespoon of butter in a large pot over medium heat. Add 4 minced garlic cloves and sauté for about 1 minute. You want the garlic to smell great but not burn. Next, toss in 1 pound of peeled and deveined shrimp. Season them with salt, pepper, and 1 teaspoon of dried Italian herbs. Cook the shrimp for about 2-3 minutes until they turn pink. Once done, remove them from the pot and set them aside. Cooking the Fettuccine In the same pot, pour in 1 cup of chicken broth and bring it to a gentle simmer. Add 8 ounces of fettuccine pasta. Make sure the pasta is fully submerged in the broth. Cook the pasta according to the package instructions, about 10-12 minutes. Stir occasionally to prevent sticking. Check for doneness; you want it al dente. Combining Ingredients for Creamy Sauce After the pasta is cooked, reduce the heat. Add 1 cup of heavy cream to the pot and stir well. Gradually sprinkle in 1/2 cup of grated Parmesan cheese while stirring. Keep mixing until the sauce is creamy and smooth. Finally, return the cooked shrimp to the pot. Stir until the shrimp are well coated in the sauce. You can taste and adjust the seasoning with more salt and pepper if needed. Let it rest for a couple of minutes before serving. Avoiding Overcooked Shrimp To keep shrimp tender, cook them for only 2-3 minutes. They should turn pink and opaque. If they curl tightly, you have cooked them too long. Remove them from the heat as soon as they are done. This keeps them juicy and delicious. Perfecting the Creamy Sauce To make a smooth sauce, add the heavy cream slowly. Stir well as you mix in the Parmesan cheese. This helps it melt evenly and avoids lumps. If the sauce is too thick, add a little more chicken broth to thin it out. Adjust the seasoning with salt and pepper to taste. Recommended Kitchen Tools Use a large pot or deep skillet for this recipe. A wooden spoon is great for stirring. A measuring cup helps with portioning the broth and cream. Don’t forget a sharp knife for mincing garlic. These tools make the cooking process easier and more fun! {{image_2}} You can swap fettuccine for other pasta types. Try penne or spaghetti for a twist. Gluten-free pasta works well if you need that option. Just be sure to check cooking times; they might differ a bit. If you don’t like shrimp, use chicken or tofu instead. Cook chicken pieces until golden brown. For tofu, use firm tofu and sauté until crispy. These swaps will still give you a tasty dish. To make this dish dairy-free, replace heavy cream with coconut milk. Almond milk or cashew cream can also work. Nutritional yeast adds a cheesy flavor without dairy. This keeps the dish creamy and rich while meeting your dietary needs. Best Practices for Storage To keep your creamy garlic shrimp pasta fresh, store it in an airtight container. Let it cool to room temperature before sealing. This helps prevent condensation and keeps the pasta from getting mushy. You can store it in the fridge for up to three days. Reheating Instructions When you're ready to enjoy your leftovers, reheat them gently. You can use a microwave or a stovetop. If using the microwave, heat in short bursts and stir often. On the stovetop, add a splash of chicken broth or cream to bring back the sauce's creaminess. Heat over low heat until warmed through. Freezing Tips If you want to store it longer, freezing is a good option. Pack the pasta in a freezer-safe container, leaving some space for expansion. It can last up to two months in the freezer. To reheat, let it thaw overnight in the fridge. Then, use the stovetop method to warm it up, adding a little cream if needed. Can I use frozen shrimp? Yes, you can use frozen shrimp. Just thaw them first. Run them under cold water until they are no longer icy. This will help them cook evenly. How can I make it spicier? To add spice, try red pepper flakes. Start with a pinch and adjust to your taste. You can also use spicy sausage or hot sauce for a kick. What are good side dishes to serve with this recipe? Great side dishes include garlic bread, Caesar salad, or roasted veggies. These pair well and add color to your meal. You can also serve a light soup to start. In this article, we explored the key ingredients for creamy garlic shrimp pasta, from fettuccine to seasoning. We walked through step-by-step instructions to cook shrimp and pasta, then combine them into a delicious dish. I shared tips to avoid overcooked shrimp and perfect your sauce. You can also swap ingredients to suit your taste. Remember to store leftovers properly and reheat them for a tasty meal. With these insights, you can create a dish that impresses family and friends, making dinner a delightful occasion.

Creamy Garlic Shrimp Pasta One Pot Delight Recipe

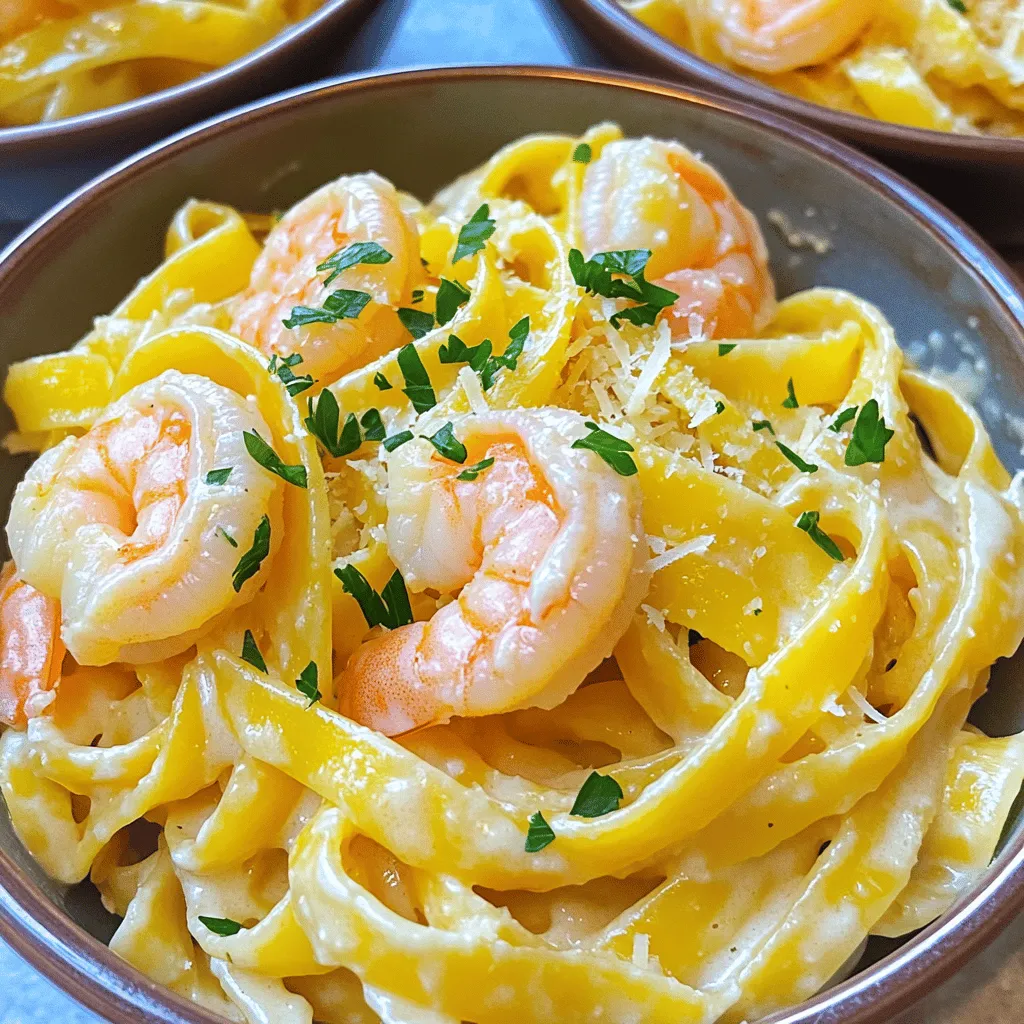
Are you in the mood for a quick and tasty dinner? This Creamy Garlic Shrimp Pasta One Pot Delight Recipe

- 4 large bell peppers (red, yellow, or green), diced - 1 cup quinoa, rinsed - 1 can black beans (15 oz), rinsed and drained - 1 cup corn (fresh or frozen) - 1 cup diced tomatoes (with juice) - 1 teaspoon cumin - 1 teaspoon smoked paprika - Salt and pepper to taste - 2 cups shredded cheese (cheddar or a blend) - 1/4 cup fresh cilantro, chopped (optional for garnish) - 2 tablespoons olive oil Gathering fresh ingredients is key to a great dish. I love using large bell peppers for color and taste. You can pick red, yellow, or green. Each adds a unique flavor. Quinoa brings a nutty touch and is a perfect grain base. Black beans add protein and fiber, making the meal hearty. Corn gives a nice sweetness and crunch. Diced tomatoes add moisture and acidity. Spices like cumin and smoked paprika round out the flavors. Salt and pepper are must-haves for seasoning. Don't forget the cheese! I prefer a blend or cheddar, which melts beautifully. Lastly, fresh cilantro is optional but adds a bright finish if you like it. With these ingredients, you can create a dish that is both comforting and fun. You will impress your family and friends with this cheesy stuffed pepper casserole! - Preheat oven to 375°F (190°C). - In a large skillet, heat 2 tablespoons of olive oil over medium heat. - Add 4 diced bell peppers to the skillet. - Sauté for about 5 minutes, until they start to soften. - In the same skillet, add 1 cup of rinsed quinoa. - Add 1 can of black beans, 1 cup of corn, and 1 cup of diced tomatoes. - Stir in 1 teaspoon of cumin and 1 teaspoon of smoked paprika. - Season with salt and pepper to taste. - Mix everything well and cook for another 2-3 minutes. - Transfer the mixture to a greased 9x13 inch casserole dish. - Spread it evenly across the bottom. - Sprinkle 1 cup of shredded cheese over the top. - Cover the dish with aluminum foil. - Bake for 25 minutes. - After 25 minutes, remove the foil. - Bake for an additional 10-15 minutes until the cheese is bubbly and golden. You can swap quinoa for rice or couscous if you prefer. For beans, kidney or pinto beans work well too. If you want to change the cheese, try mozzarella for a milder taste or pepper jack for a spicy kick. There are many options to make this dish your own. To ensure even cooking, cut your bell peppers into similar sizes. This helps them cook at the same rate. When you bake, cover the dish with foil first. This keeps moisture in and helps the dish cook through. For cheese that melts perfectly, use a mix of cheeses. Shredded cheese blends melt better than blocks. Pair your casserole with a fresh salad or some crusty bread. A light vinaigrette salad complements the rich flavors. For garnishes, fresh cilantro adds a pop of color and flavor. You can also sprinkle some green onions on top for extra crunch. {{image_2}} You can easily adapt this casserole to fit your diet. For a vegan version, swap regular cheese for plant-based cheese. It melts well and keeps the cheesy flavor. For gluten-free options, ensure your quinoa is labeled gluten-free. You can also use brown rice if you prefer. Want to spice things up? Add jalapeños or other hot peppers for a kick. You can also mix in herbs like oregano or basil. These herbs add freshness and depth to your dish. Feel free to experiment with spices like chili powder or garlic powder too. This casserole is great for adding your favorite proteins. Ground turkey or beef blends well into the mix. If you want a lighter dish, try adding more veggies. Chopped spinach, zucchini, or mushrooms work nicely. You can even toss in a mix of your favorite vegetables for extra nutrition. To keep your Cheesy Stuffed Pepper Casserole fresh, store it in the fridge. Place the leftovers in an airtight container. Make sure to seal it well to keep moisture from getting in. This dish stays good for about 3 to 4 days in the refrigerator. You can reheat your casserole in two ways: the oven or the microwave. If you want the cheese to stay nice, use the oven. Preheat it to 350°F (175°C) and warm the casserole for about 15-20 minutes. Cover it with foil to avoid drying out. If you're in a hurry, the microwave works too. Heat it in 1-minute bursts, checking often. Just remember, the cheese might not be as gooey. You can freeze Cheesy Stuffed Pepper Casserole before or after baking. To freeze before baking, wrap the dish tightly with plastic wrap and then foil. This helps keep it fresh. If you want to freeze it after baking, let it cool first. Then, store it in a freezer-safe container. When you're ready to eat, thaw it in the fridge overnight. Bake it at 350°F (175°C) for about 30-40 minutes until it's hot. Cheesy Stuffed Pepper Casserole stays fresh for about 3 to 5 days in the fridge. Store it in an airtight container to keep it tasty. If you want to enjoy it longer, consider freezing it. Yes, you can make this dish ahead of time. Prepare the casserole up to the baking step and cover it. Store it in the fridge for up to 24 hours. When you're ready, just bake it as directed. This makes meal prep easy! You can pair this casserole with several sides. Here are some tasty options: - Salad: A fresh green salad with vinaigrette adds crunch. - Rice or Quinoa: Serve alongside to soak up extra sauce. - Guacamole: This creamy dip complements the flavors well. - Sour Cream: A dollop adds richness and coolness. - Beverages: Try a light beer or a fruity soda for a fun pairing. Feel free to mix and match these ideas to create your perfect meal! In this blog post, we explored a delicious Cheesy Stuffed Pepper Casserole, from ingredients to storage. You learned how to prepare this dish step by step. We shared tips on substitutes and cooking methods to make it your own. Plus, you found ways to customize it for different diets and flavors. Enjoying this recipe can bring joy to your meals. Remember, cooking is fun and allows you to get creative! Try out these ideas and share your own twists on this tasty dish.

Cheesy Stuffed Pepper Casserole Easy and Flavorful Meal

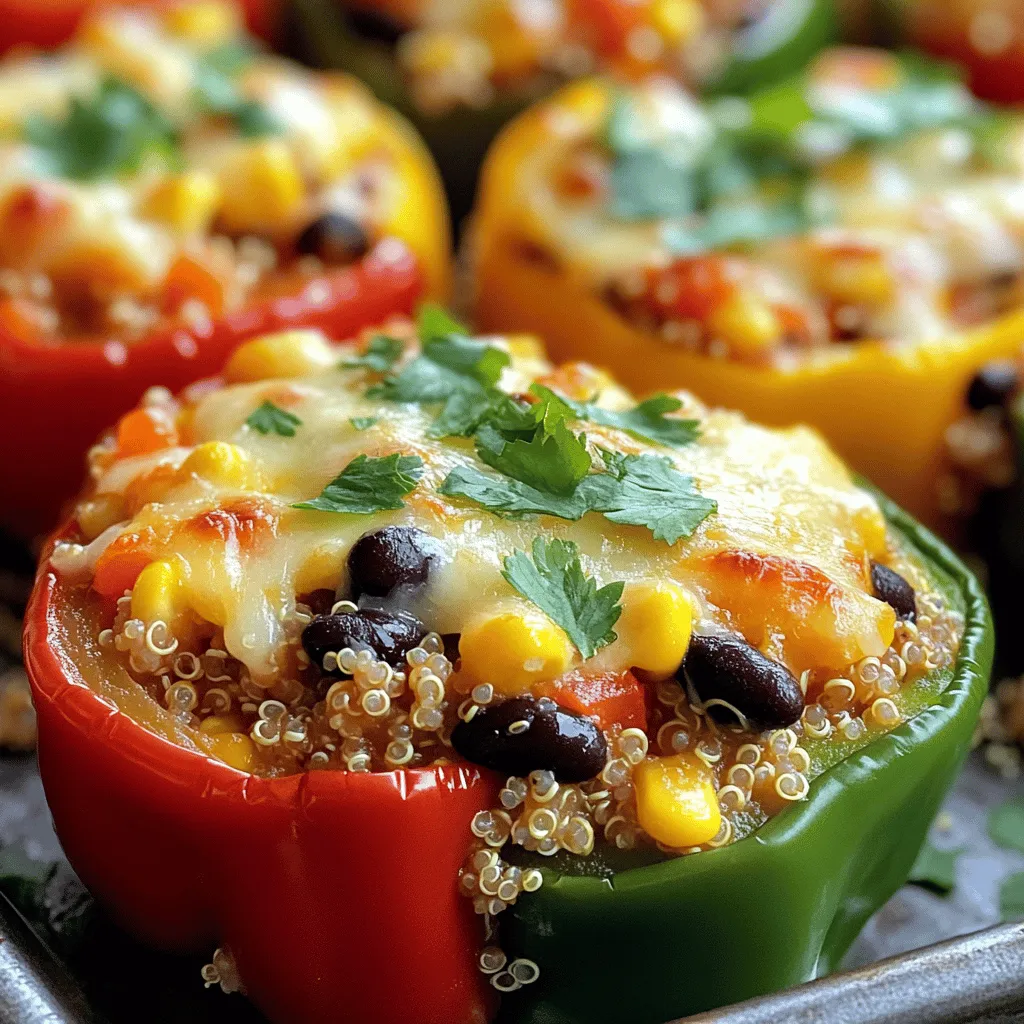
Looking for a simple, tasty meal? Try my Cheesy Stuffed Pepper Casserole! This dish combines fresh bell peppers, hearty quinoa,

Older posts
Newer posts
← Previous Page1 … Page20 Page21 Page22 … Page84 Next →

dsad

© 2026 juliesdish • Built with GeneratePress

Our Policies

  • Copyright Policy
  • Cookie Policy
  • GDPR Policy
  • Privacy Policy
  • Disclaimer
  • Terms Of Use

More Information

  • Home
  • About
  • Contact
  • Appetizers
  • Dessert
  • Dinner
  • Drinks
©2026, juliesdish About Back To Top