Skip to content
DisclaimerTerms Of UseGDPR PolicyCookie Policy

juliesdish

  • Home
  • Drinks
  • Appetizers
  • Dinner
  • Dessert
  • About
  • Contact
  • Privacy Policy
DisclaimerTerms Of UseGDPR PolicyCookie Policy

NO-ING-IMG

For these delightful Raspberry White Chocolate Scones, you will need: - 2 cups all-purpose flour - 1/4 cup granulated sugar - 1 tablespoon baking powder - 1/2 teaspoon salt - 1/2 cup cold unsalted butter, cubed - 1/2 cup heavy cream - 1 large egg - 1 teaspoon vanilla extract - 1 cup fresh raspberries - 1/2 cup white chocolate chips - Additional cream and sugar for topping To make these scones, gather the following items: - Mixing bowls - Whisk - Pastry cutter or fork - Parchment paper - Baking sheet - Rolling pin (optional) - Knife or pizza cutter Choosing the right raspberries is key to great scones. Look for berries that: - Are plump and firm - Have a deep red color - Are free from mold or bruises Smell them! Fresh raspberries should smell sweet and fruity. If you can, buy them from local farmers' markets. They taste better and support local farms. Always wash them gently before use to keep them intact. To start, preheat your oven to 400°F (200°C). This temperature helps the scones rise well. Next, line a baking sheet with parchment paper. This step keeps the scones from sticking. It also makes cleanup easier later. In a large mixing bowl, whisk together 2 cups of all-purpose flour, 1/4 cup of granulated sugar, 1 tablespoon of baking powder, and 1/2 teaspoon of salt. Mixing these dry ingredients well is key. It ensures that the baking powder spreads evenly throughout the dough. Now, grab a separate bowl. Whisk together 1/2 cup of cold heavy cream, 1 large egg, and 1 teaspoon of vanilla extract. This mixture adds moisture and flavor. Make a well in the center of your dry mix and pour this cream mixture into it. Gently mix until just combined. It's important not to overmix; this keeps your scones light and fluffy. Next, fold in 1 cup of fresh raspberries and 1/2 cup of white chocolate chips. Be gentle here. You want to keep the raspberries whole for bursts of flavor. Mixing too hard can break them up and turn your dough pink. Turn the dough onto a lightly floured surface. Gently knead it a few times to bring it together. Pat the dough into a disc about 1 inch thick. Then, cut this disc into 8 wedges. Place the wedges on your prepared baking sheet. Brush the tops with a bit of extra cream and sprinkle with sugar for a lovely shine. Bake your scones in the preheated oven for 15-20 minutes. Look for a light golden color on top. When done, remove them from the oven and let them cool slightly on a wire rack. This cooling step helps them set and makes them easier to eat. Enjoy the warm, flaky goodness! To make light and fluffy scones, keep your butter cold. Cold butter creates steam, which helps the scones rise. Use a pastry cutter or your fingers to mix the butter into the flour until it looks like crumbs. Don't overmix the dough; just combine it enough to form a ball. This keeps the scones tender. Many people overmix the dough. This makes scones tough. Another mistake is using warm butter. Always use cold butter to get the right texture. Also, don’t skip the cream on top before baking. It gives a nice golden color. Lastly, remember to check the oven temperature. An oven that is too hot can burn the scones. Serve your Raspberry White Chocolate Scones warm for the best flavor. Dust them with powdered sugar for a sweet touch. Pair them with clotted cream or butter for richness. Arrange them on a rustic platter with fresh raspberries. This makes a lovely display for any gathering. Enjoy with a cup of tea or coffee! {{image_2}} You can swap raspberries for other fruits. Strawberries or blueberries work great too. Try blackberries for a bolder taste. Each fruit adds its own flavor and color. Mix and match to find what you like best. You can also use dried fruits like cranberries. They add a nice chewiness to the scones. While white chocolate is sweet and creamy, you can try dark chocolate. Dark chocolate gives a rich flavor. Milk chocolate is another option for a sweeter bite. You can even combine chocolate types for a fun twist. Each choice changes the taste and can surprise your taste buds. If you need a gluten-free scone, use gluten-free flour. There are many blends available. Make sure to check the package for instructions. You might need to add a binding agent like xanthan gum. This helps the scones hold together. Enjoy the same delicious flavor without gluten! After baking, let your scones cool completely. Then, place them in an airtight container. This keeps them fresh for up to three days at room temperature. If you live in a humid area, use parchment paper between layers. This helps prevent sticking. You can freeze scones for later enjoyment. First, cool the scones completely. Wrap each one in plastic wrap. Then, place them in a freezer bag or container. They will last up to three months in the freezer. When you want one, just pull it out and let it thaw. To reheat scones, preheat your oven to 350°F (175°C). Place the scones on a baking sheet. Heat them for about 10 minutes. This will restore their flaky texture. You can also use the microwave, but they may not stay as crisp. Heat for about 15-20 seconds, checking often. Enjoy warm! Yes, you can use frozen raspberries. They work well in scones. Just be careful when mixing them in. Frozen raspberries can break easily. This might turn your dough a bit pink. Patience is key. If you thaw the raspberries first, they may get too mushy. So, I suggest using them straight from the freezer. You can tell scones are done by looking for a golden top. The edges should be firm, not soft. If you tap the bottom, it should sound hollow. This means the inside is cooked right. Keep an eye on them around 15 minutes. Ovens can vary, so check them a bit early. If you want a lighter option, try half-and-half. It gives a good flavor but is less rich. You can also use whole milk with a bit of butter. Mix 3/4 cup of milk with 1/4 cup of melted butter. This works well in scones. Just remember, the texture might be slightly different. Yes, you can make the dough ahead of time! Wrap it tightly in plastic wrap. Keep it in the fridge for up to 24 hours. When you are ready, just shape and bake. This helps the flavors blend well. Just don’t freeze the dough before baking. That can change the texture. Fresh scones taste best on the day you bake them. If you store them, keep them in an airtight container. They can last for about 2-3 days at room temperature. For longer storage, freeze them. They will stay good for about a month in the freezer. Just reheat before serving! You learned how to make delicious raspberry and white chocolate scones. We covered each step, from choosing fresh ingredients to baking perfectly. Remember to avoid common mistakes to ensure success. You have many options for variations, like different fruits and chocolate types. Don’t forget to store and freeze your scones properly for best taste. Enjoy your baking, and share these tips with friends to spread the joy of scone-making. Take your skills to the next level and impress everyone with your tasty creations!

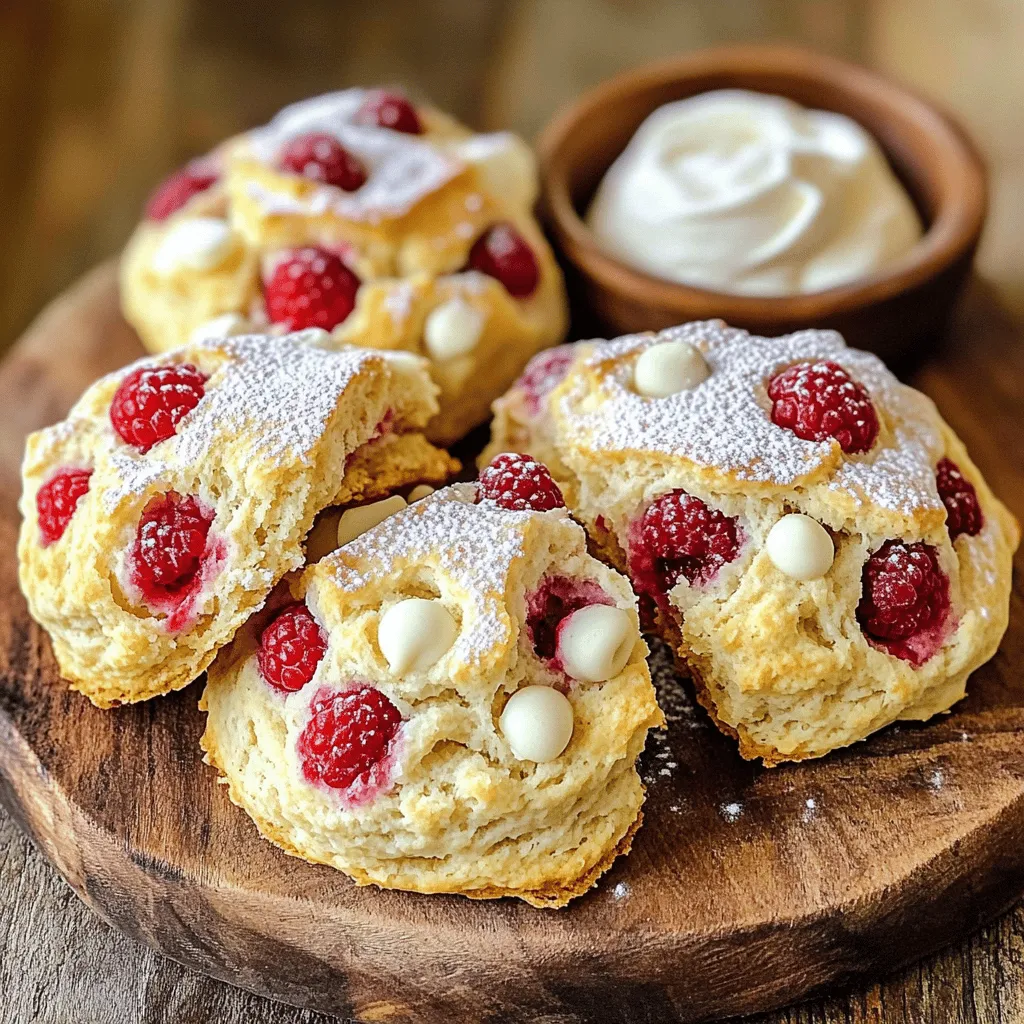
Raspberry White Chocolate Scones Fresh and Flaky Treat

Get ready to indulge in a sweet delight with my Raspberry White Chocolate Scones. These fresh and flaky treats offer

To make Air Fryer Cinnamon Sugar Donut Bites, you need: - 1 cup all-purpose flour - 1/3 cup granulated sugar - 1 tablespoon baking powder - 1/2 teaspoon ground cinnamon - 1/4 teaspoon salt - 1/2 cup whole milk - 1 large egg - 2 tablespoons unsalted butter, melted - 1/4 cup granulated sugar (for coating) - 1 tablespoon ground cinnamon (for coating) You can swap some ingredients if needed: - Use almond milk or oat milk for a dairy-free option. - Replace all-purpose flour with gluten-free flour for a gluten-free treat. - Use coconut oil instead of unsalted butter for a dairy-free fat. - Brown sugar can replace granulated sugar for a richer flavor. To make these donut bites, gather: - A large mixing bowl - A whisk for mixing - A silicone donut bite mold or mini muffin tin - An air fryer for cooking - A shallow bowl for the cinnamon sugar coating - A spoon for filling the mold With these ingredients and tools, you are ready to create delicious donut bites! Start by taking a large mixing bowl. Add 1 cup of all-purpose flour. Next, add 1/3 cup of granulated sugar. Then, mix in 1 tablespoon of baking powder. Sprinkle in 1/2 teaspoon of ground cinnamon and 1/4 teaspoon of salt. Whisk all of these dry ingredients together until well combined. This step ensures that all flavors mix evenly. In another bowl, pour in 1/2 cup of whole milk. Crack one large egg into the bowl. Add 2 tablespoons of melted unsalted butter. Mix these wet ingredients until smooth. Then, carefully pour this mixture into the bowl with the dry ingredients. Stir gently until just combined. It’s okay to see a few lumps. Overmixing will make the donut bites tough. Before cooking, lightly grease a silicone donut bite mold with cooking spray. If you don’t have a mold, mini muffin tins work great too. Spoon the batter into the mold, filling each cavity about 2/3 full. Now, preheat your air fryer to 350°F (175°C) for about 3 minutes. Once it’s ready, place the mold in the air fryer basket. Cook the donut bites for 5-7 minutes. They should turn golden brown, and a toothpick inserted should come out clean. While they cook, mix 1/4 cup of granulated sugar with 1 tablespoon of ground cinnamon in a shallow bowl. Once the bites are done, let them cool for a minute. Then, roll them gently in the cinnamon sugar until fully coated. Enjoy them warm for the best flavor! To get soft and fluffy donut bites, do not overmix the batter. Mix just until you see no dry flour. A few lumps are okay. This keeps the bites light and airy. Also, make sure your baking powder is fresh. Old baking powder can make your donut bites dense. Set your air fryer to 350°F (175°C). Preheat it for about 3 minutes. This helps the donut bites cook evenly. Cook them for 5 to 7 minutes. Check after 5 minutes. When they turn golden brown, they are ready. Use a toothpick to check if they are done. If it comes out clean, they are perfect! Avoid filling the mold too full. Fill each cavity about 2/3 full. This allows space for the bites to rise. If you skip the cooling step, the coating will not stick well. Let them cool for a minute before rolling in cinnamon sugar. Lastly, if you use muffin tins, adjust the time. Muffin tins may need a minute or two more to cook. {{image_2}} You can easily change the flavor of these donut bites. Add cocoa powder for a chocolate treat. Use vanilla extract for a sweet, classic taste. You can also mix in lemon zest for a bright twist. Each option gives you a new way to enjoy these bites. If you need a gluten-free option, swap the all-purpose flour for a gluten-free blend. This will keep the bites soft and tasty. You can also use almond milk instead of whole milk for a dairy-free version. These small changes let everyone enjoy the treats. For more fun, add toppings like sprinkles or nuts. You can fill the donut bites with jam or chocolate chips before cooking. After baking, drizzle with icing for extra sweetness. These toppings let you get creative and make each batch unique. After you enjoy your air fryer cinnamon sugar donut bites, you may have some left. To keep them fresh, place the leftover bites in an airtight container. Store them at room temperature for up to two days. If you want to keep them longer, refrigerate them for up to a week. Just make sure the container is sealed tight. When you want to enjoy the donut bites again, reheating is key. You can use your air fryer for the best texture. Preheat it to 350°F (175°C). Place the donut bites in the basket and heat for about 3-4 minutes. This will make them warm and slightly crispy. You can also use a microwave, but they might become soft. Heat them for 15-20 seconds in the microwave, checking often. If you want to save some for later, freezing works well. Let the donut bites cool completely first. Then, place them in a single layer on a baking sheet. Freeze them for about an hour until firm. Once frozen, transfer them to a freezer bag. Label the bag with the date. They can last up to three months in the freezer. When you're ready to eat, reheat them straight from the freezer using the air fryer or microwave. Yes, you can use a regular oven. Just preheat it to 350°F (175°C). Place the donut bites on a baking sheet lined with parchment paper. Bake for about 10-12 minutes. The bites may take a bit longer to cook compared to the air fryer. Check for a golden brown color. Insert a toothpick into the center of a donut bite. If it comes out clean, they are done. The bites should feel firm to the touch. You can make many desserts in an air fryer! Try air fryer cookies, brownies, or fruit crisps. The air fryer cooks them quickly and gives a nice texture. Experiment with different recipes for fun results! This blog covered key steps for making air fryer donut bites. We explored ingredients, instructions, and tools needed. You learned tips to avoid common mistakes and create the perfect texture. I shared ways to customize your bites with flavors and toppings. Lastly, we discussed how to store leftovers and reheat them. Enjoy experimenting with this fun recipe. The air fryer makes it easy. Happy cooking!

Air Fryer Cinnamon Sugar Donut Bites Delight

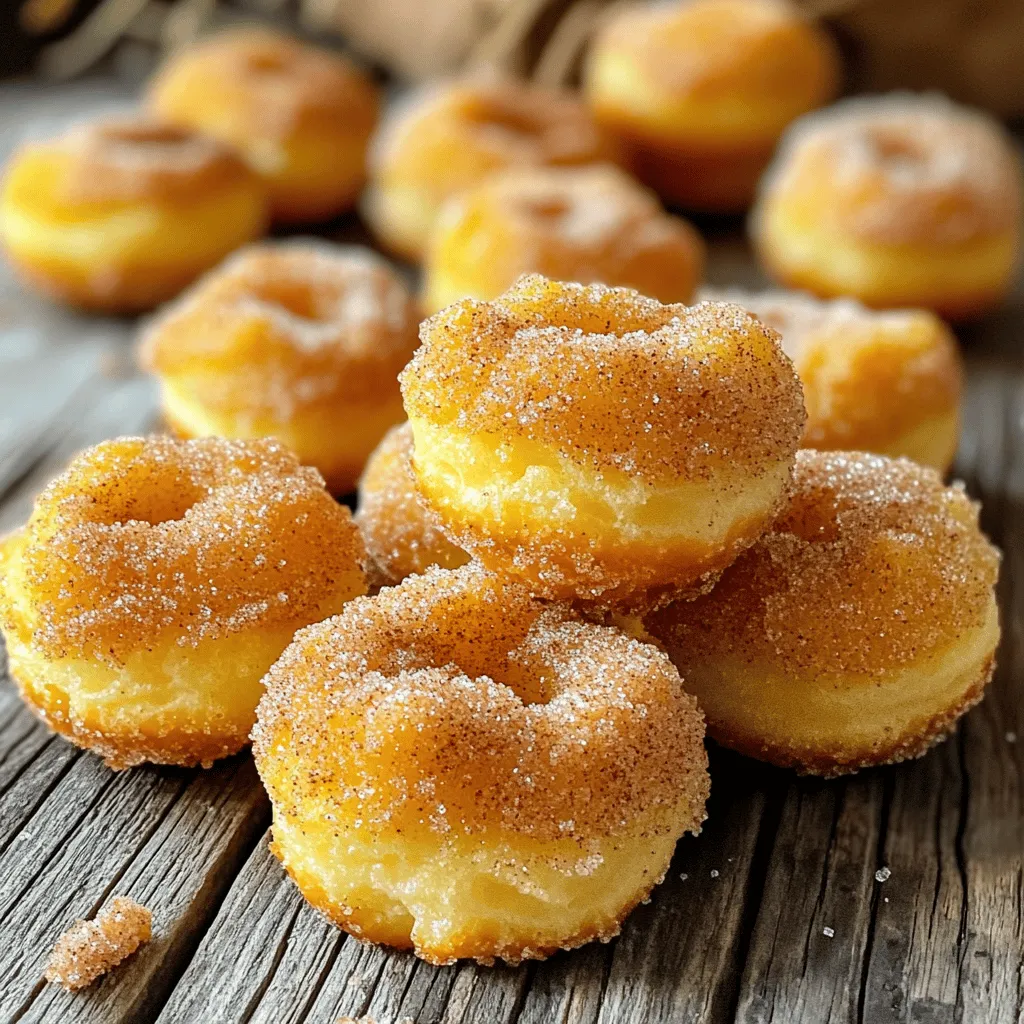
If you love donuts but want a healthier twist, you’re in for a treat! Air Fryer Cinnamon Sugar Donut Bites

Gather all the ingredients before you start. This will make cooking easier and more fun. Here’s what you need: - 2 boneless, skinless chicken breasts - 2 tablespoons olive oil - 2 teaspoons dried oregano - 1 teaspoon garlic powder - 1 teaspoon onion powder - Salt and pepper to taste - 1 cup cooked brown rice or quinoa - 1 cup cherry tomatoes, halved - 1 cucumber, diced - 1 red onion, thinly sliced - 1/2 cup Kalamata olives, pitted and halved - 1 cup Tzatziki sauce (store-bought or homemade) - Fresh parsley, chopped, for garnish Using fresh ingredients makes a big difference in flavor. The chicken brings protein, while the veggies add crunch and color. Tzatziki sauce ties everything together with its cool and creamy taste. You can mix and match the ingredients based on what you like. For example, if you love bell peppers, add those too! Enjoy exploring flavors and textures as you cook. To start, gather your marinade ingredients. You need: - 2 tablespoons olive oil - 2 teaspoons dried oregano - 1 teaspoon garlic powder - 1 teaspoon onion powder - Salt and pepper to taste In a bowl, mix the olive oil, oregano, garlic powder, onion powder, salt, and pepper. This blend gives the chicken great flavor. Add the chicken breasts to the bowl and coat them well. Let the chicken marinate for at least 30 minutes. If you have time, marinate it for up to 2 hours. This extra time makes the chicken taste even better. Next, it’s time to grill the chicken. Preheat your grill or grill pan to medium-high heat. Once hot, place the marinated chicken on the grill. Grill each side for about 6-7 minutes. You want the chicken to reach a safe temperature of 165°F (75°C). After grilling, take the chicken off the heat and let it rest for 5 minutes. This resting period helps keep it juicy when you slice it. Now, let’s put everything together. Start with your base. In each bowl, layer 1/2 cup of cooked brown rice or quinoa. This will be the heart of your gyro bowl. Next, add the grilled chicken strips on top of the rice or quinoa. Then, add fresh veggies: - 1 cup cherry tomatoes, halved - 1 cucumber, diced - 1 red onion, thinly sliced - 1/2 cup Kalamata olives, pitted and halved Finally, drizzle a generous amount of Tzatziki sauce over the top. This creamy sauce adds a cool touch to the bowl. For a finishing touch, garnish each bowl with chopped fresh parsley. This adds color and flavor to your meal. Enjoy your Greek Chicken Gyro Bowls! - Optimal marinating time: Marinate the chicken for at least 30 minutes. For deeper flavor, 2 hours works well. - Enhancing flavor profiles: Add lemon juice or fresh herbs to the marinade. These ingredients boost flavor and freshness. - Achieving perfect grill marks: Preheat your grill or pan well. Place the chicken on the grill and do not move it for a few minutes. This helps the grill marks set. - Cooking tips for juiciness: Cook the chicken over medium-high heat. Use a meat thermometer to check for 165°F (75°C). Let it rest for 5 minutes after grilling. - Serving suggestions with garnishes: Use colorful bowls for serving. Add lemon wedges on the side for an extra kick. - Colors and textures to include: Choose vibrant veggies like red onion and cherry tomatoes. Their colors will make your dish pop. {{image_2}} You can switch up the protein in your Greek chicken gyro bowls. Beef or lamb adds a rich flavor. Grilling marinated beef strips or lamb chops can be a tasty twist. If you prefer seafood, grilled shrimp works great. Simply season them with olive oil, lemon juice, and herbs. Tofu is a good choice for a vegetarian option. Marinate it like the chicken for added taste. The base of your bowl can change the whole dish. You can swap quinoa for couscous. Couscous cooks quickly and absorbs flavors well. It provides a nice texture, making your meal even more enjoyable. Another healthy option is cauliflower rice. This low-carb choice adds a fresh taste and pairs well with all the toppings. You have options when it comes to tzatziki sauce. Store-bought is easy but homemade is often better. Making your own lets you control the flavor. You can also add tasty extras like dill, mint, or garlic. These ingredients can make your sauce pop with freshness. Don’t be afraid to get creative! To keep your Greek chicken gyro bowls fresh, refrigerate leftovers right away. Use airtight containers to prevent any strong smells from getting in. Store bowls with Tzatziki sauce separately to keep everything crisp. Aim to eat leftovers within three days for the best taste. Can you freeze chicken gyro bowls? Yes, you can! Freeze the chicken and veggies together, but store Tzatziki sauce separately. This helps maintain the flavor and texture. To thaw, move the container to the fridge overnight. For reheating, warm the chicken and veggies in a skillet over medium heat. You can also microwave them for about two minutes, stirring halfway. How long will it last in the fridge? Greek chicken gyro bowls stay fresh for about three days. After three days, they might not taste as good. Watch for signs of spoilage like a sour smell or change in color. If you notice either, it's best to toss the bowl. If you don’t have Tzatziki sauce, you can use plain yogurt. Mix yogurt with diced cucumber, lemon juice, and a pinch of salt. You can also try hummus for a creamy option. Both choices work well with the flavors in the gyro bowl. Yes, you can prepare parts of this recipe ahead of time. Cook the chicken, rice, and chop the veggies. Store them separately in the fridge. Assemble the bowls when you are ready to eat. This makes for a quick meal. The best vegetables for gyro bowls include cherry tomatoes, cucumbers, and red onions. You can also add bell peppers or spinach for extra crunch and color. Feel free to mix and match your favorites. Yes, this recipe is gluten-free if you use brown rice or quinoa. Both grains are naturally gluten-free. Just be sure that the Tzatziki sauce is also gluten-free if you use store-bought. Always check the label to be safe. This blog post covered a tasty chicken gyro bowl. We explored the perfect ingredients, marinating tips, and grilling techniques. You learned how to assemble a vibrant, healthy meal with various options. You can swap proteins and grains for your taste. Feel free to store leftovers or freeze extras for later. Get creative and have fun with it! Now, it's time to try making these delicious bowls at home. Enjoy each bite, and let your kitchen shine!

Greek Chicken Gyro Bowls Flavorful and Nutritious Meal

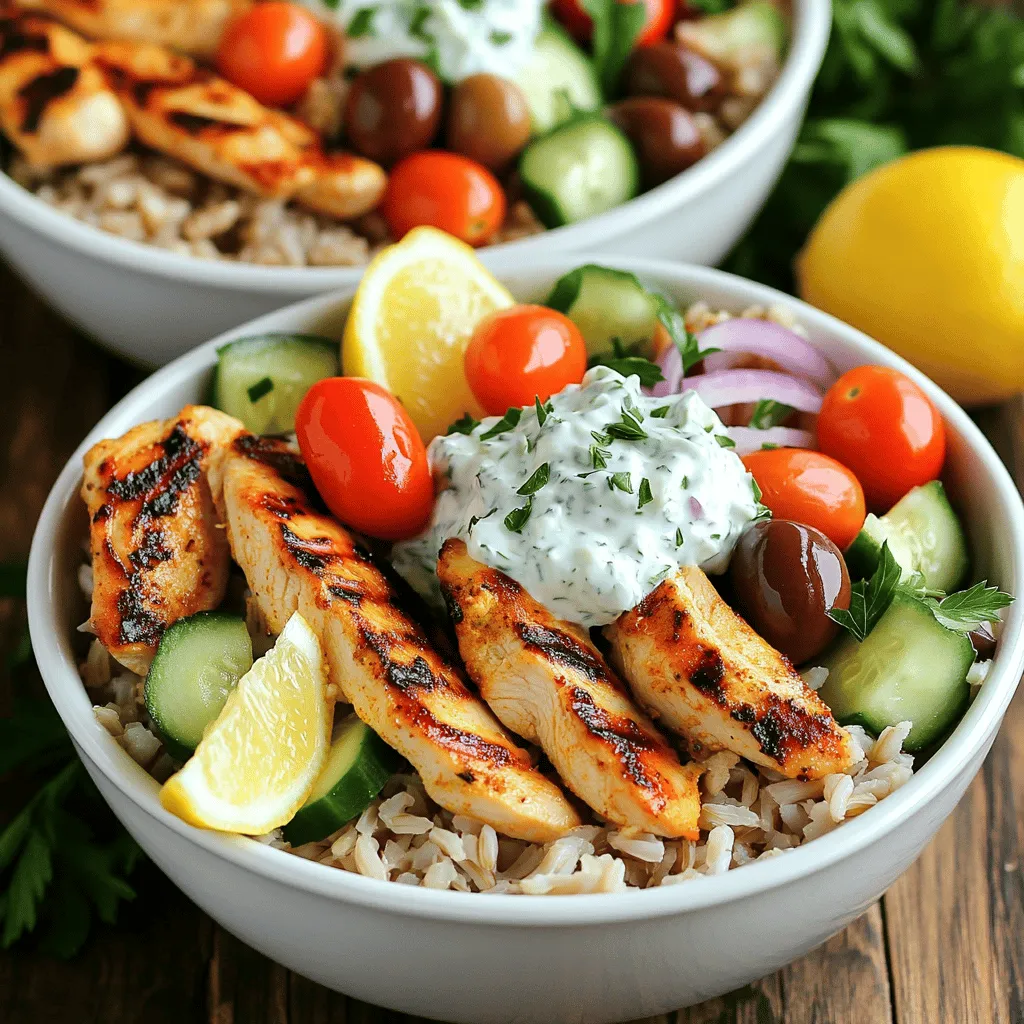
If you crave a meal that’s both tasty and good for you, look no further! Greek Chicken Gyro Bowls mix

- 2 cups miniature pretzel twists - 1 cup creamy peanut butter - 1 cup powdered sugar - 1 teaspoon vanilla extract - 1 cup semi-sweet chocolate chips - 1 tablespoon coconut oil (optional) - Sea salt for sprinkling These ingredients create a perfect mix of sweet and salty. The miniature pretzel twists bring crunch, while the creamy peanut butter adds rich flavor. The powdered sugar sweetens the filling, and the vanilla extract enhances the taste. Semi-sweet chocolate chips melt beautifully, making a delightful coating. Coconut oil helps the chocolate melt smoothly. You can swap creamy peanut butter for crunchy peanut butter. This change gives extra texture. If you want a nut-free option, sunflower seed butter works well. For a vegan treat, use dark chocolate chips instead of semi-sweet. You can also try white chocolate if you like a sweeter taste. To make these treats, you need a few simple tools: - Mixing bowl - Spoon or spatula - Baking sheet - Parchment paper - Microwave-safe bowl These tools help you mix, shape, and dip your pretzel bites easily. Having everything ready makes the process smooth. With the right tools, you'll find it fun to create these tasty snacks! Start by getting a mixing bowl. Add 1 cup of creamy peanut butter. Then, add 1 cup of powdered sugar. Don’t forget the 1 teaspoon of vanilla extract. Use a sturdy spoon to mix until the blend is smooth. This mix should be thick and creamy. It’s the star of our pretzel bites! Now, take a pretzel twist. Use a teaspoon to scoop the peanut butter mix. Spread it on the pretzel. Then, take another pretzel and press it on top. This makes a tasty sandwich. Keep doing this until you run out of pretzels or peanut butter. Place all the pretzel sandwiches on a baking sheet lined with parchment paper. It helps to freeze them for 15-20 minutes. This makes them firm and easier to dip in chocolate. While waiting, melt 1 cup of semi-sweet chocolate chips. Put them in a microwave-safe bowl. Heat in 20-second bursts, stirring after each time. This keeps the chocolate from burning. If you want it smoother, add 1 tablespoon of coconut oil. Dip each pretzel bite halfway into the melted chocolate. Let any extra chocolate drip off. Place them back on the baking sheet. Before the chocolate sets, sprinkle a tiny pinch of sea salt on top. It adds a nice flavor. Put the tray in the fridge for about 30 minutes. This helps the chocolate harden perfectly. If your chocolate is too thick, it may not melt well. Try adding more coconut oil. This oil helps thin the chocolate. If the pretzel bites fall apart, make sure to freeze them long enough. A firm bite makes dipping easier. If the chocolate doesn’t stick, dip the pretzel bites again. You can also try using a fork to help coat them. To boost flavor, consider adding crushed nuts or sprinkles. Chopped peanuts add a nice crunch. You can also use flavored chocolate, like dark or white. A dash of sea salt enhances the sweet and salty mix. For a fun twist, add a bit of cinnamon to the peanut butter filling. These small changes make a big difference in taste! When melting chocolate, use a microwave-safe bowl. Heat it in 20-second intervals. Stir well between each interval to avoid burning. If you see lumps, keep stirring. For smooth chocolate, add coconut oil. It helps the chocolate melt evenly. You can also melt chocolate on the stove using a double boiler. This method gives you more control. Always keep the heat low to prevent burning. {{image_2}} You can switch peanut butter for other nut butters. Almond butter gives a nice flavor. Cashew butter is creamy and rich. Sunflower seed butter is great for nut-free options. Each nut butter adds its own twist to the taste. If you want to try different chocolates, use milk chocolate or dark chocolate. White chocolate can give a fun, sweet taste. You can also use dairy-free chocolate for a vegan option. Each choice changes the flavor and makes it unique. Adding seasonal toppings can make these bites even more fun. In spring, try colorful sprinkles for a festive look. In fall, crushed candy corn or pumpkin spice adds a seasonal twist. Around the holidays, use crushed peppermint or festive holiday sprinkles. These small tweaks can enhance your treat's appearance and taste. To keep your chocolate dipped peanut butter pretzel bites fresh, store them in an airtight container. A glass jar or a plastic bin works well. Place parchment paper between layers to prevent sticking. Keep the container in a cool, dry area. Avoid storing them in direct sunlight or near heat sources, as this can melt the chocolate. Freezing these bites is simple. After dipping them in chocolate, place the bites on a baking sheet lined with parchment paper. Freeze them until firm, about 30 minutes. Once they are set, transfer them to an airtight container. Make sure to separate layers with parchment paper to avoid sticking. You can freeze them for up to three months. Just thaw at room temperature before enjoying. When stored properly, these treats last about one week at room temperature. If you keep them in the fridge, they can last up to two weeks. Freezing extends their shelf life significantly. Just remember to check for any signs of freezer burn if they stay frozen too long. Enjoy them while they are fresh for the best taste! Yes, you can use different types of pretzels. You might try pretzel crisps, sticks, or even chocolate-covered pretzels. Each type gives a new taste and crunch. Choose what you like best for your bites. If your chocolate turns grainy, don't worry! You can fix it. Add a small amount of coconut oil or vegetable oil. Heat it gently in the microwave. Stir it well until smooth. This will help your chocolate melt and blend better. Yes, there are nut-free options! You can use sunbutter or soy nut butter instead of peanut butter. Both options work well and still taste great. Just make sure to check for allergens if you share your treats. This blog post covered the fun and tasty world of chocolate-dipped pretzel sandwiches. We explored key ingredients, discussed essential tools, and provided easy steps for making them. Tips helped troubleshoot issues and suggest yummy variations. Remember to store them well for later. Enjoy making these treats, and let your creativity shine with different flavors and toppings. With the right technique, anyone can make great snacks that friends and family will love.

Chocolate Dipped Peanut Butter Pretzel Bites Delight

Get ready to treat yourself with a simple yet delicious snack: Chocolate Dipped Peanut Butter Pretzel Bites! This tasty treat

- 4 salmon fillets (6 ounces each) - 1/4 cup low-sodium soy sauce - 1/4 cup honey - 2 tablespoons sesame oil - 2 cloves garlic, minced - 1 tablespoon fresh ginger, grated - 2 cups broccoli florets - 1 red bell pepper, sliced - 2 carrots, sliced - 2 tablespoons sesame seeds - Green onions, sliced, for garnish The star of this dish is the salmon. Salmon fillets are rich and flavorful. They soak up the honey and soy sauce well. You want to use fresh salmon for the best taste. Low-sodium soy sauce is key here. It adds umami without too much salt. Honey brings sweetness and depth. Together, they create a glaze that makes the salmon shine. Next, sesame oil, garlic, and ginger enhance the dish. The sesame oil adds a nutty flavor. Garlic gives a savory touch, while ginger adds warmth. These three ingredients create a yummy marinade. Now, let's talk about the vegetables. Broccoli, bell pepper, and carrots are colorful and tasty. They roast well and soak up flavor from the marinade. Feel free to mix in your favorite veggies. Zucchini or snap peas can also work great! Lastly, the garnishes add a special touch. Sesame seeds give a nice crunch. Green onions add freshness and color. These simple garnishes make the dish look and taste even better. Enjoy your cooking! - Preheat your oven to 400°F (200°C). This step is key for even cooking. - Line a large sheet pan with parchment paper. This helps with easy cleanup later. - In a medium bowl, mix together: - 1/4 cup low-sodium soy sauce - 1/4 cup honey - 2 tablespoons sesame oil - 2 cloves garlic, minced - 1 tablespoon fresh ginger, grated - 1 tablespoon rice vinegar - 1 teaspoon red pepper flakes (optional) Whisk these ingredients well to make a tasty marinade. - Place the 4 salmon fillets on one side of the sheet pan. - Brush half of the marinade over the salmon. Save the other half for later. - In a bowl, toss 2 cups broccoli florets, 1 sliced red bell pepper, and 2 sliced carrots with a bit of olive oil, salt, and pepper. - Spread the veggies on the other side of the sheet pan. - Put the sheet pan in the oven and bake for about 15-20 minutes. - Cook until the salmon flakes easily and the veggies are tender-crisp. - In the last 5 minutes, brush the remaining marinade over the salmon and veggies. This adds extra flavor. To check for doneness, look for a few signs. The salmon should be opaque and flake easily with a fork. Use a fork gently to test it. If it breaks apart, it’s done. For thicker fillets, you may need more time. Adjust cooking time based on the thickness of your salmon. Marinating is key to great taste. Aim for at least 15 minutes for the salmon to soak up the flavors. If you have time, let it marinate for up to an hour. This makes a big difference! Using fresh ingredients also helps boost the flavor. Fresh garlic and ginger give a bright taste that dried spices can’t match. For roasting, broccoli, bell peppers, and carrots work well. They get tender and add color to your dish. You can also try zucchini, asparagus, or Brussels sprouts for variety. Seasonal veggies can change the dish too. In summer, use fresh corn or cherry tomatoes. In fall, consider squash or sweet potatoes. {{image_2}} You can switch out the salmon for other proteins. Chicken breast, for instance, works well. It soaks up the honey soy glaze just like salmon. You might also try shrimp or firm tofu for a plant-based option. Cooking times for other proteins: - Chicken breast: Bake for about 20-25 minutes. - Shrimp: Cook for 10-12 minutes until pink and opaque. - Tofu: Roast for 15-20 minutes, ensuring it gets crispy. Feel free to get creative with flavors! You can try different sauces to change the taste. A teriyaki sauce adds a sweet twist. For a kick, use sriracha or chili garlic sauce. Adjusting spice levels: - For less heat, skip the red pepper flakes. - If you love spice, double the flakes or add fresh chili. Pair your honey soy glazed salmon with tasty sides. Steamed rice or quinoa complements the dish well. A simple salad with greens adds freshness. Presentation ideas: - Serve salmon on a bed of rice with veggies on the side. - Drizzle extra glaze over everything for a beautiful finish. To keep your honey soy glazed salmon fresh, store it in an airtight container. Make sure to let it cool first. It stays fresh for about 3 days in the fridge. If you notice any off smells or changes in texture, it’s best to toss it. You can freeze leftovers for later use. Wrap each salmon fillet tightly in plastic wrap, then place them in a freezer bag. Make sure to remove as much air as possible. This way, your salmon can last up to 3 months in the freezer. When you’re ready to eat, thaw it in the fridge overnight. For reheating, bake it in the oven at 350°F (175°C) for about 15-20 minutes. This keeps the salmon moist and flavorful. Avoid microwaving, as it can dry it out. The cooking time for salmon depends on its thickness. Generally, salmon needs about 4 to 6 minutes per half-inch of thickness. For a standard fillet, you will bake it for 15 to 20 minutes at 400°F (200°C). The salmon is done when it flakes easily with a fork. To check, insert a fork into the thickest part of the fish. If it pulls apart easily, it's ready. Yes, you can use regular soy sauce. However, it will change the flavor. Regular soy sauce has more salt, which can make the dish saltier. If you do use it, consider reducing the amount in your marinade to balance the taste. Taste as you go to ensure the flavor is just right. Honey soy glazed salmon pairs well with many sides. Here are some popular options: - Steamed rice or jasmine rice - Quinoa or couscous - Roasted sweet potatoes - Stir-fried green beans - A fresh garden salad These sides complement the sweet and savory flavors of the salmon. Yes, you can prepare this recipe ahead of time. Marinate the salmon in the sauce for up to 2 hours in the fridge. You can also chop the vegetables and store them in the fridge for later use. On the day you plan to cook, simply assemble everything on the sheet pan and bake it. This makes meal prep easy and quick. This blog post shared a simple and tasty honey soy glazed salmon recipe. You learned about key ingredients, easy prep, and step-by-step instructions. We explored tips for perfect cooking and delicious flavor variations. You now have ideas for sides and storage methods. Try this recipe for a healthy meal. Keep experimenting, and find what your taste buds love best. Enjoy your cooking journey!

Sheet Pan Honey Soy Glazed Salmon Simple and Tasty

If you’re craving a simple yet delicious meal, you’ll love this Sheet Pan Honey Soy Glazed Salmon. It’s packed with

Gather these tasty ingredients to make your creamy spinach and sun-dried tomato orzo: - 1 cup orzo pasta - 2 cups fresh spinach, chopped - 1/3 cup sun-dried tomatoes, diced (preferably oil-packed for extra flavor) - 1 cup vegetable broth - 1/2 cup heavy cream (or a dairy-free alternative) - 1/2 cup grated Parmesan cheese (or nutritional yeast for a vegan option) - 2 cloves garlic, minced - 1 tablespoon olive oil - Salt and pepper to taste - Fresh basil leaves, for garnish This list is simple but full of flavor. You’ll love how fresh spinach and sun-dried tomatoes brighten your dish. The orzo pasta adds a nice texture, while the heavy cream and Parmesan cheese make it rich. You can switch to dairy-free options if needed. Using oil-packed sun-dried tomatoes gives you an extra boost of taste. Enjoy crafting this delightful meal! 1. Start by heating olive oil in a medium saucepan over medium heat. 2. Add minced garlic and sauté it for about 30 seconds. You want it to smell nice. 3. Next, stir in the orzo pasta. Coat it well with the garlic oil. 4. Toast the orzo for 2-3 minutes until it turns slightly golden. 5. Carefully pour in the vegetable broth. Bring it to a boil. 6. Lower the heat to a simmer and cover the pot. Cook the orzo for 8-10 minutes. Stir occasionally until the pasta is tender. 1. Once the orzo is ready, stir in the chopped spinach and diced sun-dried tomatoes. 2. Pour in the heavy cream and grated Parmesan cheese. Mix well. 3. Allow it to simmer for another 2-3 minutes. This makes the dish creamy and rich. 4. Season with salt and pepper to taste. Stir everything until well combined. 1. Remove the pot from heat. Let the dish rest for a couple of minutes. This helps it thicken slightly. 2. Serve warm and garnish with fresh basil leaves. Enjoy your creamy spinach and sun-dried tomato orzo! - Vegan options with dairy alternatives: If you want a vegan dish, swap heavy cream with coconut cream or cashew cream. Use nutritional yeast instead of Parmesan cheese for a cheesy flavor. This keeps your dish creamy and tasty without using animal products. - Gluten-free substitute suggestions: If you need a gluten-free meal, use gluten-free orzo pasta. Many brands offer a rice-based version. This way, you can enjoy the same great taste without the gluten. - Adding herbs or spices: Fresh herbs can elevate your dish. Try adding basil, oregano, or thyme. A pinch of red pepper flakes adds heat. These flavors brighten the creamy sauce and make each bite exciting. - Tips for using different cheeses: Instead of Parmesan, try goat cheese or feta for a different taste. Each cheese brings its unique flair. Mix and match cheeses for a more complex flavor profile. This makes the dish fun and personal. {{image_2}} When you serve creamy spinach and sun-dried tomato orzo, think about what goes well with it. Here are some tasty options: - Side Dishes: A light arugula salad pairs nicely with this dish. The peppery taste of arugula adds a fresh note. You can also serve garlic bread for a comforting touch. - Beverages: A crisp white wine, like Sauvignon Blanc, complements the creamy flavors. If you prefer non-alcoholic drinks, try sparkling water with lemon. How you present your dish can make a big difference. Here are some fun ideas: - Garnishing: Add fresh basil leaves on top of the orzo. This will not only look pretty but also boost flavor. You can tear the leaves for a more rustic look. - Plating Suggestions: Use a wide, shallow bowl. This allows you to spread the orzo out, showing off its creamy texture. You might sprinkle extra Parmesan on top for a nice finish. To keep your creamy spinach and sun-dried tomato orzo fresh, store leftovers properly. First, allow the dish to cool down to room temperature. This helps prevent condensation in the container. Next, transfer the orzo to an airtight container. Glass or BPA-free plastic containers work well. Make sure to seal it tightly to keep out air and moisture. Store it in the fridge for up to three days for the best taste. When it’s time to enjoy your leftovers, reheating them correctly is key. The best method is to use the stovetop. Simply place the orzo in a medium saucepan over low heat. Add a splash of vegetable broth or cream to help it regain its creaminess. Stir often to heat evenly and avoid sticking. This method keeps the flavors intact and the texture creamy. If you prefer the microwave, use a microwave-safe bowl. Heat in short intervals, stirring in between, until it’s warm throughout. Yes, you can use whole wheat orzo. It adds more fiber and a nutty taste. Just keep an eye on the cooking time. Whole wheat orzo may need a few extra minutes to cook. Taste it to check for doneness. To make this dish ahead, cook the orzo and mix it with other ingredients. Let it cool, then store it in the fridge. You can reheat it later on the stove or in the microwave. Add a splash of broth or cream when reheating for extra creaminess. Yes! This dish is great for meal prepping. You can store it in individual containers. It stays tasty in the fridge for about three days. Just remember to heat it through before serving. Enjoy it warm for a comforting meal! This dish combines simple ingredients like orzo, spinach, and sun-dried tomatoes. You learned how to sauté, simmer, and mix flavors for a creamy delight. Remember, you can adjust this recipe for vegan and gluten-free needs. Pair it well with salads or wine for a full meal experience. Store leftovers properly, so they taste fresh later. Enjoy making this recipe your own, and share it with friends. Cooking brings joy, and this dish shines in any setting.

Creamy Spinach & Sun-Dried Tomato Orzo Delight

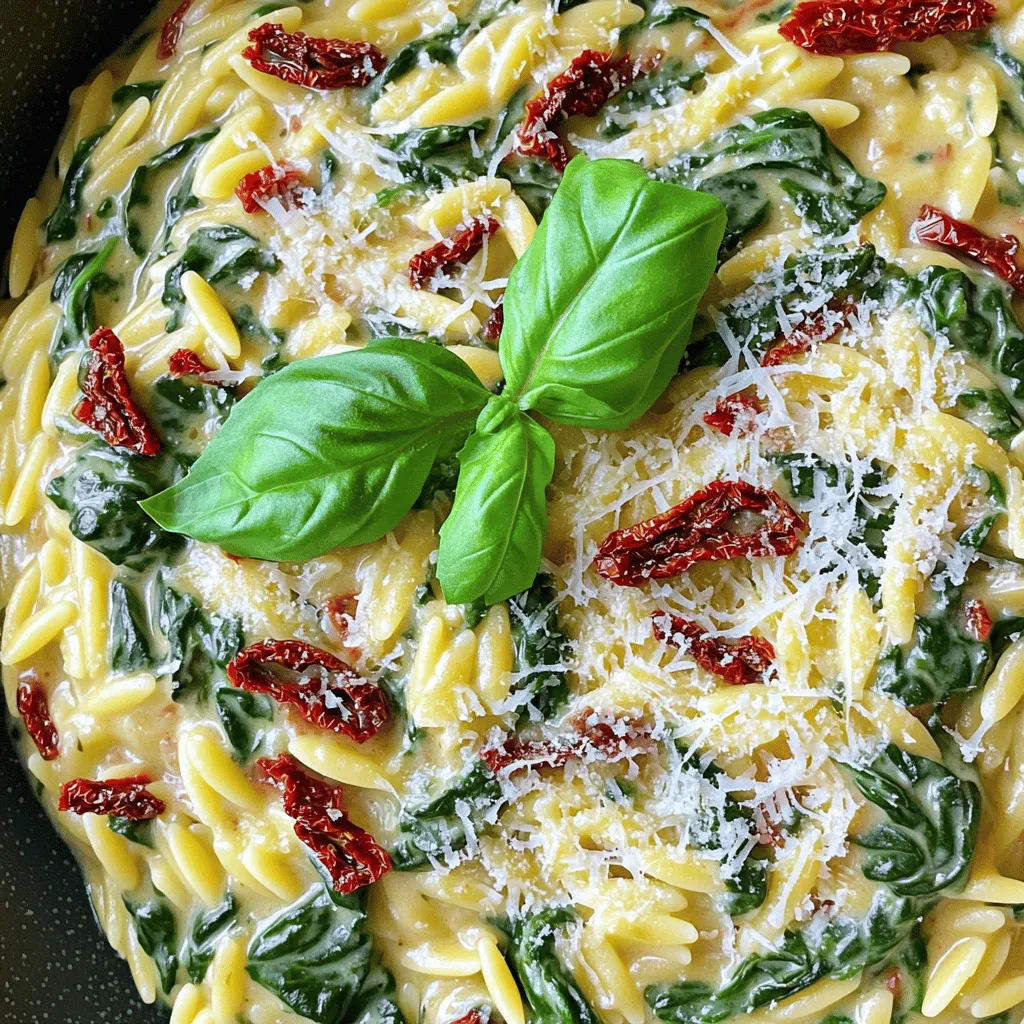
Ready to impress your taste buds? This Creamy Spinach & Sun-Dried Tomato Orzo Delight is a perfect mix of flavor

- 1 cup quinoa, rinsed - 2 cups vegetable broth or water Quinoa is a great base for this dish. It is high in protein and fiber. Rinsing it removes any bitter taste. Using vegetable broth adds flavor. You can use water, but broth makes it richer. - 1 medium zucchini, diced - 1 bell pepper (red or yellow), diced - 1 cup cherry tomatoes, halved - 1 cup broccoli florets These veggies bring color and crunch. Zucchini is soft and mild. Bell peppers add sweetness. Cherry tomatoes burst with juice. Broccoli gives a nice bite. Mixing them creates a tasty medley. - 3 tablespoons olive oil - 4 garlic cloves, minced - 1 teaspoon dried oregano - 1 teaspoon dried basil - Salt and pepper to taste - ¼ cup fresh parsley, chopped - ½ lemon, juiced This mix of herbs and spices is key. Olive oil helps the veggies roast well. Garlic adds a strong flavor. Oregano and basil bring warmth. Salt and pepper enhance everything. Garnishing with parsley and lemon adds freshness and brightness. Start by rinsing one cup of quinoa under cold water. This step removes any bitter taste. In a medium pot, combine the rinsed quinoa with two cups of vegetable broth or water. Bring this mixture to a boil over high heat. Once it boils, turn the heat down low. Cover the pot and let it simmer for about 15 minutes. The quinoa will absorb the liquid and become fluffy. After 15 minutes, remove the pot from heat but keep it covered for five more minutes. Fluff the quinoa with a fork before serving. While the quinoa cooks, it's time to roast the veggies. First, preheat your oven to 425°F (220°C). In a large bowl, add one medium diced zucchini, one diced bell pepper, one cup of halved cherry tomatoes, and one cup of broccoli florets. In a small bowl, mix three tablespoons of olive oil, four minced garlic cloves, one teaspoon of dried oregano, and one teaspoon of dried basil. Add salt and pepper to taste. Pour this oil mixture over the vegetables. Toss everything well to ensure even coating. Spread the seasoned vegetables on a baking sheet in a single layer. Roast them in the oven for 20 to 25 minutes. Stir the veggies halfway through for even cooking. They should turn tender and golden brown. Once the quinoa and vegetables are ready, it’s time to assemble your bowls. Start with a generous scoop of quinoa in each bowl. Top it with the roasted veggies. For added flavor, drizzle fresh lemon juice over the top. Finally, sprinkle chopped parsley for a fresh touch. Enjoy your Garlic Herb Roasted Veggie Quinoa Bowls! To make quinoa fluffy, rinse it well before cooking. This removes the bitter coating called saponin. Use a 1:2 ratio of quinoa to liquid. For one cup of quinoa, use two cups of vegetable broth or water. Bring it to a boil, then lower the heat. Cover and simmer for 15 minutes. Let it rest for five minutes after cooking. Fluff it gently with a fork to keep it light. Roasting veggies brings out their natural sweetness. Cut them into even pieces for uniform cooking. I like to use zucchini, bell peppers, cherry tomatoes, and broccoli. Toss them in olive oil and seasonings to coat well. Spread them out on a baking sheet. This helps them roast evenly. Roast at 425°F for 20 to 25 minutes. Stir halfway through to ensure they caramelize nicely. Serve your Garlic Herb Roasted Veggie Quinoa Bowls in bright bowls for a fun look. Top the quinoa with roasted veggies and a squeeze of fresh lemon juice. Chopped parsley adds a pop of color and flavor. For extra creaminess, try adding feta cheese or avocado slices. Enjoy your meal warm for the best taste! {{image_2}} You can swap the veggies for your favorites. Try using carrots, sweet potatoes, or asparagus. These vegetables add their own unique flavors. If you like a bit of crunch, add some snap peas or cauliflower. You can mix and match based on what you have at home. The key is to use fresh, colorful veggies to keep it fun. Quinoa is great, but other grains work too. You can use brown rice, farro, or even bulgur. Each grain has a different taste and texture. Brown rice adds a nutty flavor, while farro gives a chewy bite. You can also try couscous for a softer option. Make sure to adjust the cooking time based on the grain you choose. This bowl is versatile! To make it vegan, skip cheese and add more veggies. For protein, consider chickpeas, black beans, or lentils. Grilled chicken or shrimp also works if you eat meat. You can top it with nuts or seeds for an extra crunch. Each addition makes the meal more filling and satisfying. Store your Garlic Herb Roasted Veggie Quinoa Bowls in the fridge. Use an airtight container for best results. They will stay fresh for about 3 to 5 days. Before eating, check for any signs of spoilage. If you want to save some for later, freezing is a great option. Let the bowls cool completely first. Then, divide them into single servings. Use freezer-safe bags or containers. They can last up to 3 months in the freezer. When you’re ready to eat, thaw them in the fridge overnight. To reheat your quinoa bowls, use the microwave or the oven. For the microwave, place in a bowl with a splash of water. Heat for 1 to 2 minutes, stirring halfway through. For the oven, preheat to 350°F (175°C). Put the bowls on a baking sheet and heat for about 15 minutes. Enjoy your meal just like when it was fresh! Yes, you can use brown rice. It will change the texture and taste. Brown rice takes longer to cook, about 40-45 minutes. Adjust the liquid to 2.5 cups for brown rice. Make sure to rinse the rice before cooking. To store the bowls, let them cool first. Place them in an airtight container. They can stay in the fridge for up to four days. You can also separate the quinoa and veggies if you prefer. You can serve a simple green salad. A light soup pairs well, like tomato or vegetable. You might also enjoy crusty bread for dipping. For a heartier option, try grilled chicken or tofu. This blog post covers how to make delicious Garlic Herb Roasted Veggie Quinoa Bowls. We started with the right ingredients, including quinoa, fresh veggies, and tasty seasonings. Next, I shared clear steps for preparing the quinoa and roasting the vegetables. I also provided tips for the best flavor and texture, as well as fun variations. Finally, we discussed how to store leftovers and answered common questions. Enjoy making this dish and experiment! It’s a simple way to create a healthy meal.

Garlic Herb Roasted Veggie Quinoa Bowls Delightful Meal

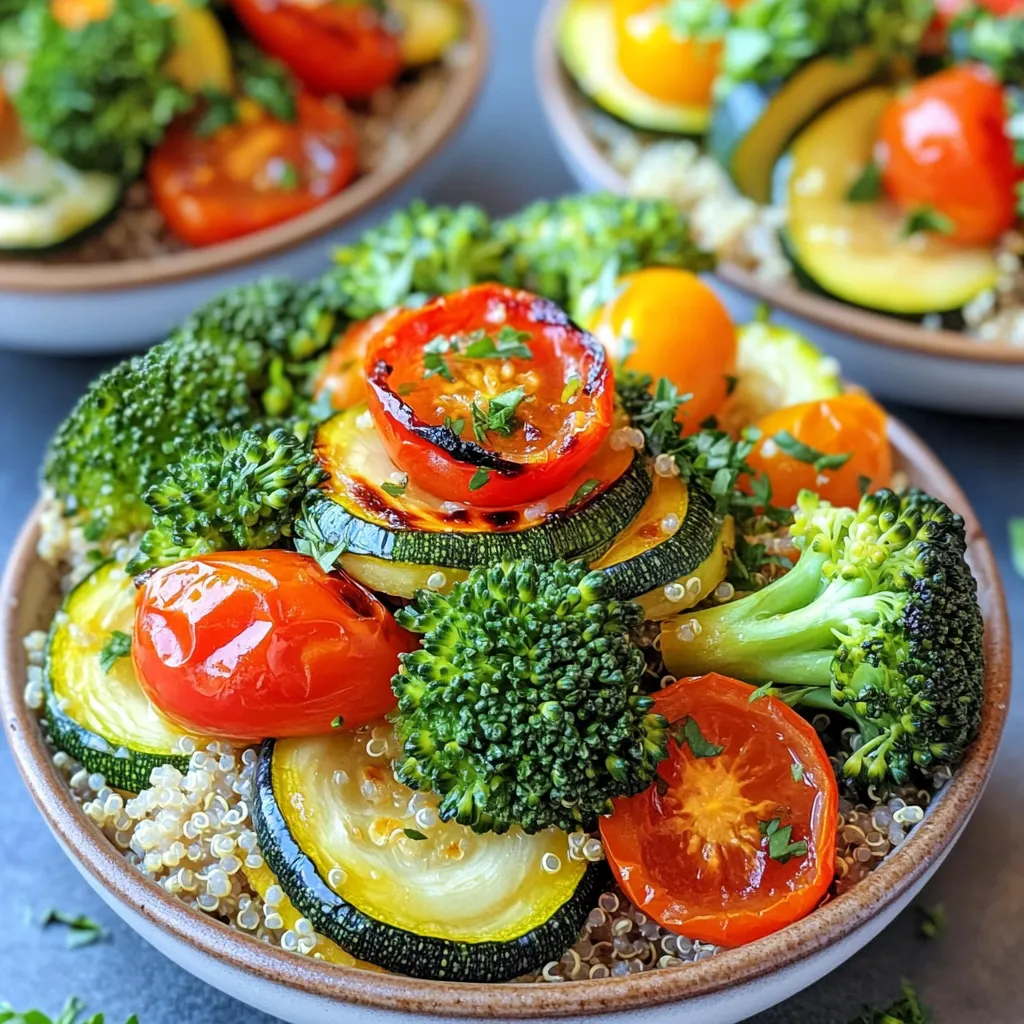
Looking for a wholesome meal that packs a flavor punch? Garlic Herb Roasted Veggie Quinoa Bowls are your answer! This

- 2 cups fresh blueberries - 1 tablespoon lemon juice - Zest of 1 lemon - 1 cup all-purpose flour - 1 cup rolled oats - 3/4 cup brown sugar, packed - 1/2 teaspoon baking powder - 1/4 teaspoon salt - 1/2 cup unsalted butter, softened - 1 teaspoon vanilla extract In this recipe, fresh blueberries are key. They add sweetness and a burst of flavor. You can also use frozen blueberries if you prefer. Just make sure to thaw them first and drain excess moisture. The lemon juice and zest give a bright taste that balances the sweetness of the blueberries. For the dry mix, you will need all-purpose flour, rolled oats, brown sugar, baking powder, and salt. The oats add texture and a nice crunch, while brown sugar provides depth in flavor. Baking powder helps the bars rise, and salt enhances all the flavors. The last ingredients are butter and vanilla extract. The butter binds everything together, giving a rich flavor. Vanilla adds warmth and rounds out the taste profile. Gather these ingredients to start making your Blueberry Lemon Crumble Bars. Each one plays an important role in creating the perfect blend of sweet and tart. Enjoy the process of mixing them together for a delightful treat! First, preheat your oven to 350°F (175°C). Line an 8x8 inch baking dish with parchment paper. Leave some paper hanging over the edges. This helps with easy removal later. In a medium bowl, combine 2 cups of fresh blueberries with 1 tablespoon of lemon juice and the zest of 1 lemon. Stir gently and set this aside. Letting the mixture sit helps the flavors blend nicely. In a large mixing bowl, mix together 1 cup of all-purpose flour, 1 cup of rolled oats, 3/4 cup of packed brown sugar, 1/2 teaspoon of baking powder, and 1/4 teaspoon of salt. These dry ingredients are key for a tasty crumble. Next, cut in 1/2 cup of softened unsalted butter. You can use a pastry cutter or your fingers. Mix until it looks like coarse crumbs. Finally, add in 1 teaspoon of vanilla extract and stir until combined. Now, take half of your crumble mixture and press it firmly into the bottom of the prepared baking dish. This forms the base layer. Evenly spread the blueberry mixture over the crumble base. Make sure the blueberries are spread out well. Sprinkle the remaining crumble mixture on top. This will cover the blueberries while leaving some visible for texture. Place the baking dish in the oven and bake for 30-35 minutes. Look for a golden brown top and bubbling blueberries. This shows they are done. When baked, remove the dish from the oven. Let it cool completely in the dish on a wire rack. This cooling step helps the bars set. Once cool, lift the edges of the parchment paper and take the bars out. Cut them into squares and enjoy! To get a crunchy crumble topping, use cold butter. Cold butter helps keep the crumbs firm. Cut the butter into your dry mix until it looks like sand. Don’t overwork it. The mix should feel crumbly, not smooth. Press half of the crumble into the pan, but keep the top layer loose. This helps it bake up nice and crunchy. To boost flavor, add spices like cinnamon or nutmeg. A pinch of cardamom also works well. For extra texture, toss in chopped nuts like walnuts or pecans. You can even add a handful of coconut flakes. These simple changes will make your bars even more delicious. Serve the Blueberry Lemon Crumble Bars warm or at room temperature. Adding a scoop of vanilla ice cream on top makes for a tasty treat. You can also drizzle some lemon glaze for extra zest. Cut the bars into small squares for easy serving. Enjoy with family or friends for a sweet gathering! {{image_2}} You can easily switch blueberries for other fruits. Raspberries, strawberries, or blackberries work great. Each fruit adds its own flavor. For a tart twist, try cranberries. Mix and match for fun combinations. Just keep the same amount of fruit. The filling will still be juicy and tasty. If you want to change the sweetener, honey or maple syrup are good choices. Use the same amount as brown sugar. Honey gives a floral taste, while maple syrup adds a rich flavor. Both options keep the bars sweet and moist. You can try them based on what you have at home. To make gluten-free Blueberry Lemon Crumble Bars, swap all-purpose flour for gluten-free flour. Use a blend that works well in baking. For oats, check that they are gluten-free. The texture may differ slightly, but the taste will still shine. These bars can be enjoyed by everyone! To keep your Blueberry Lemon Crumble Bars fresh, follow these steps: - Cool Completely: Allow the bars to cool fully in the baking dish. - Use Parchment Paper: Lift the bars out using the parchment overhang. - Store in an Airtight Container: Place the bars in a container. Make sure it seals tightly. - Layer with Parchment: If stacking, use parchment between layers to avoid sticking. You can freeze these bars with ease. Here’s how: 1. Cool Completely: Ensure the bars are cool before freezing. 2. Cut into Squares: Slice them into squares for easy serving later. 3. Wrap Each Square: Use plastic wrap to cover each square tightly. 4. Use a Freezer Bag: Place wrapped squares in a freezer-safe bag. 5. Label and Date: Write the date on the bag for reference. 6. Freeze: Store in the freezer for up to three months. Blueberry Lemon Crumble Bars can last: - At Room Temperature: Up to 3 days in an airtight container. - In the Fridge: Up to 1 week when stored properly. - In the Freezer: Up to 3 months if wrapped well. By following these tips, you can enjoy your delicious bars fresh or save them for later! Yes, you can use frozen blueberries. Just remember to thaw them first. Drain any excess liquid. This helps prevent a soggy crust. The flavor will still be great! To make these bars vegan, swap the butter for coconut oil or vegan butter. Use a flax egg in place of the regular egg. This keeps the texture while removing animal products. The best way to cut these bars is to use a sharp knife. Let the bars cool completely before cutting. If you want neat squares, wipe the knife between cuts. Yes, you can double the recipe! Just use a larger baking dish. Adjust the baking time as needed. Keep an eye on them to avoid overbaking. Your bars may be too crumbly if you used too much flour. Be sure to measure accurately. Also, ensure you mix the butter well. This helps bind the ingredients together. In this blog post, we explored how to make delicious Blueberry Lemon Crumble Bars. We covered the fresh and dry ingredients, preparation steps, and tips for perfect texture. You learned how to customize these bars with various fruits and sweeteners while ensuring they stay fresh for longer. These bars are simple to make and perfect for any occasion. Enjoy baking these tasty treats and make them your own with different flavors!

Blueberry Lemon Crumble Bars Delightful and Easy Recipe

Are you ready to treat yourself to a delicious dessert? These Blueberry Lemon Crumble Bars are simple and fun to

To make delicious Strawberry Lemonade Bars, you’ll need a few simple ingredients. Here’s what you’ll gather: - 1 cup flour - 1/2 cup powdered sugar - 1/2 cup unsalted butter, softened - 1 teaspoon vanilla extract - 2 large eggs - 1 cup fresh strawberries, pureed - 1/2 cup freshly squeezed lemon juice - 1 teaspoon lemon zest - 1/2 cup granulated sugar - 1/4 teaspoon baking powder - Pinch of salt - Garnish: fresh strawberries and lemon slices Each ingredient plays a key role. The flour gives the bars structure. Butter makes them rich and tender. The strawberries and lemon juice bring bright flavors, while the powdered sugar adds sweetness. I love using fresh strawberries for the best taste. The zest enhances the lemon flavor, making every bite refreshing. This mix of flavors creates a perfect balance of sweet and tart. Enjoy gathering these items before you start baking! {{ingredient_image_1}} 1. Preheat your oven to 350°F (175°C). 2. Grease an 8x8 inch baking pan. Line it with parchment paper, leaving some overhang. 3. In a bowl, combine 1 cup flour and 1/2 cup powdered sugar. 4. Add 1/2 cup softened unsalted butter and 1 teaspoon vanilla extract. 5. Mix until crumbly. 6. Press the crust mixture firmly into the bottom of the pan. 7. Bake for 15 minutes or until lightly golden. 8. Remove from the oven and let it cool slightly. 1. In another bowl, whisk 2 large eggs until frothy. 2. Add 1 cup pureed fresh strawberries and 1/2 cup freshly squeezed lemon juice. 3. Mix in 1 teaspoon lemon zest, 1/2 cup granulated sugar, 1/4 teaspoon baking powder, and a pinch of salt. 4. Mix until well combined. 1. Pour the strawberry-lemon batter over the cooled crust. 2. Spread it out evenly. 3. Return the pan to the oven. Bake for 20-25 minutes, until the top is set and golden around the edges. 4. Remove from the oven and let it cool completely in the pan. 5. Use the parchment paper to lift out the bars and cut them into squares. To make the best strawberry lemonade bars, focus on three key areas: the crust, the filling, and cooling. - Ensuring the crust is golden and firm: Start by pressing the crust mixture firmly into the pan. Bake until it is lightly golden, about 15 minutes. A well-baked crust holds everything together. - Achieving a smooth filling consistency: Blend the strawberries and other filling ingredients well. Whisk the eggs until frothy. This helps the filling rise and set nicely. - Cooling tips for easy cutting: Let the bars cool completely in the pan. This step makes cutting easier and keeps the filling from falling apart. Presentation is key for any dessert. Here are some tips to make your bars shine: - Garnishing tips with fresh strawberries and lemon: Add fresh strawberry slices on top of each bar. A sprinkle of lemon zest adds color and a touch of flavor. - Serving suggestions for gatherings or parties: Arrange the bars on a colorful platter. Pair them with lemon wedges. This creates a bright and inviting look that guests will love. Pro Tips Use Fresh Ingredients: Always opt for fresh strawberries and freshly squeezed lemon juice to achieve the best flavor in your bars. Let It Cool Completely: Be patient and allow the bars to cool completely in the pan before cutting to ensure clean squares. Adjust Sweetness: Taste the batter before baking; you can adjust the sugar according to your preference for sweetness. Garnish for Presentation: For a stunning finish, dust with powdered sugar and add fresh strawberry slices and lemon wedges before serving. {{image_2}} To make vegan strawberry lemonade bars, swap out the eggs. You can use ground flaxseed or chia seeds. For each egg, mix 1 tablespoon of ground flaxseed with 2.5 tablespoons of water. Let it sit for about 5 minutes until it thickens. This works as a great binding agent. For a vegan crust, replace unsalted butter with coconut oil or a vegan butter spread. These alternatives keep the crust rich and tasty. If you want gluten-free strawberry lemonade bars, use a good gluten-free flour blend. Look for one that includes xanthan gum. This helps improve texture and keeps the bars from crumbling. To maintain the right texture, check the consistency of your batter. If it seems too thick, add a bit more lemon juice. This keeps the bars moist and flavorful. To keep your strawberry lemonade bars fresh, wrap them tightly. Use plastic wrap or foil for the best seal. You can also place them in an airtight container. Make sure to store them in the fridge. This keeps them cool and tasty. The ideal temperature for storage is below 40°F (4°C). These bars will stay fresh for up to five days. If you want to save some for later, freezing is a great option. First, let the bars cool completely. Then, cut them into squares. Wrap each square in plastic wrap. After that, place them in a freezer-safe bag. This will help prevent freezer burn. When you are ready to enjoy them, take out as many as you need. Let them thaw in the fridge overnight. For a quicker option, you can thaw them at room temperature for about an hour. Enjoy your sweet treat anytime! Strawberry lemonade bars last about 3 to 5 days in the fridge. Keep them in an airtight container. This helps keep them fresh and tasty. If you want to enjoy them longer, consider freezing them. Yes, you can use frozen strawberries. Just make sure to thaw and puree them first. Drain any extra liquid to keep the bars from being too watery. Fresh strawberries give a bright taste, but frozen can work well too. If you need a substitute for powdered sugar, you can use granulated sugar. Blend it in a food processor until it’s fine. You can also use coconut sugar or a sugar alternative, but this may change the taste and texture a bit. Absolutely! You can make these bars a day or two ahead. Just store them in the fridge until you are ready to serve. This way, they are ready for parties or family gatherings without any last-minute fuss. To add more tartness, increase the lemon juice and lemon zest. You can also add a bit of lemon extract for an extra punch. Taste your filling before baking to adjust the tartness to your liking! You learned how to make delicious Strawberry Lemonade Bars. We covered all the steps, from ingredients to baking. With our tips, you can create a perfect batch every time. You can even try vegan or gluten-free options if needed. Now, enjoy these bars at your next event or just for yourself. They are fresh, tasty, and easy to make. I hope you try this recipe soon!

Strawberry Lemonade Bars Refreshing and Sweet Delight

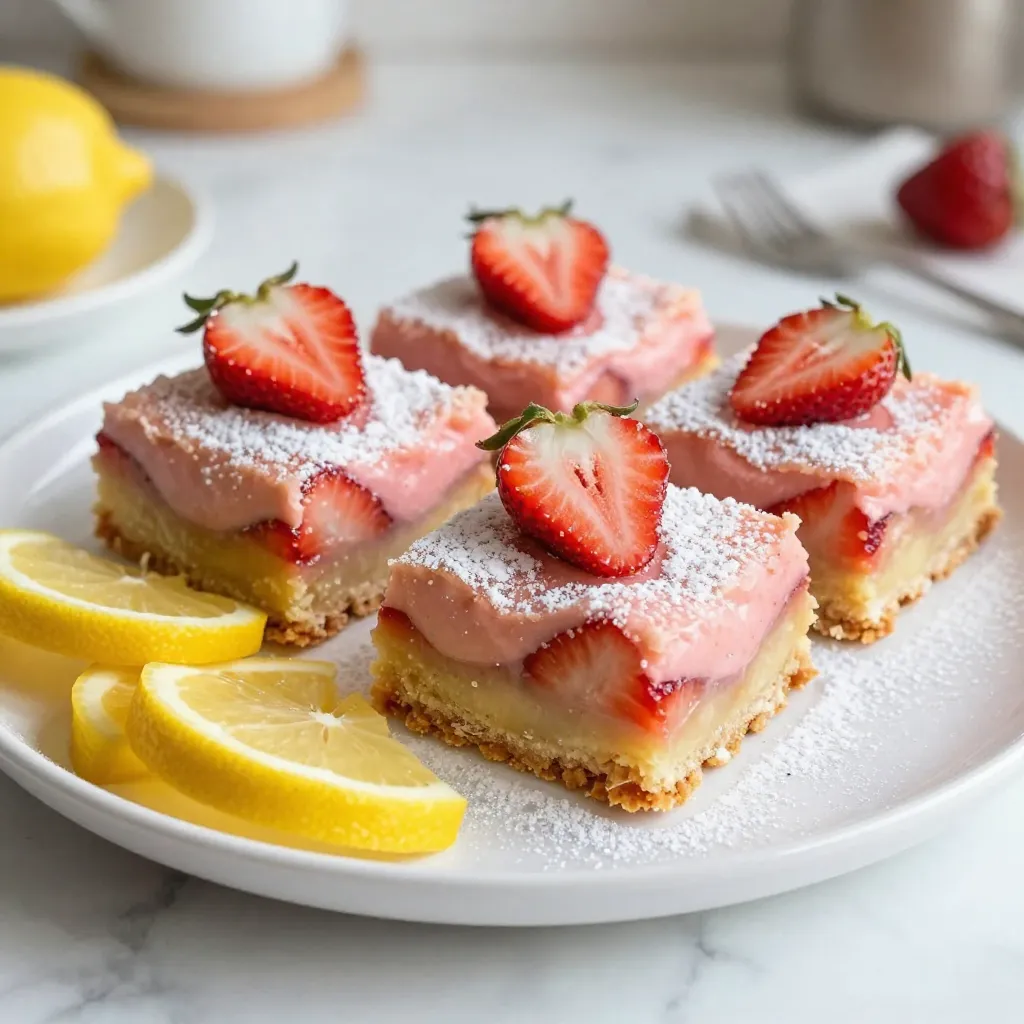
Looking for a sweet and tangy treat? These Strawberry Lemonade Bars are just the answer! Packed with fresh strawberries and

- 1 large head of cauliflower - 3 tablespoons olive oil - 1 teaspoon garlic powder - 1 teaspoon onion powder - 1 teaspoon smoked paprika - 1 teaspoon dried oregano - 1 teaspoon dried thyme - Salt and pepper to taste The star of this dish is, of course, the cauliflower. You want a large, fresh head. Look for firm florets and vibrant green leaves. The olive oil adds richness and helps the spices stick. For spices, I use garlic powder, onion powder, smoked paprika, oregano, and thyme. These create a tasty blend that makes each bite flavorful. Don’t forget the salt and pepper; they balance the dish. - 2 tablespoons freshly chopped parsley - Lemon wedges Fresh parsley adds color and a burst of flavor. The lemon wedges are key. They bring a bright, zesty note that makes the roasted cauliflower even better. You can squeeze the lemon over the steaks right before eating. This simple step takes the dish to a new level. - First, remove the leaves from the cauliflower. - Next, trim the stem so the cauliflower sits flat. - Stand the head upright on a cutting board. - Carefully slice it into 1-inch thick steaks. - Aim for 2-3 steaks, based on the size. - The leftover pieces can be roasted too. - Line a baking sheet with parchment paper for easy cleanup. - In a small bowl, whisk together olive oil and spices. - Add garlic powder, onion powder, smoked paprika, oregano, and thyme. - Mix in salt and pepper to taste until combined. - Brush both sides of the cauliflower steaks with the herb mix. - Drizzle any leftover mixture over the florets on the baking sheet. - Preheat your oven to 425°F (220°C). - Place the baking sheet with cauliflower in the oven. - Roast for 20-25 minutes, flipping halfway through. - Look for golden brown edges and tender steaks. - Once done, remove from the oven and let cool for a minute. - Garnish with freshly chopped parsley and serve with lemon wedges. When picking cauliflower, look for a head that is firm with tight florets. Avoid any with brown spots or soft areas. The size of the cauliflower matters too. For thick, hearty steaks, choose a large head. This way, you can cut thick 1-inch slices that hold up well during cooking. To get even cooking, make sure to space the steaks apart on the baking sheet. This allows hot air to flow around them. Flip the steaks halfway through cooking. This helps both sides brown nicely. Use a spatula to gently turn them. If you notice they are sticking, wait a bit longer before flipping. Plating is key to making your dish eye-catching. Stand the cauliflower steaks upright on the plate. Arrange the florets around them for color and texture. Drizzle leftover herb oil over the steaks. This adds a fresh look and boosts flavor. A sprinkle of parsley on top brings a nice touch. {{image_2}} You can change the flavor of your cauliflower steaks by using fresh or dried herbs. Fresh herbs pack a punch and add bright notes. Try using fresh thyme and parsley for a zesty twist. Dried herbs are easy to use and still tasty. Oregano and thyme work well for a balanced flavor. You might also want to add spices to kick things up. Cumin adds warmth, while chili powder gives a nice kick. Mix and match these spices based on your taste. Just keep in mind how they blend with the herbs. A little can go a long way! Herb roasted cauliflower steaks pair well with many sauces and dips. A tangy tahini sauce or a creamy avocado dip makes a great match. These add depth and taste to the dish. You could also drizzle balsamic glaze for a sweet contrast. For side dishes, think of something light and fresh. A simple green salad or roasted veggies works great. Quinoa or couscous also complements the meal well. Their textures and flavors mix nicely with the cauliflower steaks. Enjoy experimenting with what you have on hand! To keep your herb roasted cauliflower steaks fresh, place them in the fridge. Store them in an airtight container. This helps keep moisture out and flavor in. They will stay good for about 3-5 days. For best results, layer parchment paper between the steaks. This prevents them from sticking together. If you have leftover florets, store them the same way. When you are ready to enjoy your leftovers, reheating is key. The best method is to use an oven or an air fryer. Preheat your oven to 350°F (175°C). Place the steaks on a baking sheet and heat for about 10-15 minutes. If using an air fryer, set it to 300°F (150°C). Heat the steaks for about 5-7 minutes. This keeps them crispy. Avoid using a microwave, as it can make them soggy. Enjoy your tasty cauliflower steaks! Yes, you can make cauliflower steaks ahead of time. To prep in advance, slice the cauliflower into steaks and store them in an airtight container. Keep them in the fridge for up to two days. Brush the herb mixture on just before roasting. This saves time and keeps the flavors fresh. The cauliflower is done when the edges are golden brown and crispy. You can also check if a fork easily pierces the steaks. They should feel tender but not mushy. The perfect roast takes about 20-25 minutes, so watch them closely for the best results. Using frozen cauliflower is not ideal for this recipe. Frozen cauliflower often has a different texture. It can turn mushy when roasted. Fresh cauliflower gives you a nice crispness that makes the dish shine. If you must use frozen, ensure you thaw and drain it well before cooking. In this article, we covered how to prepare delicious cauliflower steaks. You learned about key ingredients like spices and olive oil. I shared step-by-step instructions to help you nail the technique. We also explored tips for storage and reheating to keep your cauliflower tasty. Remember, feel free to get creative with herbs and serving ideas. With these insights, you can make cauliflower steaks that impress. Enjoy your cooking journey!

Herb Roasted Cauliflower Steaks Delightful and Easy Recipe

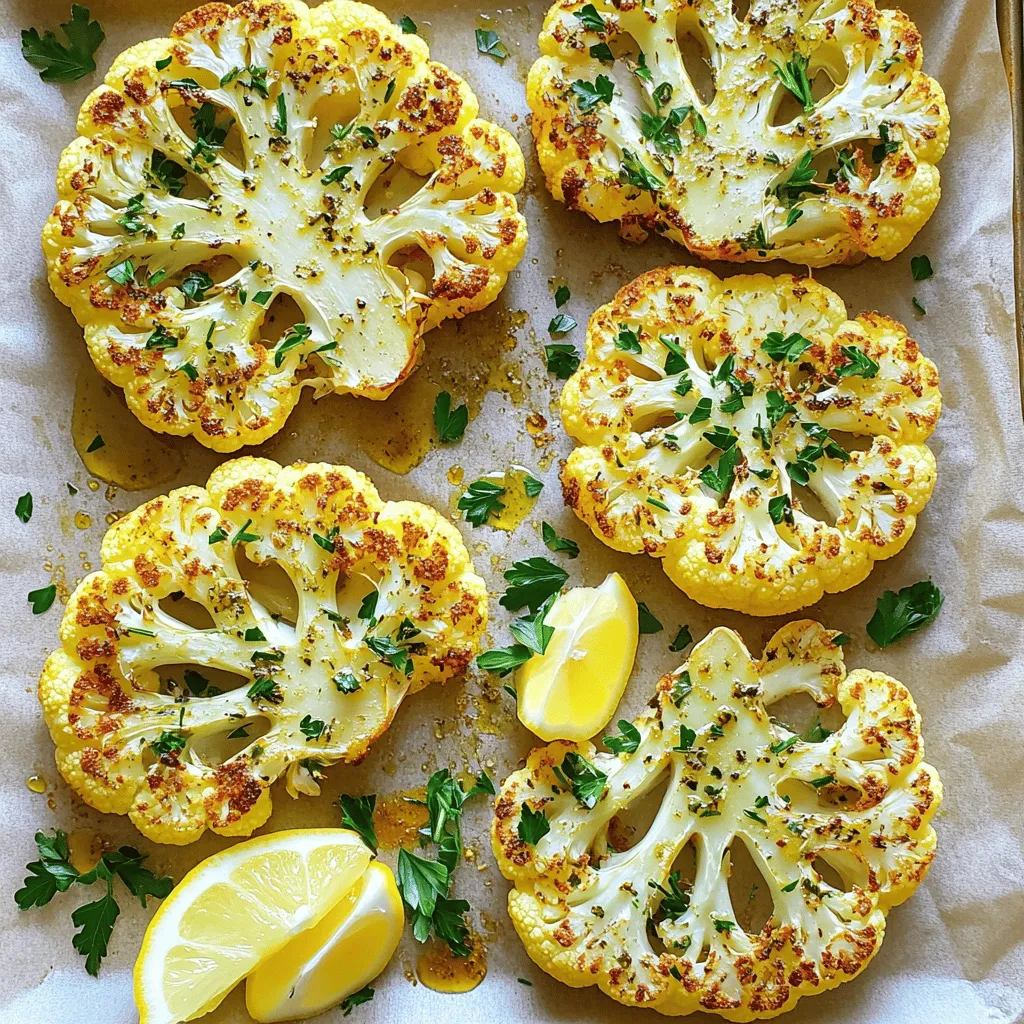
If you’re looking for a tasty, healthy dish, you’ll love my Herb Roasted Cauliflower Steaks! This easy recipe lets you

Older posts
Newer posts
← Previous Page1 … Page19 Page20 Page21 … Page84 Next →

dsad

© 2026 juliesdish • Built with GeneratePress

Our Policies

  • Copyright Policy
  • Cookie Policy
  • GDPR Policy
  • Privacy Policy
  • Disclaimer
  • Terms Of Use

More Information

  • Home
  • About
  • Contact
  • Appetizers
  • Dessert
  • Dinner
  • Drinks
©2026, juliesdish About Back To Top