Skip to content
DisclaimerTerms Of UseGDPR PolicyCookie Policy

juliesdish

  • Home
  • Drinks
  • Appetizers
  • Dinner
  • Dessert
  • About
  • Contact
  • Privacy Policy
DisclaimerTerms Of UseGDPR PolicyCookie Policy

NO-ING-IMG

To make honey garlic chicken drumsticks, you need the following main ingredients: - 8 chicken drumsticks - 1/2 cup honey - 1/4 cup soy sauce (low sodium is best) - 4 cloves garlic, minced - 1 tablespoon fresh ginger, grated - 1 tablespoon apple cider vinegar - 1 teaspoon sesame oil - Salt and pepper to taste These ingredients work together to create a tasty marinade. The honey adds sweetness, while the soy sauce gives it a nice salty flavor. Garlic and ginger add depth and warmth. You can elevate your dish with these optional garnishes: - 2 green onions, sliced - Sesame seeds Using green onions adds a fresh crunch. The sesame seeds give a nice touch and flavor. You can easily swap ingredients if needed. Here are some ideas: - Use chicken thighs instead of drumsticks for more meat. - Maple syrup can replace honey for a different sweetness. - Use coconut aminos instead of soy sauce for a gluten-free option. - Any vinegar can stand in for apple cider vinegar, like rice vinegar. These substitutions let you customize the recipe while keeping it delicious. {{ingredient_image_1}} To start, grab a large bowl for the marinade. Mix together: - 1/2 cup honey - 1/4 cup soy sauce - 4 minced garlic cloves - 1 tablespoon grated fresh ginger - 1 tablespoon apple cider vinegar - 1 teaspoon sesame oil - Salt and pepper to taste Stir these well until everything blends. Now, take your 8 chicken drumsticks and add them to the bowl. Make sure they are coated fully with the marinade. Cover the bowl and put it in the fridge. For best flavor, let it marinate for at least 1 hour, but overnight is even better. Preheat your oven to 425°F (220°C). This step is key for a crispy finish. Line a baking sheet with aluminum foil. On top, place a cooling rack. This helps air flow around the chicken, giving it that perfect crunch. Next, take the drumsticks out of the marinade and place them on the rack. Don’t throw away the marinade yet; you will use it later. Bake the chicken for 25 minutes. After that time, remove them from the oven. Brush the drumsticks with the reserved marinade to add flavor. Put them back in the oven for another 10 to 15 minutes. Check the internal temperature. It should read 165°F (74°C) to ensure they are cooked through. If you want extra crispiness, switch your oven to broil. Broil the drumsticks for 3 to 5 minutes. Keep an eye on them so they don’t burn. Once done, take them out and let them rest for a few minutes. For a nice finish, garnish the chicken with sliced green onions and a sprinkle of sesame seeds. This not only adds flavor but also makes it look great on your plate. Enjoy your delicious honey garlic chicken drumsticks! To get that nice, shiny glaze on your honey garlic chicken drumsticks, you need to baste them. After baking for 25 minutes, take the drumsticks out. Use the reserved marinade to coat them well. Put them back in the oven for another 10-15 minutes. This step helps the glaze stick and caramelize, making it sweet and sticky. For extra crispiness, broil the drumsticks for 3-5 minutes at the end. Keep an eye on them so they don’t burn! Baking is my go-to method for cooking drumsticks. It cooks them evenly and keeps them juicy. Preheat your oven to 425°F (220°C) for the best results. Use a cooling rack on your baking sheet. This allows heat to circulate all around the chicken, giving you a crispy skin. You can also grill them for a smoky flavor. Just make sure the grill is hot, and cook them until they reach 165°F (74°C) inside. If you have leftovers, store them in an airtight container. They can last up to 3 days in the fridge. You can also freeze them for up to 3 months. Just make sure to wrap them well in plastic wrap and then in foil. To reheat, place them in the oven at 350°F (175°C) for about 15-20 minutes until heated through. This keeps the skin crispy and the meat juicy. Pro Tips Marinate Longer for More Flavor: For the best flavor, marinate the chicken drumsticks overnight. This allows the flavors to penetrate the meat more deeply. Use Fresh Ingredients: Fresh garlic and ginger will enhance the overall taste of the dish. Avoid pre-minced options for a more vibrant flavor. Check Internal Temperature: Always use a meat thermometer to check that the internal temperature of the chicken reaches 165°F (74°C) to ensure it is safely cooked. Experiment with Accompaniments: Serve the drumsticks with a side of steamed vegetables or rice to balance the sweetness of the honey glaze. {{image_2}} You can swap chicken drumsticks for other proteins. Try chicken thighs for a juicier bite. If you prefer, use chicken breasts for a leaner option. You can even use pork or beef. Just adjust the cooking time based on the protein. Always check the internal temp; it should be 165°F for chicken. Feel free to switch up the sauce. Add some chili paste for heat. Or use teriyaki sauce for a sweeter twist. You can create a citrus version by adding orange juice. Mix in herbs like rosemary or thyme for fresh flavor. Experimenting keeps your meals exciting and fun! Grilling gives your chicken a smoky flavor. It adds nice char marks, too. If grilling, marinate as usual. Preheat the grill to medium heat. Cook for about 20-25 minutes, turning frequently. The oven method is easy and hands-off. Both ways yield tasty results, so choose what you love! To store leftover chicken drumsticks, let them cool first. Place them in an airtight container. You can also use a zip-top bag. Make sure to remove as much air as possible. Store them in the fridge for up to three days. This keeps the chicken fresh and tasty. You can freeze honey garlic chicken for later use. First, let the drumsticks cool completely. Wrap each one in plastic wrap, then place them in a freezer bag. Label the bag with the date. This method helps prevent freezer burn. You can freeze them for up to three months. When you are ready to eat, thaw them in the fridge overnight. To reheat the chicken drumsticks, preheat your oven to 350°F (175°C). Place the drumsticks on a baking sheet. Cover them with foil to keep them moist. Heat for about 15-20 minutes or until they reach 165°F (74°C). You can also reheat them in the microwave. Just place them on a safe plate and heat for 2-3 minutes, checking for warmth. Enjoy your delicious leftovers! Yes, you can use chicken thighs. They have more fat and flavor. They will cook well with the same marinade. Just make sure to adjust the cooking time. Thighs may need a bit longer than drumsticks. Always check the internal temperature. It should reach 165°F or 74°C. Check the internal temperature with a meat thermometer. The safe temp is 165°F or 74°C. Another way is to pierce the drumstick. If the juices run clear, it is done. Look for no pink meat near the bone. These signs ensure your chicken is safe and tasty. Honey garlic chicken pairs well with many sides. Here are some great options: - Steamed rice - Roasted vegetables - Mashed potatoes - A fresh salad - Noodles These sides balance the sweet and savory flavors of the chicken. This post walked you through the key ingredients for honey garlic chicken drumsticks and the steps to make them. We covered tips for a great glaze and how to store leftovers. You learned about variations and cooking methods that suit your taste. Remember, experimenting with proteins and sauces can lead to even tastier meals. Enjoy the flavors and make this dish your own! Your kitchen adventure awaits.

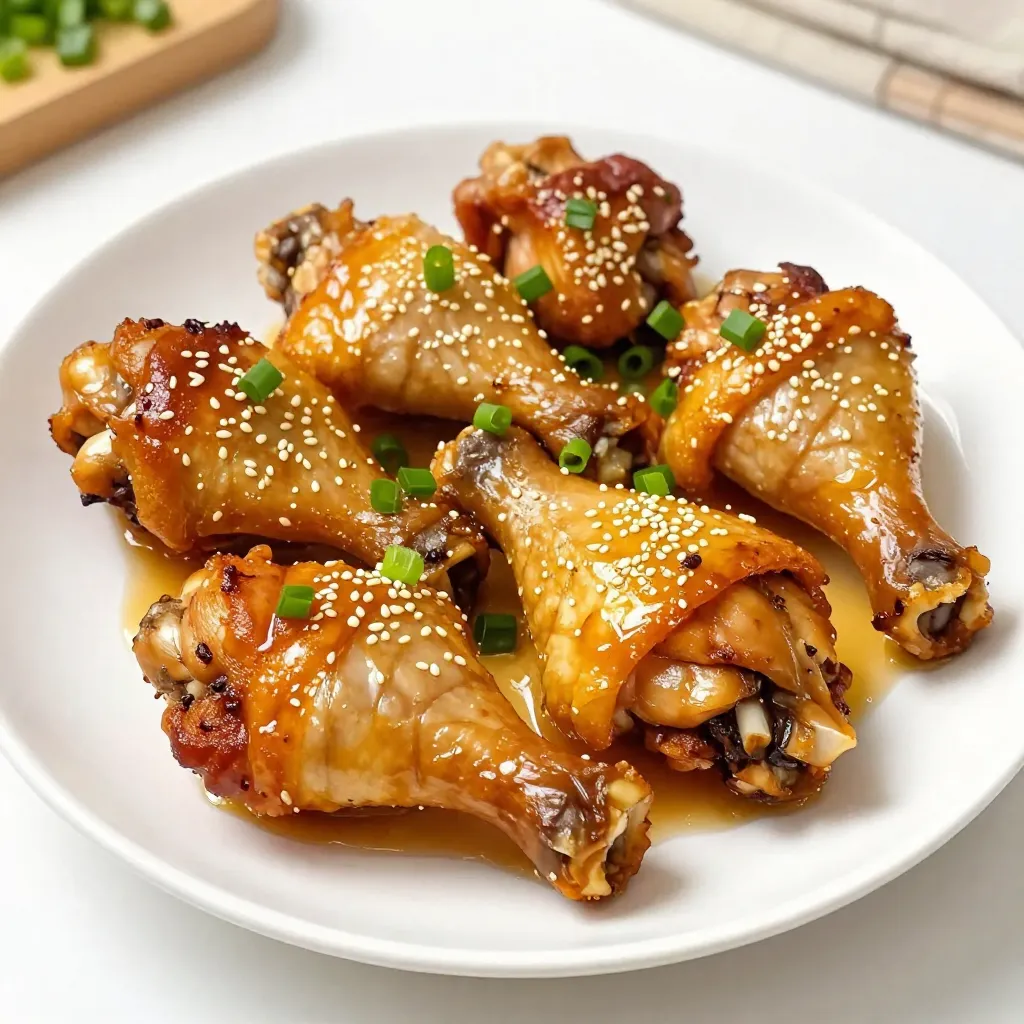
Honey Garlic Chicken Drumsticks Flavorful and Easy Recipe

Are you ready to elevate your dinner game with a simple yet tasty dish? Honey Garlic Chicken Drumsticks are packed

- 1 lb Brussels sprouts, trimmed and halved - 3 tablespoons balsamic vinegar - 2 tablespoons honey - 2 tablespoons olive oil - 1 teaspoon garlic powder - ½ teaspoon salt - ¼ teaspoon black pepper - Optional: ¼ cup chopped pecans or walnuts for crunch - Optional: Fresh parsley for garnish Balsamic honey roasted Brussels sprouts are a delight! The main ingredients create a sweet and tangy mix. The Brussels sprouts bring a nutty flavor that pairs well with the balsamic vinegar. You need fresh Brussels sprouts for the best taste. Trim and halve them to ensure even cooking. The balsamic vinegar adds a sharp tang. Honey balances that sharpness with sweetness. Olive oil helps everything roast nicely. The seasonings make a big difference. Garlic powder adds depth. Salt brings out the flavors, while black pepper adds a little kick. If you want a crunch, toss in some nuts. Pecans or walnuts can add a fun texture. Fresh parsley is great for a pop of color. It also adds a fresh taste to the dish. These ingredients come together to make a dish that everyone will love. With these simple items, you can create a flavorful and healthy side dish. {{ingredient_image_1}} - Preheat the oven to 400°F (200°C). - In a large bowl, whisk together the balsamic vinegar, honey, olive oil, garlic powder, salt, and black pepper until well combined. This mix adds sweet and tangy flavors to the Brussels sprouts. - Add the halved Brussels sprouts to the bowl. Toss them in the mixture until they are evenly coated. This step is key for flavor. - Spread the coated Brussels sprouts in a single layer on a baking sheet lined with parchment paper. This helps with easy cleanup and even roasting. - Roast in the preheated oven for 25-30 minutes. Stir halfway through. The sprouts should turn golden brown and tender. This caramelization really boosts the flavor! - Add nuts in the last 5 minutes if you like crunch. Pecan or walnut options are great choices. - Remove from the oven and let cool slightly. Garnish with fresh parsley before serving. This adds a pop of color and freshness to your dish. To get the best flavor, coat your Brussels sprouts well. This helps them soak up the balsamic mixture. A good coating ensures every bite is tasty. Stir the sprouts halfway through cooking. This step helps them cook evenly and caramelize nicely. Caramelization adds a sweet, rich flavor that is hard to beat. Want to boost the taste? Consider adding spices like paprika or cayenne. These spices can add warmth and depth. Fresh herbs like thyme or rosemary can also brighten the dish. If you want a sweeter dish, add more honey. For more acidity, increase the balsamic vinegar a bit. Adjust these to fit your taste! Make your dish look great by garnishing with fresh parsley. It adds a pop of color and freshness. You can also sprinkle chopped pecans or walnuts for a crunchy finish. Serving on a bright plate can make the Brussels sprouts stand out. A beautiful presentation makes the meal more inviting. Pro Tips Choose Fresh Brussels Sprouts: Look for compact, firm Brussels sprouts with vibrant green leaves. Avoid any that are yellowing or wilting for the best flavor. Don’t Skip the Parchment Paper: Lining your baking sheet with parchment paper not only makes cleanup easier but also helps prevent the Brussels sprouts from sticking and promotes even roasting. Adjust Sweetness to Taste: Depending on your preference, you can add more or less honey to the balsamic mixture. Taste the sauce before tossing it with the Brussels sprouts to ensure it’s to your liking. Experiment with Nuts: While pecans and walnuts add a great crunch, feel free to try other nuts like almonds or even seeds for a different texture and flavor profile. {{image_2}} You can change the honey if you want. Use maple syrup or agave for a different taste. Both options add sweetness and work well with balsamic. If you want to try a different vinegar, apple cider or red wine will do the trick. They offer unique flavors that can change the dish’s profile. To give your Brussels sprouts a smoky flavor, add some bacon or pancetta. This adds richness that many people love. For a sweet twist, try tossing in apple slices or dried cranberries. Both options add a fun burst of flavor and color. If you want a quicker option, use an air fryer. This method cooks the sprouts fast and makes them crispy. Grilling is another fun way to prepare them. The charred flavor from the grill adds an extra layer of taste. Both methods keep the sprouts tender and flavorful. To store leftovers, let the Brussels sprouts cool first. Place them in an airtight container. This helps keep them fresh. You can store them in the fridge for up to three days. Remember, the sooner you eat them, the better they taste! To reheat, you can use either an oven or a microwave. The oven is best for crispy sprouts. Preheat it to 350°F (175°C). Spread the sprouts on a baking sheet and heat for about 10-15 minutes. This helps regain that nice crunch. If you use a microwave, heat them in 30-second bursts. This method is quicker but may not keep them crispy. You can freeze roasted Brussels sprouts for longer storage. First, let them cool completely. Then, spread them in a single layer on a baking sheet. Freeze them for about an hour. Once frozen, transfer them to a freezer bag. Remove as much air as possible. They can last up to three months in the freezer. To thaw, leave them in the fridge overnight. Reheat them in the oven to keep their crispiness. You can tell when Brussels sprouts are cooked by looking for a deep golden color. They should be tender when pierced with a fork. The outer leaves may char slightly, adding to the flavor. If the sprouts are crispy and caramelized, you’ve nailed it! Yes, you can prepare the Brussels sprouts ahead. Just coat them in the balsamic honey mix and store them in the fridge. You can do this a day in advance. When you're ready to roast, simply spread them on a baking sheet and follow the cooking steps. These Brussels sprouts shine next to roasted chicken or grilled salmon. They also work great with quinoa or rice dishes. For a hearty meal, serve them alongside steak or pork chops. Don't forget a fresh salad to balance the meal! Balsamic Honey Roasted Brussels Sprouts are tasty and easy to make. We covered the ingredients, preparation, roasting, and tips for success. You can adjust flavors and even change ingredients to suit your taste. Remember to store and reheat leftovers properly for the best result. This dish shines as a side or even a main feature. Enjoy making it your own, and share it with others. Your kitchen will smell amazing, and your taste buds will thank you.

Balsamic Honey Roasted Brussels Sprouts Flavor Boost

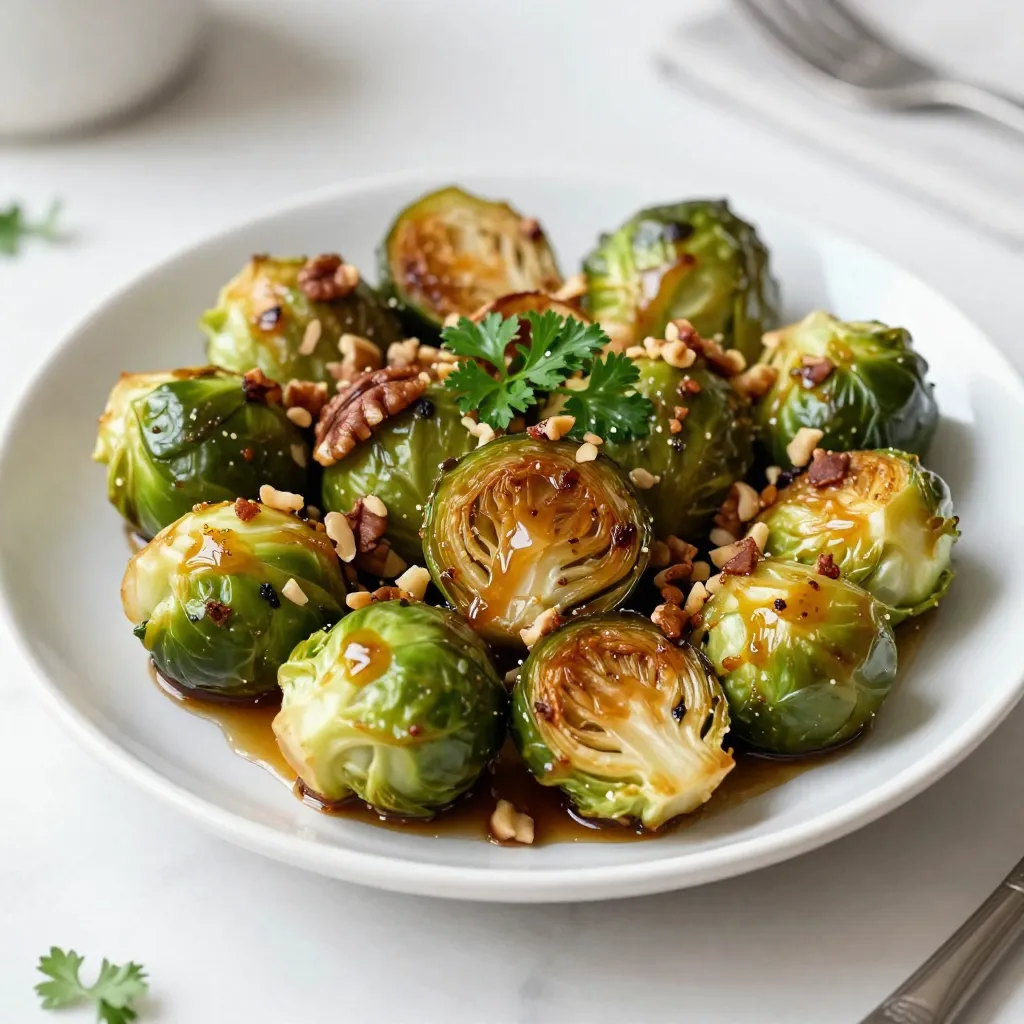
Looking for a tasty dish that will impress your family and friends? Balsamic Honey Roasted Brussels Sprouts are the perfect

- 1 ½ cups graham cracker crumbs - ½ cup unsalted butter, melted - 2 cups cream cheese, softened - 1 cup granulated sugar - 1 teaspoon vanilla extract - 3 large eggs - 1 cup sour cream - 1 cup dried cranberries - ½ cup white chocolate chips - Zest of 1 orange - ¼ teaspoon salt I love how each ingredient adds a unique layer to the cheesecake. The graham cracker crumbs form a crunchy crust that balances the creamy filling. The butter brings richness, while cream cheese gives that classic cheesecake texture. Sugar adds sweetness, and vanilla enhances the other flavors. When you use three large eggs, they bind everything together. Sour cream adds a lovely tang, and the dried cranberries give bursts of tartness. White chocolate chips melt in, creating a creamy texture, and the orange zest brightens the cake with freshness. The salt rounds it all out. This simple list makes a delightful treat. Each bite is a balance of sweet and tart, creamy and crunchy. I can’t wait for you to try it! {{ingredient_image_1}} 1. Preheat the oven to 325°F (160°C). This step warms the oven for even baking. 2. Grease a 9-inch springform pan and wrap the bottom with aluminum foil. This keeps the water out during baking. 3. Mix the graham cracker crumbs and melted butter in a medium bowl. Stir until the crumbs are well coated. 4. Press the mixture firmly into the bottom of the prepared pan. This forms a solid crust. 5. Bake for 10 minutes, then remove and let it cool. This gives the crust a nice golden color. 1. Beat the softened cream cheese and granulated sugar in a large bowl. Mix until it’s smooth and creamy. This is the base of your filling. 2. Add the vanilla extract and mix until combined. The vanilla adds great flavor. 3. Add the eggs one at a time, mixing on low speed after each addition. This helps keep the mixture smooth. 4. Gently fold in the sour cream, dried cranberries, white chocolate chips, orange zest, and salt. Make sure everything is evenly mixed. 1. Pour the cheesecake mixture over the cooled crust. Use a spatula to smooth the top. 2. Place the springform pan in a larger baking dish. Fill the dish with hot water until it reaches halfway up the sides of the springform pan. This water bath helps the cheesecake bake evenly. 3. Bake in the preheated oven for 55-65 minutes. The edges should be set, and the center should jiggle slightly. 4. Turn off the oven and crack the door open. Let the cheesecake cool in the oven for one hour. 5. Remove the cheesecake from the oven. Let it cool to room temperature. Then, cover and refrigerate for at least 4 hours, or overnight. This helps it set and makes it easier to slice. To make your cheesecake great, use room temperature ingredients. This helps the cream cheese mix well. Cold ingredients can cause lumps in your batter. Always soften the cream cheese before mixing. Avoid overmixing. Mix just until the batter is smooth. Overmixing can add air, making the cheesecake rise and fall. This can lead to cracks. When adding eggs, mix each one slowly. This keeps your batter silky and rich. For a stunning finish, drizzle white chocolate over the cheesecake. Melt the chocolate gently and use a spoon to create a beautiful design. This adds a sweet touch and makes it look fancy. A cranberry garnish adds color and flavor. Sprinkle extra dried cranberries on top. This gives a pop of tartness that pairs well with the sweet cheesecake. Together, these tips will make your cheesecake a showstopper! Pro Tips Chill Thoroughly: Make sure to refrigerate the cheesecake for at least 4 hours, preferably overnight, to allow it to set properly and enhance the flavors. Water Bath Importance: Using a water bath ensures even baking and prevents cracks on the surface of the cheesecake, resulting in a smooth texture. Room Temperature Ingredients: Allow cream cheese, sour cream, and eggs to come to room temperature before mixing to ensure a creamy and lump-free batter. Clean Slicing: For perfect slices, dip your knife in hot water and wipe it clean between cuts to maintain neat edges on each piece. {{image_2}} You can make this cheesecake unique by adding different flavors. Try using other fruit purees, like raspberry or strawberry. These will give your cheesecake a fresh twist. You can also mix in spices, like cinnamon or nutmeg, for warmth. Another fun change is to use different types of chocolate. Instead of white chocolate chips, use dark or milk chocolate chips. This will change the taste and richness of your cheesecake. You can even add a swirl of melted chocolate for visual appeal. If you want a lighter version, use low-fat cream cheese. This keeps the cheesecake creamy while cutting calories. You can also swap out granulated sugar with natural sweeteners like honey or maple syrup. This will keep the sweetness but make it a bit healthier. These simple swaps let you enjoy the cheesecake while staying mindful of your diet. You can still savor the taste without losing the joy of dessert. To keep your cranberry bliss cheesecake fresh, you should refrigerate it. First, make sure it is completely cool. Then, cover it tightly with plastic wrap. You can also use an airtight container. This helps keep it moist and prevents odors from other foods. If you want to store it for a longer time, freezing is a great option. Slice the cheesecake and wrap each piece in plastic wrap. Then, place the slices in a freezer-safe bag or container. This way, you can enjoy a piece anytime! When reheating cheesecake, you want to keep its texture smooth. Start by taking it out of the fridge. Let it sit at room temperature for about 30 minutes. This helps it warm up gently. To reheat, use a microwave on low power. Heat in 10-second bursts, checking between each one. This way, you avoid overcooking it. You can also use a warm oven. Set it to 200°F (93°C) and heat for about 10 minutes. Enjoy your cheesecake just like it was fresh! Can I make this cheesecake ahead of time? Yes, you can! This cheesecake tastes even better after chilling. I suggest making it a day before. This gives the flavors time to blend. Just cover it well after it cools. It will stay fresh in the fridge for up to five days. How do I tell when my cheesecake is done? Watch for the edges to set. The center should still jiggle slightly. It will continue to firm up as it cools. You can also use a toothpick to check. If it comes out mostly clean, it's ready. What can I serve with Cranberry Bliss Cheesecake? You can serve it with whipped cream for extra creaminess. A drizzle of caramel or chocolate sauce adds sweetness. Fresh cranberries or orange slices make a pretty garnish. You could also pair it with a cup of coffee or tea. Enjoying it with friends makes it even better! To sum up, this blog post covers the key steps for making a delicious cranberry bliss cheesecake. We discussed ingredients, preparation, and baking techniques. You learned tips for perfecting texture and creative presentation ideas. We also explored variations and storage methods for lasting enjoyment. Remember, every step counts in this process. Enjoy your cheesecake journey, and don’t hesitate to experiment! Your taste buds will thank you.

Cranberry Bliss Cheesecake Simple and Tasty Delight

If you’re craving a festive treat that’s as simple to make as it is delicious, look no further than my

- 2 cups all-purpose flour - 2 tablespoons cocoa powder - 1/4 cup sugar - 1 teaspoon instant coffee granules - 1/2 teaspoon salt - 1 tablespoon active dry yeast - 3/4 cup warm milk (about 110°F) - 1/4 cup unsalted butter, melted - 1 large egg - 1/4 cup packed brown sugar - 2 teaspoons ground cinnamon - 1/2 cup chocolate chips - 1/2 cup powdered sugar - 1 tablespoon brewed coffee (cooled) - 1 tablespoon milk (for icing) When measuring ingredients, use dry measuring cups for flour and cocoa powder. For liquids, stick to liquid measuring cups. This ensures accuracy. A kitchen scale can help for precision, especially with flour. Remember, too much flour can make your rolls dry. - All-purpose flour is the main base. It gives structure to the rolls. - Cocoa powder adds a rich chocolate flavor, making these rolls special. - Instant coffee granules enhance the mocha taste. A little goes a long way. - Brown sugar brings sweetness and moisture, making the rolls soft. - Chocolate chips provide delightful bursts of melted chocolate in each bite. These ingredients come together to create a tasty treat. Each one plays a role in making your mocha cinnamon rolls delicious. Enjoy the process of mixing and baking! {{ingredient_image_1}} To start, gather your ingredients. In a large bowl, mix 1 cup of flour, cocoa powder, sugar, instant coffee granules, salt, and yeast. This blend will give your rolls a rich flavor. In a separate bowl, whisk warm milk, melted butter, and the egg. This step adds moisture and richness to the dough. Gradually pour the wet ingredients into the dry mix. Stir as you go. Add the remaining flour slowly until the dough is soft. Knead the dough on a floured surface for about 5 minutes. It should feel elastic and smooth. Then, place the dough in a greased bowl. Cover it with a towel and let it rise in a warm spot for about 1 hour, or until it doubles in size. Once your dough has risen, punch it down gently. Roll it out into a rectangle, about 12 by 8 inches. Now, let's make it sweet! In a small bowl, mix brown sugar and ground cinnamon. Spread this mixture evenly over the dough. Next, sprinkle chocolate chips on top. Starting from one long edge, tightly roll the dough into a log. Slice it into 12 equal pieces. Each slice will become a tasty roll. Place them in a greased baking dish. Cover them with a towel and let them rise again for 30 minutes. This second rise helps create fluffy rolls. Preheat your oven to 350°F (175°C). After the rolls have risen, pop them in the oven. Bake for 20 to 25 minutes, until they are golden brown. While they bake, prepare the icing. In a bowl, mix powdered sugar, cooled brewed coffee, and milk until smooth. When the rolls are done, take them out and let them cool for a few minutes. Drizzle the icing over the warm rolls. Enjoy your delicious mocha cinnamon rolls! To get the best dough, start with warm milk. The milk should feel warm, not hot. This helps the yeast wake up. Mix the dry ingredients first. Use a large bowl for this mix. Gradually add the milk mixture to the dry mix. Stir well to combine. Knead the dough for about 5 minutes. You want it smooth and soft. If it sticks to your hands, add a little flour. If it’s too dry, add a splash of milk. You can boost flavor in many ways. Try adding a pinch of nutmeg for warmth. Use dark chocolate chips for a richer taste. You can also swap instant coffee for espresso powder. This adds a strong coffee flavor. For a twist, add a bit of vanilla extract to the icing. It adds a sweet touch that balances the coffee. Avoid using cold ingredients. Cold milk or butter can slow down yeast. Make sure you knead long enough. If the dough is not elastic, it won’t rise well. Don’t skip the second rise. This makes the rolls light and fluffy. Also, watch the baking time. Every oven is different. Check the rolls at 20 minutes. They should be golden brown. If they’re too brown, cover them with foil. Pro Tips Use Fresh Ingredients: Always use fresh yeast and high-quality cocoa powder for the best flavor in your mocha cinnamon rolls. Temperature Check: Ensure your milk is warm but not hot (around 110°F) to activate the yeast without killing it. Knead Properly: Knead the dough until it is smooth and elastic; this develops the gluten, giving your rolls the right texture. Customize Your Fillings: Feel free to experiment with different fillings, such as nuts or dried fruit, for added texture and flavor. {{image_2}} You can customize mocha cinnamon rolls to fit your taste. Here are some fun options: - Nuts: Add chopped walnuts or pecans for crunch. - Dried Fruit: Try raisins or cranberries for a fruity twist. - Caramel: Drizzle caramel sauce before rolling for extra sweetness. - Marshmallows: Add mini marshmallows to make them gooey. Experiment with these mix-ins. Each one adds a new layer of flavor. Switching up spices can change the mood of these rolls. Consider these swaps: - Nutmeg: Replace some cinnamon with nutmeg for a warm spice. - Vanilla: Add vanilla extract to the dough for a sweet aroma. - Peppermint: Use peppermint extract for a fun, holiday vibe. These swaps can make the rolls unique and exciting to enjoy. The glaze can also be changed to match your style. Here are a few ideas: - Chocolate Glaze: Melt dark chocolate for a rich topping. - Maple Icing: Use maple syrup in your icing for a different flavor. - Coconut Cream: Blend coconut cream with powdered sugar for a tropical twist. These glaze alternatives add even more fun to your mocha cinnamon rolls. Store your mocha cinnamon rolls in an airtight container. This keeps them fresh for up to three days. If you have leftover icing, store it in a separate container in the fridge. Before sealing, let it cool down to room temperature. To reheat your rolls, place them in the microwave for about 15-20 seconds. This warms them without drying them out. For a crispier texture, pop them in the oven at 350°F for about 5-7 minutes. This brings back their original fluffiness. You can freeze these rolls to enjoy later. Place them in a single layer on a baking sheet. Once frozen, transfer them to a freezer bag. They will keep well for up to three months. To enjoy, thaw them overnight in the fridge and reheat as mentioned. Yes, you can make mocha cinnamon rolls ahead of time. Prepare the dough and let it rise. After shaping the rolls, place them in the baking dish. Cover them and refrigerate overnight. In the morning, let them sit at room temperature for 30 minutes before baking. This method keeps the rolls fresh and saves you time. Instant coffee granules work best in this recipe. They blend well and add a deep coffee flavor. You can also use brewed coffee for the icing. If you prefer a stronger taste, select a dark roast coffee. This will enhance the chocolate and cinnamon flavors. Yes, you can use gluten-free flour. Look for a blend designed for baking to achieve the best results. Replace all-purpose flour with a 1:1 gluten-free blend. Keep in mind that the dough may have a different texture. You may need to adjust the liquid for the right consistency. This blog post covered key steps for making delicious mocha cinnamon rolls. We explored the right ingredients, measurement details, and the importance of each key element. You learned precise instructions for preparing the dough, shaping rolls, and baking them to perfection. The tips offered help you achieve the best dough texture and avoid common mistakes. Don’t forget the variations to excite your taste buds! Finally, proper storage and reheating tips will keep your rolls fresh. Enjoy making these tasty treats, and remember, practice makes perfect!

Mocha Cinnamon Rolls Irresistible Morning Treat

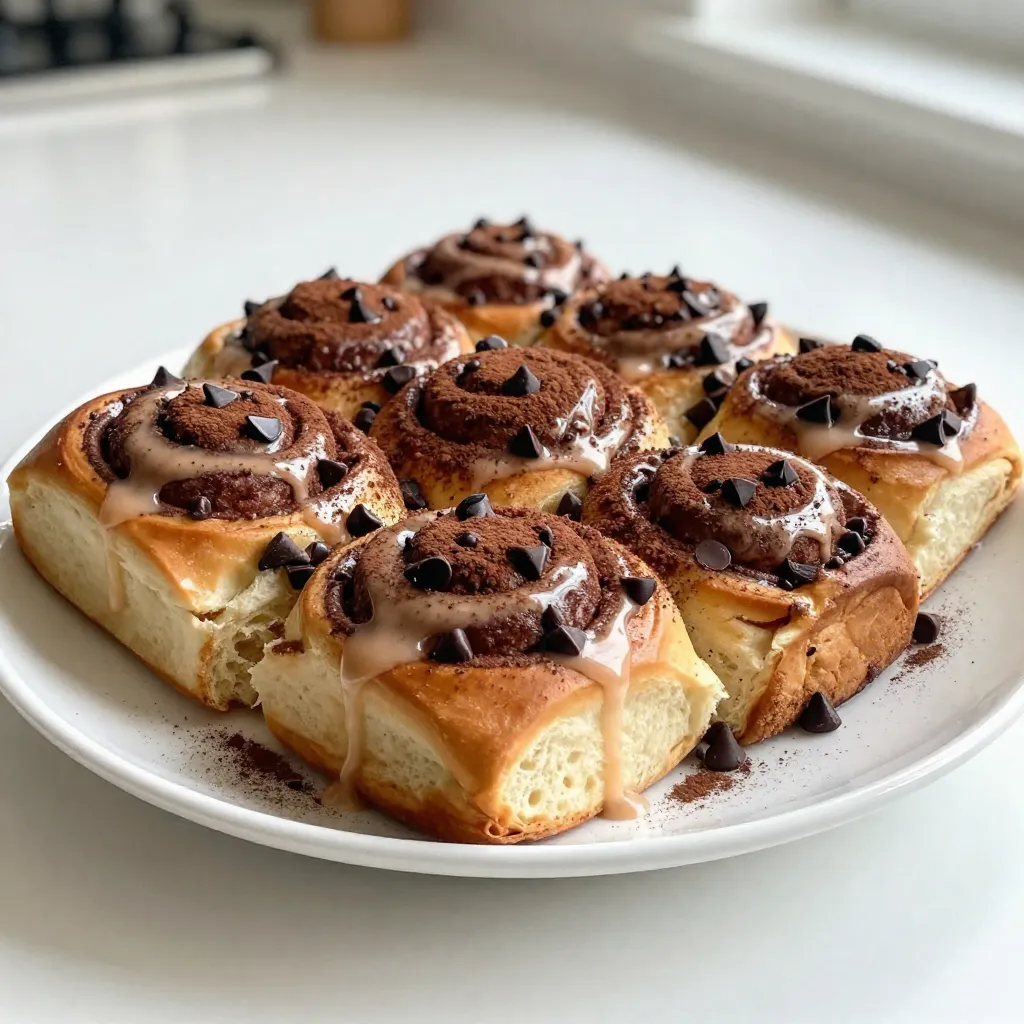
Start your morning right with Mocha Cinnamon Rolls, a treat that blends rich coffee and sweet cinnamon. I’ll guide you

- 8 oz rice noodles - 3 tablespoons sweet chili sauce - 2 tablespoons soy sauce - 1 tablespoon sesame oil - 4 cloves garlic, minced - 1 tablespoon fresh ginger, grated - 1 red bell pepper, thinly sliced - 1 cup snap peas - 1 green onion, chopped - 1 tablespoon sesame seeds - Fresh cilantro for garnish - Salt and pepper to taste Gather these fresh ingredients before you start cooking. The rice noodles are the base of the dish. Sweet chili sauce adds a rich, sweet flavor. Soy sauce gives the noodles a savory touch. Sesame oil brings a nutty scent to the mix. Next, you need aromatics and veggies. Garlic and ginger create a warm, inviting smell. The red bell pepper adds a pop of color and crunch. Snap peas give a nice snap and freshness. Finally, garnishes make the dish look pretty. Green onions add a nice bite. Sesame seeds add a bit of crunch. Fresh cilantro gives a lovely, vibrant finish. Adjust salt and pepper to your taste for the perfect flavor. {{ingredient_image_1}} To cook the rice noodles, follow the package instructions. Most noodles need boiling water. Soak them for about 5-10 minutes. Once soft, drain them in a colander. Rinse with cold water to stop cooking. This helps prevent sticking. You can also toss them with a little oil to keep them separate. In a large pan or wok, heat the sesame oil over medium heat. Add the minced garlic and grated ginger. Sauté them for about 1 minute until they smell good. Next, add the sliced red bell pepper and snap peas. Stir-fry these for 3-4 minutes. You want the veggies to be tender but still crisp. Now, it’s time to add the rice noodles to the pan. Pour in the sweet chili sauce and soy sauce. Toss everything well, so the noodles soak in the sauce. Stir-fry for another 2-3 minutes. This lets the noodles absorb all the tasty flavors. Season with salt and pepper as you like. To make these Sweet Chili Garlic Noodles just right, you can tweak the sweetness or spice levels. If you want more sweetness, add more sweet chili sauce. For extra heat, try adding a dash of chili flakes or sriracha. Seasoning is key. Taste as you cook and add salt or pepper to balance the flavors. A good pan makes a big difference. I recommend using a non-stick pan or a wok. These choices help prevent sticking and allow even cooking. Stir-frying is the best method here. It keeps the veggies crisp and the noodles hot. Other methods may not give you that perfect blend of textures. These noodles pair well with proteins like chicken, shrimp, or tofu. You can also serve them with a side salad or steamed veggies. For a nice presentation, pile the noodles high on a plate. Top them with green onions, sesame seeds, and cilantro. This adds color and makes your dish look inviting. Pro Tips Use Fresh Ingredients: Fresh garlic and ginger will enhance the flavor of your noodles. Avoid using pre-minced or jarred versions for the best taste. Customize Your Veggies: Feel free to add or substitute your favorite vegetables, such as broccoli, carrots, or zucchini, to make the dish your own. Control the Spice: If you prefer a milder dish, reduce the amount of sweet chili sauce or add a splash of lime juice for acidity without extra heat. Garnish Generously: Don’t skip the cilantro and sesame seeds; they add a fresh finish and extra crunch that elevate the dish. {{image_2}} You can use different noodles for this dish. If you need gluten-free, try rice noodles. They work well and have a nice texture. Whole grain noodles are another option. They add fiber and a nutty flavor. You can even use egg noodles for a richer taste. Just cook them according to the package instructions. Adding veggies makes this dish even better. You can use seasonal vegetables like zucchini or asparagus. Leftover veggies from your fridge work great too! Carrots, broccoli, or mushrooms add color and crunch. Just chop them small and stir-fry them with the garlic and ginger. This keeps the dish fresh and vibrant. Want to make it heartier? Add protein! Chicken, shrimp, or tofu are fantastic choices. For chicken, slice it thin and cook it first. Shrimp cooks quickly, so add it after the veggies. Tofu can be cubed and sautéed until golden. Each choice gives a different flavor and texture. These additions make your meal more filling and nutritious. To store your Sweet Chili Garlic Noodles, let them cool first. Place them in an airtight container. This helps keep the noodles fresh. Store the container in the fridge. You can reheat these noodles in a pan or microwave. If using a pan, add a splash of water to keep them moist. Heat over medium until warm. Yes, you can freeze these noodles! To do this, let them cool completely. Use freezer-safe bags or containers. Remove as much air as possible before sealing. For best quality, eat them within three months. To thaw, place them in the fridge overnight or use the microwave. In the fridge, these noodles last about three to four days. Make sure to check for any signs of spoilage before eating. If they smell off or look strange, it's best to toss them. Enjoy your leftovers while they’re fresh! Sweet chili garlic noodles come from Asian cuisine. They blend sweet, spicy, and savory flavors. This dish is popular in Thai and Chinese cooking. The sweet chili sauce adds a unique taste. Garlic enhances the flavor and aroma, making it very appealing. Yes, you can use different sauces. Hoisin sauce or teriyaki sauce can work well. These sauces offer a similar sweet taste. You can also mix soy sauce with a bit of sugar for a quick swap. Experimenting with sauces can lead to fun new flavors. Absolutely! Sweet chili garlic noodles are great for meal prep. They store well in the fridge. You can make a big batch and enjoy them later. Just keep the noodles and sauce separate until you’re ready to eat. This helps the noodles stay fresh and tasty. To add more heat, include red pepper flakes or chili paste. You can also use a hotter sweet chili sauce. Adding sliced fresh chili peppers can boost the spice level too. Adjust to your taste. Start with a little, then add more if you like it spicier. Yes, you can easily make this dish vegan. Just ensure your sweet chili sauce is vegan. Most brands are, but check the label. Use tofu or tempeh for protein. This adds texture and flavor while keeping it plant-based. Enjoy a delicious meal without any animal products! You can make Sweet Chili Garlic Noodles easily using simple ingredients. We covered key components, cooking steps, and tips to make them perfect. Add protein or veggies to suit your taste and use various noodles to switch it up. Store leftovers properly for later enjoyment. This dish is versatile, tasty, and can be tailored to your preferences. So grab your ingredients and start cooking today!

Sweet Chili Garlic Noodles Tasty and Simple Recipe

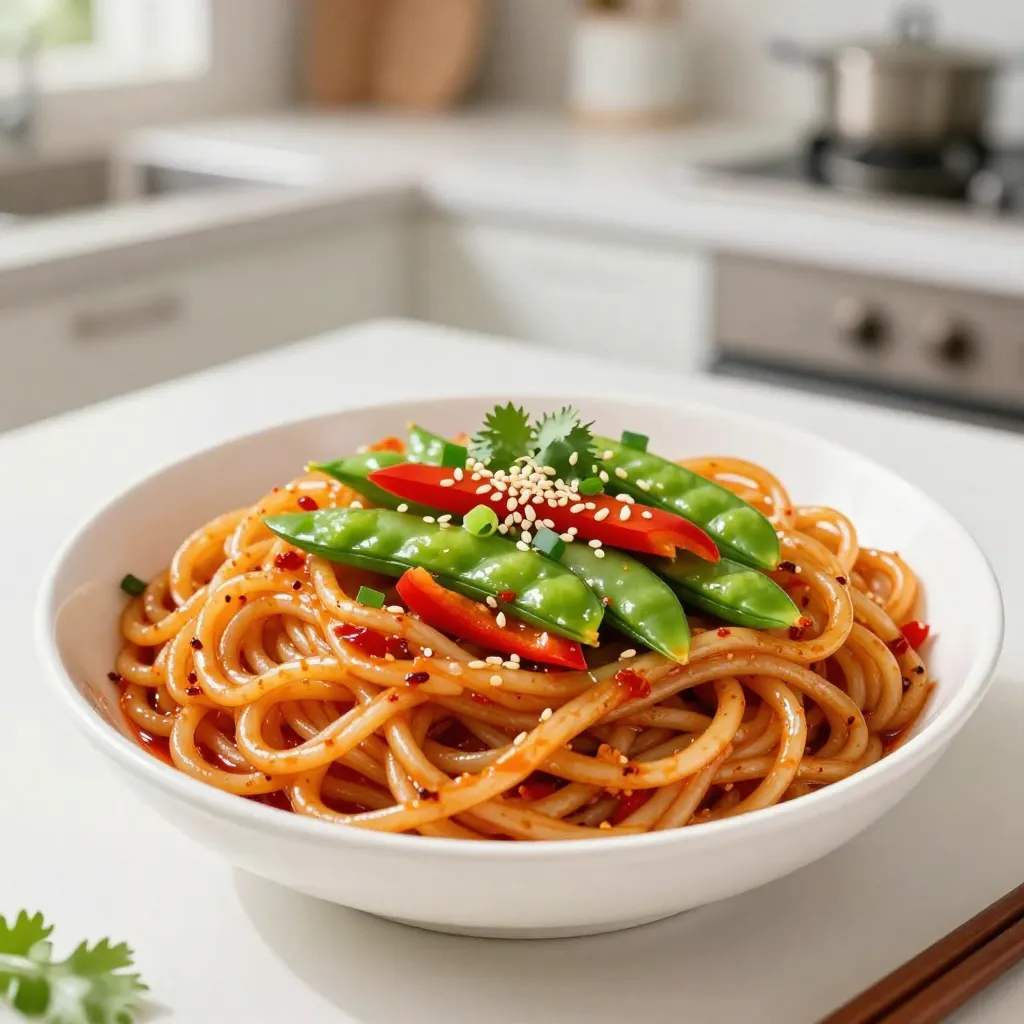
Craving a quick and delicious meal? Look no further! My Sweet Chili Garlic Noodles recipe is simple, tasty, and ready

- 1 lb (450g) boneless, skinless chicken thighs - 4 cloves garlic - 2-3 Thai bird's eye chilies - 1 tablespoon soy sauce - 1 tablespoon oyster sauce - 1 tablespoon fish sauce - 1 red bell pepper - 1 cup green beans - 1 cup fresh Thai basil leaves When I whip up Thai basil chicken stir-fry, I start with the main ingredients. The chicken thighs bring juiciness and flavor. I slice them thinly for quick cooking. Garlic adds a strong aroma, while Thai bird's eye chilies bring heat. You can adjust the number based on your spice level. Next, I prepare the sauces. The soy sauce adds saltiness, and the oyster sauce gives a hint of sweetness. Fish sauce brings depth. Together, they create a balanced sauce that enhances the dish. For vegetables, I choose a red bell pepper and green beans. The red bell pepper adds sweetness and color, while green beans offer a nice crunch. Finally, fresh Thai basil leaves bring a unique and fragrant touch. They add freshness that ties everything together. {{ingredient_image_1}} 1. Slice the chicken thighs: Take 1 lb of boneless, skinless chicken thighs. Use a sharp knife to slice them thinly. This helps the chicken cook fast and evenly. 2. Mince the garlic and chop the chilies: Grab 4 cloves of garlic. Mince them finely. Next, take 2-3 Thai bird's eye chilies. Chop them based on how spicy you like your dish. 1. Heat oil and sauté garlic and chilies: In a large skillet or wok, pour in 2 tablespoons of vegetable oil. Heat it over medium-high heat. Once hot, add the minced garlic and chopped chilies. Sauté for about 30 seconds until they smell great. 2. Stir-fry the chicken until cooked through: Increase the heat to high. Add the sliced chicken to the skillet. Stir-fry for 4-5 minutes. The chicken should be cooked through and lightly browned. 1. Toss in veggies and stir-fry: Now, add 1 sliced red bell pepper and 1 cup of trimmed green beans to the skillet. Stir-fry for another 2-3 minutes. The veggies should be tender but still crisp. 2. Mix and pour over sauce: In a small bowl, mix 1 tablespoon of soy sauce, 1 tablespoon of oyster sauce, 1 tablespoon of fish sauce, and 1 teaspoon of sugar. Pour this sauce over the chicken and veggies. Stir everything well and cook for another 1-2 minutes until heated through. - Choosing the right heat: Start with medium-high heat for the oil. This helps cook the garlic and chilies quickly without burning them. Once they’re fragrant, turn the heat to high. This cooks the chicken fast, keeping it juicy and tender. - Timing for ideal vegetable texture: Add the vegetables after the chicken is mostly cooked. Stir-fry them just until they are bright and slightly tender. This keeps them crisp and colorful, enhancing both taste and look. - Adding more spices: If you like heat, toss in extra bird's eye chilies. For a deeper flavor, add a dash of black pepper or a sprinkle of crushed red pepper flakes. These small changes can elevate your dish. - Incorporating additional vegetables: Feel free to mix in other veggies. Broccoli, snap peas, or carrots work great. Just cut them to similar sizes for even cooking. More colors add fun and nutrition. - Ideal side dishes: Serve your stir-fry with steamed jasmine rice or rice noodles. Both absorb the sauce well and make the meal filling. - Garnishing tips for presentation: Top the dish with extra fresh Thai basil leaves. A lime wedge on the side adds a fresh zing when squeezed over the stir-fry. These touches make your meal look and taste better. Pro Tips Use Fresh Ingredients: Fresh Thai basil and vegetables will enhance the flavor and aroma of your dish, making it truly authentic. Adjust the Heat: Feel free to modify the number of chilies based on your preferred spice level. Start with fewer and add more if needed. Wok or Skillet: A wok is ideal for stir-frying due to its shape, which allows for even cooking and easy tossing of ingredients. Let It Rest: Allow the stir-fry to sit for a minute after cooking before serving. This helps the flavors meld together beautifully. {{image_2}} You can switch the chicken for shrimp or tofu. Shrimp cooks fast and adds a nice taste. Just toss them in when the garlic is fragrant. Tofu is a great choice for a meatless meal. Use firm tofu, cut it into cubes, and sauté until golden. You can also substitute with pork or beef. Thin slices of pork work well. Beef adds a hearty flavor. Just ensure you cook it until tender. If you want to change the veggies, try zucchini or snap peas. They give a fresh crunch. Carrots can add a sweet note, too. Seasonal veggies, like asparagus in spring, are fun to use. Feel free to mix and match. The key is to keep them vibrant and crisp. You can adjust the sauce for diets. Use low-sodium soy sauce for a healthier option. If you are gluten-free, swap soy sauce for tamari. To enhance flavor, add hoisin sauce or teriyaki sauce. A splash of lime juice can brighten the dish. A dash of sesame oil adds depth too. To store leftovers, place them in an airtight container. Make sure the stir-fry is cool before sealing it. This keeps moisture in check and helps flavor stay strong. The shelf life in the refrigerator is about 3 to 4 days. Always check for any off smells or changes in color before eating. For freezing stir-fry, cool it completely first. Then, use a freezer-safe container or bag. Remove as much air as possible to prevent freezer burn. The best practice is to eat it within 2 to 3 months for best taste. When you want to eat it, thaw in the fridge overnight. Reheat in a pan over low heat, stirring until hot. You can also use a microwave, but stir midway for even heating. Preparing in advance helps save time. Chop the chicken and veggies a day before cooking. Store them separately in containers. This keeps them fresh and ready. Ideal storage containers are glass or BPA-free plastic. They should seal well to keep air out and flavors in. To lower the heat, you can skip the chilies. Use a sweet bell pepper instead. You can also use fewer chilies or remove their seeds. Adding more sugar can help balance the spice, too. Serve with extra rice to soften the heat. This way, everyone can enjoy the dish! Dried basil has a different taste than fresh basil. Fresh basil gives a bright, sweet flavor. Dried basil can taste a bit dull. If you use dried basil, add less. Start with one teaspoon and adjust to your taste. Fresh basil is always best for the full flavor. Serve Thai Basil Chicken over jasmine rice or rice noodles. This adds a nice touch. You can also garnish with extra basil leaves and a lime wedge. A side of pickled vegetables can add crunch and flavor. This makes your meal bright and colorful! This article covered how to make Thai Basil Chicken using fresh ingredients and simple steps. You learned about the main ingredients, cooking methods, and helpful tips for great flavor. Remember, you can customize the protein and vegetables to suit your taste. Storage tips will help keep your leftovers fresh. Thai Basil Chicken is quick, tasty, and perfect for any meal. Enjoy your cooking and impress your friends with this dish!

Thai Basil Chicken Stir-Fry Flavorful Quick Meal

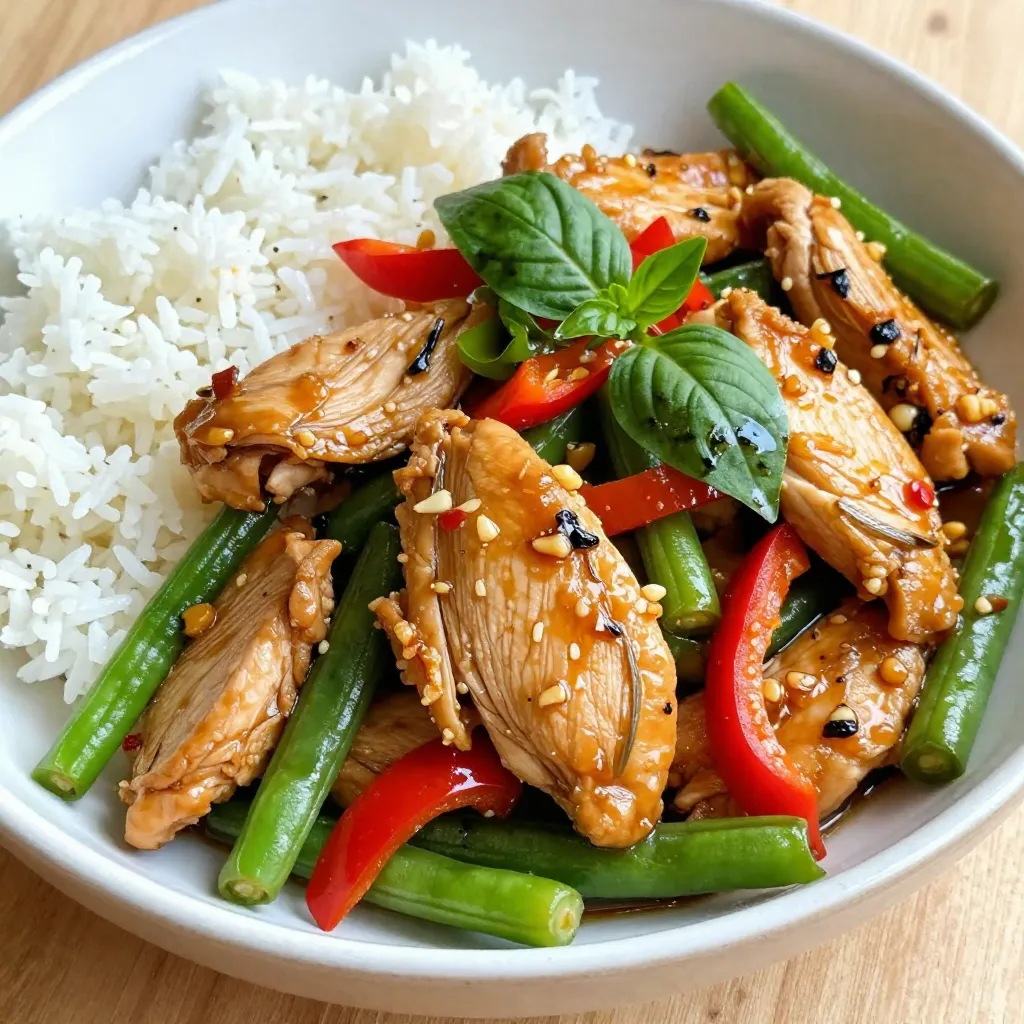
Looking for a quick and tasty meal? Thai Basil Chicken Stir-Fry checks all the boxes! It’s easy to make and

For a tasty Sesame Ginger Beef Stir Fry, gather these key ingredients: - 1 lb flank steak, thinly sliced against the grain - 2 tablespoons sesame oil - 1 tablespoon fresh ginger, grated - 3 cloves garlic, minced - 2 cups broccoli florets - 1 red bell pepper, sliced - 1 cup snap peas - 3 tablespoons soy sauce - 2 tablespoons honey - 1 tablespoon rice vinegar - 1 teaspoon cornstarch mixed with 2 tablespoons water - Sesame seeds for garnish - Green onions, sliced for garnish Each ingredient plays a role in building flavor and texture. The flank steak gives richness, while the ginger and garlic add zest. Sesame oil brings a nutty taste, and the veggies provide crunch and color. Soy sauce and honey balance sweetness and saltiness, while rice vinegar gives a bit of tang. Cornstarch thickens the sauce, making it glossy and delicious. Don't forget the sesame seeds and green onions for that final touch! {{ingredient_image_1}} Marinating the flank steak Start by slicing the flank steak thinly. This helps to make it tender. Place the slices in a bowl. Add one tablespoon of sesame oil, fresh ginger, and minced garlic. Mix this well. Let it marinate for at least 15 minutes. This time adds flavor to the beef. Tips for slicing against the grain Slicing against the grain means cutting across the muscle fibers. Look for the lines on the beef. Cut perpendicular to these lines. This technique makes the beef easier to chew. Timing for marination Marinating for 15 minutes works well. You can marinate longer if needed. Just avoid over-marinating, as it can change the beef's texture. Heating the sesame oil In a large wok or skillet, heat the remaining tablespoon of sesame oil. Use medium-high heat for best results. Wait until the oil shimmers before adding the beef. Searing the beef Add the marinated beef in a single layer. Avoid crowding the pan. Sear for about 1-2 minutes on each side. You want a nice brown color. Once done, remove the beef and set it aside. Best practices for browning meat Ensure the pan is hot. This helps create a good sear. Do not stir the meat too much. Let it sit in the pan to develop flavor. Cooking times for each vegetable Add the broccoli, red bell pepper, and snap peas to the same pan. Stir-fry these for about 3-4 minutes. You want them bright and tender-crisp. Techniques for keeping vegetables crisp Cook over high heat and keep stirring. This helps to cook them fast while keeping their crunch. Incorporating the beef back Once the vegetables are done, return the beef to the pan. Mix everything well to combine. Preparing the sauce In a small bowl, mix soy sauce, honey, rice vinegar, and cornstarch mixed with water. This sauce brings all the flavors together. Combining all ingredients Pour the sauce over the beef and vegetables. Stir constantly until the sauce thickens. This should take about 1-2 minutes. Achieving the right sauce consistency A good sauce should coat the beef and veggies, not be too runny. Adjust by adding more cornstarch if needed. Enjoy your delicious Sesame Ginger Beef Stir Fry! - Balancing sweetness and saltiness: Use honey and soy sauce to create a tasty mix. Start with a small amount of honey. Taste as you go to find the right balance. - Adjusting spice levels: If you want heat, add red pepper flakes or fresh chili. Start with a pinch and increase to your liking. - Adding more vegetables: Feel free to mix in your favorite veggies. Carrots, bell peppers, or snap peas add crunch and color. - Best pan choices for stir-frying: A wok or large skillet works best. They heat evenly and give great results. - Temperature control for optimal results: Keep the heat high when stir-frying. This helps brown the meat and keep the veggies crisp. - Using the right utensils: A spatula or wooden spoon is best for stirring. Avoid using metal utensils to protect your pan’s surface. - Serving suggestions: Serve the stir fry hot over jasmine rice or quinoa. This adds a nice base and soaks up the sauce. - Garnishing tips for visual appeal: Top with sesame seeds and sliced green onions. These add color and a fresh taste. - Pairing with sides like rice or quinoa: Both options are great. They complement the stir fry and make it a complete meal. Pro Tips Marination Matters: Allowing the beef to marinate for at least 15 minutes enhances the flavor and tenderness. For an even deeper flavor, consider marinating it for up to 2 hours in the refrigerator. High Heat for Searing: Make sure your wok or skillet is hot before adding the beef. Searing at high heat locks in moisture and creates a nice crust on the meat. Colorful Vegetables: Use a variety of colorful vegetables for a visually appealing dish. This not only enhances presentation but also maximizes nutritional benefits. Thickening the Sauce: If you prefer a thicker sauce, add a bit more cornstarch mixed with water and stir until you reach the desired consistency. Just be careful not to overdo it! {{image_2}} You can switch out beef for chicken or tofu in this recipe. For chicken, use thin slices of breast or thigh meat. If you prefer tofu, use firm tofu and press it to remove extra water. Adjust cooking times slightly. Chicken needs about 5-6 minutes to cook through. Tofu cooks fast, about 3-4 minutes, just until golden. Feel free to mix and match vegetables based on what you have. Seasonal options include bell peppers, carrots, or zucchini. You can also use frozen vegetables. They are quick and easy. Just add them straight to the pan and cook until they are heated through. Want to spice things up? Add chili flakes for a kick. Fresh herbs like basil or cilantro can also brighten the dish. Don’t hesitate to explore different sauces. Try teriyaki or hoisin sauce for a new twist. Experimenting makes cooking fun! To keep your Sesame Ginger Beef Stir Fry fresh, store it in an airtight container. Place it in the fridge within two hours of cooking. It stays good for up to three days. Reheat it in a pan or microwave until hot. If you want to save some for later, freeze it. Let the stir fry cool completely first. Then, use a freezer-safe container. It can last for about two months in the freezer. When you're ready to eat, thaw it overnight in the fridge. Reheat it in a pan over medium heat until hot. Always handle food safely. Make sure to wash your hands before and after touching food. Check for spoilage signs before eating leftovers. If it smells bad or looks off, do not eat it. Keeping food safe helps you enjoy your meals worry-free. Yes, you can use other cuts of beef. Good alternatives include sirloin or ribeye. These cuts are tender and flavorful, just like flank steak. If you choose a thicker cut, slice it thin for quick cooking. Always cut against the grain for the best texture. To make this dish gluten-free, swap soy sauce for tamari. Tamari is a gluten-free soy sauce that tastes great. You can also use coconut aminos as a good substitute. Both options work well and keep the flavors strong. This stir fry pairs well with jasmine rice or quinoa. You can also serve it with steamed rice noodles for a twist. For added crunch, try serving it with a side salad. It balances the meal with fresh flavors. To add heat, include sliced fresh chili peppers. You can also use chili flakes or sriracha for a spicy kick. If you like it really hot, add some chili oil while cooking. This enhances the dish and makes it exciting! In this post, we explored how to make a delicious Sesame Ginger Beef Stir Fry. We covered key ingredients, from flank steak to fresh veggies. I shared step-by-step instructions for preparation and cooking. We looked at tips to enhance flavors and presented variations for flexibility. Finally, I provided storage advice to keep leftovers fresh. This dish is not only quick to make but also easy to customize. Dive in and enjoy creating this tasty meal!

Sesame Ginger Beef Stir Fry Tasty and Simple Meal

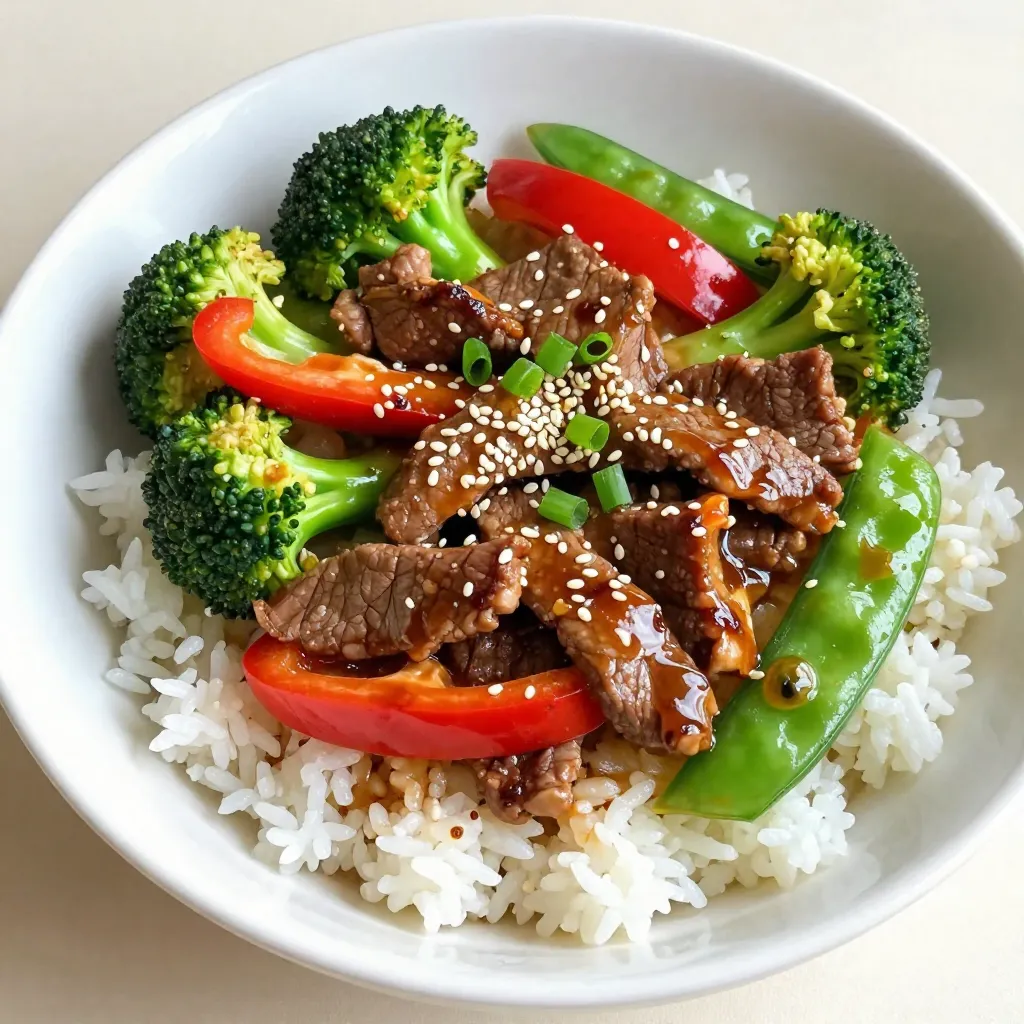
Want a quick, tasty dinner that impresses? This Sesame Ginger Beef Stir Fry is the solution! Packed with flavor from

- 2 boneless, skinless chicken breasts - 2 tablespoons Cajun seasoning - 1 tablespoon olive oil The main ingredients are key to making this dish shine. The chicken breasts serve as the protein base. Cajun seasoning adds a rich, spicy flavor that makes each bite exciting. Olive oil helps cook the chicken, adding moisture and flavor. - 4 cups romaine lettuce, chopped - 1 cup cherry tomatoes, halved - 1/4 cup grated Parmesan cheese The salad ingredients are fresh and bright. Romaine lettuce is crunchy and full of water. Cherry tomatoes add sweetness and color to the dish. Parmesan cheese brings a savory note that ties everything together. - 1/2 cup croutons - 3 tablespoons Caesar dressing - Fresh parsley, chopped (for garnish) Toppings boost the salad's texture and flavor. Croutons bring crunch and a toasty taste. Caesar dressing adds creaminess and zest. Fresh parsley gives a pop of color and freshness, making the dish look great. {{ingredient_image_1}} Seasoning the chicken Start by seasoning the chicken breasts. Use Cajun seasoning and coat each side evenly. This mix adds great flavor and a nice kick. Cooking the chicken Heat olive oil in a skillet over medium-high heat. Once hot, add the seasoned chicken breasts. Cook for 5 to 7 minutes on each side. Make sure the chicken reaches an internal temperature of 165°F. This gives you blackened and crispy chicken. Combining salad ingredients In a large bowl, combine chopped romaine lettuce, halved cherry tomatoes, and croutons. These fresh ingredients add crunch and flavor to your salad. Drizzling with dressing Next, drizzle Caesar dressing over the salad mix. Toss gently to coat all ingredients evenly. This step brings everything together for a tasty bite. Adding chicken and cheese After the salad is mixed, slice the cooked chicken into strips. Place the chicken on top of the salad. Then, sprinkle grated Parmesan cheese over everything. Garnishing the salad Finish with freshly ground black pepper and chopped parsley. This adds color and freshness to your delicious dish. Enjoy your flavorful Blackened Chicken Caesar Salad! To make great blackened chicken, start with a hot skillet. Heat it over medium-high heat for even cooking. If the skillet is too cool, the chicken will not blacken well. Aim for a temperature of about 400°F (204°C). This ensures a nice, crispy crust. To avoid burnt chicken, watch the cooking time. Cook the chicken for about 5-7 minutes on each side. Look for a deep, rich color. If the chicken becomes too dark before the inside cooks, lower the heat slightly. Always check the internal temperature. It should reach 165°F (75°C) for safety. For added flavor, consider using spices like paprika, garlic powder, or cayenne pepper. These enhance the Cajun seasoning nicely. Fresh herbs, such as thyme or oregano, can also brighten the dish. A touch of lemon zest can bring out the flavors too. When it comes to Caesar dressings, I recommend using a creamy, rich option. Look for dressings that contain Parmesan cheese and anchovies for authentic taste. You can also try lighter dressings if you prefer a fresher approach. To plate your salad beautifully, start with a bed of romaine lettuce. Arrange the chicken slices on top, fanning them out. Sprinkle the grated Parmesan evenly for a nice look. Then, add cherry tomatoes and croutons around the chicken. For a pop of color, garnish with fresh parsley. You can also use other colorful ingredients, like slices of bell pepper or radishes. This makes the salad not only tasty but also visually appealing. A well-presented dish makes every meal feel special. Pro Tips Properly Season Your Chicken: Ensure you season the chicken breasts generously with the Cajun seasoning. This is key to achieving that bold flavor profile. Let It Rest: After cooking, allow the chicken to rest for a few minutes before slicing. This helps retain the juices, making the chicken more tender and flavorful. Homemade Croutons: For added crunch and flavor, consider making your own croutons. Simply toss cubed bread with olive oil and spices, then bake until golden. Fresh Ingredients Matter: Use fresh romaine lettuce and ripe cherry tomatoes for the best texture and taste in your salad. Fresh ingredients elevate the entire dish. {{image_2}} You can switch up the protein in this salad. Grilled shrimp works nicely and adds a sweet flavor. Tofu is a great choice too; it soaks up flavor well. If you want to mix meats, try adding crispy bacon or grilled steak. Each option brings its own taste and texture. Enhance your salad with extra veggies or fruits. Sliced bell peppers or cucumbers add crunch. You might also consider adding avocados or apples for a sweet twist. Different cheeses can change the flavor, too. Feta adds a tangy touch, while blue cheese gives a bold profile. Experiment to find your favorite mix. You can make your own Caesar dressing at home. Use mayo, garlic, lemon juice, and Parmesan. This adds a fresh taste. If you want a lighter option, try Greek yogurt mixed with lemon juice and a bit of mustard. This keeps the salad creamy while reducing calories. To store your blackened chicken Caesar salad, place the chicken and salad separately. This helps keep the salad crisp. Use airtight containers for best results. Glass containers work great. They prevent odors and keep food fresh. - Chicken Storage: Let the chicken cool first. Wrap it in foil or place it in a container. Add a label with the date. This way, you know how long it’s been stored. - Salad Storage: Place the salad in a bowl and cover it tightly with plastic wrap. Avoid adding dressing until you are ready to eat. When reheating blackened chicken, I suggest using a skillet. Heat it over medium-low heat. This keeps the chicken moist and flavorful. You can also use the oven. Preheat it to 350°F (175°C) and warm the chicken for about 10 minutes. - Keeping Salad Fresh: Never reheat the salad. It’s best enjoyed cold. If you have leftovers, store the salad dressing separately until serving. Store the blackened chicken for up to 3 days in the fridge. The salad can last about 2 days. Always check for signs of spoilage. - Signs the Salad is Bad: Look for wilting leaves or a sour smell. If the chicken looks dry or has a strange odor, it’s best to throw it away. Always trust your senses. They help keep your food safe! Yes, you can make this salad ahead of time. To prepare in advance, cook the blackened chicken and let it cool. Slice it and store it in the fridge. You can also wash and chop the romaine lettuce. Keep the croutons and dressing separate. This way, everything stays fresh. When you are ready to eat, toss the salad and add the chicken. If you don’t have Cajun seasoning, you can make your own. Use equal parts of paprika, garlic powder, and onion powder. Add a pinch of cayenne for heat. You can also try chili powder or taco seasoning. These will add a nice flavor to your chicken. Yes, this recipe is gluten-free. The main ingredients do not contain gluten. Check the croutons and Caesar dressing. Some brands may use wheat. Always read labels or choose gluten-free options. You can use pre-cooked chicken, like rotisserie or leftover chicken. Just skip the cooking step. Slice the chicken and add it to your salad. This saves time and still tastes great. This blog post covered how to make a delicious blackened chicken salad. We detailed the main ingredients like chicken, seasoning, and fresh salad items. You learned how to prepare and assemble your salad step by step. We shared tips to enhance flavor and suggestions for variations. Finally, we discussed how to store your leftovers properly. In the end, making this salad is simple and fun. Enjoy trying different ingredients to find your favorite!

Blackened Chicken Caesar Salad Flavorful and Simple Dish

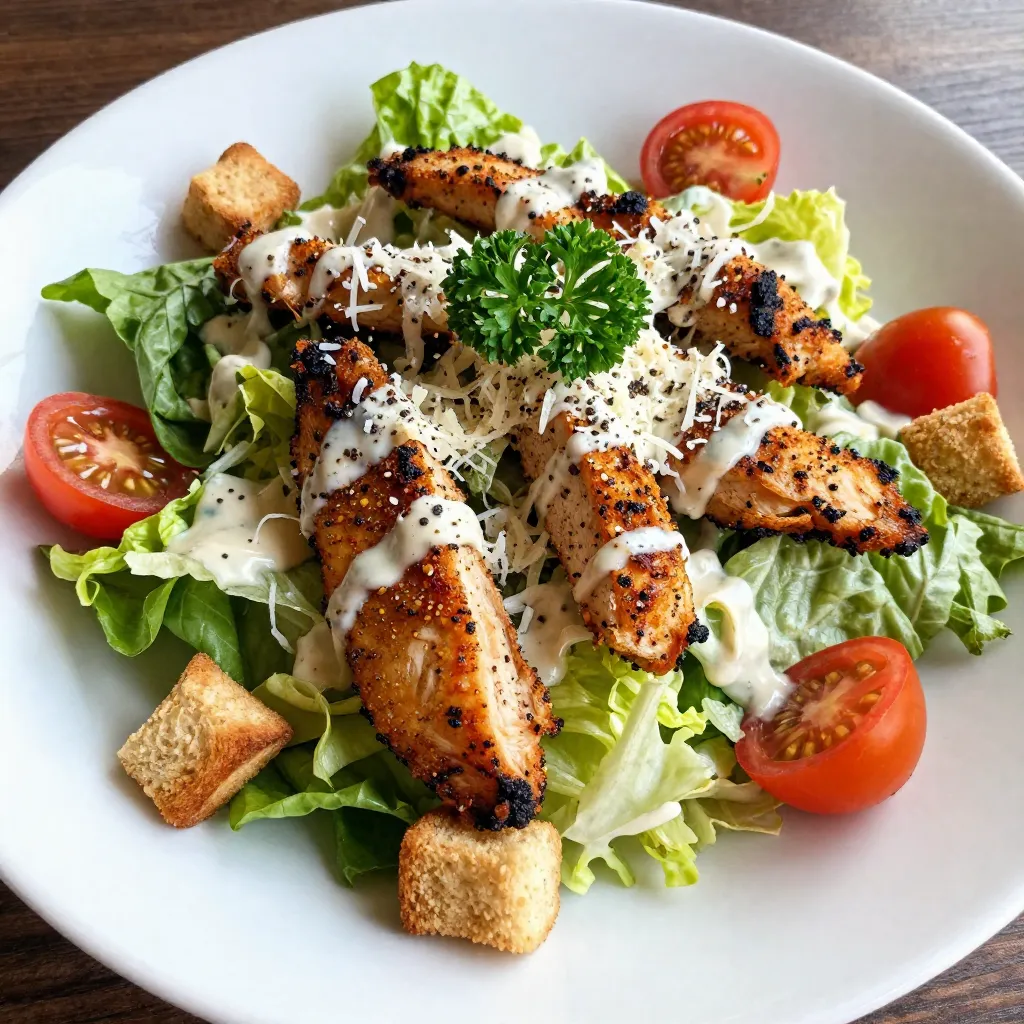
Looking for a fresh twist on a classic favorite? My Blackened Chicken Caesar Salad combines juicy chicken, crisp romaine, and

- 1 ripe banana, frozen - 2 tablespoons natural peanut butter - 1 tablespoon unsweetened cocoa powder - 1 cup almond milk (or any milk of your choice) - 1 tablespoon honey or maple syrup (optional) - A pinch of cinnamon (optional) - Ice cubes (optional) These main ingredients are key to making a rich and creamy smoothie. The frozen banana gives the drink its smooth texture and natural sweetness. Peanut butter adds a nutty flavor and protein. Cocoa powder gives that amazing chocolate taste. Almond milk keeps it light, but feel free to use any milk you like. - Protein powder - Chia seeds - Flaxseeds - Spinach - Vanilla extract Add-ins can boost the nutrition of your smoothie. Protein powder helps keep you full longer. Chia and flaxseeds add omega-3s and fiber. If you want greens, spinach is a great choice, and you won’t taste it! - Use fresh banana if you don’t have frozen. Just add ice to chill it. - Swap peanut butter for almond butter or sunflower seed butter for nut-free. - If you don’t like cocoa powder, try carob powder for a different taste. - For a sweeter smoothie, use agave syrup instead of honey or maple syrup. These substitutes can help customize your smoothie to fit your taste or dietary needs. {{ingredient_image_1}} To start, gather all your ingredients. You will need: - 1 ripe banana, frozen - 2 tablespoons natural peanut butter - 1 tablespoon unsweetened cocoa powder - 1 cup almond milk (or any milk of your choice) - 1 tablespoon honey or maple syrup (optional) - A pinch of cinnamon (optional) - Ice cubes (optional) First, peel the frozen banana. This step is key, as it makes blending easier. Next, measure out the peanut butter and cocoa powder. If you want, grab a pinch of cinnamon for added flavor. Now, it's time to blend! Place the banana in your blender. Add the peanut butter and cocoa powder next. If you chose to add cinnamon, toss that in too. Pour in the almond milk carefully. If you like it sweeter, add honey or maple syrup. Finally, if you want a thicker smoothie, add a few ice cubes. Blend on high until the mixture is smooth and creamy. If the mixture sticks to the sides, stop the blender and scrape it down. This ensures everything mixes well. After blending, taste your smoothie. If it seems too thick, add a splash more milk. Blend again briefly to mix. If it isn't sweet enough, add more honey or syrup. Blend one last time to make it perfect. Once it’s just right, pour your smoothie into a glass or bowl. Enjoy the rich flavors of chocolate, banana, and peanut butter! To get the best texture, make sure to blend well. Use a high-speed blender for this smoothie. Start with your frozen banana. Then add peanut butter and cocoa powder. Pour in the almond milk next. Blend on high until smooth. If it gets stuck, stop and scrape the sides. This helps mix everything evenly. Always use ripe bananas for the best flavor. Peel and slice them before freezing. This makes them easier to blend. Store them in a zip-top bag to keep fresh. You can freeze them overnight or for a few hours. Frozen bananas add creaminess and chill to your smoothie. You can boost flavors in your smoothie easily. A pinch of cinnamon gives a warm touch. If you like it sweeter, add honey or maple syrup. This balances the cocoa powder's bitterness. For a richer taste, try adding vanilla extract. You can also use almond butter for a twist. These small changes make a big difference! Pro Tips Use a Ripe Banana: The riper the banana, the sweeter and more flavorful your smoothie will be. Frozen bananas add creaminess and chill without needing ice. Adjust Sweetness to Taste: Depending on your preference and the ripeness of your banana, you may want to adjust the amount of honey or maple syrup added. Experiment with Nut Butters: While peanut butter is delicious, try swapping in almond or cashew butter for a different flavor profile and added nutrition. Add Extra Nutrition: Boost your smoothie’s health benefits by adding a handful of spinach, protein powder, or flaxseed for a nutrient-rich kick. {{image_2}} You can easily make this smoothie vegan. Just use almond milk or any plant milk. Natural peanut butter is often vegan, but check the label. Skip honey and use maple syrup for sweetness. This way, you keep it all plant-based. Want to boost your smoothie? Add a handful of spinach. It blends well and adds nutrients without changing the taste. You can also mix in protein powder. It gives your drink a protein punch. This is great after a workout or for breakfast. Feel free to get creative with flavors! A splash of vanilla extract adds warmth and sweetness. If you love coffee, add a shot of espresso or cold brew. This gives your smoothie a kick and makes it extra tasty. Try different combos to find your favorite! If you have extra smoothie, pour it into a sealed container. The smoothie stays fresh for about one day in the fridge. Keep it in the back of the fridge, where it is coldest. Before drinking, give it a good shake. This helps mix the ingredients again. You can freeze the leftover smoothie too. Pour it into ice cube trays or freezer-safe bags. This method helps save space. When you want to enjoy it, simply take out the cubes or bags. Leave them in the fridge overnight to thaw. You can also blend the frozen cubes into a new smoothie. Once you thaw or take it from the fridge, you may need to re-blend. The ingredients often separate after sitting. Just add a splash of milk or water to help it blend smoothly again. Blend until it is creamy and thick. Enjoy your delicious smoothie once more! Yes, you can use fresh bananas. However, the smoothie will be less thick and creamy. Frozen bananas make the drink cold and rich. If you use fresh bananas, add ice cubes. This will help you achieve the right texture. Almond milk is my favorite for this smoothie. It adds a nice nutty flavor. However, you can use any milk you like. Try soy milk, oat milk, or cow's milk. Each type of milk will give the smoothie a different taste. Choose what you enjoy most. To make this smoothie healthier, consider these tips: - Use unsweetened almond milk to cut sugar. - Add spinach for extra nutrients. - Swap honey or maple syrup for a ripe date. - Use less peanut butter if you're watching calories. These changes will keep the taste while making it better for you. This blog post provided a full guide to making delicious smoothies. You learned about key ingredients, choices for add-ins, and suitable substitutes. I shared step-by-step instructions to help you blend the perfect drink. Tips showed how to achieve a smooth texture and improve flavor. You discovered fun variations to try and smart storage tips for leftovers. With this knowledge, you can create tasty smoothies your way. Enjoy experimenting and savoring every sip.

Chocolate Peanut Butter Banana Smoothie Delightful Treat

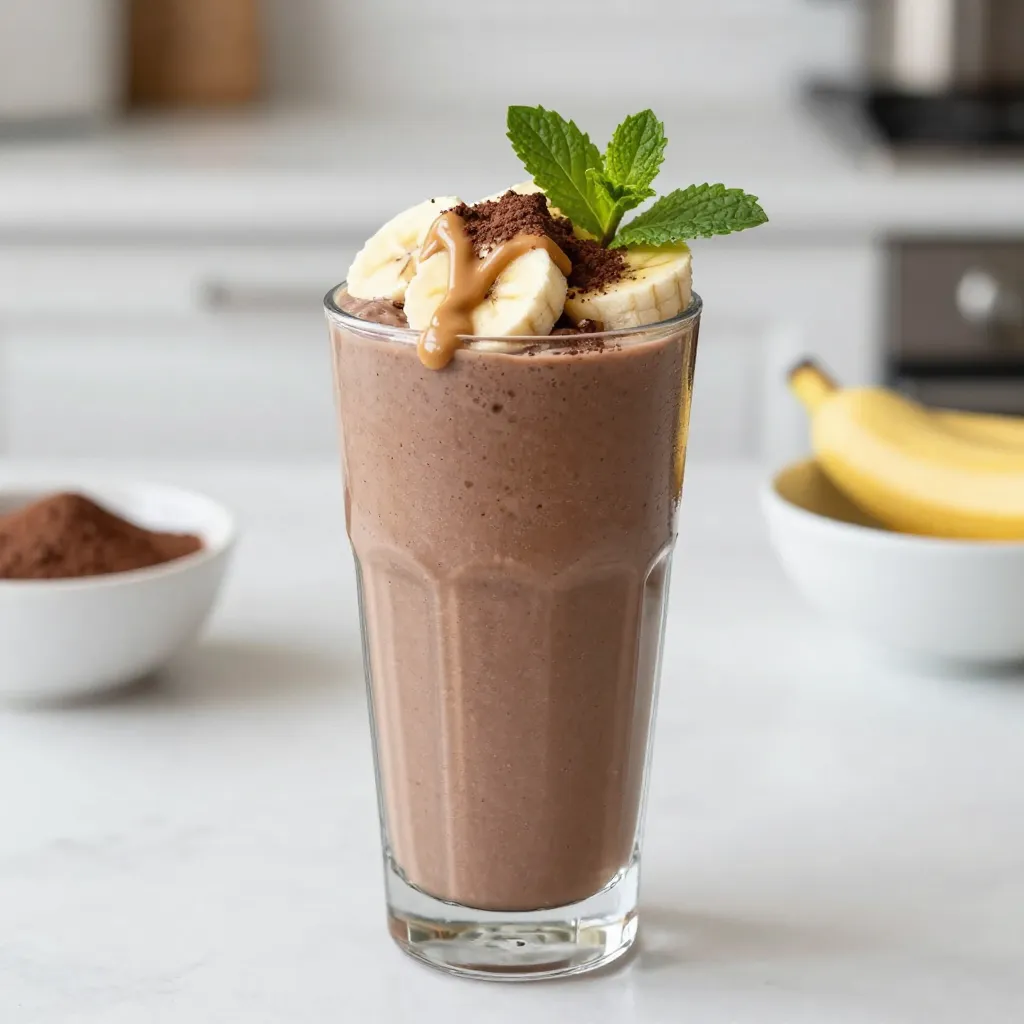
If you love smooth, creamy treats, then you’ll adore this Chocolate Peanut Butter Banana Smoothie. This tasty blend is rich,

When making Coconut Lime Energy Bites, you need simple and fresh ingredients. Here’s what you will need: - 1 cup rolled oats - 1/2 cup unsweetened shredded coconut - 1/2 cup almond butter - 1/4 cup honey or maple syrup - Zest of 2 limes - 2 tablespoons lime juice - 1/4 cup ground chia seeds - 1/4 teaspoon sea salt - Optional: dark chocolate chips or cacao nibs These ingredients work together to create a tasty and healthy snack. Each bite bursts with flavor. The oats give a nice chewy texture. The shredded coconut adds a touch of sweetness. Almond butter brings healthy fats and protein to keep you full. Lime zest and juice give a refreshing tang. Chia seeds add more nutrients and a slight crunch. You can also add dark chocolate chips or cacao nibs for a sweet twist. These optional ingredients enhance flavor and make the bites even more fun. Feel free to mix and match based on your taste. {{ingredient_image_1}} First, let's mix the dry ingredients. In a big mixing bowl, add 1 cup of rolled oats. Then, pour in 1/2 cup of unsweetened shredded coconut. Next, add 1/4 cup of ground chia seeds, and finish with 1/4 teaspoon of sea salt. Mix everything well until it looks even. Now, prepare the wet ingredients. In a separate bowl, whisk together 1/2 cup of almond butter, 1/4 cup of honey (or maple syrup), the zest of 2 limes, and 2 tablespoons of lime juice. Keep whisking until it is smooth and well mixed. Now, pour the wet mixture into the dry ingredients. Stir everything together until all the oats and coconut are coated. If you want a treat, you can fold in 1/4 cup of dark chocolate chips or cacao nibs. This adds a fun twist and makes them even tastier. Next, it's time to shape the energy bites. Scoop out about a tablespoon of the mixture and roll it into a ball. Keep going until you use all the mixture. Place each ball on a lined baking sheet or plate. It’s a fun step, and you can feel proud of your neat little bites. Finally, let’s set everything up. You need to refrigerate the energy bites for at least 30 minutes. This helps them firm up nicely. After that, make sure to store them in an airtight container in the fridge. They can last up to a week, making them a perfect snack for the busy days ahead. To get the right texture in your energy bites, focus on the wet-to-dry ratio. You want the mixture to stick together but not be too wet. If it feels too dry, add a bit more nut butter or honey. If it’s too wet, add a touch more oats. Chill time is also key. After mixing, let the bites chill in the fridge for at least 30 minutes. This helps them firm up nicely. If you want them firmer, chill them longer. For a beautiful presentation, serve the energy bites on a colorful plate. Add a sprig of fresh mint and a sprinkle of lime zest on top. This adds a pop of color and freshness. When it comes to pairings, these energy bites work well with a cup of green tea or a smoothie. They make a great snack before or after a workout, too. Each energy bite has about 100 calories. They are a great source of energy without too much sugar. For the macronutrient breakdown: - Carbohydrates: 12g - Protein: 3g - Fat: 4g These bites provide a good balance of nutrients to keep you going throughout the day. Pro Tips Customize Your Sweetness: Adjust the amount of honey or maple syrup based on your preference for sweetness. You can also use a sugar substitute if you’re looking to reduce sugar intake. Chill for Better Texture: Allowing the energy bites to chill in the refrigerator not only helps them firm up but also enhances the flavors as they meld together. Experiment with Add-Ins: Feel free to add other ingredients like nuts, seeds, or dried fruits to personalize these bites. This adds variety and extra nutrition! Make It a Batch: These energy bites can easily be doubled or tripled to ensure you have a healthy snack ready for the week. {{image_2}} You can change the nut butter in this recipe. Almond butter is great, but you can also use peanut butter or cashew butter. Each nut butter gives a unique taste. Try sunflower seed butter if you want a nut-free option. Sweeteners are another area for swaps. I prefer honey, but maple syrup works well too. You can use agave syrup or even coconut sugar for a new flavor. Want to spice it up? Add cinnamon for warmth or vanilla for sweetness. These spices can make the bites even more tasty. You can also switch the lime for lemon or orange. Each citrus fruit brings its own zing to the bites. You can easily make these bites vegan. Just replace honey with maple syrup. For a gluten-free option, make sure your oats are certified gluten-free. If you want more protein, add protein powder to the mix. This change makes the bites a great snack for after workouts. Store your Coconut Lime Energy Bites in an airtight container. This helps keep them fresh. Choose a container that fits tightly. Glass or plastic can work well. Keep the energy bites in the refrigerator. This helps maintain their flavor and texture. Avoid leaving them at room temperature. Heat can make them soft and sticky. These energy bites last about a week in the refrigerator. After that, they may lose taste and texture. To enjoy them longer, freeze the bites. If you freeze them, place them in a freezer-safe container. They can last up to three months in the freezer. When you're ready to eat, just thaw them in the fridge overnight. This way, you always have a healthy snack ready! You can replace nut butter with mashed bananas or applesauce. These options add moisture and help bind the ingredients. You can also use sunflower seed butter for a nut-free choice. Just mix it with the other wet ingredients like honey and lime juice. This keeps the bites tasty and healthy. Yes, you can make these energy bites ahead of time. They store well in the fridge for up to a week. For meal prep, make a big batch and roll them into balls. Place them in an airtight container. This way, you'll always have a healthy snack ready to go. You can also freeze them for longer storage. Just thaw them in the fridge before eating. When making these energy bites, consider common allergens. The recipe includes oats, coconut, and nut butter. If you use almond butter, avoid it if you have nut allergies. Always check for cross-contamination, especially if you are sensitive to gluten. The recipe can easily adapt to be nut-free, using other options instead. These coconut lime energy bites are easy and fun to make. You learned about the key ingredients, how to mix and shape them, and tips for the best flavor. Remember to try different nut butters or sweeteners to fit your taste. Store them well to keep them fresh. These bites are perfect for a quick snack or a boost of energy. Enjoy making your own variations and share them with friends. These bites are tasty and good for you!

Coconut Lime Energy Bites Healthy Snack Delight

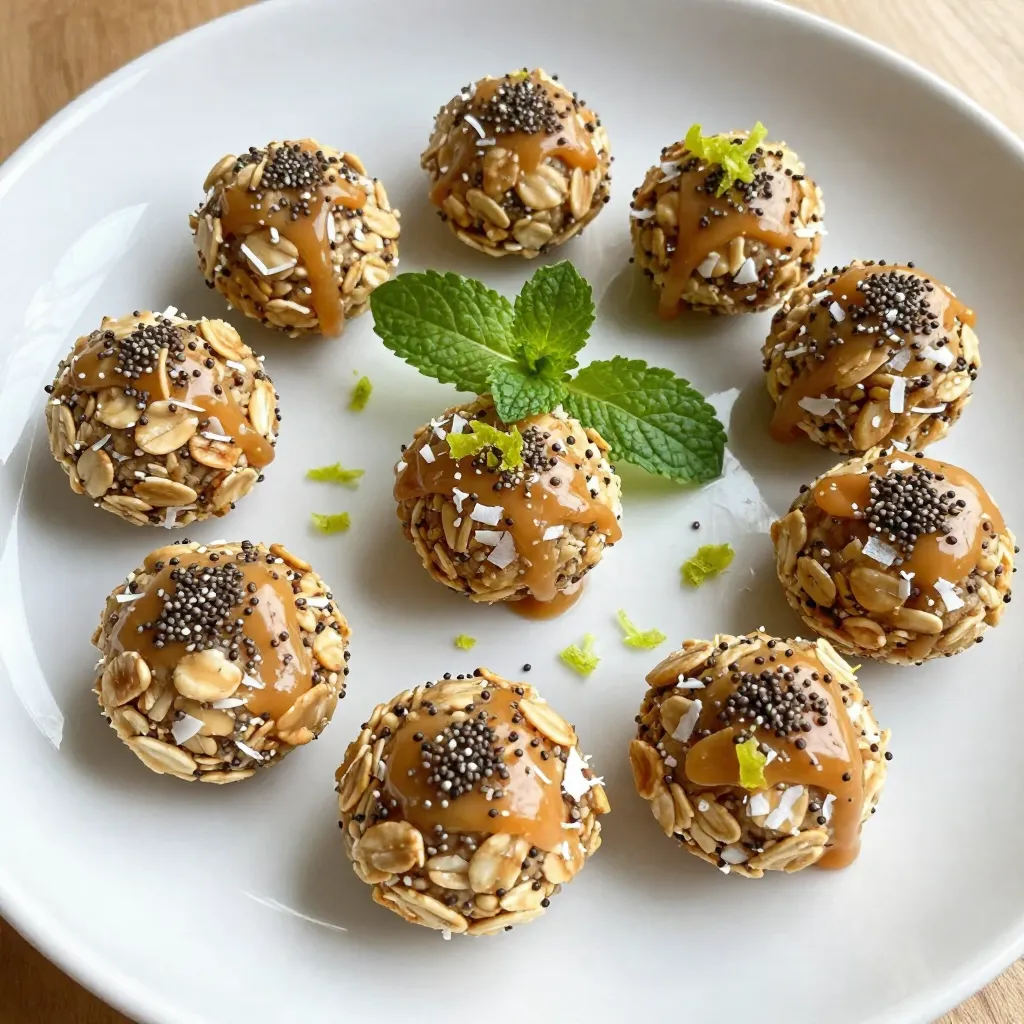
Looking for a healthy snack that tastes like a tropical getaway? Try my Coconut Lime Energy Bites! They’re packed with

Older posts
Newer posts
← Previous Page1 Page2 Page3 … Page84 Next →

dsad

© 2026 juliesdish • Built with GeneratePress

Our Policies

  • Copyright Policy
  • Cookie Policy
  • GDPR Policy
  • Privacy Policy
  • Disclaimer
  • Terms Of Use

More Information

  • Home
  • About
  • Contact
  • Appetizers
  • Dessert
  • Dinner
  • Drinks
©2026, juliesdish About Back To Top