Skip to content
DisclaimerTerms Of UseGDPR PolicyCookie Policy

juliesdish

  • Home
  • Drinks
  • Appetizers
  • Dinner
  • Dessert
  • About
  • Contact
  • Privacy Policy
DisclaimerTerms Of UseGDPR PolicyCookie Policy

NO-ING-IMG

- 1 lb chicken breast, cut into bite-sized pieces - 2 cups broccoli florets - 1 red bell pepper, sliced - 1 cup carrots, julienned - 2 cups cooked jasmine rice These ingredients form the heart of the dish. The chicken breast provides protein and will absorb the teriyaki flavor well. Broccoli adds crunch and nutrition, while red bell pepper and carrots bring color and sweetness. Jasmine rice serves as a fluffy base to soak up all those tasty juices. - 1/4 cup teriyaki sauce - 2 tablespoons olive oil - 2 cloves garlic, minced - 1 teaspoon grated ginger - 1 tablespoon sesame seeds (for garnish) - 2 green onions, chopped (for garnish) The teriyaki sauce gives the chicken its signature taste. Olive oil helps everything cook evenly. Garlic and ginger add warmth and depth. Sesame seeds and green onions are key for finishing touches, adding flavor and a pop of color. - Importance of seasoning Seasoning your dish is key. Salt enhances flavors, while pepper adds a mild heat. Without these, your dish may taste flat. Always taste as you go, adjusting salt and pepper to your liking. This small step can elevate your meal from good to great. First, preheat your oven to 400°F (200°C). This step is key for cooking the chicken and veggies evenly. Next, take a large bowl. Combine 1 lb of chicken breast pieces with 1/4 cup of teriyaki sauce, 2 tablespoons of olive oil, 2 minced cloves of garlic, and 1 teaspoon of grated ginger. Season with salt and pepper. Mix well until the chicken is fully coated. Now, grab a large sheet pan. Spread the marinated chicken evenly over it. Add 2 cups of broccoli florets, 1 sliced red bell pepper, and 1 cup of julienned carrots around the chicken. Make sure everything is in a single layer for even cooking. Place the sheet pan in the oven. Bake for 20-25 minutes. Stir halfway through to ensure even cooking. The chicken should be cooked through, and the veggies should be tender. While the chicken and veggies are baking, cook the jasmine rice. Follow the package instructions if you didn’t pre-cook it. This will create a fluffy base for your bowls. Once everything is cooked, take the sheet pan out of the oven. Serve the teriyaki chicken and veggies over the jasmine rice in bowls. For the final touch, sprinkle sesame seeds and chopped green onions on top. This adds flavor and a nice look to your dish. To keep your chicken juicy, marinate it well. I suggest marinating for at least 30 minutes. This allows the flavors to soak in. Use a mix of teriyaki sauce, olive oil, garlic, and ginger. The acid in the sauce helps tenderize the meat. Ensure the chicken pieces are all coated. This ensures even flavor and moisture when cooking. For tender yet crisp veggies, cut them uniformly. This ensures they cook evenly. Spread them out on the sheet pan without crowding. Crowded veggies steam instead of roast. Bake them alongside the chicken for about 20 minutes. This method keeps them vibrant and crunchy. To add more flavor, toss the veggies in a bit of oil and seasoning before baking. Fluffy jasmine rice is easy to achieve. Rinse the rice before cooking to remove excess starch. This prevents it from becoming sticky. Use a 1:1.5 rice-to-water ratio. Bring the water to a boil, then simmer on low. Cover the pot while it cooks for about 15 minutes. Once done, let it sit off the heat for another 5 minutes. Fluff the rice with a fork before serving. This helps separate the grains beautifully. {{image_2}} You can swap the chicken for other proteins. Tofu works well for a plant-based option. It soaks up flavors nicely. Shrimp is another great choice. Simply adjust the cooking time. If you prefer beef, use flank steak cut into strips. Each protein brings a unique taste. Feel free to change the veggies based on the season or your taste. Snap peas add a nice crunch. Bell peppers come in many colors, so mix them up. Zucchini or asparagus can also fit well in this dish. Just keep the cooking time in mind. You can get creative with sauces. A spicy teriyaki sauce adds heat and flavor. Sweet chili sauce gives a different sweetness and tang. You can even make your own sauce. Just mix soy sauce, honey, and a dash of sriracha for a twist. Explore flavors to make this dish your own! Store leftovers in an airtight container. You can refrigerate them for up to three days. Make sure to let the dish cool before sealing it. This helps keep the flavors intact. To reheat, use the microwave or oven. If using the microwave, place in a bowl and cover it. Heat in short intervals until warm. For the oven, preheat to 350°F (175°C). Bake until heated through. Stir halfway for even warmth. You can freeze the chicken and veggies. Place them in a freezer-safe container. They will last for up to three months. To thaw, move to the fridge overnight or use the microwave. Heat thoroughly before serving. Yes, you can use frozen chicken for this recipe. Just remember to thaw it first. You can do this in the fridge overnight or use the defrost setting on your microwave. Once thawed, cut the chicken into bite-sized pieces. Then, follow the same marinating steps with the teriyaki sauce. For teriyaki sauce, store-bought options work great. Look for sauces with natural ingredients. If you prefer homemade, you can mix soy sauce, sugar, and a bit of mirin. This gives a fresh flavor. Feel free to adjust the sweetness to your taste. Yes, you can prepare this dish ahead of time. Marinate the chicken and chop the veggies a day before. Store them in the fridge. When you’re ready, simply bake everything together. This saves time on busy days. You can serve teriyaki chicken bowls with various side dishes. Steamed edamame or a simple green salad pairs well. You might also add pickled ginger for a tangy kick. If you love spice, try some chili flakes on top. This blog post covered how to make a delicious teriyaki chicken bowl. We discussed key ingredients, like chicken breast, broccoli, and jasmine rice. I shared steps to bake everything perfectly and tips to ensure juicy chicken and fluffy rice. You can also explore variations using different proteins or sauces. With proper storage advice, you'll keep leftovers fresh. Enjoy your cooking and personalizing this dish to make it truly yours!

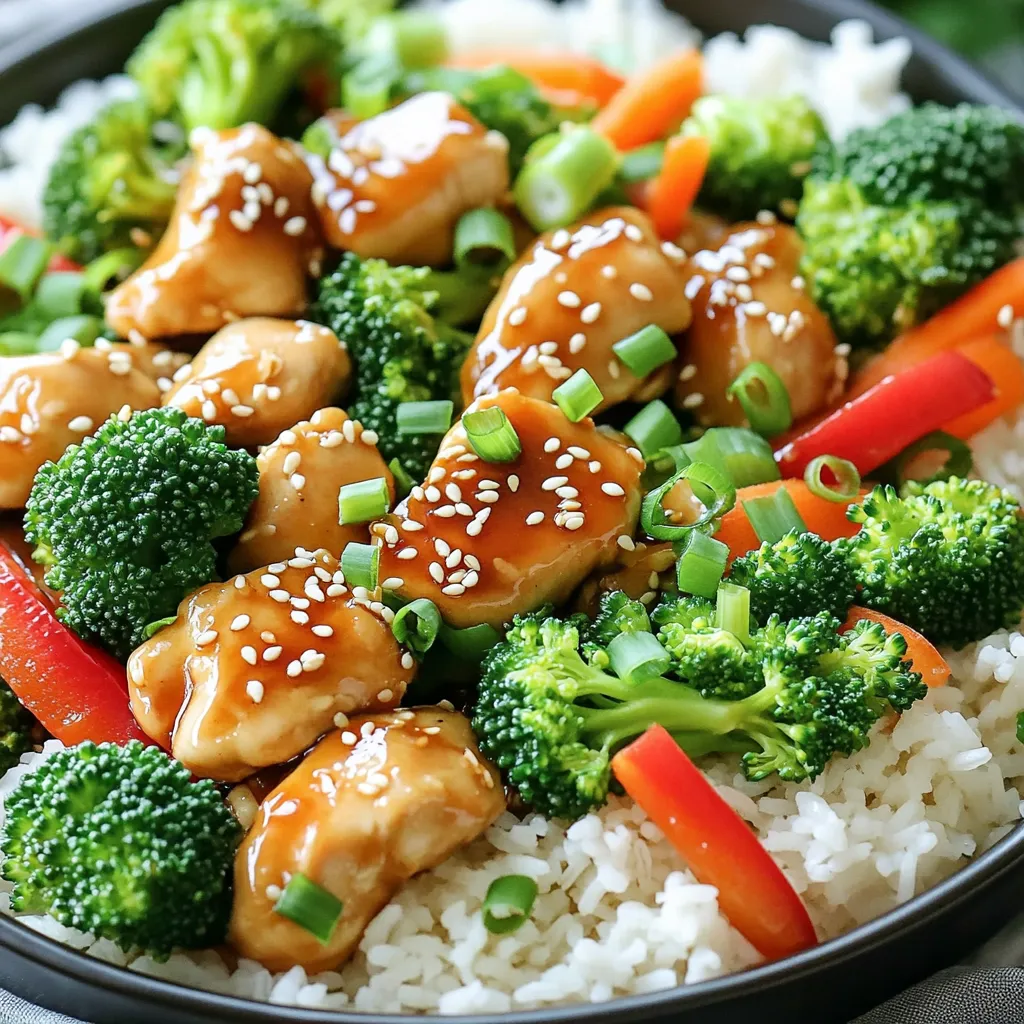
Sheet-Pan Teriyaki Chicken and Rice Bowls Delight

Get ready to savor a delicious meal with minimal cleanup! In this blog, I’ll show you how to make Sheet-Pan

To make Slow Cooker White Bean Turkey Chili, you need these main ingredients: - 1 lb ground turkey - 2 cans (15 oz each) white beans, rinsed and drained - 1 can (14 oz) diced tomatoes with green chilies - 1 medium onion, diced - 2 cloves garlic, minced - 1 bell pepper (any color), diced - 1 cup chicken broth - 1 tablespoon olive oil - 1 tablespoon ground cumin - 1 tablespoon chili powder - 1 teaspoon paprika - 1 teaspoon salt - 1/2 teaspoon black pepper - 1/2 teaspoon cayenne pepper (optional for heat) - Fresh cilantro, chopped (for garnish) - Avocado slices (for serving) You can swap some ingredients based on your taste or what you have on hand. Here are a few ideas: - Instead of ground turkey, use ground chicken or beef. - If you can’t find white beans, use kidney or pinto beans. - Use vegetable broth in place of chicken broth for a vegetarian option. - Any fresh herbs can replace cilantro for a different flavor. - For heat, add jalapeños or hot sauce if you like it spicy. Choosing fresh produce makes your chili taste better. Here are some tips: - Onions: Look for firm onions with smooth skin. Avoid any with soft spots. - Bell Peppers: Choose peppers that are bright in color and feel heavy for their size. - Garlic: Pick garlic bulbs that are firm and dry. Avoid any that are sprouting. - Herbs: Fresh herbs should smell strong and bright. Look for vibrant green leaves. When you select fresh ingredients, you set the stage for a great meal. This chili will warm your heart and fill your belly! First, I heat olive oil in a medium skillet over medium heat. Then, I add diced onion, bell pepper, and minced garlic. I sauté these vegetables until they soften, which takes about five minutes. This step builds a great flavor base for the chili. Next, I add one pound of ground turkey to the skillet. I cook it for six to eight minutes while breaking it up with a spoon. The turkey should be browned and cooked through. This step adds protein and richness to the dish. Now, I transfer the turkey and vegetable mix to the slow cooker. I add two cans of rinsed white beans and one can of diced tomatoes, including the juice. Then, I pour in one cup of chicken broth. I also add one tablespoon each of ground cumin and chili powder, along with paprika, salt, black pepper, and cayenne pepper if I want some heat. Finally, I stir everything well to combine. This mixture will create a deliciously hearty chili. Using a slow cooker is great for this chili. It lets flavors blend well. You can set your slow cooker to low or high. Each option gives you a tasty meal. If you choose low, cook for 6 to 8 hours. If you decide on high, cook for 3 to 4 hours. Both methods work well. The low setting makes the turkey tender. The high setting is faster but still gives good results. Cooking time matters for flavor and texture. A longer cook helps blend spices. It makes the chili rich and creamy. If you rush it, the flavors may not shine. So, pick your cooking time wisely. Enjoy the process; it makes the meal even better! {{image_2}} To boost the taste of your chili, try adding fresh herbs. Fresh cilantro adds a nice touch. You can also sprinkle some lime juice for a zesty kick. Consider adding a splash of hot sauce for more heat. If you want a thicker chili, try mashing some beans. You can take a cup of beans and mash them with a fork. Then, stir this back into the pot. Another tip is to add a cornstarch slurry. Mix one tablespoon of cornstarch with two tablespoons of water and stir it in. Let it cook for a bit until it thickens. Serve your chili warm in big bowls. Top each bowl with fresh cilantro and creamy avocado slices. You can also add a dollop of sour cream for extra richness. Serve with crusty bread or warm tortillas on the side. This adds a nice crunch and helps soak up the chili. You can make a tasty vegetarian version of this chili. Instead of ground turkey, use a mix of mushrooms and lentils. They add great texture and flavor. You can still use white beans and diced tomatoes. For extra protein, add quinoa or chickpeas. This version is hearty and filling, just like the original. You can still spice it up with cumin and chili powder. It’s a great option for meatless meals. If you like heat, this chili can get spicy! Add extra cayenne pepper to the mix for a kick. You can also use fresh jalapeños or serrano peppers. Chop them up and add them when cooking the onion and bell pepper. For even more spice, try adding a splash of hot sauce just before serving. Adjust the heat to your liking, and enjoy the warmth! You can switch up the beans for a different taste. Instead of just white beans, mix in black beans, kidney beans, or pinto beans. Each bean has its own flavor and texture. Mixing different beans can make your chili even more fun. Just make sure to rinse and drain them well. This way, you keep the chili creamy and delicious! After you enjoy your Slow Cooker White Bean Turkey Chili, store any leftovers in an airtight container. Make sure to let the chili cool to room temperature first. This prevents condensation inside the container. You can keep it in the fridge for up to four days. Label it with the date so you know when to use it. You can freeze your chili for later meals. Use freezer-safe containers or resealable bags. Divide the chili into portions, making it easy to thaw later. Be sure to leave some space in the container for expansion. Your chili can stay fresh in the freezer for up to three months. When you're ready to eat, just thaw it in the fridge overnight. Reheat your chili on the stove or in the microwave. If using the stove, heat it over medium heat. Stir often to ensure even heating. In the microwave, use a microwave-safe bowl. Heat in short intervals, stirring in between, until hot. If the chili seems thick, add a splash of chicken broth or water to loosen it up. Enjoy that comforting meal again! Yes, you can use other meats. Ground chicken or beef works well. If you want a stronger flavor, try pork. Each meat changes the taste a bit, but it will still be tasty. Just make sure to cook it fully before adding it to the slow cooker. You can store this chili for about five days in the fridge. Keep it in an airtight container. If you want to save it longer, freeze it. It stays good in the freezer for up to three months. When you're ready to eat, thaw it overnight in the fridge. This chili pairs well with many sides. Try some warm cornbread or crusty bread. You can also serve it with rice or quinoa for a filling meal. Add fresh avocado slices on top for creaminess. A side salad adds a nice crunch, too. This blog post covered key points for making Slow Cooker White Bean Turkey Chili. We explored ingredients, from substitutions to picking fresh produce. I shared step-by-step instructions for preparing, browning, and combining. We discussed optimal cooking times and settings. Tips on enhancing flavor and thickening the chili added excitement. I also suggested variations for different diets. Finally, we reviewed storage options for leftovers. Now, you have all the tools to create a delicious chili. Enjoy the cooking process, and try out your own ideas!

Slow Cooker White Bean Turkey Chili Comforting Meal

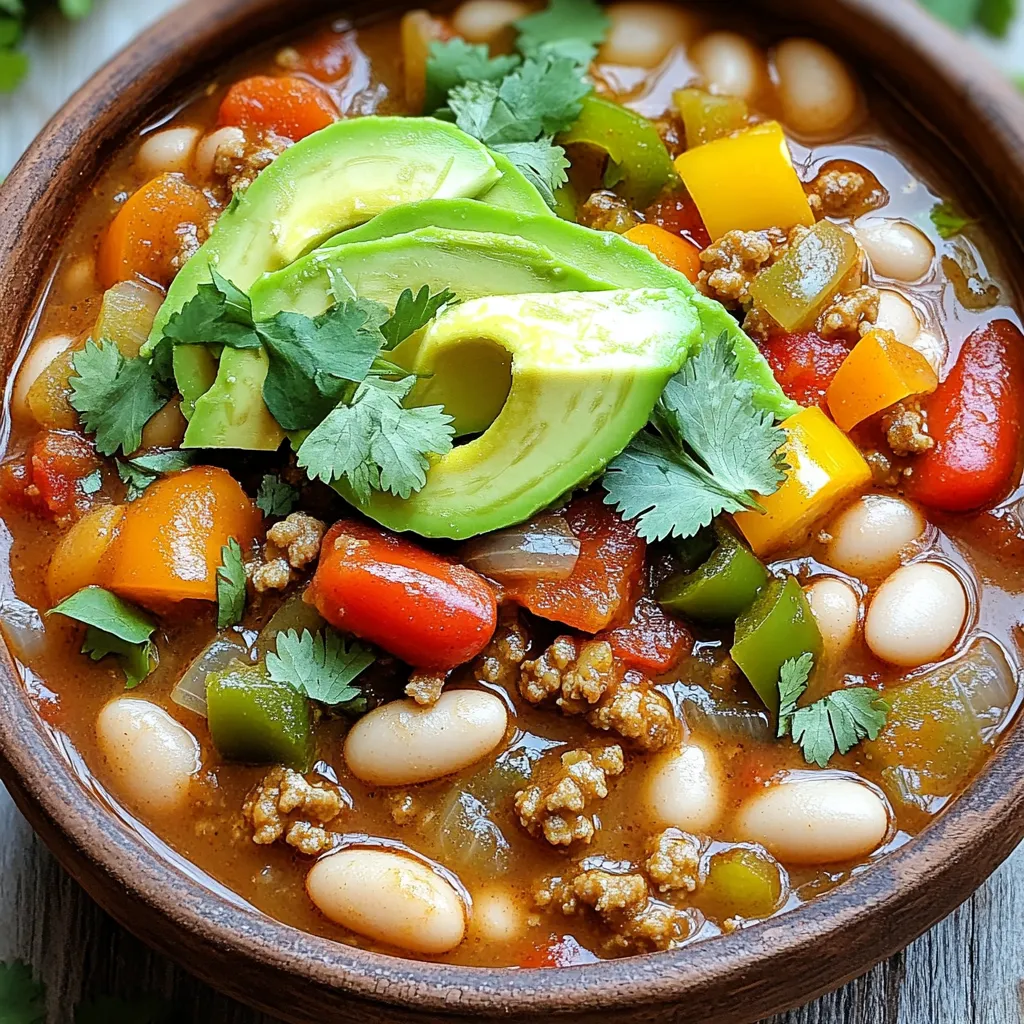
Are you ready to warm up with a delicious bowl of Slow Cooker White Bean Turkey Chili? This comforting meal

To make Air Fryer Crispy Garlic Parmesan Broccoli, you will need: - 3 cups fresh broccoli florets - 3 tablespoons olive oil - 4 cloves garlic, minced - 1/2 cup grated Parmesan cheese - 1 teaspoon garlic powder - 1/2 teaspoon red pepper flakes (optional) - Salt and black pepper to taste - Lemon wedges for serving These ingredients work together to create a tasty and crunchy dish that you will love. You can make this dish your own with these optional ingredients: - Lemon zest for extra flavor - Nutritional yeast for a cheesy flavor without dairy - Other spices like paprika or onion powder for a different twist Feel free to mix and match based on what you like. If you have certain dietary needs, here are some great substitutes: - Use avocado oil instead of olive oil for a different taste. - Swap Parmesan cheese for a dairy-free cheese to make it vegan. - Use garlic powder if you don't have fresh garlic on hand. These swaps can help you enjoy this dish while meeting your dietary goals. Start with three cups of fresh broccoli florets. Rinse them well under cold water. This step removes any dirt or grit. After rinsing, dry them gently with a clean towel. Dry broccoli crisps better in the air fryer. In a large bowl, add the broccoli. Pour in three tablespoons of olive oil. Next, add four cloves of minced garlic. Sprinkle in one teaspoon of garlic powder, and add salt and black pepper to taste. If you like some heat, toss in half a teaspoon of red pepper flakes. Use your hands to mix everything well. You want the broccoli fully coated. Finally, add half a cup of grated Parmesan cheese. Toss again to ensure even coverage. Preheat your air fryer to 400°F (200°C). Once hot, place the seasoned broccoli in the basket. Make sure to spread it out in a single layer. Avoid overcrowding for even cooking. Air fry for eight to ten minutes. Shake the basket halfway through to ensure even crispiness. The broccoli should turn golden brown and smell amazing. When done, carefully transfer it to a serving dish. Serve with lemon wedges for a bright finish. To get the crispiest broccoli, start by drying the florets well. Excess moisture can lead to sogginess. Toss the broccoli in olive oil, garlic, and spices before air frying. This helps the cheese stick and adds flavor. Make sure to spread the broccoli in a single layer in the air fryer. Overcrowding can prevent proper air circulation, resulting in less crispiness. Shake the basket halfway through cooking to promote even browning. You will know the broccoli is done when it turns bright green and golden brown on the edges. The air fryer cooks quickly, so watch closely. If you see crispy edges, it is likely ready. You can also poke a floret with a fork; it should feel tender but still have a bit of bite. If it feels too soft, it may be overcooked. To boost the flavor, consider adding different spices. A sprinkle of smoked paprika or cayenne pepper can add warmth. You can also squeeze fresh lemon juice over the broccoli after cooking for a bright taste. If you like nuts, try adding toasted pine nuts or chopped almonds for crunch. For an extra cheesy touch, sprinkle more Parmesan cheese right before serving. {{image_2}} You can change the flavor of your crispy garlic Parmesan broccoli. Try adding different herbs, like thyme or oregano. For a tangy twist, add a splash of balsamic vinegar. You can also mix in some lemon zest for brightness. If you like heat, increase the red pepper flakes or add cayenne pepper. Toppings like toasted nuts or seeds add crunch and flavor, too. Fresh broccoli gives the best taste and texture. However, frozen broccoli works well in a pinch. If using frozen broccoli, do not thaw it first. Just toss it with oil and seasonings. You may need to air fry a bit longer to get it crispy. Always check for doneness by looking for a nice golden color. Many veggies can become crispy and tasty in the air fryer. Try Brussels sprouts, cauliflower, or carrots. Cut them into similar sizes as the broccoli for even cooking. Season and cook them just like the broccoli. Each veggie will bring a unique flavor and texture, making your meals fun and exciting. To keep leftover crispy garlic Parmesan broccoli fresh, store it in an airtight container. Let the broccoli cool before placing it in the fridge. It stays good for 3-4 days. If you notice any moisture, use a paper towel in the container. This helps absorb excess moisture and keeps the broccoli crisp. Reheating can be tricky. To keep your broccoli crispy, try using the air fryer. Set it to 350°F (175°C) and cook for 3-5 minutes. This method helps maintain the crunch. You can also use an oven. Spread the broccoli on a baking sheet and heat it at 350°F (175°C) for 5-10 minutes. Avoid the microwave, as it may make the broccoli soggy. If you want to store the broccoli for a longer time, freezing is a great option. First, blanch the broccoli for 2-3 minutes in boiling water. Quickly transfer it to ice water to stop the cooking. Drain and dry the florets. Then, place them in a freezer bag and remove as much air as possible. Frozen broccoli can last for up to 3 months. When you’re ready to eat, cook it straight from the freezer; no need to thaw! Yes, you can use different cheeses. Cheddar, mozzarella, or feta work well. Each cheese adds its own flavor. Grated cheese melts nicely and adds a tasty touch. Try mixing cheeses for a fun twist! The broccoli is done when it is crispy and golden brown. You should feel it is tender when you poke it with a fork. Shaking the basket halfway helps cook it evenly. If it looks dry, it may need a bit more time. Aim for 8-10 minutes total cooking time. Yes, this recipe is great for meal prepping! You can cook a large batch ahead. Store it in an airtight container in the fridge. It keeps well for about 3-4 days. Reheat in the air fryer for a quick and crispy meal. This blog post covered how to make delicious air-fried broccoli. You learned about the key ingredients, including optional ones for personal touches. I shared the step-by-step process for preparing and cooking the broccoli perfectly. You also found tips for maximum crispiness and flavor variations. Finally, I discussed how to store leftovers and answered common questions. Now, enjoy creating your crispy broccoli dish. Experiment and make it your own!

Air Fryer Crispy Garlic Parmesan Broccoli Delight

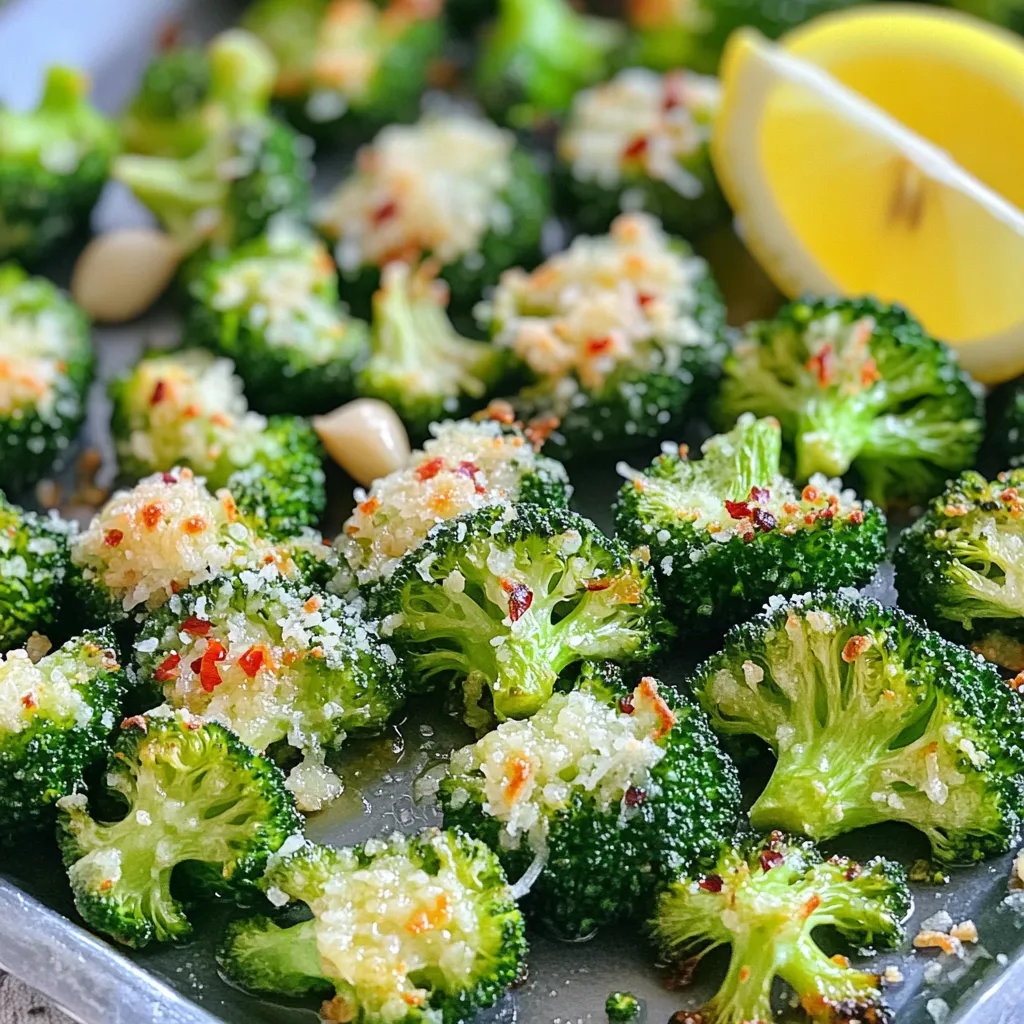
Looking for a quick and tasty side dish? Let me introduce you to Air Fryer Crispy Garlic Parmesan Broccoli! This

- 1 ½ cups warm water (110°F to 115°F) - 1 packet (2 ¼ tsp) active dry yeast - 1 tablespoon granulated sugar - 4 cups all-purpose flour - 1 teaspoon salt - ½ cup baking soda - ¼ cup unsalted butter, melted - 1 cup granulated sugar (for coating) - 2 tablespoons ground cinnamon - Flaky sea salt for sprinkling (optional) I love using simple ingredients to create Cinnamon Sugar Soft Pretzel Bites. Each item plays a key role in the final taste and texture. Warm water activates the yeast. The best temperature is between 110°F and 115°F. Too hot or too cold can affect the rise. Active dry yeast helps the dough rise. It gives the pretzel bites their soft, fluffy texture. Granulated sugar adds sweetness to the dough and helps yeast grow. You’ll also use sugar for the cinnamon coating. All-purpose flour gives the dough structure and chewiness. Use fresh flour for the best results. Salt enhances all other flavors. It is essential for a balanced taste. Baking soda is crucial for the boiling step. It gives pretzels their classic flavor and color. Unsalted butter adds richness and helps the coating stick. You brush it on after boiling. Cinnamon is what makes these bites special. It adds warmth and sweetness. Flaky sea salt is optional but highly recommended. It gives a nice contrast to the sweet cinnamon sugar. Each ingredient works together to create a delicious snack. These pretzel bites are a perfect treat for any occasion! To start, combine 1 ½ cups of warm water, a packet of active dry yeast, and 1 tablespoon of sugar in a bowl. Let this mixture sit for about 5 minutes. You want it to look frothy. This means the yeast is active. Next, mix 4 cups of all-purpose flour with 1 teaspoon of salt in a large bowl. After that, pour in the yeast mix. Stir until the dough starts to form. Now it’s time to knead the dough. Place it on a floured surface and knead for about 5 minutes. You want it smooth and elastic. Once ready, put the dough in a greased bowl. Cover it with a clean towel and let it rise in a warm spot. This should take about 1 hour, or until the dough doubles in size. After the dough has risen, preheat your oven to 425°F (220°C). Line a baking sheet with parchment paper. Divide the dough into 12 equal pieces. Roll each piece into a rope about ½ inch thick. Cut each rope into 1-inch pieces for the pretzel bites. In a large pot, bring 8 cups of water to a boil. Stir in ½ cup of baking soda. Carefully drop a few pretzel bites into the boiling water for about 30 seconds. Remove them with a slotted spoon and place them on the baking sheet. Next, brush the melted butter over the pretzel bites. This adds flavor and helps the sugar stick. Bake them in the preheated oven for 12-15 minutes until they turn golden brown. Let them cool slightly before serving. Enjoy these treats warm for the best taste! - Not allowing dough to rise properly: This step is key. If you skip it, your pretzel bites will be dense and tough. Make sure to cover the dough and let it rise in a warm spot. Aim for about an hour until it doubles in size. - Overcooking the pretzel bites: Keep an eye on them while baking. If you let them stay in too long, they will become hard. Bake them just until golden brown, usually around 12 to 15 minutes. - Adjusting cinnamon-sugar coating: You can make your cinnamon-sugar mix sweeter or spicier. For a sweeter bite, add more sugar. If you like spice, add more cinnamon. Find a balance that you love! - Options for dipping sauces: While these pretzel bites are great on their own, dipping sauces can add fun flavors. Try melted chocolate, caramel, or even cheese sauce. Each adds a new twist to your snack! {{image_2}} You can make your Cinnamon Sugar Soft Pretzel Bites even more special. Here are a few ideas: - Adding vanilla to the dough: A splash of vanilla makes the bites sweeter. It adds a warm flavor that pairs well with cinnamon. Just mix in one teaspoon of vanilla extract with the wet ingredients. - Experimenting with different spices: Try adding nutmeg or cardamom for a twist. Each spice brings its own unique flavor. A pinch of ginger can also add a nice zing. If you have special dietary needs, don’t worry! You can still enjoy these bites: - Gluten-free flour substitutes: Use a gluten-free flour blend. This will help keep the dough light and fluffy. Look for blends that contain xanthan gum for the best texture. - Reducing sugar for healthier options: You can cut the sugar in the dough. Use only half a cup instead of a full cup. This still gives you sweet pretzel bites while being a bit healthier. You can also use a sugar substitute if you prefer. To store leftover cinnamon sugar soft pretzel bites, place them in an airtight container. Keep them at room temperature for up to two days. If you want to keep them longer, refrigerate them. Just remember, refrigeration can make them a bit chewy. For reheating, preheat your oven to 350°F (175°C). Place the pretzel bites on a baking sheet and cover them with foil. Heat them for about 10 minutes. This method helps to restore some of their original texture and warmth. You can also use a microwave. Just heat them in short bursts of 10 seconds until warm. You can freeze these pretzel bites before or after baking. If you freeze them before baking, shape the bites and place them on a baking sheet. Freeze until solid, then transfer them to a freezer-safe bag. This way, they stay fresh for up to three months. When you're ready to bake, just add a few extra minutes to the baking time. If you prefer to freeze after baking, let the pretzel bites cool completely. Then, place them in an airtight container or freezer-safe bag. Again, they can last up to three months. To reheat, follow the same reheating tips mentioned above. Enjoy your delicious bites even after some time! Cinnamon sugar soft pretzel bites are warm, chewy snacks. They are made from a simple dough of flour, yeast, and sugar. After boiling, they get a coating of cinnamon and sugar. These bites are sweet, soft, and perfect for sharing. You can enjoy them fresh out of the oven or cool. They are a fun twist on the classic pretzel. These pretzel bites last about 2 to 3 days at room temperature. To keep them fresh, store them in an airtight container. If you want them to last longer, put them in the fridge. They may become a bit tough, but reheating will help. Yes, you can make these pretzel bites in advance. You can prepare the dough and shape the bites. After shaping, cover them and place them in the fridge. You can bake them later. They will be fresh and ready for a warm snack. These pretzel bites are great with dips. You can serve them with melted chocolate or caramel sauce. Cream cheese icing is another tasty option. For a fun twist, try a sweet yogurt dip. Pairing them with drinks like hot cocoa or milk makes for a cozy snack! In this post, we explored how to make delicious cinnamon sugar soft pretzel bites. You learned about the key ingredients, step-by-step instructions, and tips to avoid common mistakes. Flavor adjustments and storage tips help keep your pretzels tasty. These bites are fun to make and perfect for sharing. Enjoy experimenting with different flavors and dipping options. Soft pretzel bites are sure to be a hit at any gathering.

Cinnamon Sugar Soft Pretzel Bites Irresistible Snack

Are you ready to indulge in a sweet and salty treat? Cinnamon Sugar Soft Pretzel Bites are the perfect snack

To make these delightful jars, gather the following ingredients: - 2 cups crushed pretzels - 1/2 cup unsalted butter, melted - 1/4 cup sugar - 8 oz cream cheese, softened - 1 cup powdered sugar - 1 cup whipped topping (like Cool Whip) - 2 cups fresh strawberries, hulled and sliced - 1/2 cup granulated sugar - 1 cup strawberry gelatin (Jell-O) - 2 cups boiling water Accurate measurements make a big difference. Here are some tips to help you: - Use dry measuring cups for dry ingredients like pretzels and sugar. - Use liquid measuring cups for wet ingredients like melted butter. - Level off the measuring cup with a flat edge for precision. - For sticky ingredients like cream cheese, use a spatula to get every bit out. You can swap some ingredients to fit your taste or diet: - Use gluten-free pretzels for a gluten-free option. - Replace cream cheese with a dairy-free cream cheese for a vegan choice. - Try using fresh blueberries or raspberries in place of strawberries for a twist. - Substitute whipped topping with homemade whipped cream for a fresher taste. {{ingredient_image_1}} To start, preheat your oven to 350°F (175°C). In a bowl, mix 2 cups of crushed pretzels with 1/2 cup of melted unsalted butter and 1/4 cup of sugar. Stir well until the pretzels are fully coated. Next, spread this pretzel mixture into a greased 9x13-inch baking dish. Bake it for about 10 minutes. Once done, let it cool completely. This crust will add a nice crunch to your jars. In a separate bowl, beat together 8 oz of softened cream cheese and 1 cup of powdered sugar until smooth. This step is key for a creamy texture. Then, gently fold in 1 cup of whipped topping, like Cool Whip, to keep it light. Spread this cream cheese layer evenly over the cooled pretzel crust. This layer brings a rich and sweet element to the dish. Now, let's make the strawberry topping. Take 2 cups of fresh strawberries, hull and slice them, then mix them with 1/2 cup of granulated sugar. Let them sit for about 10 minutes. This helps the strawberries release their juices. In another bowl, dissolve 1 cup of strawberry gelatin in 2 cups of boiling water. Stir until it’s fully dissolved. After a few minutes, add the macerated strawberries with their juices to the gelatin and mix well. Pour this mixture over the cream cheese layer. Refrigerate for at least 2-4 hours until it sets. This topping adds a fruity burst to every bite. To create stunning layers in your jars, use clear glass. This lets you see each layer. Start with the pretzel crust at the bottom. Make sure it is cool before adding the cream cheese mixture. Spread the cream cheese evenly. Use a spatula for a smooth finish. Next, gently add the strawberry gelatin mix on top. Pour slowly to avoid mixing layers. Finally, top with a fresh strawberry and mint leaf for color. One common mistake is using warm layers. Always cool the pretzel crust completely. If the cream cheese mix is too warm, it will melt into the crust. Another issue is not letting the gelatin set long enough. Refrigerate for at least 2-4 hours. This ensures the layers stay separated. Lastly, don’t rush the maceration of strawberries. Let them sit for at least 10 minutes. This step makes them juicy and flavorful. These jars are perfect for parties and picnics. They are fun and easy to serve. Set up a dessert table with colorful jars. You can make them ahead of time. Just remember to keep them chilled until serving. Consider pairing them with whipped cream or a scoop of ice cream for extra indulgence. If you want to impress guests, use a mix of different fruits in some jars. This way, you create a variety of flavors. Pro Tips Use Fresh Strawberries: Opt for ripe, fresh strawberries for the best flavor and texture in your salad jars. Cool the Gelatin: Allow the gelatin to cool slightly before mixing in the strawberries to prevent them from cooking or becoming mushy. Layering Technique: For a visually appealing jar, layer the ingredients carefully and consider using a piping bag for the cream cheese mixture. Make Ahead: This dessert is perfect for making ahead of time; it can be prepared a day in advance and stored in the refrigerator until serving. {{image_2}} You can make your Strawberry Pretzel Salad Jars even better by adding other fruits. Try using blueberries, raspberries, or diced peaches. These fruits add color and flavor. Just make sure to cut them small. Mix them in with the strawberries or layer them on top. This gives your jars a fun twist. It also makes them more colorful and tasty. To make a gluten-free version, swap regular pretzels for gluten-free pretzels. Check the label to make sure they are safe. Use the same amount as the recipe calls for. This way, you can enjoy the same great taste without gluten. You can also check for gluten-free whipped toppings and gelatin. You can switch up the flavor of the gelatin for a new taste. Instead of strawberry gelatin, try raspberry, peach, or even lemon. Each flavor brings a different vibe to the dish. Just remember to mix the new flavor with the same amount of boiling water. This keeps the texture nice. Layering different gelatins makes your jars look pretty, too! To keep your Strawberry Pretzel Salad Jars fresh, store them in the fridge. Use airtight containers or simply cover the jars tightly. This helps keep the layers intact and prevents drying out. Avoid stacking jars to keep the layers from mixing. These jars can last up to four days in the refrigerator. After that, the pretzel crust might become soggy. To enjoy the best texture, eat them within this time frame. If you see any changes in color or smell, it’s best to toss them. Freezing these jars is not ideal. The cream cheese layer and gelatin do not freeze well. If you must freeze them, do so without the cream cheese layer. You can freeze just the pretzel crust and gelatin separately. When ready to serve, prepare the cream cheese layer fresh. This keeps everything tasting great! Yes, you can make these jars the night before. Just assemble them and chill. This way, the flavors meld nicely. The layers stay fresh and tasty. Plus, it saves you time on the day you serve them. If you don’t have Cool Whip, you can use homemade whipped cream. Simply whip heavy cream with a bit of sugar. You can also use any store-bought whipped topping. Just ensure it has a similar texture. This keeps your jars light and fluffy. To check if the gelatin is set, gently press it with your finger. If it feels firm and holds its shape, it's ready. You can also look for a wobbly surface. It should not jiggle too much. This means your strawberry layer is good to go! Yes, you can use frozen strawberries. Just thaw them first and drain excess liquid. This helps keep your jars from getting too watery. Frozen strawberries work great in this recipe if fresh ones are not available. Enjoy the sweet flavors! In this post, we explored how to make Strawberry Pretzel Salad Jars from start to finish. We covered the ingredients, step-by-step instructions, useful tips, and even variations you can try. Remember, layering is key for a pretty dessert. Don't hesitate to play with fruits or flavors to make it your own. With the right storage, your jars will stay fresh for days. Dive into this tasty treat, and enjoy every bite!

Strawberry Pretzel Salad Jars Delightful and Refreshing

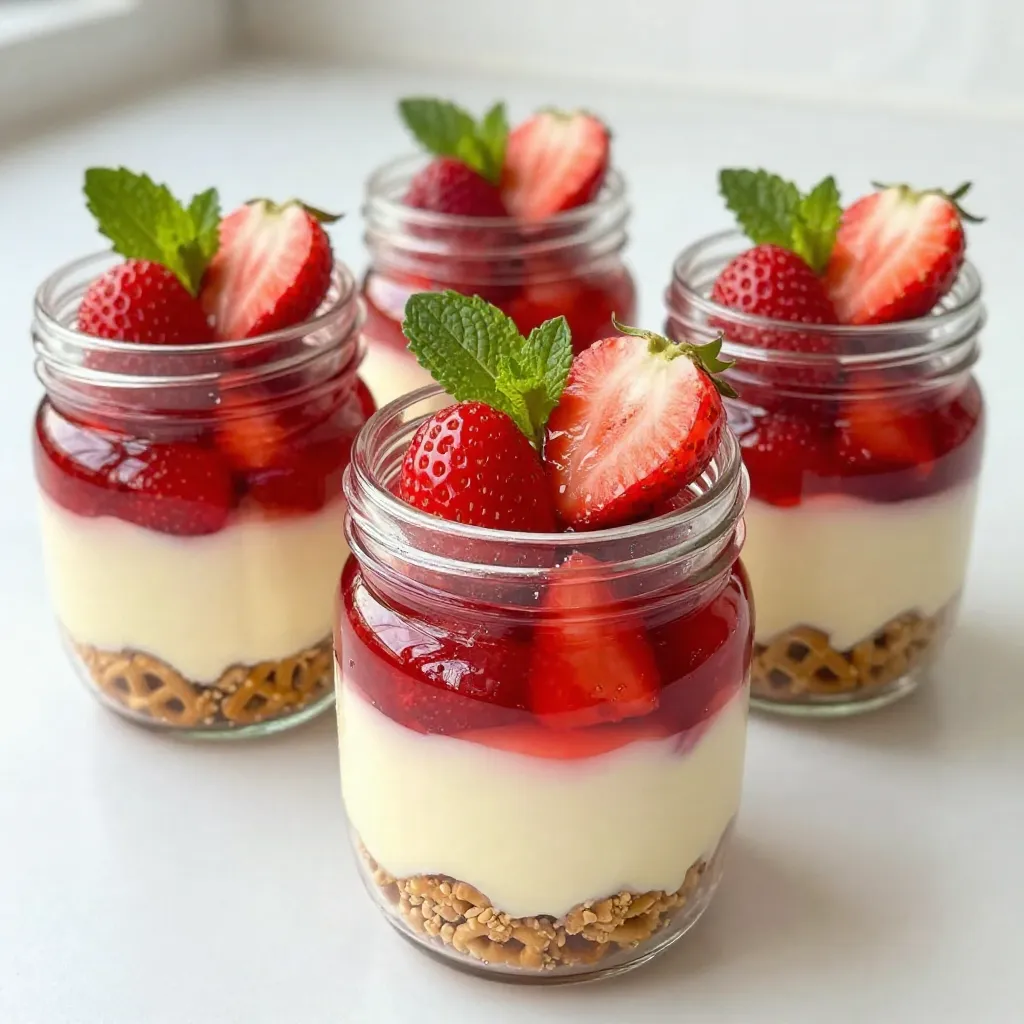
Are you ready to enjoy a sweet and salty treat that dazzles in a jar? Strawberry Pretzel Salad Jars are

To make these tasty bars, you need the following main ingredients: - 1 cup all-purpose flour - 1/2 cup rolled oats - 1/2 cup brown sugar, packed - 1/2 teaspoon baking powder - 1/2 teaspoon cinnamon - 1/4 teaspoon nutmeg - 1/4 teaspoon salt - 1/2 cup unsalted butter, melted - 1 cup pumpkin puree - 1/2 cup cream cheese, softened - 1/2 cup granulated sugar - 1 large egg - 1/4 teaspoon vanilla extract - 1/4 teaspoon ground ginger These ingredients create a rich and creamy treat that everyone will love. For an extra special touch, consider adding: - Whipped cream for topping This brings a nice creaminess and makes each bite more delightful. If you don't have some ingredients, here are a few swaps: - Use whole wheat flour instead of all-purpose flour for a healthier option. - Swap the brown sugar with coconut sugar for a different flavor. - You can use Greek yogurt in place of cream cheese for a lighter version. These substitutions can still give you a great taste while fitting your needs. Start by preheating your oven to 350°F (175°C). Grease an 8x8-inch baking dish. In a mixing bowl, combine these dry ingredients: - 1 cup all-purpose flour - 1/2 cup rolled oats - 1/2 cup brown sugar, packed - 1/2 teaspoon baking powder - 1/2 teaspoon cinnamon - 1/4 teaspoon nutmeg - 1/4 teaspoon salt Next, pour in 1/2 cup melted unsalted butter. Mix it well until it looks like wet sand. Firmly press this mixture into the bottom of your baking dish. This will be your crust. In another bowl, mix together: - 1 cup pumpkin puree - 1/2 cup softened cream cheese - 1/2 cup granulated sugar - 1 large egg - 1/4 teaspoon vanilla extract - 1/4 teaspoon ground ginger Stir until smooth and creamy. This filling will bring rich flavor to your bars. Spread it evenly over the crust you just made. Place the baking dish in the preheated oven. Bake for 25-30 minutes. The edges should turn golden, and the center should set. Use a toothpick to check; it should come out clean. Once baked, let the bars cool completely in the pan. After cooling, slice them into squares. For a special touch, you can add whipped cream on top before serving. To get a great texture, use softened cream cheese. This helps it mix well. A smooth filling is key for those creamy bites. Make sure your pumpkin puree is not too watery. If it is, drain some excess moisture. This keeps the bars from getting soggy. One common mistake is undercooking the bars. Check them at 25 minutes. The edges should be golden, and a toothpick should come out clean. If the center wobbles, give it more time. Avoid pressing the crust too hard. This can make it dense and tough. Just press it gently, enough to hold together. Greasing the dish helps the bars come out easily. Use unsalted butter or baking spray. Coat the bottom and sides well. This prevents sticking. You can also line the dish with parchment paper. This makes lifting the bars out much easier. {{image_2}} You can switch up the sugar in this recipe. Brown sugar gives a deep flavor. If you prefer, try using coconut sugar. It adds a nice caramel note. You can also use granulated sugar for a lighter taste. Each type of sugar can change the taste slightly. Feel free to experiment and find what you like best. Spices can bring out the best in your bars. While cinnamon and nutmeg are great, consider adding more. A pinch of allspice can give warmth. You can also add cloves for a stronger flavor. Ground ginger is another nice addition. Just a little brings a fresh kick. Don't be afraid to mix and match! When it comes to toppings, the sky's the limit! A sprinkle of crushed nuts can add crunch. Chopped pecans or walnuts work well. You can also drizzle caramel on top for sweetness. For a fun twist, use mini chocolate chips in the filling. They melt and create a creamy surprise. You might even want to top with a dollop of whipped cream. It adds a light and fluffy touch! To keep your Pumpkin Cream Cheese Layered Bars fresh, place them in an airtight container. This will help them stay moist and tasty. You can store them in the fridge for up to five days. Just make sure they are completely cool before sealing them up. If you cut the bars, place parchment paper between layers. This prevents them from sticking together. You can freeze these bars if you want to save some for later. First, let the bars cool completely. Then, cut them into squares. Wrap each square tightly in plastic wrap. After that, place them in a freezer bag. Make sure to squeeze out all the air. They will stay good for up to three months. When you're ready to enjoy them, just take out what you need. To reheat your Pumpkin Cream Cheese Layered Bars, take them out of the fridge or freezer. If they are frozen, let them thaw in the fridge overnight. For a quick warm-up, place a bar on a microwave-safe plate. Heat it in the microwave for about ten to fifteen seconds. This makes the cream cheese filling soft and creamy again. You can also warm them in the oven at 350°F (175°C) for about five minutes. Enjoy them warm! Yes, you can make these bars a day before. They taste even better after resting. Just let them cool and cover them tightly. Store them in the fridge. This helps the flavors blend well. If you lack cream cheese, use mascarpone or Greek yogurt. Both options give a creamy texture. You can also blend silken tofu with a bit of lemon juice for a dairy-free choice. Each option will change the taste slightly, but they still work well. These bars last for about 5 days in the fridge. Make sure to keep them in an airtight container. This helps them stay fresh and tasty. If you see any mold or off smells, discard them. Always trust your senses when it comes to food safety. You can make delicious Pumpkin Cream Cheese Layered Bars with easy steps and simple tips. We covered the key ingredients, how to prepare the crust, and create the filling. I shared tips to get the best texture and avoid mistakes. You learned various ways to store and reheat your bars and answered common FAQs. Enjoy your baking journey and have fun with flavors and options. Your treats will impress friends and family!

Pumpkin Cream Cheese Layered Bars Tempting and Tasty Treat

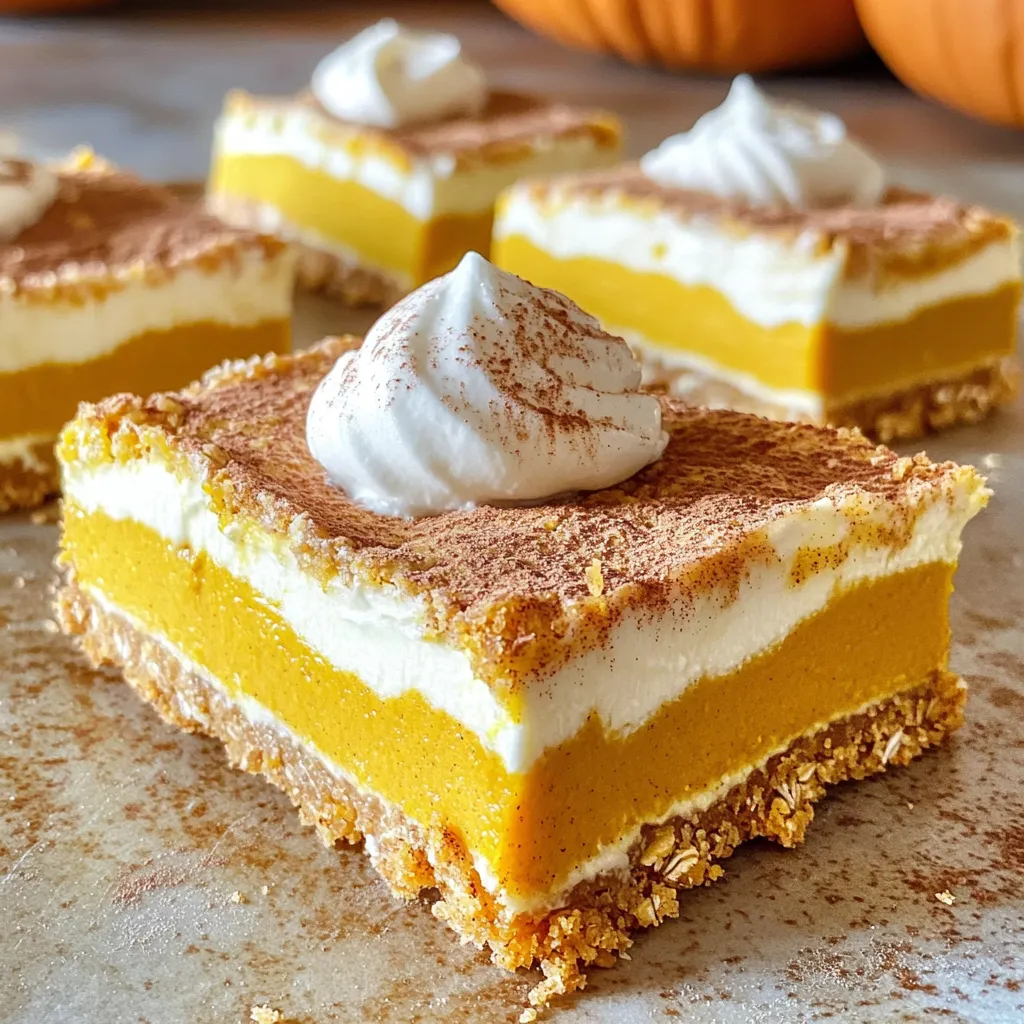
Get ready to dive into a delicious fall treat with my Pumpkin Cream Cheese Layered Bars! These bars combine creamy

- 4 medium russet potatoes - 3 tablespoons olive oil - 4 cloves garlic, minced - 1 teaspoon dried oregano - 1 teaspoon paprika - ½ cup grated Parmesan cheese - Salt and pepper, to taste - Fresh parsley, chopped (for garnish) Gathering the right ingredients is key for great flavor. I love using russet potatoes. They are starchy and crisp up well in the air fryer. You need four medium-sized potatoes. Next, grab three tablespoons of olive oil. It helps the seasonings stick and adds a nice richness. Don’t forget four cloves of minced garlic. Garlic gives these wedges a tasty punch. For herbs, you’ll need one teaspoon of dried oregano. This adds a lovely earthy flavor. A teaspoon of paprika adds warmth and a hint of smokiness. Parmesan cheese is a must! Use half a cup of grated cheese for a cheesy finish. Season with salt and pepper to taste. Finally, fresh parsley adds color and a bit of freshness. With these ingredients ready, you’ll create a dish full of flavor and joy. Enjoy the cooking process! First, wash the russet potatoes under cold water. Scrub them well to remove dirt. Next, cut each potato into wedges. Aim for about eight wedges per potato. Make sure all wedges are about the same size. This helps them cook evenly. In a large bowl, mix three tablespoons of olive oil with four cloves of minced garlic. Add one teaspoon of dried oregano and one teaspoon of paprika. Sprinkle in salt and pepper to taste. Toss the potato wedges in the bowl until they are well coated with the mixture. Next, add the grated Parmesan cheese. Use a half cup of cheese for great flavor. Toss again to ensure the cheese sticks to the wedges. Preheat your air fryer to 400°F (200°C). Let it heat for about five minutes. This step helps the wedges cook evenly. Place the seasoned wedge in the air fryer basket. Arrange them in a single layer. If your basket is small, cook in batches. Air fry for 15 to 18 minutes. Shake the basket halfway through to promote even cooking. After 15 minutes, check the wedges. They should be golden brown and crispy. If they need more time, cook in two-minute increments. Ensure they reach your desired crispiness before serving. To get crispy potato wedges, size matters. Cut your potatoes into uniform wedges. This ensures they cook evenly. Aim for about eight wedges per potato. Next, oil and seasoning ratios are key. Use three tablespoons of olive oil for four potatoes. This amount helps the wedges crisp up nicely. Make sure to coat them well with the oil and the garlic mix. After cooking, store any leftovers in an airtight container. This keeps them fresh and tasty. Place the container in the fridge. They last about three days. For reheating, use the air fryer or oven. Reheat at 375°F (190°C) for about 5-7 minutes. This helps regain that crispy texture. Avoid using the microwave as it can make them soggy. These potato wedges shine with dipping sauces. Try serving them with ranch or garlic aioli. Both add a great flavor boost. For presentation, arrange the wedges on a plate. Drizzle with a little olive oil. A sprinkle of parsley adds a nice touch. Your dish will look as good as it tastes! {{image_2}} You can change the flavor of your potato wedges easily. Try adding different herbs, like rosemary or thyme. These will give your dish a new twist. You can also use spices like chili powder for a kick. If you love cheese, swap out Parmesan for cheddar or gouda. Each cheese adds its unique taste. Looking for a lighter option? You can use less olive oil or an oil spray. This keeps your wedges crispy while cutting down on fat. Another healthy twist is to use sweet potatoes. They offer a different taste and more nutrients. For gluten-free eaters, this recipe is already safe. The ingredients do not contain gluten. If you need dairy-free options, try using a dairy-free cheese. Many brands offer great alternatives that melt well. Enjoy your wedges without worry! To keep your garlic Parmesan potato wedges fresh, use an airtight container. Glass or plastic containers both work well. Store in the refrigerator. For the best taste, eat them within 3 days. After this time, they may lose some flavor and texture. You can freeze your potato wedges for later. First, let them cool completely. Then, place them in a single layer on a baking sheet. Freeze until solid, about 1-2 hours. Next, transfer the frozen wedges to a freezer bag. They will stay good for up to 2 months. When you’re ready to enjoy them, thaw the wedges in the fridge overnight. Reheat in the air fryer at 400°F (200°C) for 8-10 minutes. This method helps restore their crispy texture. Enjoy your tasty treat again! Yes, you can make these potato wedges in a conventional oven. Preheat your oven to 425°F (220°C). Place the seasoned potato wedges on a baking sheet lined with parchment paper. Bake them for about 25 to 30 minutes. Flip the wedges halfway through for even cooking. Watch for that golden brown color to know they are ready. To stop the potato wedges from sticking, use enough olive oil. Coat the wedges well before cooking. You can also spray a little oil in the air fryer basket. Make sure not to overcrowd the basket. This allows hot air to flow around each wedge, helping them cook and crisp up nicely. - Popular sauce recommendations: - Ranch dressing - Garlic aioli - Ketchup - Spicy mayo - Homemade dipping sauce ideas: - Mix Greek yogurt with herbs for a healthy dip. - Combine sour cream, lime juice, and spices for a zesty dip. - Blend mayonnaise with sriracha for a spicy kick. These sauces enhance the flavor of the garlic parmesan potato wedges and add a fun twist to your snack! In this post, we covered how to make crispy garlic parmesan potato wedges. You learned about essential ingredients, step-by-step instructions, and helpful tips for the best results. I shared ways to customize your wedges with different flavors and storage tips for leftovers. Remember, cooking is fun! Experiment with seasonings and sides to match your taste. Enjoy your tasty creations and share them with family and friends. Your next meal can be a hit with these easy steps!

Air Fryer Garlic Parmesan Potato Wedges Delight

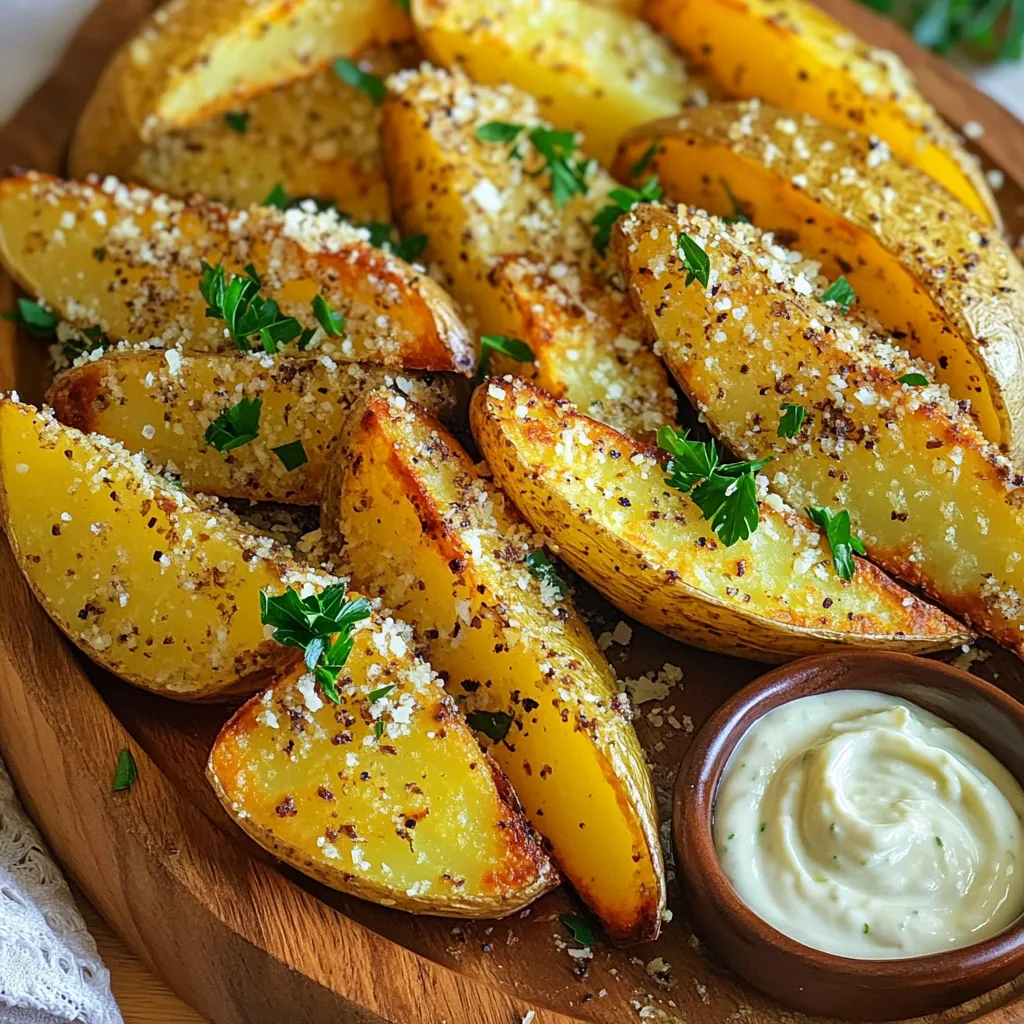
Looking for a tasty side dish that’s easy to make? You’ve found it! My Air Fryer Garlic Parmesan Potato Wedges

- 1 ½ cups all-purpose flour - 1 teaspoon baking powder - ½ teaspoon baking soda - ½ teaspoon salt - ½ cup unsalted butter, softened - ¾ cup brown sugar, packed - 2 large eggs - 1 teaspoon vanilla extract - ½ cup buttermilk (or milk mixed with lemon juice) - ¼ teaspoon almond extract - 1 cup dried cranberries - ½ cup sliced almonds I love using simple ingredients to create a tasty treat. The dry ingredients give the loaf its body. The flour, baking powder, baking soda, and salt work together to provide the perfect rise and flavor. Next, the wet ingredients add moisture and sweetness. The unsalted butter makes for a rich texture. The brown sugar adds a deep sweetness that pairs well with the tart cranberries. I always use fresh eggs for the best rise. The vanilla and almond extracts fill the loaf with delightful flavor. Buttermilk keeps the loaf soft and tender. Finally, we have our mix-ins. The dried cranberries bring a tangy burst, while sliced almonds add a nice crunch. Together, these ingredients create a perfect balance of flavors and textures that make this loaf truly irresistible. - Preheat your oven to 350°F (175°C). - Grease and flour a 9x5-inch loaf pan. This helps the loaf come out easily. - In a medium bowl, whisk together: - 1 ½ cups all-purpose flour - 1 teaspoon baking powder - ½ teaspoon baking soda - ½ teaspoon salt - Mix until everything is well combined. Set this bowl aside. - In a large bowl, cream together: - ½ cup unsalted butter, softened - ¾ cup brown sugar, packed - Use an electric mixer. Mix for about 2-3 minutes until light and fluffy. - Add 2 large eggs one at a time. Mix well after each egg. - Now, mix in: - 1 teaspoon vanilla extract - ¼ teaspoon almond extract - Gradually add the flour mixture to the butter mix. - Alternate with: - ½ cup buttermilk (or milk mixed with lemon juice) - Start and end with the flour mixture. Mix until just combined. - Gently fold in: - 1 cup dried cranberries - ½ cup sliced almonds - Use a spatula to ensure even distribution. - Pour the batter into the prepared loaf pan. - Smooth the top with a spatula. - Bake for 55-65 minutes. - A toothpick should come out clean when inserted into the center. - Let the loaf cool in the pan for 10 minutes. - After that, transfer it to a wire rack to cool completely. - This step helps keep the loaf light and fluffy. To make your loaf soft, avoid over-mixing the batter. When you mix too much, the loaf can become dense and tough. Mix just until you see no dry flour. This keeps the texture light. Fluffiness is key in a great loaf. Cream the butter and brown sugar well. This step adds air into the mix. The more air, the fluffier your loaf will be. Use an electric mixer for best results. Use quality extracts for the best taste. Vanilla and almond extracts add a rich flavor. Look for pure extracts, not imitation ones. They make a big difference in the end result. Fresh ingredients are vital. Use fresh cranberries when in season. If dried cranberries are your choice, pick ones without added sugar. This keeps the flavor balanced. Serving your loaf well makes it more inviting. Slice it neatly and place it on a wooden board. This gives it a rustic feel. For garnishing, use fresh cranberries and a sprig of mint. This adds color and freshness. You can also serve it with cream cheese or a drizzle of honey for extra flavor. {{image_2}} You can switch up the dried cranberries in this loaf. Try using dried cherries or apricots for a new flavor. You can even mix different fruits together. For a seasonal twist, use dried figs in fall or dried mango in summer. Each fruit adds its unique taste. If you want a different crunch, use walnuts or pecans instead of almonds. These nuts bring a rich, buttery flavor. For those with nut allergies, try sunflower seeds or pumpkin seeds. They give a nice texture without nuts. For gluten-free options, use a gluten-free flour blend. This will work well in the recipe. If you want a vegan version, replace the eggs with flax eggs and use a plant-based butter. These swaps keep the loaf tasty while meeting your dietary needs. For short-term storage, keep your cranberry almond loaf at room temperature. Wrap it tightly in plastic wrap or place it in an airtight container. This keeps it fresh for up to three days. Avoid putting it in the fridge, as this can dry it out. If you want to store the loaf for a longer time, freezing is the best option. Slice the loaf first to make serving easier later. Wrap each slice in plastic wrap and then in aluminum foil. This prevents freezer burn. You can freeze it for up to three months. When you're ready to enjoy, simply thaw it overnight in the fridge. Reheat slices in the oven at 350°F for about 10 minutes. To keep your cranberry almond loaf fresh, follow these best practices. Store it in a cool, dry place. Check for signs of spoilage, like mold or an off smell. If it feels dry or hard, it's time to toss it. A fresh loaf should be soft and moist. To keep your loaf moist, follow these tips: - Use softened butter and mix well with sugar. - Don’t overbake the loaf; check for doneness early. - Add buttermilk, as it adds moisture. A little yogurt also works. - Wrap the cooled loaf in plastic wrap to keep moisture in. - Store it in an airtight container. This keeps it fresh longer. Yes, you can substitute buttermilk easily. Here are a few options: - Mix ½ cup of milk with 1 teaspoon of lemon juice. Let it sit for 5 minutes. - Use plain yogurt thinned with a bit of water. - Sour cream can also stand in for buttermilk. Just use it in the same amount. These options will give you a similar tangy flavor. The loaf lasts about 3 to 5 days when stored properly. Here’s how to store it: - Keep it at room temperature in an airtight container. - You can also refrigerate it for a longer shelf life. - If you freeze it, wrap it well to avoid freezer burn. It can last up to 3 months in the freezer. Yes, you can make a gluten-free cranberry almond loaf. Here’s how: - Use a gluten-free flour blend instead of all-purpose flour. - Make sure the baking powder is gluten-free. - Check that your other ingredients, like baking soda and extracts, are gluten-free. These changes will help you enjoy a delicious gluten-free version! You now have a clear guide for making a delicious loaf. We covered key ingredients, step-by-step instructions, and tips for perfecting your bake. Don’t forget about variations and storage to keep it fresh. Experiment with flavors and textures to make your loaf unique. With practice, you’ll create a treat that impresses everyone. Enjoy sharing your homemade loaf with friends and family. Happy baking!

Cranberry Almond Loaf Irresistible and Easy Recipe

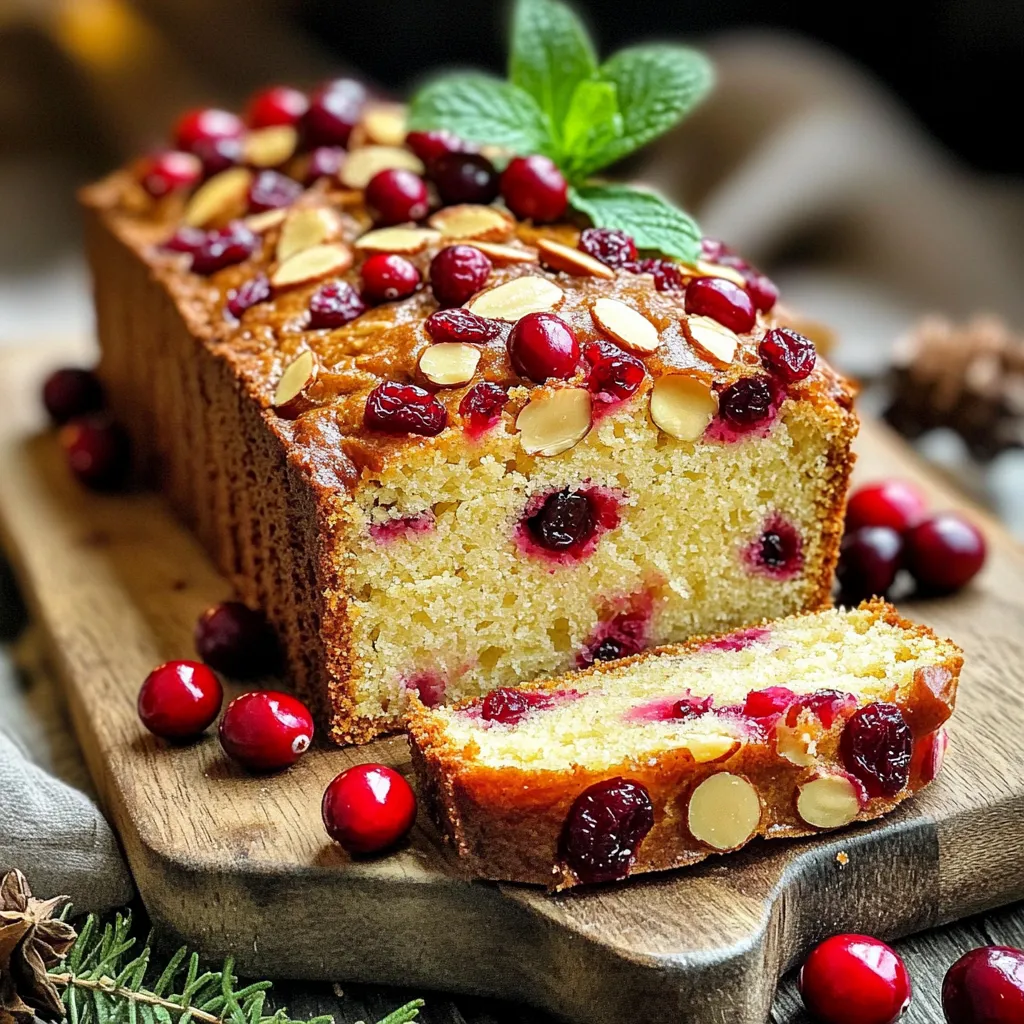
Looking for a tasty treat that’s easy to make? You’ll love this Cranberry Almond Loaf recipe! It combines sweet cranberries

- 1 lb boneless, skinless chicken breasts - 1 cup pesto sauce - 1 cup heavy cream - 3 cups chicken broth - 12 oz pasta (penne or rotini) - 1 cup cherry tomatoes, halved - 1/2 cup grated Parmesan cheese - Salt and pepper to taste - Fresh basil leaves for garnish For this creamy pesto chicken pasta, I keep it simple. The main items are chicken, pesto, and cream. These three make a rich base for the dish. You can use store-bought pesto or make your own. I love homemade pesto for its fresh flavor. The chicken adds protein and keeps the meal filling. Next, I add chicken broth for moisture. It helps cook the chicken and adds depth to the sauce. The pasta is the heart of this dish. I prefer penne or rotini because they hold the sauce well. Don’t forget the cherry tomatoes! They add a sweet burst of flavor. Lastly, I sprinkle grated Parmesan cheese on top. It melts beautifully and enhances the creaminess. Season with salt and pepper to taste. Fresh basil leaves make a lovely garnish. They add color and aroma, making the dish visually appealing. With these ingredients, you create a delicious and satisfying meal. - Place 1 lb of boneless, skinless chicken breasts at the bottom of your slow cooker. - Season the chicken with salt and pepper. - Pour 1 cup of pesto sauce over the chicken. - Add 3 cups of chicken broth to the slow cooker. Stir gently to mix. - Cover the slow cooker with its lid. - Cook on low for 4-5 hours or on high for 2-3 hours. - Check if the chicken is fully cooked and tender. - Remove the chicken and shred it using two forks. - Pour in 1 cup of heavy cream and stir it well. - Cook 12 oz of pasta according to the package until al dente. - Drain the pasta and add it to the slow cooker. - Add the shredded chicken and 1 cup of halved cherry tomatoes. - Stir all ingredients together until well combined. - Let it warm for 10 minutes on low. - Just before serving, sprinkle in 1/2 cup of grated Parmesan cheese. Stir until it melts and becomes creamy. This dish is simple and full of flavor. Enjoy your creamy pesto chicken pasta! How to choose the best pesto sauce When picking pesto, look for fresh flavor. You can use store-bought or homemade. If you choose store-bought, check for real basil and no added sugars. A bright green color shows freshness. If you make your own, blend basil, garlic, nuts, cheese, and olive oil. This will give you control over taste and texture. Tips for shredding chicken easily To shred chicken, first let it cool for a few minutes. This helps you handle it better. Use two forks to pull apart the meat. Start at the thicker part and work your way down. If you have a stand mixer, you can use it too. Just place the chicken in the bowl and mix on low speed for a few seconds. This technique saves time and gives you perfect shreds. Presentation tips for an appealing dish Serve the creamy pesto pasta in wide bowls. This allows the dish to shine. Top with fresh basil leaves for color. A sprinkle of grated Parmesan adds a nice touch. You can also add a dash of extra pesto on top for style. Make sure the dish looks vibrant and inviting. Best side dishes to pair with creamy pesto pasta Pair this dish with a light salad. A mix of greens, cherry tomatoes, and a simple vinaigrette works well. Garlic bread is another great choice. Its crunch complements the soft pasta. Roasted vegetables can also add flavor and color to your meal. These sides balance the creamy pasta nicely. {{image_2}} You can switch out the chicken for other proteins. Turkey works well in this dish. You can also use shrimp for a seafood twist. Both options give a new taste while keeping the dish fun. If you prefer a vegetarian meal, use tofu instead of chicken. Tofu soaks up the pesto flavor nicely. It also adds a nice texture. Want to boost the taste? Add extra herbs like thyme or oregano. They bring fresh flavors to the dish. You can also try a pinch of red pepper flakes for heat. Incorporating vegetables is another great way to enhance the meal. Spinach adds color and nutrients. Bell peppers give a sweet crunch. Toss them in before serving for a vibrant touch. To store leftovers, let the pasta cool down. Place it in an airtight container. Make sure to seal it tightly. Use glass or plastic containers for best results. This helps keep the flavors fresh. Refrigerate the pasta for up to three days. Always label your containers with the date. This way, you remember when you made it. To freeze the dish, cool it completely first. Spoon it into freezer-safe bags or containers. Remove as much air as you can before sealing. This prevents freezer burn. You can freeze it for up to three months. When you are ready to eat, thaw it overnight in the fridge. To reheat, you can use the microwave or stovetop. Add a splash of chicken broth for moisture while reheating. Stir well and heat until hot throughout. Enjoy this creamy delight anytime! Can I make this recipe ahead of time? Yes, you can make this recipe ahead. Cook the chicken and sauce in the slow cooker. Let it cool, and store in the fridge. You can cook the pasta later and mix it in when ready to serve. What type of pasta works best? I recommend using penne or rotini pasta. These shapes hold the sauce well. They also add a nice texture to the dish. Is this recipe gluten-free? No, this recipe is not gluten-free. The pasta contains gluten. To make it gluten-free, use gluten-free pasta. Many brands offer good options that taste great. How can I make it dairy-free? To make this dish dairy-free, swap heavy cream for a non-dairy milk. You can use almond milk or coconut cream. For cheese, try a dairy-free alternative or skip it. Can I make this on the stovetop instead? Yes, you can make this on the stovetop. Cook the chicken in a large pot with the pesto and broth. Simmer until the chicken is tender. Then, stir in the cream and cooked pasta. How to adjust cooking times for different slow cookers? Each slow cooker heats differently. If your slow cooker runs hot, check the chicken after 3 hours on low. If it runs cool, you might need to add time. Always make sure the chicken is fully cooked before serving. This creamy pesto chicken pasta combines simple ingredients and easy steps for a tasty meal. Start with seasoned chicken and pesto, then let it cook to perfection. Add cream, pasta, and veggies for a complete dish. Remember, you can swap ingredients to fit your taste. Store leftovers for quick meals later. With these tips, you’ll make a dish your family will love. Enjoy experimenting with flavors and serving suggestions!

Slow Cooker Creamy Pesto Chicken Pasta Delight

Are you ready for a dinner that’s easy and rich in flavor? In this post, I’ll show you how to

- 4 salmon fillets (about 6 oz each) - 1 red bell pepper, sliced - 1 cup broccoli florets - 1 carrot, julienned - 2 tablespoons honey - 3 tablespoons soy sauce - 1 cup jasmine rice - 2 cups water or low-sodium vegetable broth - 3 cloves garlic, minced - 1 tablespoon fresh ginger, grated - 1 tablespoon sesame oil - Salt and pepper to taste - 2 green onions, chopped - Sesame seeds First, preheat your oven to 400°F (200°C). This step helps the salmon cook evenly. Next, in a small bowl, whisk together the marinade. Combine 2 tablespoons of honey, 3 tablespoons of soy sauce, 3 minced garlic cloves, 1 tablespoon of grated ginger, and 1 tablespoon of sesame oil. Make sure to reserve half of this mixture for later. To marinate the salmon, place the fillets in a large resealable bag or a shallow dish. Pour the marinade over the salmon. Seal the bag or cover the dish. Let it marinate for at least 15 minutes. You can also refrigerate it for up to 2 hours. This extra time will add more flavor. While the salmon marinates, rinse 1 cup of jasmine rice under cold water. This removes excess starch. In a medium saucepan, combine the rice and 2 cups of water or low-sodium vegetable broth. Bring it to a boil. Then, reduce the heat to low, cover, and simmer for about 15 minutes. The rice will be fluffy when done. Keep it covered to stay warm. For the vegetables, prepare a large sheet pan. Arrange the sliced red bell pepper, broccoli florets, and julienned carrot on the pan. Drizzle them with olive oil, then season with salt and pepper. Toss to coat the veggies evenly. Now, it’s time to bake. Remove the salmon from the marinade and discard that marinade. Place the salmon on the sheet pan with the vegetables. Pour the reserved marinade over both. Bake in the preheated oven for 12 to 15 minutes. Check for doneness by ensuring the salmon flakes easily with a fork. Once everything is cooked, fluff the rice with a fork. Divide the rice among serving bowls. Top each bowl with the honey garlic salmon and the roasted vegetables. For a finishing touch, sprinkle chopped green onions and sesame seeds on top. Enjoy your delicious meal! To keep your salmon moist, marinate it well. Use the honey, soy sauce, garlic, ginger, and sesame oil mix. This blend adds flavor and helps lock in moisture. Check for doneness by using a fork. If the salmon flakes easily, it's ready. The fish should be opaque in color. If it's still translucent, give it more time. Fluffing the rice is key for a light texture. After cooking, use a fork to gently lift the rice grains. This helps separate them for a better bite. Using broth instead of water adds flavor. The broth gives the rice a richer taste that pairs well with the salmon and veggies. Always rinse the rice first to remove excess starch. Adjust cooking times for each vegetable. Broccoli needs about 12-15 minutes, while bell peppers and carrots cook faster, around 10-12 minutes. Keep an eye on them to avoid overcooking. For the best mix, use colorful veggies. Red bell pepper, broccoli, and carrot not only taste great together, but they also look appealing in your bowl. This balance adds nutrition and makes your dish pop! {{image_2}} You can swap salmon for other proteins. Chicken works well, too. Tofu is a great choice for vegans. Both options will soak up the honey garlic flavor. For grains, consider using quinoa or brown rice. Quinoa adds a nutty taste. Brown rice gives a hearty texture. Both options boost fiber in your meal. Want some heat? Add sriracha or chili flakes to the marinade. A little spice can elevate the dish. You can also try other sauces like teriyaki or hoisin. These options provide a unique twist on the classic flavor. Using seasonal veggies can enhance your dish. Fresh asparagus or zucchini can replace bell peppers. Carrots can be swapped for snap peas in spring. Adjust the marinade for seasonal flavors, too. In fall, add a touch of maple syrup. Summer might call for fresh herbs like basil or mint. These tweaks keep your meals fresh and exciting. For best results, store leftovers in an airtight container. Let the food cool down before sealing. Keep the salmon, rice, and veggies together. Refrigerate them within two hours of cooking. Leftovers taste best when eaten within three days. After that, the flavors may fade. To reheat, use the microwave or oven. For the microwave, place the food in a microwave-safe dish. Heat in short bursts, stirring in between. The oven method works well too. Preheat it to 350°F (175°C). Cover the dish with foil to keep moisture in. Avoid overcooking by checking often. Salmon should be warm but not dry. You can freeze salmon and rice for later use. Wrap each piece of salmon tightly in plastic wrap. Place the wrapped salmon in a freezer bag. Use the same method for the rice. For best taste, consume within three months. To thaw, place the salmon in the fridge overnight. Reheat after thawing to enjoy again. You should marinate the salmon for at least 15 minutes. For best flavor, try marinating it for up to 2 hours. The longer it sits, the more the salmon absorbs the honey garlic sauce. This adds a rich taste that makes every bite special. You can use many different veggies. Try snap peas, asparagus, or zucchini for a twist. Carrots, broccoli, and bell peppers work great too. Feel free to mix and match based on what you like or have on hand. This recipe is all about your taste! Yes, you can prep this meal ahead. Marinate the salmon and chop the veggies a day before. Store everything in the fridge until you're ready to cook. You can even cook the rice in advance. Just reheat it when you’re ready to serve. This saves time on busy days. These rice bowls are filling on their own. But, if you want extras, try a fresh salad or steamed edamame. A light cucumber salad also complements the flavors nicely. These sides add a refreshing touch to your meal. This recipe shows how to make delicious salmon bowls with fresh and pantry ingredients. You learned to prep, cook, and assemble the dish step-by-step. I shared tips for perfect salmon, rice, and vegetables. You can modify the flavors and store leftovers easily. Try new ingredients or spices to keep it fun. Cooking doesn't have to be hard. With a few simple steps, you can enjoy tasty meals at home. Enjoy your cooking, and have fun experimenting!

Sheet-Pan Honey Garlic Salmon Rice Bowls Delight

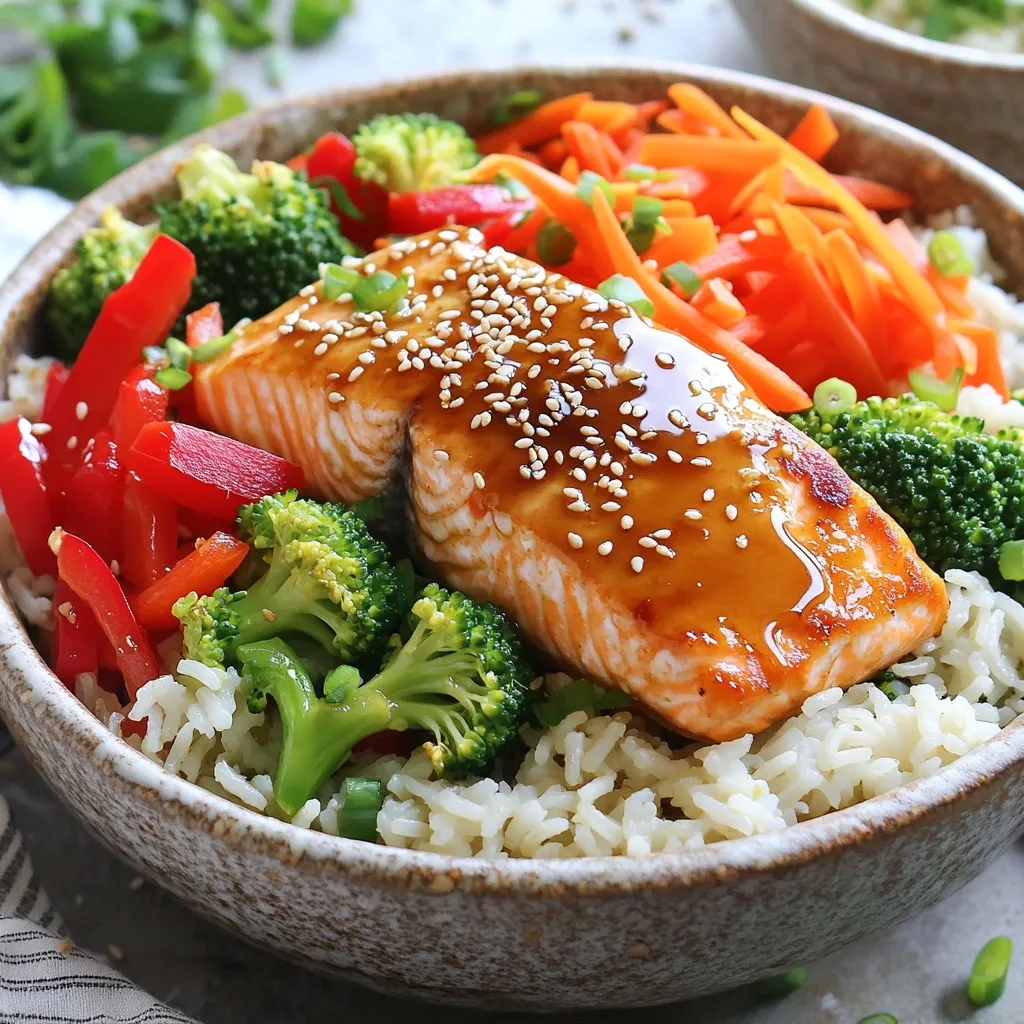
If you’re craving a quick, tasty meal, these Sheet-Pan Honey Garlic Salmon Rice Bowls are for you! With fresh salmon,

Older posts
Newer posts
← Previous Page1 … Page16 Page17 Page18 … Page84 Next →

dsad

© 2026 juliesdish • Built with GeneratePress

Our Policies

  • Copyright Policy
  • Cookie Policy
  • GDPR Policy
  • Privacy Policy
  • Disclaimer
  • Terms Of Use

More Information

  • Home
  • About
  • Contact
  • Appetizers
  • Dessert
  • Dinner
  • Drinks
©2026, juliesdish About Back To Top