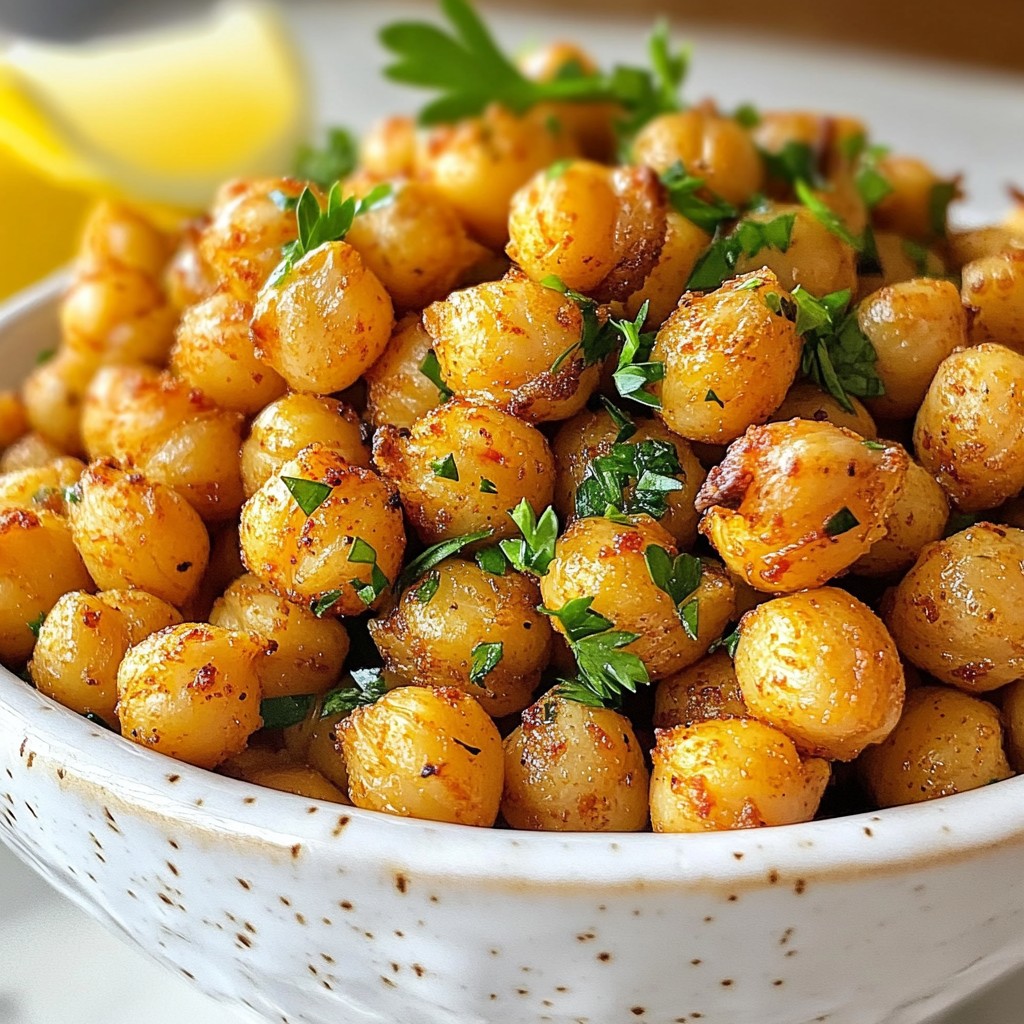
Looking for a tasty snack that brings a punch of flavor? Spicy roasted chickpeas are the answer! With a satisfying crunch and bold spices, these little bites are perfect for any craving. They're easy to make and pack a nutritional punch. In this guide, I'll walk you through simple steps to create your own crunchy snack delight. Let's dive into the world of spicy roasted chickpeas!
Why I Love This Recipe
- Healthy Snack Option: These roasted chickpeas provide a nutritious alternative to traditional snacks, packed with protein and fiber.
- Customizable Flavors: You can easily adjust the spices to suit your taste, making them perfect for everyone.
- Quick and Easy: With just a few simple steps, you can whip up this delicious snack in no time.
- Great for Meal Prep: These crunchy chickpeas can be made in advance and stored for a quick and satisfying snack throughout the week.
Ingredients
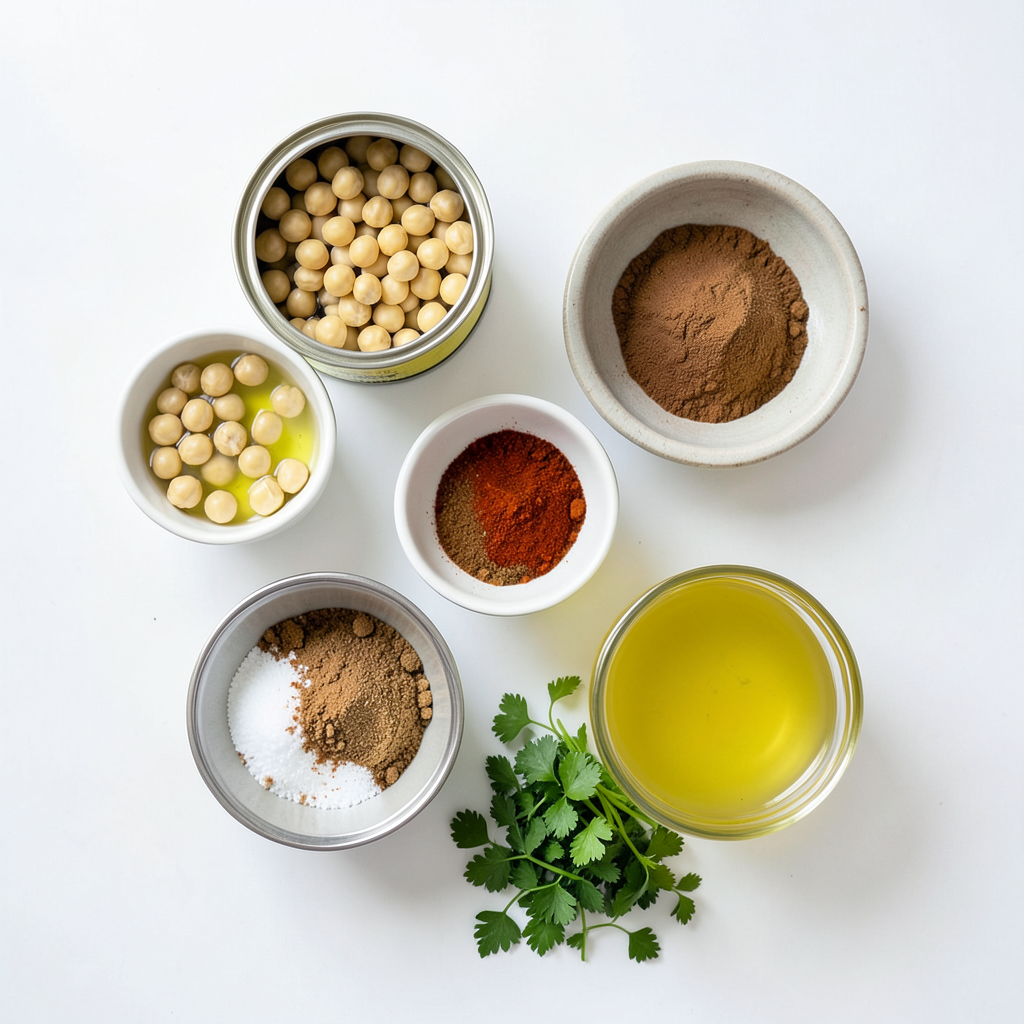
List of Ingredients
- 1 can (15 oz) chickpeas, drained and rinsed
- 2 tablespoons olive oil
- 1 teaspoon smoked paprika
- 1 teaspoon cumin
- 1/2 teaspoon cayenne pepper
- 1/2 teaspoon garlic powder
- 1/2 teaspoon onion powder
- Salt to taste
- 1 tablespoon lemon juice
- Fresh parsley, chopped for garnish
Alternative Ingredient Suggestions
For those looking to switch things up, there are easy swaps. You can use avocado oil instead of olive oil. This change adds a creamy taste. If you want a gluten-free option, most spices are safe. Just check the labels to be sure.
You can also play with flavors. Some enjoy adding a touch of lime juice for zest. Others may prefer a sprinkle of curry powder for a unique twist. Enjoy these options to make your snacks more fun!
Step-by-Step Instructions
Preparation Steps
1. Preheat your oven to 400°F (200°C). This temp helps the chickpeas get nice and crispy.
2. Take the drained chickpeas and spread them on a clean kitchen towel. Pat them dry. This step is key for that crunchy texture. If you want, remove any loose skins for even more crunch.
Roasting Process
1. In a mixing bowl, toss the dried chickpeas with olive oil, smoked paprika, cumin, cayenne pepper, garlic powder, onion powder, and salt. Make sure they are well-coated.
2. Spread the seasoned chickpeas evenly on a baking sheet in a single layer. This helps them roast evenly.
3. Roast in the oven for 25-30 minutes. Shake the baking sheet halfway through to ensure all sides get crispy. You want them golden brown.
Final Touches
1. Once the chickpeas are roasted, take them out and drizzle fresh lemon juice over them while they are hot. This adds a bright flavor.
2. Let them cool for a few minutes, and then toss with chopped parsley for a fresh finish. This step adds color and flavor, making your snack even more appealing.
Tips & Tricks
Enhancing Flavor
You can change the spice levels in your chickpeas. If you like it hot, add more cayenne pepper. If you want less heat, use less. You can also try different spices. For a smoky taste, add smoked paprika. If you enjoy herbs, mix in some dried oregano or thyme for a fresh twist. Experimenting with spices makes each batch unique.
Making Them Extra Crunchy
To get extra crunch, remove the skins from the chickpeas. After rinsing, pat them dry and gently squeeze each chickpea to pop off the skin. It takes time, but it is worth it! For cooking, adjust the time. Roasting them for about 30-35 minutes gives a crunchier texture. Just keep an eye on them to prevent burning.
Best Serving Suggestions
Spicy roasted chickpeas taste great with dips. Try pairing them with hummus or guacamole for a fun snack. You can also sprinkle them on salads for added crunch and flavor. They make a healthy topping on soups too. Enjoy them any way you like!
Pro Tips
- Dry Chickpeas Thoroughly: Ensure that the chickpeas are completely dry before seasoning and roasting to achieve maximum crunchiness.
- Experiment with Spices: Feel free to customize the spice blend according to your taste; try adding herbs like oregano or a dash of curry powder for a unique flavor!
- Store in an Airtight Container: To maintain their crunch, store leftover roasted chickpeas in an airtight container at room temperature for up to a week.
- Use Parchment Paper: Line your baking sheet with parchment paper to prevent sticking and make cleanup easier.
Variations
Flavor Combinations
You can change the flavor of your chickpeas easily. For a Mediterranean twist, try herbs like oregano and thyme. Just mix them into the chickpeas before roasting. This gives a fresh taste that brightens the dish.
If you love a sweet kick, mix honey with your spices. The honey will balance the heat of the cayenne. This combination creates a unique sweet and spicy flavor. It's a great way to surprise your taste buds!
Dietary Modifications
Many people want tasty snacks that fit their diets. These chickpeas are vegan by nature. You do not need any animal products to enjoy them. Just stick to the ingredients listed, and you’re good to go!
For a low-sodium option, skip the added salt. Use fresh herbs for flavor instead. You can also try using no-salt seasoning blends. This keeps the dish healthy while still tasting great.
Preparation Methods
You can roast chickpeas in different ways. The oven method gives a deep crunch. Preheat your oven to 400°F (200°C) for best results. Spread the chickpeas in a single layer for even cooking.
If you want a quicker option, use an air fryer. It cooks them faster and still makes them crispy. Just adjust the time to around 15-20 minutes at 380°F (193°C).
Another method is stovetop cooking. Heat a pan over medium heat and add the chickpeas. Stir them often until they are golden brown and crunchy. This method is quick and easy, perfect for busy days!
Storage Info
How to Store Roasted Chickpeas
To keep your roasted chickpeas crunchy, store them in an airtight container. Glass jars or plastic containers work well. Avoid leaving them in open bags or bowls. This helps prevent moisture from making them soft. You can also add a small packet of silica gel to absorb any moisture.
Duration of Freshness
Roasted chickpeas last about 1 week in the pantry. If you store them in the fridge, they may last a bit longer, around 10-14 days. However, the fridge can make them less crispy. For the best taste, eat them within the first week.
Reheating Tips
To restore crispiness, reheat your chickpeas in the oven. Preheat it to 350°F (175°C). Spread the chickpeas on a baking sheet. Heat them for about 5 to 10 minutes. This method helps bring back that crunchy texture you love. You can also use an air fryer for a quick fix. Just heat them for 3 to 5 minutes to enjoy that delightful crunch again.
FAQs
Common Questions About Roasted Chickpeas
Can I use dried chickpeas instead of canned? Yes, you can use dried chickpeas. Just soak them overnight and cook until tender. This takes longer but can make them fresher.
How can I make them spicier? To boost the heat, add more cayenne pepper or try chili powder. You can also use hot sauce for a different kick.
Are roasted chickpeas healthy? Yes, roasted chickpeas are a great snack. They are high in protein and fiber, making them filling and nutritious.
Cooking and Ingredient-Related Inquiries
What to do if they aren’t crispy? If they aren’t crispy, they may be too wet. Make sure to dry them well before roasting. You can also roast them longer, checking to avoid burning.
Can I freeze roasted chickpeas? Freezing is not ideal, as they lose crunch. It’s best to store them in an airtight container at room temperature.
Serving and Pairing Questions
What dips pair well with spicy roasted chickpeas? These chickpeas are great with hummus, guacamole, or yogurt dips. Their spice matches well with cool flavors.
How to serve them as snacks or toppings? You can serve roasted chickpeas in a bowl for snacking. They also make a tasty topping for salads or soups, adding crunch.
Roasted chickpeas are a tasty and fun snack. We covered the key ingredients, steps, and tips to make them perfection. You learned how to add flavors, achieve crunch, and store them well. Roasted chickpeas fit many diets and can be enjoyed in various ways. Whether you snack on them solo or use them in dishes, they pack a punch of flavor. Now it’s time to try this easy recipe and enjoy the results. Happy cooking!