If you love pumpkin spice and cream cheese, you’re in for a treat! Pumpkin Cream Cheese Muffins are the perfect blend of cozy flavors. They are soft, rich, and so easy to bake at home. In this post, I’ll guide you through simple steps and tips for making these delightful muffins. Get ready to impress yourself and your friends with a delicious autumn-inspired snack! Let’s dive in!
Ingredients
To make delightful pumpkin cream cheese muffins, gather the following ingredients:
– 1 ½ cups all-purpose flour
– 1 teaspoon baking powder
– 1 teaspoon baking soda
– 1 teaspoon ground cinnamon
– ½ teaspoon ground nutmeg
– ½ teaspoon ground ginger
– ¼ teaspoon salt
– 1 cup granulated sugar
– ½ cup brown sugar, packed
– ½ cup vegetable oil
– 2 large eggs
– 1 cup canned pumpkin puree
– 1 teaspoon vanilla extract
– 4 ounces cream cheese, softened
– 1 tablespoon honey
Each ingredient plays a key role in creating a moist, flavorful muffin. The all-purpose flour gives structure, while baking powder and baking soda help them rise. The spices—cinnamon, nutmeg, and ginger—bring a warm, autumn flavor to every bite.
The blend of granulated and brown sugars adds sweetness and depth to the muffins. Vegetable oil keeps them moist, and eggs bind everything together. Canned pumpkin puree adds rich flavor and a vibrant orange hue.
The cream cheese mixed with honey creates a sweet, creamy filling that takes these muffins to the next level. This combination of ingredients makes every muffin a treat you won’t forget.
Step-by-Step Instructions
Preparation Steps
1. Preheat your oven to 350°F (175°C). Line your muffin tin with paper liners or grease it. This step helps the muffins release easily after baking.
2. In a medium bowl, mix the dry ingredients. Combine 1 ½ cups of all-purpose flour, 1 teaspoon each of baking powder and baking soda, 1 teaspoon of cinnamon, ½ teaspoon each of nutmeg and ginger, and ¼ teaspoon of salt. Whisk them well and set aside.
3. In a large bowl, combine the wet ingredients. Mix together 1 cup of granulated sugar, ½ cup of packed brown sugar, and ½ cup of vegetable oil. Blend them until they look fluffy.
4. Add the eggs and pumpkin. Crack in 2 large eggs and add 1 cup of canned pumpkin puree. Pour in 1 teaspoon of vanilla extract. Whisk until the mixture is smooth and creamy.
5. Merge the wet and dry mixes. Gradually add the dry ingredients to the wet mixture. Stir gently until just combined. It’s okay if a few lumps remain; don’t overmix!
6. Prepare the cream cheese filling. In a separate bowl, beat 4 ounces of softened cream cheese with 1 tablespoon of honey until it’s smooth. This filling will add a tasty surprise.
7. Fill the muffin cups. Pour pumpkin batter halfway into each muffin cup. Add about 1 teaspoon of the cream cheese filling in the center. Top with more pumpkin batter until each cup is ¾ full.
Baking Instructions
1. Bake your muffins. Place the muffin tin in the preheated oven. Bake for 18-20 minutes.
2. Check for doneness. Insert a toothpick into the center of a muffin. If it comes out clean, they are done! If not, give them a few more minutes.
These steps will help you create warm, fluffy pumpkin cream cheese muffins that everyone will love.
Tips & Tricks
Baking Tips
To make great pumpkin cream cheese muffins, you need the right consistency.
– Mix dry and wet ingredients separately: This helps avoid lumps.
– Do not overmix: A few lumps in the batter are fine. Overmixing makes muffins dense.
– Check your oven temperature: Use an oven thermometer for accuracy.
Common mistakes to avoid include:
– Skipping the creaming step: Mix sugars and oil well. This adds air for fluffiness.
– Filling muffin cups too full: Fill them only ¾ full to help them rise properly.
– Not swirling the cream cheese: Swirl gently to make a nice pattern.
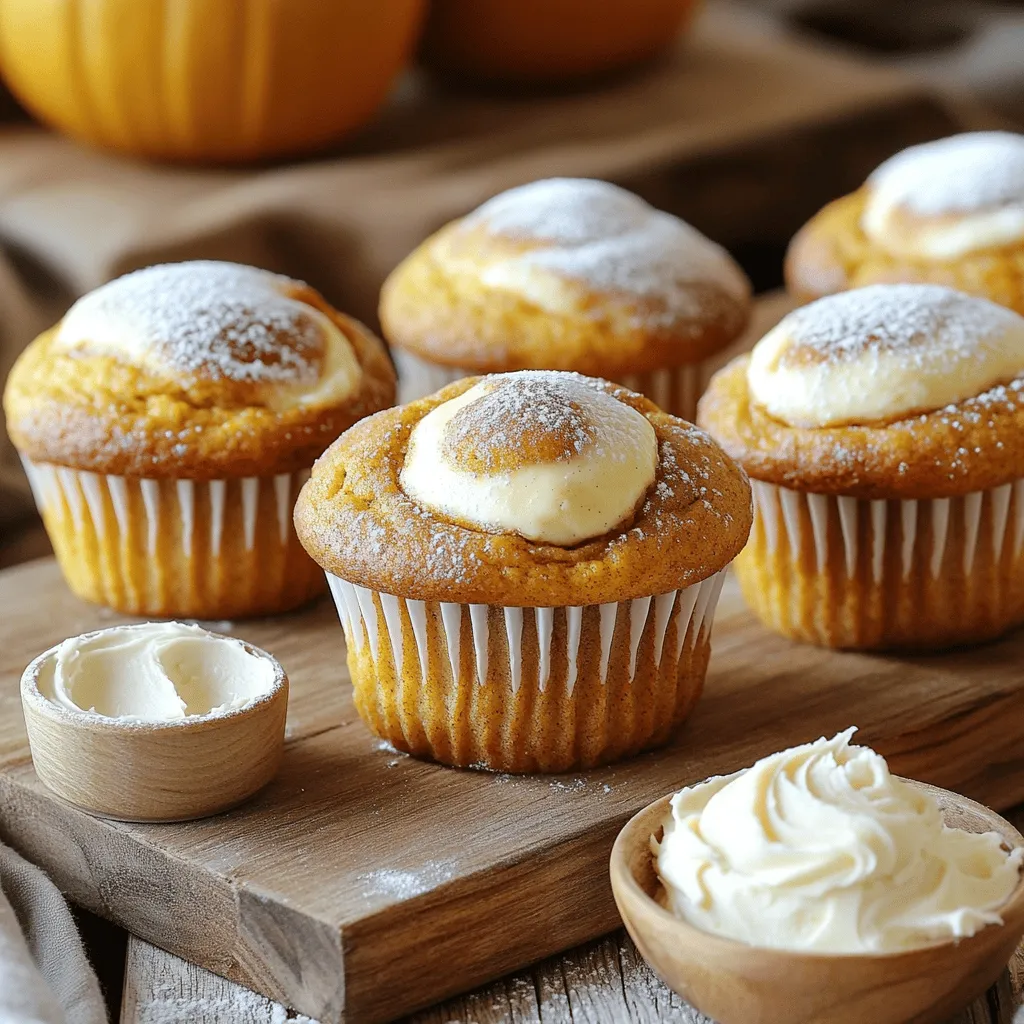
Presentation Tips
For serving, a rustic wooden board looks great.
– Dust muffins with powdered sugar: This adds a nice touch.
– Offer cream cheese frosting: A small bowl for dipping is fun!
– Pair with drinks: Serve with coffee or tea for a cozy treat.
For garnishing, consider:
– Sprinkling cinnamon: A light dusting of cinnamon boosts flavor.
– Adding nuts: Chopped pecans or walnuts on top add crunch.
These small touches make your muffins not only taste great but look even better!
Variations
Flavor Variations
You can make these pumpkin cream cheese muffins even more exciting. Adding chocolate chips is a great idea. They add a sweet bite that pairs well with pumpkin. Try semi-sweet or dark chocolate chips for a rich flavor.
You can also mix in nuts or dried fruits. Walnuts or pecans add a nice crunch. Dried cranberries or raisins give a sweet and chewy addition. These flavors work well with the spices in the muffins, making each bite a delight.
Dietary Substitutions
If you need gluten-free options, you can use a gluten-free flour blend. This works well for most recipes. Just make sure the blend has a good amount of starch for the right texture.
For dairy-free alternatives, swap the cream cheese with a dairy-free cream cheese. You can also use yogurt made from nuts. This helps keep the muffins moist while making them suitable for those with dairy allergies.
Storage Info
Storage Recommendations
To keep your pumpkin cream cheese muffins fresh, you have two great options.
– Room temperature storage: If you plan to eat your muffins in a few days, store them in an airtight container at room temperature. They stay soft and tasty for about 2 to 3 days. Just make sure they cool completely before you seal them up.
– Refrigeration tips: For longer storage, place the muffins in the fridge. They can last up to a week this way. Wrap each muffin in plastic wrap or place them in a container. This keeps them from drying out and helps maintain their flavor.
Freezing Instructions
Freezing is a fantastic way to enjoy these muffins later.
– Best practices for freezing muffins: First, allow the muffins to cool completely. Then, wrap each muffin tightly in plastic wrap. After that, place them in a freezer bag or an airtight container. This helps prevent freezer burn and keeps them delicious. They can stay frozen for up to 3 months.
– Thawing and reheating methods: To enjoy your muffins, simply take them out of the freezer. Let them thaw in the fridge overnight. If you want them warm, you can heat them in the microwave for about 15 to 30 seconds. This brings back their soft, fresh texture. Enjoy with your favorite drink!
FAQs
Common Questions
Can I make these muffins ahead of time?
Yes, you can make these muffins ahead of time. Bake them, then let them cool completely. Store them in an airtight container at room temperature for up to two days. For longer storage, freeze them wrapped in plastic. When ready to eat, thaw them overnight in the fridge.
How do I store leftover muffins?
To store leftover muffins, place them in an airtight container. Keep them at room temperature for up to two days. If you want to keep them fresh longer, store them in the fridge for about a week. Always allow them to cool before covering.
Can I substitute fresh pumpkin for canned pumpkin puree?
Yes, you can use fresh pumpkin. Cook and puree the pumpkin until smooth. Use the same amount as canned pumpkin puree in your recipe. Just ensure it has a similar texture for best results.
Tips for Perfect Muffins
How do I keep my muffins moist?
To keep your muffins moist, do not overmix the batter. Mix until just combined. Using oil instead of butter also helps retain moisture. Adding a little sour cream or yogurt can improve moisture and flavor.
What can I use instead of cream cheese?
If you want to replace cream cheese, use ricotta cheese or mascarpone. Both will give a creamy texture. Greek yogurt is another good option for a healthier twist. Just adjust sweetness, as these options vary in taste.
You now have all the tools to create delicious muffins. You learned about each ingredient and how they work together. I shared clear steps for preparation and baking, plus tips for perfect results. We explored fun variations to keep things exciting, and I offered storage advice to keep your muffins fresh.
Muffins can bring joy to any moment. With these tips, anyone can bake with confidence. Enjoy your time in the kitchen—happy baking!