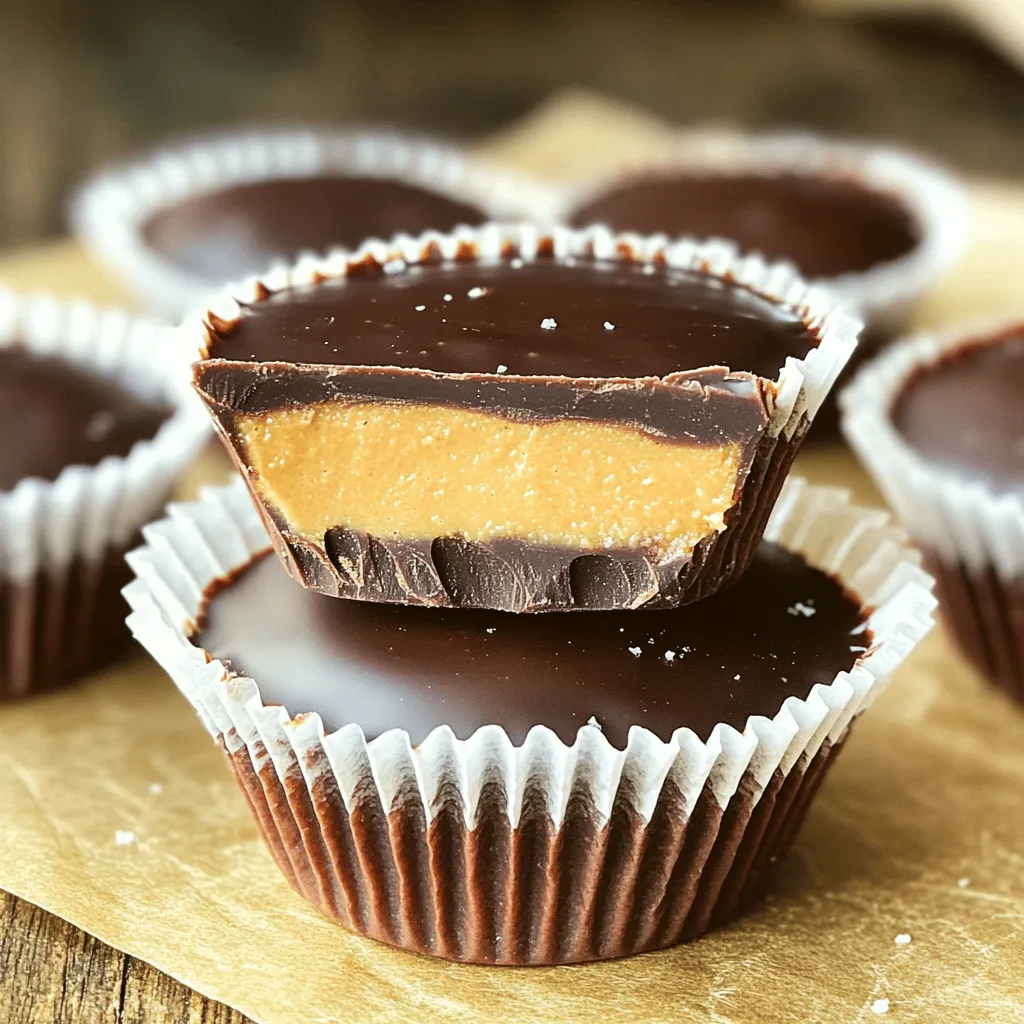
If you love the creamy blend of peanut butter and chocolate, you’ll adore these Peanut Butter Chocolate Fudge Cups. They’re simple to make and utterly delicious! I’ll guide you through the easy steps, from gathering your ingredients to perfecting those gooey layers. Plus, I’ll share tips and tricks to ensure your fudge cups are a hit. Ready to satisfy your sweet tooth? Let’s dive in!
Ingredients
List of Ingredients
To make these Peanut Butter Chocolate Fudge Cups, gather the following items:
– 1 cup natural peanut butter (choose creamy or crunchy)
– 1 cup dark chocolate chips
– 1/4 cup maple syrup
– 1/2 teaspoon vanilla extract
– 1/4 teaspoon sea salt
– 10 to 12 mini cupcake liners
Substitutions for Ingredients
You can swap items if needed. Instead of natural peanut butter, try almond butter or cashew butter. If dark chocolate does not suit your taste, use milk chocolate chips instead. For maple syrup, honey or agave nectar works well. If you want to avoid vanilla, skip it or add a pinch of cinnamon for warmth. The sea salt adds flavor, but you can leave it out if preferred.
Nutritional Information
Each fudge cup contains a mix of healthy fats, protein, and sweetness. Here’s a rough breakdown per cup:
– Calories: 150
– Protein: 4 grams
– Fat: 10 grams
– Carbohydrates: 14 grams
– Fiber: 1 gram
– Sugar: 6 grams
These cups are not only tasty but also provide energy. Enjoy them in moderation!
Step-by-Step Instructions
Preparation of Cupcake Liners
To start, grab your mini cupcake liners. I like to use 10 to 12 of them. Place each liner inside a muffin tin. This will help them hold their shape while we fill them. Make sure they fit snugly. This step is key for neat fudge cups.
Melting the Chocolate
Next, we’ll melt the chocolate. Take a microwave-safe bowl and add 1 cup of dark chocolate chips. Add 2 tablespoons of peanut butter to the bowl. This makes the chocolate creamy and rich. Heat the bowl in the microwave. Set it for 30 seconds. After 30 seconds, stir the mixture. Repeat until the chocolate is smooth. This usually takes about 1 to 2 minutes.
Layering the Chocolate and Peanut Butter
Now it’s time to layer! Spoon a little melted chocolate into each cupcake liner. Fill them about one-third full. This is where you want to tap the muffin tin gently on the counter. This helps level the chocolate. Once leveled, place the muffin tin in the freezer for about 10 minutes.
While the chocolate sets, mix the rest of the peanut butter, maple syrup, vanilla extract, and sea salt in a bowl. Stir until it’s smooth. After the chocolate hardens, take the muffin tin out of the freezer. Spoon the peanut butter mixture into the chocolate-lined cups. Fill them almost to the top.
Now, reheat any leftover melted chocolate if needed. Carefully spoon more chocolate on top of each peanut butter layer. Make sure each cup is filled. Return the muffin tin to the freezer for another 15 to 20 minutes. When they are fully set, they will be ready to enjoy!
Tips & Tricks
Tips for Melting Chocolate Smoothly
To melt chocolate well, use a microwave-safe bowl. Start with 30-second bursts. Stir between each interval to avoid burning. Chocolate can seize if it gets too hot. You want it smooth and shiny. Adding a bit of peanut butter helps it blend nicely. This creates a rich flavor and texture.
How to Perfectly Layer the Fudge Cups
Start by filling your cupcake liners with melted chocolate. Only fill them about one-third full. Gently tap the tin on the counter to level the chocolate. After that, freeze for about 10 minutes. Next, add the peanut butter mix. Fill them almost to the top, leaving some space for more chocolate. Finally, pour the remaining melted chocolate on top.
Common Mistakes to Avoid
One common mistake is overheating the chocolate. This can ruin the texture. Another mistake is not tapping the tin. This can lead to uneven layers. Also, make sure to chill the layers fully before adding more. If you skip this step, the layers might mix together. Lastly, use fresh ingredients for the best taste.

Variations
Different Nut Butters to Use
You can switch up the nut butter in this recipe. Almond butter works well, too. Cashew butter offers a creamy taste and smooth texture. Hazelnut butter adds a unique, rich flavor. Each nut butter gives a new twist to the fudge cups.
Adding Mix-Ins and Toppings
You can make these fudge cups even more fun with mix-ins. Try adding chopped nuts like walnuts or pecans for crunch. Mini marshmallows can add sweetness and softness. You might also sprinkle sea salt on top for contrast. Shredded coconut gives a tropical flair. You can even add a bit of crushed candy for a festive touch.
Healthier Version Ideas
For a healthier take, try natural sweeteners like honey or agave syrup. You can use a sugar-free chocolate to cut sugar. Swap the peanut butter for a low-fat version. You might also try adding protein powder for a boost. These small changes keep the taste yummy while making them a bit healthier.
Storage Info
Best Storage Practices
To keep your Peanut Butter Chocolate Fudge Cups fresh, store them in an airtight container. Wrap each cup in plastic wrap to prevent sticking. This helps keep them safe from air and moisture. You can also place parchment paper between layers. This way, they won’t stick together.
How Long They Last
When stored properly, these fudge cups last up to one week at room temperature. If you want them to last longer, keep them in the fridge. They can stay fresh for up to two weeks when chilled. If you freeze them, they can last for up to three months. Just remember to label the container with the date!
Freezing Fudge Cups
Freezing is a great option if you want to save some fudge cups for later. After they are set, remove them from the muffin tin. Place them in a single layer on a baking sheet. Freeze for about an hour until solid. Then, transfer them to an airtight container or freezer bag. Be sure to separate layers with parchment paper. When you’re ready to enjoy them, thaw them in the fridge. This keeps them from getting too soft.
FAQs
Can I use milk chocolate instead of dark chocolate?
Yes, you can use milk chocolate. It will change the taste. Milk chocolate is sweeter and creamier. This choice can make the fudge cups taste more like a candy bar. Just melt it the same way as dark chocolate.
What can I substitute for maple syrup?
You can use honey or agave syrup. Both will add sweetness. If you want a sugar-free option, try using a sugar-free syrup. Each option may change the flavor slightly. Make sure to use the same amount for the best results.
How do I make these fudge cups vegan?
To make these fudge cups vegan, swap the dark chocolate for dairy-free chocolate chips. Use maple syrup as usual. Ensure the peanut butter is also vegan-friendly. This way, you keep all the great taste without any animal products.
In this blog post, we explored key ingredients, melting methods, and storage tips for fudge cups. I shared ways to customize your recipe and avoid common mistakes. Remember, the right ingredients and techniques make a big difference. With practice and creativity, you can enjoy delicious treats that suit your taste. Keep experimenting, and you’ll find the perfect fudge cup that you love. Happy baking!