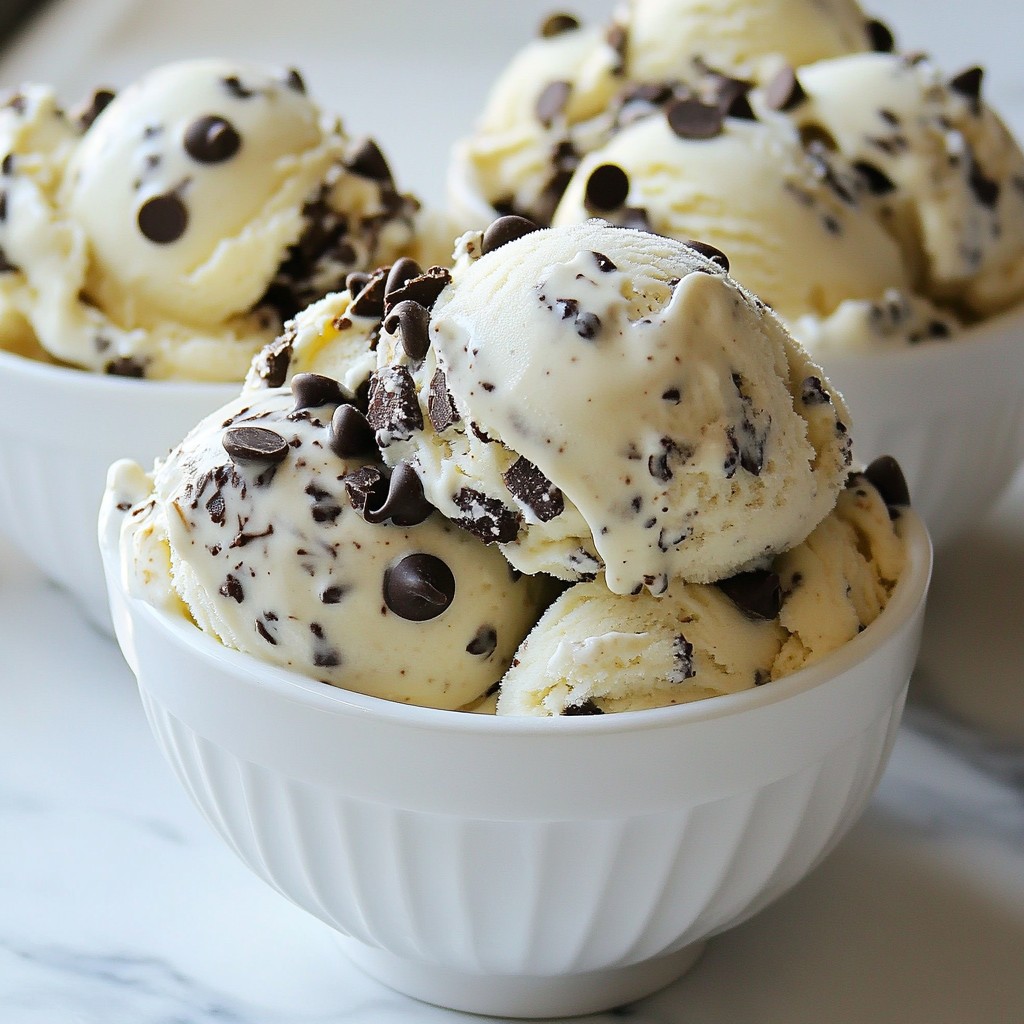
Looking for a sweet treat that’s easy to make? You’ll love my No Churn Cookies and Cream Ice Cream! No special tools or skills are needed. With just a few simple ingredients, you can whip up a dreamy dessert that will impress everyone. Stick around as I walk you through the steps, tips, and even fun variations. Let’s dive into this creamy delight!
Why I Love This Recipe
- Irresistible Flavor: This ice cream combines the rich creaminess of heavy cream with the delightful crunch of cookies, making every scoop a dream come true.
- No Churn Required: No need for an ice cream maker! This simple recipe allows you to create delicious ice cream with minimal fuss.
- Customizable Delight: Feel free to mix in your favorite add-ins or swap out the cookie flavors for a unique twist on this classic treat.
- Perfect for Any Occasion: Whether it’s a summer barbecue or a cozy night in, this cookies and cream ice cream is sure to please everyone.
Ingredients
Detailed Ingredient List
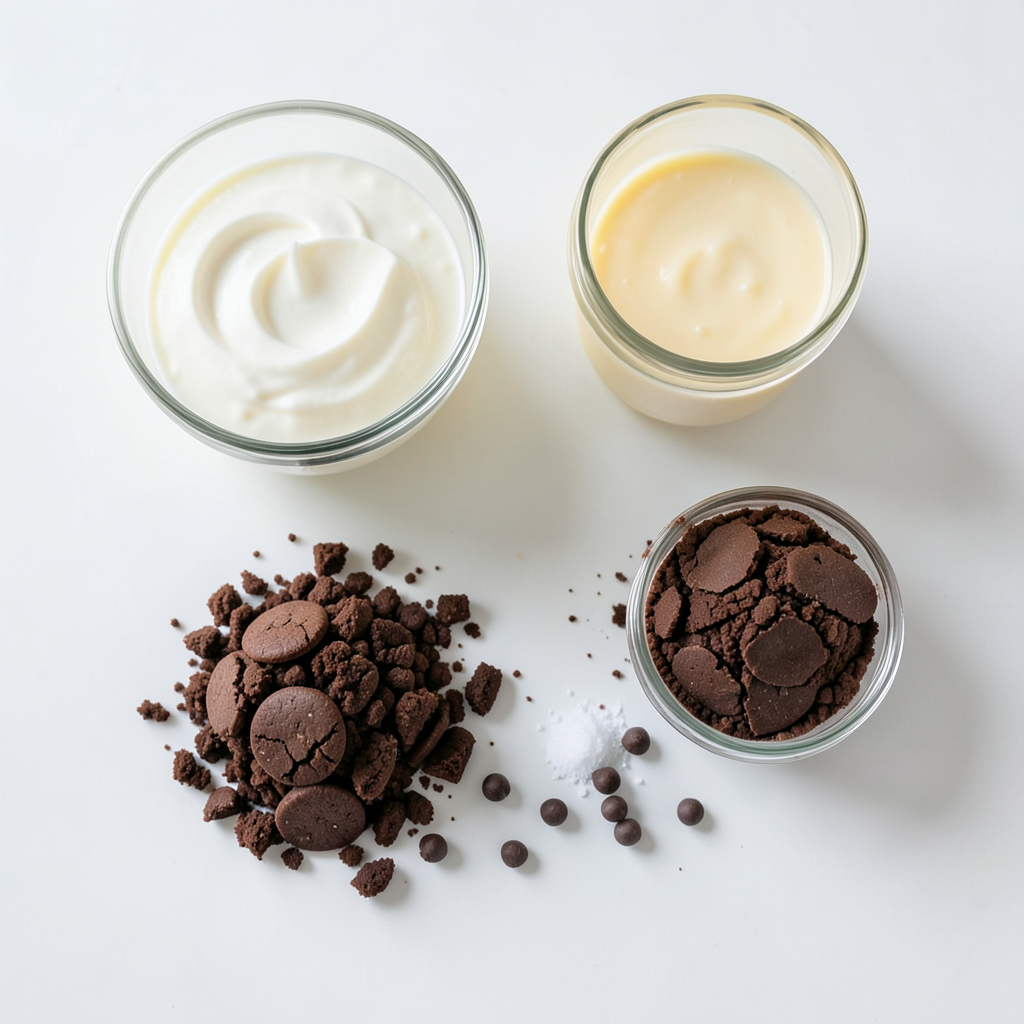
To make my no churn cookies and cream ice cream, you need these ingredients:
- 2 cups heavy cream
- 1 cup sweetened condensed milk
- 1 teaspoon vanilla extract
- 1 cup crushed chocolate sandwich cookies (like Oreos)
- 1/2 cup mini chocolate chips
- A pinch of salt
These simple ingredients come together to create a rich treat.
Ingredient Substitutions
You can swap some ingredients if needed. Here are some ideas:
- Heavy cream: Use coconut cream for a dairy-free option.
- Sweetened condensed milk: Try making your own or use a plant-based version.
- Chocolate sandwich cookies: Any chocolate cookie works, like chocolate wafers.
These swaps help you adjust for taste or dietary needs.
Importance of Quality Ingredients
Using quality ingredients makes a big difference. Fresh cream brings creaminess. Good cookies add crunch.
Sweetened condensed milk gives it sweetness and smoothness. When you choose high-quality items, your ice cream tastes better. Trust me; it’s worth it!
Step-by-Step Instructions
Preparation Overview
Making No Churn Cookies and Cream Ice Cream is simple and fun. You only need a few basic tools: a large mixing bowl, a spatula, and a mixer. The whole process takes about 15 minutes of work, plus freezing time. Gather your ingredients, and let’s start!
Mixing the Base
1. First, take a large mixing bowl. Add 2 cups of heavy cream and 1 cup of sweetened condensed milk.
2. Use an electric mixer. Beat the mixture on medium speed for about 2-3 minutes. You want it to be smooth and slightly thick.
3. Next, add 1 teaspoon of vanilla extract and a pinch of salt. Mix again until everything is well combined. This creates a rich and creamy base.
Folding in Cookies and Chips
1. Now, it’s time to add the fun stuff! Take 1 cup of crushed chocolate sandwich cookies (like Oreos) and 1/2 cup of mini chocolate chips.
2. Using a spatula, gently fold these into your ice cream base. Be careful not to over-mix. You want some cookie chunks for texture.
3. Once combined, pour the mixture into a loaf pan or an airtight container. Smooth the top with your spatula.
4. Cover the pan with plastic wrap or a lid. Freeze it for at least 6 hours, or until fully set.
Now you have a delicious treat waiting for you!
Tips & Tricks
Achieving the Perfect Texture
To get smooth ice cream, whip the cream well. Mix it until it thickens slightly. This makes it light and fluffy. Avoid over-mixing; you want air in the cream. When folding in cookies, do it gently. This keeps the texture nice and chunky.
Common Mistakes to Avoid
One mistake is not chilling your bowl. A cold bowl helps the cream whip faster. Another issue is not using enough cookies. You want a good crunch in every bite. Also, don’t skip the salt. It enhances the flavors and balances the sweetness.
Serving Suggestions
Serve your cookies and cream ice cream in bowls or cones. Add more crushed cookies on top for fun. Drizzle some chocolate sauce for extra sweetness. You can even serve it with whipped cream. This makes for a perfect treat on hot days or any day!
Pro Tips
- Chill Your Bowl: For an even creamier texture, chill your mixing bowl and beaters in the freezer for about 15 minutes before starting. This helps the cream whip up better.
- Cookie Variety: Feel free to experiment with different types of sandwich cookies, such as peanut butter or mint-flavored, to create unique flavor combinations.
- Texture Control: If you prefer a smoother ice cream, crush the cookies into finer pieces. For a chunkier texture, leave larger pieces intact.
- Storage Tips: Store any leftover ice cream in an airtight container with a layer of plastic wrap pressed against the surface to prevent ice crystals from forming.
Variations
Flavor Additions
You can change up the flavor of your cookies and cream ice cream. Try adding a splash of almond extract for a nutty twist. You can also mix in some crushed mint candy for a fresh taste. Another fun idea is to add a swirl of chocolate syrup before freezing. This will give your ice cream a rich, chocolatey layer.
Alternative Mix-Ins
Mix-ins can make your ice cream special. Instead of chocolate sandwich cookies, use peanut butter cookies. You can even try ginger snaps for a spicy kick. Want some crunch? Toss in crushed pretzels or nuts. You can also add in some fruit, like strawberries or bananas. These add a nice contrast to the creamy base.
Dairy-Free Option
If you want a dairy-free treat, it is easy to swap ingredients. Use coconut cream instead of heavy cream. You can find dairy-free condensed milk in stores or make your own. Just blend coconut milk with a little sugar. This will give you a sweet and creamy base. Add your favorite dairy-free cookies to keep that cookies and cream vibe. Enjoy a delicious treat that fits your diet!
Storage Info
Best Practices for Freezing
To keep your no churn cookies and cream ice cream fresh, use an airtight container. I like to use a loaf pan for easy scooping. Cover the top with plastic wrap. This helps prevent ice crystals from forming. Make sure the container is snug to avoid air exposure. Freeze the ice cream for at least 6 hours. The longer it freezes, the firmer it gets.
Shelf Life of No Churn Ice Cream
This ice cream can last up to 2 weeks in the freezer. After that, it may lose texture and flavor. For best taste, try to eat it within a week. Always check for ice crystals. If you see them, the ice cream may not be as creamy.
Reheating Tips for Leftovers
If your ice cream is too hard, let it sit at room temperature for 5-10 minutes. This softens it just enough for scooping. Never microwave ice cream; it can ruin the texture. Enjoy your ice cream in bowls or cones, topped with extra cookies if you like!
FAQs
What if I don’t have a mixer?
If you don’t have a mixer, don’t worry. You can still make ice cream. Use a whisk or a sturdy spoon. It will take more effort, but it works. Just mix the heavy cream and sweetened condensed milk until it thickens. Keep whisking for about 5 to 7 minutes. You want a smooth and thick texture.
Can I use other cookies?
Yes, you can use other cookies. Any chocolate cookie will work well. Try using chocolate chip cookies or even peanut butter cookies. Just crush them into small pieces. This way, you will still get that nice crunch. Each cookie will give a different taste. Feel free to mix and match your favorites.
How long does this ice cream last in the freezer?
This ice cream lasts about two weeks in the freezer. After that, it may lose its texture. To keep it fresh, store it in an airtight container. Make sure to press plastic wrap against the surface. This helps prevent ice crystals. If you want to enjoy it longer, label the container with the date.
This article shared all you need for making no-churn ice cream. You learned about key ingredients and how to pick quality ones. We covered step-by-step instructions for mixing and folding in your favorite goodies. You got tips for a great texture and ways to avoid common mistakes. Lastly, we explored tasty variations and proper storage tips.
Try new flavors and share your creations! Enjoy your homemade ice cream journey!