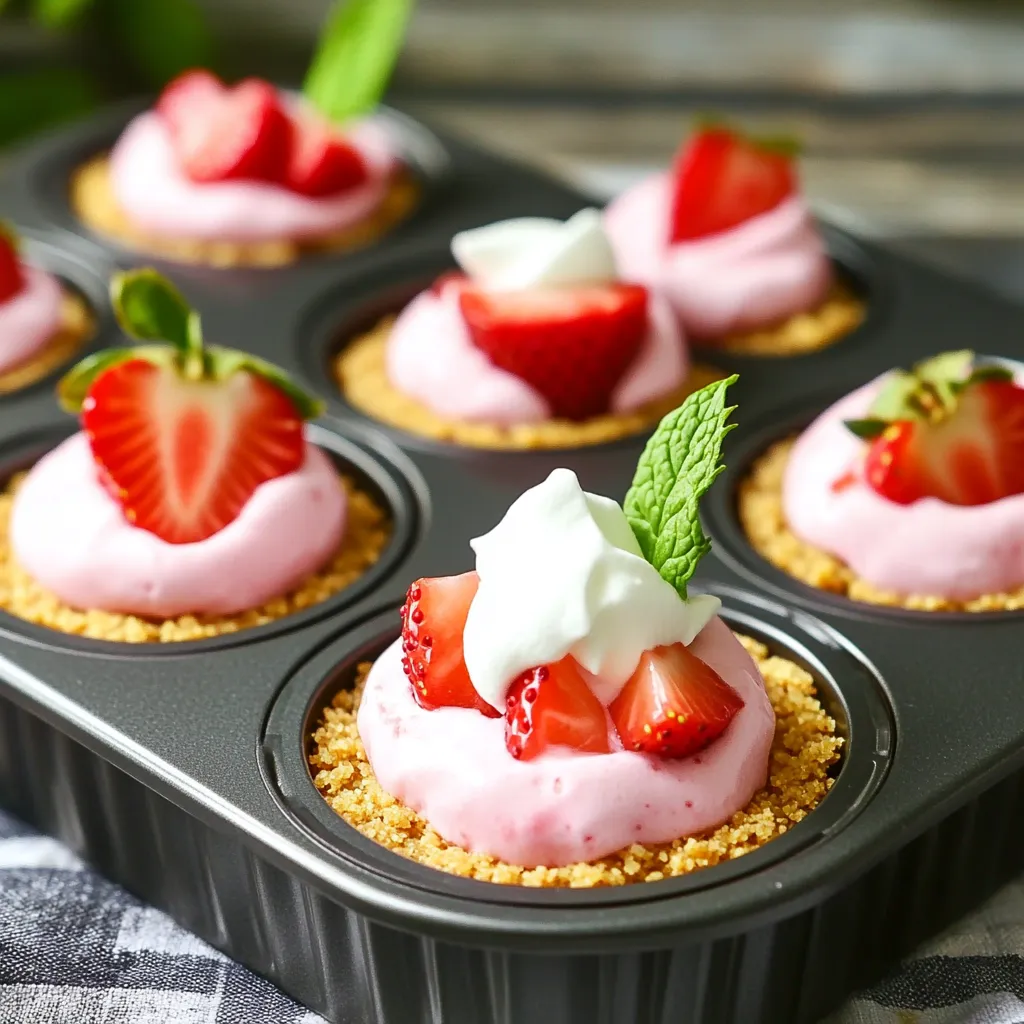
Looking for a sweet and easy treat? You’ll love these No Bake Strawberry Cheesecake Bites! They’re quick to make and need no baking. With just a few simple ingredients, you can whip up a delicious dessert that’s perfect for sharing. Whether you’re an experienced baker or a beginner, this guide will help you create a bite-sized delight that everyone will crave. Let’s dive into the sweet details!
Ingredients
List of Ingredients for No Bake Strawberry Cheesecake Bites
To make these tasty cheesecake bites, gather these simple ingredients:
– 1 cup graham cracker crumbs
– 1/4 cup melted coconut oil
– 1/4 cup honey or maple syrup
– 8 oz cream cheese, softened
– 1/3 cup powdered sugar
– 1 teaspoon vanilla extract
– 1 cup fresh strawberries, chopped
– 1/4 cup whipped cream (optional, for topping)
– Fresh mint leaves (for garnish, optional)
These ingredients blend together to create a creamy, fruity treat that bursts with flavor.
Optional Toppings and Garnishes
You can make your cheesecake bites even more special with some fun toppings:
– A dollop of whipped cream adds a nice touch.
– A fresh slice of strawberry on top looks pretty and tastes great.
– Mint leaves can enhance the look and add a fresh flavor.
Feel free to mix and match these toppings to suit your taste!
Ingredient Substitutions
If you need to swap some ingredients, here are a few easy ideas:
– Instead of graham cracker crumbs, use crushed cookies or nuts for a different base.
– Swap coconut oil for unsalted butter if you prefer.
– For a vegan option, use a plant-based cream cheese.
– Maple syrup can replace honey for a vegan-friendly sweetener.
These substitutions can help you tailor the recipe to your dietary needs while keeping it delicious!
Step-by-Step Instructions
Preparation of the Crust
For the crust, grab a mixing bowl. Add 1 cup of graham cracker crumbs, 1/4 cup of melted coconut oil, and 1/4 cup of honey or maple syrup. Mix these until everything is well combined. The mixture should feel like damp sand. This texture helps it hold together well.
Next, take a mini muffin tin and line it with paper liners. Divide the crumb mixture evenly among the cups. Press down firmly to shape each crust. Make sure it is compact. A firm crust will keep the bites intact.
Making the Cheesecake Filling
In a separate bowl, take 8 oz of softened cream cheese. Beat it until smooth and creamy. Then, add 1/3 cup of powdered sugar and 1 teaspoon of vanilla extract. Mix well until it is fully combined. This should take only a minute or two.
Now, chop 1 cup of fresh strawberries. Gently fold the chopped strawberries into the cream cheese mixture. Be careful not to crush them too much. You want nice bits of strawberry in each bite.
Assembling the Cheesecake Bites
Now it’s time to fill the crusts. Spoon the strawberry cheesecake filling over each crust in the muffin tin. Use a spatula to smooth the tops. Make sure each bite is filled to the brim.
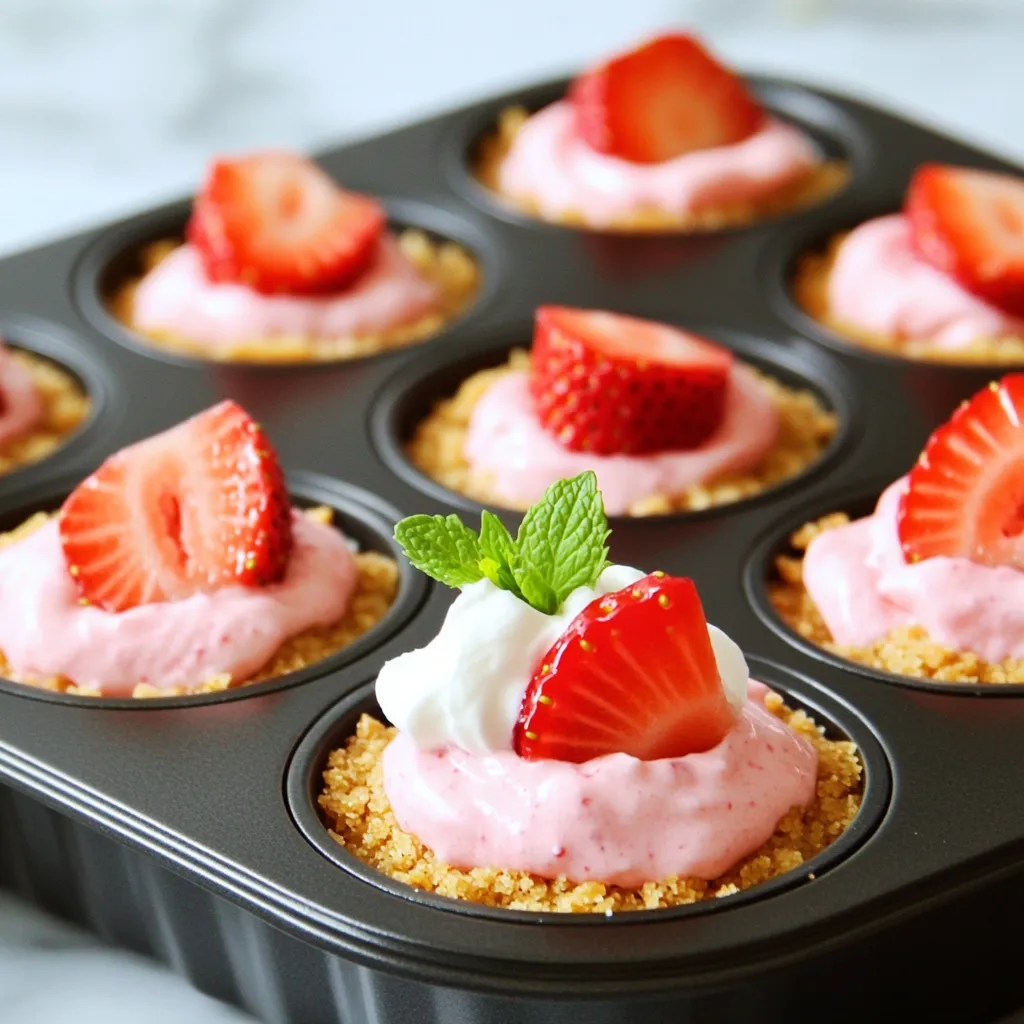
Once filled, place the muffin tin in the fridge. Let them chill for at least 2 hours. This helps the bites firm up nicely. When they are set, carefully remove them from the tin and peel off the paper liners.
If you like, you can add a dollop of whipped cream on top of each bite. A slice of fresh strawberry and a mint leaf can add a nice touch as well. Enjoy your tasty no-bake treats!
Tips & Tricks
How to Ensure Smooth Cream Cheese Mixture
To get a smooth cream cheese mixture, start with softened cream cheese. Cold cream cheese can be lumpy. I like to let it sit at room temp for about 30 minutes. Then, use a hand mixer or a whisk to beat it well. Mix until it’s creamy and free of lumps. Adding the powdered sugar and vanilla helps too. Make sure to mix it all together until you see no white bits.
Tips for Pressing the Crust Firmly
Pressing the crust firmly is key for good bites. Use the back of a spoon or your fingers. I find that pressing down in the middle first works best. Then, push it out toward the edges. This helps the crust hold together. Make sure each bite has a solid base. If it feels too loose, give it another press. A firm crust keeps the filling from leaking out.
Storing and Serving Suggestions
Store these bites in the fridge. Use an airtight container to keep them fresh. They last about 3 days. If you want to serve them later, wait to add toppings. Top each bite just before serving. I love to add a dollop of whipped cream and a fresh strawberry slice. A mint leaf on top adds a nice touch. These bites are great for parties or just a sweet treat at home!
Variations
Different Fruit Options for Cheesecake Bites
You can switch up the fruit in these cheesecake bites. Blueberries, raspberries, and even peaches work great. Each fruit brings its own flavor and color. For blueberries, use a cup of fresh ones. For raspberries, mash them slightly before mixing. Peaches add a nice sweetness. Whatever fruit you choose, it can make your bites unique and fun.
Dairy-Free and Vegan Alternatives
If you want a dairy-free treat, swap cream cheese for cashew cream. Soak cashews in water overnight, then blend until smooth. Use maple syrup instead of honey for a vegan option. Coconut cream can also replace whipped cream. These changes keep the bites creamy and delicious without dairy.
Adding Flavor Variations to the Filling
Mixing in flavors can make your cheesecake bites special. Try adding lemon zest or a splash of almond extract. This will brighten the taste. You could also fold in chocolate chips for a sweet twist. Another option is to add spices like cinnamon or nutmeg. Each flavor gives a new and exciting taste to your bites.
Storage Info
Best Ways to Store No Bake Strawberry Cheesecake Bites
To keep your no bake strawberry cheesecake bites fresh, store them in an airtight container. I like to use glass containers with tight lids. This helps keep the bites from drying out. If you have any toppings, like whipped cream, add them just before serving.
How Long They Last in the Fridge
These bites usually last for about 3 to 5 days in the fridge. Make sure to check for any signs of spoilage before digging in. If they look or smell off, it’s best to throw them away. I recommend enjoying them within the first few days for the best taste.
Freezing Instructions for Longer Storage
If you want to keep them longer, you can freeze the cheesecake bites. Place them in a single layer on a baking sheet. Once they are frozen solid, transfer them to a freezer-safe bag or container. They can last up to 2 months in the freezer. To eat, just thaw them in the fridge overnight.
FAQs
Can I make these cheesecake bites ahead of time?
Yes, you can make these cheesecake bites ahead of time. They are perfect for meal prep. Just follow the recipe and store them in the fridge. They taste best when chilled. You can make them a day or two in advance. Just keep them covered to stay fresh.
What if I don’t have a mini muffin tin?
If you don’t have a mini muffin tin, don’t worry! You can use small cups or ramekins instead. Just make sure they are the right size for bites. You can also use a regular muffin tin. Your bites will just be a bit larger. Just adjust the chilling time since larger bites may take longer to set.
How do I know when they are set and ready to eat?
You can tell they are set when they feel firm to the touch. After chilling for at least 2 hours, check them. If they hold their shape and do not wobble, they are ready. You can also check by gently pressing the top. If it feels solid, they are good to go!
In this post, we covered how to make no-bake strawberry cheesecake bites. We discussed key ingredients, optional toppings, and handy substitutions. The step-by-step instructions guide you through preparing the crust and filling, then assembling the bites. We shared tips for a smooth cream cheese mix and firm crust. You learned about variations using different fruits and dairy-free options. Finally, storage tips ensure your bites stay fresh. Enjoy this easy treat, perfect for any occasion!