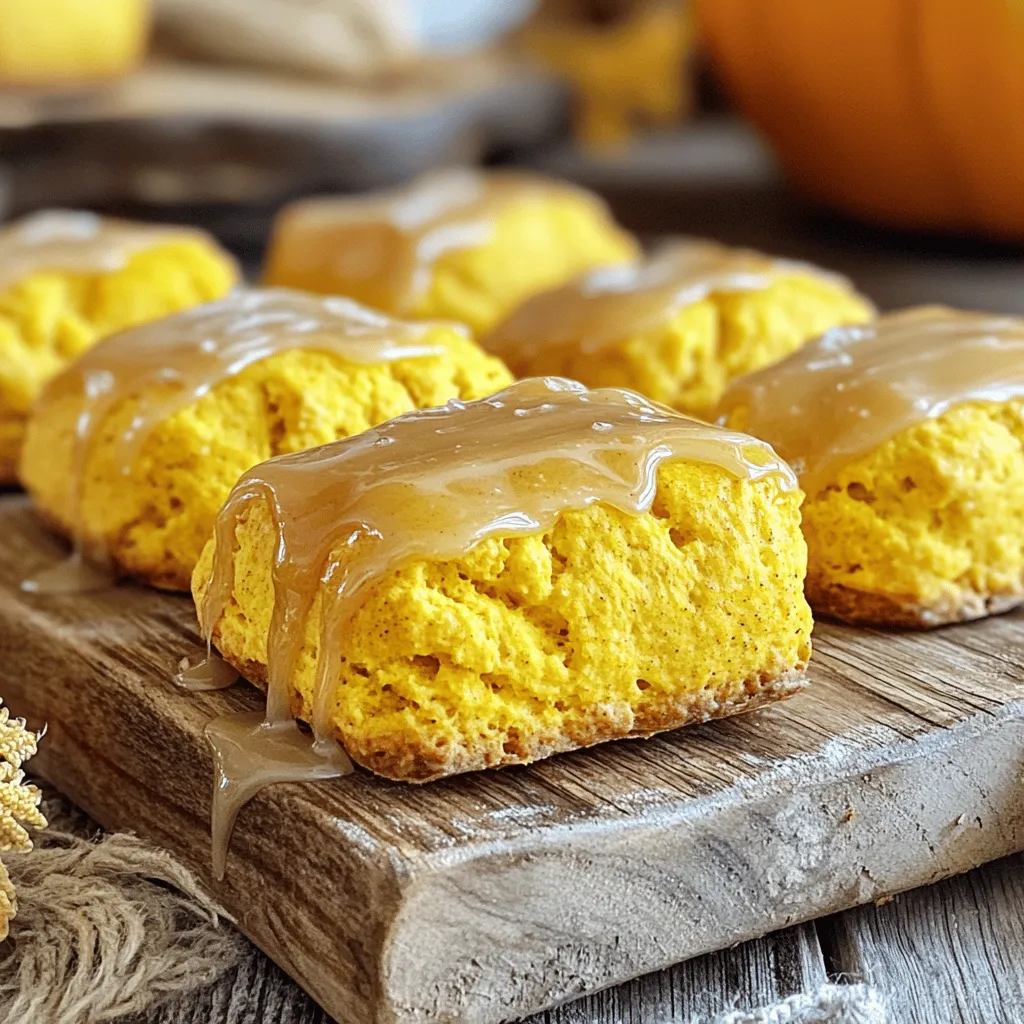
If you love warm, sweet treats, you’re in for a delight! Today, I’ll show you how to make Maple Glazed Pumpkin Scones—a simple and tasty treat perfect for any occasion. With easy steps and common ingredients, these scones will wow your family and friends. Let’s get started on this delicious fall favorite that brings the cozy flavors of pumpkin right to your kitchen!
Ingredients
List of Required Ingredients
To make Maple Glazed Pumpkin Scones, you will need the following ingredients:
Dry Ingredients
– 2 cups all-purpose flour
– 1/2 cup brown sugar, packed
– 1 tablespoon baking powder
– 1/2 teaspoon baking soda
– 1/4 teaspoon salt
– 1 teaspoon ground cinnamon
– 1/2 teaspoon ground nutmeg
– 1/4 teaspoon ground ginger
Wet Ingredients
– 1/2 cup cold unsalted butter, cubed
– 1/2 cup canned pumpkin puree
– 1/4 cup heavy cream
– 1 large egg
– 1 teaspoon vanilla extract
Ingredients for Maple Glaze
– 1 cup powdered sugar
– 2 tablespoons pure maple syrup
– 1-2 tablespoons milk (as needed for consistency)
These ingredients are simple and easy to find. You may already have some in your kitchen. I love the warm flavors of cinnamon and nutmeg mixed with the sweet pumpkin. The maple glaze adds a perfect touch of sweetness.Enjoy every bite!
Step-by-Step Instructions
Preparing the Oven and Baking Sheet
First, we need to get the oven ready. Preheat your oven to 400°F (200°C). While that heats up, line a baking sheet with parchment paper. This will stop the scones from sticking.
Mixing the Dry Ingredients
Now, let’s mix the dry ingredients. In a large bowl, whisk together:
– 2 cups all-purpose flour
– 1/2 cup brown sugar, packed
– 1 tablespoon baking powder
– 1/2 teaspoon baking soda
– 1/4 teaspoon salt
– 1 teaspoon ground cinnamon
– 1/2 teaspoon ground nutmeg
– 1/4 teaspoon ground ginger
Make sure everything is well combined. This mix gives our scones great flavor.
Combining Wet Ingredients and Forming the Dough
Next, grab another bowl for the wet ingredients. Whisk together:
– 1/2 cup canned pumpkin puree
– 1/4 cup heavy cream
– 1 large egg
– 1 teaspoon vanilla extract
Mix until smooth. Then, pour this wet mix into the dry mix. Stir gently until just combined. The dough should be soft but not sticky. Be careful not to overmix, as this can make the scones tough.
Shaping and Baking the Scones
Turn the dough onto a floured surface. Gently knead it a few times to bring it together. Pat the dough into a circle about 1 inch thick. Cut it into wedges, like a pizza, or use a round cutter for biscuit-style scones. Place them on the prepared baking sheet. Bake for 15-20 minutes, until they are golden brown. A toothpick should come out clean when poked in the center.
Preparing the Maple Glaze
While the scones bake, let’s make the glaze. In a small bowl, whisk together:
– 1 cup powdered sugar
– 2 tablespoons pure maple syrup
– 1-2 tablespoons milk (as needed for consistency)
Keep whisking until it is smooth and glossy. This glaze adds a sweet touch.
Final Glazing and Serving
Once the scones cool for a few minutes, drizzle the maple glaze over them while they are still warm. Let the glaze set for a few minutes. Now, you are ready to enjoy your delicious Maple Glazed Pumpkin Scones! Pair them with your favorite warm drink for the best treat.
Tips & Tricks
Achieving the Perfect Dough Consistency
To get the right dough, start with cold butter. This keeps the scones flaky. When you mix the wet and dry ingredients, stop as soon as they come together. The dough should feel soft but not sticky. If it feels too dry, add a splash of cream. If it’s too wet, sprinkle in a bit of flour.
Preventing Overmixing
Mixing too much can make scones tough. When you combine the wet and dry ingredients, use a gentle hand. Stir just until no dry flour shows. A few lumps are okay! This keeps your scones light and fluffy.
Ensuring Even Baking
To bake scones evenly, make sure they are all the same size. If you cut them into wedges, aim for equal pieces. For round scones, use a biscuit cutter and press straight down. Space them about an inch apart on the baking sheet. This allows heat to circulate around each scone, giving you a nice golden finish.
Try these tips when you make your Maple Glazed Pumpkin Scones for the best results!

Variations
Adding Nuts or Chocolate Chips
You can add nuts or chocolate chips to your pumpkin scones for extra flavor. Chopped walnuts or pecans work well. They add a nice crunch to the soft scone. If you love chocolate, mix in some semi-sweet chocolate chips. Add about 1/2 cup of your choice to the dough. Make sure to fold them in gently so you don’t overmix the dough.
Flavor Variations (Spices or Extracts)
Feel free to change the spices or add extracts to make your scones unique. You can try adding a dash of allspice or clove for a warm kick. Replace the vanilla extract with almond extract for a different taste. You could even add a splash of maple extract to enhance the maple flavor. Just remember to start with a small amount. You can always add more if needed.
Gluten-Free Option
If you need a gluten-free option, it’s easy to adapt this recipe. Use a gluten-free flour blend instead of all-purpose flour. Make sure the blend contains xanthan gum for better texture. The scones may bake a bit differently, so keep an eye on them in the oven. Check for that lovely golden brown color.
Storage Info
How to Store Leftover Scones
Store leftover scones in an airtight container. Place them in a cool, dry spot. They stay fresh for about two days. For longer storage, keep them in the fridge. This helps maintain their softness.
Reheating Instructions
To reheat scones, preheat your oven to 350°F (175°C). Place scones on a baking sheet. Heat them for about 5 to 10 minutes. This brings back their warmth and crispness. You can also use a microwave. Heat each scone for about 15-20 seconds. This method is quick, but the texture may change.
Freezing for Later Use
You can freeze scones to enjoy later. Allow them to cool completely first. Wrap each scone tightly in plastic wrap. Then place them in a freezer bag. They can last up to three months. To eat, thaw overnight in the fridge. Reheat as mentioned above. Enjoy your Maple Glazed Pumpkin Scones fresh, even after freezing!
FAQs
Can I use fresh pumpkin instead of canned?
Yes, you can use fresh pumpkin. Start by roasting or boiling pumpkin until soft. Then, mash it well. Use the same amount as canned pumpkin puree. Fresh pumpkin adds great flavor and nutrition.
How do I know when the scones are done baking?
Look for a golden brown color on the tops. You can also use a toothpick. Insert it into the center of a scone. If it comes out clean, the scones are done. They should feel firm, not wet.
What can I serve with maple glazed pumpkin scones?
These scones pair well with hot drinks like coffee or tea. You can also serve them with jam, butter, or cream cheese. For a fun twist, try them with spiced apple butter.
How long do these scones stay fresh?
Store the scones in an airtight container. They stay fresh for about 2-3 days at room temperature. For longer storage, freeze them. Just wrap them well, and they can last up to 3 months. Enjoy your maple glazed pumpkin scones!
You now have all the steps to make delicious scones. We covered the key ingredients, preparation, and baking. The maple glaze adds a sweet touch. Remember to follow tips for the best dough and an even bake. You can even try fun variations to suit your taste. Store leftover scones properly to keep them fresh. With these easy instructions, you can enjoy tasty treats anytime. Happy baking!