If you love the sweet, buttery crunch of vanilla wafers, you’re in for a treat! In this simple baking recipe, I’ll guide you through making your own homemade vanilla wafers from scratch. They’re easy to whip up and perfect for sharing—or enjoying all by yourself. Get ready to impress your friends and family with these delightful cookies that are great for any occasion! Let’s dive into the tasty details!
Ingredients
List of Ingredients
– 2 cups all-purpose flour
– 1 teaspoon baking powder
– 1/2 teaspoon baking soda
– 1/2 teaspoon salt
– 3/4 cup unsalted butter, softened
– 1 cup granulated sugar
– 1 large egg
– 2 teaspoons pure vanilla extract
– 1 teaspoon almond extract (optional for extra flavor)
– 1/2 cup powdered sugar (for dusting)
Measurement Details
When I measure ingredients, I make sure to level off the flour. This helps me avoid too much flour in my dough. For the butter, I let it soften at room temperature. This step makes it easy to cream with sugar. I use a standard measuring cup for dry and wet ingredients. Accurate measurements lead to better cookies.
Optional Add-Ins
If you want to mix things up, try adding 1/2 cup of mini chocolate chips. They add a rich touch to the cookies. You can also use 1/2 cup of chopped nuts for some crunch. Dried fruits like raisins or cranberries can bring a bit of sweetness. These add-ins let you customize your wafers for different tastes.
Step-by-Step Instructions
Prepping for Baking
First, gather all your ingredients. You need flour, baking powder, baking soda, salt, butter, sugar, an egg, and vanilla extract. If you want a twist, add almond extract. Preheat your oven to 350°F (175°C). Line two baking sheets with parchment paper. This step helps the cookies not stick.
Mixing the Dough
In a medium bowl, whisk together the flour, baking powder, baking soda, and salt. Set this bowl aside. In a larger bowl, use an electric mixer to beat the softened butter and granulated sugar. Mix until it looks light and fluffy, about 2-3 minutes. Then, add in the egg and vanilla extract. If you’re using almond extract, add that too. Mix everything until it blends well. Slowly add your dry mix to the wet mix. Keep mixing on low speed until just combined. Don’t overmix; it’s key for soft cookies.
Baking and Cooling
Now it’s time to bake! Use a teaspoon or small cookie scoop to drop rounded tablespoons of dough onto your baking sheets. Space them about 2 inches apart. Flatten each cookie slightly with your fingers or a spoon. Place them in the oven and bake for 10-12 minutes. Look for golden edges; that’s how you know they’re done. After baking, let them cool on the sheets for about 5 minutes. Then, move them to a wire rack to cool completely. Once cool, dust the cookies with powdered sugar to make them look fancy. Enjoy your delightful homemade vanilla wafers!
Tips & Tricks
Common Mistakes to Avoid
Baking is fun but can be tricky. Here are some common mistakes to watch out for:
– Overmixing the dough: This can make your cookies tough. Mix just until combined.
– Not measuring flour correctly: Use the spoon and level method for accuracy.
– Baking on a cold sheet: Always preheat your oven and use a lined baking sheet.
How to Achieve Perfect Texture
To get that crisp yet tender texture, follow these tips:
– Use room temperature butter: Softened butter blends better, helping to create air and lightness.
– Flatten the cookies slightly: This gives them a traditional wafer shape and helps even baking.
– Watch the bake time: Take them out when the edges are golden brown, not too dark.
Serving Suggestions
These vanilla wafers are great on their own but can shine even more:
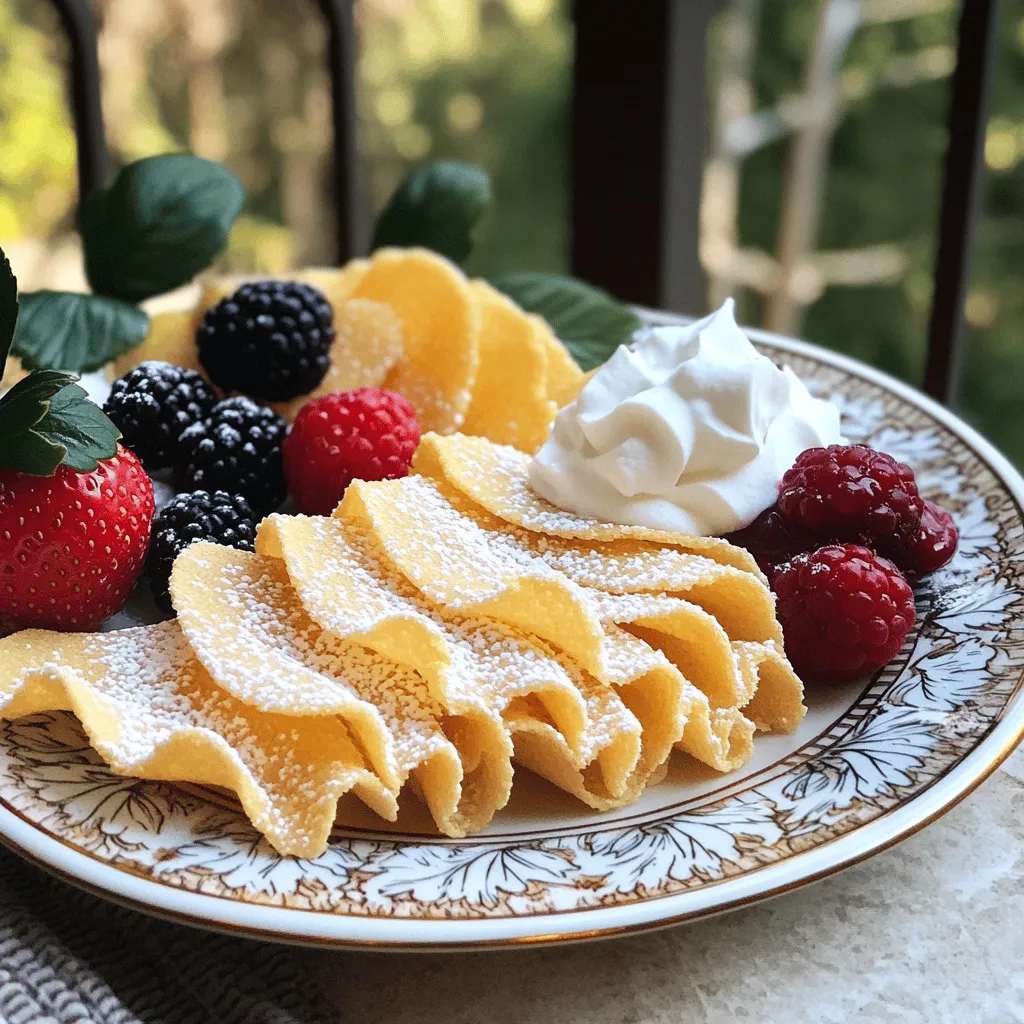
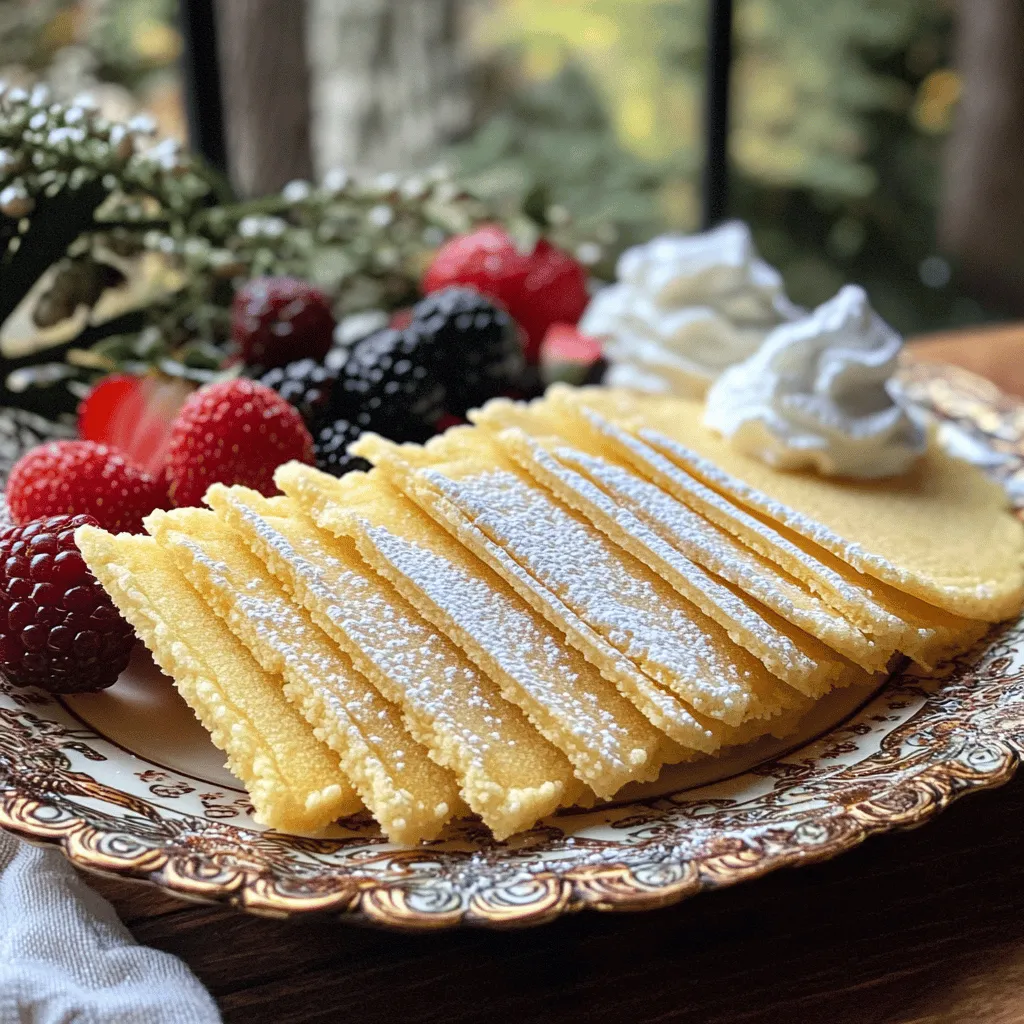
– Serve with fresh berries: A burst of color and flavor adds a lovely touch.
– Pair with whipped cream: This makes for a delightful dessert experience.
– Use as a base for banana pudding: Layer them with pudding and bananas for a classic treat.
Variations
Flavor Variations
You can give your vanilla wafers a twist by adding flavors. Try using lemon zest for a fresh taste. A bit of cocoa powder makes chocolate wafers. You can even add spices like cinnamon or nutmeg for warmth. Almond extract adds a nice depth, too. Each option gives a new spin to your homemade treats.
Alternative Ingredients
If you want to swap out some ingredients, you have options. Substitute coconut oil for butter for a dairy-free choice. You can use whole wheat flour instead of all-purpose flour for more fiber. Maple syrup can replace granulated sugar for a unique flavor. Experimenting with these swaps can lead to fun results.
Dietary Modifications
Making these wafers fit different diets is easy. For vegan wafers, use a flax egg instead of a real egg. You can replace the butter with vegan margarine or coconut oil. If you need gluten-free wafers, use a gluten-free flour blend. These changes keep the cookies tasty while meeting dietary needs.
Storage Info
Best Ways to Store Homemade Vanilla Wafers
To keep your homemade vanilla wafers fresh, store them in an airtight container. This will stop air from making them soft. Layer the wafers with parchment paper to keep them from sticking together. You can also use a cookie tin for a charming touch.
Shelf Life and Freezing Tips
Homemade vanilla wafers last about one week at room temperature. If you want to keep them longer, freeze them. Place the cooled cookies in a freezer bag, squeezing out as much air as possible. They can last up to three months in the freezer. When you’re ready to enjoy them, just thaw at room temperature.
Reheating Instructions
If your cookies lose their crunch, you can easily refresh them. Preheat your oven to 300°F (150°C). Place the cookies on a baking sheet and warm them for about 5 minutes. This restores their crispness. Enjoy your delicious wafers again!
FAQs
Can I use whole wheat flour instead of all-purpose flour?
Yes, you can use whole wheat flour. The cookies will have a nuttier taste. They may also be a bit denser, but they will still taste great. Start with a mix of half whole wheat and half all-purpose for best results.
How can I make these cookies gluten-free?
To make gluten-free cookies, use a gluten-free flour blend. Look for blends made for baking. Make sure your baking powder is gluten-free too. This swap keeps the texture light and crispy.
What can I serve with homemade vanilla wafers?
You can serve vanilla wafers with many treats. They pair well with whipped cream, fresh berries, or ice cream. Try them in a banana pudding for a classic dessert. You can even enjoy them plain with a cup of tea or coffee.
How do I know when the cookies are done baking?
Cookies are done when the edges turn golden brown. The center may look a bit soft, but that’s fine. They will firm up as they cool. Avoid overbaking for the best texture.It includes all the steps and tips you need to make these tasty treats!
We covered how to make delightful vanilla wafers step by step. You learned the key ingredients, measurements, and tips for mixing and baking. I shared common mistakes and ways to achieve that perfect texture. We explored fun flavor variations and how to store your cookies.
Creating these treats can be simple and fun. With the right guidance, you can enjoy perfect vanilla wafers every time. Happy baking!