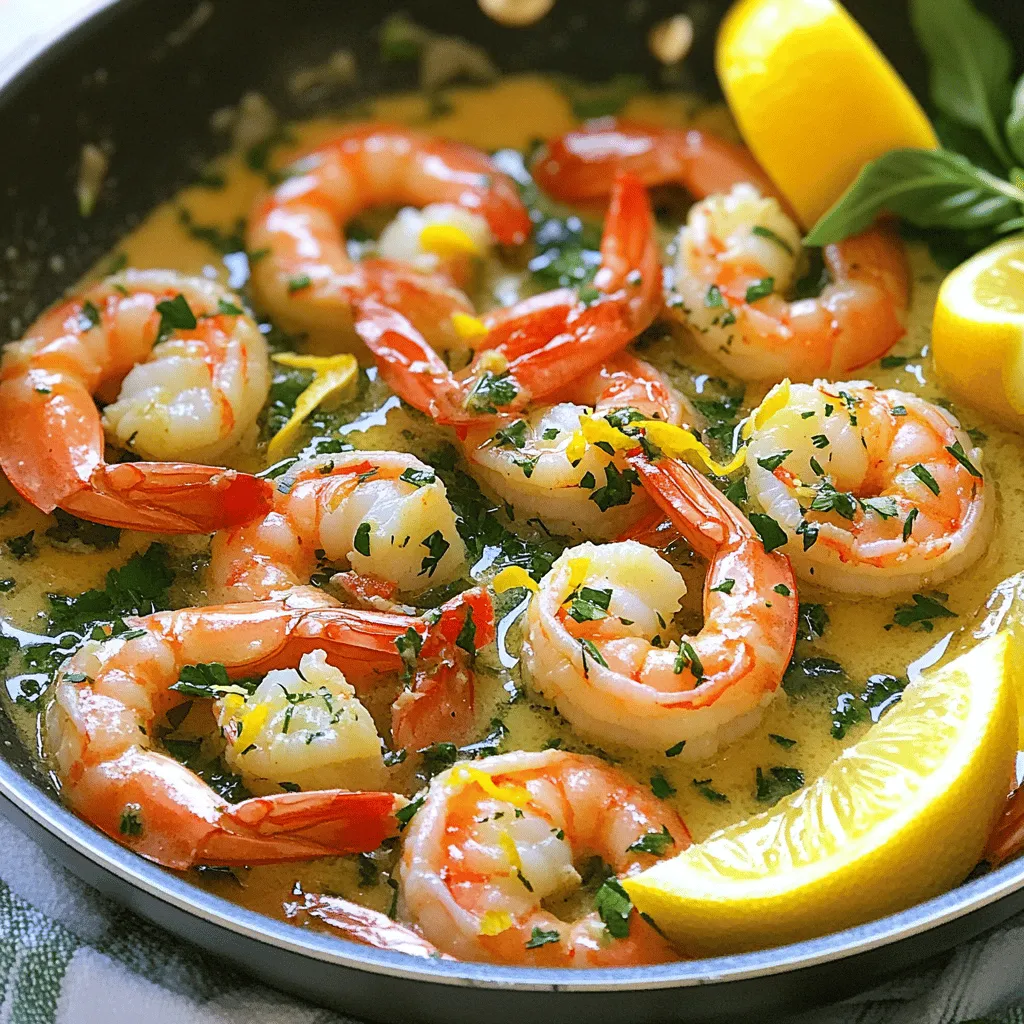
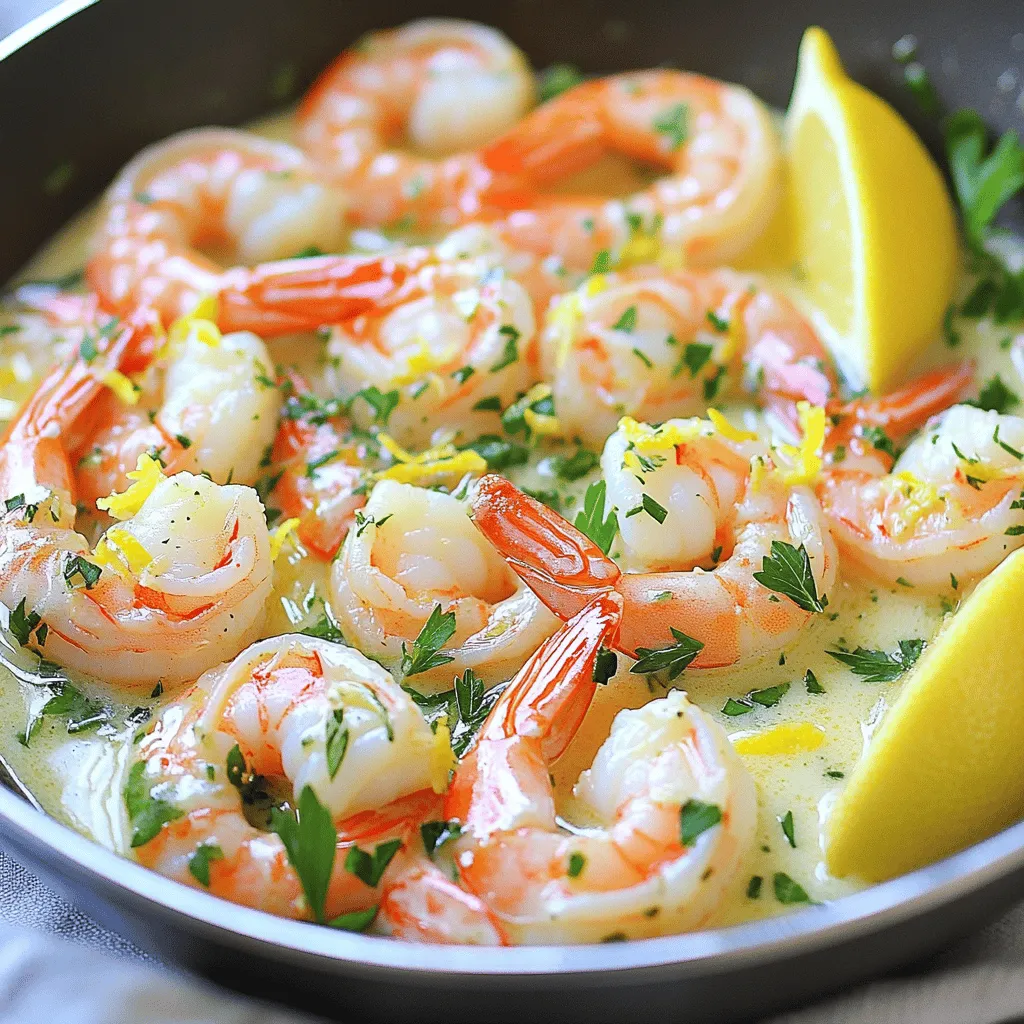
Craving a quick yet tasty meal? Look no further than Garlic Butter Herb Shrimp! This dish is perfect for busy days or surprise guests. You’ll whip it up in minutes using fresh ingredients like shrimp, butter, and herbs. Stick around as I share easy steps, helpful tips, and even ways to switch up the recipe. Let’s dive into this flavorful adventure you can create in no time!
Ingredients
Detailed List of Ingredients
– 1 lb (450g) large shrimp, peeled and deveined
– 4 tablespoons unsalted butter
– 5 cloves garlic, minced
– 1 teaspoon paprika
– 1 tablespoon fresh parsley, finely chopped
– 1 tablespoon fresh basil, finely chopped
– 1 tablespoon fresh thyme leaves
– Zest of 1 lemon
– Juice of 1/2 lemon
– Salt and freshly ground black pepper to taste
– Optional: Lemon wedges and additional herbs for garnish
Let’s dive into the ingredients that make Garlic Butter Herb Shrimp a quick and tasty meal.
First, we need shrimp. I love using large shrimp because they cook quickly and stay juicy. Look for shrimp that are fresh or frozen but peeled and deveined. This saves time and effort.
Next, butter is key. Unsalted butter gives a rich base. It melts down and makes everything taste great.
Garlic adds a punch. Fresh garlic brings out the best flavor. I use five cloves, but you can adjust to your taste.
Paprika adds a warm color and mild spice. Just a teaspoon is enough to give it a nice kick without overpowering the dish.
Fresh herbs are a must! I use parsley, basil, and thyme. They add bright flavors. Each herb brings its own unique taste, making the dish lively and fresh.
You can’t forget the lemon! The zest adds a fragrant note while the juice brightens the dish.
Finally, season with salt and pepper to taste. This will help bring all the flavors together.Enjoy the cooking!
Step-by-Step Instructions
Preparation of Ingredients
Peeling and Deveining Shrimp
Start with the shrimp. You want to peel off the shell and remove the dark vein. This keeps the shrimp clean and tasty. Use a sharp knife to cut along the back. It’s quick and easy!
Mincing Garlic
Next, grab your garlic cloves. Use a knife to chop them into tiny bits. The smaller, the better! This step adds great flavor to your dish. Fresh garlic makes a big difference.
Chopping Herbs
Now, take your fresh herbs. You will need parsley, basil, and thyme. Use scissors or a knife to chop them finely. This helps release their wonderful aroma. Fresh herbs add a burst of color and flavor.
Cooking Instructions
Melting Butter and Sautéing Garlic
Heat a large skillet over medium heat. Add the butter and let it melt until bubbly. Once melted, toss in the minced garlic. Sauté it for 1-2 minutes. You want it fragrant but not brown.
Adding Shrimp and Seasoning
Now, it’s time for the shrimp. Place the peeled shrimp in the skillet. Season them with salt and pepper. Cook for 2-3 minutes on one side. You’ll see them start to turn pink.
Incorporating Lemon and Herbs
Flip the shrimp over. Add lemon zest, lemon juice, and your chopped herbs. Mix everything well. Cook for another 2-3 minutes. The shrimp should be fully cooked and opaque.
Final Touches
Adjusting Seasonings
Take a moment to taste your dish. Adjust the salt and pepper to your liking. This step is important for great flavor.
Presentation Suggestions
For a lovely presentation, serve your shrimp on a nice plate. You can add lemon wedges and extra herbs on top. This makes your dish look as good as it tastes.
Tips & Tricks
Cooking Techniques for Perfect Shrimp
Avoiding Overcooking
Overcooked shrimp can be tough and rubbery. To avoid this, cook shrimp until they turn pink and opaque. This usually takes about 2-3 minutes on each side. Keep a close eye on them. If they start curling tightly, it’s time to take them off the heat.
Ensuring Even Cooking
To ensure even cooking, spread the shrimp in a single layer in the skillet. Avoid crowding them. If your skillet is small, cook in batches. This allows the shrimp to sear well and develop a nice flavor.
Storage and Reheating Best Practices
Recommended Storage Containers
For storing leftovers, use airtight containers. Glass or BPA-free plastic works best. Let the shrimp cool completely before sealing. This prevents moisture buildup, keeping them fresh longer.
Reheating Methods for Best Flavor
When reheating, do it gently. Use a skillet over low heat. Add a splash of water or broth to keep them moist. Avoid the microwave, as it can make shrimp tough.
Enhancing Flavor Profiles
Additional Seasonings to Consider
You can add more depth to your garlic butter herb shrimp. Try a pinch of red pepper flakes for heat. Alternatively, a splash of white wine can boost flavor. Experiment with herbs like dill or cilantro for a twist.
Experimenting with Condiments
Don’t be afraid to play with condiments. A drizzle of sriracha or a dollop of aioli can elevate your dish. You can also serve shrimp with a side of tartar sauce or mango salsa for added flavor.
Variations
Garlic Butter Herb Shrimp with Different Proteins
You can swap shrimp for other proteins. Scallops make a great choice. They cook fast and soak up all the flavors. Chicken is another option. Use bite-sized pieces for even cooking. Just adjust the cooking time. Chicken may take a bit longer to cook. Always check for doneness before serving.
Dietary Modifications
You can easily adapt this recipe for different diets.
Gluten-Free Options
This recipe is already gluten-free. Just ensure your butter and seasoning are free from gluten. Fresh herbs and lemon add flavor without any gluten.
Dairy-Free Alternatives
For a dairy-free version, use olive oil instead of butter. This keeps the dish light and healthy. The garlic and herbs will still shine through.
Serving Suggestions
Pair your garlic butter herb shrimp with tasty sides.
Complementary Side Dishes
Rice or quinoa makes a great base. They soak up the garlic butter well. Steamed veggies like asparagus or broccoli add color and nutrients. A fresh salad with greens and lemon dressing complements the dish nicely.
Pairing with Sauces or Salads
A light sauce, like a lemon vinaigrette, brightens the meal. You can also serve the shrimp over a bed of greens. This adds freshness and crunch, making each bite delightful.
Storage Info
How to Store Leftovers
To keep your garlic butter herb shrimp fresh, follow these steps:
– Refrigeration: Store leftovers in an airtight container. Place them in the fridge. They will stay good for up to three days.
– Freezing: You can freeze the shrimp too. Use a freezer-safe bag or container. They can last for up to three months in the freezer.
Duration of Freshness
Knowing how long your shrimp lasts helps save food. Here’s what to keep in mind:
– Recommended Timeframe for Storage: In the fridge, enjoy your leftovers within three days. In the freezer, use them within three months for the best taste.
– Signs of Spoilage: If the shrimp smells off or looks slimy, toss it out. Fresh shrimp should smell like the sea and be firm to the touch.
FAQs
Common Questions about Garlic Butter Herb Shrimp
How long does it take to cook shrimp?
Shrimp cooks very fast. It takes about 4-6 minutes total. You want them pink and firm.
Can I use frozen shrimp for this recipe?
Yes, frozen shrimp work well! Just thaw them first. You can run them under cold water.
What can I substitute for fresh herbs?
If you don’t have fresh herbs, use dried ones. Use one-third of the amount.
Recipe-Specific Queries
What other ingredients can I add to enhance the dish?
You can add veggies like bell peppers or snap peas. For heat, try red pepper flakes.
How do I know when shrimp is fully cooked?
Cooked shrimp turns pink and curls up. It should also look opaque.
Nutritional Information
Caloric Content Per Serving
Each serving has about 300 calories. This depends on how much butter you use.
Key Nutritional Benefits of Ingredients
Shrimp is high in protein and low in fat. Garlic boosts your immune system. Fresh herbs add vitamins and flavor.
In this post, we explored how to make Garlic Butter Herb Shrimp. I shared the key ingredients like shrimp, garlic, and spices. You learned how to prepare and cook shrimp to perfection. We also covered tips for storage and reheating. Remember, you can tweak this dish for different diets and preferences. Try different proteins or fresh herbs to suit your taste. With these steps, you can enjoy a delicious meal any time. Happy cooking!