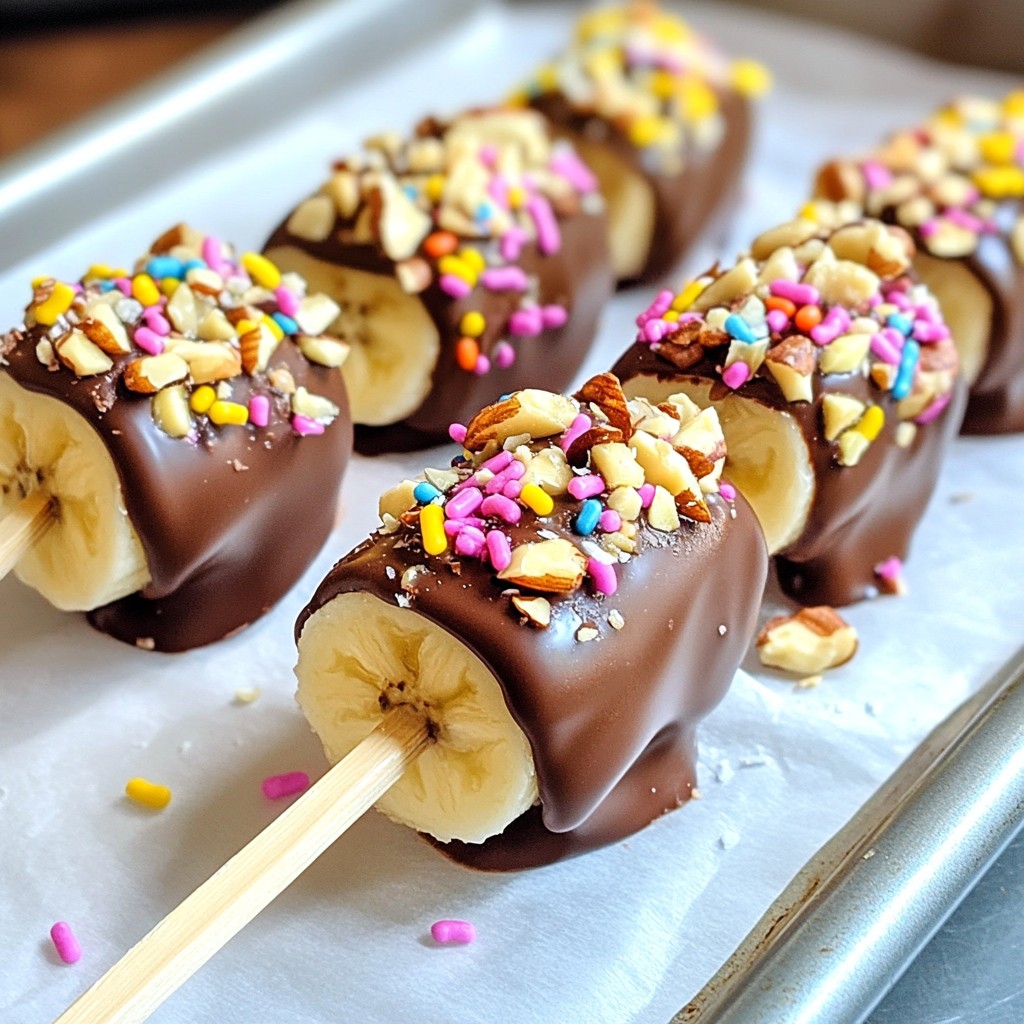
Craving a sweet treat that's both fun and simple? Chocolate Covered Banana Pops are the perfect solution! Made with just a few easy ingredients, these pops are a delightful way to enjoy chocolate and fruit. I’ll guide you through each step, from peeling bananas to making a smooth chocolate coat. Get ready for a delicious adventure that will surely please everyone—you're going to love making these!
Why I Love This Recipe
- Easy to Make: This recipe requires minimal ingredients and is simple enough for even novice cooks.
- Healthy Treat: Bananas are a great source of potassium, and when paired with dark chocolate, they create a deliciously healthy dessert.
- Customizable: You can easily switch up the toppings from nuts to sprinkles, allowing for endless variations and creativity.
- Fun for Kids: Making these banana pops is a fun activity that kids will love, whether they are helping to dip or decorate!
Ingredients
List of Ingredients
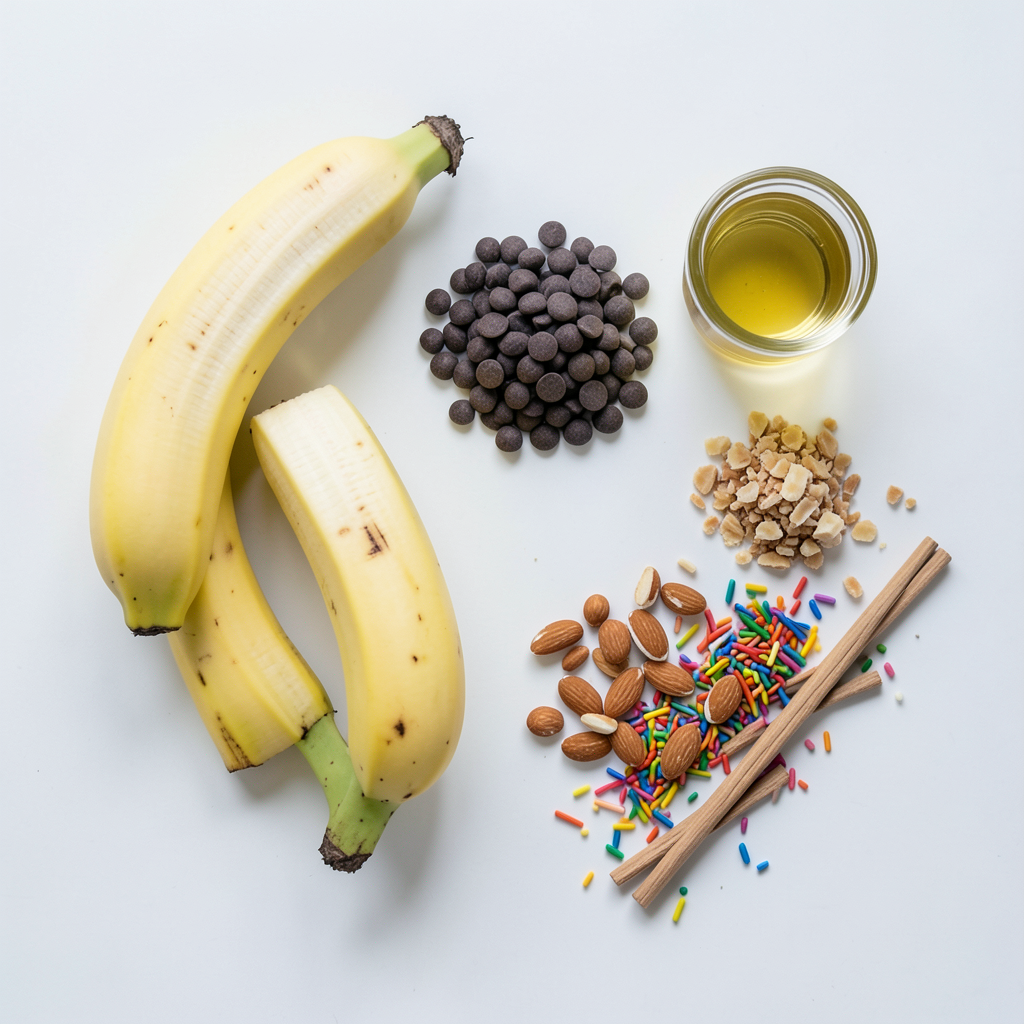
- 2 ripe bananas
- 1 cup dark chocolate chips
- 1 tablespoon coconut oil
- 1/2 cup crushed nuts (almonds, peanuts, or hazelnuts)
- 1/2 cup rainbow sprinkles
- 4 wooden sticks
Gathering the right ingredients is key to making chocolate covered banana pops. Start with two ripe bananas. The riper they are, the sweeter your pops will be.
Next, you need one cup of dark chocolate chips. I love dark chocolate because it adds richness. Add one tablespoon of coconut oil to keep the chocolate smooth and shiny.
For some crunch, get half a cup of crushed nuts. You can choose almonds, peanuts, or hazelnuts. Each nut will give a different flavor.
If you want a fun touch, grab half a cup of rainbow sprinkles. They are perfect for kids and look great.
Finally, don’t forget four wooden sticks. These will help you eat your pops with ease.
Now that you have everything, you are ready to make this delightful treat!
Step-by-Step Instructions
Preparation of the Bananas
First, take your ripe bananas and peel them. Make sure they are nice and yellow. Next, cut each banana in half crosswise. This gives you two pieces per banana. Now, insert a wooden stick into the cut side of each half. This stick will be your handle for the banana pop.
Freezing Process
Grab a baking sheet and line it with parchment paper. This helps the pops not stick. Place your banana halves on this sheet. Make sure they are spaced apart. Now, it’s time to freeze them. Put the baking sheet in the freezer for about one hour. You want the bananas to be firm.
Melting the Chocolate
While the bananas freeze, you can melt the chocolate. You have two options here. You can use a double boiler. Bring some water to a boil in a pot. Reduce the heat to a simmer. Place dark chocolate chips and a tablespoon of coconut oil in the top pot. Stir until it melts smoothly.
If you prefer, you can also use a microwave. Place the chocolate chips and coconut oil in a microwave-safe bowl. Heat in 20-second intervals. Stir in between each interval until melted.
Coating the Pops
Once the bananas are firm and the chocolate is melted, take the bananas out of the freezer. Dip each banana pop into the melted chocolate. Make sure they are fully coated. After that, roll the chocolate-covered bananas in your choice of toppings. You can use crushed nuts or rainbow sprinkles. Do this while the chocolate is still wet.
Finalizing the Pops
Place the coated banana pops back on the parchment-lined baking sheet. Now, return them to the freezer. Let them freeze for another 15 to 30 minutes. This will help the chocolate set. When ready, serve them chilled. Enjoy your tasty chocolate-covered banana pops!
Tips & Tricks
How to Perfectly Coat Bananas
To get a smooth chocolate coating, melt the chocolate and coconut oil well. Use a double boiler or a microwave. Stir often to make sure the mixture is smooth. If you see lumps, keep stirring until they disappear. This gives a nice shine to your pops.
Preventing ice crystals is key. Make sure your bananas are fully frozen before dipping them. If they are too soft, they may release water. This can cause ice crystals to form. Freeze them for at least an hour to make sure they are firm.
Presentation Tips
For creative serving ideas, try placing the pops in a tall glass. This makes them look fun and easy to grab. You can also use colorful plates to add excitement. For special occasions, consider using themed decorations. Festive sprinkles or edible glitter can make your pops stand out.
You can also add labels or tags if you have a party. This lets guests know what toppings are on each pop. It adds a nice touch and gets people excited about trying them.
Common Mistakes to Avoid
A common mistake is not melting the chocolate correctly. If you heat it too quickly, it can seize up. Always use low heat or short bursts in the microwave. Stir well after each interval to keep the chocolate smooth.
Choosing the right bananas is also important. Look for ripe bananas that are not overly brown. If they are too soft, they can fall apart when dipped. A firm banana will hold up better and taste great. Aim for bananas that are yellow with a few brown spots for the best flavor.
Pro Tips
- Choose the Right Bananas: Make sure to use ripe bananas with a few brown spots for the best flavor and texture.
- Melting Chocolate: Adding coconut oil not only helps to thin the chocolate but also gives it a nice sheen.
- Variety is Key: Experiment with different toppings like shredded coconut or mini chocolate chips for added texture and flavor.
- Perfect Storage: Store leftover pops in an airtight container in the freezer for up to a week for a quick treat.
Variations
Alternative Coatings
You can switch up the chocolate for a fun twist. Try using white chocolate or milk chocolate. Both add a sweet flavor that pairs well with bananas. Melt them just like dark chocolate. You can also coat the bananas in caramel for a sticky, sweet treat. Just melt some caramel candies and dip the frozen bananas in it.
Different Toppings
Toppings can make your banana pops unique. You can use crushed nuts like almonds, peanuts, or hazelnuts. They add a nice crunch. If you want a healthier option, sprinkle on coconut flakes. They give a tropical vibe and taste great with chocolate.
Flavor Enhancements
Want to spice things up? You can add flavors like cinnamon or vanilla extract to the melted chocolate. It gives the pops an extra layer of taste. Another fun idea is to use flavored chocolate. Look for mint, orange, or even coffee-flavored options. The choices are endless!
Storage Information
How to Store Chocolate Covered Banana Pops
Store your chocolate covered banana pops in an airtight container. A plastic or glass container works best. Make sure the pops do not touch each other to avoid sticking. You can also use parchment paper between them for extra protection. This keeps them fresh and tasty.
Freezing Tips
You can freeze chocolate covered banana pops for up to two months. To thaw, place them in the fridge for a few hours. You can also leave them at room temperature for about 20 minutes. This way, they will be ready to eat without losing their yummy taste.
Shelf Life
Check your banana pops for signs of spoilage. If the chocolate looks dull or has white spots, it may be old. Also, if the bananas are brown or mushy, it’s time to toss them. Always trust your senses. If they smell off, don’t eat them.
FAQs
Can I use other fruits for chocolate pops?
Yes, you can use many fruits for chocolate pops. Some great options are strawberries, apples, and pineapple. These fruits are sweet and juicy. Their texture pairs well with chocolate. Just cut them into bite-sized pieces. You can then dip them in the melted chocolate. It’s a fun way to mix flavors!
How long do chocolate covered bananas last?
Chocolate covered bananas can last up to two weeks in the freezer. To store them, wrap each pop in plastic wrap. Place them in an airtight container. This keeps them fresh and prevents freezer burn. Avoid leaving them at room temperature for long. They will melt quickly and lose their shape.
Can I make chocolate covered banana pops ahead of time?
Yes, you can make them ahead of time! Prepare the pops and freeze them. They can stay frozen for up to two weeks. This is perfect for parties or snacks. Just remember to store them properly. Take them out of the freezer when you are ready to serve.
Are there any vegan options for this recipe?
Absolutely! To make this recipe vegan, swap dark chocolate chips for dairy-free chocolate chips. Use coconut oil as it is already vegan. You can also skip the nuts if you want. The banana pops will still taste great. Enjoy a delicious treat that fits your diet!
Making chocolate-covered banana pops is simple and fun. We covered all the steps, from gathering ingredients to freezing your tasty treats. You learned tips for coating and presented options to personalize your pops. Storing them properly keeps them fresh for longer, too.
Enjoy these delightful snacks at any time! With some creativity, you can impress friends and family with your skills. Whether you stick to the basics or try new flavors, enjoy every bite.