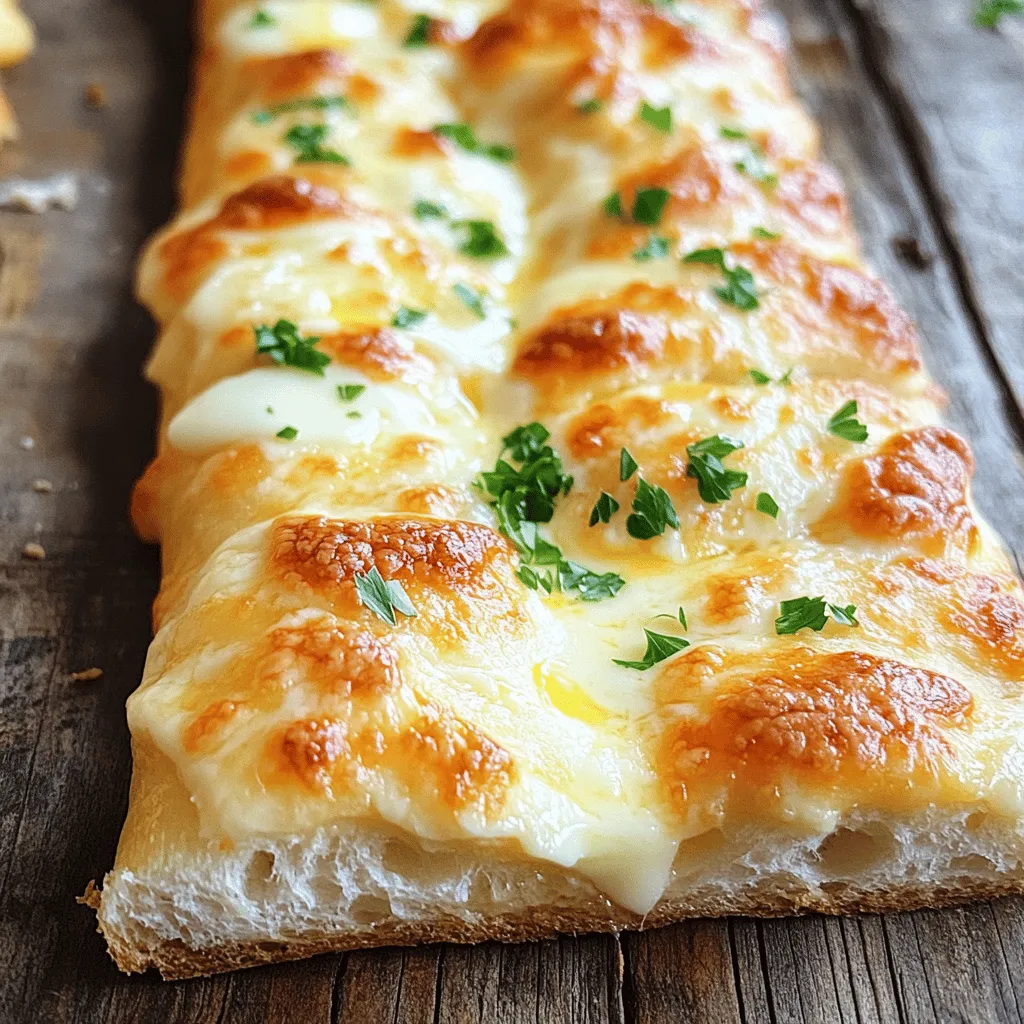
Craving a tasty snack that’s easy to make? Look no further! Cheesy garlic breadsticks are the perfect solution. Soft, warm, and packed with gooey cheese, these breadsticks are the ideal treat for any occasion. In this guide, I’ll walk you through every step, from choosing the right ingredients to baking them to perfection. Get ready to impress your friends and family with this fresh and delectable snack!
Ingredients
To make cheesy garlic breadsticks, you need simple items. Here’s the complete list of ingredients:
– 2 cups all-purpose flour
– 1 packet (2 1/4 teaspoons) active dry yeast
– 1 cup warm water (110°F/45°C)
– 1 tablespoon sugar
– 1 tablespoon olive oil
– 1 teaspoon salt
– 1 teaspoon garlic powder
– 1 cup shredded mozzarella cheese
– 1/2 cup grated Parmesan cheese
– 2 tablespoons unsalted butter, melted
– Fresh parsley, finely chopped (for garnish)
Each ingredient plays a vital role. The flour gives the breadsticks structure. Active dry yeast helps the dough rise. Warm water activates the yeast. Sugar feeds the yeast and adds a touch of sweetness. Olive oil keeps the dough moist. Salt enhances flavor, while garlic powder adds that distinct taste we love. The cheeses bring richness, and melted butter gives a golden finish. Finally, fresh parsley adds color and freshness.
Step-by-Step Instructions
Preparing the Yeast Mixture
To start, combine 1 cup of warm water, 1 tablespoon of sugar, and 1 packet of active dry yeast in a small bowl. Stir gently and let it sit for about 5 to 10 minutes. You will see it become foamy, which means the yeast is active. This step is crucial for giving your breadsticks a nice rise.
Making the Dough
In a large mixing bowl, mix 2 cups of all-purpose flour, 1 teaspoon of salt, and 1 teaspoon of garlic powder. Make sure these dry ingredients are well combined. Next, add the yeast mixture and 1 tablespoon of olive oil. Stir everything until a dough forms. Knead the dough on a lightly floured surface for about 5 minutes. You want the dough to be smooth and elastic.
Rising and Rolling the Dough
Now, place the kneaded dough in a greased bowl. Cover it with a kitchen towel and let it rise in a warm place for 1 hour. The dough should double in size. Once it has risen, punch it down gently. Roll the dough out into a rectangle, about 1/2 inch thick. Use a pizza cutter or sharp knife to cut the dough into strips, about 1 inch wide.
Baking the Breadsticks
Preheat your oven to 425°F (220°C). Prepare a baking sheet by lining it with parchment paper. Place the strips of dough on the sheet. Brush the melted 2 tablespoons of unsalted butter over each strip. Top them with 1 cup of shredded mozzarella cheese and 1/2 cup of grated Parmesan cheese. Bake in the oven for 12 to 15 minutes or until the breadsticks turn golden brown. Enjoy the aroma as they bake!
Tips & Tricks
Achieving the Perfect Texture
To get that soft and chewy texture, kneading is key. Knead the dough for about five minutes. This helps develop gluten, making the breadsticks stretchy. If you find the dough too sticky, add a bit more flour, but not too much. Letting the dough rise is just as important. After kneading, place it in a greased bowl. Cover it and let it rise in a warm spot for one hour. This step allows the dough to double in size, making your breadsticks light and fluffy.
Flavor Enhancements
Spice up your breadsticks with extra flavor! Consider adding dried herbs like oregano or basil to the dough. You can also mix in some crushed red pepper flakes for a kick. After baking, sprinkle fresh herbs like parsley on top. This adds a bright touch and a lovely aroma.
Cooking Techniques
Checking for doneness is simple. Look for a golden brown color on the breadsticks. You can also tap on the bottom; it should sound hollow. If they’re not ready, give them a few more minutes in the oven. Adjusting the oven temperature can help too. If you want crispier breadsticks, bake them a bit longer at 425°F. Just keep an eye on them to avoid burning. Following these tips will lead you to perfect cheesy garlic breadsticks every time!
Variations
Cheese Options
You can change the cheese in your breadsticks for fun. Try using sharp cheddar or gouda. These cheeses add a different taste. If you want a creamier texture, add cream cheese. This will make the breadsticks richer and smoother. Imagine biting into a warm stick with gooey cheese inside; it’s pure bliss!
Herb Variations
Herbs can take your breadsticks to the next level. Instead of just garlic powder, try Italian seasoning. This mix adds a nice touch of flavor. Garlic salt is another great option; it gives that extra kick. You can also mix in fresh herbs like basil or oregano. They brighten the taste and smell amazing!
Dietary Adjustments
If you’re gluten-free, don’t worry! You can use alternative flours like almond or coconut flour. These flours work well and taste good, too. For those who follow a vegan diet, swap out butter and cheese. Use vegan butter and nut-based cheese. They melt nicely and create a tasty treat without dairy. With these easy changes, everyone can enjoy cheesy garlic breadsticks!
Storage Info
Storing Leftovers
To keep your cheesy garlic breadsticks fresh, store them in an airtight container. Place parchment paper between layers to prevent sticking. This helps keep them soft. You can refrigerate the breadsticks for up to four days. If you want to save them longer, freezing is a great choice.
To freeze breadsticks, wrap them tightly in plastic wrap. Then, place them in a freezer-safe bag or container. Make sure to remove as much air as possible. This keeps them from getting freezer burn. They can last up to three months in the freezer.
Reheating Tips
When it’s time to enjoy your leftover breadsticks, reheating is key. The best method is to use an oven. Preheat it to 350°F (175°C). Place the breadsticks on a baking sheet. Heat them for about 10 minutes. This method keeps them warm and crispy.
If you’re short on time, you can use a microwave. Heat them for 15 to 30 seconds. Check often to avoid making them soggy. To keep them crispy, place a paper towel underneath. This absorbs excess moisture and helps maintain that perfect texture. Enjoy your cheesy garlic breadsticks just like they were fresh!
FAQs
How long does it take to make Cheesy Garlic Breadsticks?
Making Cheesy Garlic Breadsticks takes about 1 hour and 30 minutes. You need 15 minutes to prep the dough. The dough then rises for 1 hour. After that, baking takes 12 to 15 minutes.
Can I use frozen dough for Cheesy Garlic Breadsticks?
Yes, you can use frozen dough. Many stores sell pre-made frozen bread dough. Just thaw it first. Then, follow the same steps as the recipe. This saves time and works well for quick snacks.
What can I serve with Cheesy Garlic Breadsticks?
These breadsticks pair well with many dishes. You can serve them with marinara sauce for dipping. They also go great with soups or salads. Try them alongside pasta for a full meal.
How can I make these breadsticks spicy?
To add heat, use red pepper flakes. Sprinkle them on top before baking. You can also mix hot sauce into the dough. For a twist, try jalapeños or spicy cheese. Experiment with the flavors you love!
In this post, we explored how to make Cheesy Garlic Breadsticks from scratch. I guided you through each step, from mixing ingredients to baking. Remember to let the dough rise for the best texture. Feel free to experiment with different cheeses and herbs for unique flavors. Store leftovers properly to enjoy later, and reheating tips can help keep them tasty. Making these breadsticks can be a fun experience, so get creative and enjoy!