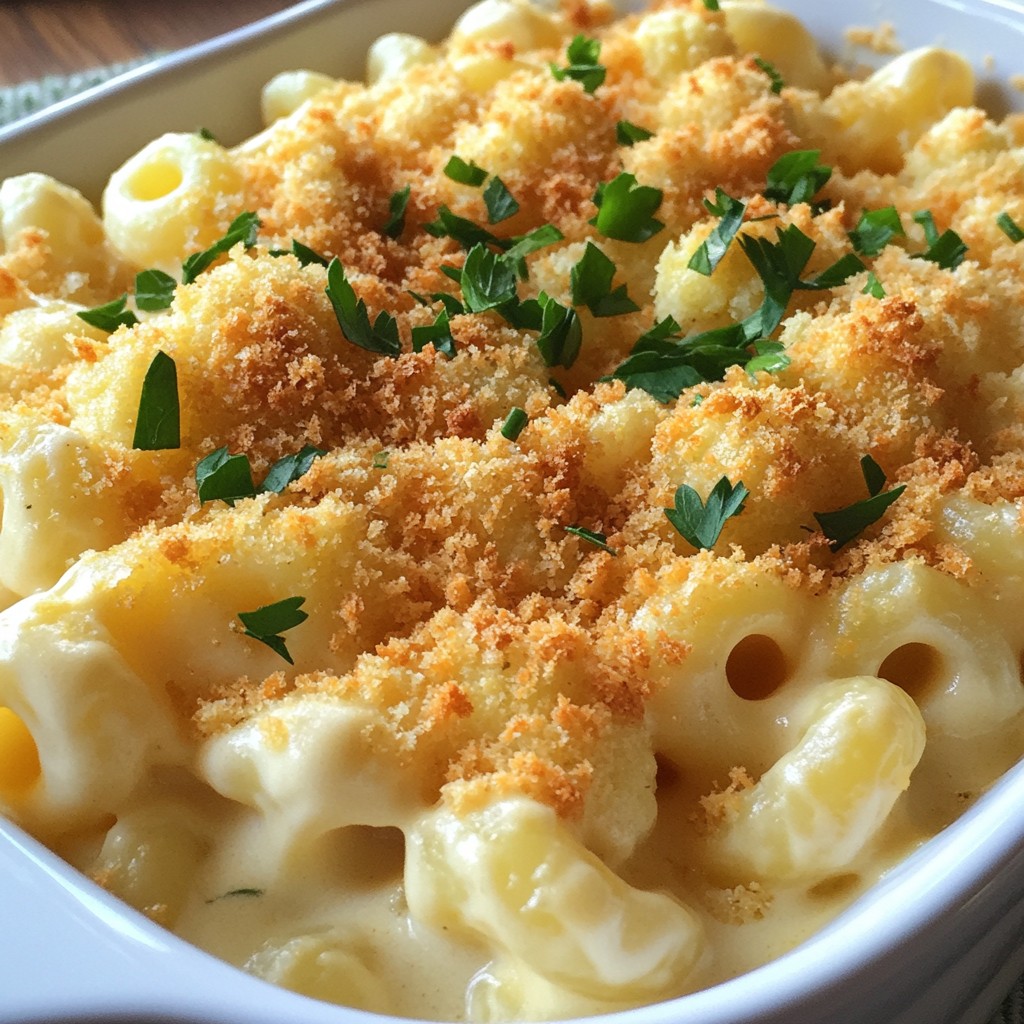
Craving comfort food that’s tasty and healthy? You’re in the right place! My Cheesy Cauliflower Mac combines creamy cheeses with tender cauliflower and classic elbow macaroni. This dish offers all the satisfaction of traditional mac and cheese but packs in the goodness of veggies. Let me show you how to whip up this easy, crowd-pleasing meal that’s perfect for dinner. Let’s dive in!
Why I Love This Recipe
- Comfort Food Classic: This cheesy cauliflower mac is a delightful twist on traditional mac and cheese, combining comfort and health in one dish.
- Easy to Make: With simple ingredients and straightforward steps, this recipe is perfect for both beginner and experienced cooks.
- Customizable: You can easily swap out the cheeses or add in your favorite vegetables to make this dish your own.
- Family-Friendly: This dish is loved by kids and adults alike, making it a great option for family dinners or gatherings.
Ingredients
Main Ingredients
- 1 medium head of cauliflower, cut into florets
- 1 cup elbow macaroni (or gluten-free pasta)
- 2 cups shredded sharp cheddar cheese
- 1/2 cup grated Parmesan cheese
Optional Ingredients
- 1/4 cup breadcrumbs (for topping)
- Fresh parsley, chopped (for garnish)
Seasonings
- 1 teaspoon garlic powder
- 1 teaspoon onion powder
- 1/2 teaspoon smoked paprika
- Salt and pepper to taste
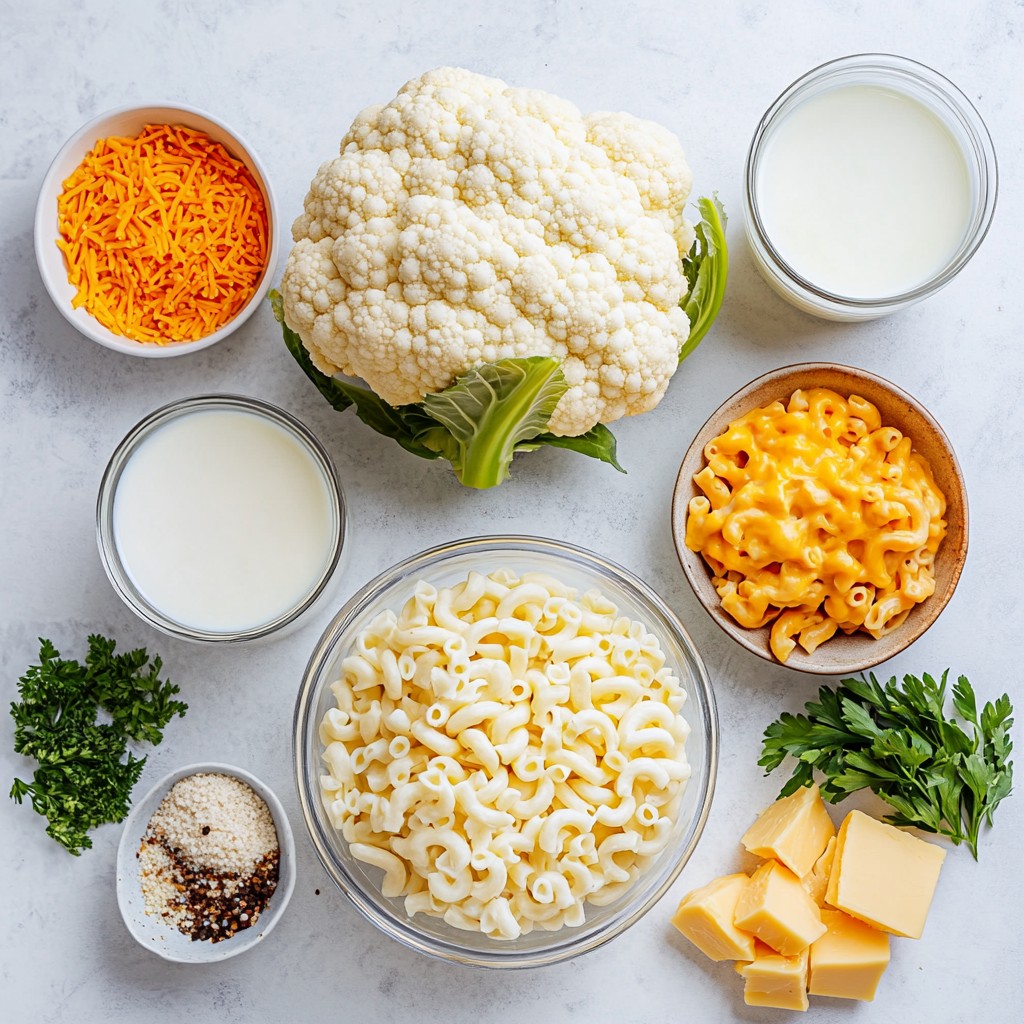
Cheesy Cauliflower Mac needs simple, fresh ingredients. The main star is the cauliflower. It adds a great texture and taste. I love using a medium head of cauliflower. Cut it into small florets for even cooking.
Next, we have elbow macaroni. You can use gluten-free pasta if you like. I always choose a cup for the right amount.
The cheese! I use two types to create rich flavor and creaminess. Sharp cheddar gives a nice bite, while Parmesan adds depth. You’ll need two cups of cheddar and half a cup of Parmesan.
For optional ingredients, I suggest breadcrumbs for a crunchy topping. Fresh parsley makes a lovely garnish. It adds color and freshness.
Now, let’s talk about seasonings. Garlic and onion powders enhance the dish. I also like to add smoked paprika for a hint of smokiness. Lastly, use salt and pepper to taste. These seasonings make the flavors pop!
Gather these ingredients, and you’re ready for a delicious meal.
Step-by-Step Instructions
Preparing the Cauliflower
1. Boiling the cauliflower florets: Start by bringing a large pot of salted water to a boil. Once boiling, add the cauliflower florets. Cook them for about 5-7 minutes. You want them tender but not mushy.
2. Setting aside cooked cauliflower: Use a slotted spoon to remove the cauliflower. Place it in a bowl and set it aside for later.
Cooking the Pasta
1. Instructions for cooking elbow macaroni: In the same pot, add 1 cup of elbow macaroni. Cook it according to the package instructions until it is al dente.
2. Draining and preparing for mixing: Once the macaroni is cooked, drain it well. Set it aside with the cauliflower.
Making the Cheese Sauce
1. Melting butter and whisking in flour: In a saucepan over medium heat, melt 1/4 cup of unsalted butter. After it melts, whisk in 1/4 cup of all-purpose flour. Cook for about 2 minutes until it bubbles.
2. Adding milk and cooking until thickened: Gradually pour in 2 cups of milk while whisking. Cook this mixture until it thickens up nicely.
3. Incorporating cheddar and Parmesan cheese: Once thick, stir in 2 cups of shredded sharp cheddar cheese and 1/2 cup of grated Parmesan cheese. Keep stirring until all the cheese melts smoothly.
Mixing Everything Together
1. Combining macaroni, cauliflower, and cheese sauce: In a large mixing bowl, combine the drained macaroni and cooked cauliflower with the cheese sauce.
2. Ensuring even distribution: Mix everything well so that the cheese coats the pasta and cauliflower evenly.
Baking Process
1. Preheating the oven: Preheat your oven to 350°F (175°C). This step is key for even baking.
2. Transferring to a baking dish: Grease a baking dish and pour the mac and cheese mixture into it.
3. Optional breadcrumb topping: If you want a crunchy top, sprinkle 1/4 cup of breadcrumbs over the mixture.
Final Touches
1. Baking time: Bake in the preheated oven for 20-25 minutes. Look for a bubbly and golden top.
2. Garnishing with parsley: When done, take it out and let it cool slightly. Chop some fresh parsley and sprinkle it on top before serving. Enjoy your Cheesy Cauliflower Mac!
Tips & Tricks
Cooking Tips
- How to avoid mushy cauliflower: Start by cooking the cauliflower for just 5-7 minutes. You want it tender but still firm. A quick boil keeps the florets from turning mushy.
- Ensuring al dente pasta: Follow the package instructions for your macaroni. Test it a minute or two before the time is up. It should be firm but not hard.
Cheese Variations
- Alternative cheese options: You can mix things up with gouda or Monterey Jack. These cheeses add a different taste and melt well.
- Dairy-free suggestions: If you need a dairy-free option, try cashew cheese or a store-bought dairy-free cheese blend. Almond milk works great in the sauce too.
Serving Suggestions
- Best sides to pair with Cheesy Cauliflower Mac: A crisp side salad or steamed broccoli complements this dish well. You can also serve it with roasted vegetables for added flavor.
- Presentation ideas: To make your dish look fancy, sprinkle fresh parsley on top. A few extra cheese shreds can also add a nice touch. Use a colorful dish to make the meal pop!
Pro Tips
- Blanching Cauliflower: Blanching the cauliflower in salted boiling water not only cooks it but also helps retain its vibrant color and nutrients.
- Cheese Selection: For a deeper flavor, try mixing different types of cheese like Gruyère or pepper jack with the cheddar.
- Breadcrumb Topping: For an extra crunchy topping, mix breadcrumbs with melted butter and a sprinkle of garlic powder before adding them on top.
- Make-Ahead Option: This dish can be prepared ahead of time; just assemble and refrigerate before baking. When ready, bake it directly from the fridge, adding a few extra minutes to the baking time.
Variations
Ingredient Substitutions
You can switch the pasta for a gluten-free option. Many stores sell gluten-free elbow macaroni. You can also use a mix of quinoa pasta or chickpea pasta. They add great flavor and texture.
For a non-dairy choice, you can replace regular milk with almond or oat milk. These options keep your dish creamy without dairy. They also add a touch of nutty flavor.
Flavor Enhancements
Want to make it more exciting? Add veggies like spinach or broccoli. They not only boost nutrition but also add color. Just steam or sauté them before mixing in.
If you like a little heat, sprinkle in cayenne pepper. Start with a small amount, then taste. You can always add more if you want it spicier.
Dietary Adaptations
If you follow a vegan diet, you can make this dish without dairy. Use vegan cheese instead of cheddar and Parmesan. You can also swap butter for coconut oil or vegan butter.
For a low-carb version, skip the pasta altogether. Use more cauliflower instead. You can even add cooked chicken or turkey for extra protein without the carbs.
Storage Info
Refrigeration
To store leftovers, place Cheesy Cauliflower Mac in an airtight container. Make sure it cools down before sealing. This helps keep it fresh. In the fridge, it lasts about 3 to 5 days. Always check for any signs of spoilage before eating.
Freezing Guidelines
You can freeze Cheesy Cauliflower Mac for longer storage. First, let it cool completely. Then, transfer it to a freezer-safe container. It will stay good for up to 2 to 3 months. When you’re ready to eat, take it out and thaw it in the fridge overnight.
Serving after Storage
For the best taste, reheat it in the oven. Preheat your oven to 350°F. Place the Cheesy Cauliflower Mac in a baking dish. Cover it with foil to keep it moist. Heat for about 20 minutes, or until warm. You can also microwave it, but the oven keeps the texture nice. Enjoy your delicious meal just like when it was fresh!
FAQs
Is Cheesy Cauliflower Mac healthy?
Cheesy Cauliflower Mac is a great dish that offers many health benefits. Cauliflower is low in calories and high in fiber. It can help with digestion and weight management. It also has vitamins C and K, which support your immune system and bone health. The cheese adds protein and calcium, making it a balanced meal.
Can I make this recipe in advance?
Yes, you can make Cheesy Cauliflower Mac ahead of time. To do this, cook the dish and let it cool. Then, cover it and store it in the fridge for up to three days. When ready to eat, you can bake it straight from the fridge. Just add a few extra minutes to the bake time.
What can I serve with Cheesy Cauliflower Mac?
Cheesy Cauliflower Mac pairs well with many side dishes. You can serve it with a simple green salad to add freshness. Roasted vegetables also make a great side. If you want to add protein, grilled chicken or sausage works well too.
Can I make this recipe vegan?
Yes, you can easily make Cheesy Cauliflower Mac vegan. For cheese, use vegan cheese or nutritional yeast for a cheesy flavor. Instead of butter, use coconut oil or vegan butter. For milk, almond milk or soy milk works perfectly.
How do I make Cheesy Cauliflower Mac spicier?
To add heat to Cheesy Cauliflower Mac, try a few simple methods. You can mix in red pepper flakes or cayenne pepper into the cheese sauce. Adding jalapeños or spicy cheese also boosts the heat. For a smoky flavor, try adding chipotle powder.
Cheesy Cauliflower Mac blends classic comfort with healthy ingredients. We covered how to prepare the cauliflower, cook the pasta, and make a rich cheese sauce. You learned tips for variations, storage, and serving ideas to elevate your dish. This recipe is adaptable for various diets and flavor preferences.
Remember, this dish is not just tasty but offers nutritional benefits too. Enjoy experimenting with it today, and don’t hesitate to share your own twists!