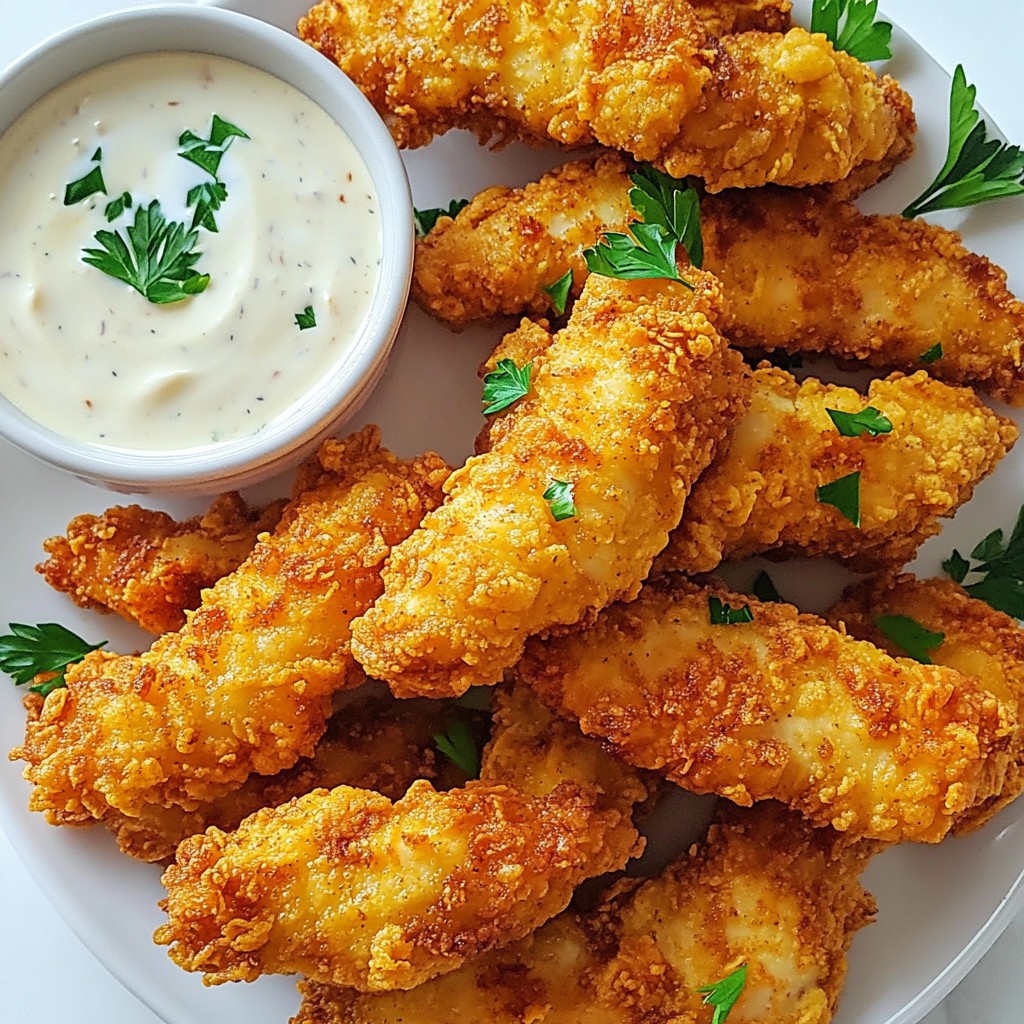
If you crave crispy and juicy fried chicken tenders, you're in the right place. Buttermilk Fried Chicken Tenders are my go-to for a weekend treat or family meal. With tenderloins soaked in seasoned buttermilk, they get super flavorful. Plus, the crunchy breading makes each bite a delight. Ready to impress your taste buds? Let's dive into the steps, tips, and tricks to make these tenders irresistible!
Why I Love This Recipe
- Juicy and Flavorful: The marination in buttermilk not only tenderizes the chicken but infuses it with flavor, making each bite juicy and delicious.
- Perfectly Crispy: The combination of flour and cornmeal creates a crunchy exterior that contrasts beautifully with the tender meat inside.
- Customizable Spice: Add cayenne pepper for a kick or adjust the spices to suit your taste, making this recipe adaptable for everyone.
- Easy to Make: This recipe is straightforward and requires minimal ingredients, perfect for a quick weeknight dinner or a gathering with friends.
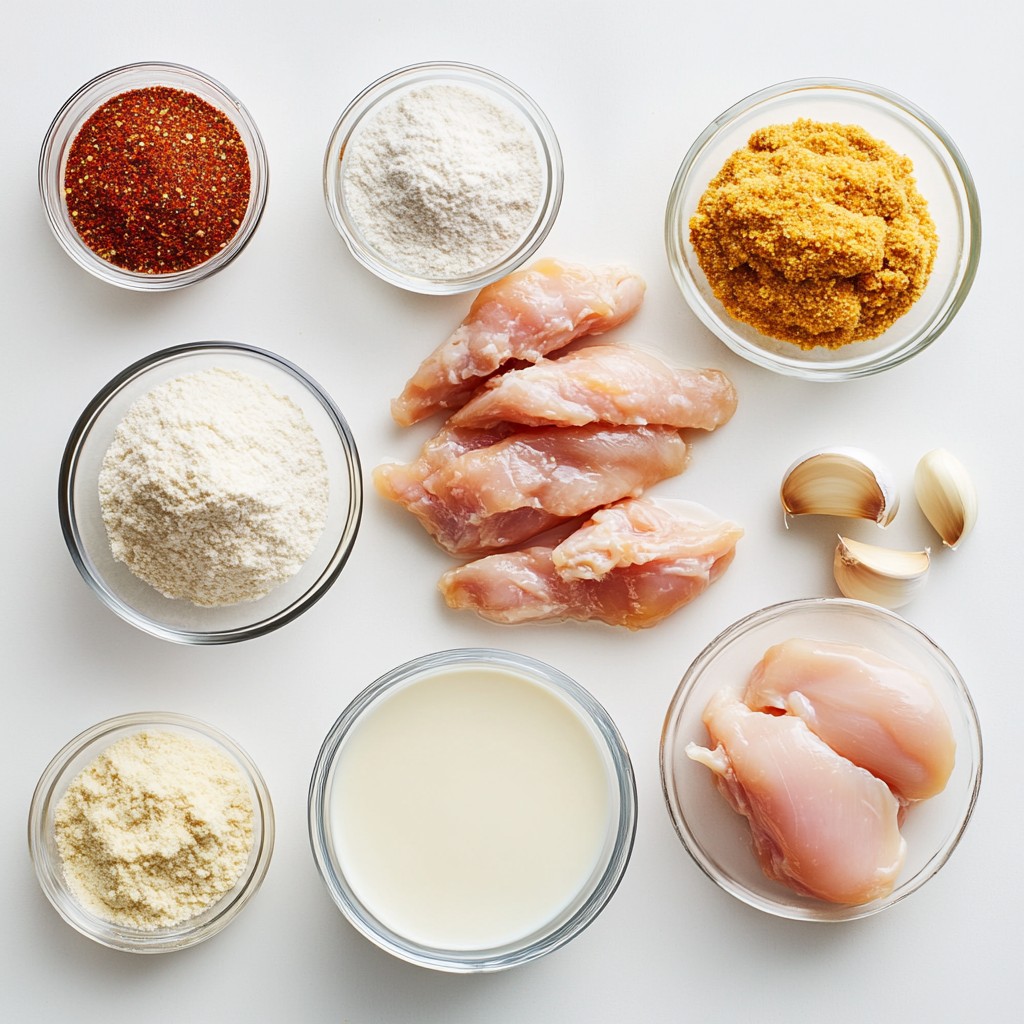
Ingredients
Main Ingredients
- 1 pound chicken tenderloins
- 1 cup buttermilk
- 1 teaspoon garlic powder
- 1 teaspoon onion powder
- 1 teaspoon paprika
- ½ teaspoon cayenne pepper (optional for spice)
- 1 teaspoon salt
- ½ teaspoon black pepper
The chicken tenderloins are the star of this dish. They are lean, juicy, and easy to cook. The buttermilk makes the chicken tender and adds a rich flavor. The seasonings enhance the taste and add depth.
Breading Components
- 1 cup all-purpose flour
- ½ cup cornmeal
For the breading, I mix all-purpose flour and cornmeal. This blend gives the tenders a nice crunch. The cornmeal adds texture and a unique flavor that makes them special.
Oil for Frying
- Oil for frying (vegetable or canola oil recommended)
I prefer to use vegetable or canola oil for frying. They have high smoke points, making them great for frying. This helps achieve the crispy texture we all love.
Step-by-Step Instructions
Marinating the Chicken
First, take a large bowl. Add the chicken tenderloins, buttermilk, garlic powder, onion powder, paprika, cayenne pepper, salt, and black pepper. Mix them well. Cover the bowl and put it in the fridge. Let it sit for at least one hour. If you can, marinate overnight for deeper flavor. This step makes the chicken juicy and tasty.
Preparing the Breading
Next, grab a shallow dish. In this dish, mix the all-purpose flour and cornmeal together. The cornmeal adds a nice crunch. This is the coating that will make your chicken crispy.
Breading Process
Now, take the marinated chicken out of the fridge. Let the excess buttermilk drip off each tender. Dip each piece into the flour and cornmeal mix. Make sure to coat each tender well. Press gently on the breading to help it stick. This step is key for a good crust.
Cooking the Chicken
In a large skillet, pour enough oil to cover about half an inch of the bottom. Heat the oil over medium-high heat. Wait until it shimmers, which means it's ready. This is around 350°F or 175°C. Carefully place the coated chicken tenders in the hot oil. Don’t crowd them; cook in batches if needed. Fry them for about 4 to 5 minutes on each side. They should turn golden brown and reach 165°F inside to be safe to eat.
Draining and Serving
Once cooked, move the chicken tenders to a plate lined with paper towels. This helps drain excess oil. While they are still hot, sprinkle a little salt on top for flavor. Serve your crispy buttermilk fried chicken tenders with your favorite dipping sauce. Good options are ranch, honey mustard, or BBQ sauce. Enjoy every bite!
Tips & Tricks
Perfecting the Fry
The right oil temperature matters. For crispy chicken, heat your oil to 350°F or 175°C. Use a deep, heavy pan for even cooking. When the oil shimmers, it's ready for frying. If it's too hot, the chicken burns. If it's too cold, the tenders soak up oil. Make sure to fry in batches to keep the temperature steady.
Marination Time
Longer marination gives better flavor. I suggest marinating for at least one hour. But overnight is even better. The buttermilk tenderizes the chicken. It adds a nice tang and helps the spices stick. This step also keeps the meat juicy during frying.
Seasoning Variations
Don't be afraid to play with spices. Besides the basic garlic and onion powder, try adding herbs or different spices. You could use cumin for warmth or lemon zest for brightness. If you like heat, add more cayenne. Each mix brings a unique flavor to your chicken tenders. Try new combinations to find your favorite!
Pro Tips
- Marinate for Maximum Flavor: For the best flavor and tenderness, marinate the chicken in buttermilk overnight. This not only enhances the taste but also ensures a juicy texture.
- Oil Temperature Matters: Use a thermometer to check the oil temperature before frying. If the oil is too hot, the coating will burn before the chicken cooks through; too cool, and the coating will become soggy.
- Don't Overcrowd the Pan: Fry the chicken in batches to maintain the oil temperature. Overcrowding the skillet can lower the oil temperature, leading to greasy and unevenly cooked tenders.
- Rest Before Serving: Allow the fried chicken tenders to rest on a paper towel-lined plate for a few minutes after frying. This helps the coating set and keeps them crispy.
Variations
Spicy Buttermilk Tenders
To add some heat to your chicken tenders, mix cayenne pepper into the buttermilk. You can also try other spices like chili powder or hot sauce. This gives your tenders a nice kick. Adjust the amount based on your spice level. Taste as you go, and enjoy the bold flavor.
Gluten-Free Option
If you need a gluten-free option, simply swap the all-purpose flour with gluten-free flour. You can also use almond flour or rice flour. These alternatives will still give you a nice crunch. Just make sure to check if they work well for frying.
Oven-Baked Version
For a healthier choice, you can bake the chicken tenders instead of frying. Preheat your oven to 425°F (220°C). Line a baking sheet with parchment paper. Once breaded, place the tenders on the sheet. Bake for about 20-25 minutes or until golden brown. Flip halfway through for even cooking. This keeps them crispy without the oil.
Storage Info
Refrigeration Guidelines
To store leftovers, let the chicken cool first. Place the chicken tenders in an airtight container. You can keep them in the fridge for up to four days. This way, they stay fresh and tasty. If you plan to eat them later, don't forget to label the container with the date.
Reheating Tips
To reheat chicken tenders, use your oven. Preheat it to 375°F. Place the tenders on a baking sheet. Bake for about 10-15 minutes. This method helps keep them crispy. You can also use an air fryer for great results. Set it to 350°F and cook for about 5-7 minutes.
Freezing Chicken Tenders
If you want to freeze chicken tenders, first let them cool completely. Place them in a single layer on a baking sheet. Freeze them for about an hour. Once firm, transfer them to a freezer bag. Remove as much air as you can. They will last for up to three months. To thaw, put them in the fridge overnight before reheating.
FAQs
How long should I marinate buttermilk chicken?
I recommend marinating your chicken for at least 1 hour. For more flavor, try marinating overnight. The longer you marinate, the more the spices soak in. Buttermilk helps tenderize the chicken, making it juicy and flavorful. This step is key for tasty chicken tenders.
Can I use chicken breasts instead of tenders?
Yes, you can use chicken breasts. Just cut them into strips to match the size of tenders. Keep in mind that chicken breasts may need a bit more cooking time. Always check that they reach an internal temperature of 165°F or 75°C to ensure they are safe to eat.
What dipping sauces pair well with buttermilk fried chicken tenders?
Many sauces go great with buttermilk fried chicken tenders. Here are a few popular options:
- Ranch dressing
- Honey mustard
- BBQ sauce
- Hot sauce
Each sauce adds its own flavor, so feel free to try different ones. Enjoy your meal!
In this article, we explored how to make tasty buttermilk chicken tenders. I covered the key ingredients, from chicken and buttermilk to the right oils. The step-by-step instructions clarified the marinating, breading, and cooking process. We discussed tips for perfect frying and creative variations to try. I also shared smart storage and reheating methods to keep your tenders fresh. Remember, good food brings joy. Enjoy perfecting your chicken tenders, and don’t be afraid to get creative with flavors!