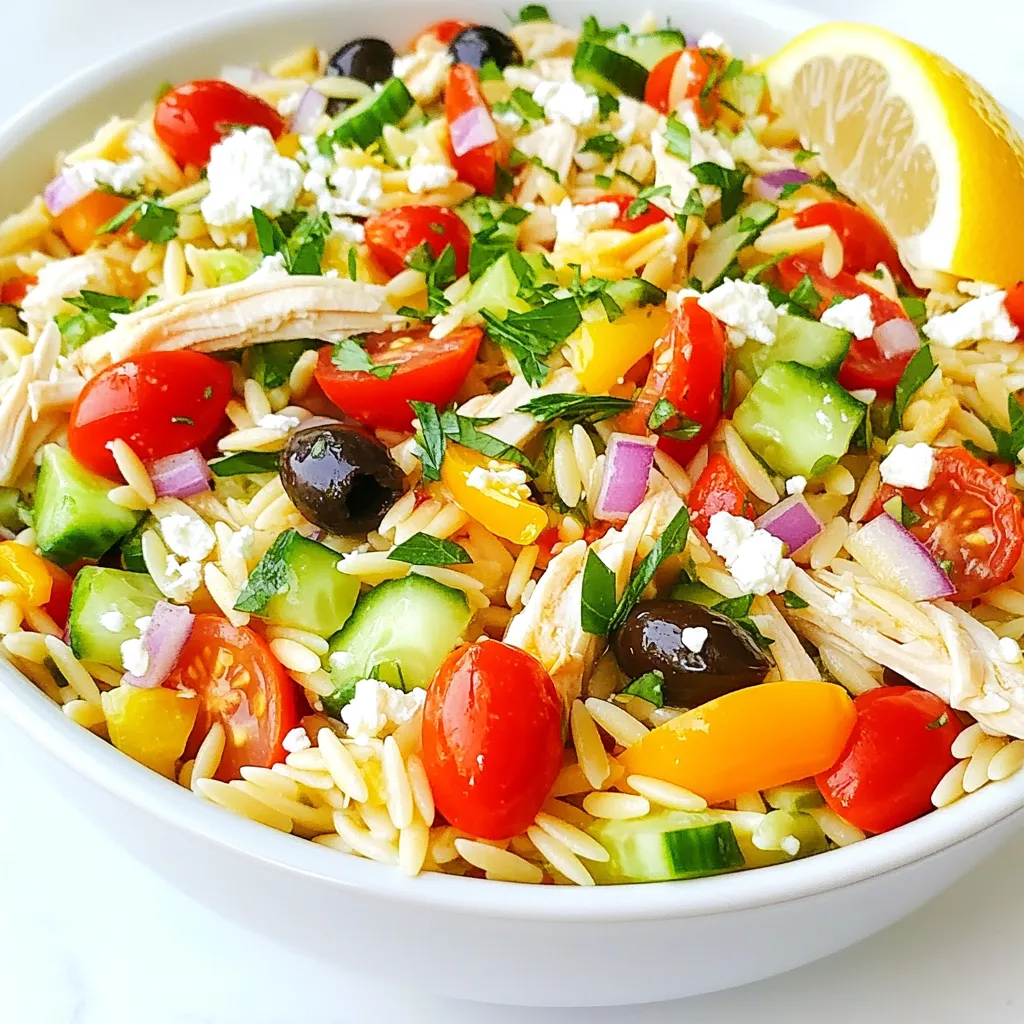
Greek Orzo Salad with Chicken Fresh and Flavorful Meal
Looking for a fresh, healthy meal? This Greek Orzo Salad with Chicken packs a punch of flavor and nutrition. With

Looking for a fresh, healthy meal? This Greek Orzo Salad with Chicken packs a punch of flavor and nutrition. With
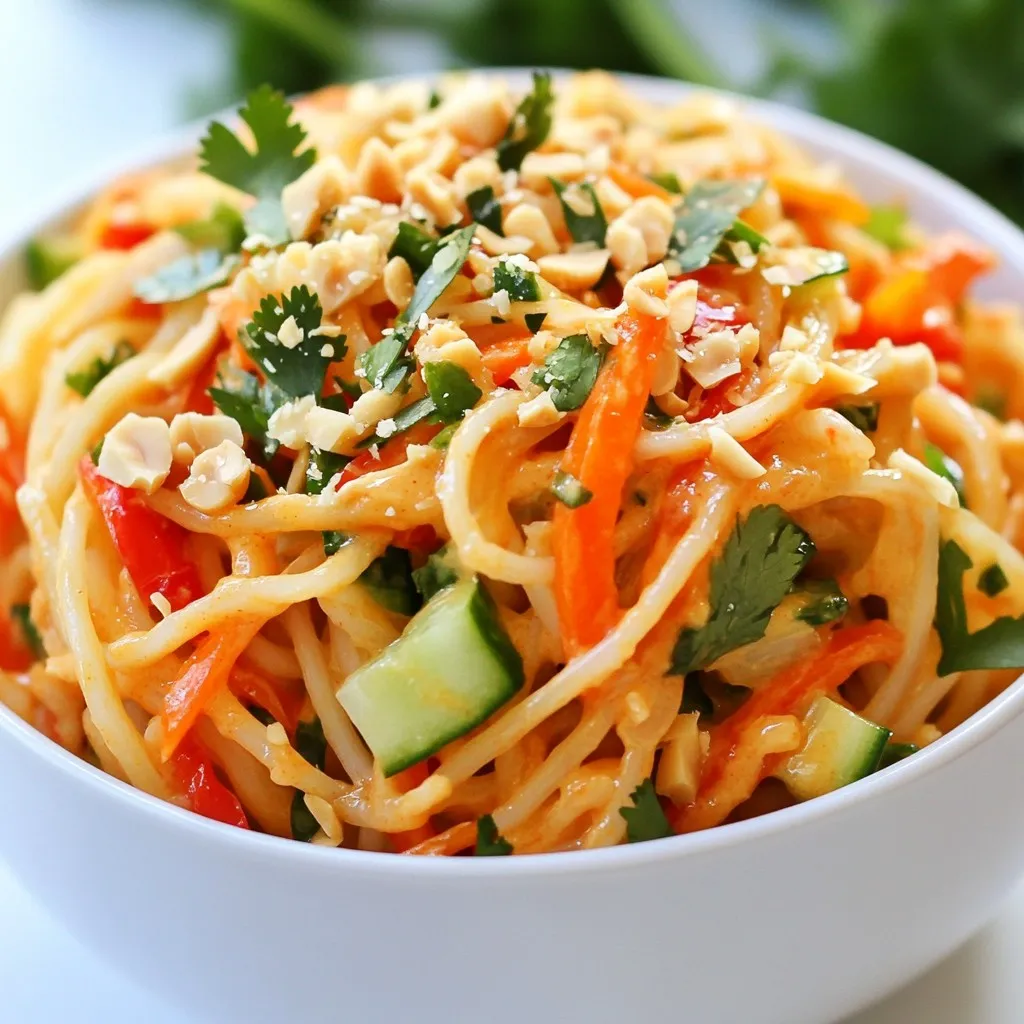
Looking for a fresh and zesty dish to spice up your meals? Try my Spicy Peanut Noodle Salad! This easy
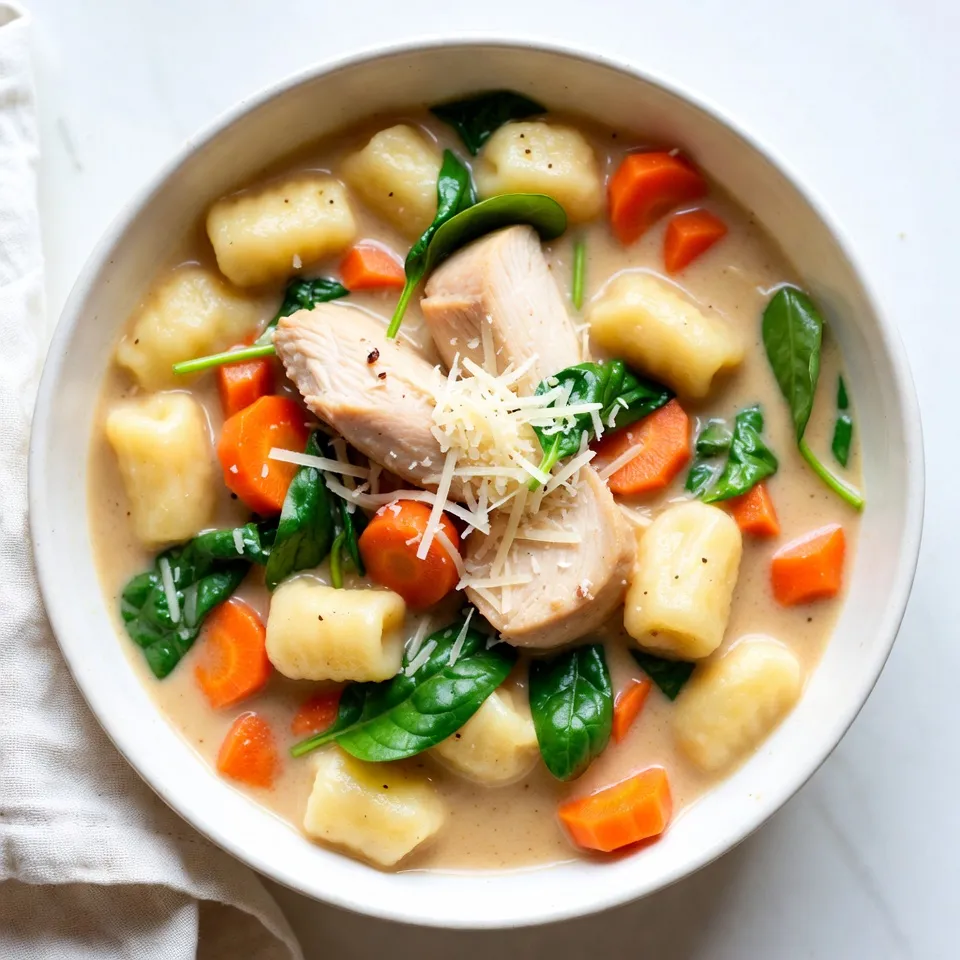
Looking for a meal that warms your heart and fills your belly? Creamy Chicken Gnocchi Soup is the answer! This
![Choosing the right veggies is key. I love using: - Red bell pepper - Yellow bell pepper - Zucchini - Red onion - Brussels sprouts These vegetables bring color and nutrition to the bowl. They roast perfectly together, creating a tasty mix. The magic of flavor comes from simple seasonings. You need: - 3 tablespoons balsamic vinegar - 2 tablespoons olive oil - 1 teaspoon garlic powder - 1 teaspoon dried oregano - Salt and pepper to taste - Optional toppings: ½ cup feta cheese, crumbled; ¼ cup walnuts, chopped Balsamic vinegar adds a sweet tang. Olive oil helps the veggies roast nicely. Garlic powder and oregano boost the flavor. For a hearty meal, choose a base. I often use: - Quinoa or brown rice These grains add fiber and protein. They make the bowls filling and nutritious. You can find the full recipe to learn how to combine all these ingredients perfectly. - Preheat your oven to 425°F (220°C). This high heat helps the veggies caramelize. - In a large bowl, combine the sliced red and yellow bell peppers, diced zucchini, red onion wedges, and halved Brussels sprouts. Add olive oil, balsamic vinegar, garlic powder, oregano, salt, and pepper. Toss well until the veggies are coated. - Spread the vegetable mixture evenly on a large baking sheet. Lining it with parchment paper helps with easy cleanup. - Roast the veggies in your preheated oven for 20-25 minutes. Stir them halfway through to ensure even cooking. You want them to be tender and caramelized for the best flavor. - While your veggies roast, cook quinoa or brown rice according to package instructions. This will be the base of your bowl. - Once the veggies are done, remove them from the oven. Let them cool slightly. - In a bowl, layer the cooked quinoa or rice first. Add a generous portion of the roasted vegetables. Then, top it with fresh spinach. If you like, sprinkle crumbled feta cheese and chopped walnuts for extra flavor and crunch. - Drizzle a bit more balsamic vinegar on top if you want an extra kick. Feel free to check the Full Recipe for more details. Enjoy your nutritious and tasty Balsamic Roasted Veggie Bowl! To ensure even cooking, cut your vegetables into similar sizes. This helps them cook at the same rate. Spread them out on the baking sheet without crowding. If they touch, they steam instead of roast. Stir them halfway through to get all sides nice and crispy. To achieve caramelization, use high heat. Roasting at 425°F (220°C) works great. The sugar in the veggies will brown and create a sweet flavor. Keep an eye on them to avoid burning. Add more herbs and spices to boost the flavor. Try adding rosemary or thyme for a fresh taste. A pinch of red pepper flakes can add heat if you like spice. Don't be afraid to experiment until you find your favorite mix. For alternative vinegar options, try apple cider vinegar or red wine vinegar. Each will change the taste a bit, but they will still taste good. Just make sure to keep the same amount as the balsamic vinegar in the recipe. For a beautiful presentation, serve the bowls in deep, colorful dishes. This makes the colors of the veggies pop. Garnish with extra spinach leaves on top. A drizzle of balsamic vinegar adds a nice touch. Pair your veggie bowls with proteins for a complete meal. Grilled chicken or chickpeas work well. This makes the dish more filling and adds more flavors to enjoy. Check the [Full Recipe] for more details on making these delicious bowls! {{image_2}} You can change up the veggies in your Balsamic Roasted Veggie Bowls. Seasonal options work great! Try using: - Sweet potatoes - Eggplant - Carrots - Cauliflower - Broccoli These add different colors and flavors. If you have dietary needs, you can substitute vegetables too. For example, if you don’t like Brussels sprouts, use green beans instead. Making this dish vegan is easy. Just skip the feta cheese. You can also use nutritional yeast for a cheesy flavor without dairy. If you want gluten-free options, use quinoa or brown rice as your base. Both are tasty and safe for gluten-free diets. Want a kick? Add some spice! A pinch of cayenne pepper or red pepper flakes can heat things up. For sweetness, try adding a drizzle of honey or maple syrup. Both can balance the tang of balsamic vinegar. Feel free to get creative with what you add. The fun part of cooking is making it your own. For more tips, check out the Full Recipe! To keep your Balsamic Roasted Veggie Bowls fresh, put them in an airtight container. This helps keep moisture out. Place the container in the fridge. Your leftovers will last about 3 to 5 days. If you want to store them longer, freezing is a good option. Just make sure to use freezer-safe bags or containers. You can enjoy them for up to 3 months when frozen. When you are ready to eat your leftovers, you can reheat them easily. If you want the best taste, use the oven. Preheat it to 350°F (175°C). Spread the veggies on a baking sheet and warm for about 10-15 minutes. This method keeps them crispy. If you’re in a hurry, use the microwave. Place the veggies in a microwave-safe bowl and cover it with a lid. Heat for about 1-2 minutes, checking often. The shelf life of your Balsamic Roasted Veggie Bowls depends on how you store them. In the fridge, they stay fresh for 3 to 5 days. If you freeze them, they last up to 3 months. After this time, the taste and texture might change. Always check for any signs of spoilage before eating. This way, you ensure your meal is safe and tasty. To make Balsamic Roasted Veggie Bowls, you start by roasting fresh vegetables. First, preheat your oven to 425°F (220°C). Then, mix sliced bell peppers, diced zucchini, onion wedges, and halved Brussels sprouts in a large bowl. Add olive oil, balsamic vinegar, garlic powder, oregano, salt, and pepper. Toss until all veggies are coated. Next, spread the mixture on a baking sheet and roast for 20-25 minutes. While roasting, cook quinoa or brown rice. Once done, layer the cooked grain with the roasted veggies and fresh spinach. Top with feta cheese and walnuts for crunch. For the full recipe, check out the detailed instructions. Yes, you can use many different vegetables. Some great options include carrots, sweet potatoes, or asparagus. You can also try eggplant, mushrooms, or broccoli. Seasonal veggies work well too! Just remember to cut them into similar sizes for even cooking. These veggie bowls are tasty on their own but pair nicely with proteins. Grilled chicken, shrimp, or tofu are excellent choices. You can also serve a side salad or some crusty bread. Try adding a light vinaigrette for an extra flavor boost! Leftovers from Balsamic Roasted Veggie Bowls last about 3-4 days in the fridge. Store them in an airtight container to keep them fresh. You can also freeze them for up to three months. Just make sure to thaw before reheating. Absolutely! You can prep the veggies and store them in the fridge for up to two days before roasting. Cook the grains ahead too. Just assemble the bowls right before serving for the best taste and texture. This makes it easy for busy weekdays! Balsamic roasted veggie bowls are simple, tasty, and versatile. We covered ingredients, step-by-step instructions, and tips to elevate your dish. You can mix and match veggies to fit your diet. Also, try different toppings or bases like quinoa or rice. Make this meal ahead and enjoy easy leftovers. With these tips, your bowls will impress. Enjoy making and sharing this healthy recipe!](https://juliesdish.com/wp-content/uploads/2025/07/d49d0788-46c6-45f4-93da-228084eed2ab.webp)
Are you ready to delight your taste buds with a meal that’s both tasty and nutritious? Balsamic Roasted Veggie Bowls

Craving a warm treat that screams fall? Baked pumpkin spice donuts are your answer! These easy-to-make delights blend cozy spices

Looking for a tasty snack that’s easy to make? Try these Easy Air Fryer Veggie Egg Rolls! With crunchy textures
![To make this dish, gather these key items: - 4 boneless, skinless chicken thighs - 1 cup sweet chili sauce - 2 tablespoons soy sauce (low sodium) - 1 tablespoon garlic, minced - 1 tablespoon fresh ginger, grated - 1 bell pepper (red or yellow), sliced - 1 cup broccoli florets - 1 cup snap peas - 2 tablespoons olive oil - Salt and pepper to taste - Sesame seeds for garnish - Chopped green onions for garnish These ingredients work together to create a wonderful flavor profile. The sweet chili sauce brings a nice sweetness with a hint of heat. The garlic and ginger add depth and aroma, making every bite exciting. For a pop of color and flavor, I suggest these garnishes: - Sesame seeds - Chopped green onions These toppings give your dish a pleasant crunch and fresh taste. You can also add lime wedges for a zesty finish. It’s a simple way to elevate your meal. You can swap some ingredients if needed. If you don’t have chicken thighs, chicken breasts work just as well. For a vegetarian option, try tofu or tempeh. If sweet chili sauce isn’t available, a mix of honey and hot sauce can work. Low-sodium soy sauce is best, but you can use regular if that’s what you have. Remember, cooking is all about being creative! Adjust flavors to your liking, and don’t be afraid to experiment. Explore the [Full Recipe] for complete instructions and tips. Start by preheating your oven to 400°F (200°C). This step is key for cooking the chicken evenly. Next, make the marinade. In a bowl, mix the sweet chili sauce, soy sauce, minced garlic, and grated ginger. This mix packs a punch! Reserve about 2 tablespoons of this sauce for later. Now, grab your chicken thighs. Place them in a large zip-top bag or bowl. Pour the marinade over the chicken. Make sure every piece is coated well. Let it sit in the fridge for at least 30 minutes. If you have time, marinate for up to 2 hours. This extra time helps deepen the flavors. While the chicken marinates, prepare your veggies. Slice the bell pepper and rinse the broccoli and snap peas. These colorful veggies add great crunch and taste. Line a large sheet pan with parchment paper or foil. This makes cleanup easy. Place the marinated chicken thighs in the center of the pan. Arrange the bell pepper, broccoli, and snap peas around the chicken. Drizzle the veggies with olive oil. Season them with salt and pepper to taste. Now it’s time to bake! Slide the sheet pan into your hot oven. Bake for 25 to 30 minutes. The chicken should reach an internal temperature of 165°F (74°C) and look caramelized. In the last 5 minutes, take the reserved marinade and brush it over the chicken. This step adds more flavor and a nice glossy finish. When the timer goes off, carefully remove the pan from the oven. Let it rest for a few minutes. Before serving, sprinkle sesame seeds and chopped green onions on top. This extra touch makes the dish look great. For the full recipe, check out the details above. To keep your chicken juicy, marinate it well. Use sweet chili sauce, soy sauce, garlic, and ginger. This mix adds flavor and moisture. Let the chicken sit in the marinade for at least 30 minutes. For even better results, marinate for two hours. This extra time helps the chicken absorb all those tasty flavors. Oven temperatures can vary. If your oven runs hot, check the chicken early. Aim for 25 minutes, then use a meat thermometer. The chicken should reach 165°F (74°C). If your oven runs cool, you may need 30 minutes or more. Always trust your thermometer over the timer for the best results. Prep your veggies while the chicken marinates. Slice the bell pepper and rinse your broccoli and snap peas. Cut them into even pieces for quicker cooking. Spread the veggies around the chicken on the sheet pan. Drizzle with olive oil and season. This way, they cook evenly and soak up the chicken's flavors. For the perfect finish, add a touch of salt and pepper before baking. Check out the Full Recipe for more tips! {{image_2}} You can swap chicken thighs with other proteins. Try using chicken breasts for a leaner option. They cook fast and still soak up the sweet chili sauce. If you want something different, use shrimp. Shrimp cooks quickly and takes on the sauce's flavor well. For a vegetarian twist, consider tofu. Press it to remove excess water and cut it into cubes. Marinate it just like the chicken for great taste. The beauty of this dish lies in its versatility. You can use any vegetables you have on hand. In spring, try asparagus or snap peas for a fresh crunch. Summer calls for zucchini or corn, adding sweetness. In fall, consider Brussels sprouts or carrots for warmth. Winter vegetables like cauliflower or kale work great too. Always remember to cut veggies into even pieces for even cooking. If you love heat, add some spice to your sweet chili chicken. Mix in a teaspoon of red pepper flakes in the marinade. You can also use sriracha or another hot sauce for a kick. For an extra layer of flavor, try adding sliced jalapeños to the pan. These spicy options will balance the sweet chili sauce well. Adjust the heat level to your taste, and enjoy every bite! For the full recipe, check out the complete instructions above. After enjoying your meal, cool the leftovers quickly. Place them in an airtight container. Make sure to store the chicken and veggies together or separately. This keeps them fresh. Refrigerate them within two hours. The leftovers will last up to three days in the fridge. Always check for any bad smells or signs of spoilage before eating. To reheat your sweet chili chicken, use an oven or stovetop for the best taste. Preheat your oven to 350°F (175°C). Place the chicken and veggies on a baking sheet. Cover them with foil to keep moisture. Heat for about 15-20 minutes. If using a stovetop, heat a pan over medium heat. Add a splash of water to keep it moist. Cook until warmed through. Avoid using the microwave, as it can make the chicken dry. You can freeze leftovers if you want to save them for later. Place the cooled chicken and veggies in a freezer-safe container. Use a vacuum sealer for the best results. Label the container with the date. The meal can last up to three months in the freezer. To thaw, place it in the fridge overnight. Then, reheat as mentioned above. This method helps keep the flavors intact. Enjoy your meal again without losing taste! Yes, chicken breasts can work well. They cook faster than thighs. You may need to adjust your baking time. Check for an internal temperature of 165°F. This helps ensure they stay juicy. Thighs have more fat, so the dish may taste richer with them. If you lack sweet chili sauce, you can make a quick mix. Combine equal parts of honey and soy sauce. Add a splash of sriracha for heat. This gives a nice balance of sweet and spicy. You can also use barbecue sauce. It won’t be the same, but it will still taste good. You can prep the chicken and veggies ahead of time. Marinate the chicken and store it in the fridge. Cut the veggies and keep them in a sealed container. This way, you can assemble the dish quickly later. It’s great for busy days or meal prep. Just make sure to bake it fresh when you’re ready! For the complete recipe, check out the Full Recipe section. This blog post covered all you need for Sheet Pan Sweet Chili Chicken. We discussed main ingredients, tasty garnishes, and swaps for what you might not have. I laid out easy steps for prep, baking, and tips for juicy chicken. Don't forget to try fun variations and proper storage tips. Wrap it all up with FAQs to answer your burning questions. Enjoy making this dish, and let it brighten your meals. You now have the tools to create something delicious!](https://juliesdish.com/wp-content/uploads/2025/07/a0afb4ce-013d-406f-84cc-8af6e1862478.webp)
Looking to spice up your dinner routine? This Sheet Pan Sweet Chili Chicken recipe is your answer. It combines juicy
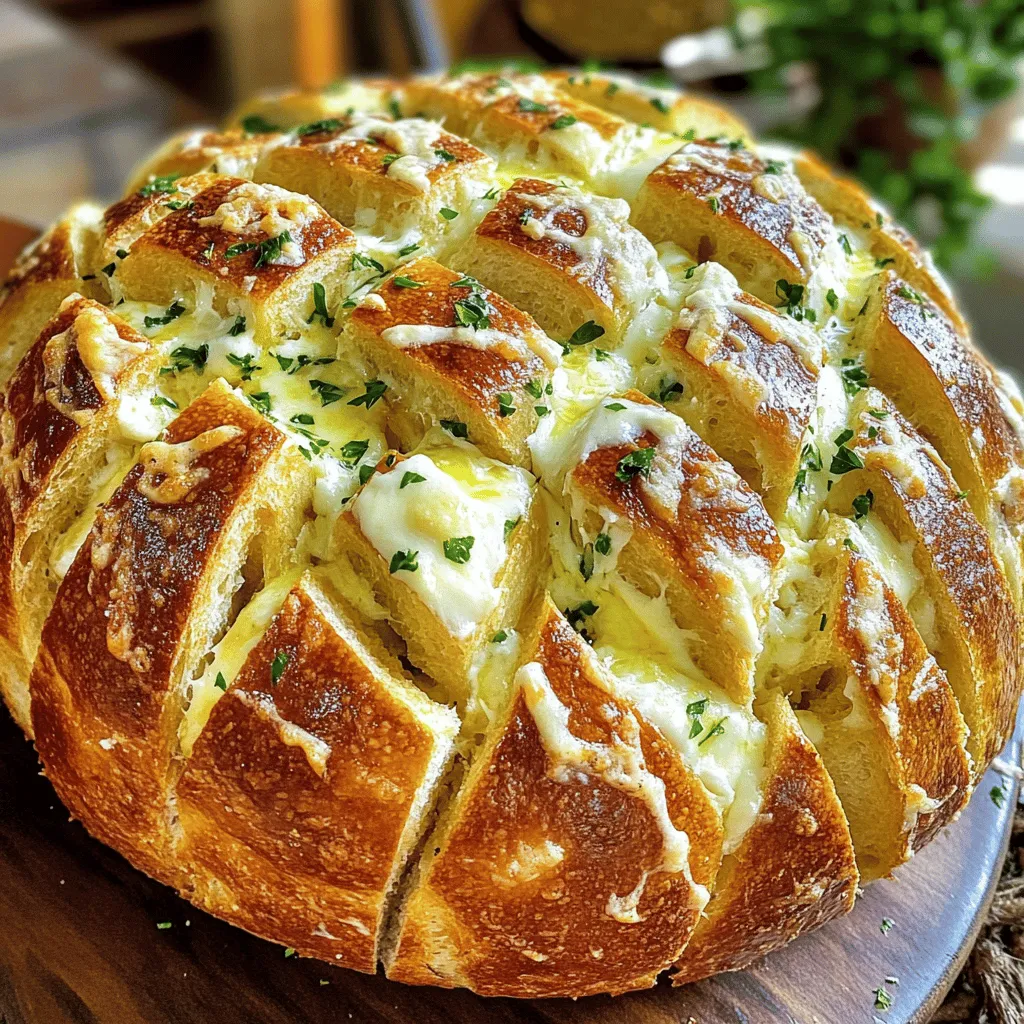
Ready to indulge in a treat that’s perfect for any gathering? Cheesy Garlic Pull Apart Bread is a delight that
![- 1 can (15 oz) chickpeas, drained and rinsed - 1/4 cup hot sauce (adjust to taste) - 1 tablespoon olive oil - 1 teaspoon garlic powder - 1 teaspoon onion powder - 1/2 teaspoon smoked paprika - Salt and pepper to taste - 4 large whole wheat tortillas or wraps - 1 cup mixed greens (spinach, arugula, or lettuce) - 1/2 cup carrot, shredded - 1/2 cup cucumber, thinly sliced - 1/4 cup vegan ranch dressing (optional) Chickpeas are the star of this dish. They give a great base and pack protein. I usually use canned chickpeas because they save time. Rinsing them helps remove excess salt. You can also use fresh chickpeas if you prefer. Just cook them before mashing. Hot sauce adds that spicy kick we love. You can use any brand you like. I enjoy a classic buffalo sauce, but you can try sriracha for a twist. Adjust the amount based on your spice tolerance. Olive oil keeps everything moist. Garlic powder and onion powder bring flavor without being overpowering. Smoked paprika adds a nice depth. The whole wheat tortillas are healthy and sturdy. They hold all the fillings well. The mixed greens, carrots, and cucumbers add crunch and freshness. If you like creamy toppings, vegan ranch dressing is a great choice. It cools the heat from the hot sauce. You can skip it if you want fewer calories. For the full recipe, check the detailed instructions so you can enjoy these wraps at home. 1. Start with the chickpeas. Grab a medium bowl. Open your can of chickpeas, drain, and rinse them well. Use a fork or potato masher to mash the chickpeas. Aim for a slightly chunky texture. This adds a nice bite to your wraps. 2. Time to flavor the chickpeas! Add 1/4 cup of hot sauce, 1 tablespoon of olive oil, 1 teaspoon of garlic powder, 1 teaspoon of onion powder, and 1/2 teaspoon of smoked paprika to the bowl. Don’t forget to sprinkle in a bit of salt and pepper. Mix everything well until the chickpeas are fully coated. 3. Now, heat a non-stick skillet over medium heat. Once hot, add your chickpea mixture. Cook for about 5-7 minutes. Stir occasionally to ensure even heating. The goal is to warm the mixture and blend the flavors well. 4. While your chickpeas are cooking, prepare your wraps. Lay one large tortilla flat on a clean surface. 5. In the center of your tortilla, add a handful of mixed greens. You can use spinach, arugula, or any lettuce you like. Then, add a generous amount of shredded carrots and thin cucumber slices. 6. Spoon the buffalo chickpea mixture on top of the veggies. Make sure each wrap gets a good amount of that delicious filling. 7. If you want, drizzle some vegan ranch dressing over the chickpeas. It adds a creamy touch that pairs well with the spice. 8. Now, fold in the sides of your tortilla. Roll it up tightly from the bottom to form a wrap. 9. Repeat these steps for the remaining tortillas. 10. Finally, cut each wrap in half diagonally. Serve them right away for the best taste and freshness. Follow this full recipe and enjoy a tasty meal that’s easy to make! To get the best flavor from your Vegan Buffalo Chickpea Wraps, use good seasonings. Garlic powder, onion powder, and smoked paprika add depth. They enhance the chickpeas' taste and create a rich flavor. Start by mixing these spices well with the chickpeas. This step makes the flavors blend nicely. If you want more heat, adjust the hot sauce. Start with a small amount and add more until it suits your taste. You can also try different hot sauces. Some are milder, while others pack a punch. Choose one that fits your spice level. Proper tortilla folding is key for a secure wrap. Place the filling in the center of your tortilla. Fold in the sides first, then roll from the bottom up. This method keeps the filling inside and makes it easy to eat. If your wrap feels loose, it may fall apart. A tight roll keeps it together. For a complete guide on making these wraps, check the Full Recipe. {{image_2}} You can make this dish even more exciting by changing a few ingredients. Start with the greens. Instead of mixed greens, try kale or collard greens for a heartier bite. These options add vitamins and a nice crunch. You can also use shredded cabbage or bell peppers for a colorful twist. Next, consider the buffalo sauce. If you want a milder flavor, try using barbecue sauce or a sweet chili sauce. This change gives a different taste while still keeping it fun. You can even make your own sauce with vinegar, hot sauce, and spices for a personal touch. For a lighter wrap, swap out the vegan ranch dressing. You can use a squeeze of lemon juice or plain yogurt. Both add flavor without the extra calories. Experiment with these options to find what you love best. These changes keep your wraps fresh and fun. You can mix and match based on what you have at home. Enjoy the process and make the wraps your own! To keep your wraps fresh, store leftovers in an airtight container. This helps prevent them from drying out. You can place a damp paper towel in the container to maintain moisture. For reheating, use a microwave or a skillet. If using a microwave, heat for about 30 seconds. For the skillet, warm on medium heat for about 2-3 minutes on each side. This helps keep the wrap soft and warm. If you want to make these wraps ahead of time, freezing is a great option. Wrap each prepared wrap in plastic wrap, then place them in a freezer bag. They can last up to three months in the freezer. When ready to eat, thaw overnight in the fridge and reheat as mentioned before. By following these simple steps, you can enjoy your Vegan Buffalo Chickpea Wraps at their best! For the full recipe, check out the details above. To make vinegar-based buffalo sauce, mix equal parts hot sauce and vinegar. You can use apple cider vinegar or white vinegar. Add melted vegan butter for creaminess, if you wish. Taste the sauce and adjust the heat with more hot sauce. This mix gives a tangy kick that pairs well with chickpeas. Yes, you can make this recipe gluten-free easily. Use gluten-free tortillas instead of whole wheat ones. Check the hot sauce label to ensure it’s gluten-free. Chickpeas, veggies, and vegan ranch are naturally gluten-free. This way, everyone can enjoy these wraps! Chickpeas are packed with protein and fiber. They help keep you full and satisfied. Eating chickpeas can improve gut health too. They are low in fat and high in vitamins. Adding chickpeas to your diet benefits overall health. For the full recipe, be sure to check out the [Full Recipe]. In this post, I covered the key ingredients for delicious chickpea wraps, from fresh versus canned chickpeas to choosing hot sauce. I shared a clear, step-by-step guide for preparation and cooking, ensuring you get the best texture. Tips on flavor and tortilla folding can help you create a perfect wrap. I also explored variations and storage methods for easy meal prep. Overall, this recipe offers both tasty and healthy options. Enjoy making your wraps and have fun customizing them to your taste!](https://juliesdish.com/wp-content/uploads/2025/07/8bec37da-e834-42d1-beba-0d2a46a8480f.webp)
Are you craving a quick, tasty meal that packs a punch? Look no further! My Vegan Buffalo Chickpea Wraps are
![To make crispy Parmesan zucchini chips, you need fresh and quality ingredients. Here’s what you’ll need: - 2 medium zucchinis, thinly sliced - 1 cup grated Parmesan cheese - 1 cup breadcrumbs (panko works best) Seasonings bring out the best flavors in your chips. You’ll want the following: - 1 teaspoon garlic powder - 1 teaspoon onion powder - 1 teaspoon dried oregano - 1 teaspoon dried basil - Salt and pepper to taste For a crispy finish, I recommend using cooking spray. It helps achieve that perfect crunch. Look for a high-quality cooking spray. You can also use olive oil for extra richness and flavor. With these ingredients, you’re ready to create a delicious snack. Check out the Full Recipe for complete steps and tips. First, you need to preheat your oven to 425°F (220°C). This high heat is key for crispiness. Next, grab a baking sheet and line it with parchment paper. This helps prevent sticking and makes cleanup easy. In a large bowl, mix together the grated Parmesan cheese, breadcrumbs, garlic powder, onion powder, oregano, basil, salt, and pepper. Stir these ingredients until they blend well. This mix will give your zucchini chips a tasty coating. Take your two medium zucchinis and slice them thinly. Aim for about 1/4 inch thick. Once sliced, place the zucchini on a clean kitchen towel. Pat them dry gently to soak up extra moisture. This step helps your chips get crispier when baked. Now, drizzle the olive oil over the zucchini slices. Toss them lightly to coat each slice. Next, dip each zucchini slice into your cheese and breadcrumb mix. Press lightly to make sure the coating sticks. Arrange the coated slices on your prepared baking sheet in a single layer. Lightly spray the tops with cooking spray. This helps them brown and crisp up. Bake for 20-25 minutes, flipping the chips halfway through. They should turn golden brown and crispy. Once done, take them out and let them cool a bit before serving. Enjoy your delicious crispy Parmesan zucchini chips! For the full recipe, check out the details above. To get the best crunch from your zucchini chips, start by slicing the zucchinis thin. Aim for about 1/4 inch thick. Thin slices cook faster and crisp up better. Pat the slices dry with a towel after cutting. This helps remove extra moisture that can make chips soggy. Using panko breadcrumbs adds extra crunch. They are light and airy, perfect for this recipe. Finally, don't skip the cooking spray. A light mist on top helps them crisp up while baking. One common mistake is not drying the zucchini well. If they are wet, they won’t crisp up. Another issue is overcrowding the baking sheet. Make sure the chips have space. If they touch, they’ll steam instead of bake. Also, don’t skip flipping them halfway through. This ensures both sides get golden and crispy. Lastly, avoid using too much oil. It can make your chips greasy instead of crunchy. I love to serve these zucchini chips with a dip. Marinara sauce pairs well for a classic touch. You can also try a yogurt-based dip for a fresh flavor. For a fun twist, stack the chips on a wooden board. Add some fresh herbs or a sprinkle of Parmesan on top. It makes for a great snack at parties or movie nights. You can find the full recipe above for all the details! {{image_2}} You can switch up the cheese for different flavors. Try using Pecorino Romano for a saltier taste. Or, go for a sharp cheddar if you prefer a bolder flavor. If you want a dairy-free option, nutritional yeast can work well. It gives a nice cheesy taste without the dairy. Get creative with your seasonings! Add smoked paprika for a subtle kick. You can also try cayenne pepper for heat. For more herbs, consider thyme or rosemary. These spices can take your zucchini chips to the next level. You can even mix in some lemon zest for a bright touch. If you need a gluten-free option, use gluten-free breadcrumbs. You can also crush up gluten-free crackers as a substitute. Almond flour can work too, giving a nutty twist. Just make sure your cheese is gluten-free as well. This way, everyone can enjoy these crispy snacks! For the full recipe, visit the section above. To keep your crispy Parmesan zucchini chips fresh, store them in an airtight container. Place parchment paper between layers to avoid moisture. This helps them stay crisp longer. Store them in the fridge if you plan to eat them within a few days. For longer storage, consider freezing. When reheating, you want to keep the chips crispy. The oven is the best method. Preheat your oven to 375°F (190°C). Place the chips on a baking sheet and heat for about 5-7 minutes. This way, they regain their crunch. Avoid the microwave, as it can make them soggy. If you want to freeze your zucchini chips, do so before baking. After breading, place the slices on a baking sheet and freeze until solid. Then, transfer them to a freezer bag. When ready to cook, bake them directly from the freezer. Just add a few extra minutes to the baking time. Enjoy your crispy Parmesan zucchini chips anytime with this method! For the full recipe, check out the [Full Recipe]. Yes, you can make crispy Parmesan zucchini chips in an air fryer. Set the air fryer to 400°F (200°C). Arrange the zucchini slices in a single layer. Cook for about 10-12 minutes. Shake the basket halfway through for even cooking. This method gives you great crispiness! To keep your zucchini chips crispy, pat them dry before coating. Removing extra moisture is key. Use a clean kitchen towel to absorb any wetness. Also, avoid overcrowding the baking sheet. Give each chip space to breathe for the best results. Crispy Parmesan zucchini chips taste great with a few dips. Marinara sauce is a classic choice. You can also try ranch dressing, garlic aioli, or tzatziki. Each dip adds a fun flavor twist to your snack. Serve a few options for variety! Several factors can affect crispiness. Not drying the zucchini slices well is a common issue. Also, if the oven temperature is too low, they won’t crisp up. Be sure to use enough oil and don’t skip the cooking spray. These steps help achieve that perfect crunch. This blog post covered how to make crispy zucchini chips. We discussed fresh ingredients and seasonings that enhance flavor. You learned step-by-step instructions for preparing and baking the chips. I shared tips for achieving crispiness and avoiding common mistakes. Variations for different tastes and storage methods were also included. With these insights, you can make your own tasty zucchini chips at home. Enjoy experimenting with flavors and serving them to others!](https://juliesdish.com/wp-content/uploads/2025/07/6f580be4-cba0-4b76-b8f4-41c45fd7326e.webp)
Are you ready for a tasty snack that’s both easy and healthy? Crispy Parmesan Zucchini Chips are the answer! With
