Brown Butter Maple Pecan Pumpkin Bread Delight
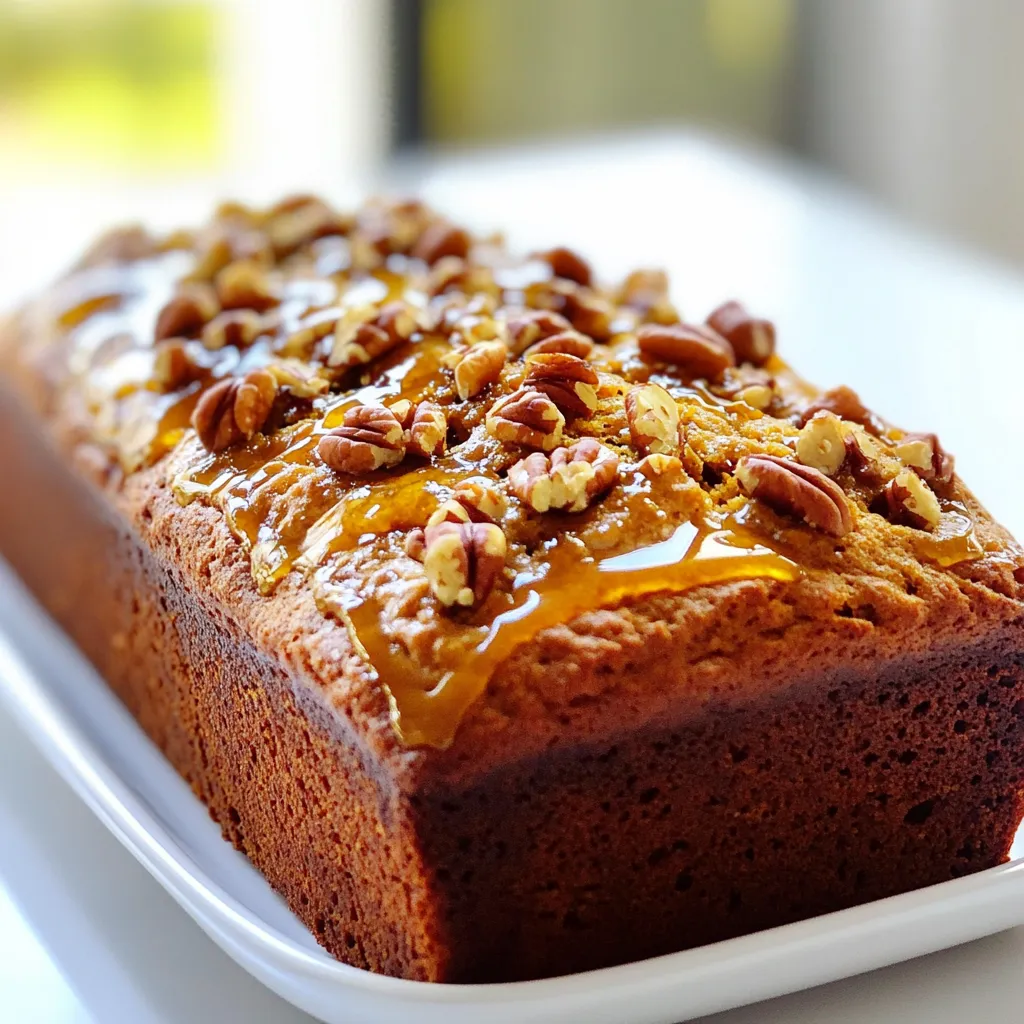
Get ready to indulge in the warm flavors of fall with my Brown Butter Maple Pecan Pumpkin Bread Delight! This

Get ready to indulge in the warm flavors of fall with my Brown Butter Maple Pecan Pumpkin Bread Delight! This
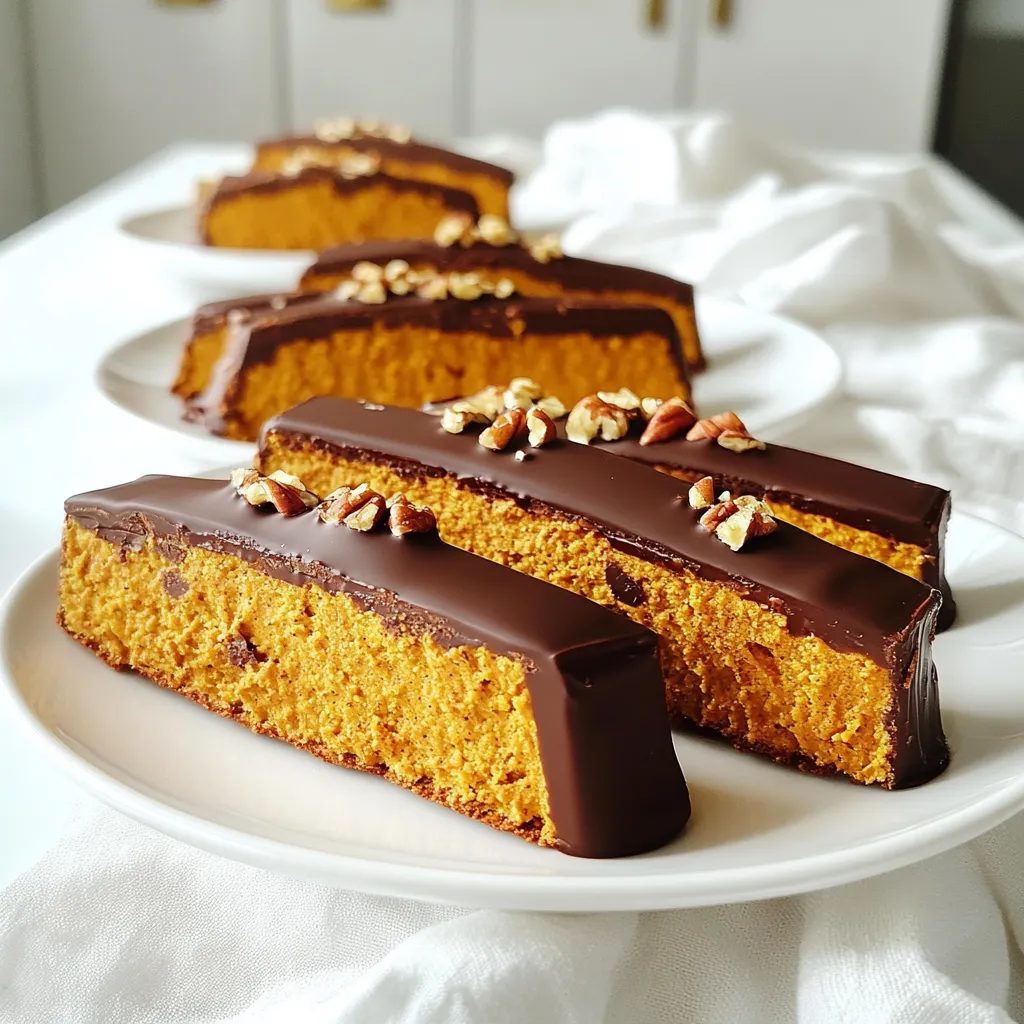
Are you ready to elevate your snack game? I’m excited to share my recipe for Bakery-Style Chocolate Dipped Pumpkin Biscotti.
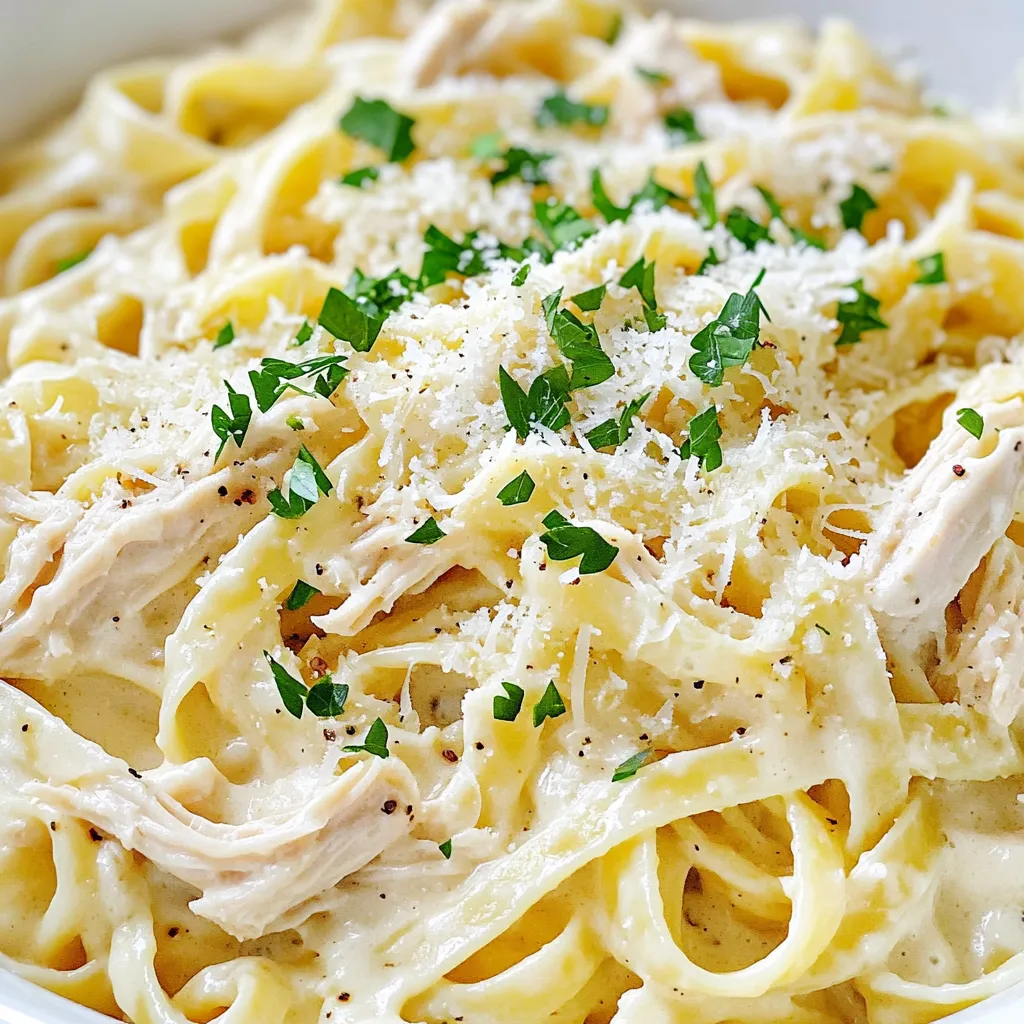
Looking for a quick and tasty meal? You’ve landed in the right spot! My Slow Cooker Creamy Chicken Alfredo Pasta
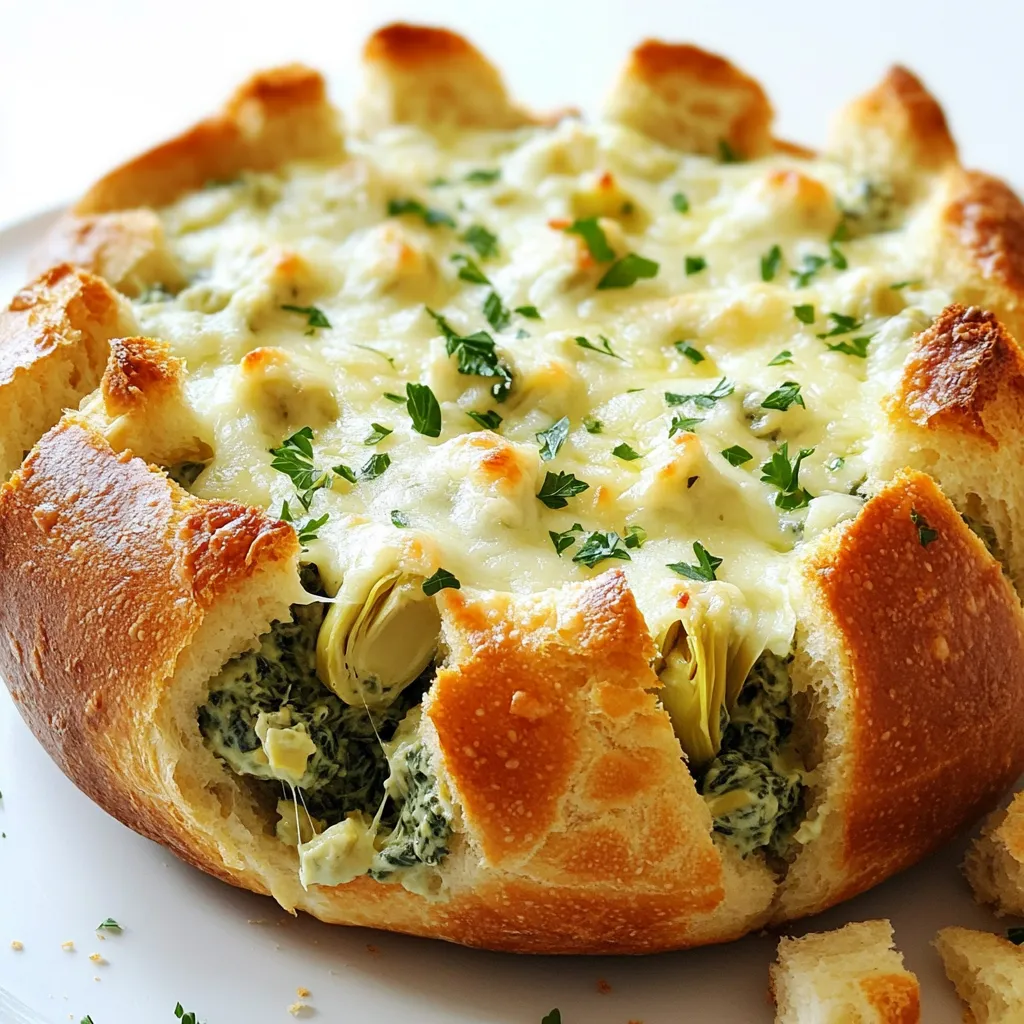
Are you ready to elevate your snack game? This Savory Spinach Artichoke Dip Pull Apart Bread recipe combines gooey cheese,
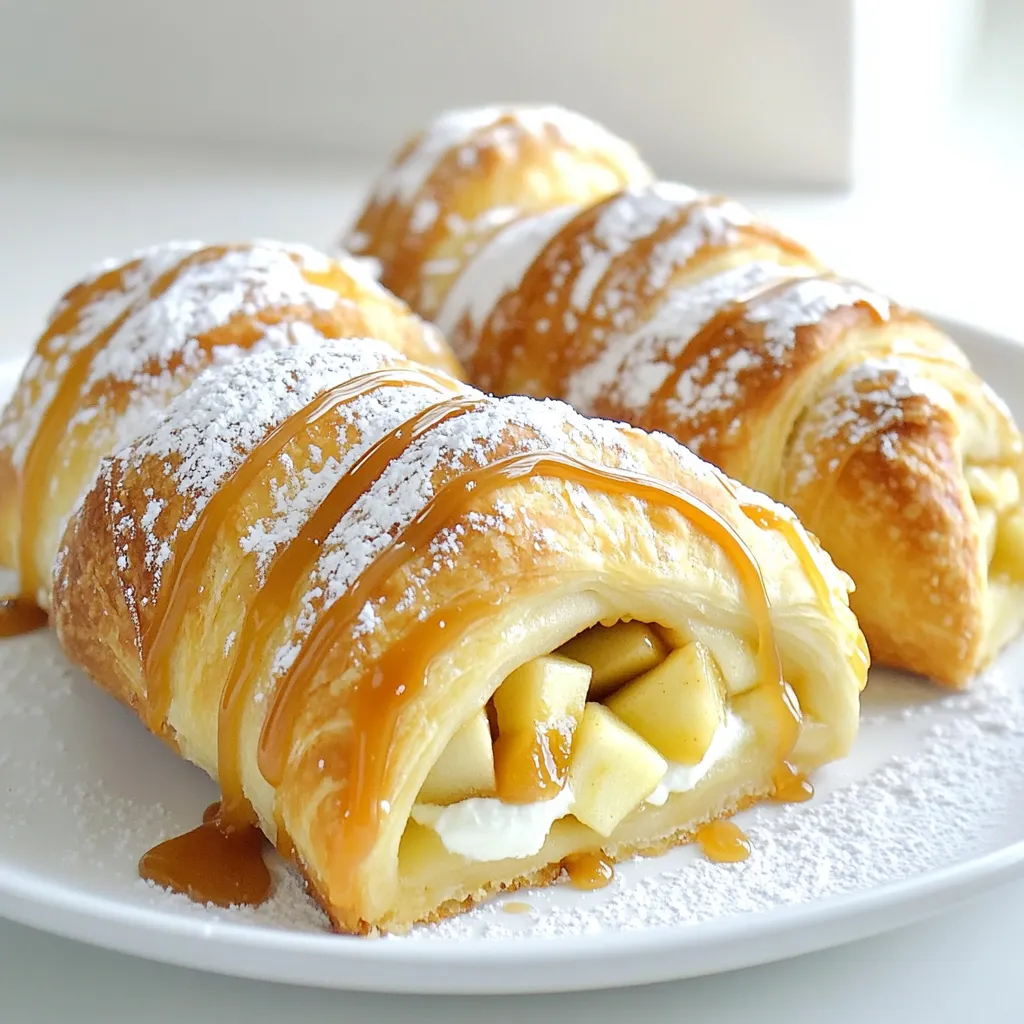
Get ready for a sweet treat that will impress everyone! My Caramel Apple Cheesecake Crescent Rolls blend creamy cheesecake with
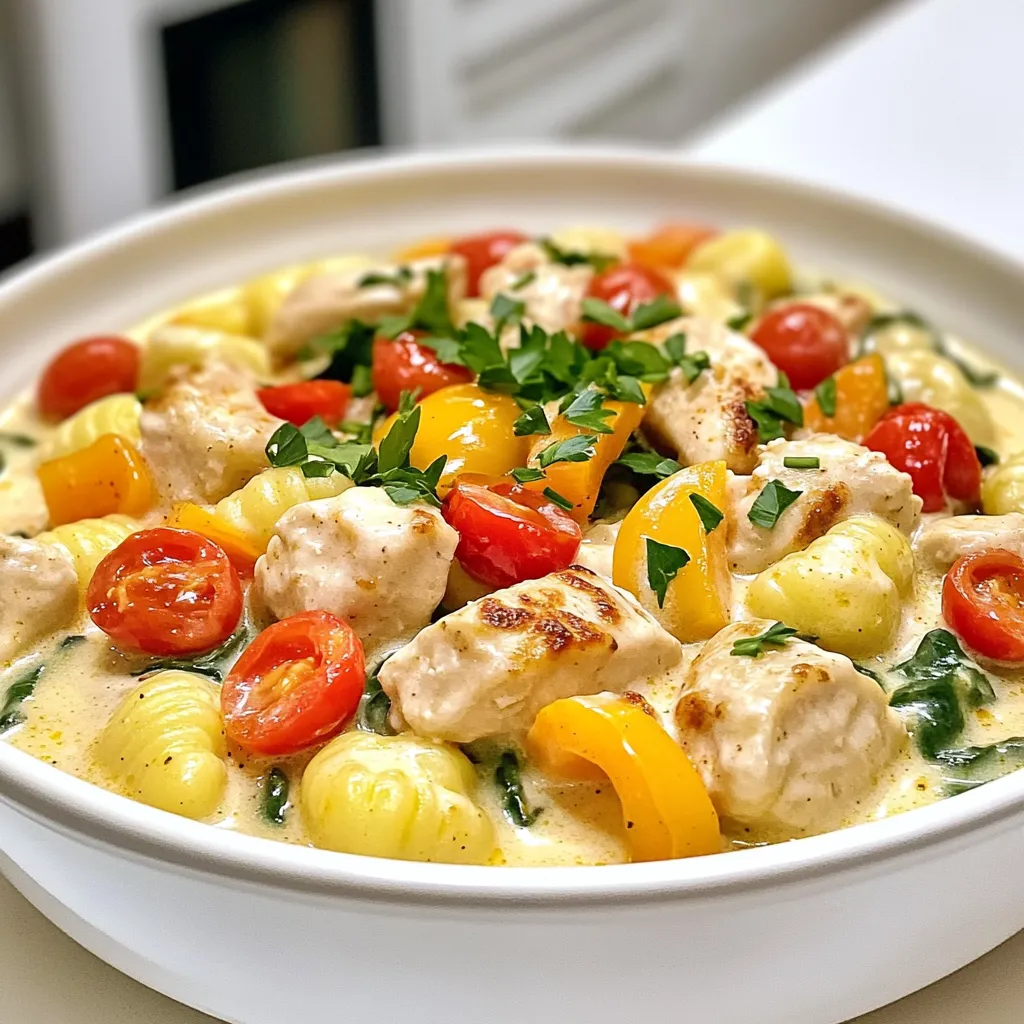
Are you ready to spice up your dinner routine? My Creamy Cajun Chicken Gnocchi One Pot Delight combines bold flavors
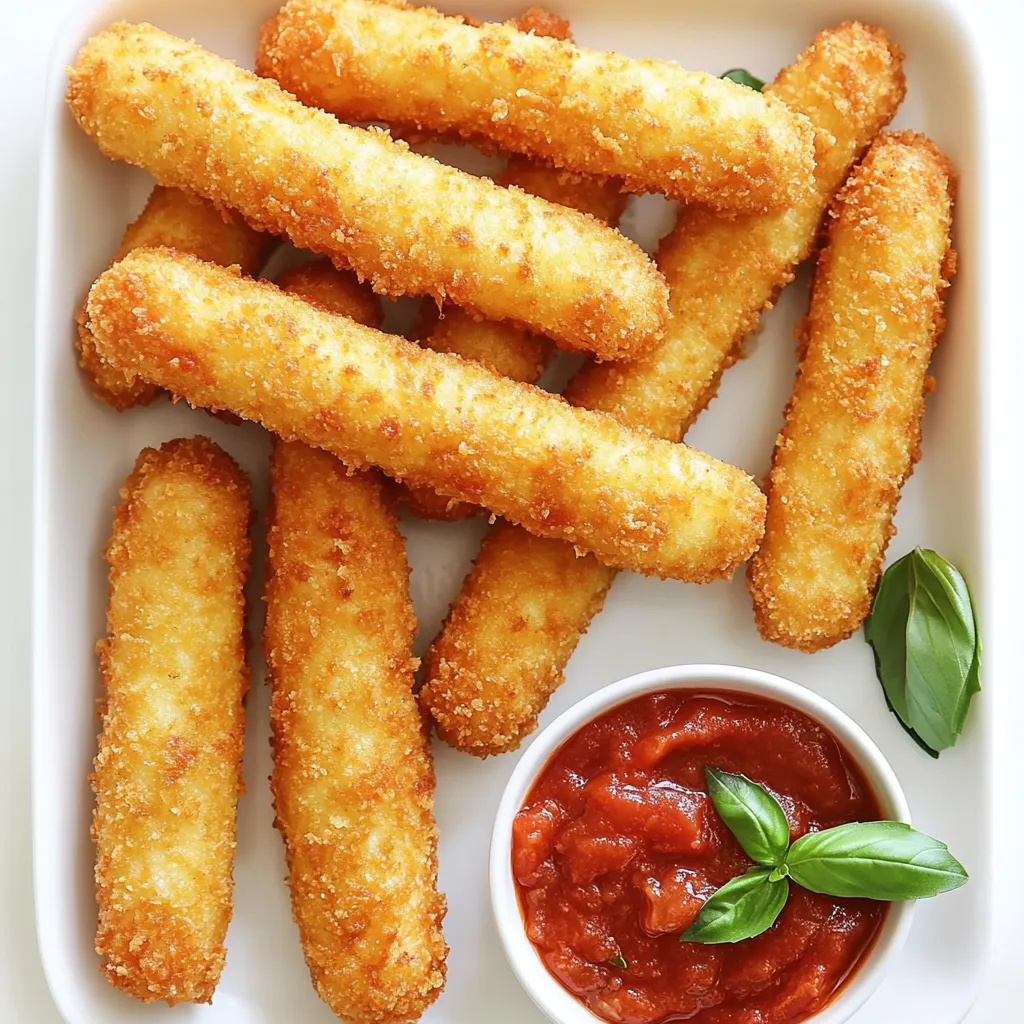
If you’re craving a quick, tasty snack, crispy mozzarella sticks are the perfect choice. Using an air fryer makes them
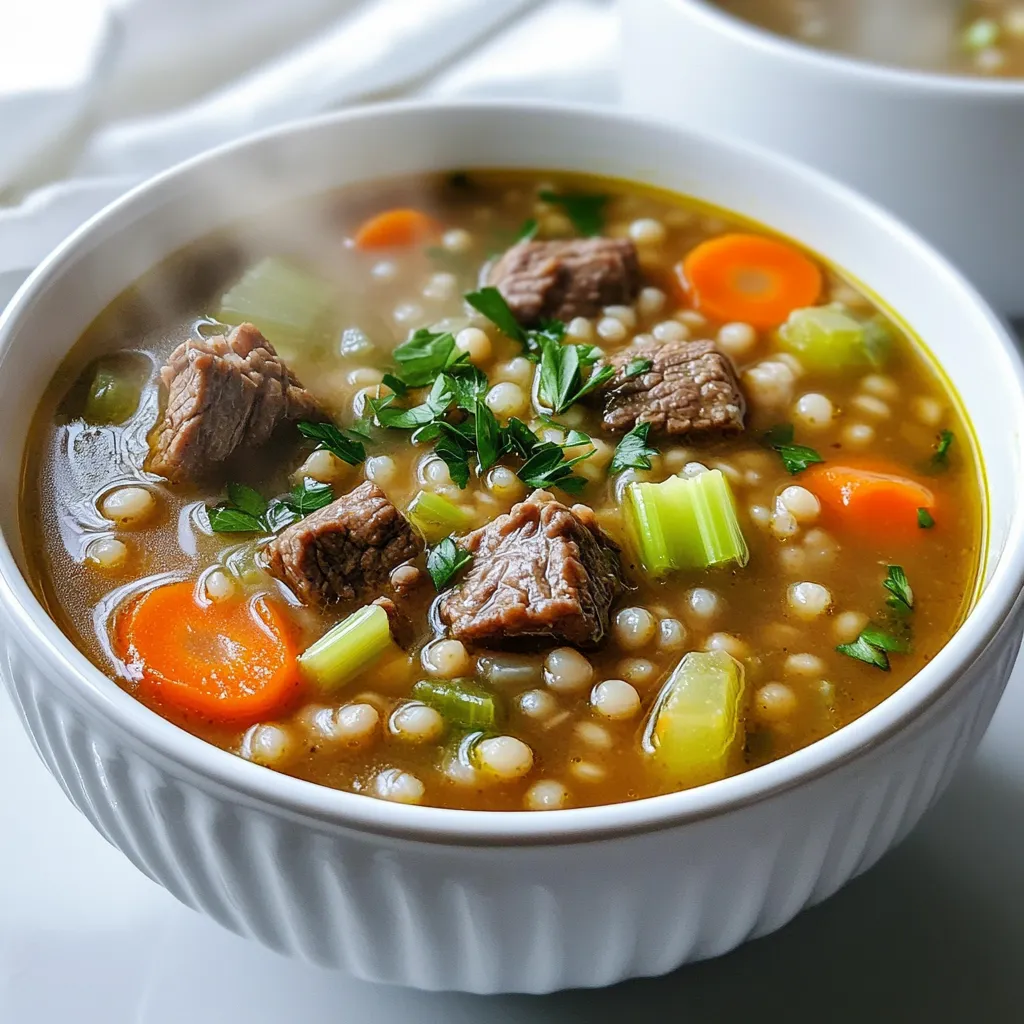
Are you ready for a warm bowl of comfort? My Beef and Barley Soup is a perfect slow cooker meal.
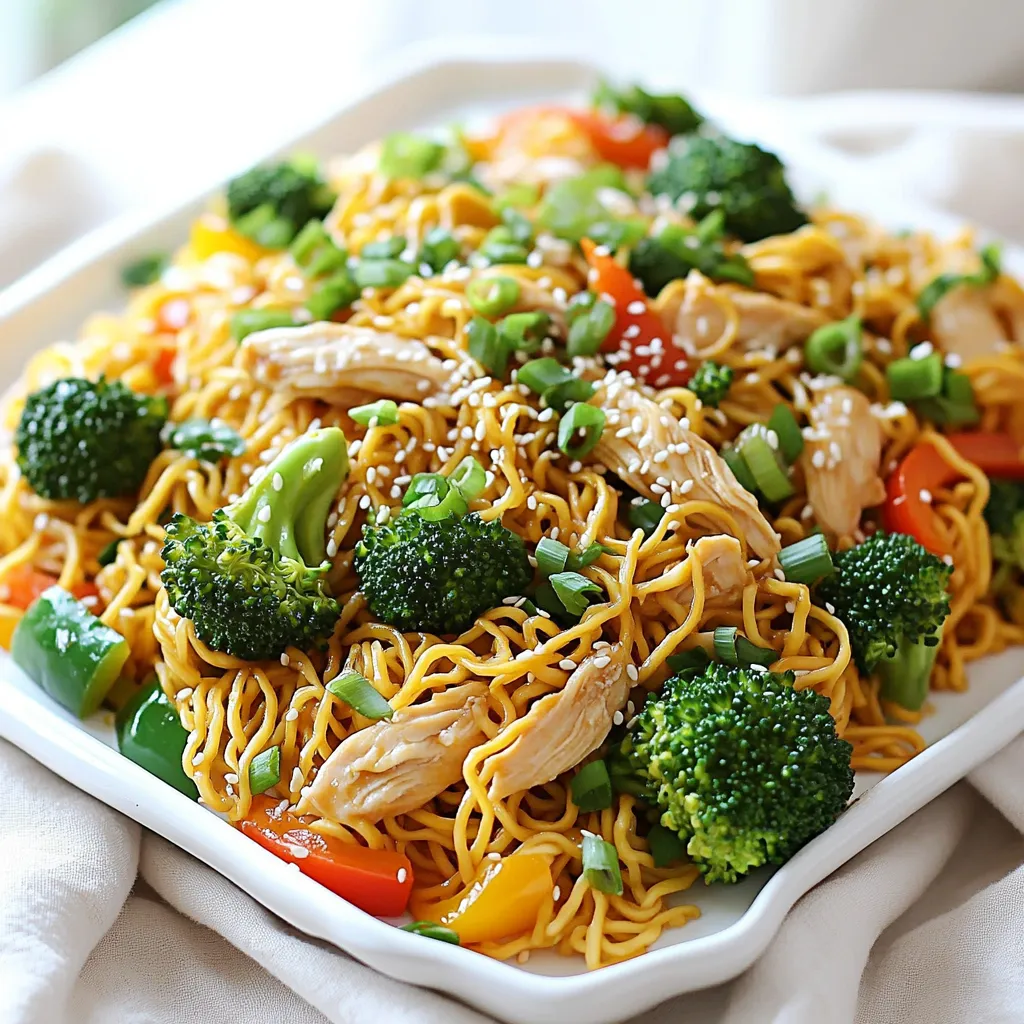
Looking to whip up a meal that’s better than takeout? You’re in the right place! In “Chicken Chow Mein Better
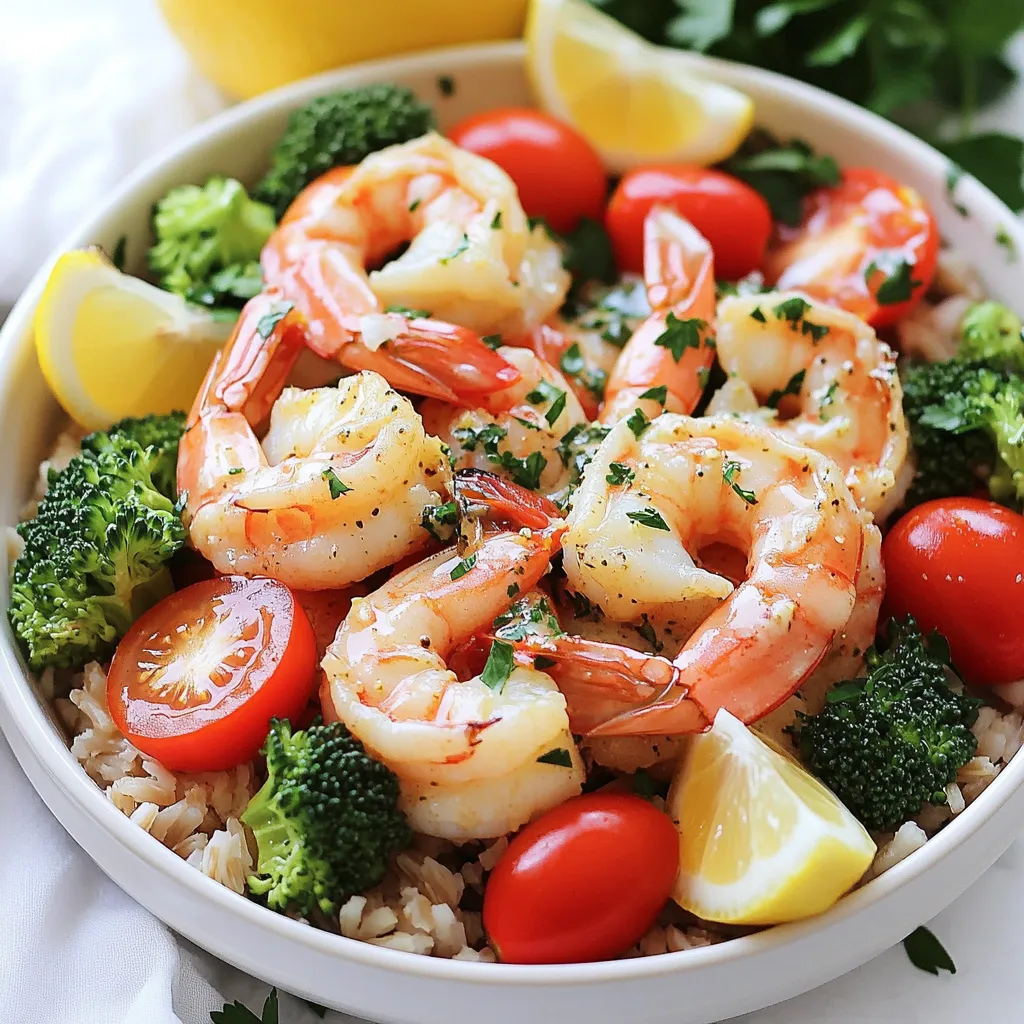
Craving a dish that’s both quick and full of flavor? You’ll love these Garlic Butter Shrimp Bowls! This sheet pan
