Sheet Pan Spicy Harissa Veggie Bowls Flavor Boost
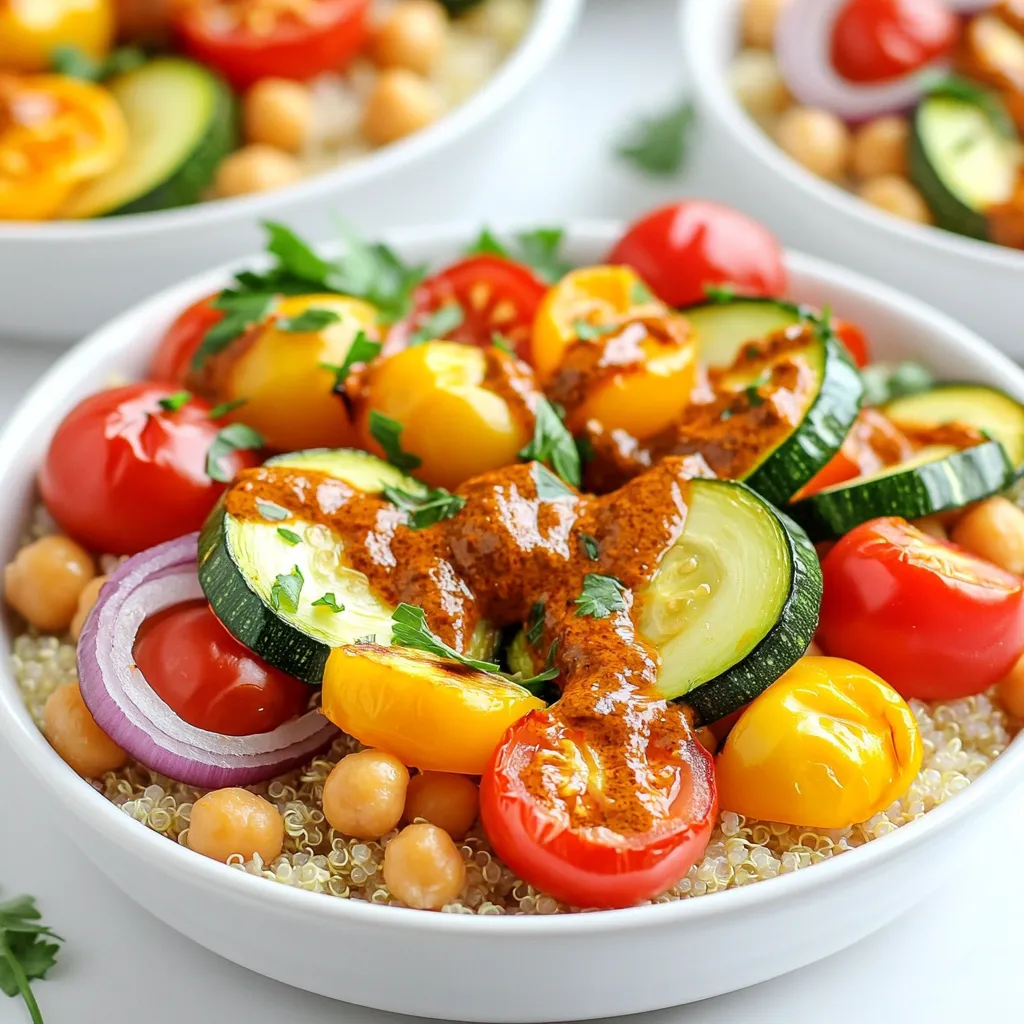
Looking to spice up your mealtime? These Sheet Pan Spicy Harissa Veggie Bowls offer bold flavors and easy prep. I’ll

Looking to spice up your mealtime? These Sheet Pan Spicy Harissa Veggie Bowls offer bold flavors and easy prep. I’ll
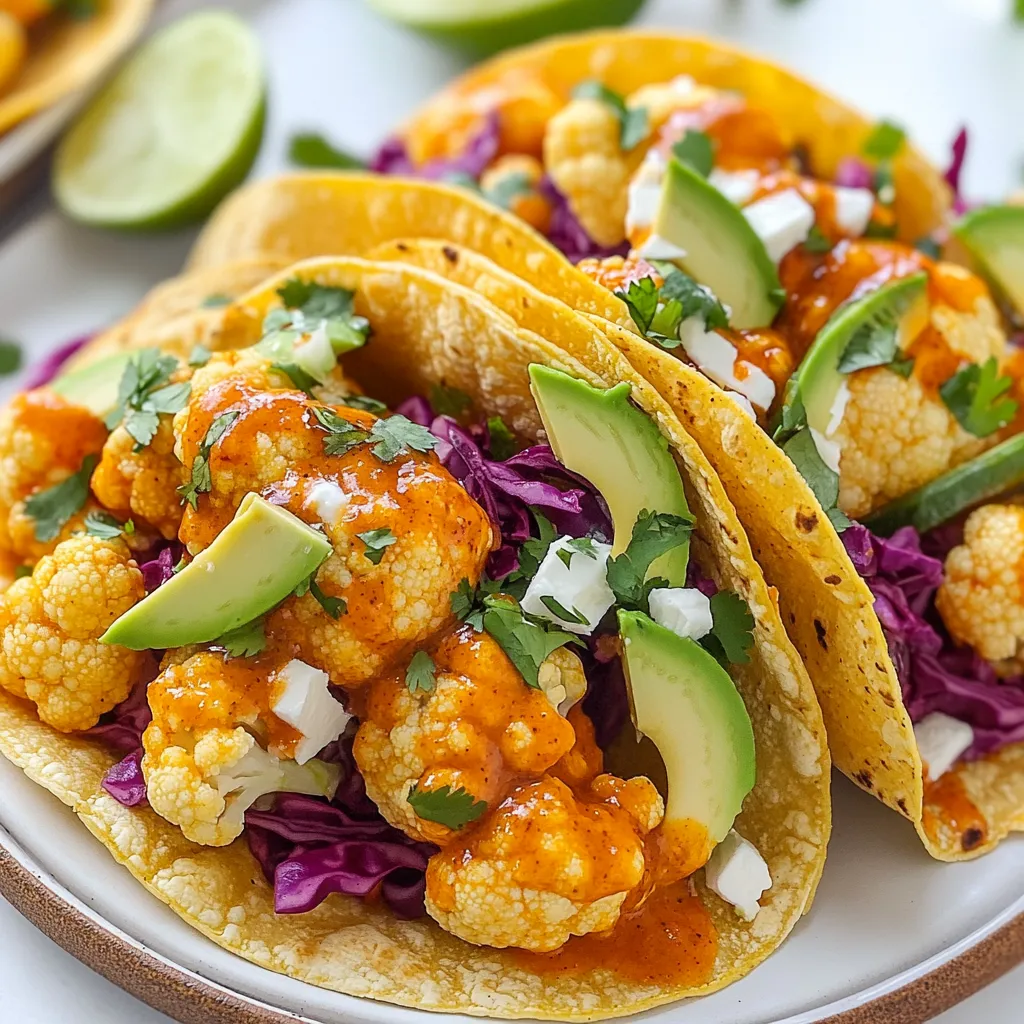
Craving a burst of flavor in your meals? Let’s dive into Buffalo Cauliflower Tacos—a crispy and tasty delight that’ll wow
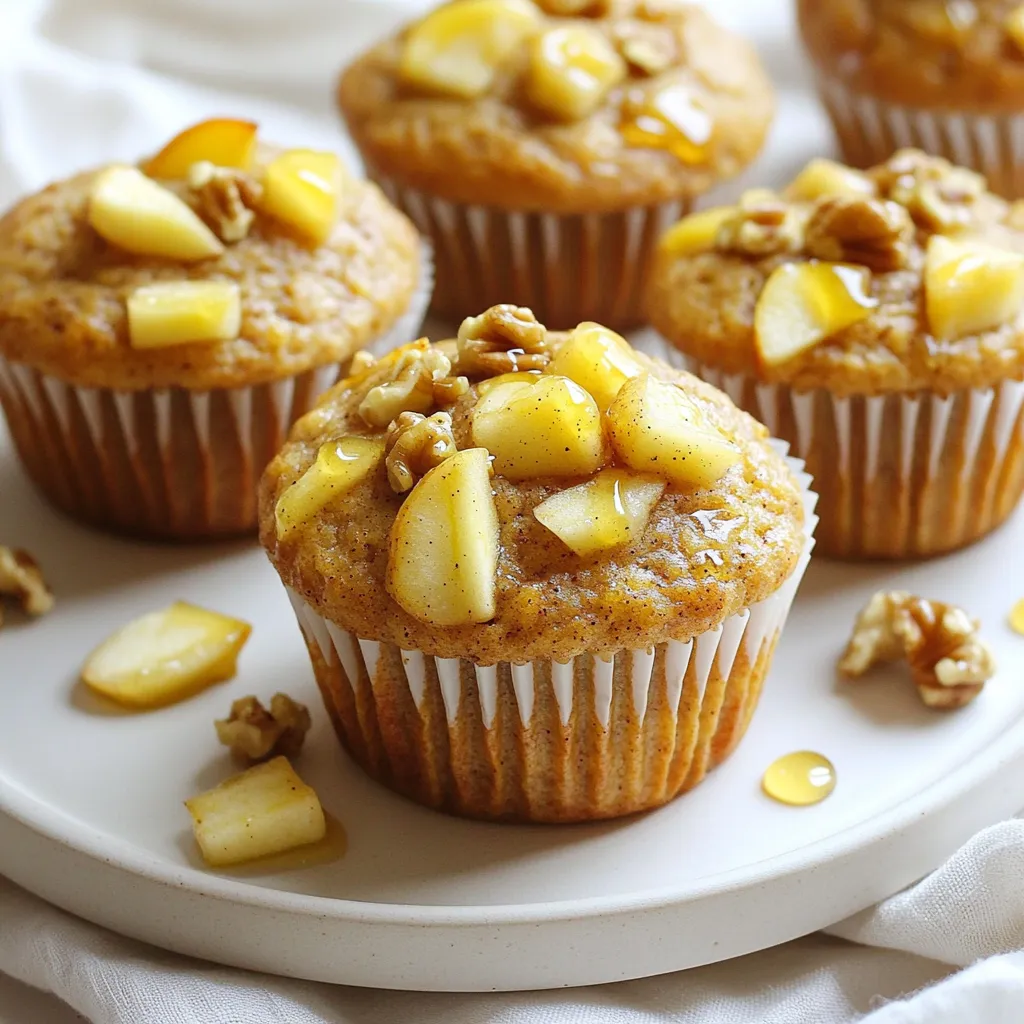
Looking for a tasty and healthy treat? You’ll love my easy Apple Cinnamon Protein Muffins! Packed with protein and full

Indulge in the cozy flavors of fall with my Pumpkin Spice White Hot Chocolate Slow Cooker Delight. This creamy, dreamy
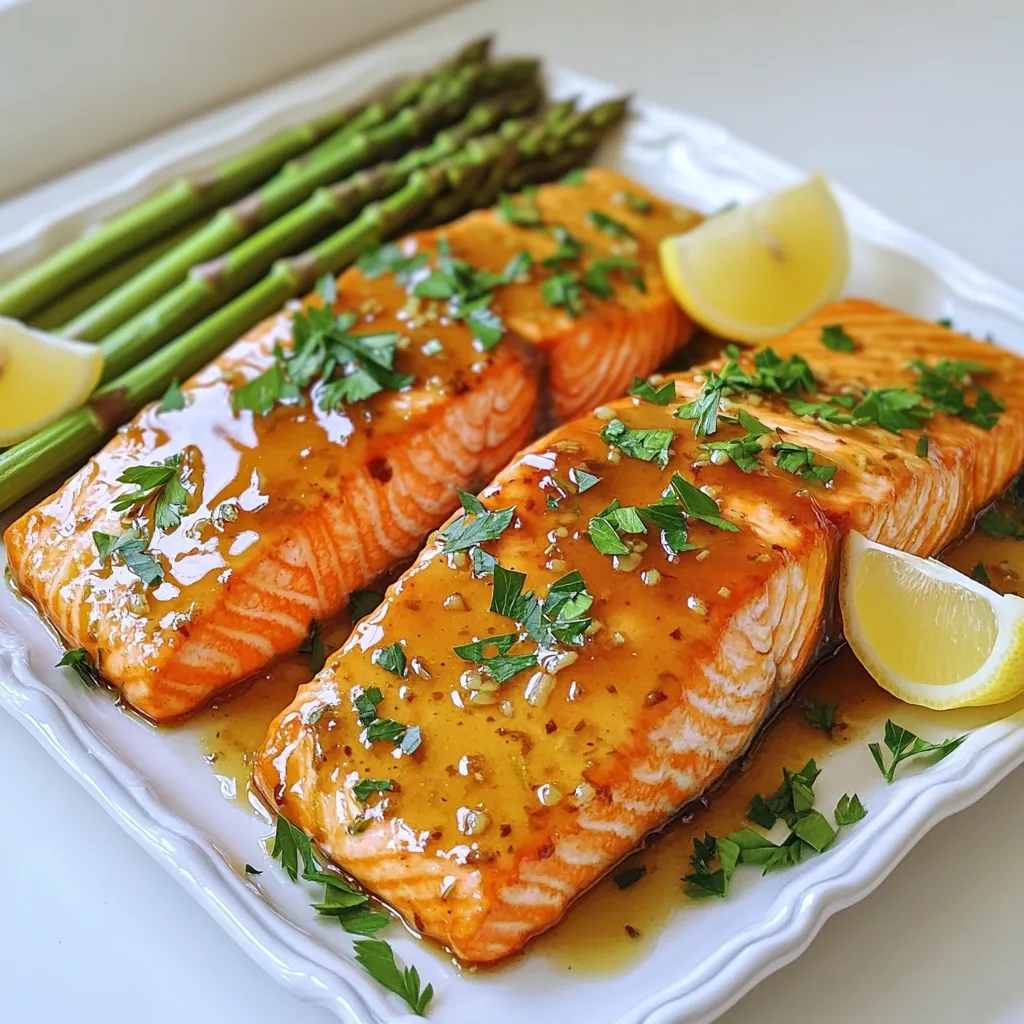
Ready for a delicious and easy dinner? In this blog post, I will show you how to make a Honey
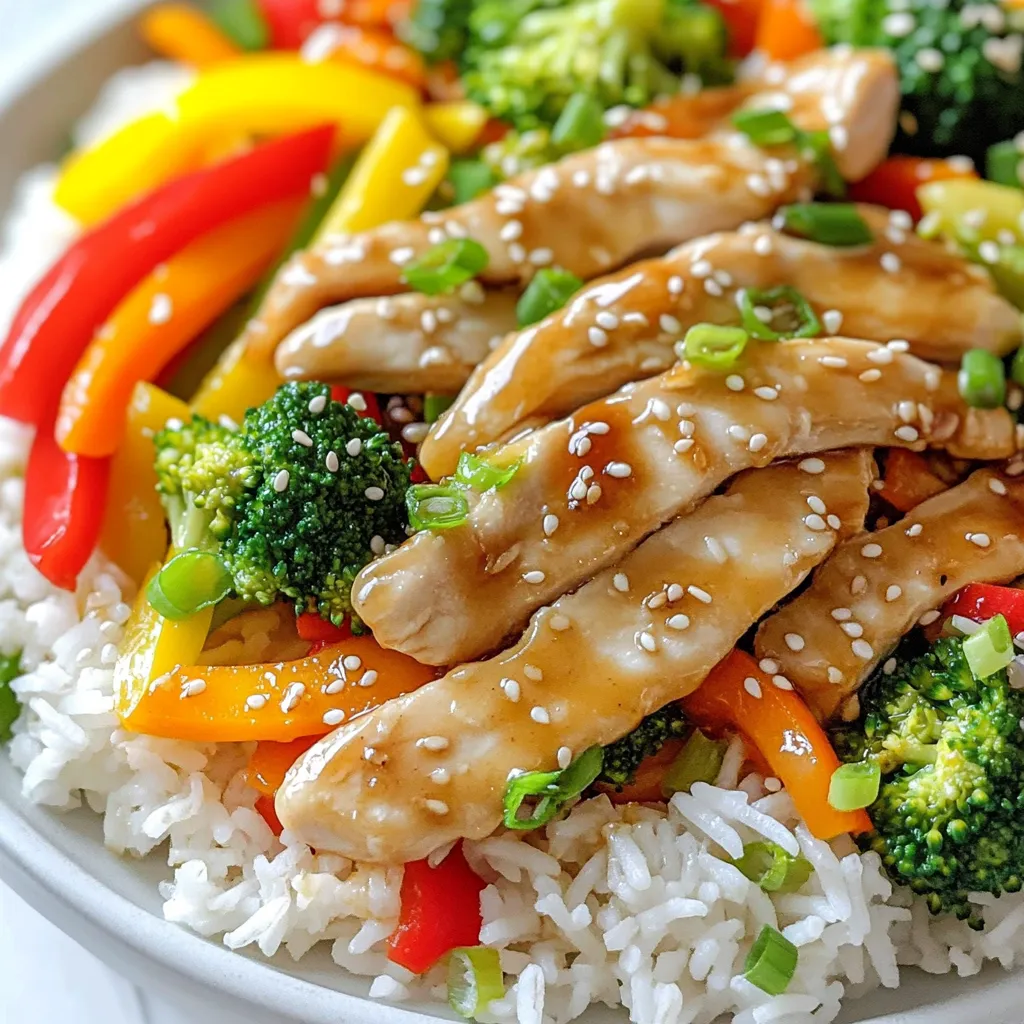
Looking for a simple yet tasty meal? My Garlic Butter Chicken Stir Fry is just what you need! It’s quick
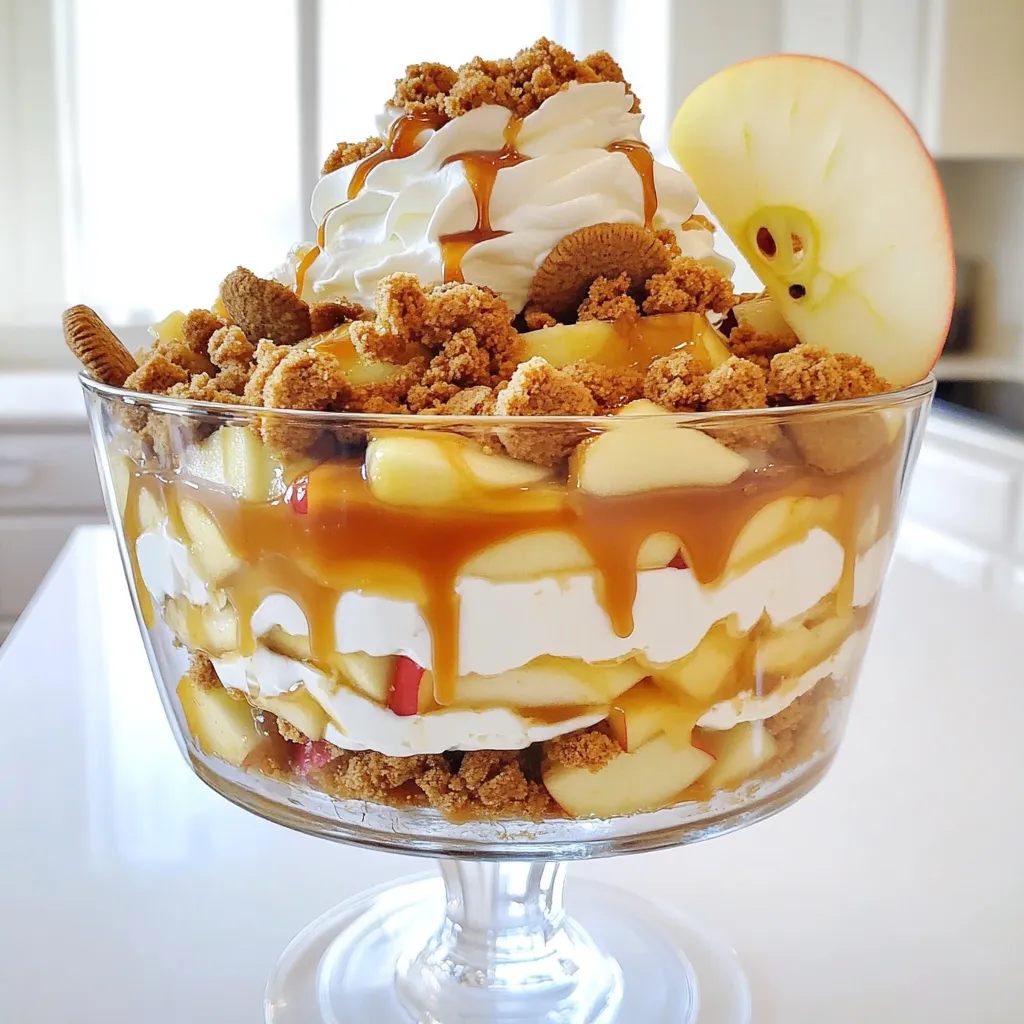
Fall is here, and that means it’s time for cozy desserts like Caramel Apple Trifle! This simple recipe layers tender
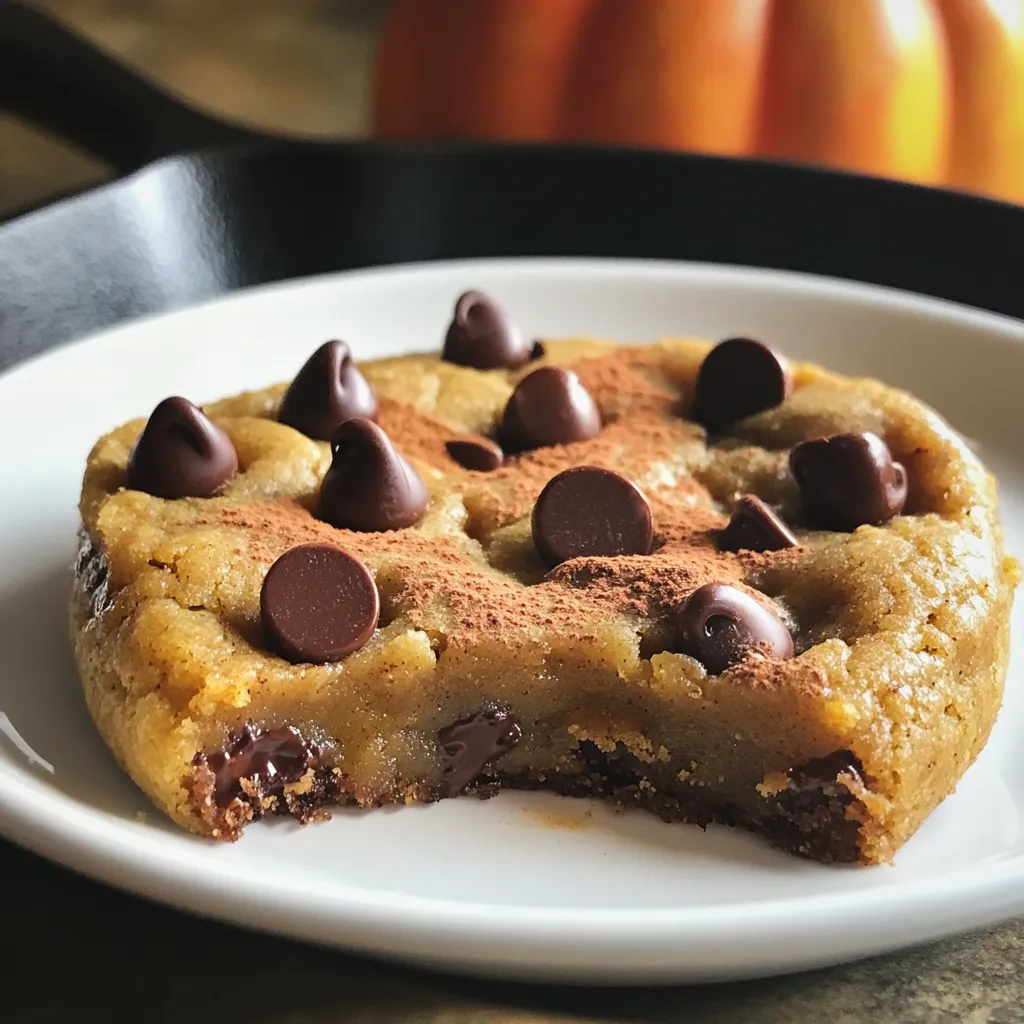
Fall is the perfect time for a cozy, warm dessert, and this Pumpkin Chocolate Chip Skillet Cookie fits the bill.
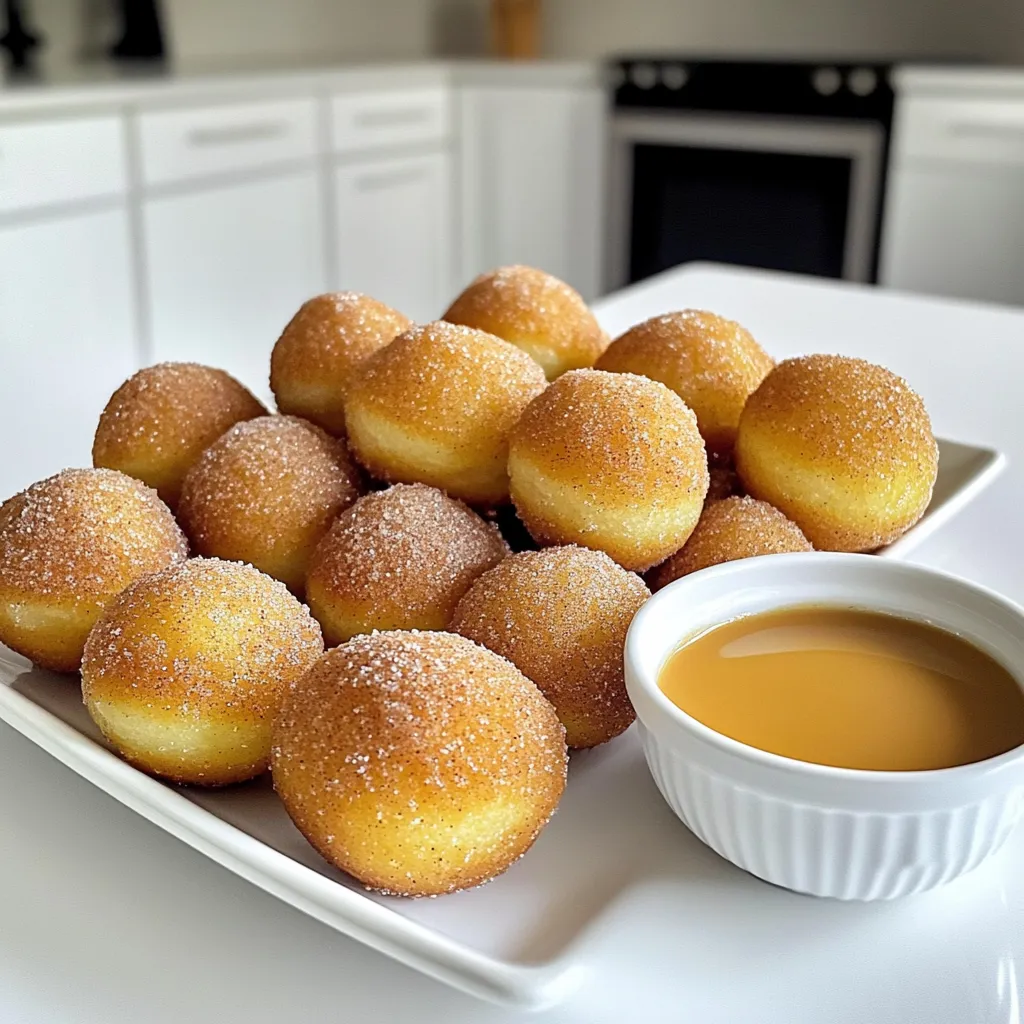
Get ready for a sweet treat that brings fall flavors to life! In this post, I’ll guide you through making

Get ready to whip up a fun twist on a classic fall favorite! In this blog post, I’ll show you
