Maple Glazed Pumpkin Scones Delightful and Easy Recipe

WANT TO SAVE THIS RECIPE?

Are you ready to boost your baking skills with a delightful treat? My Maple Glazed Pumpkin Scones recipe is not just easy, it’s full of warm flavors that scream autumn. With simple ingredients and easy steps, you can enjoy these tasty scones in no time. Plus, I’ll share tips to get the texture just right. Let’s dive into the world of pumpkin scones and make your kitchen smell amazing!

Ingredients

List of Ingredients

– 2 cups all-purpose flour

– 1/2 cup brown sugar, packed

– 1 tablespoon baking powder

– 1/2 teaspoon salt

– 1 tablespoon ground cinnamon

– 1/2 teaspoon ground nutmeg

– 1/4 teaspoon ground ginger

– 1/2 cup unsalted butter, cold and cubed

– 1/2 cup pumpkin puree

– 1/4 cup heavy cream

– 1 large egg

– 1 teaspoon vanilla extract

– 1/2 cup powdered sugar (for glaze)

– 2 tablespoons maple syrup (for glaze)

– 1-2 tablespoons milk (for glaze)

Notes on Ingredient Quality

Using high-quality ingredients makes a big difference. Choose fresh, organic pumpkin puree for the best flavor. Fresh spices enhance aroma and taste. Use unsalted butter for control over salt levels. The right flour, like all-purpose, ensures a nice texture. For the best glaze, use pure maple syrup. It adds depth and sweetness.

Substitutions for Common Ingredients

You can swap brown sugar for white sugar if needed. Coconut oil can replace unsalted butter for a dairy-free option. For a gluten-free scone, try almond or oat flour. Use a plant-based cream for a dairy-free glaze. Applesauce can replace heavy cream to lighten the recipe. Make sure your substitutions suit your taste and dietary needs.

Step-by-Step Instructions

Preparation Steps

1. Start by preheating your oven to 400°F (200°C). This gives the scones a nice rise.

2. Line a baking sheet with parchment paper. This helps with cleanup and prevents sticking.

3. In a large bowl, whisk together these dry ingredients:

– 2 cups all-purpose flour

– 1/2 cup brown sugar, packed

– 1 tablespoon baking powder

– 1/2 teaspoon salt

– 1 tablespoon ground cinnamon

– 1/2 teaspoon ground nutmeg

– 1/4 teaspoon ground ginger

4. Now, take your cold butter. Cut it into the flour mix using a pastry cutter or your fingers. You want it to look like coarse crumbs.

5. In another bowl, mix together the wet ingredients:

– 1/2 cup pumpkin puree

– 1/4 cup heavy cream

– 1 large egg

– 1 teaspoon vanilla extract

Stir until it is smooth.

6. Pour the pumpkin mix into the flour mixture. Gently stir until just combined. Be careful not to overmix.

Baking Instructions

7. Turn your dough onto a lightly floured surface. Pat it into a circle about 1 inch thick.

8. Cut the dough into wedges, like a pizza, or use a biscuit cutter for round shapes.

9. Place the scones on the prepared baking sheet. Bake for 15-18 minutes. They should be lightly golden brown on the edges.

Tips for the Perfect Scone Texture

– Use cold butter for flakiness. It keeps the scones light and airy.

– Don’t overmix the dough. Overworking can make the scones dense.

– If you want more flavor, add a pinch of salt to the glaze. It enhances the sweetness.

– For a shiny glaze, drizzle it on while the scones are still warm.

Tips & Tricks

Common Mistakes to Avoid

When making maple glazed pumpkin scones, avoid these common issues:

Overmixing the dough: This can lead to tough scones. Mix until just combined.

Using warm butter: Cold butter makes the scones flaky. Keep it chilled.

Not measuring flour correctly: Too much flour can make scones dry. Use a scale for accuracy.

Skipping the glaze: The glaze adds sweet flavor. Don’t skip it!

How to Achieve Optimal Flavor

To enhance the flavor of your scones, try these tips:

Use fresh spices: Freshly ground spices have more flavor. Always check your pantry.

Quality pumpkin puree: Choose pure pumpkin, not pumpkin pie filling. It’s smoother and richer.

Chill dough before cutting: This helps the scones keep their shape while baking.

Add a pinch of salt: It brightens the overall taste. A small amount goes a long way.

Serving Suggestions for Maple Glazed Pumpkin Scones

Serve your scones with these ideas:

Pair with coffee or tea: The warm drinks balance the sweet glaze.

Top with whipped cream: A dollop adds creaminess and richness.

Add nuts or seeds: Chopped pecans or pumpkin seeds give a nice crunch.

Serve with butter: Spread a little butter on warm scones for extra flavor.

Enjoy your baking adventure with these tips! They will help you create perfect maple glazed pumpkin scones every time.
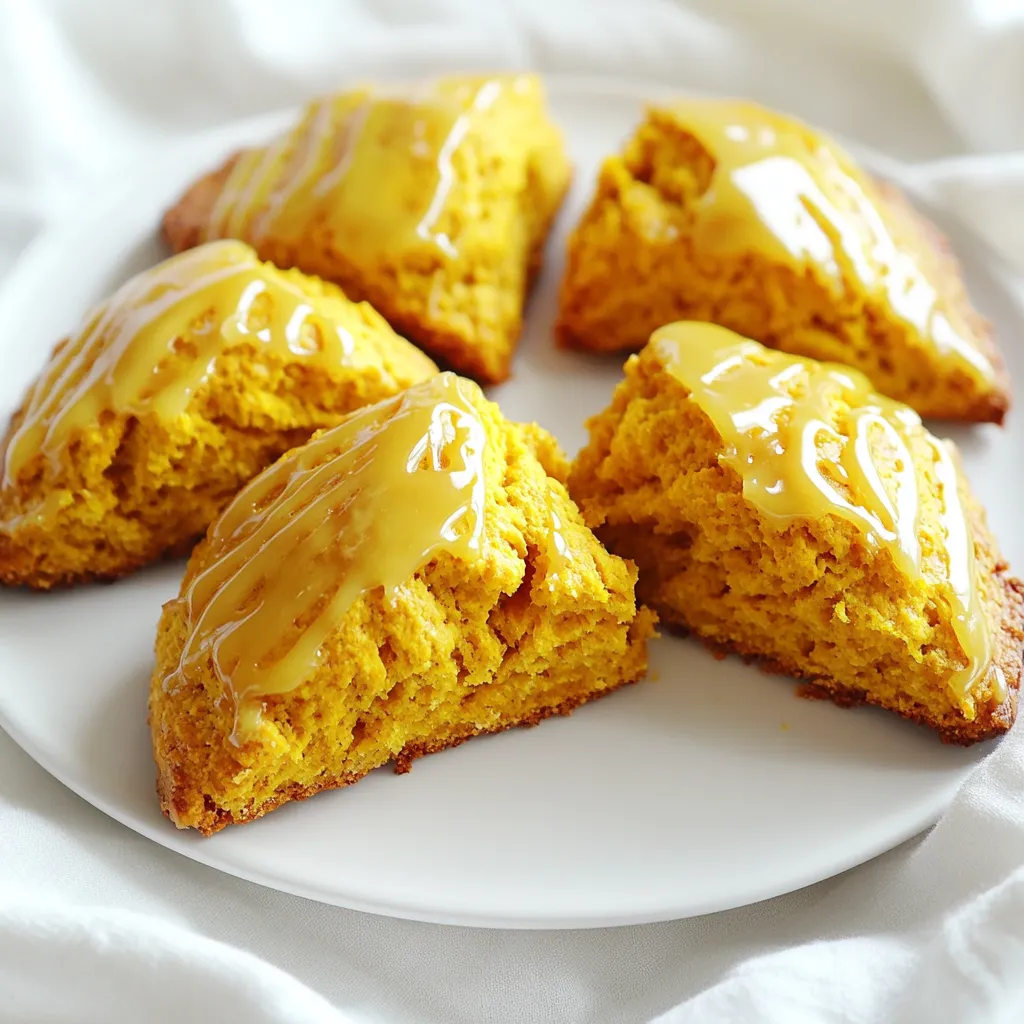
Variations

Add-ins for Additional Flavor

You can jazz up your maple glazed pumpkin scones with fun add-ins. Try adding chocolate chips for a sweet touch. Dried cranberries or raisins can add a chewy bite. For a nutty flavor, consider chopped pecans or walnuts. You can also mix in some orange zest for a fresh twist. These add-ins make each bite special.

Gluten-Free and Dairy-Free Alternatives

To make these scones gluten-free, swap all-purpose flour with almond flour or a gluten-free blend. Ensure your baking powder is gluten-free too. For a dairy-free option, use coconut oil instead of butter. You can also replace heavy cream with coconut cream or a nut milk. These swaps keep the scones delicious and inclusive.

Seasonal Variations and Adaptations

Change your scones with the seasons! In fall, add apple chunks or caramel bits for a cozy vibe. In winter, try spicing them up with peppermint extract. For spring, mix in fresh berries like blueberries or strawberries. In summer, a hint of lemon zest can brighten the flavors. Adapting your scones makes them fun all year round.

Storage Info

How to Store Leftover Scones

To keep your scones fresh, place them in an airtight container. You can store them at room temperature for up to two days. If you want them to last longer, refrigerate them. Just remember that refrigeration can make them a bit dry.

Freezing Instructions

Freezing is a great way to save your scones. First, let them cool completely. Wrap each scone tightly in plastic wrap. Then, place them in a freezer bag. They can stay frozen for up to three months. When you’re ready to eat them, just thaw at room temperature.

Reheating Tips

To reheat, preheat your oven to 350°F (175°C). Place the scones on a baking sheet. Heat them for about 10 minutes. This warms them up and brings back the nice texture. You can also use a microwave for quick reheating. Just heat for about 15-20 seconds, but this may make them a bit soft. Enjoy your scones fresh and warm!

FAQs

Can I make these scones ahead of time?

Yes, you can make these scones ahead of time. You can prepare the dough and shape it. Wrap it tightly in plastic wrap and freeze it. When you’re ready to bake, just thaw the dough in the fridge overnight. Bake as directed, and enjoy fresh scones.

What can I use instead of heavy cream in the glaze?

If you don’t have heavy cream, you can use milk or a non-dairy milk. Almond milk or oat milk works well. You may need to adjust the amount a little for the right taste and texture. The glaze should still be smooth and easy to drizzle.

How do I know when the scones are fully baked?

You can tell the scones are done when they are lightly golden brown on the edges. A toothpick inserted into the center should come out clean. If you gently press on the tops, they should feel firm and not doughy.

This blog post covered all you need to make perfect maple glazed pumpkin scones. We explored the right ingredients, their quality, and possible substitutions. I provided step-by-step baking instructions and tips for the best texture. You learned common mistakes to avoid, flavor tips, and how to serve these treats. I also shared variations and storage tips to keep your scones fresh. Remember, practice makes perfect! With these tips, you can impress anyone with your baking skills. Enjoy making your scones and experimenting along the way!

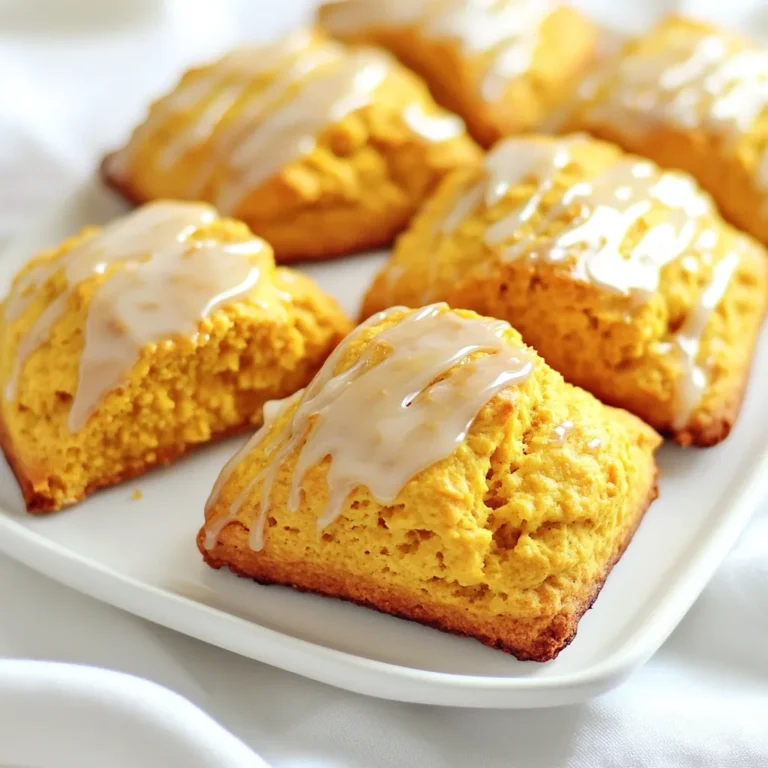
- 2 cups all-purpose flour - 1/2 cup brown sugar, packed - 1 tablespoon baking powder - 1/2 teaspoon salt - 1 tablespoon ground cinnamon - 1/2 teaspoon ground nutmeg - 1/4 teaspoon ground ginger - 1/2 cup unsalted butter, cold and cubed - 1/2 cup pumpkin puree - 1/4 cup heavy cream - 1 large egg - 1 teaspoon vanilla extract - 1/2 cup powdered sugar (for glaze) - 2 tablespoons maple syrup (for glaze) - 1-2 tablespoons milk (for glaze) Using high-quality ingredients makes a big difference. Choose fresh, organic pumpkin puree for the best flavor. Fresh spices enhance aroma and taste. Use unsalted butter for control over salt levels. The right flour, like all-purpose, ensures a nice texture. For the best glaze, use pure maple syrup. It adds depth and sweetness. You can swap brown sugar for white sugar if needed. Coconut oil can replace unsalted butter for a dairy-free option. For a gluten-free scone, try almond or oat flour. Use a plant-based cream for a dairy-free glaze. Applesauce can replace heavy cream to lighten the recipe. Make sure your substitutions suit your taste and dietary needs. 1. Start by preheating your oven to 400°F (200°C). This gives the scones a nice rise. 2. Line a baking sheet with parchment paper. This helps with cleanup and prevents sticking. 3. In a large bowl, whisk together these dry ingredients: - 2 cups all-purpose flour - 1/2 cup brown sugar, packed - 1 tablespoon baking powder - 1/2 teaspoon salt - 1 tablespoon ground cinnamon - 1/2 teaspoon ground nutmeg - 1/4 teaspoon ground ginger 4. Now, take your cold butter. Cut it into the flour mix using a pastry cutter or your fingers. You want it to look like coarse crumbs. 5. In another bowl, mix together the wet ingredients: - 1/2 cup pumpkin puree - 1/4 cup heavy cream - 1 large egg - 1 teaspoon vanilla extract Stir until it is smooth. 6. Pour the pumpkin mix into the flour mixture. Gently stir until just combined. Be careful not to overmix. 7. Turn your dough onto a lightly floured surface. Pat it into a circle about 1 inch thick. 8. Cut the dough into wedges, like a pizza, or use a biscuit cutter for round shapes. 9. Place the scones on the prepared baking sheet. Bake for 15-18 minutes. They should be lightly golden brown on the edges. - Use cold butter for flakiness. It keeps the scones light and airy. - Don't overmix the dough. Overworking can make the scones dense. - If you want more flavor, add a pinch of salt to the glaze. It enhances the sweetness. - For a shiny glaze, drizzle it on while the scones are still warm. When making maple glazed pumpkin scones, avoid these common issues: - Overmixing the dough: This can lead to tough scones. Mix until just combined. - Using warm butter: Cold butter makes the scones flaky. Keep it chilled. - Not measuring flour correctly: Too much flour can make scones dry. Use a scale for accuracy. - Skipping the glaze: The glaze adds sweet flavor. Don’t skip it! To enhance the flavor of your scones, try these tips: - Use fresh spices: Freshly ground spices have more flavor. Always check your pantry. - Quality pumpkin puree: Choose pure pumpkin, not pumpkin pie filling. It’s smoother and richer. - Chill dough before cutting: This helps the scones keep their shape while baking. - Add a pinch of salt: It brightens the overall taste. A small amount goes a long way. Serve your scones with these ideas: - Pair with coffee or tea: The warm drinks balance the sweet glaze. - Top with whipped cream: A dollop adds creaminess and richness. - Add nuts or seeds: Chopped pecans or pumpkin seeds give a nice crunch. - Serve with butter: Spread a little butter on warm scones for extra flavor. Enjoy your baking adventure with these tips! They will help you create perfect maple glazed pumpkin scones every time. {{image_2}} You can jazz up your maple glazed pumpkin scones with fun add-ins. Try adding chocolate chips for a sweet touch. Dried cranberries or raisins can add a chewy bite. For a nutty flavor, consider chopped pecans or walnuts. You can also mix in some orange zest for a fresh twist. These add-ins make each bite special. To make these scones gluten-free, swap all-purpose flour with almond flour or a gluten-free blend. Ensure your baking powder is gluten-free too. For a dairy-free option, use coconut oil instead of butter. You can also replace heavy cream with coconut cream or a nut milk. These swaps keep the scones delicious and inclusive. Change your scones with the seasons! In fall, add apple chunks or caramel bits for a cozy vibe. In winter, try spicing them up with peppermint extract. For spring, mix in fresh berries like blueberries or strawberries. In summer, a hint of lemon zest can brighten the flavors. Adapting your scones makes them fun all year round. To keep your scones fresh, place them in an airtight container. You can store them at room temperature for up to two days. If you want them to last longer, refrigerate them. Just remember that refrigeration can make them a bit dry. Freezing is a great way to save your scones. First, let them cool completely. Wrap each scone tightly in plastic wrap. Then, place them in a freezer bag. They can stay frozen for up to three months. When you're ready to eat them, just thaw at room temperature. To reheat, preheat your oven to 350°F (175°C). Place the scones on a baking sheet. Heat them for about 10 minutes. This warms them up and brings back the nice texture. You can also use a microwave for quick reheating. Just heat for about 15-20 seconds, but this may make them a bit soft. Enjoy your scones fresh and warm! Yes, you can make these scones ahead of time. You can prepare the dough and shape it. Wrap it tightly in plastic wrap and freeze it. When you're ready to bake, just thaw the dough in the fridge overnight. Bake as directed, and enjoy fresh scones. If you don't have heavy cream, you can use milk or a non-dairy milk. Almond milk or oat milk works well. You may need to adjust the amount a little for the right taste and texture. The glaze should still be smooth and easy to drizzle. You can tell the scones are done when they are lightly golden brown on the edges. A toothpick inserted into the center should come out clean. If you gently press on the tops, they should feel firm and not doughy. This blog post covered all you need to make perfect maple glazed pumpkin scones. We explored the right ingredients, their quality, and possible substitutions. I provided step-by-step baking instructions and tips for the best texture. You learned common mistakes to avoid, flavor tips, and how to serve these treats. I also shared variations and storage tips to keep your scones fresh. Remember, practice makes perfect! With these tips, you can impress anyone with your baking skills. Enjoy making your scones and experimenting along the way!

Maple Glazed Pumpkin Scones

Indulge in the delightful flavors of fall with these Maple Glazed Pumpkin Scones! Perfect for breakfast or a cozy afternoon treat, these scones are easy to make and oh-so-tasty. With warm spices and a sweet maple glaze, they are sure to impress. Get the full recipe and step-by-step instructions to bake your own batch today. Click to explore more delicious treats! #PumpkinScones #FallBaking #MapleGlaze #AutumnRecipes

Ingredients
  

2 cups all-purpose flour

1/2 cup brown sugar, packed

1 tablespoon baking powder

1/2 teaspoon salt

1 tablespoon ground cinnamon

1/2 teaspoon ground nutmeg

1/4 teaspoon ground ginger

1/2 cup unsalted butter, cold and cubed

1/2 cup pumpkin puree

1/4 cup heavy cream

1 large egg

1 teaspoon vanilla extract

1/2 cup powdered sugar (for glaze)

2 tablespoons maple syrup (for glaze)

1-2 tablespoons milk (for glaze)

Instructions
 

Preheat your oven to 400°F (200°C) and line a baking sheet with parchment paper.

    In a large bowl, whisk together flour, brown sugar, baking powder, salt, cinnamon, nutmeg, and ginger until well combined.

      Using a pastry cutter or your fingers, cut the cold butter into the flour mixture until it resembles coarse crumbs.

        In a separate bowl, mix together the pumpkin puree, heavy cream, egg, and vanilla extract until smooth.

          Pour the pumpkin mixture into the dry ingredients and gently stir until just combined. Be careful not to overmix.

            Turn the dough out onto a lightly floured surface and pat it into a circle about 1 inch thick. Cut the dough into wedges (like a pizza) or use a biscuit cutter for round shapes.

              Transfer the scones to the prepared baking sheet and bake for 15-18 minutes, or until they are lightly golden brown on the edges.

                While the scones are baking, prepare the maple glaze. In a small bowl, whisk together powdered sugar, maple syrup, and milk until smooth. Adjust the thickness to your preference by adding more powdered sugar or milk as needed.

                  Once the scones are done baking, allow them to cool for 5 minutes on the baking sheet, then drizzle the maple glaze over the top while they are still warm.

                    Prep Time: 15 mins | Total Time: 35 mins | Servings: 8 scones

                      WANT TO SAVE THIS RECIPE?

                      Leave a Comment

                      Recipe Rating